
Let’s be honest, fairies aren’t snobs about building materials. They’re quite happy to cross yesterday’s ‘rubbish’ if it looks magical. This little fairy bridge proves it. It all began when we decided to recycle a plastic cup recycle that was headed for the trash can.

Isn’t it just adorable? You would never say that the bridge started out looking like this.

And it’s one of those really easy projects that take less than an hour to make.

Plus it’s such a fun project to do with the kids and they can learn all about building bridges too. The little ones can help with painting the bridge while older kids will love coming up with creative ideas to make the deck and the handrails.
Okay, before we get to the tutorial, be sure to follow us on Facebook, Twitter, Pinterest, or Instagram. And don’t forget to subscribe so you’ll never miss a post!
How to Turn a Plastic Cup into a Fairy Bridge
For the fairy bridge, you only need the sides of the plastic cup. Use a pair of scissors to cut down either side of the cup and remove the bottom. Don’t throw them away, they can be turned into oversized smiley badges. Just add a safety pin on the back and mod podge an emoticon onto the front. Or wrap it in silken rags and use it to make the cutest boho storage.

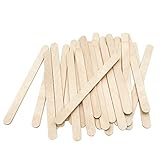
The curved cup half looks like an arch, and it’s really strong, which is the perfect starting point for the deck of the fairy bridge. To cover the deck, we used a few ice cream sticks. Those innocuous sticks of wood are perfect for making all kinds of miniatures, from porch swings to treasure chests, stained-glass fairy doors and tiny, little park benches.

Cut the ice cream sticks, so they’re a little wider than the piece of plastic. The easiest way to do it is to simply use a pair of scissors or a sharp knife to score a long the sticks and break them off. Don’t worry if they’re not the same size; it adds to the look. Before gluing the sticks to the bridge, use 100 grit sandpaper to roughen the plastic up a little, so the glue has something to grip onto.

The plastic bits are really “bouncy,” which makes it so much easier when you’re gluing the sticks on. Press it down firmly to create a flat piece, and then add the sticks. That way, they won’t slide off the curved surface while the glue dries. We used quick setting glue, so it only takes a few seconds.

As soon as the glue dries and you stop pressing down, it will pop right back up again. It’s magic 😉

Before adding the handrails, you can paint the deck or leave Au Naturale if you prefer.
Adding the Handrails to the Fairy Bridge
There are quite a few ways to add handrails to the bridge. We don’t want our fairies falling off. You can glue twigs to the sides of the bridge, or you can take it up a notch and use beads instead. To form a stable base for a bead handrail, I first glued on equally spaced flat-bottomed abalone nuggets. While the glue is still wet, insert a piece of wire. You’ll have to bend the wire a little, so the actual handrail stands up straight.

Thread a few small beads onto the wire support beams and tie them together with a bit of twine. To ensure the beads don’t fall off, add a little bit of glue to that last bead at the top before threading the beads onto the piece of wire.

Snip off any excess pieces of wire, and the bridge is ready for your fairy garden. Fill a container with potting soil and add your favorite plants and flowers.

Our little fairy bridge spans a small ceramic bowl that’s been filled with silver pebbles and water.

We placed the fairy bridge and the bowl inside a wooden crate and added Peace in the Home (Soleirolia soleirolii) and thyme.
Fairies love thyme. It’s one of the plants they like to dance around!
Most herbs work well in fairy gardens since they have tiny delicate leaves and flowers that attract butterflies. And if there are butterflies, you’re sure to find a fairy too.

Don’t forget to add a few fairy mushrooms under the thyme for a pop of color.

And hang a fairy wind chime or lantern-shaped bead on one of the handrails to guide the way.
The possibilities are endless. Just let your imagination run wild.

FAQ
What kind of plastic cup works best for a fairy bridge?
A sturdy yogurt‑style or takeaway cup with fairly rigid sides works best because it keeps its curved shape once you cut it. Thin, flimsy cups can collapse or bend too much when you glue on the deck and handrails.
How long does it take to make a plastic cup fairy bridge?
The basic bridge takes less than an hour to make, especially if you use quick‑setting glue. Drying time for paint or sealant can add a little extra time if you choose to decorate it further.
Can kids help make this fairy bridge?
Yes, kids can absolutely help with this project. Younger children can paint the bridge and help place beads or twigs, while older kids can safely help cut the craft sticks and design the handrails with supervision.
Do I need to sand the plastic cup before painting or gluing?
Lightly sanding the plastic helps a lot, because it gives the smooth surface some tooth so the glue and paint can grip better. A quick rub with medium‑grit sandpaper is usually enough.
Can the fairy bridge be used outdoors?
The bridge can be used outdoors in a sheltered fairy garden, but it will last longer if it’s protected from constant rain and harsh sun. Sealing the wood and plastic with an outdoor‑safe clear sealer helps the bridge stay pretty for longer.
What can I use for fairy bridge handrails?
You can glue on twigs, beads threaded on wire, or a mix of small stones and twine to create handrails. In the tutorial, flat‑bottomed nuggets and wire are used as supports, with beads and twine added for extra detail.
How else can I recycle plastic cups for fairy gardens?
Plastic cups can be used to make so many fairy things. Here are a few more ideas to recycle them for your fairy garden:
- Make a wishing well by simply gluing twigs or small stones around the outside of the cup and adding wire or longer twigs to form the arch of the well, and you’re good to go.
- Turn the plastic cup upside down, add a little roof similar to the one we made for our fairy toadstool and paint on some windows and doors to make an adorable fairy hut. Just remember to lightly sand the cups before painting, so it doesn’t peel off.
- Paint the inside of the plastic container grey, fill it with resin and add small fish beads for a quick and easy fairy pond.
- Or you can use those plastic cups and/or the lid to make a really cool fort for a fairy playground.
I hope this project inspired you to reduce, reuse and recycle those plastic cups or containers. It’s a great way to teach our kids to take something that would normally get thrown away and find a fun way to reuse it and protect the planet. Small efforts can make a huge difference!

And if you’re looking for a few more fairy crafts to make, you’ll find a whole bunch on our blog, including:
- A fairy world in a book nook;
- Working grandfather clock;
- Tiny fairy beach in a cloche;
- Fairy throne in an altered bottle;
- Adorable fairy playground in a chair planter;
- Fairy door with a stained glass window;
- Kokedama fairy village;
- A pixie den in a lantern;
- Potting bench and the smallest planters ever;
We’ve also included affiliate links below, so you don’t have to worry about finding some of the stuff we used to make the fairy bridge. Disclosure: Clicking on the links below means we may receive a very small commission from Amazon. But don’t worry, it won’t come out of your pocket, and it helps us come up with more unique DIY and fairy craft ideas for you 😉




And as always, wishing you a beautiful, crafty week filled with lots of love. Thank you for popping in for a visit.

Last update on 2026-10-01 / Source Amazon Affiliates
76 comments
This is so cute! I did nothing with my fairy stuff here in Maine, USA, this year. The ticks were so back that you picked them up between the car and the house–20′. Never mind the outdoor clothesline! And the days are already getting shorter–and darker. The older I get, the more I dislike the inconveniences of winter! BUT, it gives me more crafting time! Maybe I’ll be ready for next spring!!!
I’m not a fan of Winter at all. The long nights and cold make me want to cuddle up in a ball with our fur babies and sleep through the whole thing. And everything always looks so blegh in Winter too. Give me Spring or Summer anytime, although I’m not sure if I’d want to fight off ticks all the time. I read somewhere that 2021 was a bad tick year. Apparently, the shorter Winter and wet conditions played a big role. If you have space, maybe you can move your fairy things inside?
I love this! I am raising my four-year-old grandson. I had girls so I’ve been learning along the way how to do fun things with boys. We have been making “Gnome Homes” instead of fairy houses. He will love this “Gnome Bridge”! Thank you for sharing your talent. I’m going to join your newsletters. Thank you again ❤️ have a beautiful day ☺️ be well
Awwww, Rita, you don’t know how happy your comment makes me. After a looooong day at work and coming home and reading what you said, all the stress just flies out the window. Thank you ❤ and yes, boys are special. I’m lucky to have both a son and a daughter (no grandbabies yet) and they taught me so many things. Boys explore and go on adventures with dangerous creatures so I do hope your grandson enjoys making a gnome bridge with you and that there are no dinosaurs waiting to tear everything apart on the other side 😀
bridge is so cute, also like that you recycled the cup. I`m making houses for my garden from cardboard containers and twigs. Love anything Fairy
That sounds so lovely. I can just picture all those fairies collecting twigs and planning their little homes
I am new to the fairy garden scene and am.loving it. I love your work. I did a bridge and used hot glue. But have found with the rain it isn’t holding. What glue is the best to withstand rain and hot weather? I’m frustrated lol
Hello Tracey, glue guns are great inventions for gluing something quickly but most of the glue sticks you get in craft shops don’t have enough “adhesive” power”. The best glue for outdoor use is E6000, Loctite, or Weldbond. They’re all water-resistant and stick almost anything to anything. E6000 and Weldbond do take a little longer to dry though and I know I struggled for a while to find E6000 here in South Africa. Not sure where you’re based, but I’m hoping you can find it easier. It’s also really important to sand the plastic a little first to roughen it up and give the glue something to grip onto.
AMMMMMMMMMMMMMMAZING
? Thank you Deborah, it was a fun challenge and the bridge is still going strong
This is just the sweetest bridge I ever did see!! The Fairies must be so chuffed in your garden!!
We love our fairies and I’m convinced that’s why our garden is so lush too ?
How enchanting this is. So adorable!
Thank you very much Maria ?
This is so ADORABLE! You know how much I love your miniatures and this makes me want to pull a “honey I shrunk the kids” and take a walk through your magical fairy garden.
Put those sneakers on my friend, I’m sure I can arrange with one of the fairies to sprinkle some of their magic dust and make us small enough to take a walk through their fairy gardens ?
Wow! That is really clever Michelle. It looks super cute in the fairy garden.
? I’m saving everyone of those plastic cups now. They really come in so handy and not just for fairy gardens ?
Hi ! I guess you cant use a hot glue gun as the plastic would melt? or is that just a stupid question?? thanks
Hey there Linda so happy you popped in for a visit. I’m sure a hot glue gun will work as long as the tips doesn’t touch the plastic and no question is ever stupid
This is really beautiful, I love your fairy projects. Pinning to make with my granddaughters. Thank you or the craft project idea.
You and your grandbabies are going to have so much fun together Leanna. I just love how imaginative the little ones are when it comes to making things for a fairy garden and I bet they come up with some really lovely ideas on how they want to decorate their little bridge.
Love the little fairy bridge. Great way to upcycle a plastic cup. Love the hand rails, and the little lantern is adorable! You have the luckiest little fairy’s!
? I think we’re the lucky ones because they always come to visit ?
It’s super cute!!! I would look amazing on a tiny fish pond and I really love the lantern….
Thanks so much Mel ?
Michelle, I have next to no craft skills, but I’d like to give it a try. Glad I found your blog today and know where to come for inspiration. Thank you for hosting #SweetInspiration.
It’s a pleasure Jean, I so love meeting new friends at the link party and your recipes are so yummilicious and sound easy enough that someone like me, who has very little cooking skills, can make
This has got to be the cutest thing I have ever seen done! My granddaughter is 2 and I can see in the next several years doing a fairy garden for her at my house….oh such fun that will be!! I would never have thought a simple plastic container/cup would be turned into something so adorable. Great job!!
Oh you are going to have so much fun with your granddaughter Sandy. Enjoy every second with her. They grow up way to quickly
You are just so creative, WOW!! This is amazing. What a lovely idea indeed and it look fab.
Thank you so much Elizabeth ?
All the little tiny things always fascinate me!! I don’t know if I would ever have the patience to create them (guess that is why God gave me three rough and tumble boys! 😉 but they always amaze me!!
? Rough and tumble boys are super cool Renee. They have such inquisitive minds, maybe one day they’ll grab your hand and lead you down the garden path to build a fairy garden filled with dinosaurs and those other boy things ?