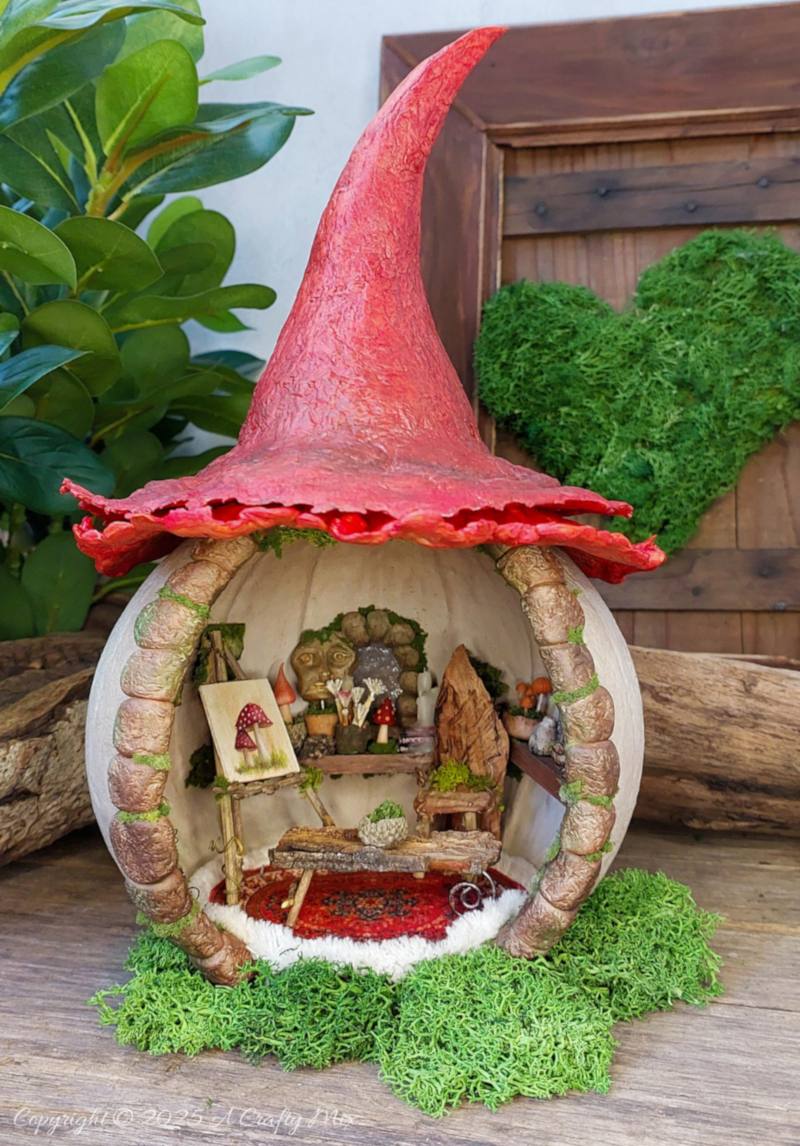
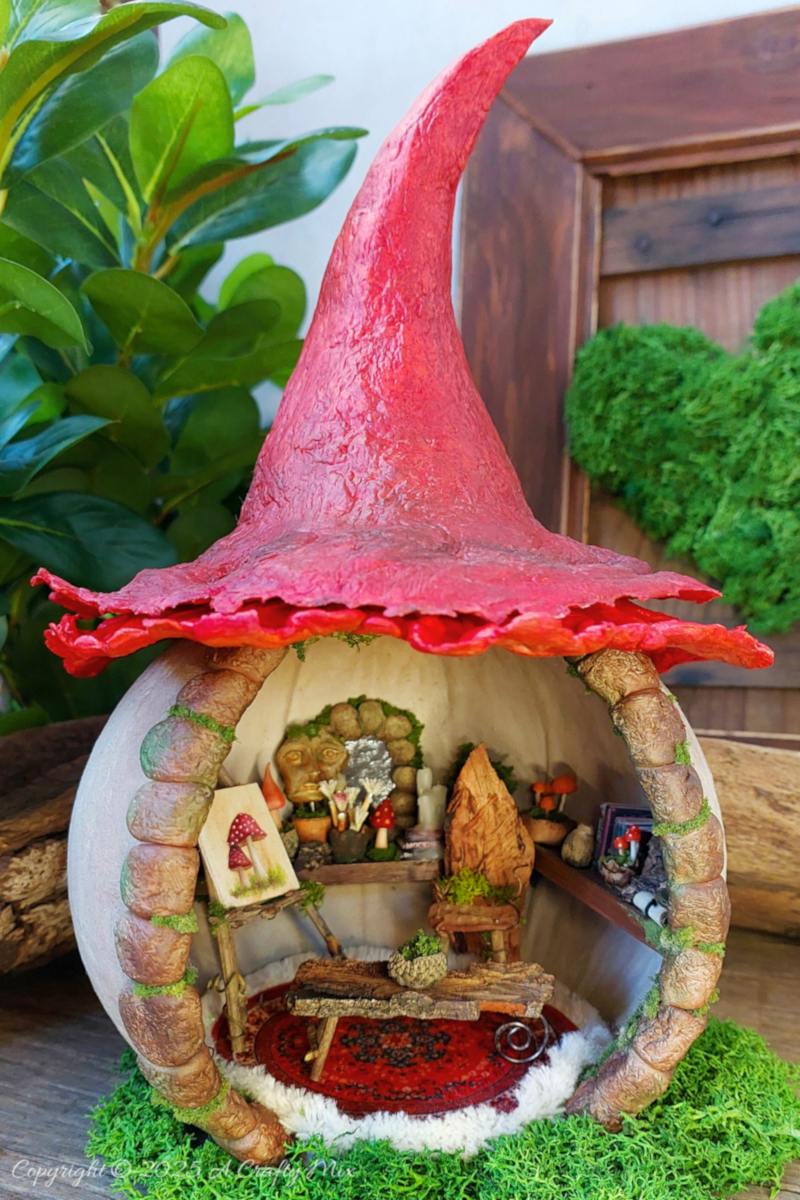
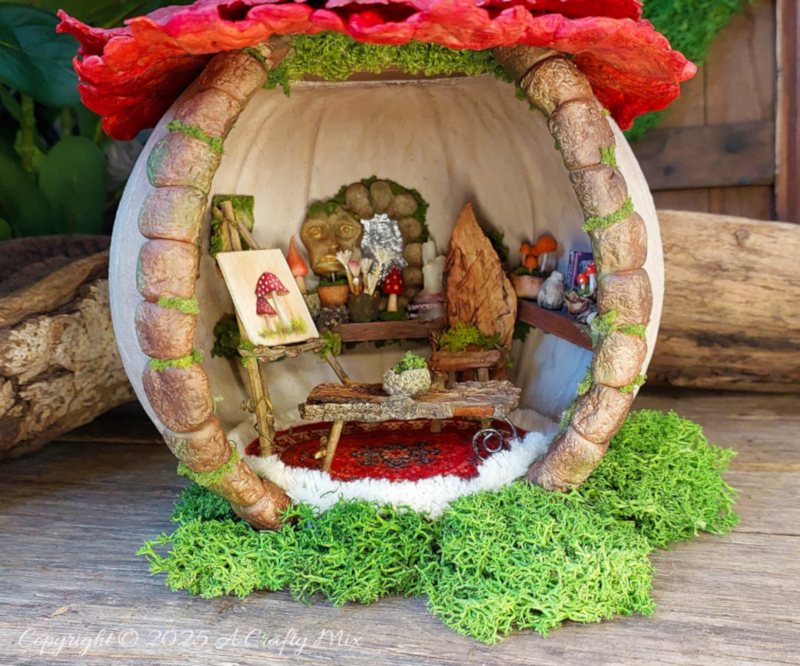
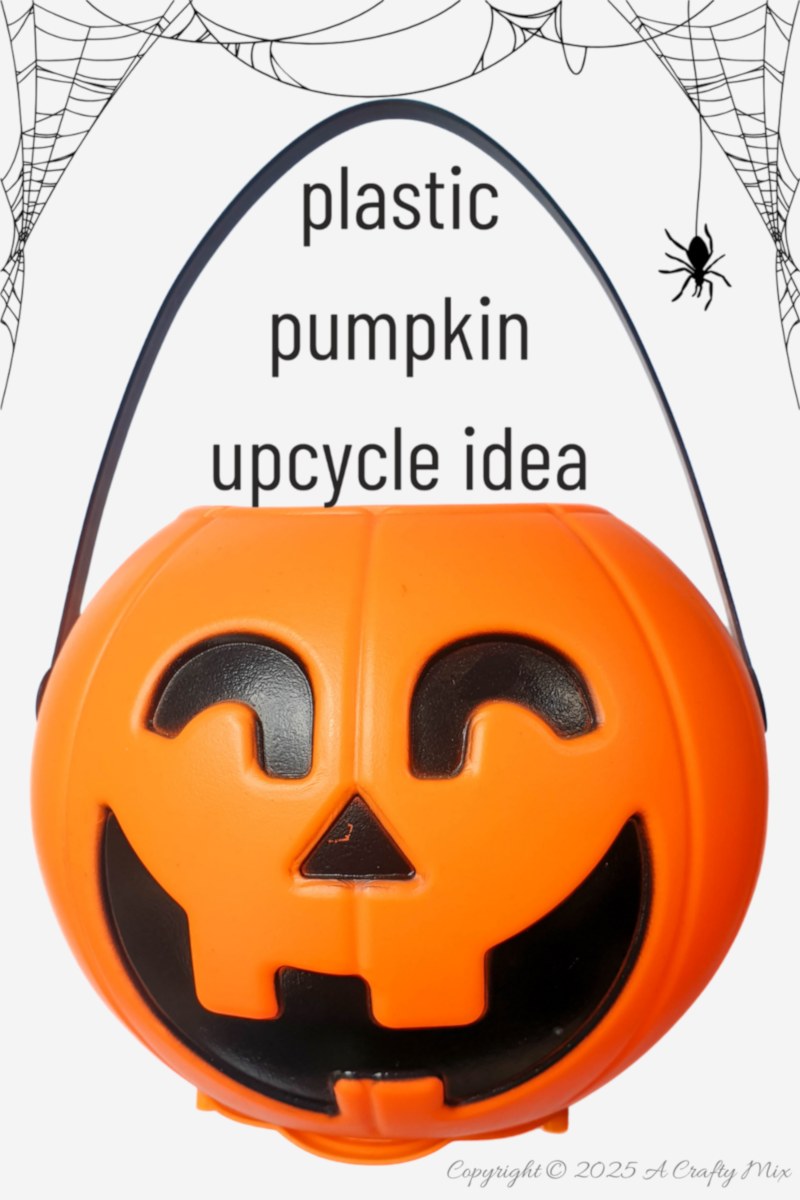
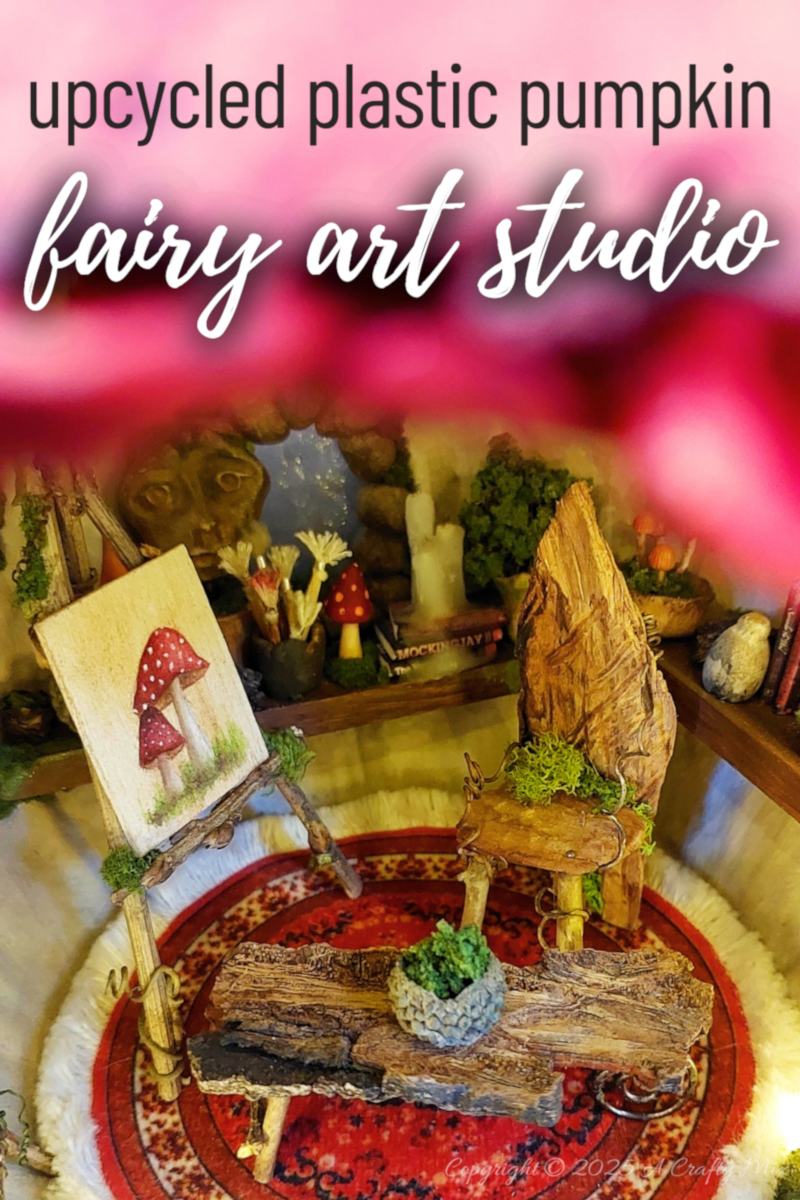
The other day, while I was trying to tidy the house and not get distracted, I found a plastic pumpkin bucket. My kids are all grown up, so I have no idea why I kept it. But I’m sure glad I did, because now I have an excuse to stop dusting and repurpose that pumpkin into a fairy art studio.
I mean, wouldn’t you rather make something this enchanting than clean the house?
Or is it only me?
Anyways, in this tutorial I’ll show you how I did it. So get comfy because we have lots to cover.
But before we get there, follow us on Facebook, Twitter, Pinterest, or Instagram. And don’t forget to subscribe so you’ll never miss a post!
What you need
This is what my kids’ the plastic pumpkin bucket looked like before its transformation into a fairy art studio.
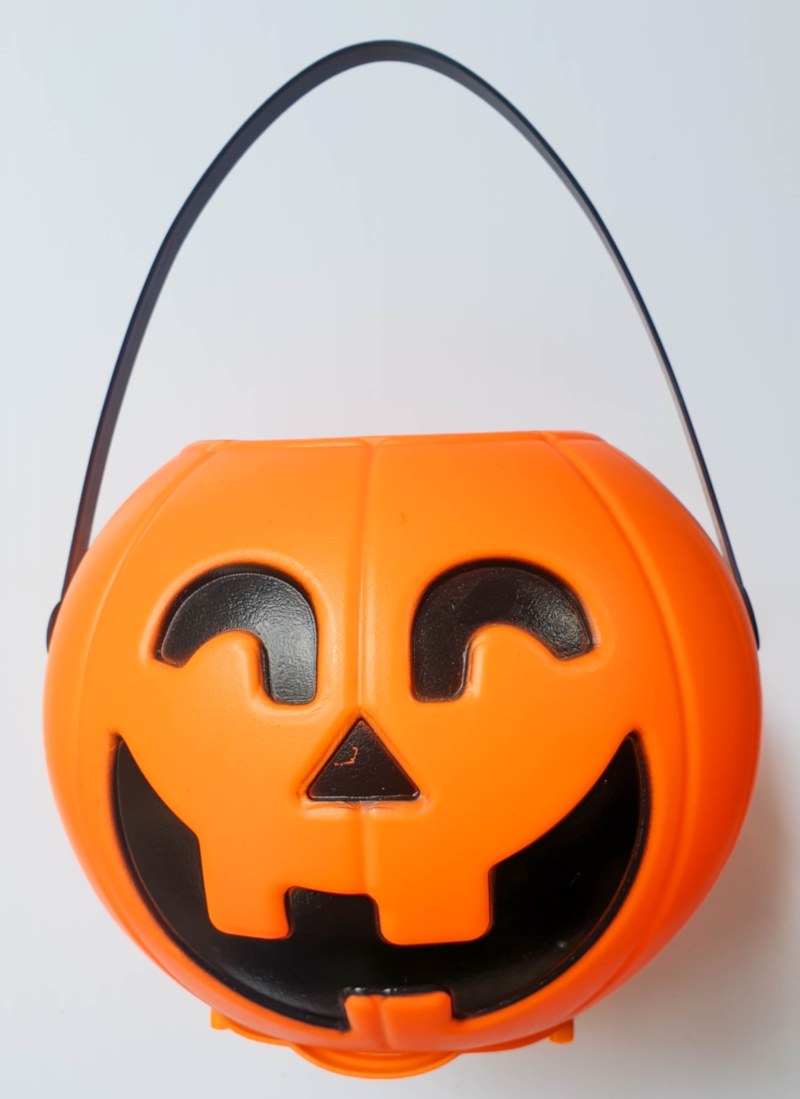
With its classic jack-o’-lantern face, it’s a trusty companion for all kinds of spooky adventures. But, like many things, there comes a time when it gets dumped, which is probably how the candy chauffeur ended up at the back of the “Ag-just-throw-it-in-there” cupboard. If you can’t find a plastic one, you can make this hollow concrete pumpkin. Besides the pumpkin bucket, you’ll also need the following:
To disguise the plastic pumpkin
- Heavy-duty texture paste or gesso
- Sandpaper
- Craft paint
- Sharp craft knife
Build a roof
- Foam clay
- Aluminum foil
- Craft paint, or
- Powdered food coloring
Make some shelves
- Cardboard
- Wooden stirrers
- Craft paint
How to repurpose a plastic pumpkin bucket
Prepping the plastic bucket
Before we turn the plastic pumpkin into a fairy art studio, we need to remove a few things. The handle definitely has to go.
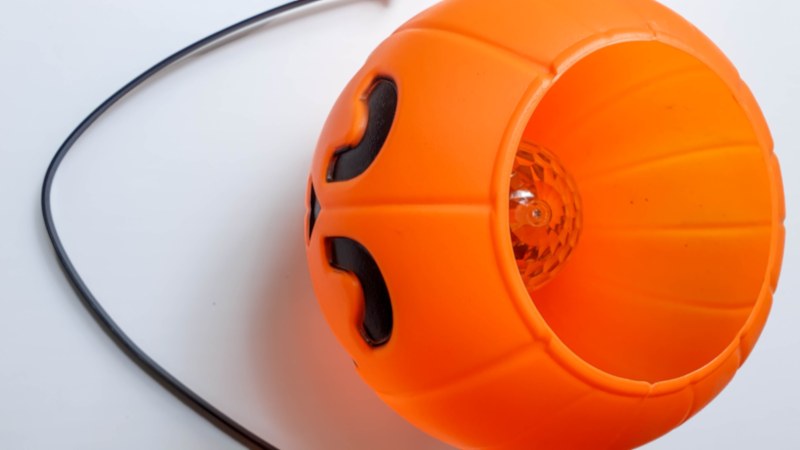
And if your pumpkin looks like mine, you need to remove the battery pack, light, and scary voice recording.
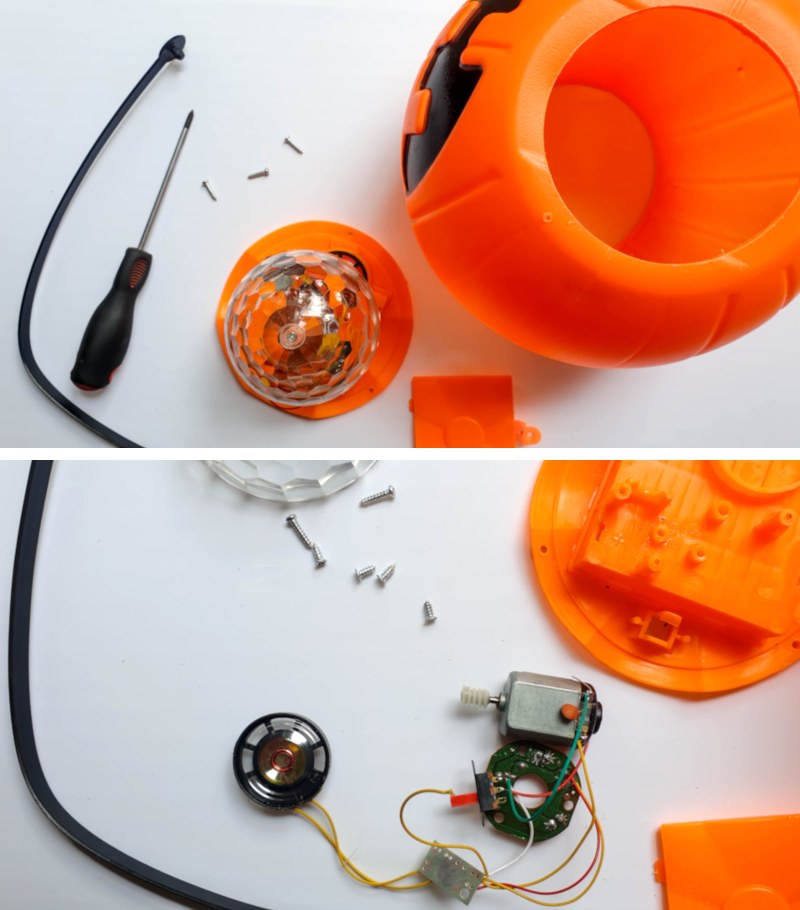
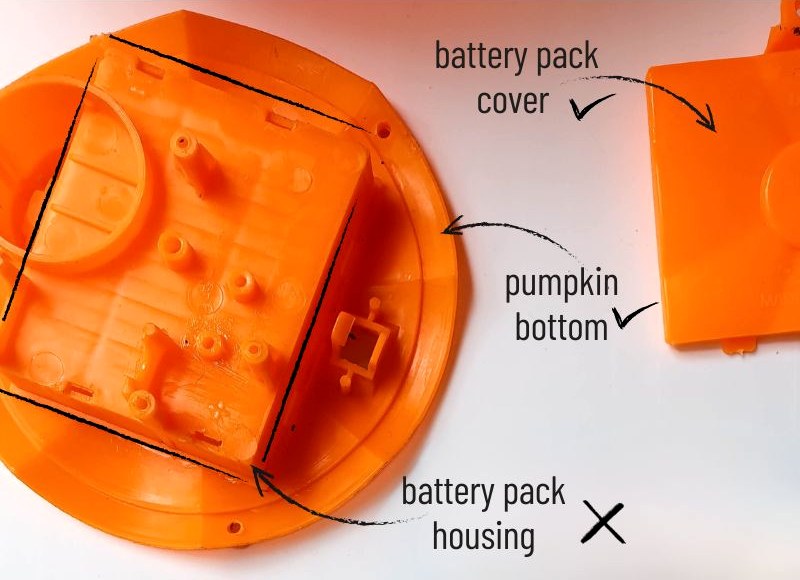
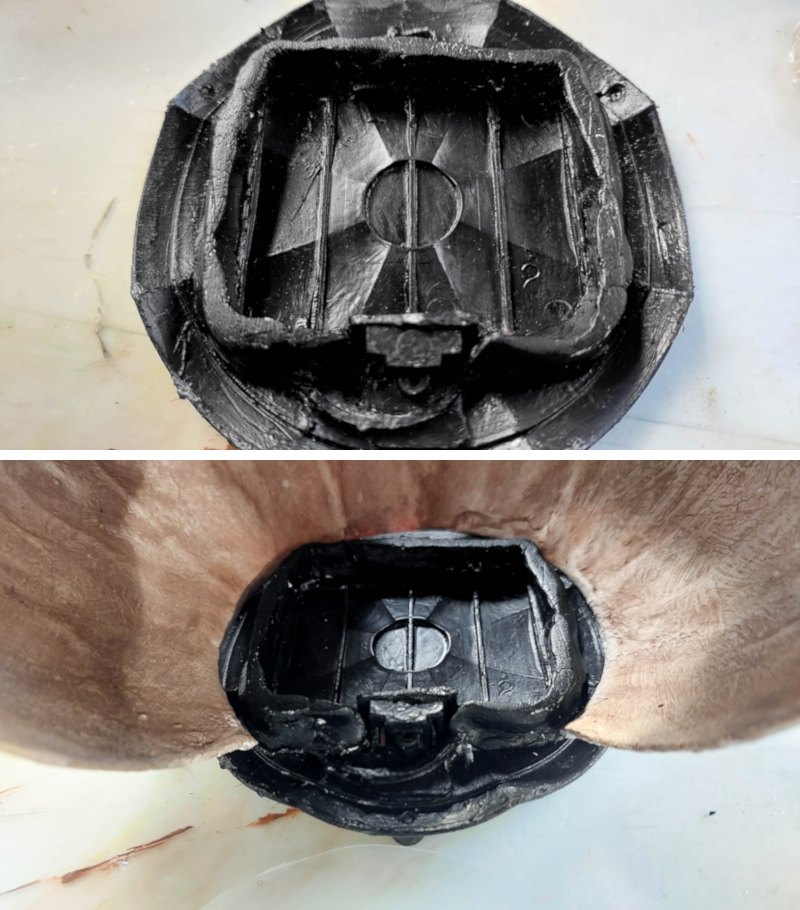
We’ll use the battery pack housing a little later to make the floor for the studio; we just need to modify it a little. I used a sharp craft knife to cut away the box that holds the batteries. I think it’s called the housing. Anyway, it’s that square bit in the picture below.
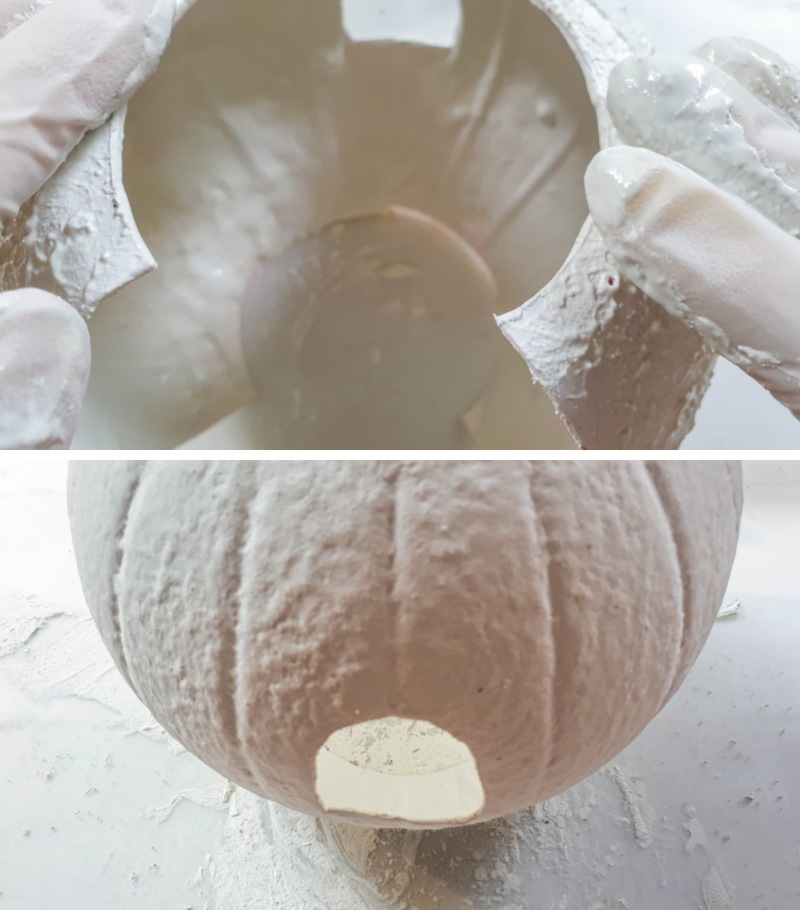
Cut away the face of the pumpkin to create a big door.
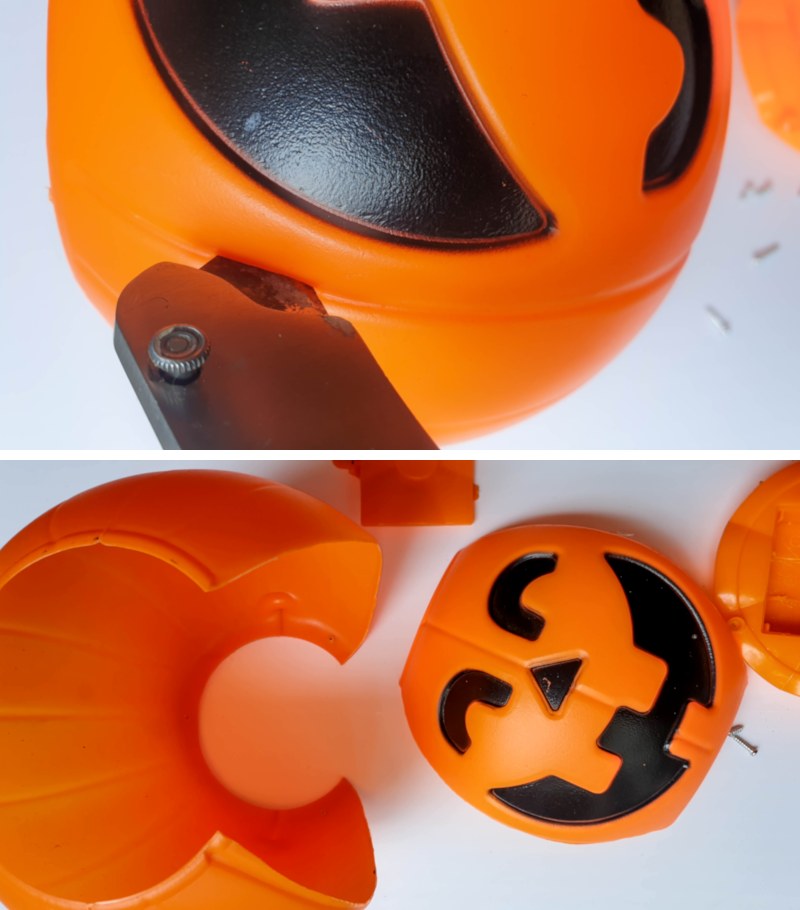
And cut a window. These plastic bucket pumpkins are easy to cut with a sharp craft knife.
Lightly sand the pumpkin with 100- to 120-grit sandpaper to roughen it up. Don’t skip this step if you want your primer and paint to stick. I ran out of plastic primer, so I mixed equal quantities of acrylic paint and mod podge and used that instead.

Don’t ignore the modified battery pack. I forgot to sand mine and had to redo it after watching the primer peel like a bad sunburn.
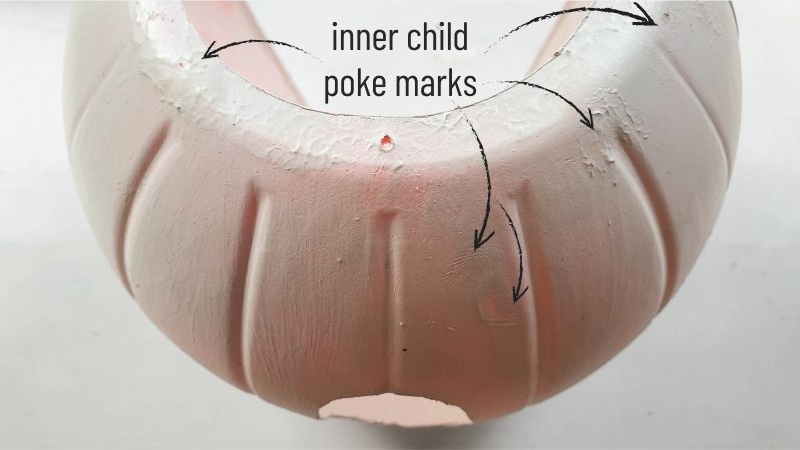
 Let the “primer” cure fully, even if your inner child insists on poking it “just to check”.
Apply loads of texture paste or gesso all over the plastic pumpkin and set it aside to dry.
Right, so that’s the prep work done. Well kinda, because we’re going to come back to that battery pack and make a few more modifications. Now we just need to give the art studio some character, add a roof, a floor, and some lights, and decorate the interior.
Giving the pumpkin studio character
Remember that window and large door we cut out earlier? They needed finishing off. Otherwise, they’d just end up looking like holes in the wall.
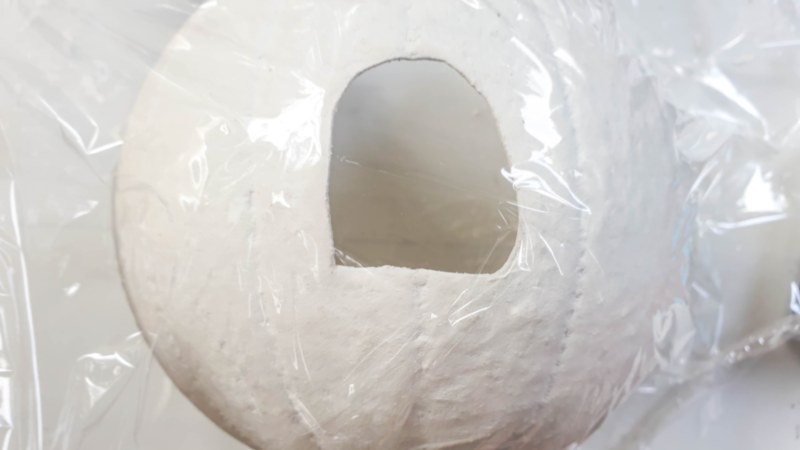
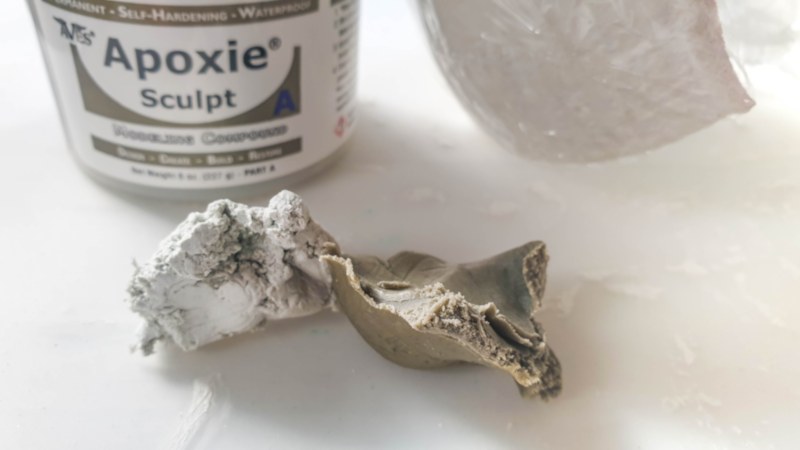
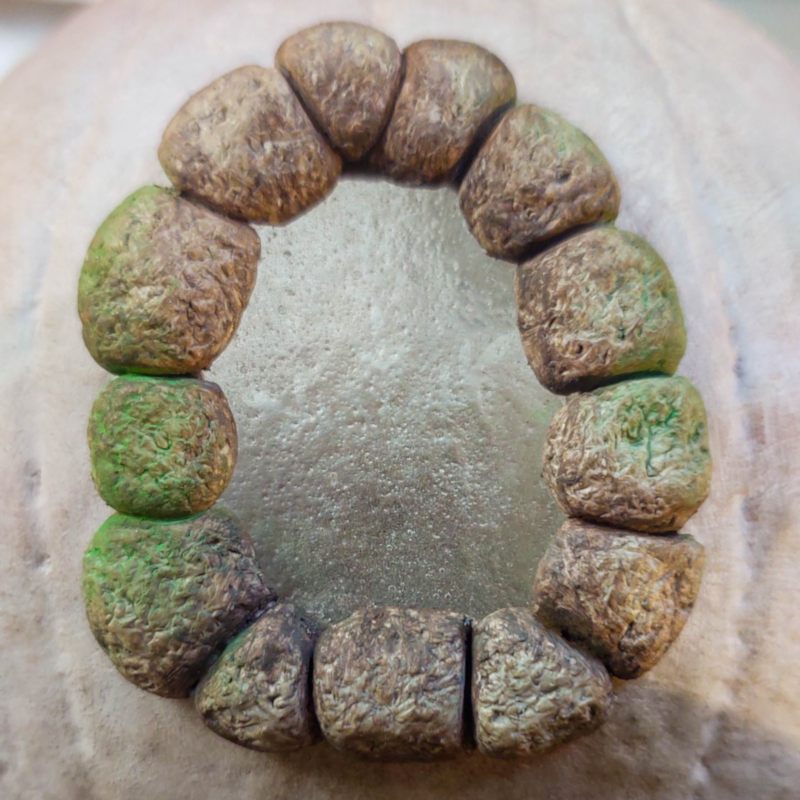
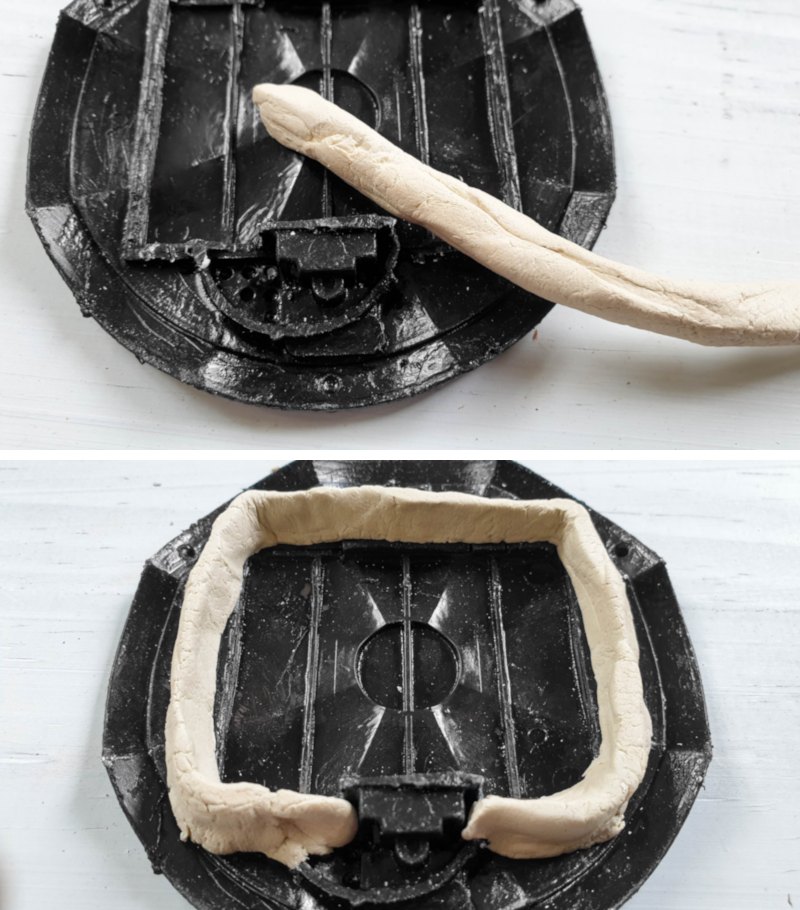
Now you might be asking yourself, “Why on earth did she put shrink wrap over the pumpkin? Did I miss a step?” No, you didn’t. I used a 2-part epoxy clay to make the cladding around the window and door frame.
From past experience, this stuff is super tacky and tends to leave an oily residue as it dries. So, the cling wrap is just there to protect the unpainted, beautifully textured pumpkin. Roll the clay into little balls and place them around the window to form a frame.
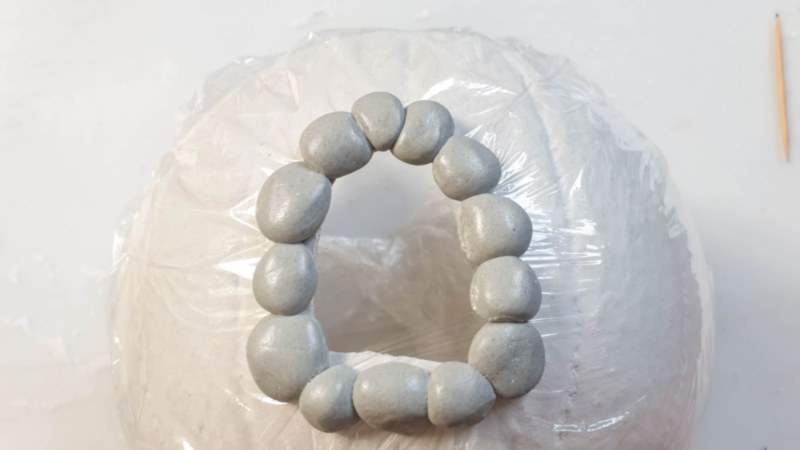
Scrunch up some foil and lightly tap it over the balls.

It’s an easy way to create a rough, stone-like texture.
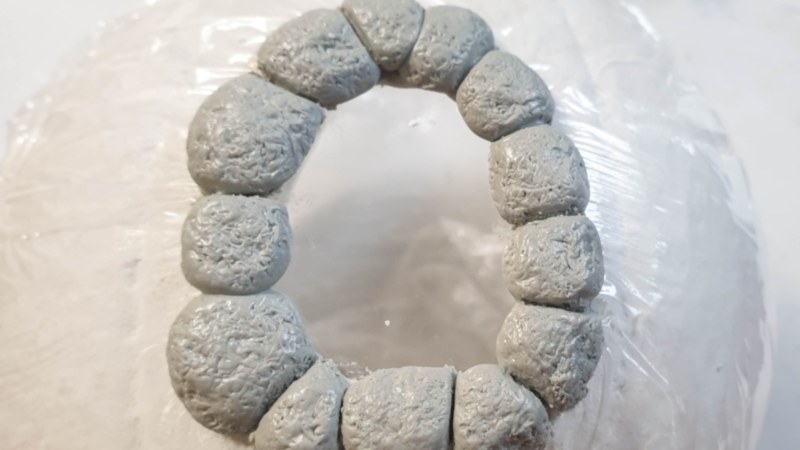
Leave the cladding to dry on the pumpkin so it can memorise those fabulous curves before it hardens up.
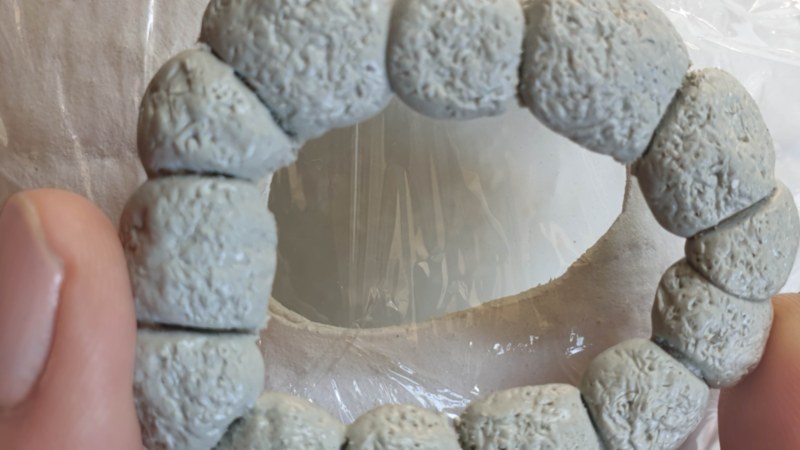
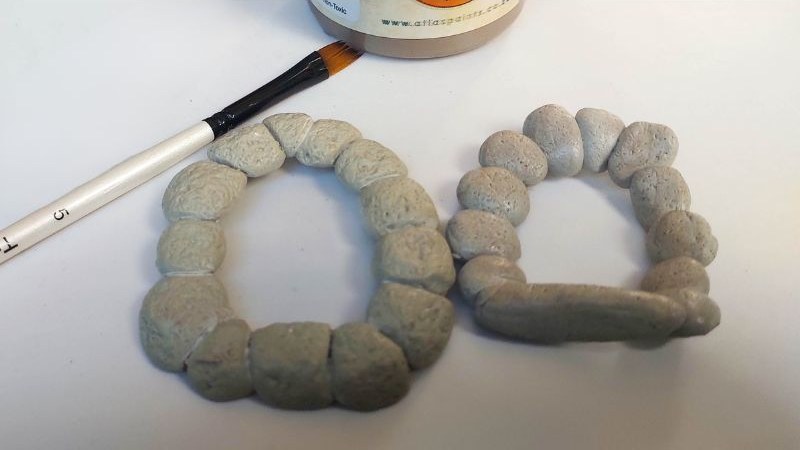
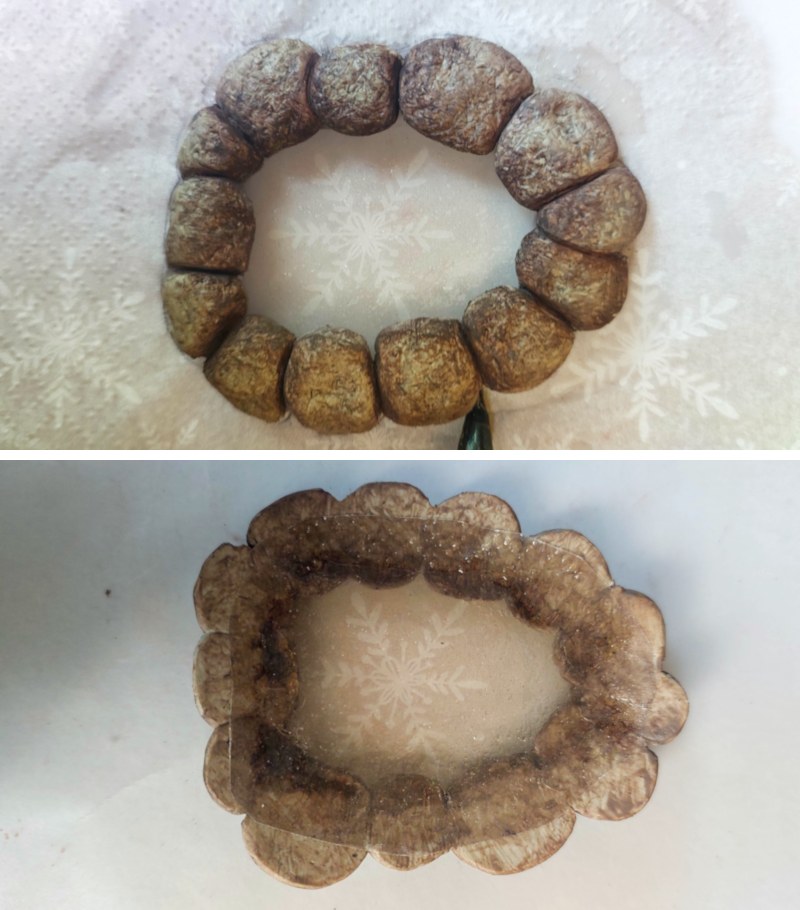
Repeat the same steps to make a door frame and an inside window frame. Paint the cladding.
To make a windowpane, I used a paper napkin covered in clear gel nail polish. The nail polish hardens under a UV light and makes the napkin translucent. Glue the napkin on one of the window frames.
Paint the pumpkin, and then glue the windows and doorframe in place.
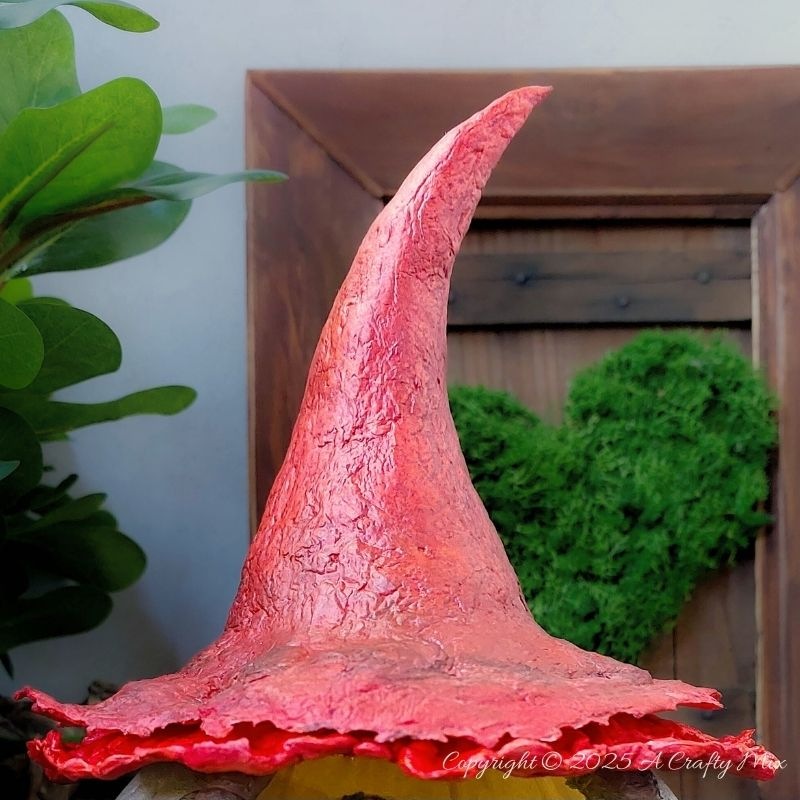
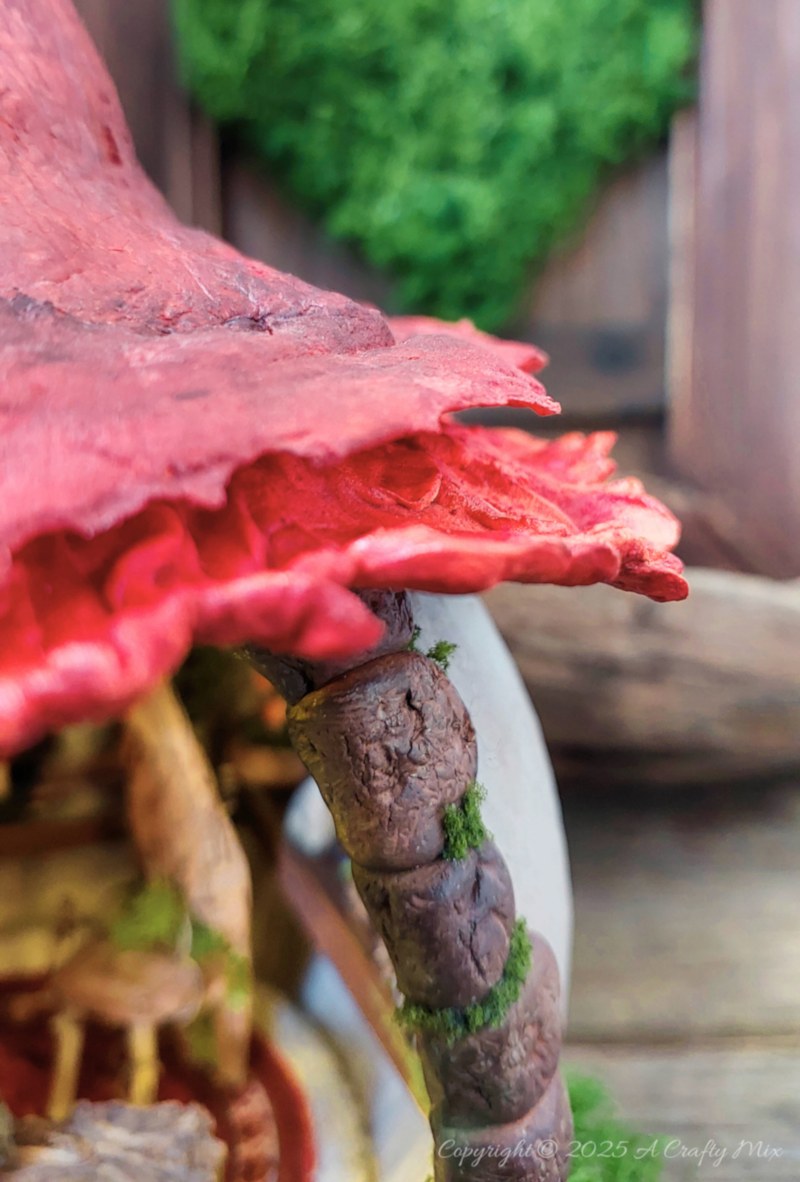
Making a mushroom roof
I was in two minds about what kind of roof would suit the fairy art studio. A thatch roof would have made it too…… uuuuuum……. simple, cottagey, rustic. Making a big pumpkin stalk also crossed my mind. But the top of the bucket is flat, so the stalk would have looked like it was squishing the pumpkin down. At the end of the day, I decided to give my fairy studio a curly top mushroom roof. It worked when I made this fantasy planter so I knew it would be perfect for the pumpkin.
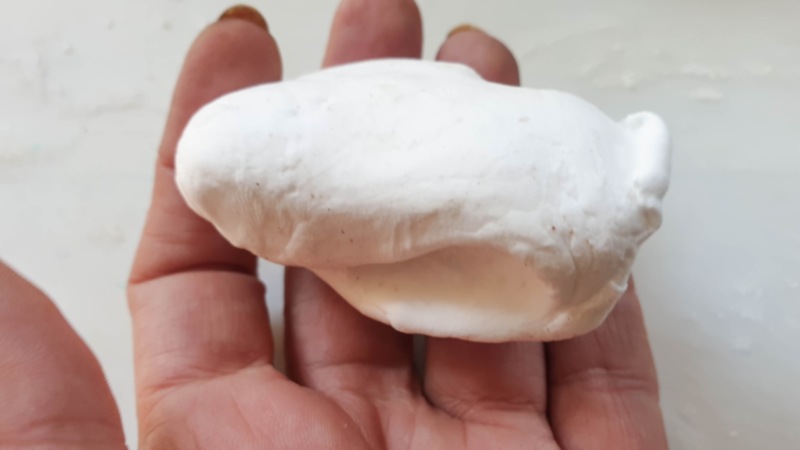
To make something similar, you need to use foam clay to get that crinkly texture. If you prefer a smooth finish, polymer or air-dry clay will work too.
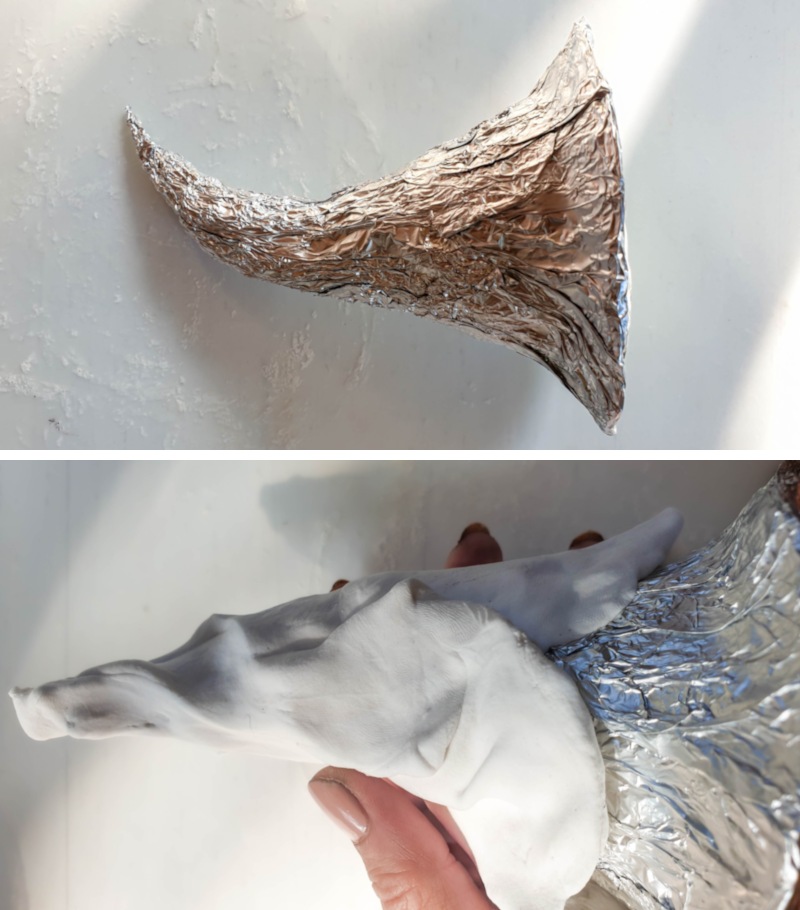
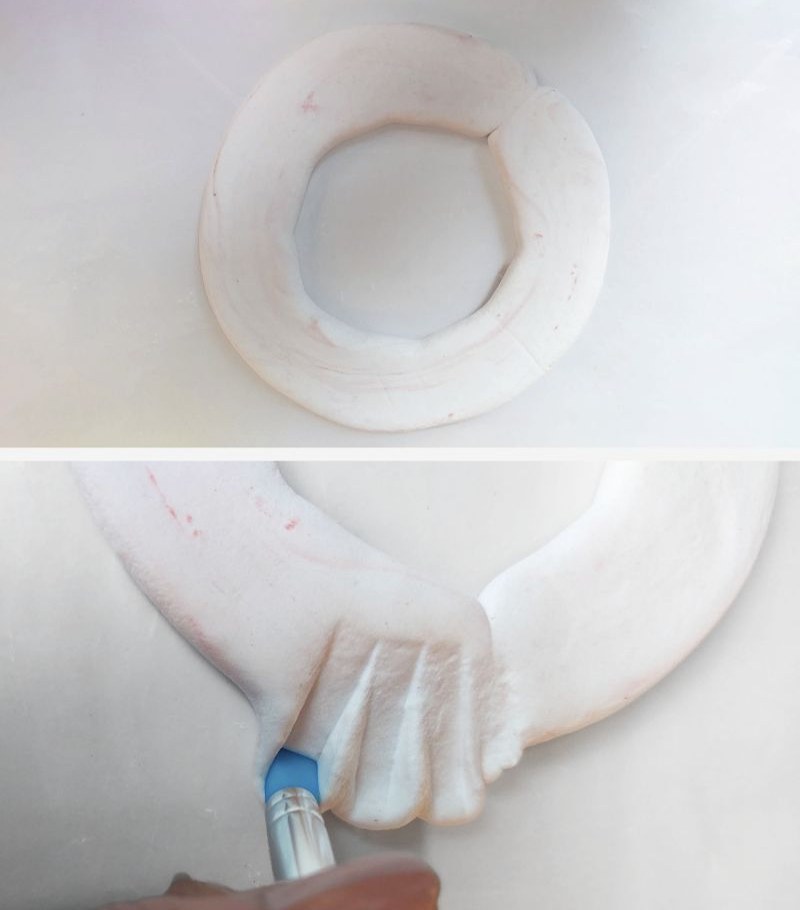
You don’t need a lot of clay if you make the base mushroom form out of aluminium foil. Start with a loosely scrunched-up ball of foil that’s roughly the width of the top of the pumpkin. Add more layers by glueing scrunched-up foil shapes to the ball.
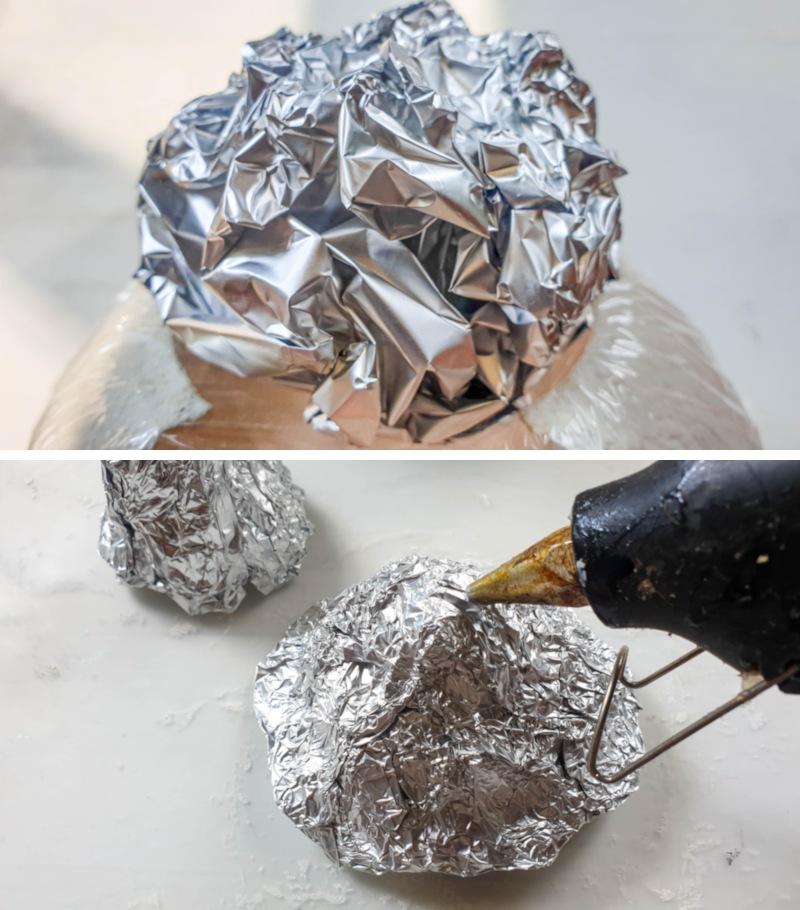
Bend and form the foil until you’re happy with the shape. Wrap the foil mushroom top in clay. About ¼” – ½” (5mm – 10mm) thick.
You should end up with something like this.
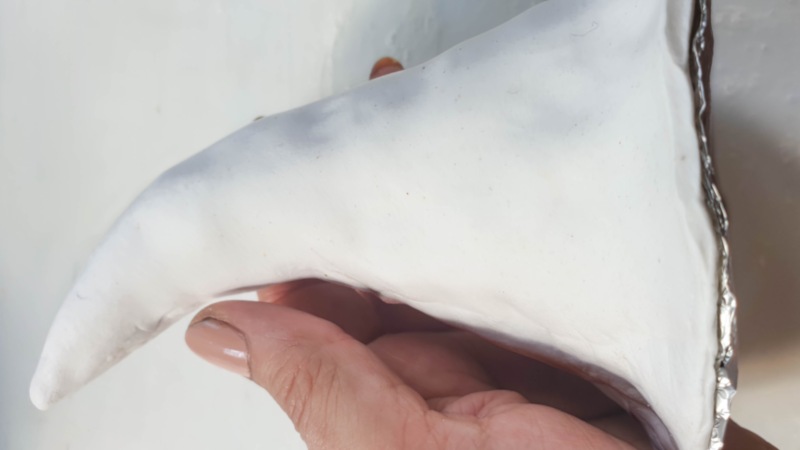
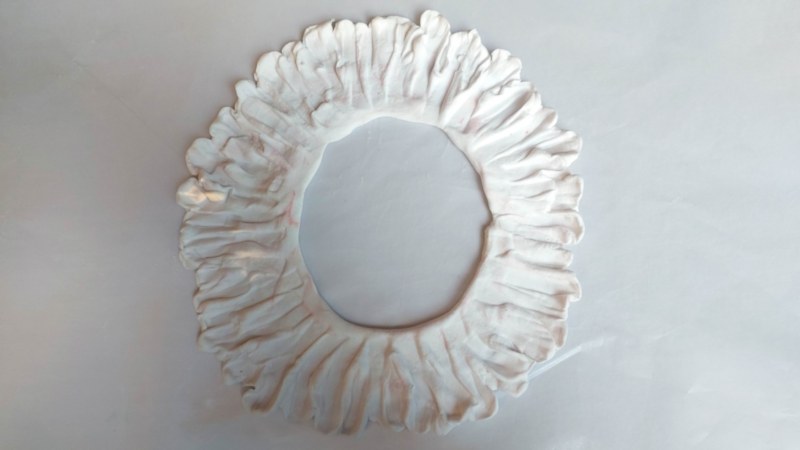
Adding the crinkly texture is optional, but it does create an intriguing effect, which I love. Before the foam clay cures completely, gently peel it away from the foil mushroom base and flip it inside out.
That’s the beauty of using foam clay. It’s still pliable while it cures.
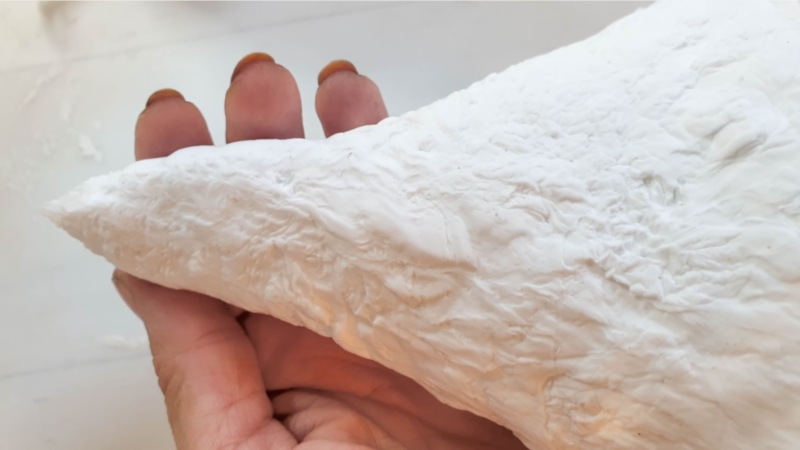
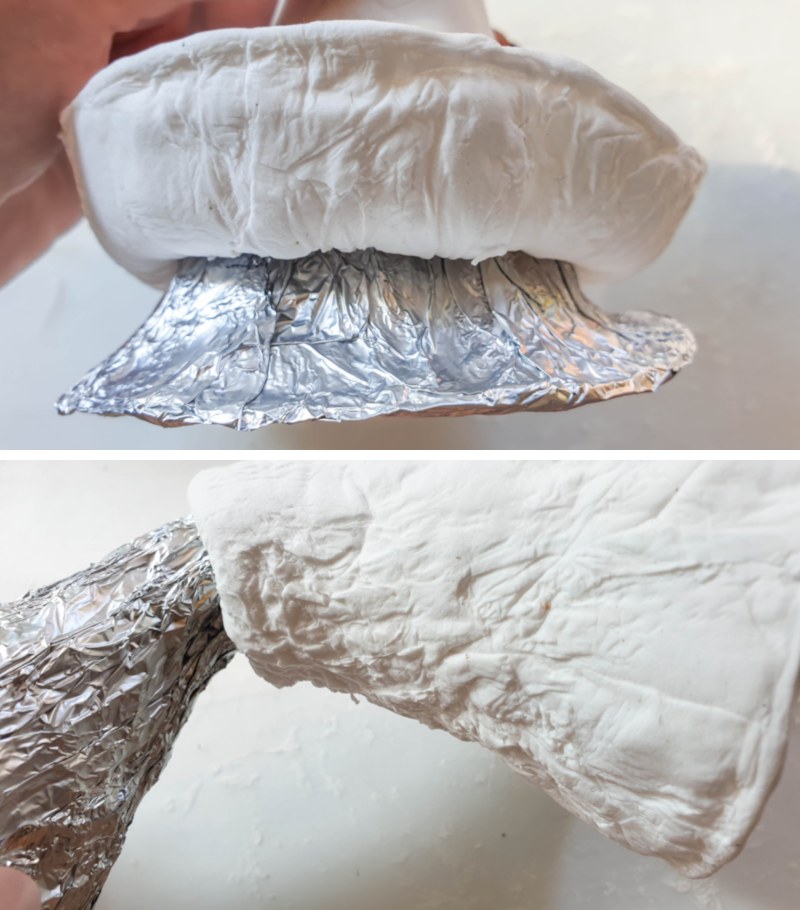
Push the foil form back inside the mushroom top and leave it to cure completely.
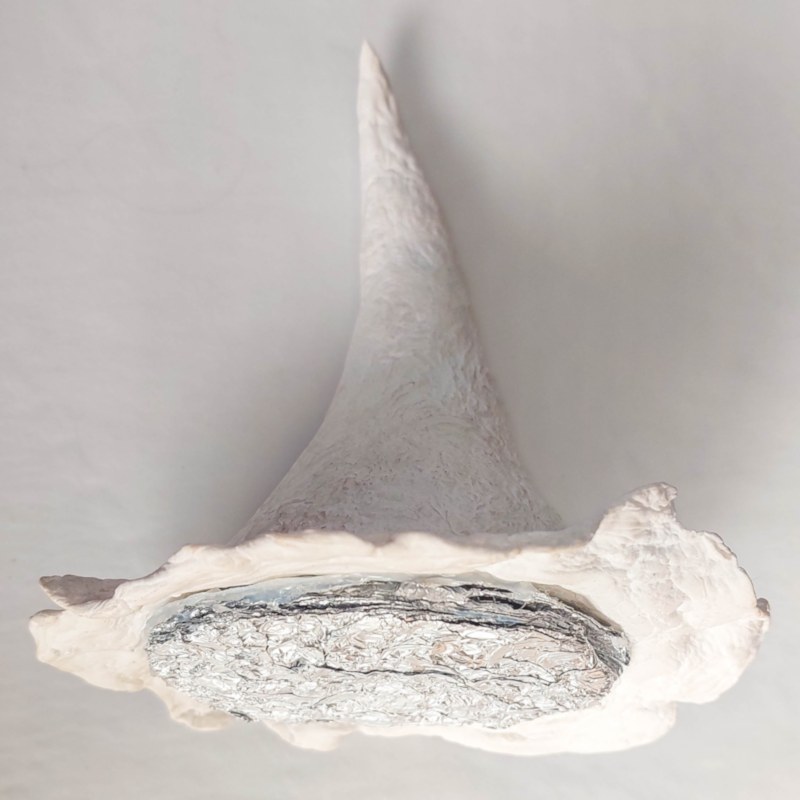
Just for fun I gave my mushroom rooftop a “petticoat”.
It added another layer of whimsy.
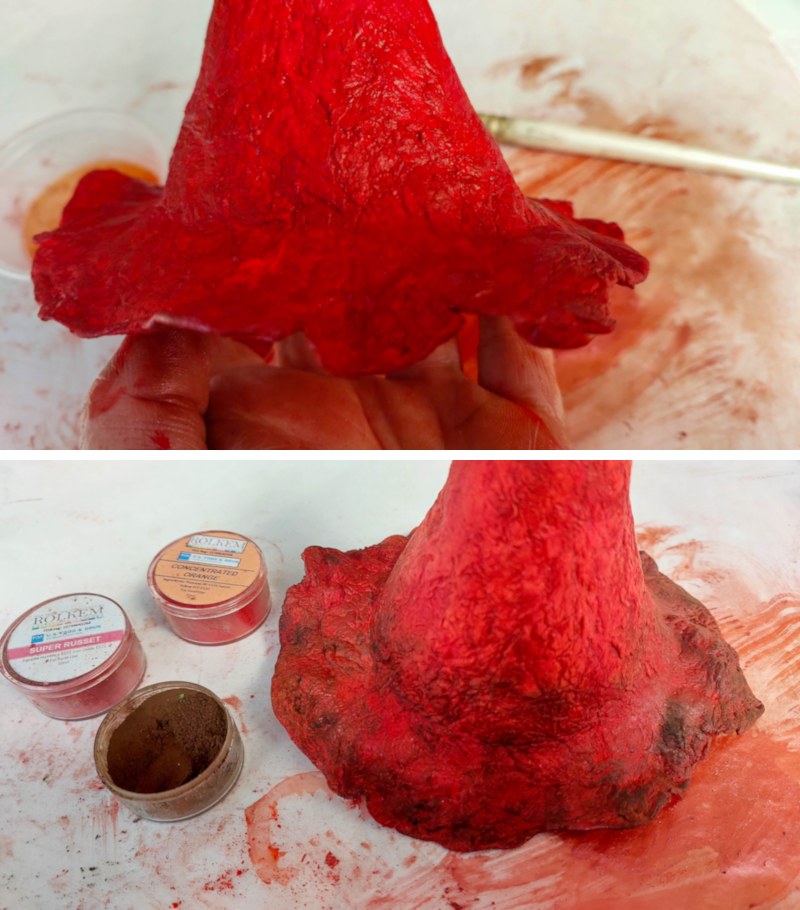
Paint the roof with craft paint or powdered food coloring. I fell in love with using food coloring when I made this antique clay bottle. It’s so easy to work with, and blending is a breeze.
Put the roof to one side. We’ll pop it onto the studio when everything else is done.
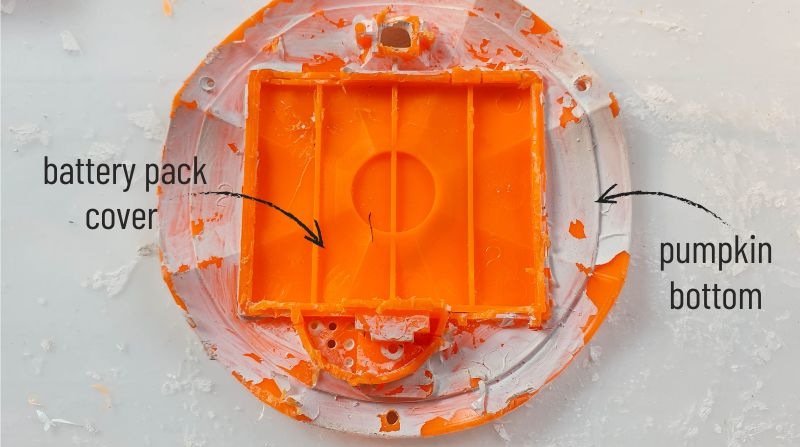
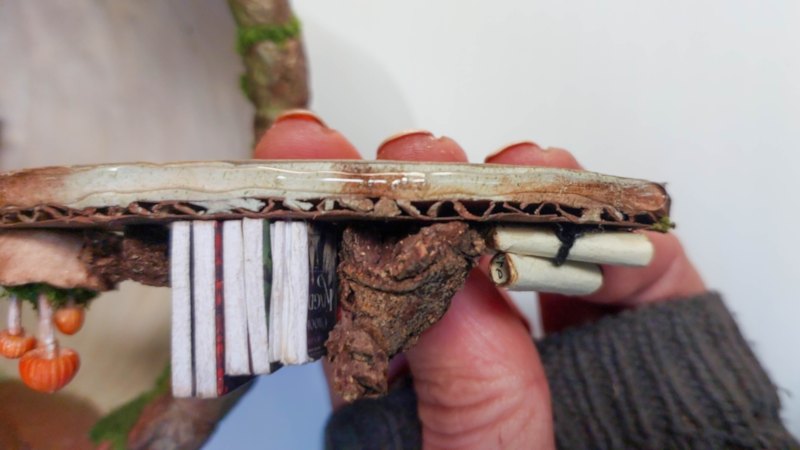
Modifying the battery pack (again) to make a floor
It feels like I spent more time modifying the battery pack than anything else. You see, I wanted to hide the battery for the fairy lights under the floor. And with me cutting away the housing, I removed too much, which meant the floor would be wonky. So, I had to build it up again with clay.
That’s much better….
….. or so I thought. It wasn’t until I cut up a plastic lid…..
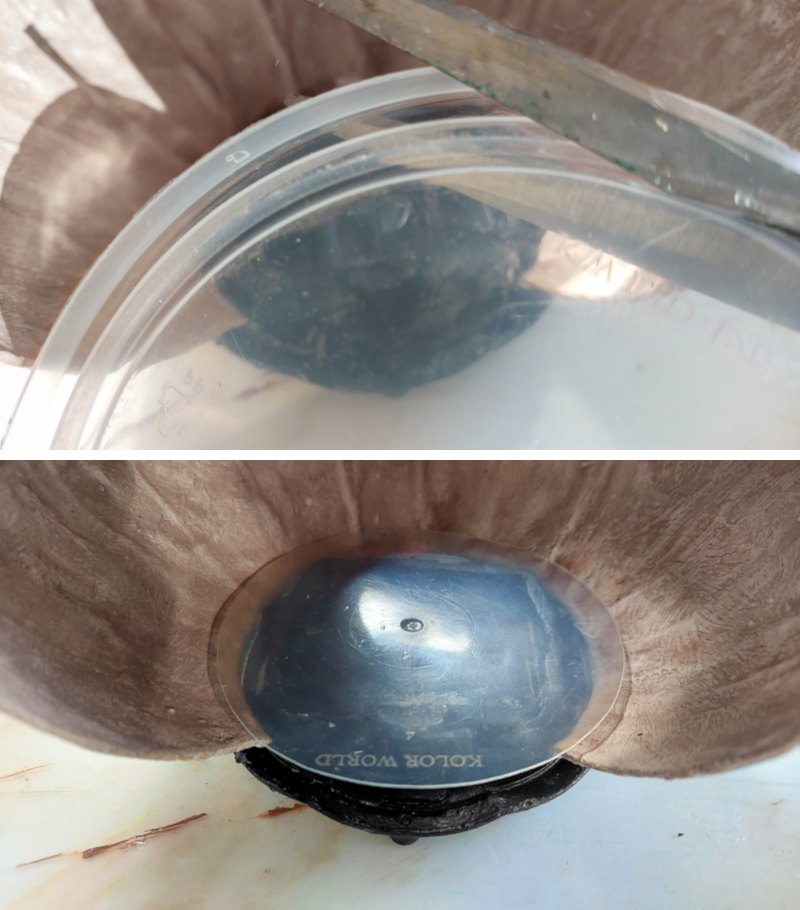
… and glued a small mat (it’s actually a mouse pad) on the lid that I realised I still had work to do.

The floor was still wonky. Pretty, but wonky. So, the clay came out again, and this time I went all out and filled in the gaps to level out the floor once and for all. I even added a small step.
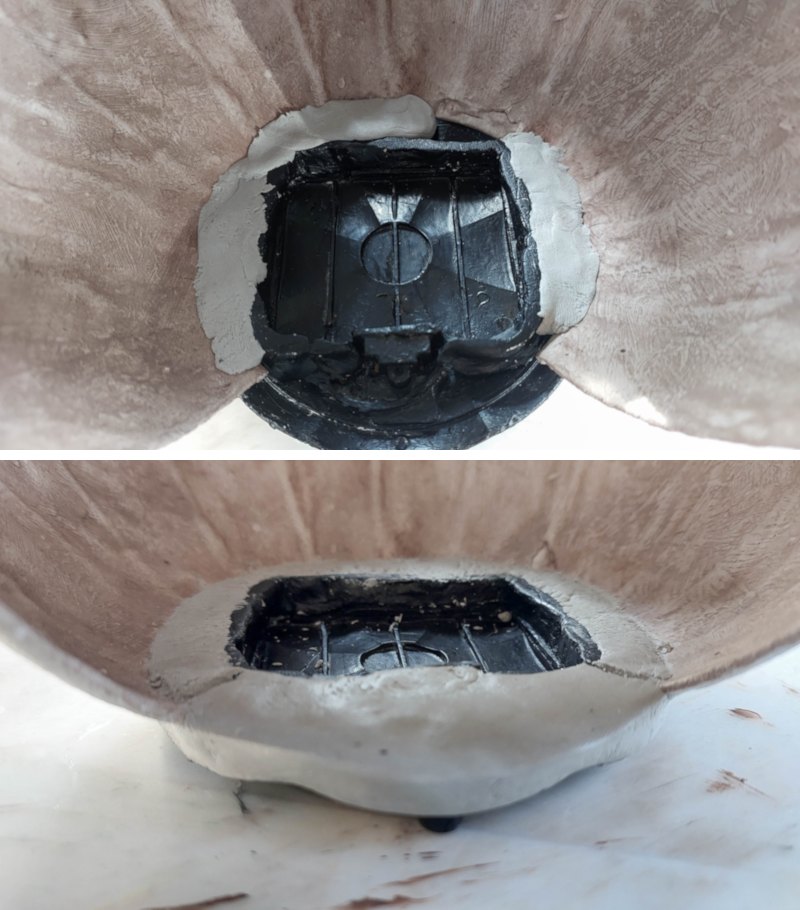
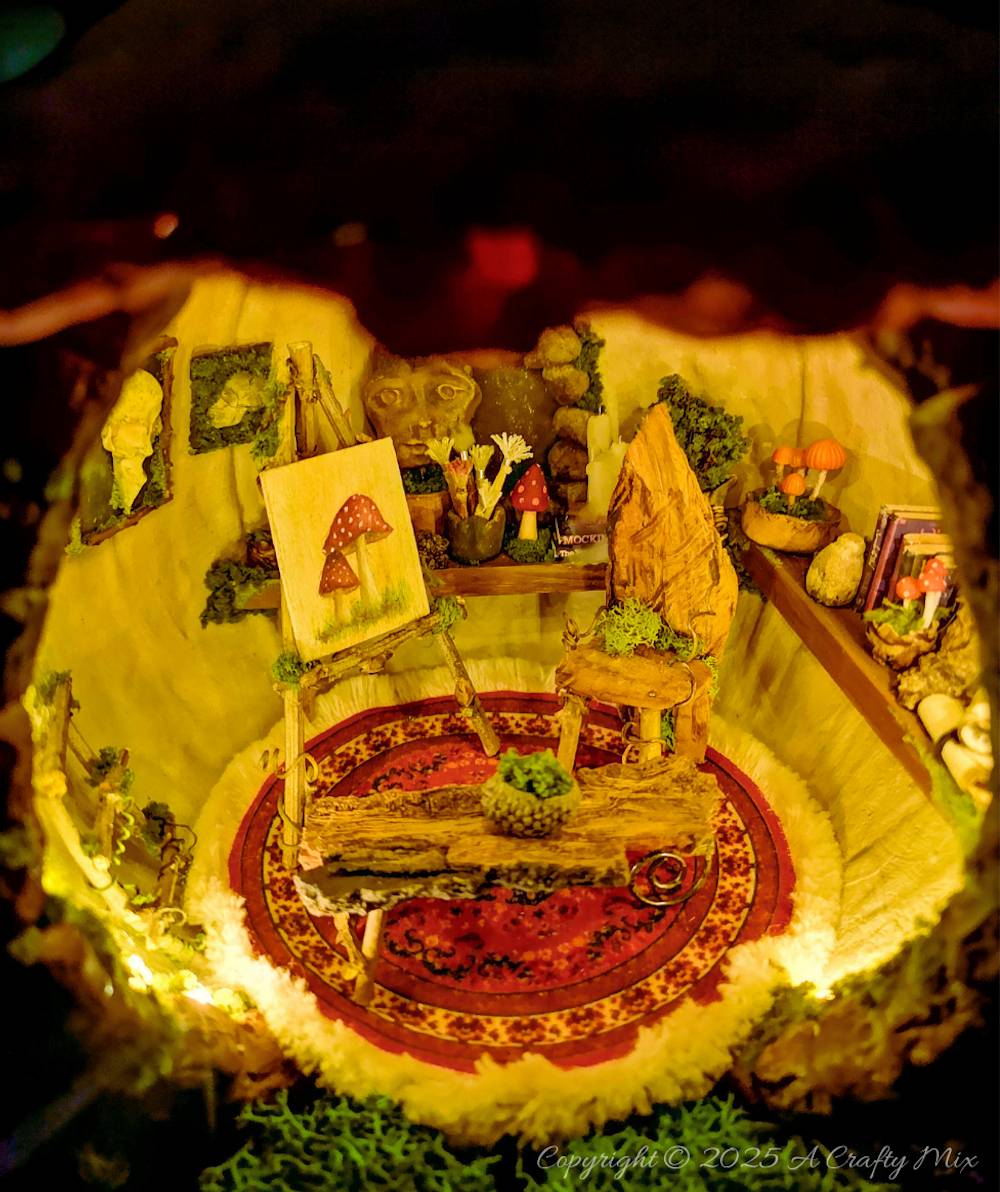
Now I was finally ready to install the fairy lights. I glued the battery inside the triple-modified housing. When you glue your battery pack down, just make sure you can still open the lid to replace the batteries. Glue the fairy lights on the inside edge of the door. Any excess lights can be cut off with a pair of scissors.

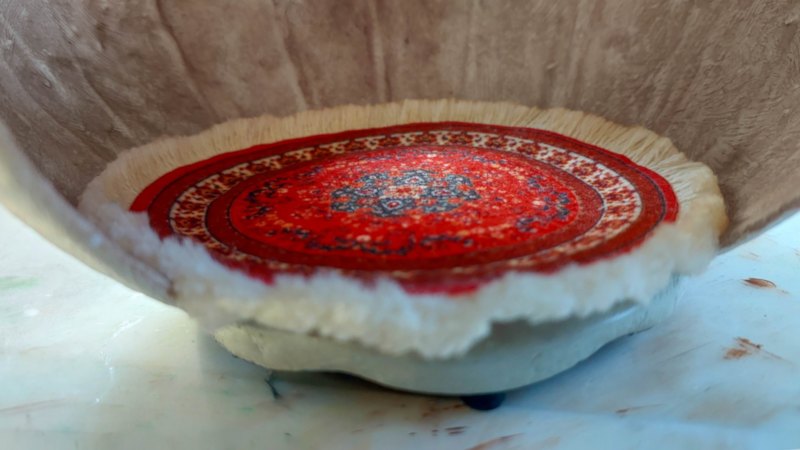
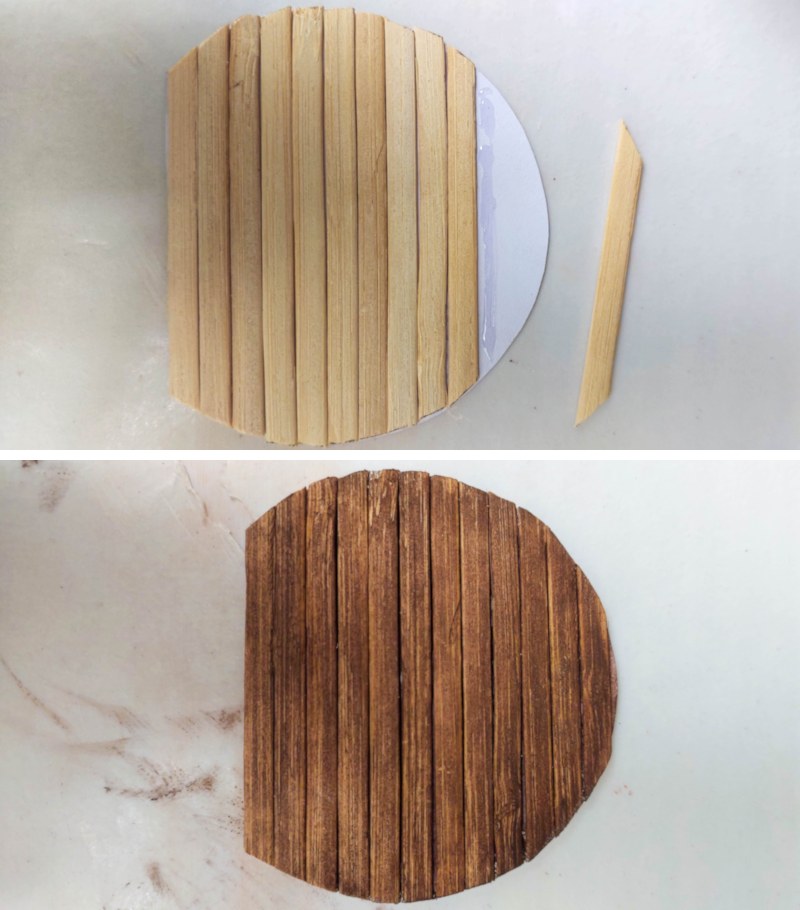
Oh, BTW, if you can’t find a small mat, you can use stirrers to make a wooden floor instead. In fact, that’s what I used to make a ceiling for my fairy art studio. Cut a piece of cardstock to fit and glue the stirrers on. Trim away any excess and paint or stain the ceiling.
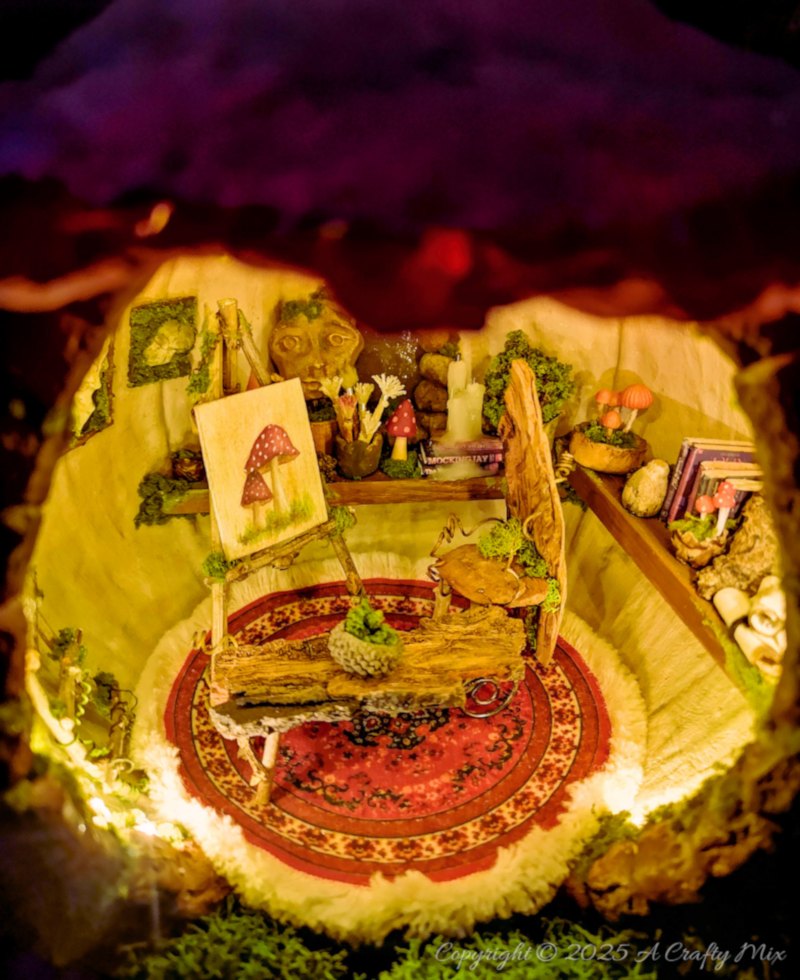
Now, all that’s left to do is decorate the inside of the fairy art studio.
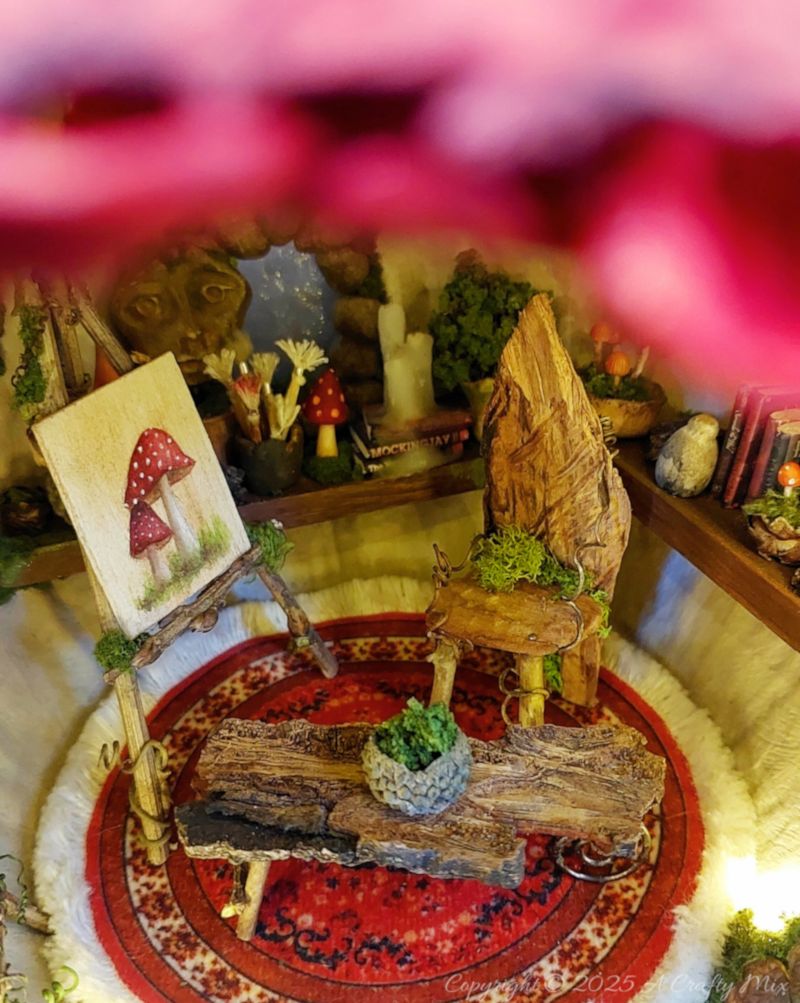
Decorating the interior
When it comes to decorating, you have so many choices. Since this is an art studio for the fae folk, I filled mine with artsy-craftsy stuff. Just let your imagination run wild. I adore making miniatures, but if that’s not your vibe, you can repurpose inexpensive doll’s house furniture instead.
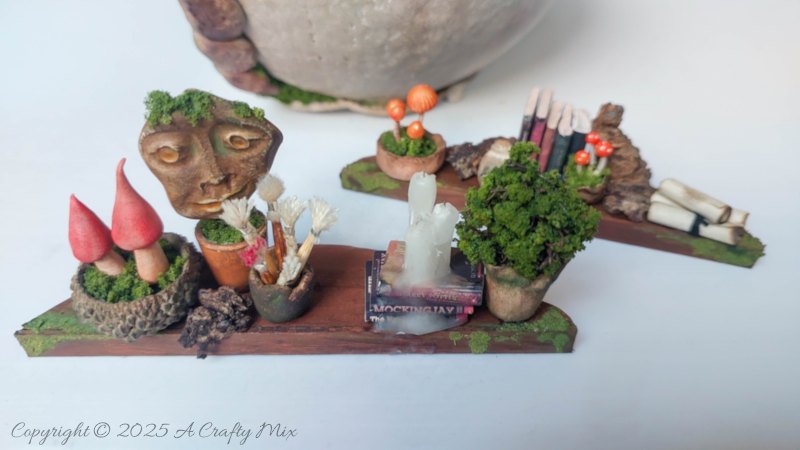
If you do want to make your own, you’ll find a whole bunch of miniature tutorials on the blog:
- Miniature book tutorial
- Fairy wood chip chair tutorial
- Little hammock
- Fairy easel and tiny paintbrushes tutorial
- Teeny, tiny fairy candles
- Scrolls tutorial
- Tiny mushrooms tutorial
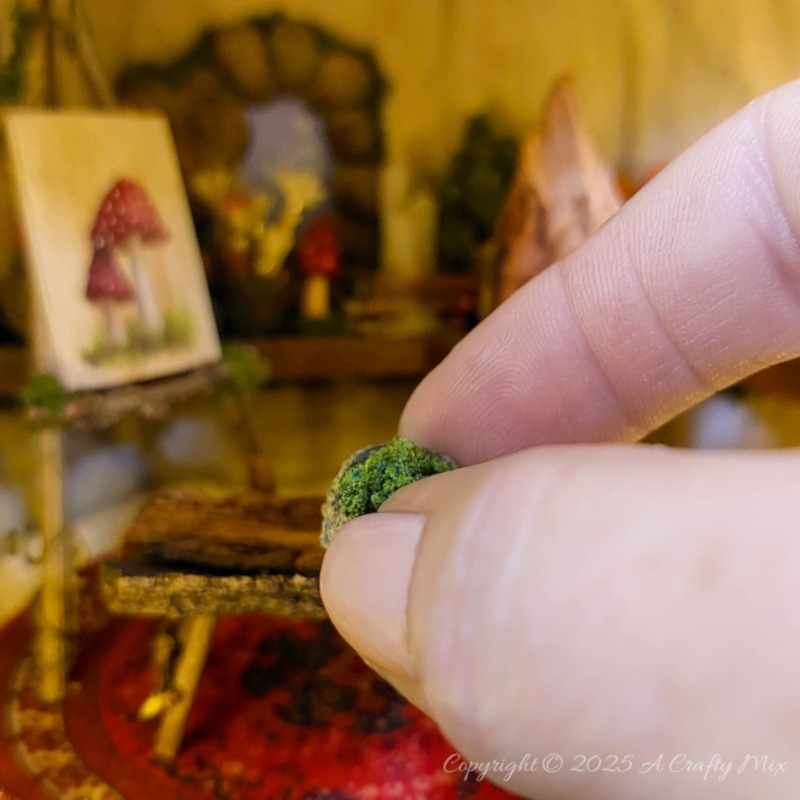
- Fake bath sponge fairy moss tutorial
These tips for working in small spaces and this general guide to making miniatures will help a lot too. The only thing that hasn’t really been covered in another tutorial is making curved shelves. So, let me quickly show you how I made those.
All you need is some cardboard, wooden craft sticks, and paint. Draw a circle on the edge of a piece of cardboard. The deeper the circle goes onto the cardboard, the wider the shelves will be. Cut the circle slice out. Using the straight edge as a guide, cut a craft stick that’s the same length. Glue a craft stick to the edge to disguise the wiggly, waggly cardboard edge.
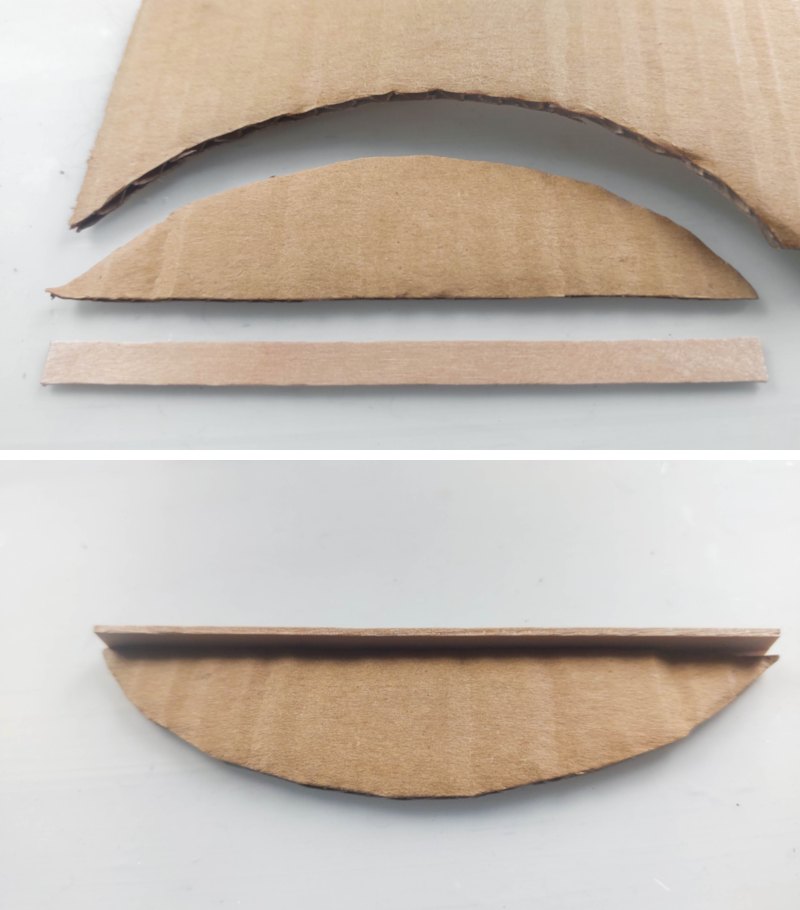
Paint the shelves. I used brown craft paint and added hints of green powdered food coloring to the edges to mimic moss.

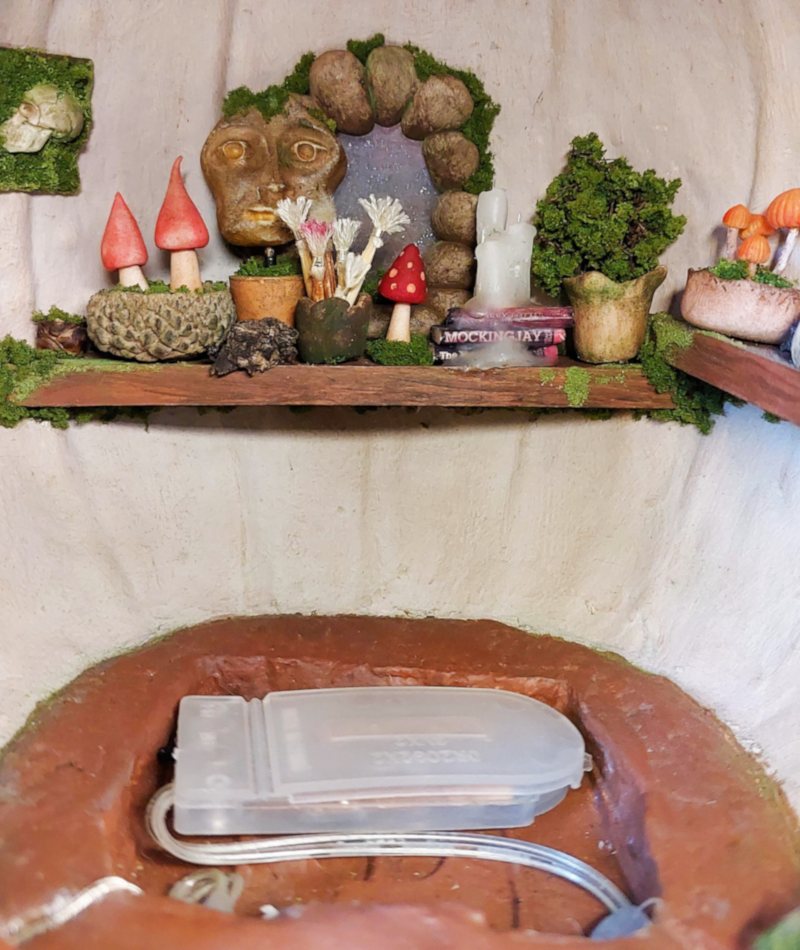
Before installing the shelves, be sure to glue all the little decor bits down.
You don’t want them to get lost before you have a chance to glue the shelves inside the fairy art studio.
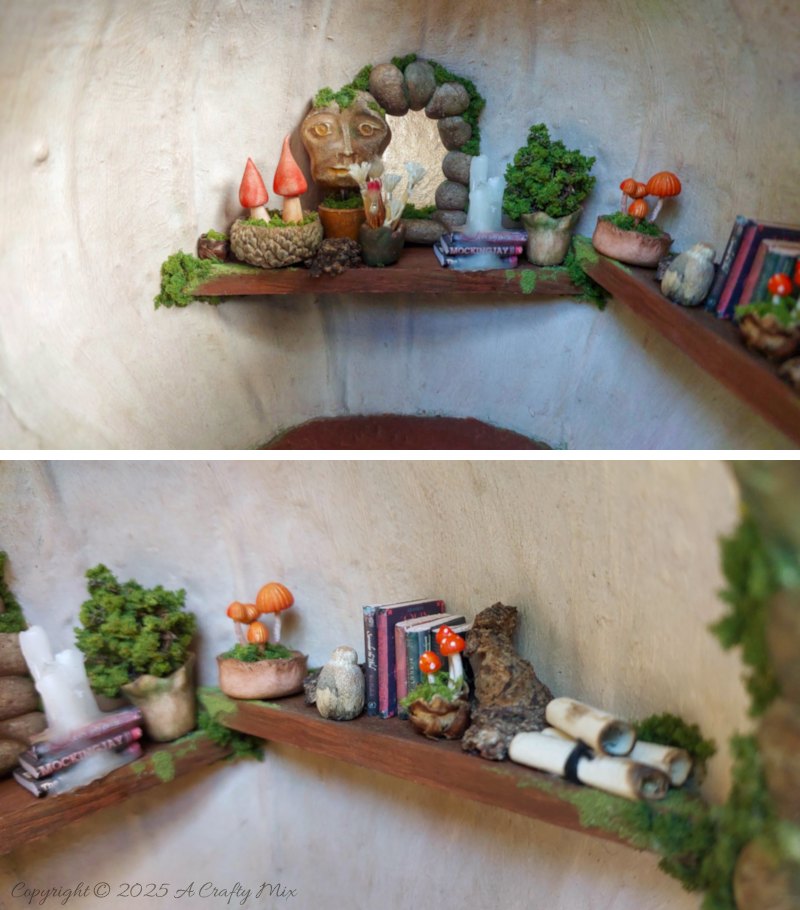
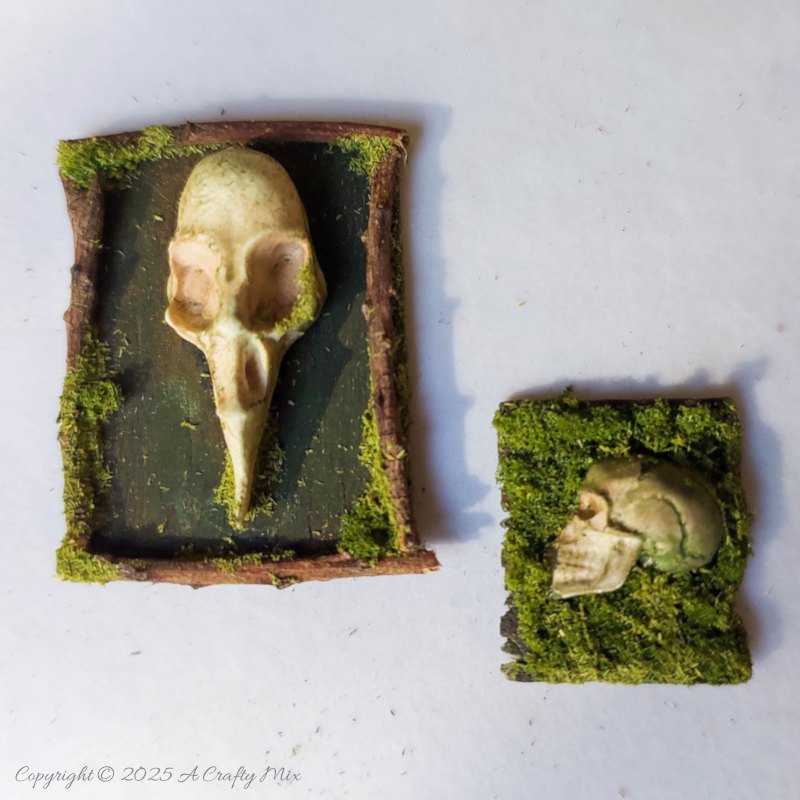
I also made some art for the walls. These two are clay skulls glued to cardboard with twig frames.
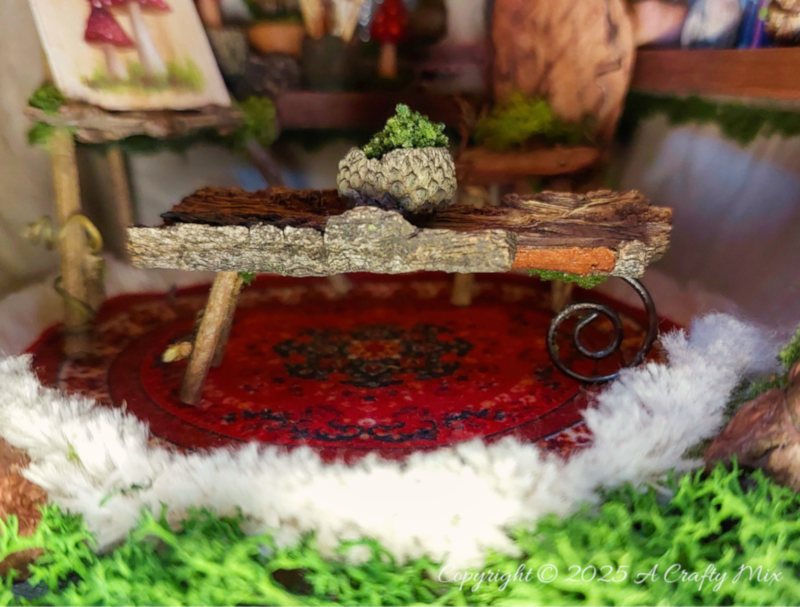
And then there’s this custom-made table using a piece of bark, twigs and a curly wurly piece of wire.
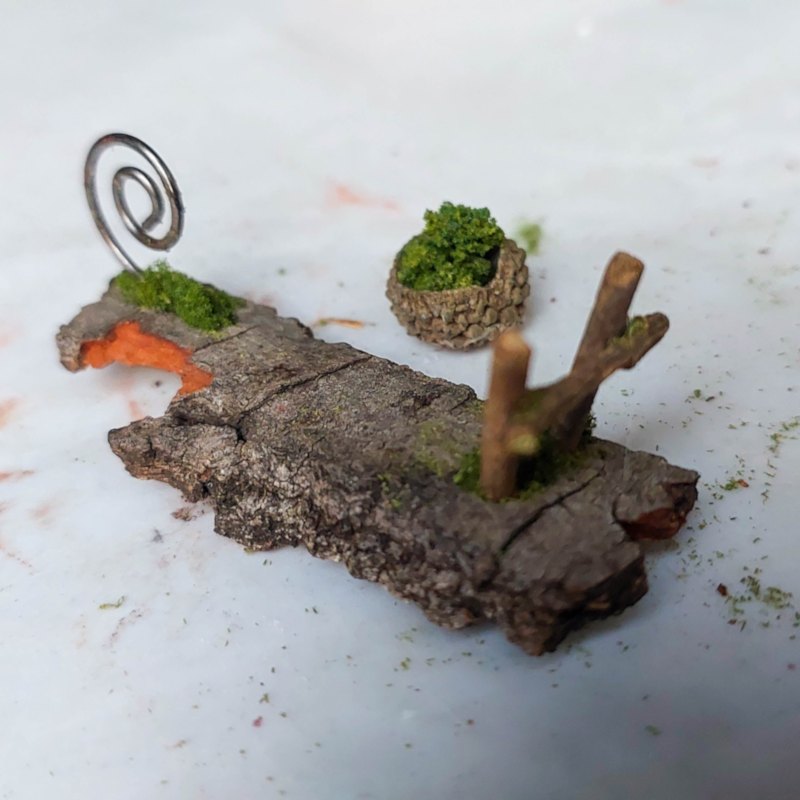
Wait, let me put it upright for you; maybe it will make more sense.

The only things that aren’t glued down are the wood chip chair, fairy easel, table and mat.
They all have to come out so you can switch the lights on and off.
When you’re happy with the interior, pop the roof onto the fairy studio.
You can glue it down too, but it makes life easier if you want to rearrange the furniture or add something else.
That way there’s more space to play around.
Soooooooo, what do you think? Have you repurposed a plastic pumpkin into something unique? Let me know in the comments; I’d love to hear all about it.
If you like the idea of repurposing a plastic bucket into a fairy art studio, don’t forget to pin the tutorial for later
Sharing is caring
Oh, and if you’re looking for some of the things we used, we’ve got you covered. Disclosure: Clicking on the links below means we may receive a commission from Amazon. But don’t worry it won’t come out of your pocket, and it helps us make more amazing crafts to share with you 😉
To prep the plastic pumpkin

Fairy Art studio doors, windows and lights


Mushroom rooftop


Art studio – interior


B0DJSPJKQM
And if you prefer to buy rather than DIY, then maybe these beauties will appeal.


Psst, don’t forget to share your pumpkin creations on Facebook or Instagram with the hashtag #FairyPumpkinStudio. And as always, wishing you a wonderful, crafty week filled with lots of love. Thank you for popping in for a visit.

Last update on 2026-04-23 / Source Amazon Affiliates