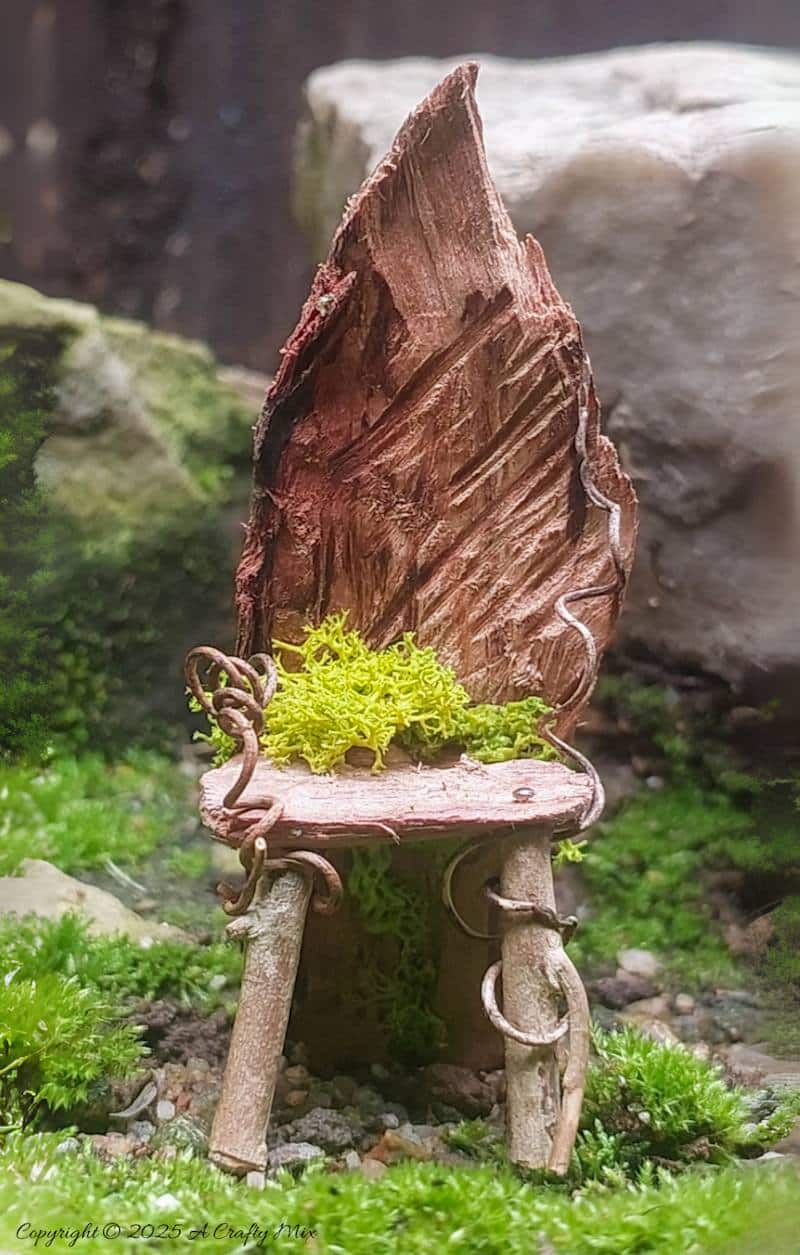
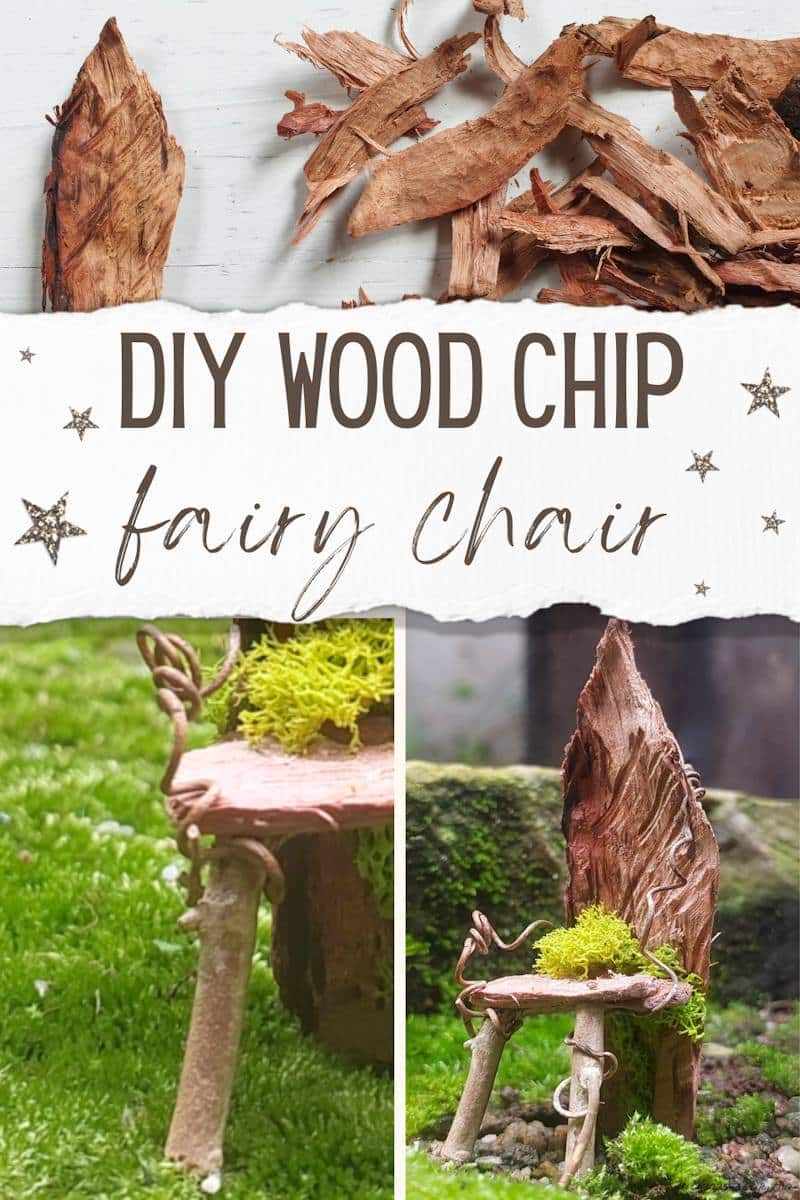
Have you ever wandered around your fairy garden and thought, “I need to make something for the fae folk to rest their little butts on after a busy day”? That same thought crossed my mind the other day. And that thought turned into this charming wood chip fairy chair. It’s quick, easy, and, dare I say, oh-so-delightful!
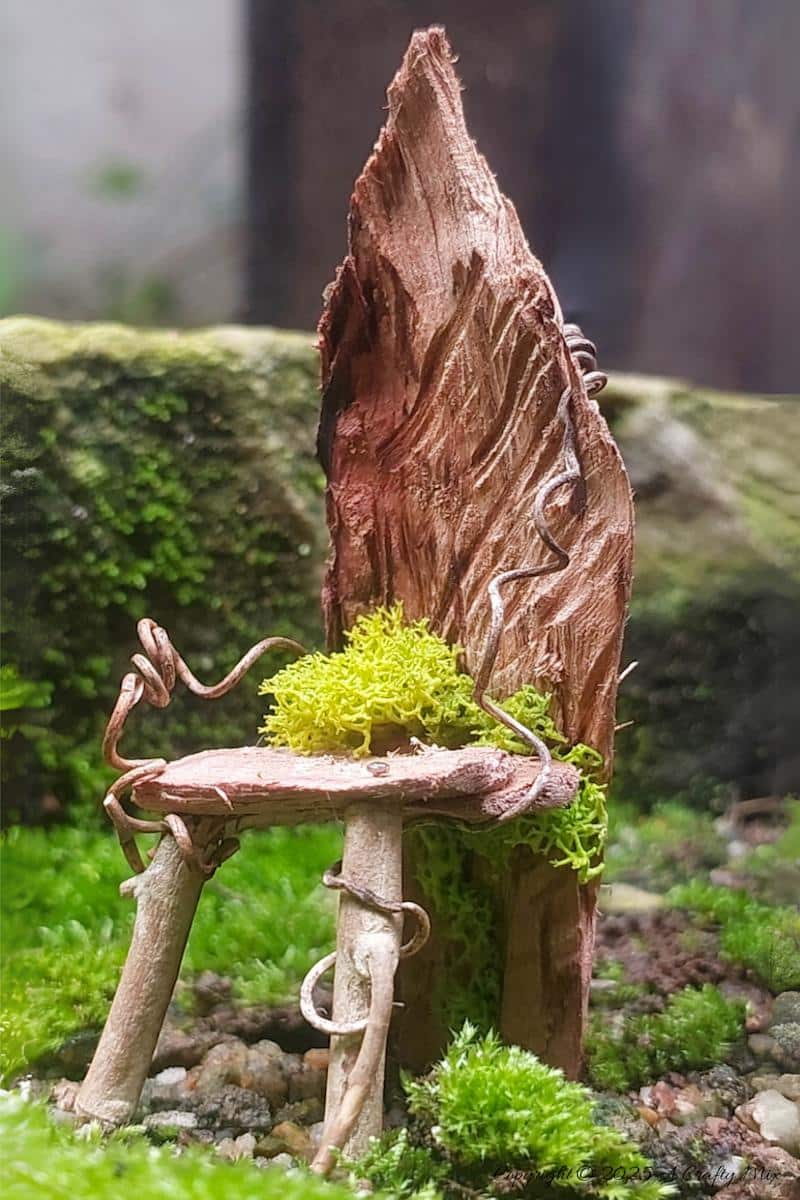
A seat fit for the tiniest of royalty.

Plus, I found everything I needed to make the chair in our highveld garden and craft cupboard.
So, if you need an excuse to let your inner child run wild while you make something truly magical, then this tutorial is for you. But before we get there, follow us on Facebook, Twitter, Pinterest, or Instagram. And don’t forget to subscribe so you’ll never miss a post!
What you need
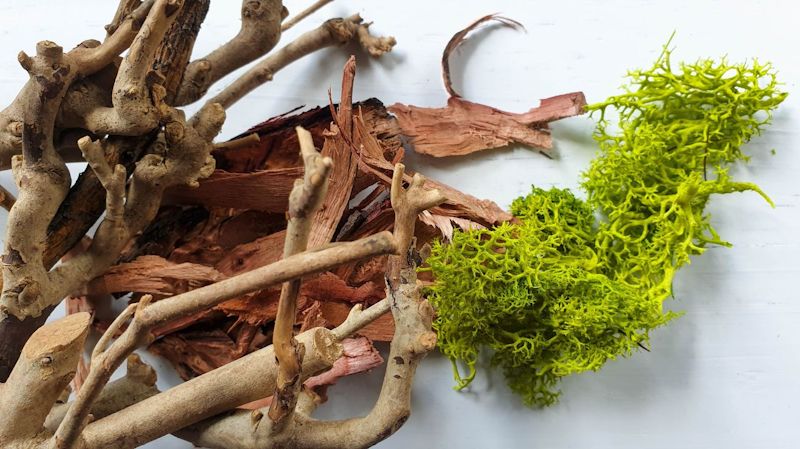
- Wood chips
- Small twigs
- Moss
- Tendrils
- B7000 glue
- Sewing pins
- Small side cutters
- Sandpaper
- Clothespins (pegs)
How to make a quick wood chip fairy chair
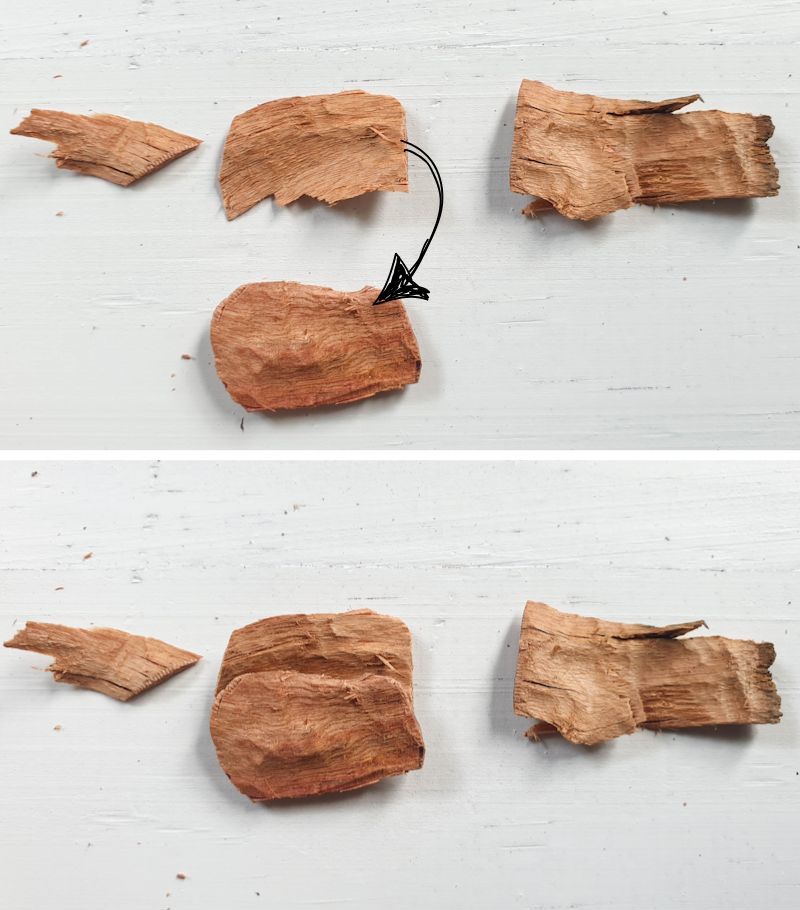
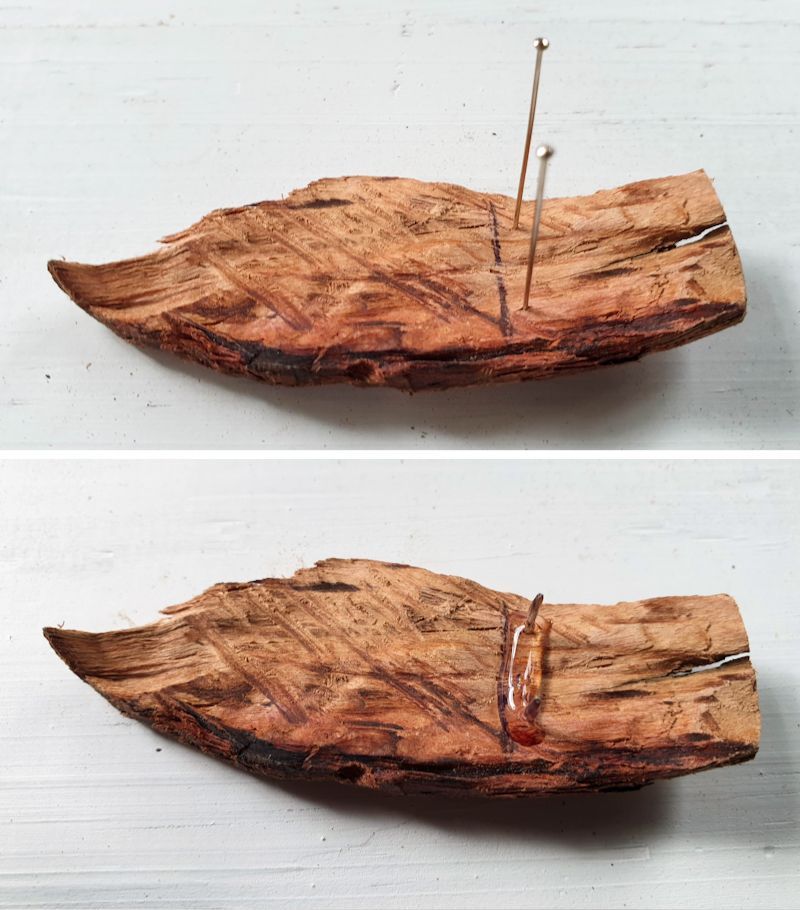
Rummage through your collection of wood chips and look for bits that can be used for the fairy chair. You’ll need a backrest, a seat, and a few twigs that are roughly the same thickness. These are the bits I used.
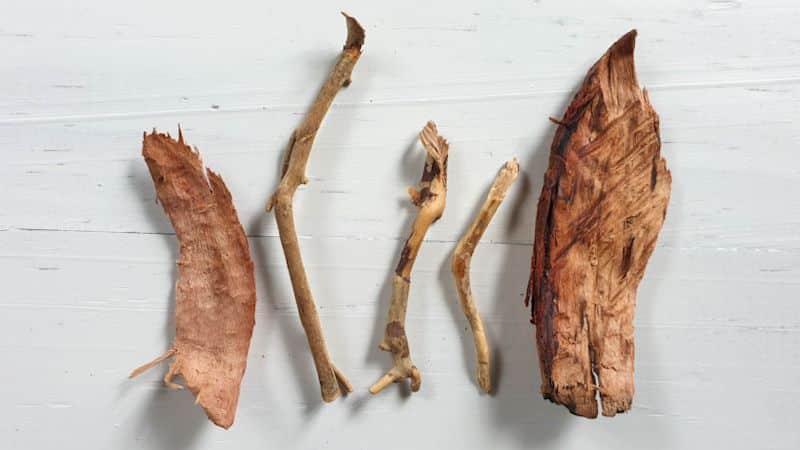
If I were a fairy carpenter, I’d look for wood chips imbued with magical properties, but as a flat-footed human, I just went for something with loads of texture and character. As long as the chips are the right size to fit into a fairy garden, you’re good. I did have to cut my seat chip a bit shorter.
And glue on another little piece to make it wider.
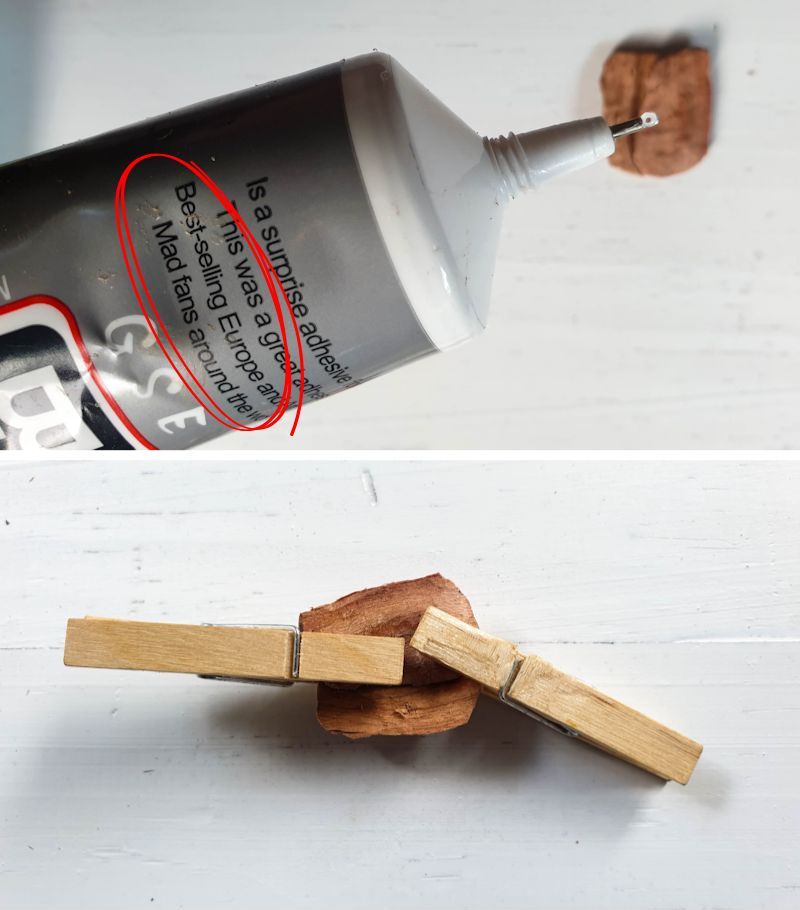
Hot tips coming up. When I make fairy furniture, my new favorite glue is B7000. Its tiny nozzle is ideal for something like this. Plus, it’s waterproof, and, according to the packaging, it’s got “mad fans all around the world.” My kinda people. Oh, and clothespins make great clamps.
Adding legs to the fairy chair
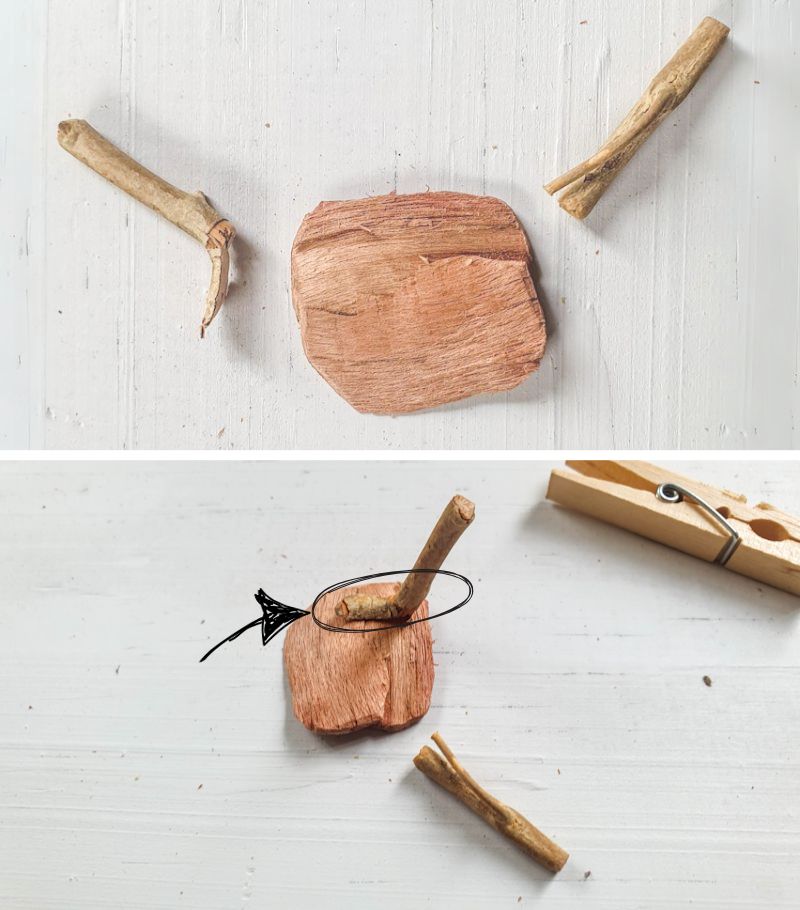
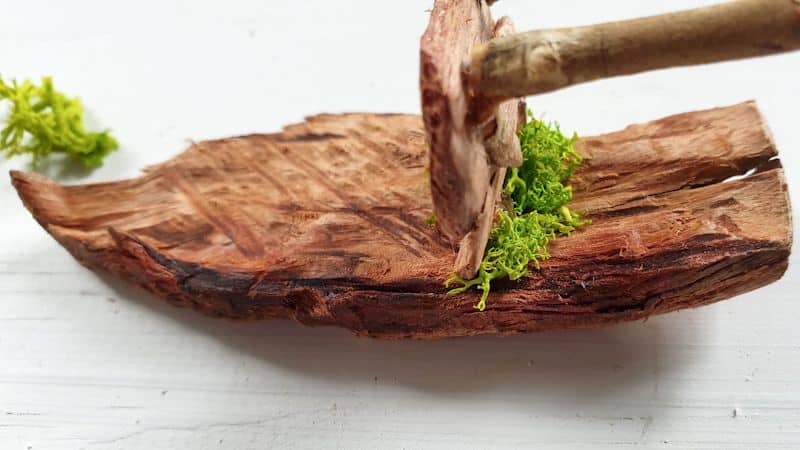
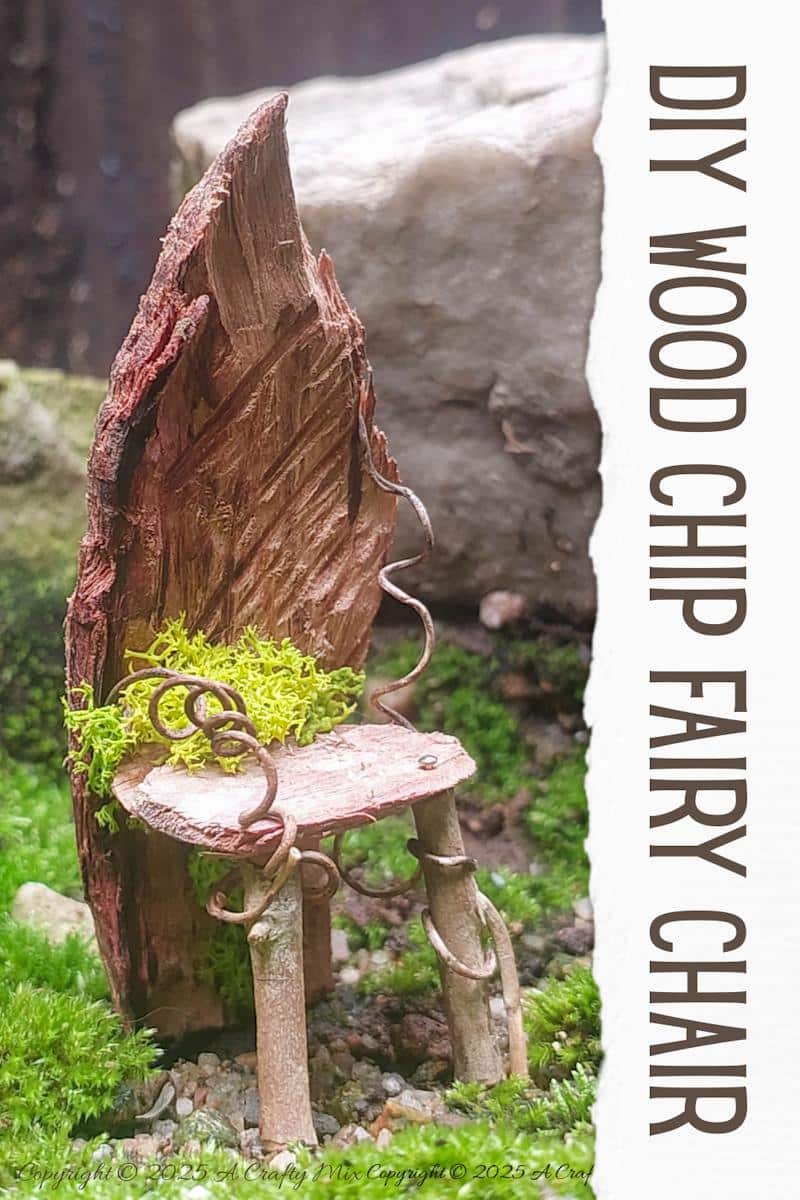
Once the wood chips have been cut and trimmed to size, use the bits and pieces to figure out the height of the legs. Since the bottom of my backrest will double up as the back legs for my fairy chair, I marked off the legs’ height on the backrest and cut my twiggy front legs to size.

If possible, try to make the top of the legs as wide as you can. That way there’s a bigger surface area to apply the glue. One of my twig legs had a handy side shoot, which was perfect.
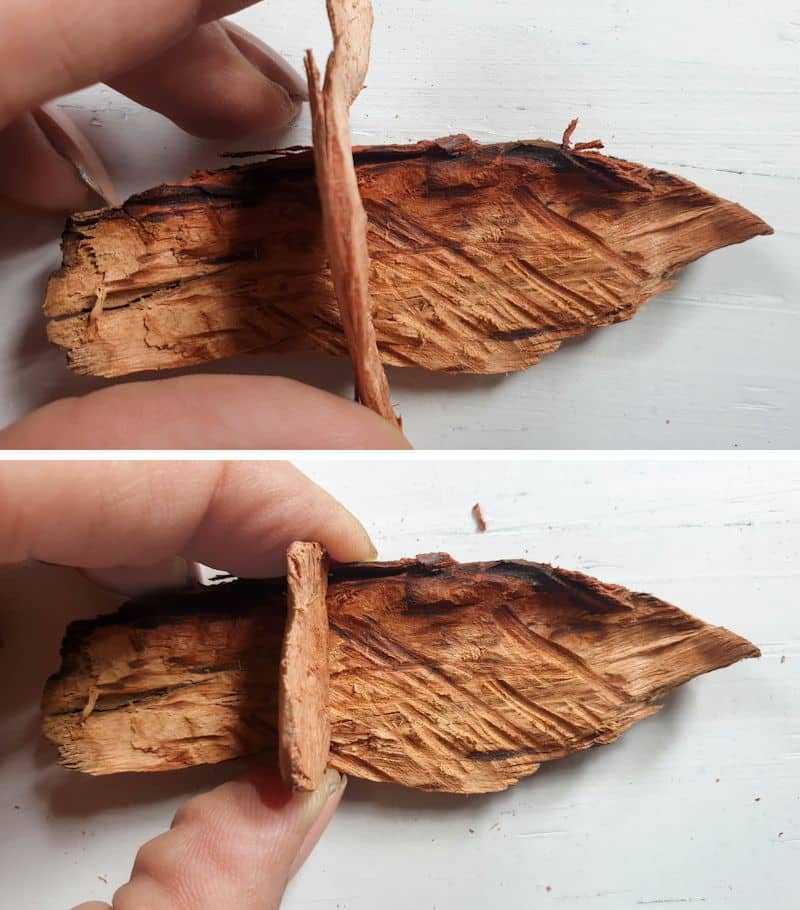
The other one needed a little work before I could glue it in place. In a fairy world, pins are my go-to hack if you need a tiny nail or screw. Just stick it through the seat and make a hole in the twig. The woody inside of a twig is usually quite soft, so you shouldn’t have a problem pushing a pin inside.
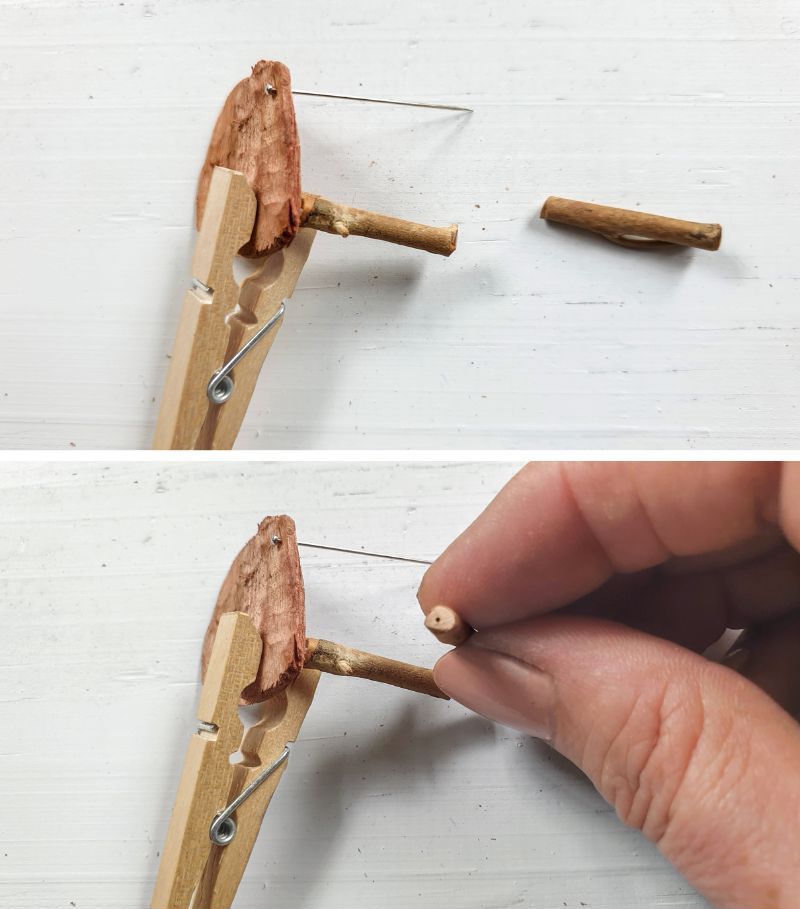
Cut the pin with side cutters, …….
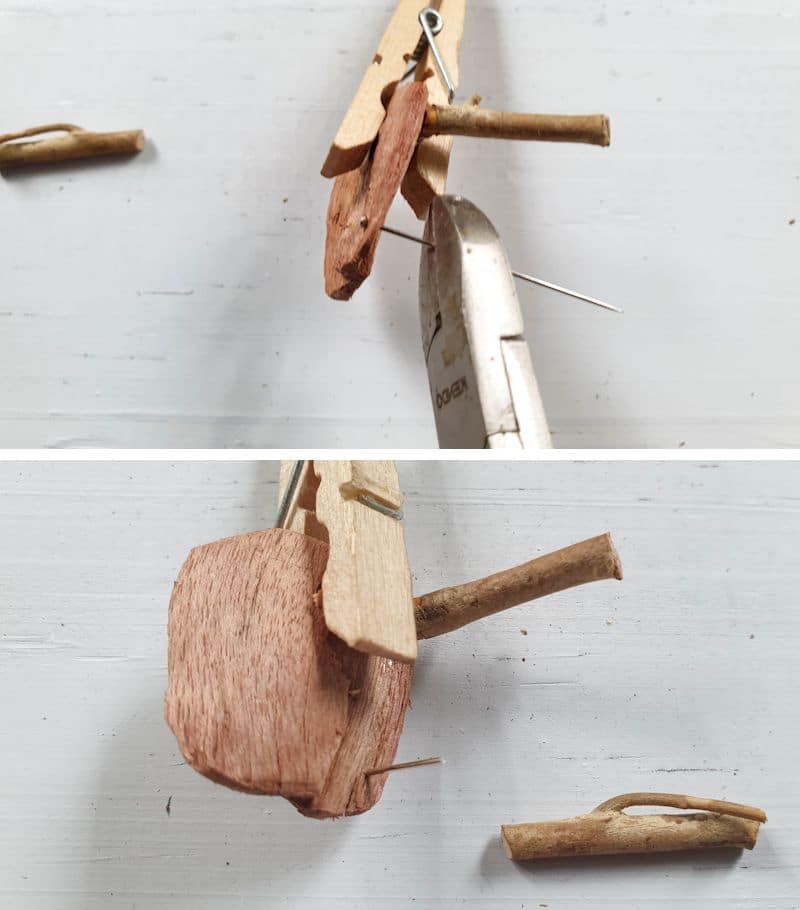
……add a drop of glue, and push it inside the leg
Putting the wood chip chair together
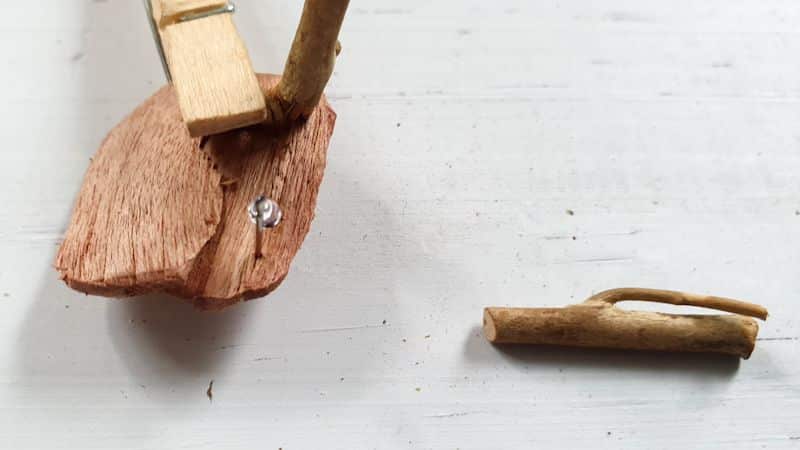
To join the seat and backrest, I used the same pin hack.
This time, instead of pushing the pins through the seat, I simply glued the seat on top of the pins and disguised them with moss.
For the armrests, I used tendrils from our granadilla vine.
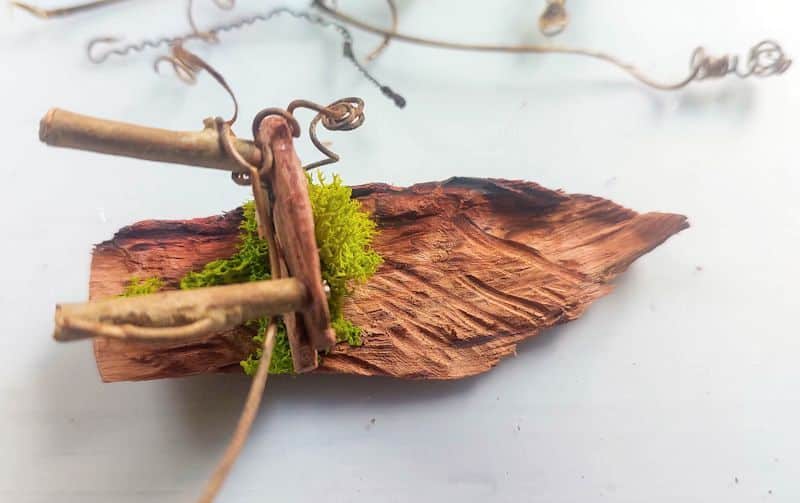
Those delicate, ethereal curls add just the right touch of whimsy to any fairy creation. And the fruit is yummy too.

Place the wood chip fairy chair in the garden or inside a fantasy bottle.
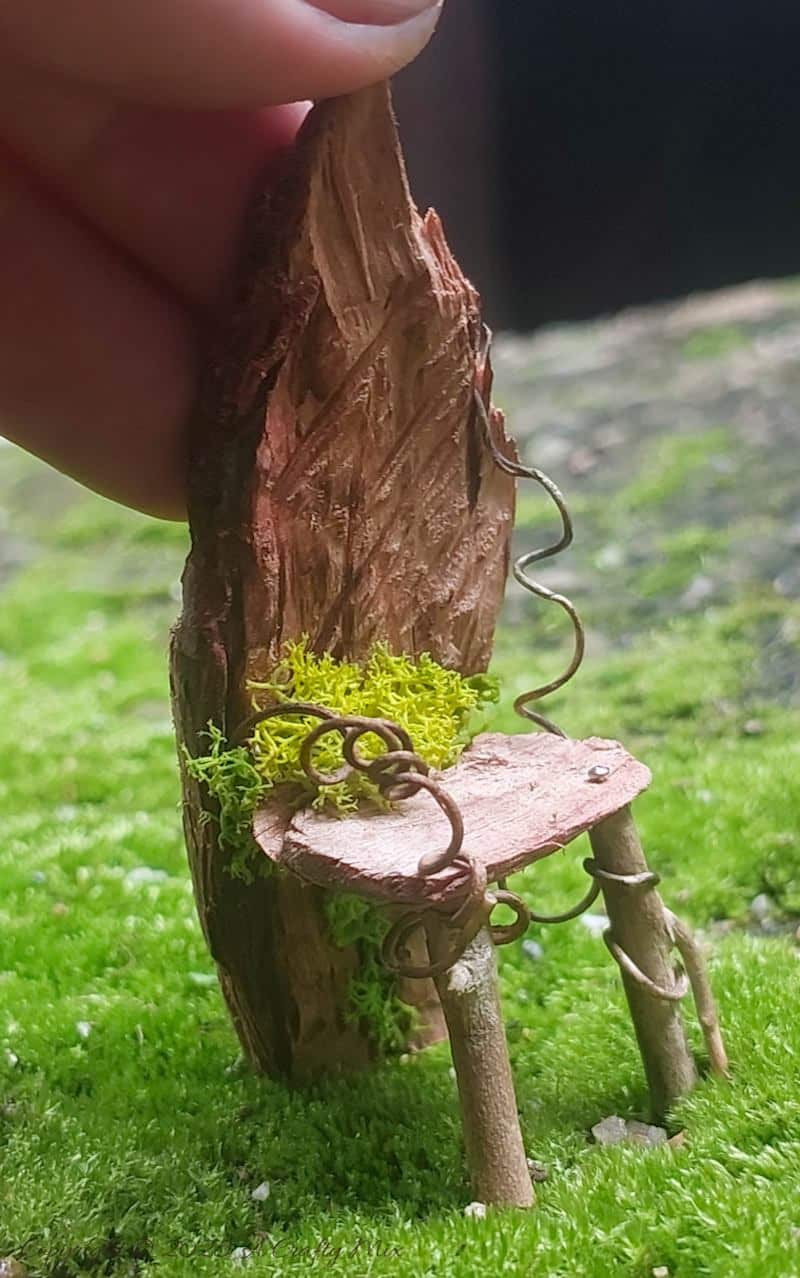
And wait patiently for your magical friends to come test it out.

And, since the little chair is eco-friendly and pretty much biodegradable (except for the glue and pins), the fairies should approve.
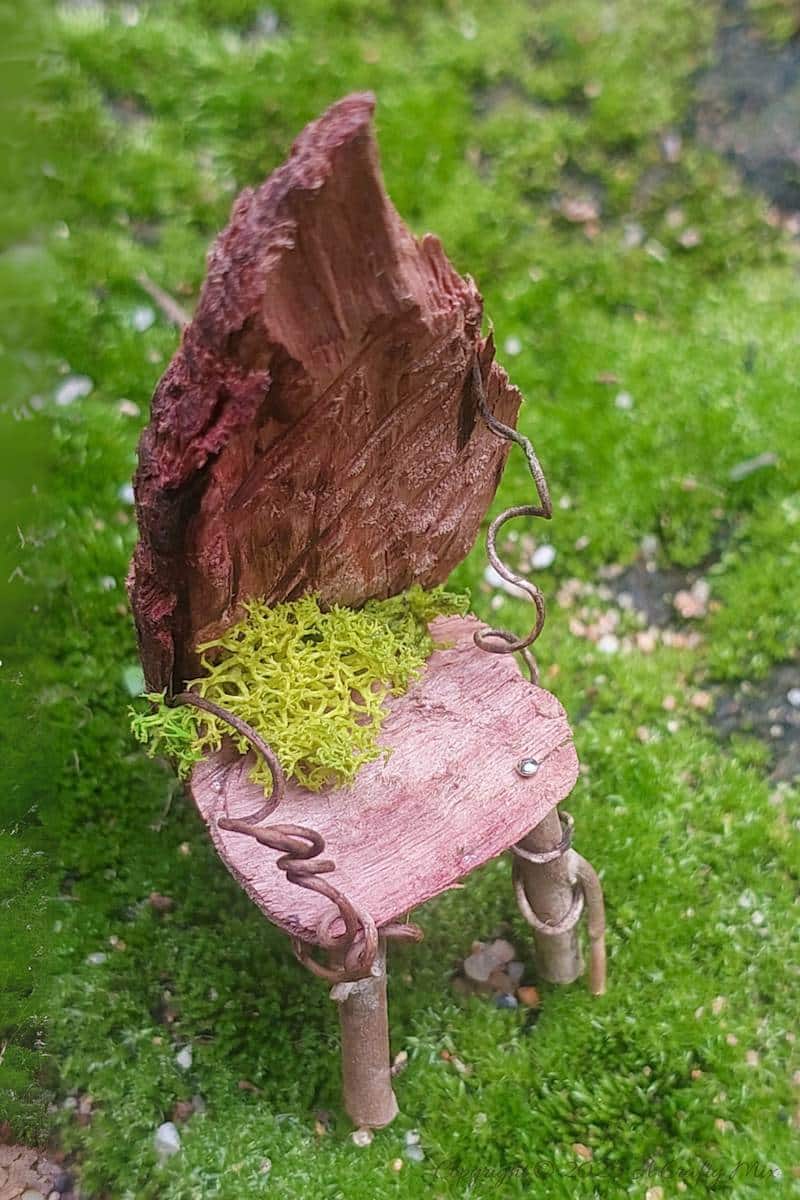
This little one is going in my fairy art studio, but I’ll be cobbling a few more together. They’re so easy to make, and fairies are social creatures. I don’t want them fighting over one chair.

If you like the idea of making a fairy chair out of wood chips, don’t forget to pin it for later.
Sharing is caring
Oh, and if you’re looking for some of the things we used, we’ve got you covered. Disclosure: Clicking on the links below means we may receive a commission from Amazon. But don’t worry it won’t come out of your pocket, and it helps us make more amazing crafts to share with you 😉


And if you prefer to buy rather than DIY, then maybe these beauties will appeal.


And as always, wishing you a wonderful, crafty week filled with lots of love. Thank you for popping in for a visit.

Last update on 2026-06-03 / Source Amazon Affiliates