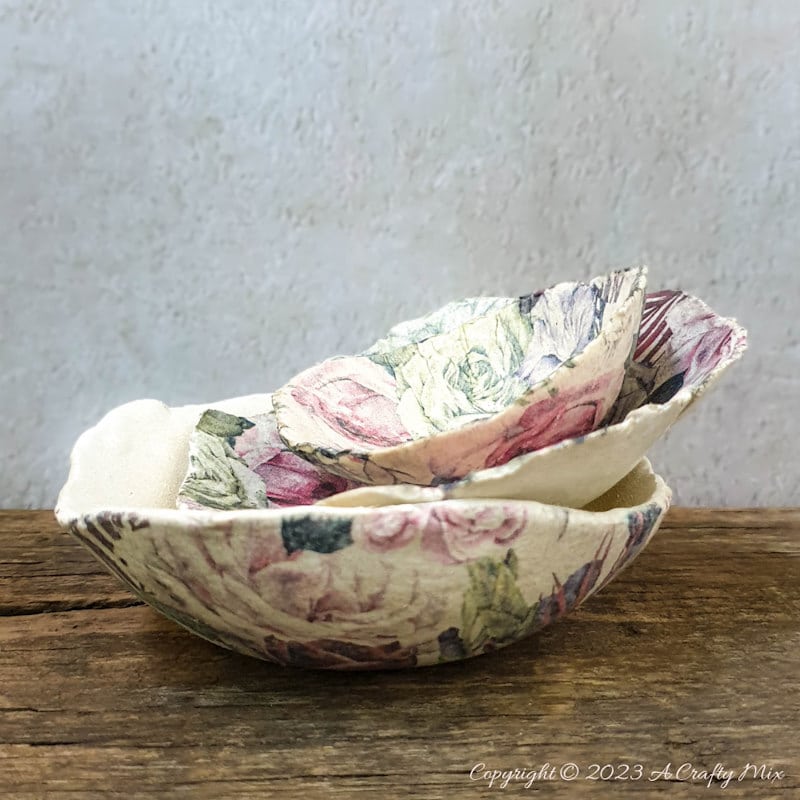
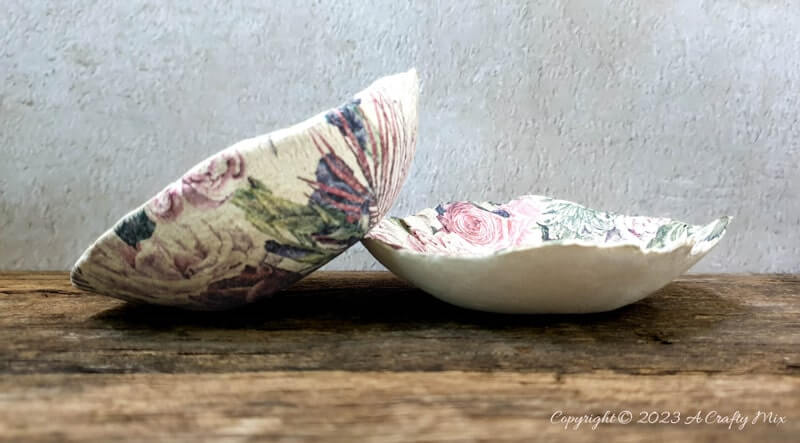
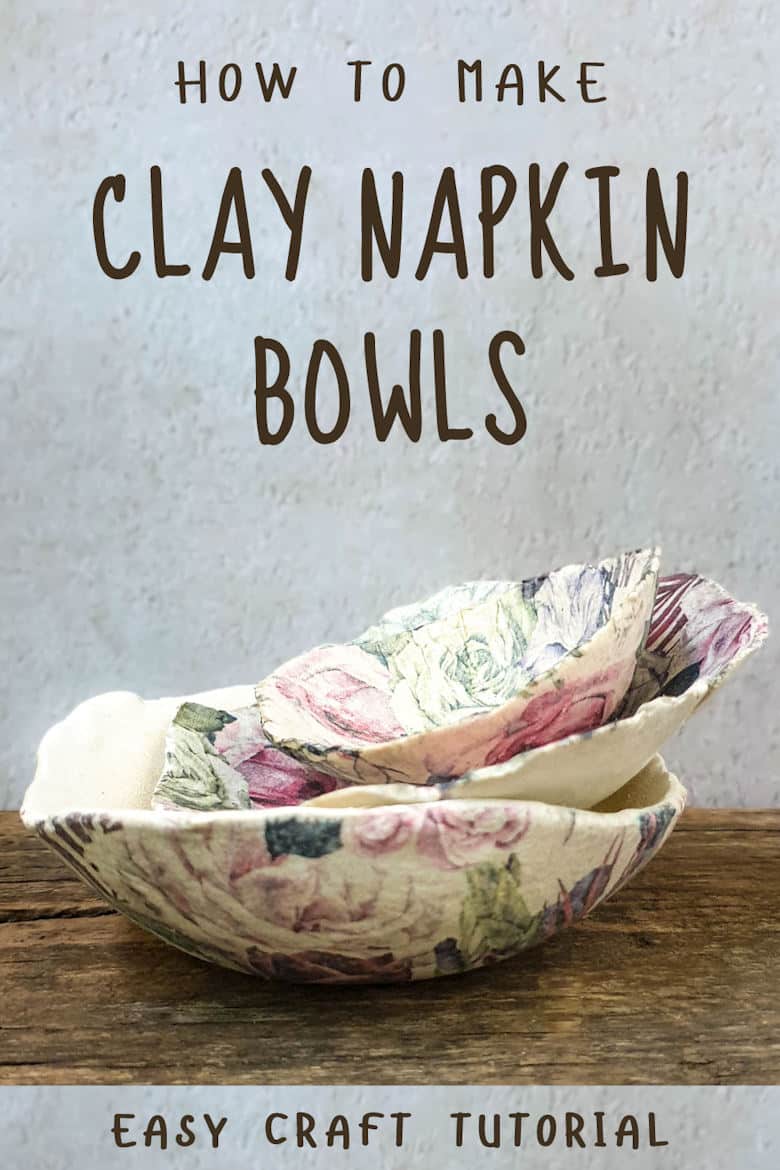
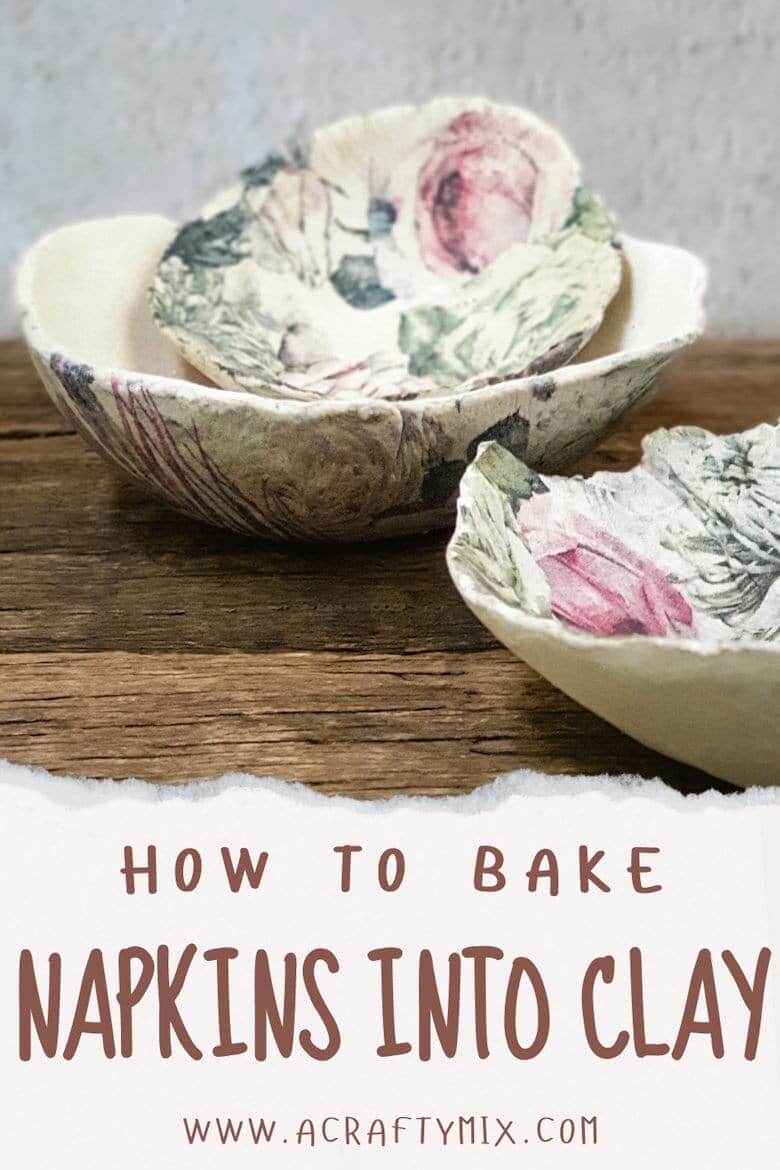
Don’t you just love it when an experiment turns out better than expected? A few weeks back, while tidying up one of those “I don’t know where to put this” drawers I found some gorgeous paper napkins. Ever since, I’ve been racking my brain on how I could use them in a craft project. The print wasn’t suitable for a dreamcatcher. It was too flowery. And then a whole bunch of little things happened at once. I had just baked some clay door pulls, my nails needed a touch-up, the IBC Ceramic Crafts challenge was around the corner, and the napkins were right there. Long story short, those little things turned into these lovely clay-baked napkin bowls.

They look so feminine and soft. I hardly ever make girly stuff. Well, I did when my daughter was knee-high to a grasshopper but that was a loooong time ago.


Anyhoos, you can use any patterned paper napkin to make something similar and they literally take 5 minutes to do. That’s 5 minutes excluding the baking time.

Okay, enough of my waffling, let me show you how I made these clay-baked napkin bowls. But, we get there, be sure to follow us on Facebook, Twitter, Pinterest, or Instagram. And don’t forget to subscribe so you’ll never miss a post!
Towards the end of this post I’ll share what my fellow bloggers from the IBC (Int’l Blogger’s Club) did for the Ceramic Crafts Challenge, so stick around.
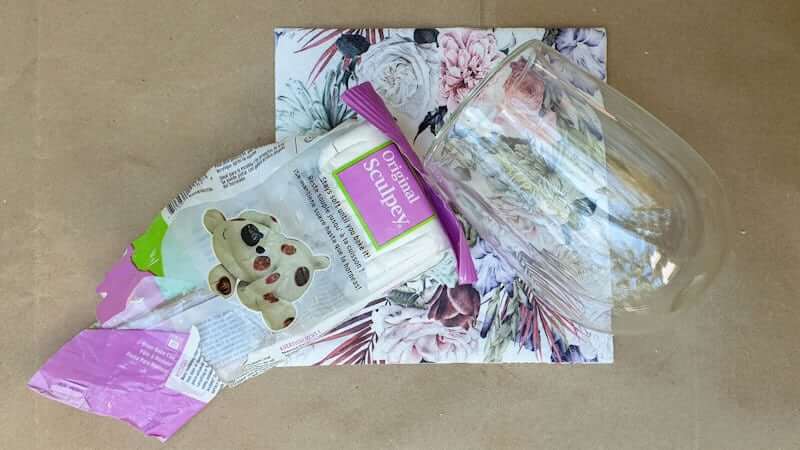
What you need
- Pretty paper napkins (aka serviettes here in South Africa)
- Polymer clay
- Acetone
- Clay roller or glass bottle
- Clear varnish

How to make clay-baked napkin bowls
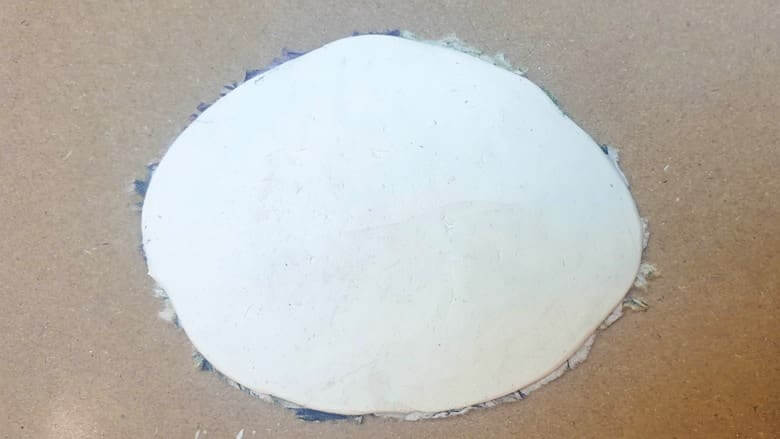
Grab a hunk of polymer clay and knead it between your fingers to soften it up. Roll the clay into a ball and use a rolling pin or bottle to flatten the ball out.

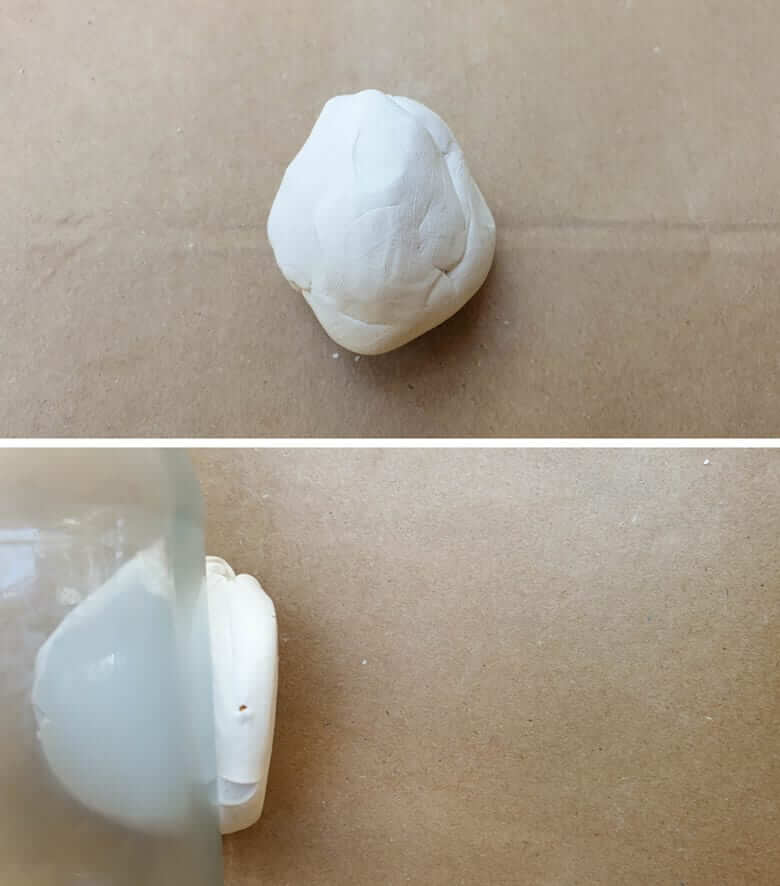
Don’t worry too much about making a perfect shape. Mine resembled a squished blob. As long as the rolled-out clay is big enough to form a bowl. If you don’t have enough clay to make a bowl, you can use the same technique to make napkin rings.

Embedding the napkin in the clay
Separate the napkin layers. You only needed the printed layer.

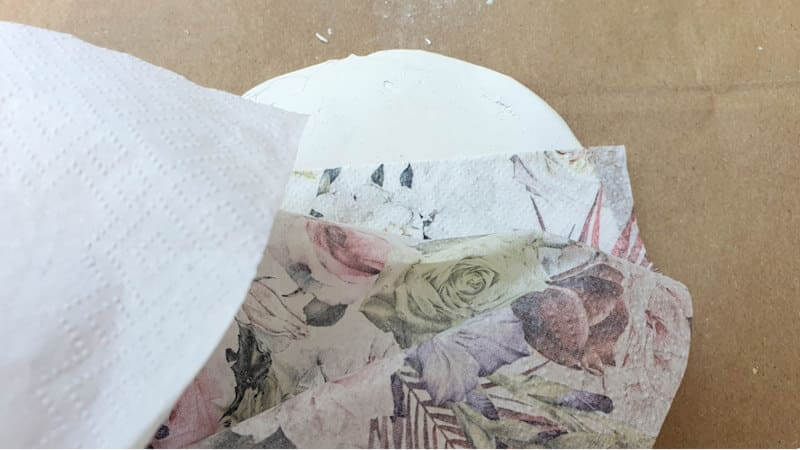
Place the napkin face up on the clay. If you want a muted print, place the napkin face down. Gently roll the napkin into the clay. Don’t overdo it. Two or three rolls in different directions are all you need.

Dab a little acetone all over the napkin including the edges. I originally thought the acetone would transfer the image to the clay but nothing happened. Not a biggie, since I was just playing around. On that note, acetone has a pungent smell so it’s best to do this part in a well ventilated area. It evaporates really quicky and many clay artists use it to remove fingerprints or smooth out clay before baking.

Wet the edges of the napkin and tear them away.

Fold the torn edges neatly around the clay and trim where necessary.

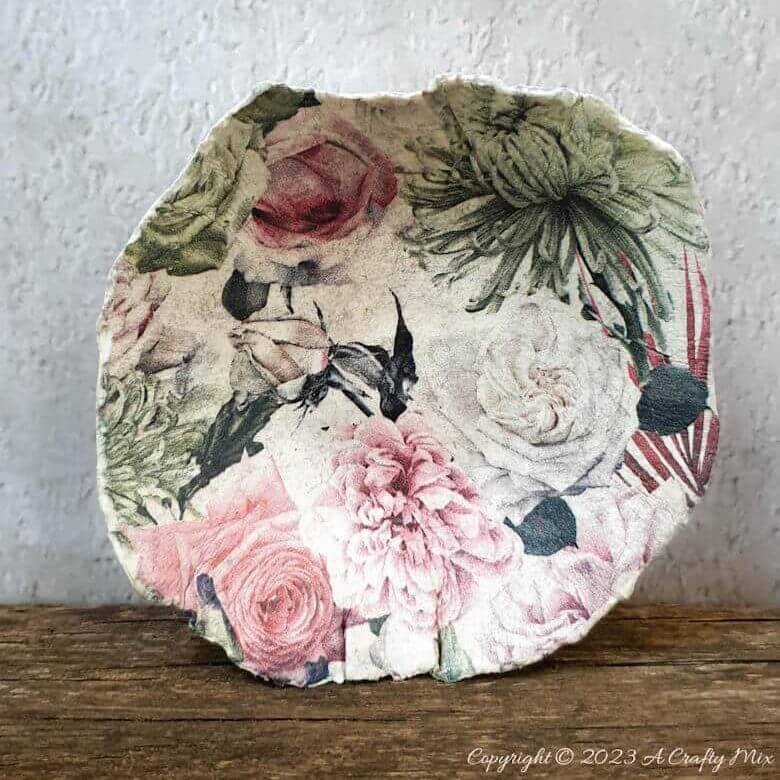
Form the clay napkin over a bowl or just use you hands to create the shape. The first one I made I formed the bowl with the printed image facing inwards. The next one I swapped things around and had the image facing outwards. Both ways will work.

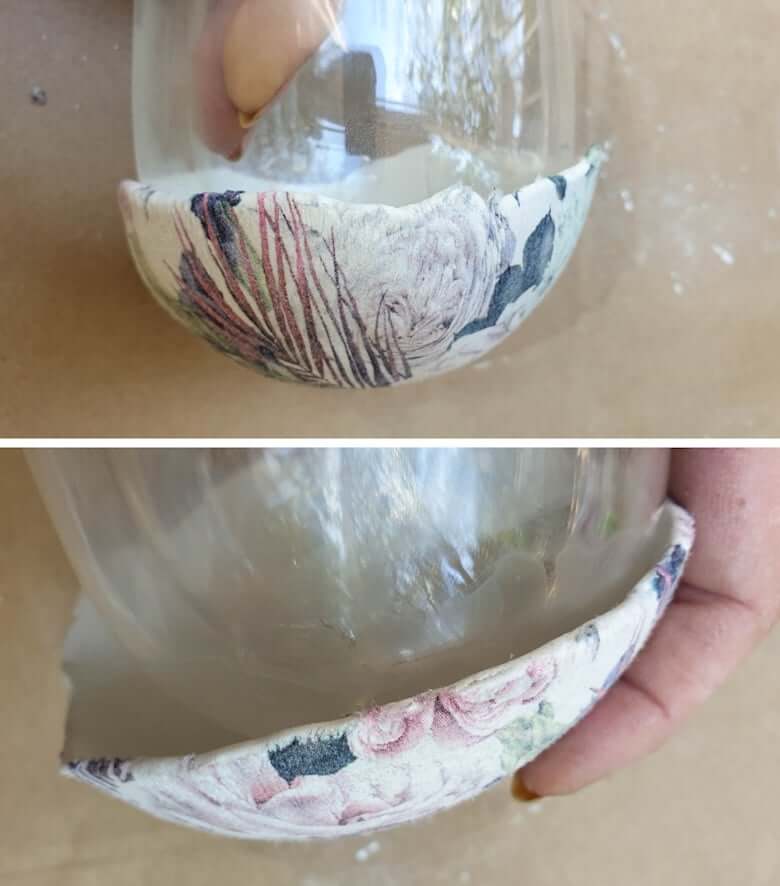
If you want to cover both sides of the clay bowl with the napkin, do the one side first, flip it over and repeat on the other side.


Baking the clay and finishing off
Before baking make sure the bowls are dry to the touch. I have a convection oven so I have no idea if this works in a gas oven. Bake the clay napkin bowls according to the manufacturer’s instructions. Leave them to cool down completely before applying a few coats of clear varnish.

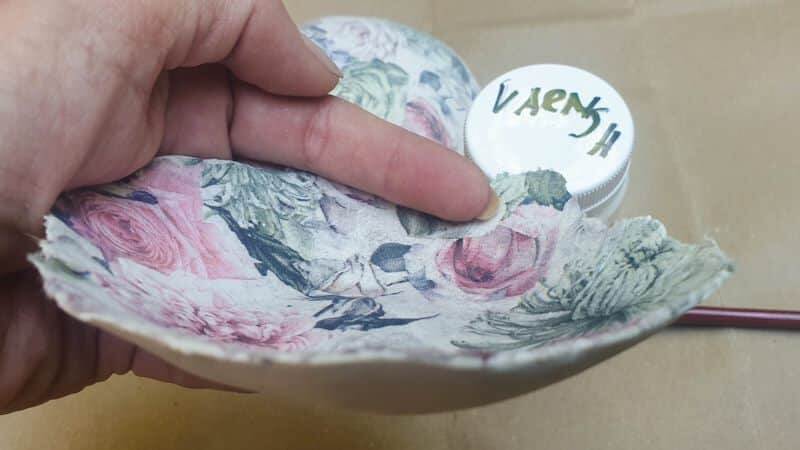
You can either paint the varnish on or use spray paint. Whichever is easier for you. The varnish locks in those beautiful colors and protects and seals the bowls.

What I love about this technique is how you can fold the “napkinned” clay over itself and the image embeds itself into the folds. Something I’ve never been able to do with mod podge.

Plus you don’t have to worry about wrinkles. Well, you do but only when you’re rolling the napkin into the clay and most of them get flattened out anyway.

Pssst, can I tell you a secret? I wasn’t sure what I was going to make for the IBC Ceramic Crafts challenge, so I’m over the moon with how the bowls turned out. Plus I can add another mixed media technique to my repertoire of unique craft ideas.

Have you played around with napkins and clay?
If you like the idea of making clay-baked napkin bowls don’t forget to pin it for later.
Sharing is caring ;-)
What my IBC Buddies did for their challenge
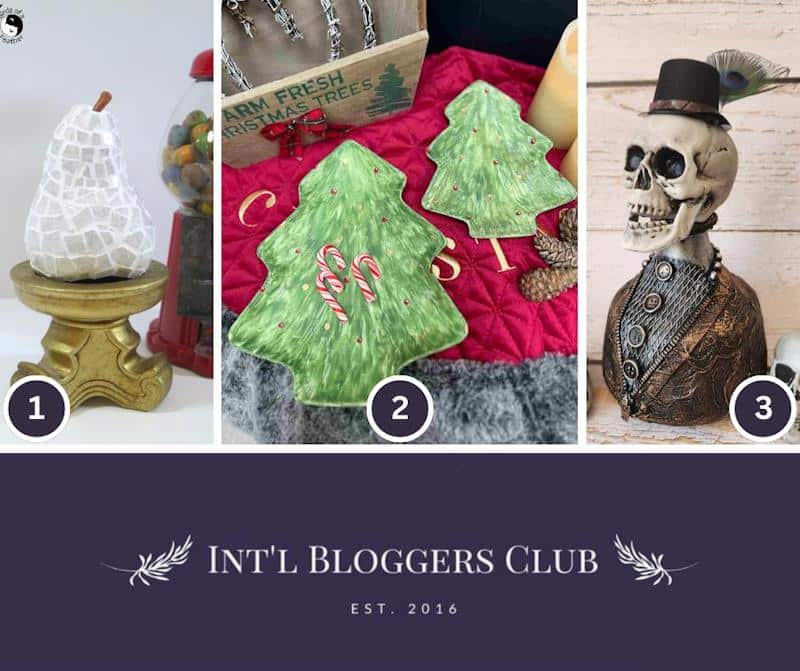
- Sara, based in Canada, upcycled left-over floor tile scraps into a beautiful mosaic pear.
- Rachel, from England, shares a neat tutorial that show you how to paint ceramic Christmas trees.
- Anita, from down under in Australia channeled her inner Steampunk wizardness to transform a bottle into this proud gentleman.
Oh, and if you’re looking for some of the things we used, we’ve got you covered. Disclosure: Clicking on the links below, means we may receive a commission from Amazon. But don’t worry it won’t come out of your pocket, and it helps us make more amazing crafts to share with you ;-)
And if you prefer to buy rather than DIY, then maybe these beauties will appeal.
And as always, wishing you a wonderful, crafty week filled with lots of love. Thank you for popping in for a visit.

28 comments
ciao ,i tuoi lavori sono veramente belli e vorrei provare, anche se sto iniziando ora con l’argilla che secca all’aria.
Volevo farti una domanda: i forni di casa (almeno qui in Italia) difficilmente superano i 250 ° il mio arriva a 220, è una questione di tempi cioè :devo far stare l’oggetto di più nel forno ( invece di 15 minuti 20 o più), o non va bene la temperatura i ogni caso?
Grazie se vorrai o potrai rispondermi ,ti seguirò comunque, Saluti dall’Italia
Giovanna
Hello, Giovanna from Italy, so lovely to meet you. I believe that ovens in Italy are in degrees Celcius (ours in South Africa are like that too). For Sculpey clay, I normally bake mine at 130 degrees C for 15 minutes per 6mm thickness. I asked Google to translate my answer just in case
Ciao Giovanna dall’Italia, è un piacere conoscerti. Credo che i forni in Italia siano in gradi Celsius (anche i nostri in Sud Africa sono così). Per l’argilla Sculpey, normalmente cuocio la mia a 130 gradi C per 15 minuti per uno spessore di 6 mm.
Did I miss what temperature you used? And how long in oven.
Thank you
The baking time will depend on which make clay you’re using and how thick your bowls are. Mine are quite thin and according to Sculpey, they needed to be baked at 130 degrees Celsius for 15 minutes. Google tells me that’s 266 degrees Fahrenheit. I hope that helps, Angie, but if not please give me a shout and I’ll do my best to answer.
How tin or thick do you roll out your clay?
The clay before adding the paper napkin is probably about 1/2 cm (1/4″) thick. The second set of rolls (after applying the napkin) flattens it down a tiny bit. I think it all depends on how big and chunky you want your bowls to be. The napkin trick works on earrings too and they were really thin. Hope that helps.
Are these bowls dishwasher safe?
If you use a dishwasher-safe varnish and polymer clay, they should be. I’ve never see a varnish like that here in South Africa so I wipe my bowls with a damp cloth to clean.
Three questions:
1. Do the bowls hold their shape in the oven or do you have to drape them over something?
2. How much clay do you use per bowl?
3. How many bowls can you get from a large package of clay?
Thank you!
Great questions, Roberta. Since this was just a happy experiment, I didn’t drape the bowls over anything while baking and the clay held its shape nicely. As to how much clay I used per bowl, that’s a difficult one. All the bowls are different sizes and I made the little one first as a test run. I’m stingy with my polymer clay so I would have used the smallest amount possible. Just in case the experiment didn’t work out. If you look at the photo under the “What you need” heading, that left-over blob of clay in the 1lb (454g) Sculpey packet gave me three bowls.
I hope that helps, but please reach out if I missed anything and I’ll try my best to answer.
Acetone is a very flammable substance. I would think twice before placing anything with Acetone on it in the oven. Has there been any problems with this?
Good point, Linda. Acetone evaporates fairly quickly and by the time the napkin has been transferred to the clay it should be all gone. I use it all the time to get rid of fingerprints when I’m making my fantasy mushrooms and haven’t had a problem. We have a convention oven at home, so I’m not sure about gas ovens.
These bowls are beautiful!! I need a few more things to add to stuff for the craft shows for Mothers Day. These are perfect!
I do have a question. Does the acetone seal in the color? Is acetone necessary? Just wondering. Thanks
Shannon
I haven’t tried doing something similar without the acetone. This was just a happy experiment. I did seal the bowls after baking and didn’t notice any color fading. That being said, the colors on the napkins I used were all subtle pastels to start with. I have no idea if bright, happy colors would show some fade. If you use bright colors, let me know how yours turn out and good luck with the craft show.
I’ve been stalled for awhile waiting for inspiration to strike and finally it has with these beautiful easy bowls. I can’t wait to gather supplies and get some done! Thanks for sharing.
I’m so happy to hear that Judy. I hope you have loads of fun making your bowls and shout anytime if you run into issues.
Can this to be done with air dry clay ? Also I didn’t see you mentioned of how long to bake in oven from your project. Thanks
Hello Dawn, I haven’t tried it with air dry clay, but it should work. WRT to the baking time, I just baked according to what it says on the package. Sculpey bakes for 15 minutes at 130 degrees C.
Great work! Did you mention if these are food safe? I’m guessing they’re not…
Thanks so much, Nancy. I’m not a great cook (to be honest, I’m pretty useless) but I would seal them with a food-safe sealer if you do want to use them for snacks or something like that. No idea how the sealers will interact with the napkins, though. Sorry. These are sealed with mod-podge, so I can wipe them with a damp cloth when they get dusty.
These napkin clay bowls turned out so pretty. I’ve never thought of putting a napkin on clay. But then I haven’t worked with clay much either. Yes I am really happy when a experiment goes awry in a good way, mine usually go the other way. LOL
:D I’ve had a ton of experiments go bad on me too, but it’s such a great way to learn what works and what doesn’t. I’m happy this one worked out though.
These turned out great Michelle, it feels great to come up with something new from our junk drawers. I agree they are on the girly side which is not usually your style but you did an awesome job.
That junk drawer needs a serious cleaning up I think. Knowing me I won’t even get halfway before something forgotten distracts me :D
Easy crafts that turn out beautifully are my absolute favourite. Great project.
Mine too :D
So pretty! Girly stuff looks good on you Michelle :) Love how you switched up the pattern on the inside and outside of the bowl; such a great idea. I’ve never played around with either of those materials but now I want to find some interesting napkins and try this too!!
Oh goodness, I think my hubby would give me the hairy eyeball if I went all girly on him :D Do let me know how yours turn out when you start playing. It’s such an easy technique.