Ooooo, do I have a magical, whimsical project for you today. This fairy easel is quick and easy to make and doesn’t need any special tools or fairy dust to cobble together.
Plus, you’ll find all the materials you need in your garden and craft cupboard. So, it’s budget-friendly too.

As a bonus, I’ve included a short video tutorial that will show you how to make teeny, tiny, mini paintbrushes.

IMHO, no storybook art studio would be complete without a few of those.

So, if you have 30 minutes to spare and love making fairy stuff, then this one’s for you. The easel and paintbrushes are perfect for fairy gardens, dollhouse displays, or showcasing your miniature art.
But before we get there, follow us on Facebook, Twitter, Pinterest, or Instagram. And don’t forget to subscribe so you’ll never miss a post!
What you need
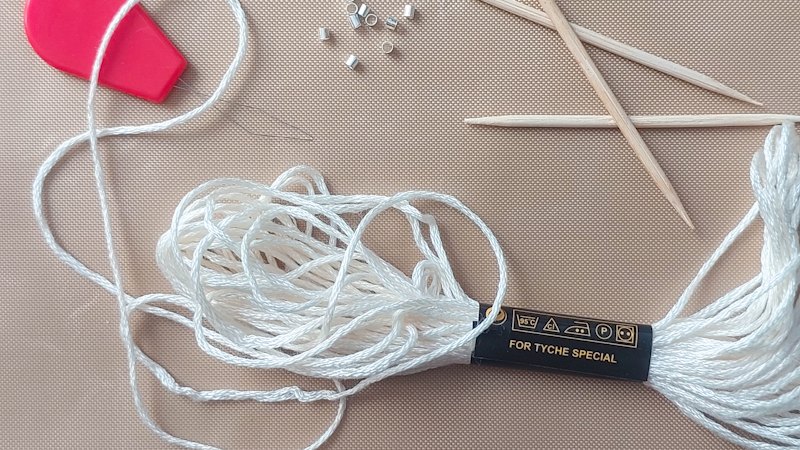
To make the easel
- Fresh twigs or vines
- Pins
- Embroidery thread
- Glue
- Sticky tape
To make mini paintbrushes
- Embroidery thread
- Toothpicks
- Crimper beads
- Scissors
How to make a fairy easel
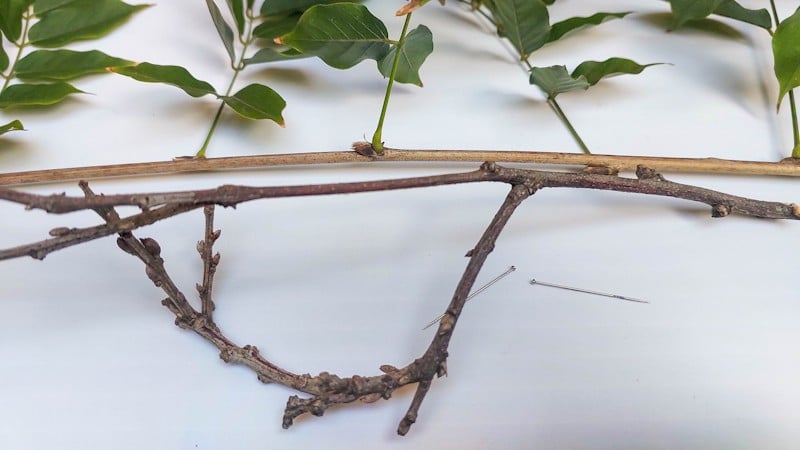
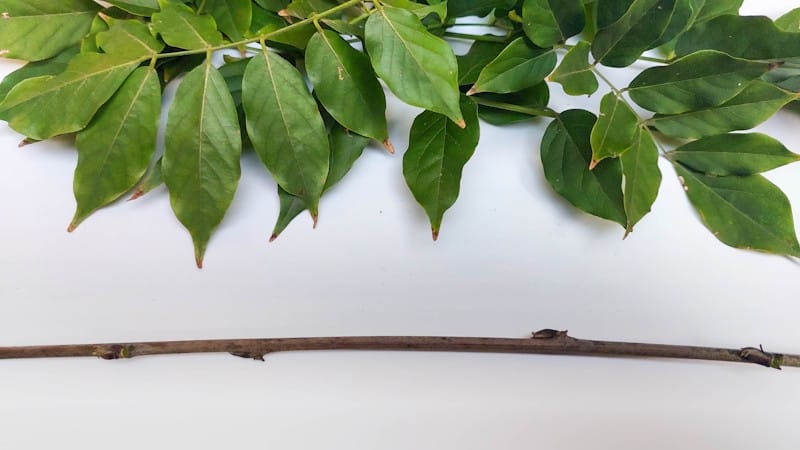
Take a walk in the garden and gather a few fresh twigs or vines. I used shoots from our Wisteria. Remove all the leaves.
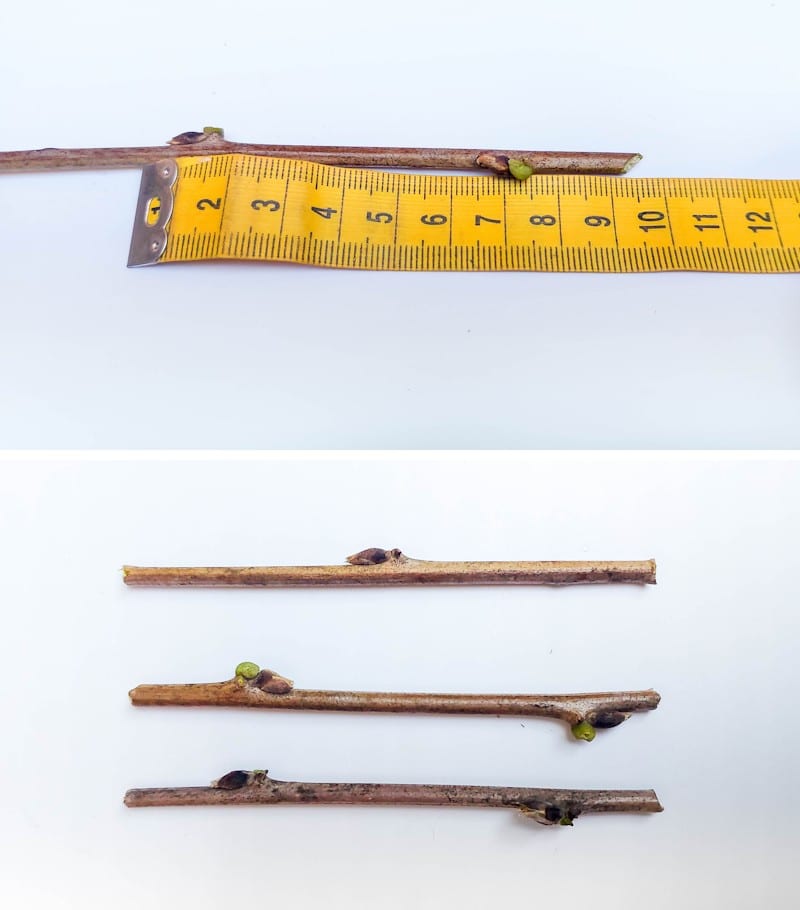
Cut the twigs or vine into 3 equal lengths. Mine are about 9.5 cm long (about 3.5”).
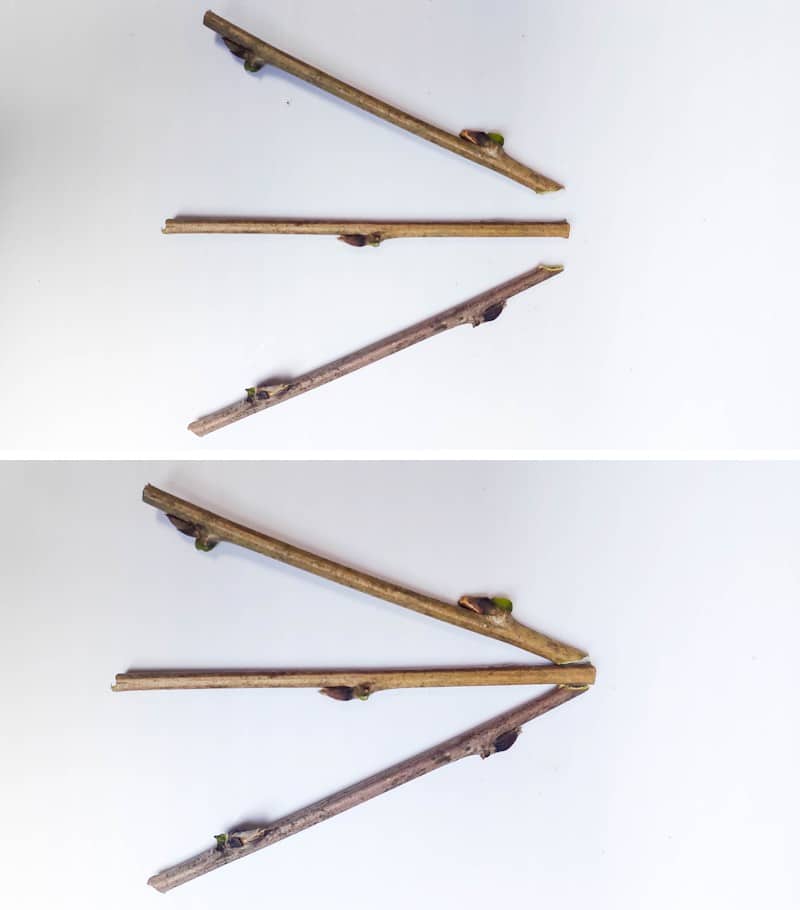
Take two of the twigs or vines and trim one end at an angle so the two outer vines sit flush against the middle vine. Hope that makes sense.
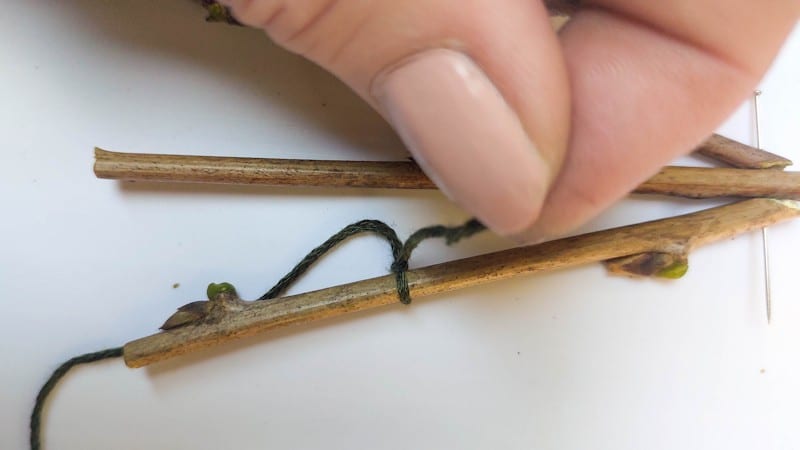
Tape the twigs down to keep them from rolling around. Push a pin through the top of all three vines.
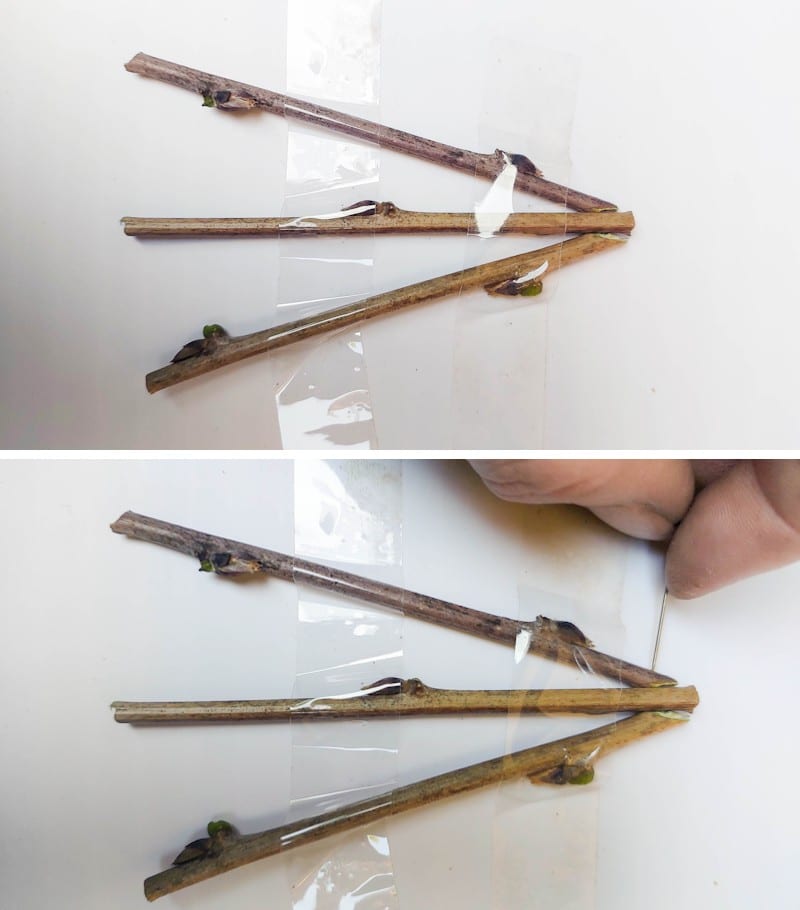
If the vines are still green and fresh, you shouldn’t have a problem getting the pin through.

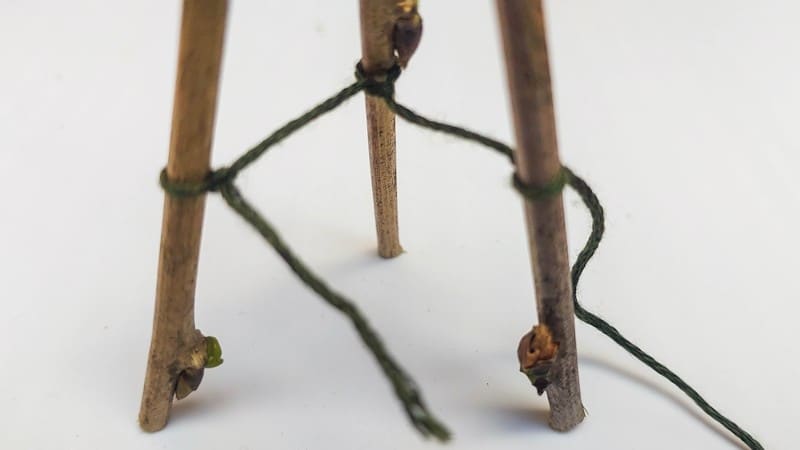
Cut a piece of embroidery thread and tie one end to one of the outer legs of the easel. About a third of the way up the leg.
Then, wrap the thread around the middle back leg and tie the other end to the opposite outer leg. This will prevent the back leg from spreading too far apart.
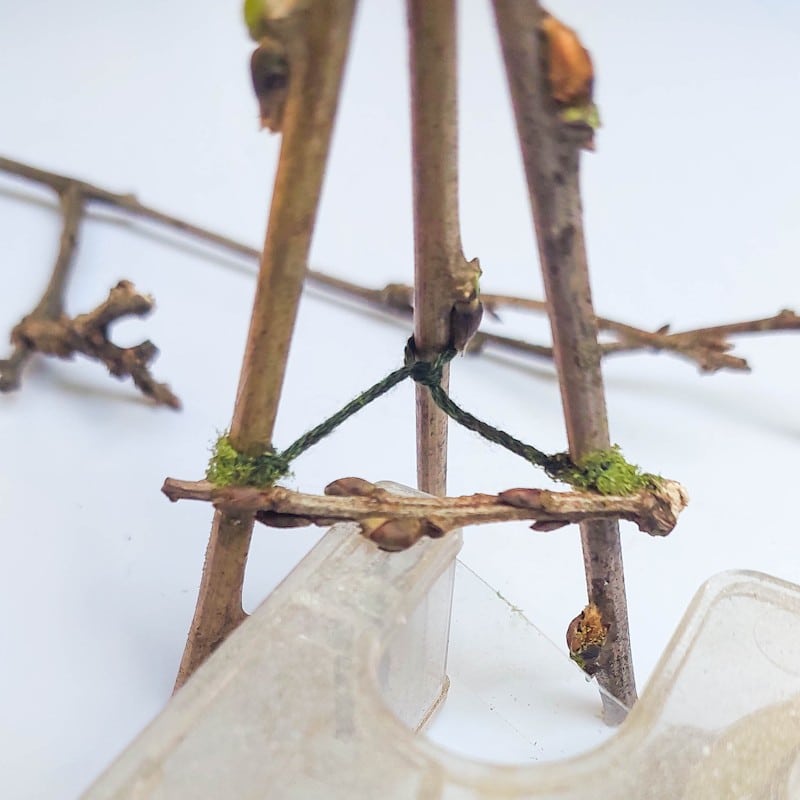
Measure the distance between the two outer legs and cut a piece of vine that’s a teeny bit longer.

Put two small drops of glue on the outer legs.

And glue the easel crossbeam down. Add a small amount of moss and let the glue dry completely.
Use wire cutters to trim the pin and add a drop of glue to secure.

Wrap a few tendrils around the legs and add more moss.
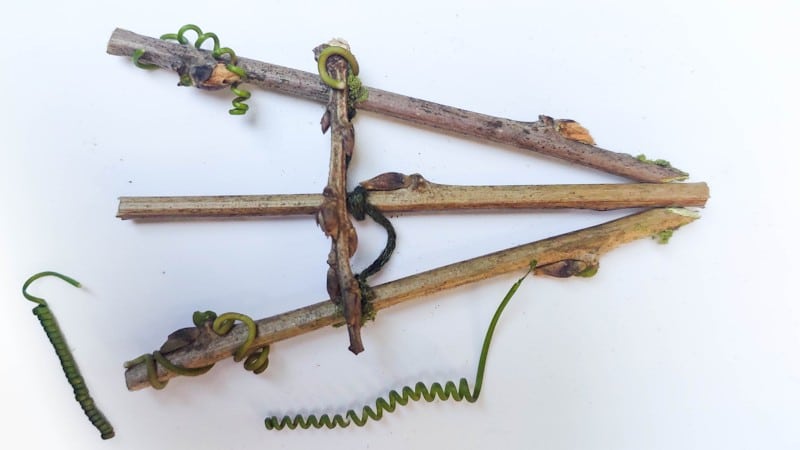
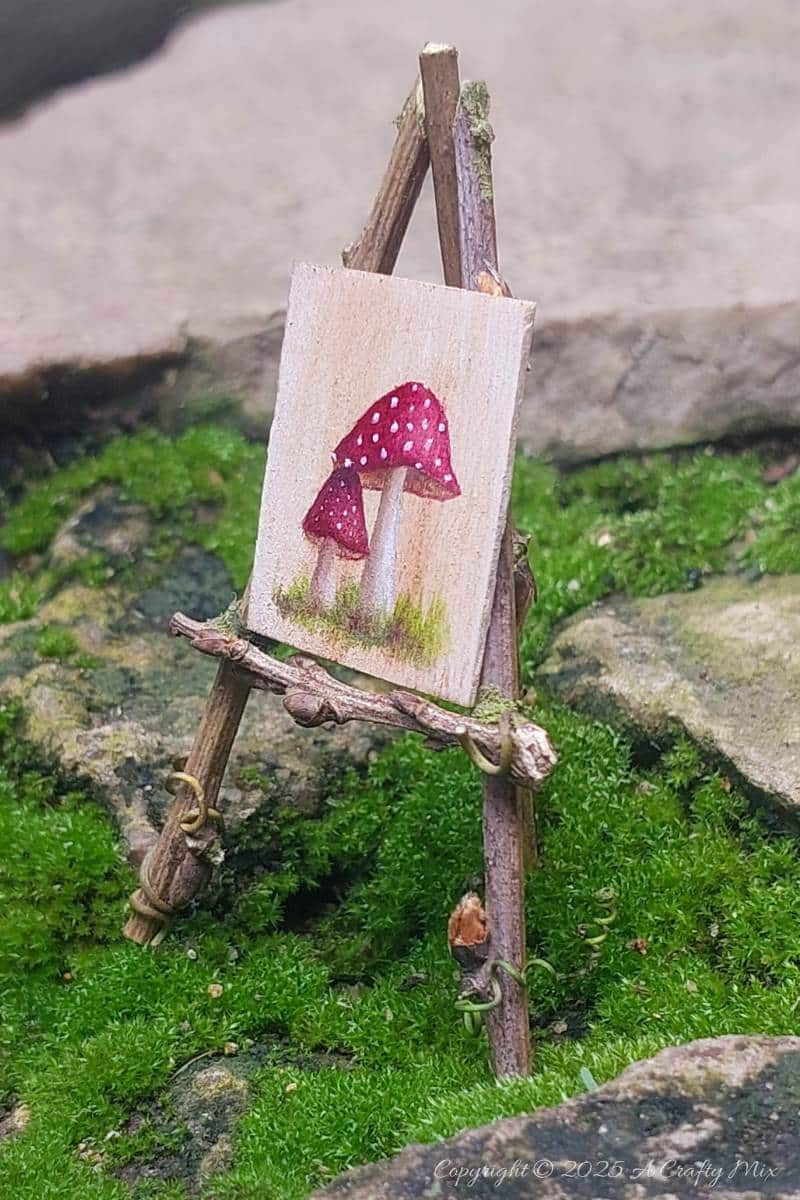
And that’s it. The fairy easel is done. Next up: tiny paintbrushes.
How to make mini paintbrushes
This part is probably easier to demonstrate with a quick video.

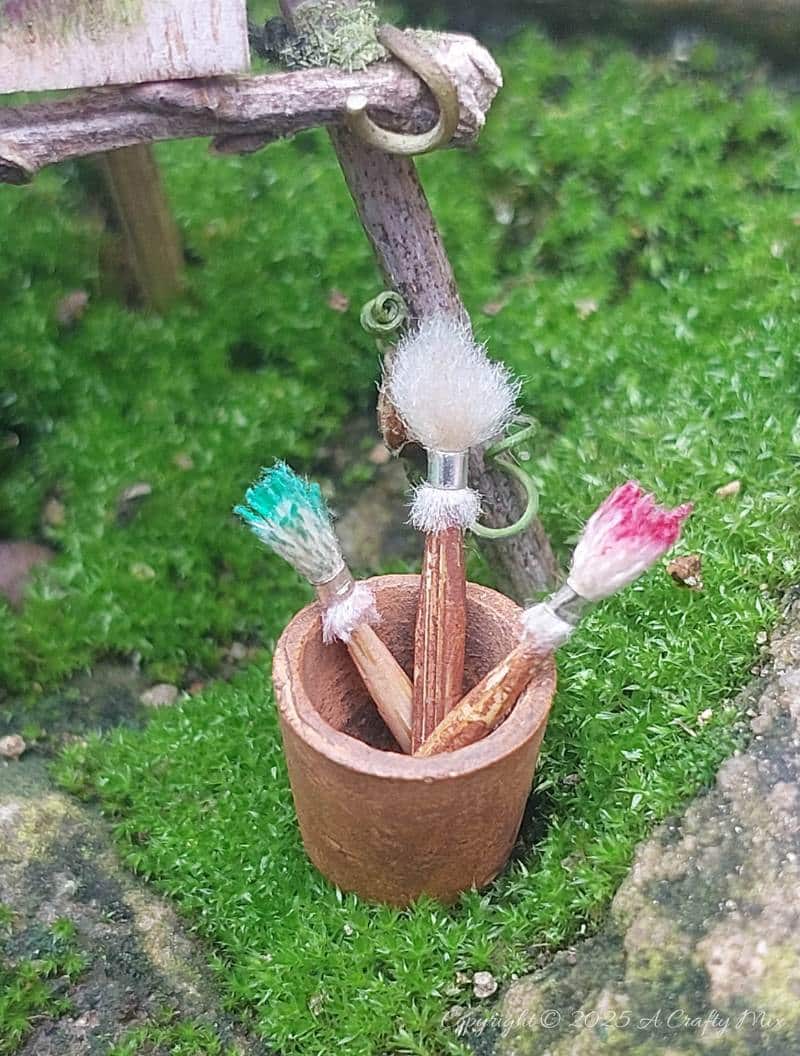
Just for fun, I dipped my paintbrushes in a little bit of paint.
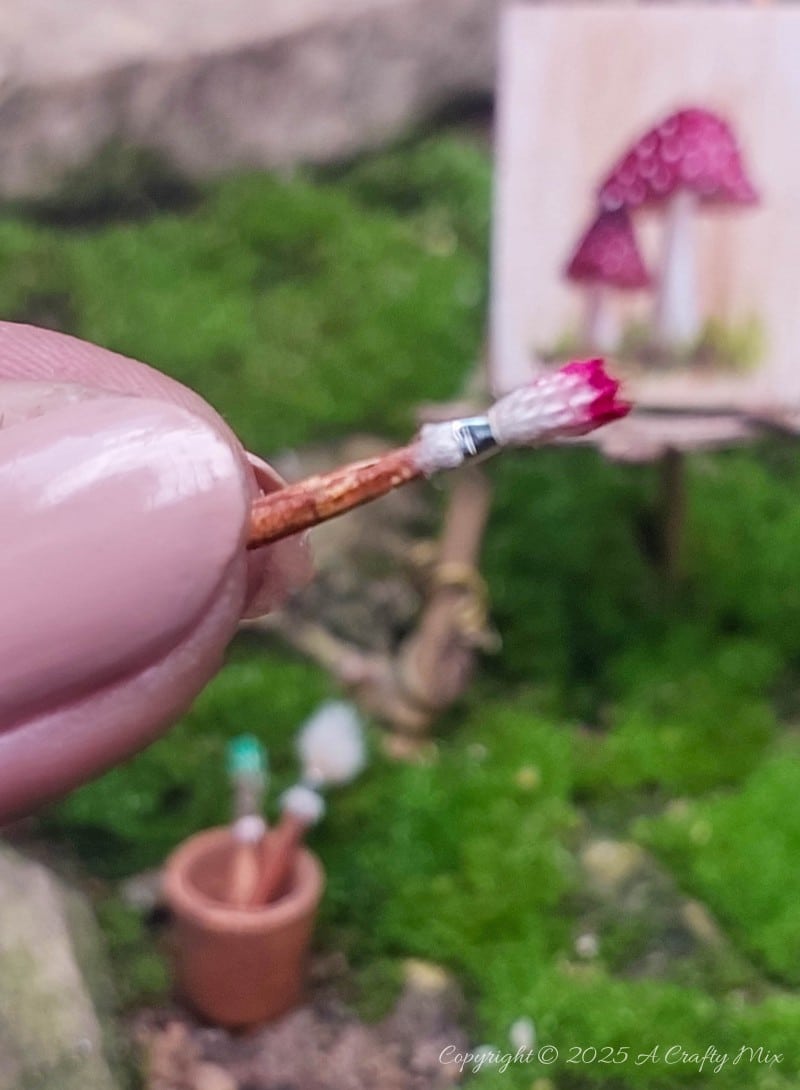
And popped them into a small terracotta bowl.
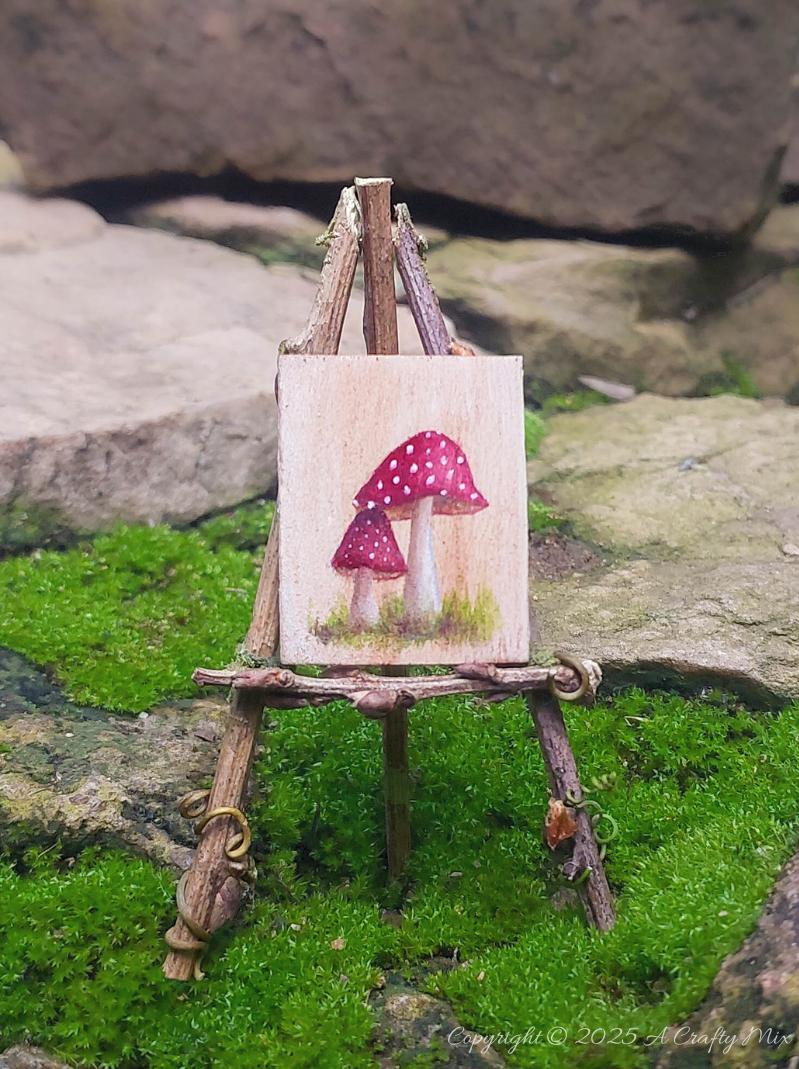
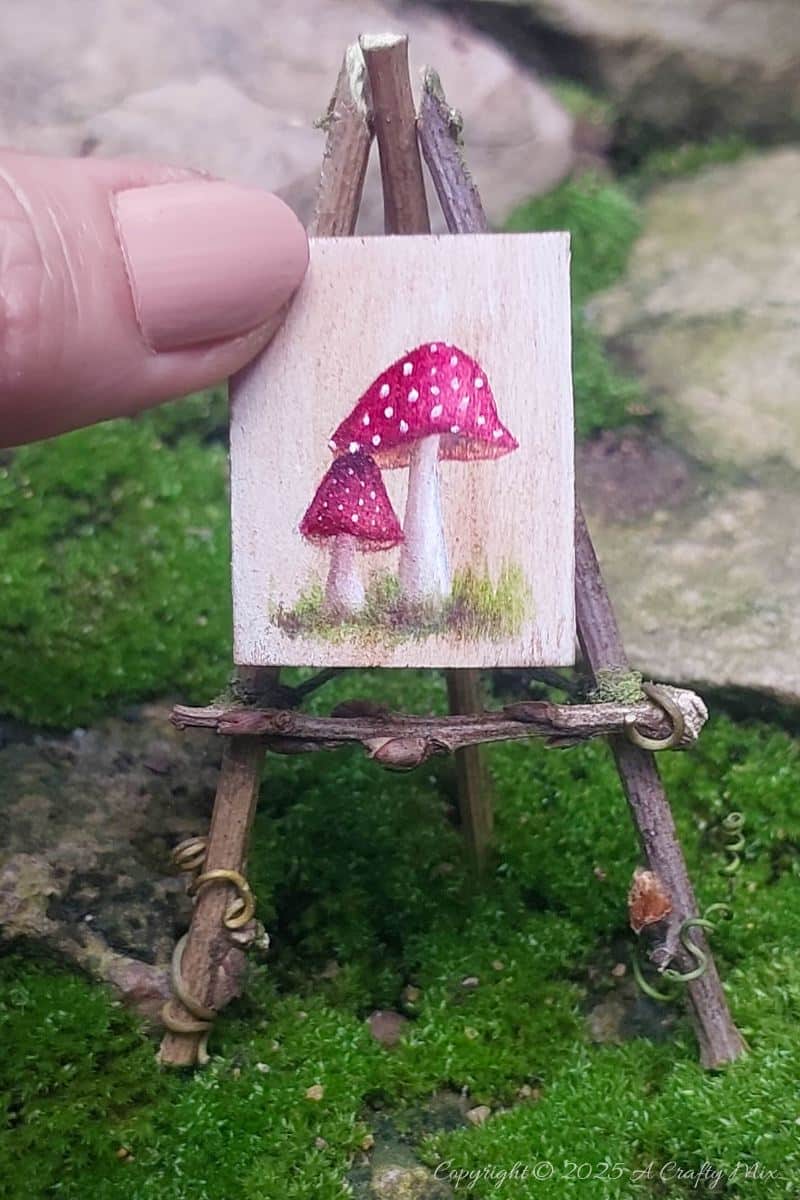
The tiny, nature-inspired easel is perfect for showing off your miniature art….

…. Or adding a touch of whimsy to your fairy garden.
Would you give this one a try?
If you like the idea of making a fairy easel and tiny paintbrushes, don’t forget to pin them for later.

Sharing is caring.

Oh, and if you’re looking for some of the things we used, we’ve got you covered. Disclosure: Clicking on the links below means we may receive a commission from Amazon. But don’t worry, it won’t come out of your pocket, and it helps us make more amazing crafts to share with you.
Fairy Easel

Mini Paintbrushes


And as always, wishing you a wonderful, crafty week filled with lots of love and laughter. Thank you for popping in for a visit.

Last update on 2026-06-03 / Source Amazon Affiliates