Well hello there. Are you looking for an easy way to make a crate and turn it into a planter. This little one that we made from paint stirrers is not only budget friendly, it’s a quick DIY project too. You can make it in less than an hour. It’s a lovely house warming or hostess gift. Or why not make a few so you can keep one for yourself . Come on I know you want too, since it just looks so adorable hanging on the wall ;-)
What You Need to Make a Paint Stirrer Crate
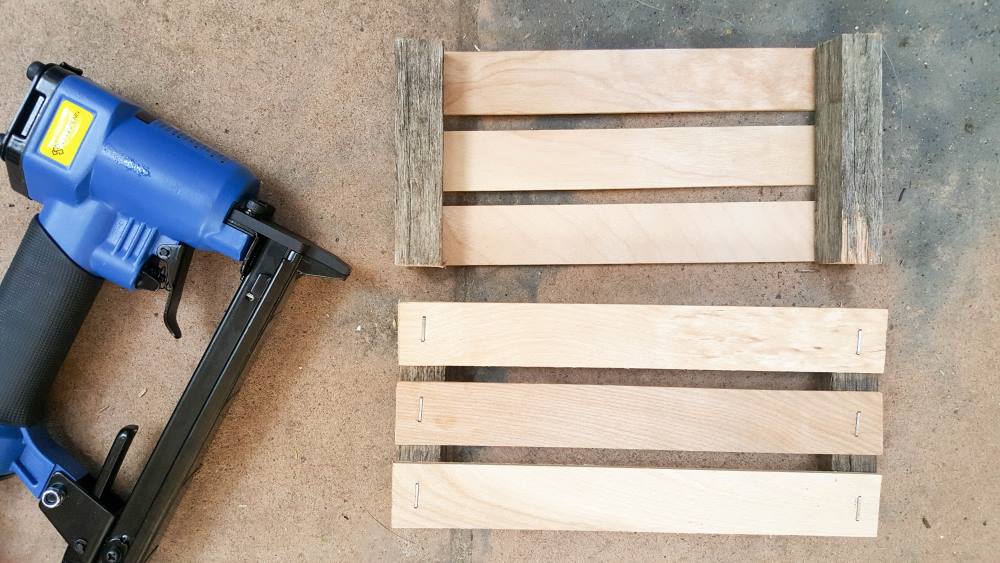
Besides the paint stirrers, which you can get at most hardware stores for free, you’ll also need a measuring tape, some chicken wire, staple gun, wire cutters, 1×1’s, and something to cut the stirrers and 1×1 to the right length. We used our Miter Saw but a good old fashioned hand saw will work too. In fact, the hubby gave me the beady eye for not doing it the old fashioned way. But in my defense, I wanted to get the cutting stuff done so I could concentrate on making it pretty and turning the paint stirrer crate into a planter ;-) If you can’t find stirrers you can make this easy shadow box from wood scraps and use that instead.
You’ll need 18 stirrers in total to make the crate which measures 33 cm x 23 cm x 11 cm (13″ x 9″ x 4 1/4″).
Okay, before we get to all the good stuff, be sure to follow us on Facebook, Twitter, Pinterest, or Instagram. And don’t forget to subscribe so you’ll never miss a post!
How To Make a Paint Stirrer Crate
Paint stirrers usually have these notches on the side that makes it easier to grip while you’re stirring. And while I didn’t really mind that the sticks weren’t completely straight all the way, I decided to cut those bit off the 6 sticks that will form the top and bottom. If you want your crate to be wider you can leave them as is. Cut the 1×1 into 4 equal pieces measuring 11 cm (4 1/4″). These will form the side supports of the crate.
Use a staple gun to attach the side support to the shorter, cut paint stirrers as shown below. Use one of the other paint stirrers as a spacer to align the them nicely or just use the highly scientific eye ball method ;-)
Staple the longer side pieces onto the shorter sides. Just make sure all those notches are pointing in the same direction for a more professional look.
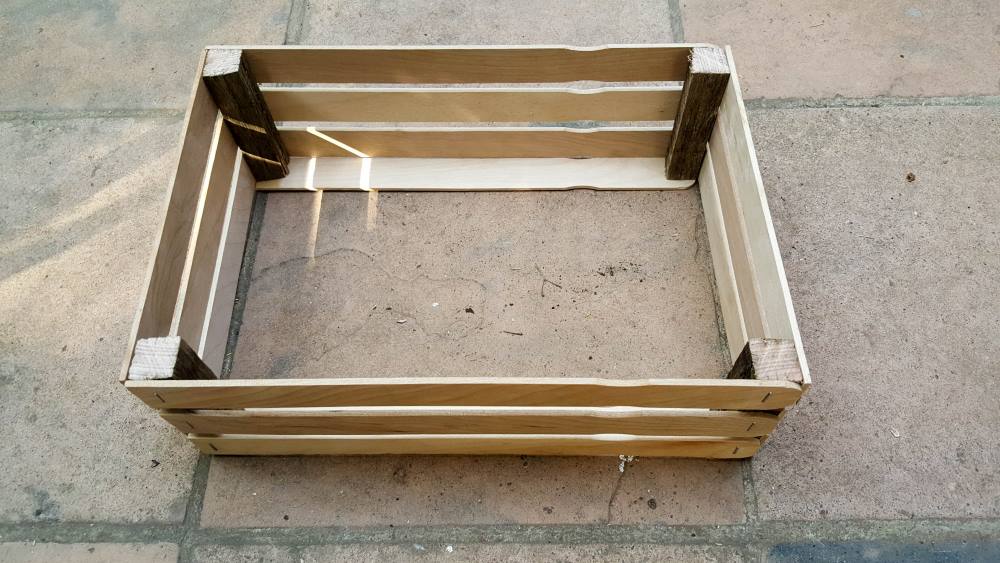
Measure the inside of the shorter side, between the 1x1s and cut two pieces to fit snuggly. Staple those two pieces onto the shorter side. If I wasn’t so focused on getting to the point where I could start making pretty, I probably would have thought about adding those bits before I attached the longer sides to the shorter ones. Oh well lesson learnt :D Finally staple all the bottom pieces on, once again making sure that the notches all face the same way.
Time to Make Pretty And Turn it Into a Planter
If there’s one thing we make a lot it’s planters. Whether they’re made from mismatched forks or broken wine glasses, we’ve done it all. Not even an old lantern is safe :D But this paint stirrer crate planter is one of the easier one. Paint or stain the crate to suit your decor before cutting a strip of chicken wire that fits neatly across the bottom of your crate.
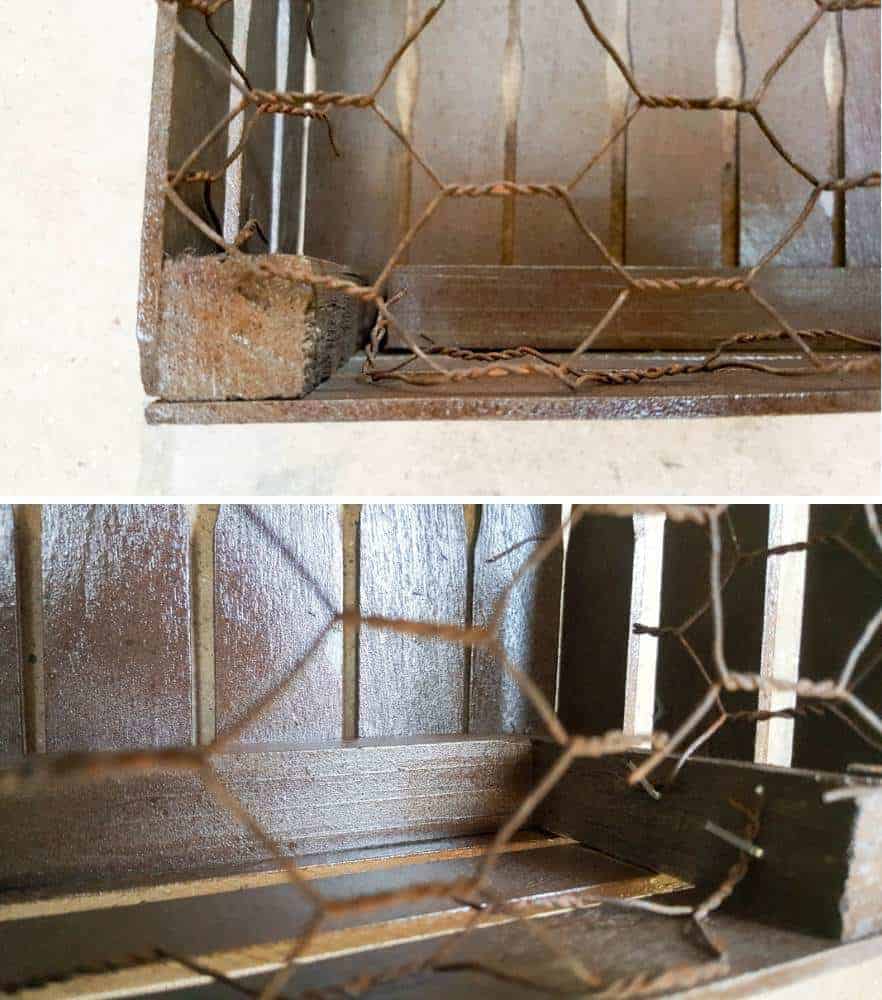
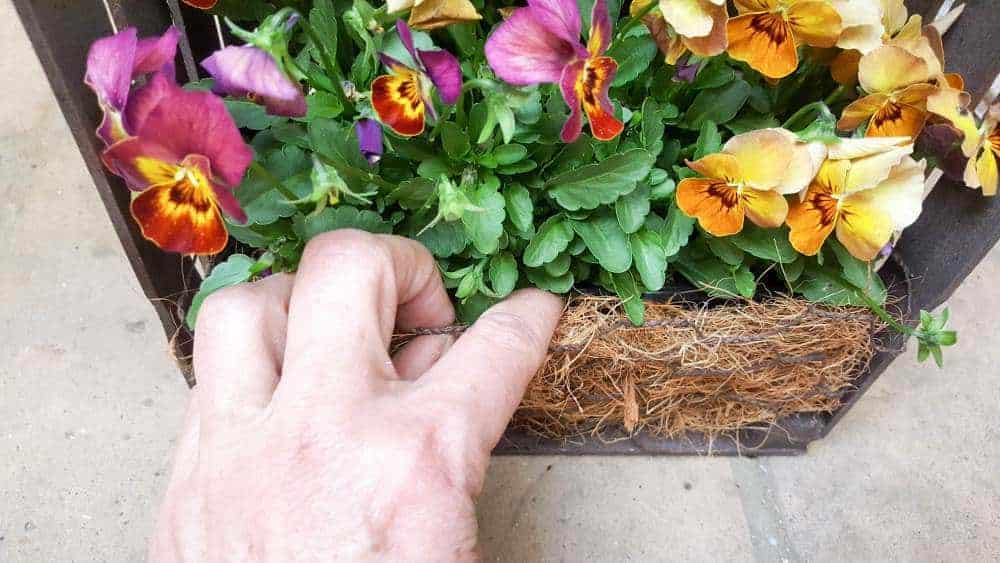
Use the staple gun to attach the chicken wire and add some coconut fiber.
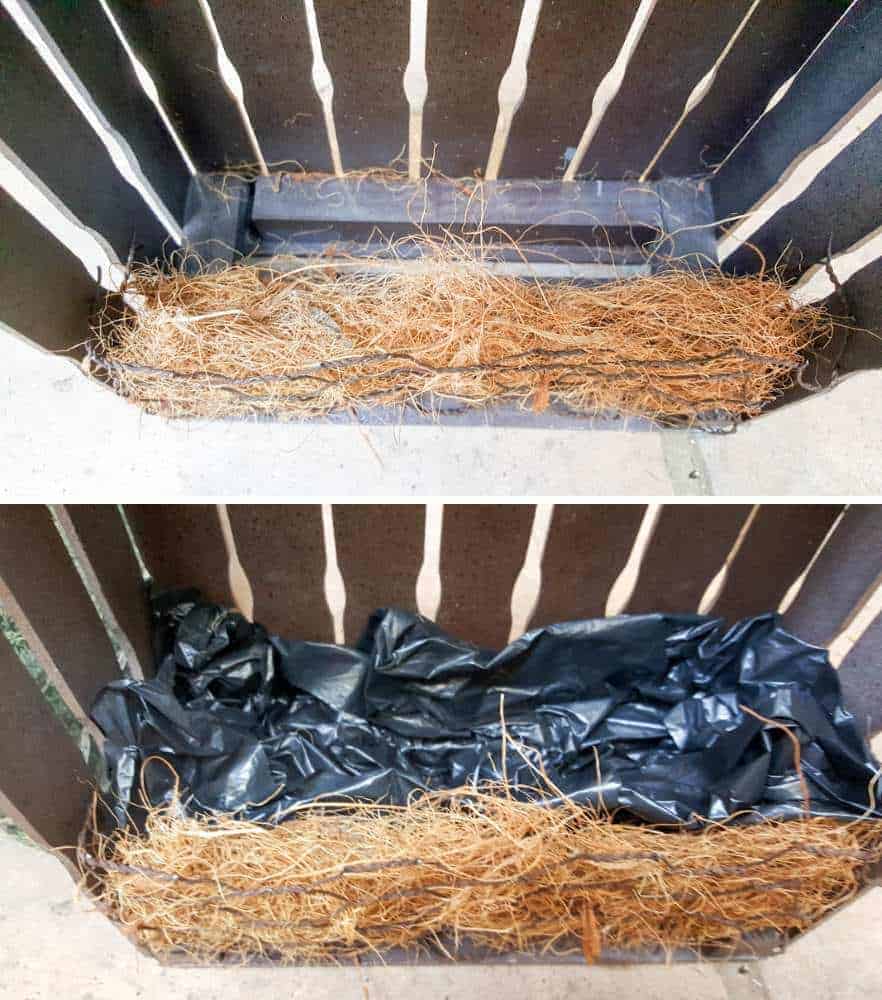
Line the bottom of the crate planter with plastic to protect it and create a waterproof barrier. If you’re going to use faux plants in your planter you don’t need to worry about it. Fill her up with plants, real or faux. We added the most gorgeous pansies to ours. There little faces always make me happy and they come in so many different colors.
No one can keep being angry if they look into the heart of a pansy for a while
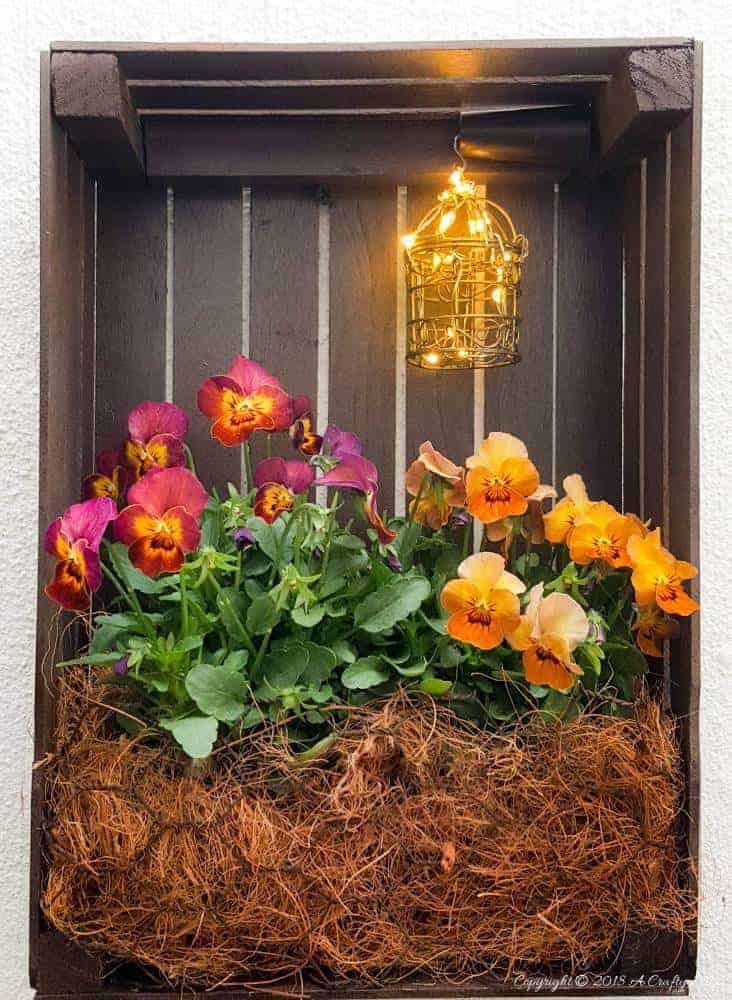
Hang her up and enjoy.
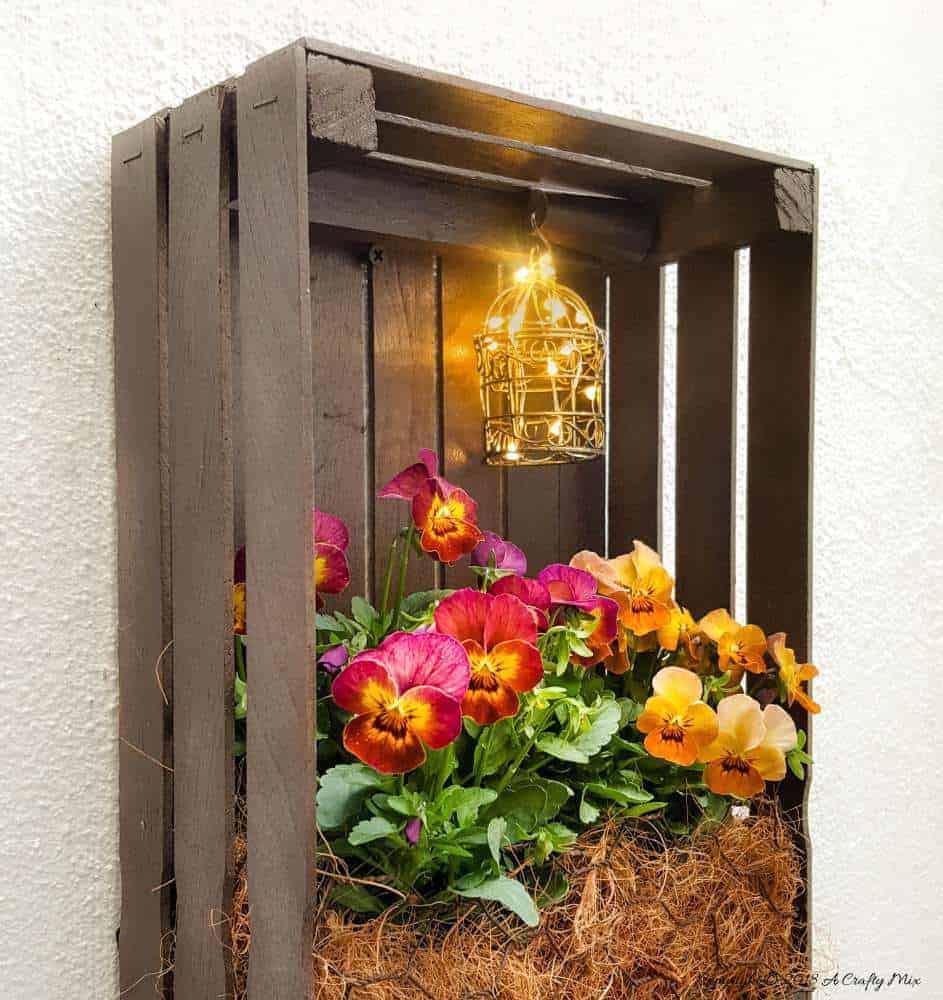
Just for fun we added a miniature wire bird cage that’s been filled with fairy lights.
I love the way it adds a bit of interest and creates a warm glow in the corner.
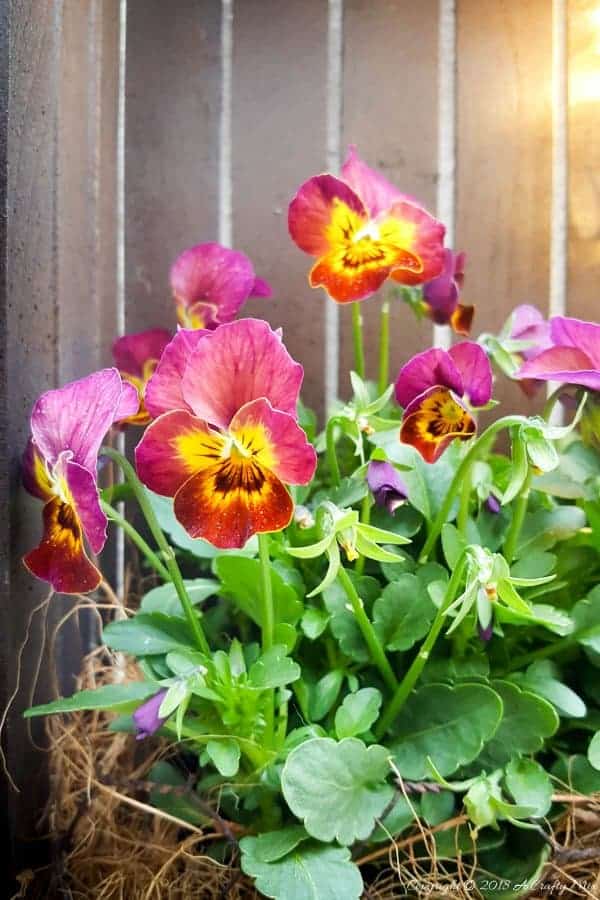
And those beautiful little pansies are all nestled up snuggly in their bed of coconut fiber.
What do you think? Is it something you would try to make?
If you like the idea of repurposing paint stirrers into a crate don’t forget to pin it for later.
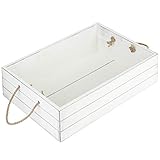
Oh before I forget, if you’d like to make something similar or prefer to buy rather than DIY, we’ve got you covered Disclosure: Clicking on the links below, means we may receive a commission from Amazon. But don’t worry it won’t come out of your pocket, and it helps us come up with more unique DIY and craft ideas for you ;-)
As always wishing you a beautiful and crafty week.
50 comments
Look at that, another beautiful work of art. It looks fantastic Michelle!
Thanks so very much Keri
You always come up with great planters that are so creative. Great repurpose 😍
Thanks so much, Anita :D
The crate looks great, especially with that miniature birdcage. As always Michelle you inspire me, love your blog.
? Thank you Leanna, that means a lot to me
So cute !!! But the most incredible thing is that you made a crate!!! You always surprise me Michelle with your skills! I think that the miniature cage and fairy lights were the perfect addition!
Ahhh yes, that little birdcage and the fairy lights did make such a difference. The whole crate looks happy ?
This is beautiful Michelle! Who would of known you could turn paint sticks into such a cute planter. Love your little lighted birdcage, adorable!
Thanks so much Linda ? and I love that little birdcage too
Oh my gosh, this is so lovely, Michelle! I love crafts with paint stirrers and this one is at the top of that list!
? Thanks so much Carolann, I’m glad you like it
omg I must have one…..drool
LOL Christine, so happy you like it
What a cute planter! Love the use of the paints sticks as I always seem to have a stash on hand!
You and me both Libbie but they do come in so handy ?
It’s so gorgeous Michelle! The crate, the pansies…and oh that fairy light! It is something you would like to see in your garden. Have a great weekend!
? So glad you like it Mel. I bet you’ll be able to do something similar with your ice cream sticks. Hope you have a happy weekend too
Shut the front door. That is adorable! I can’t believe it was so simple to put together, and that miniature chandelier is everything. I may have to make one of these for myself. :)
So happy you like it Amy and you’ll be able to make it no problem
Well you know exactly where I’m doing this, Michelle! It may not be a crate but this will totally work but with faux. I have the exact same birdcage and never thought to hang it and fill with fairy lights – so happening! I wish you lived near me, I have a special project I’m pondering and I know you could help me execute it beautifully ?
LOL Marie and I was actually thinking about you when I made it. They need to invent that “beam me up Scotty” travelling machine real soon. I would love to come visit and spend time on that beautiful deck of yours. I’ll bring the beers ?
What a beautiful decoration. The colors and fairy lights make it so warm and inviting. The pansies are sweet and gentle. Your crafts are always creative and adorable.
Thank you so much Kathleen, that means alot to me
Michelle,
What a great idea and it looks so pretty!! Love the addition of the bird cage….Thanks so much for stopping by!!
Hugs,
Deb
Thanks so much Debbie ❤
Only you would make a crate from scratch instead of buying one. It turned out so much nicer than the store bought ones Michelle. And you have filled it with so much love!!
LOL Mary, those paint stirrers are a bit big to repurpose into a fairy garden, so I thought I’d try make something else with them. Glad it worked out the way it did. I think I’ll make a few more since it was so easy to do ?
This project is absolutely adorable Michelle! you make it seem so easy, but not having the right tools (and your talent) could turn it into a very difficult task.
Thank you Nati. We’re very lucky to have a few power tools that make things easier, but if you have a handsaw you’ll be able to do it too and wood glue can be used instead of staples ?
Wow! This is pretty awesome. You really have a creative eye. Love how you repurpose and transform non traditional items!
? Thank you Taryn. Repurposing unusual things is what we’re all about ?
This is so beautiful! It is amazing how we can use the most basic of objects and turn it into something stunning! ❤
♡ XOXO ♡ • fionadiaries.com
Thanks so much Fiona ?
I had no idea paint stirrers existed! I always just use a stick, lol! Such a cute planter idea, this. Clever!
? They’re a life saver, those paint stirrers and so much easier to use than a stick.
This must be the cutest little planter I have ever seen! It is gorgeous Michelle. I love how you added the wire and the coconut fibre, it makes it so much more interesting and the pansies are adorable!!
Thank you Katrin, pansies are always such rewarding little flowers. They’re just so …happy ?
That is the cutest thing ever! I have so many ideas rolling around in my head for this! Fun!!
That’s so cool Terri, I’m real happy if it gave you some ideas
I am always amazed at the beautiful items you create. That little lantern is so adorable. I would love to make something like this but I’m afraid I would mess it up terribly.
I’m sure you won’t mess it up Kesha and even if you do, that’s okay too. You would have learnt something new
What a truly lovely planter you made. It’s really creative to come up with this and it looks really gorgeous too.
Thanks so much Elizabeth ?
Gosh. You out do yourself each week. This looks rather elaborate though. The end result is absolute perfection.
❥ tanvii.com
? Awwww Tanvi, thank you so much for that
I wish I were more crafty. For one, you always find something interesting to do which is great. Secondly, you save lots of money
That’s so true. I was just thinking when we hung the planter that it didn’t even exist last week and now we have a brand new planter that really looks so pretty on the wall and it didn’t cost us a cent. It’s very satisfying
Another beautiful creation! Love how you also included a miniaure wire bird cage. I find it super cute. Wonder if you can do that yourself too? If yes, I can’t wait to see it in the next blog :)
I’ve been meaning to put a tutorial up on how to make a miniature bird cage. They’re not difficult at all. ? I’ll have make a plan soon