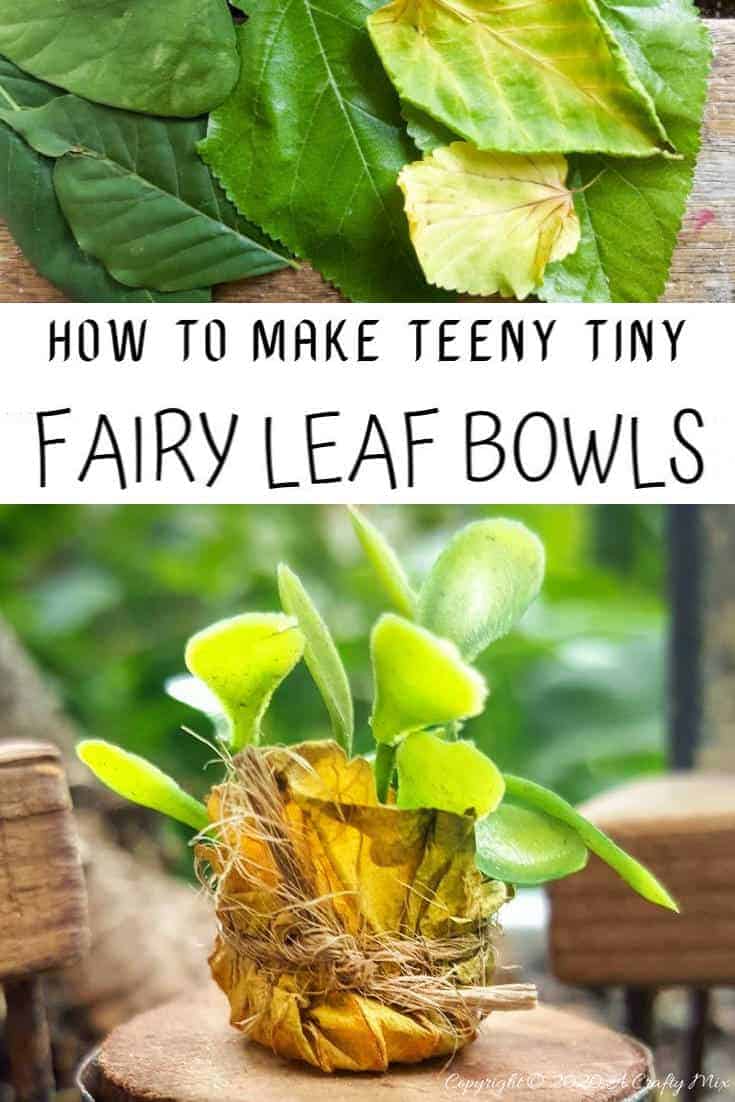
Happy New Year everyone. I hope 2019 ended on a good note and that 2020 brings you much joy and laughter. I thought I’d kick the new year off with a tutorial on how to make these teeny, tiny fairy leaf bowls.
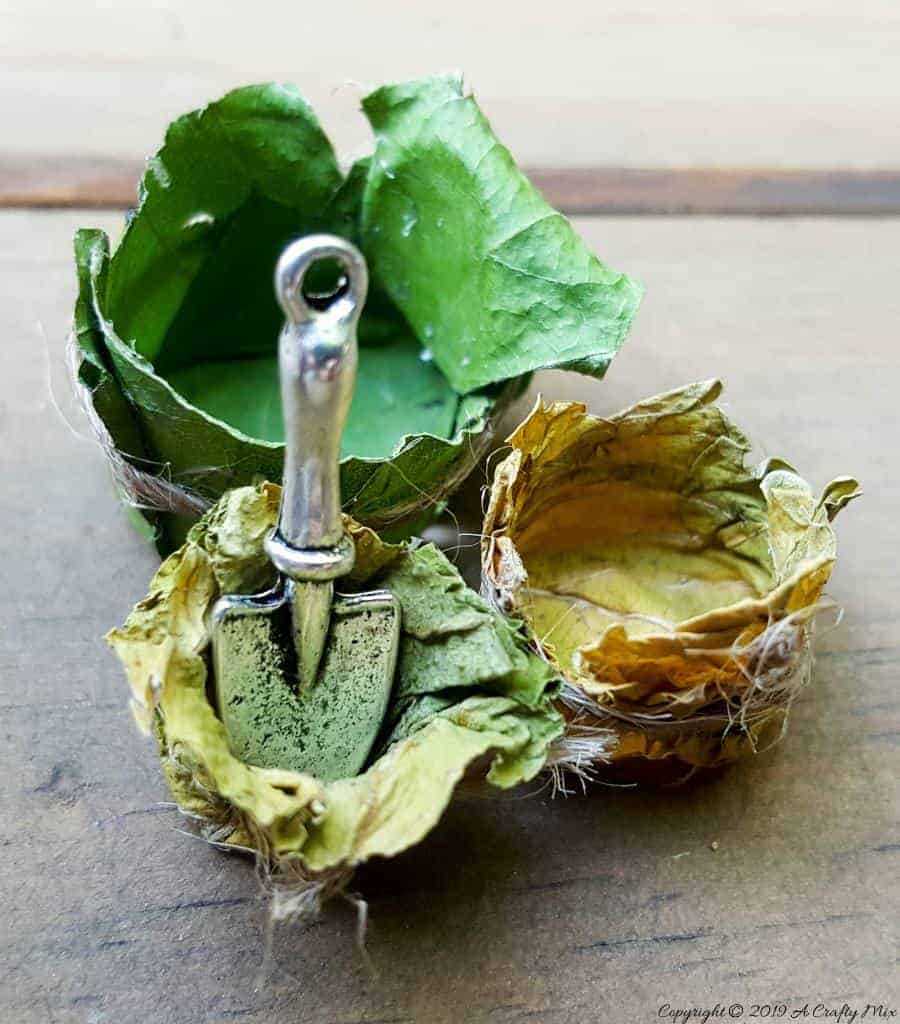
Aren’t they adorable? Our garden fairies love them and they’re super easy to make too. The fairy leaf bowls can be used as planters or to store those tiny garden tools.
Either way, they make the perfect little addition to a fairy scape.
Okay, before we get to the tutorial, be sure to follow us on Facebook, Twitter, Pinterest, or Instagram. And don’t forget to subscribe so you’ll never miss a post!
What you need
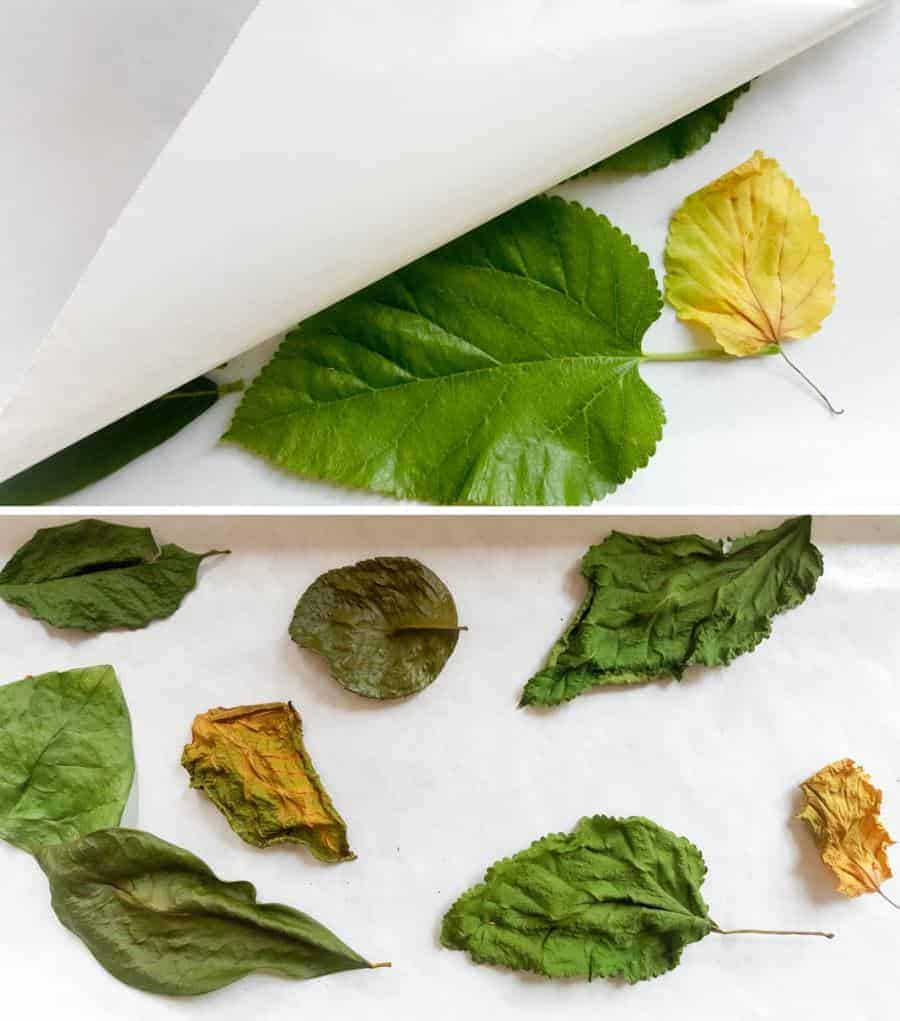
For the fairy leaf bowls, you’ll need various pliable, soft leaves. I normally use leaves from our mulberry tree, rose bushes and wisteria. Oak, ivy, and maple are also good choices, especially if they’ve donned their autumn colors.
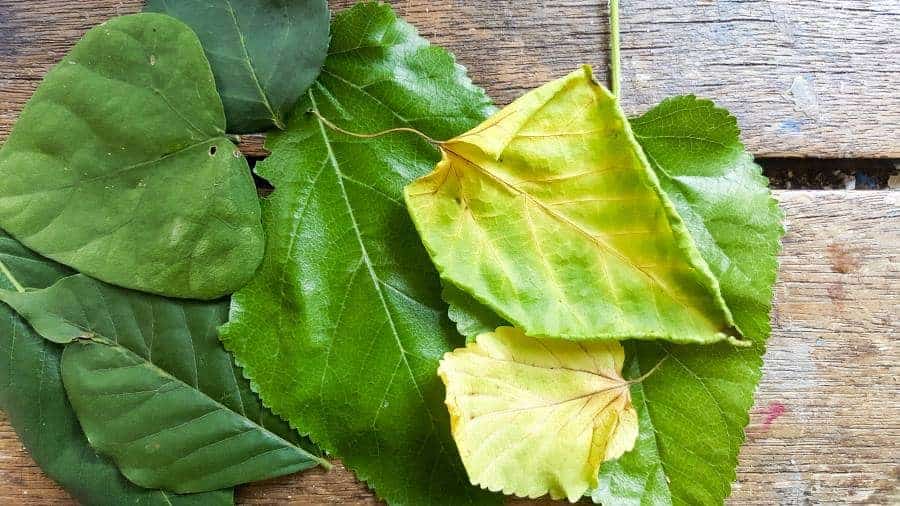
Basically, any leaf that bends easily without breaking will work. The leaves can be wet or dry as long as they “used to be” pliable.
You will also need:
- A mixing container
- A plastic fork or spoon
- Craft or wood glue that dries clear
- Water
- Burlap string or small elastic bands
- Scissors
- Small flat-bottomed lids, pens, tubes or other containers to use as a mold

Objects with straight upright edges work best to make the bowls. If you do use something that has a tapered edge make sure it tapers downward. It’s easier to de-mold the leaf bowls once they dry.
How to make the fairy leaf bowls
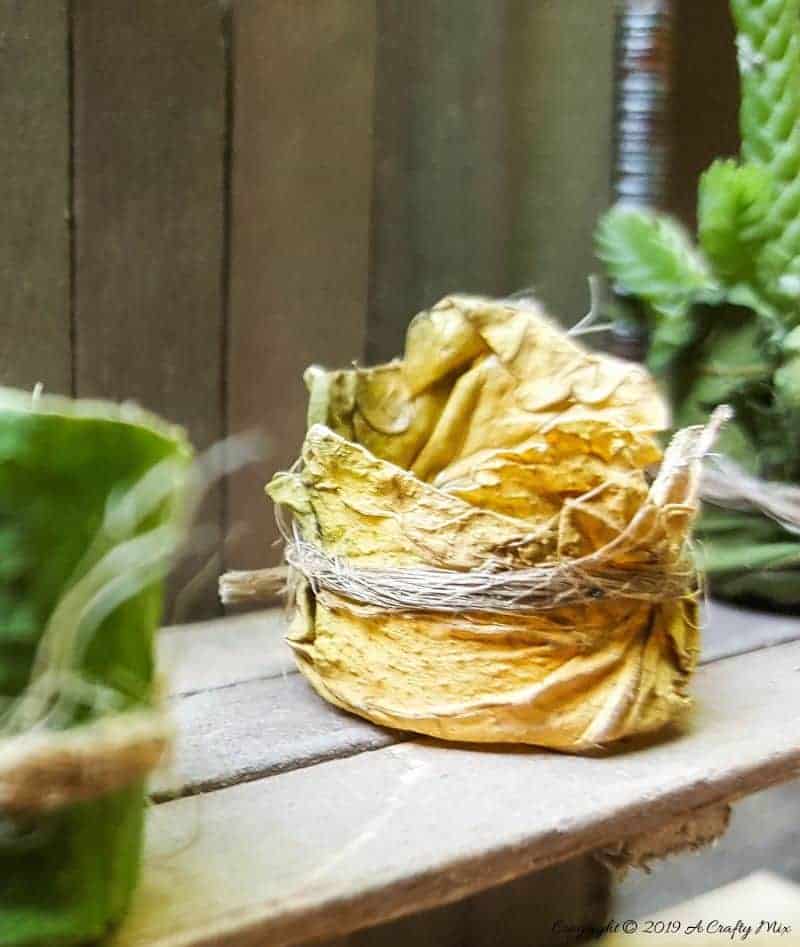
To make the fairy leaf bowls I used a mixture of “dried” leaves and leaves that were freshly plucked. If you look at the piccy below, the dried leaves create those beautifully, crinkly, textured bowls on the right, while the fresh green ones tend to be smoother and you can see the veins.
Since it’s Summer here in South Africa I had to “force dry” the leaves by placing them between two baking sheets and putting them in the oven on low for about 20 minutes.
You can wait for them to dry naturally but I’m way too impatient for something like that 😉 Once you have all your leaves, mix a little craft glue with enough water to cover them. A flat bottomed aluminum container works really well.
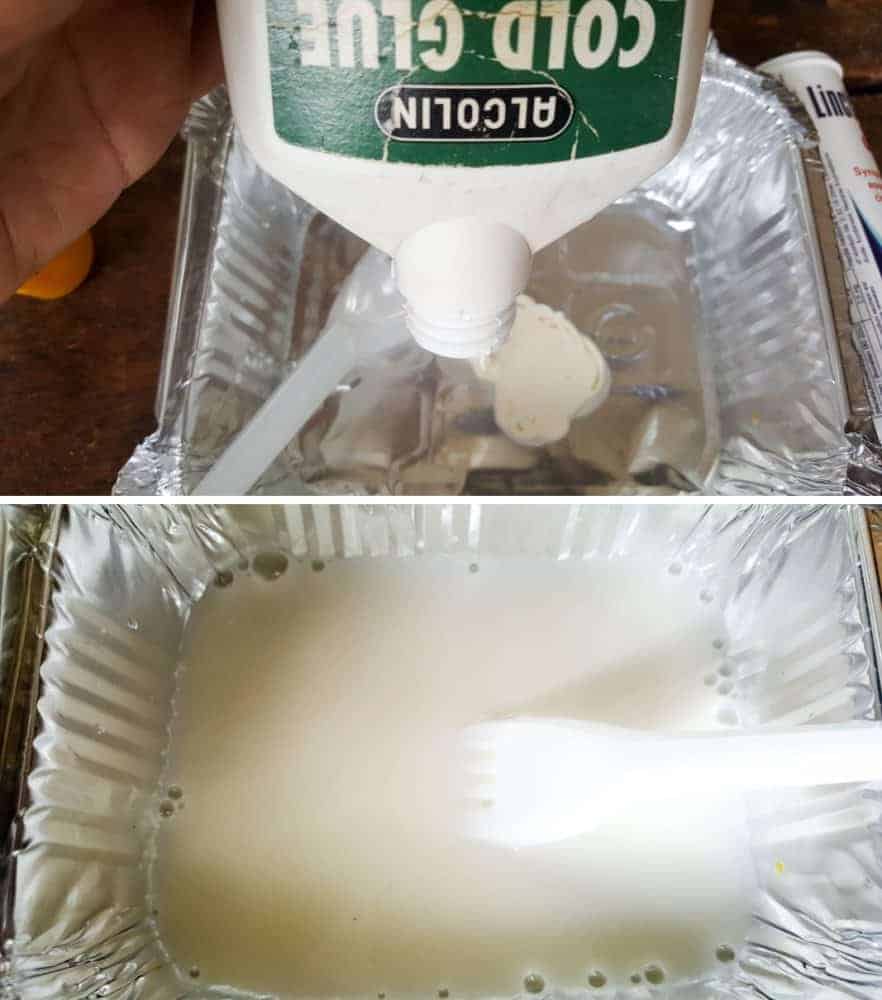
Submerge the leaves in the watery glue mix. If your leaves are still wet it only takes a few minutes to give them a decent soak.
A deer knows when a leaf falls silently. She hears it breathing differently.

The dried leaves need to stay in the mixture for about 20 minutes until they’re soft and pliable again.
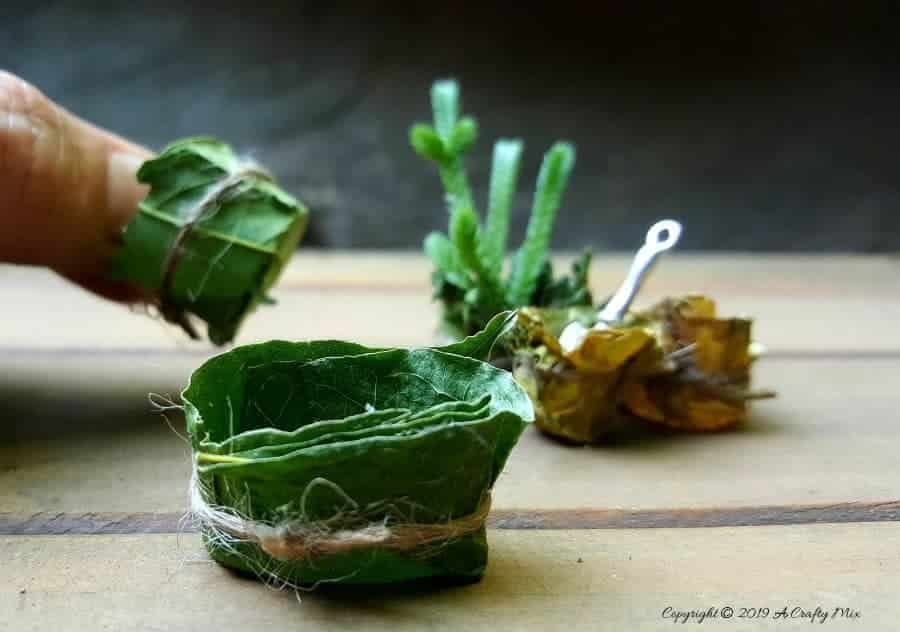
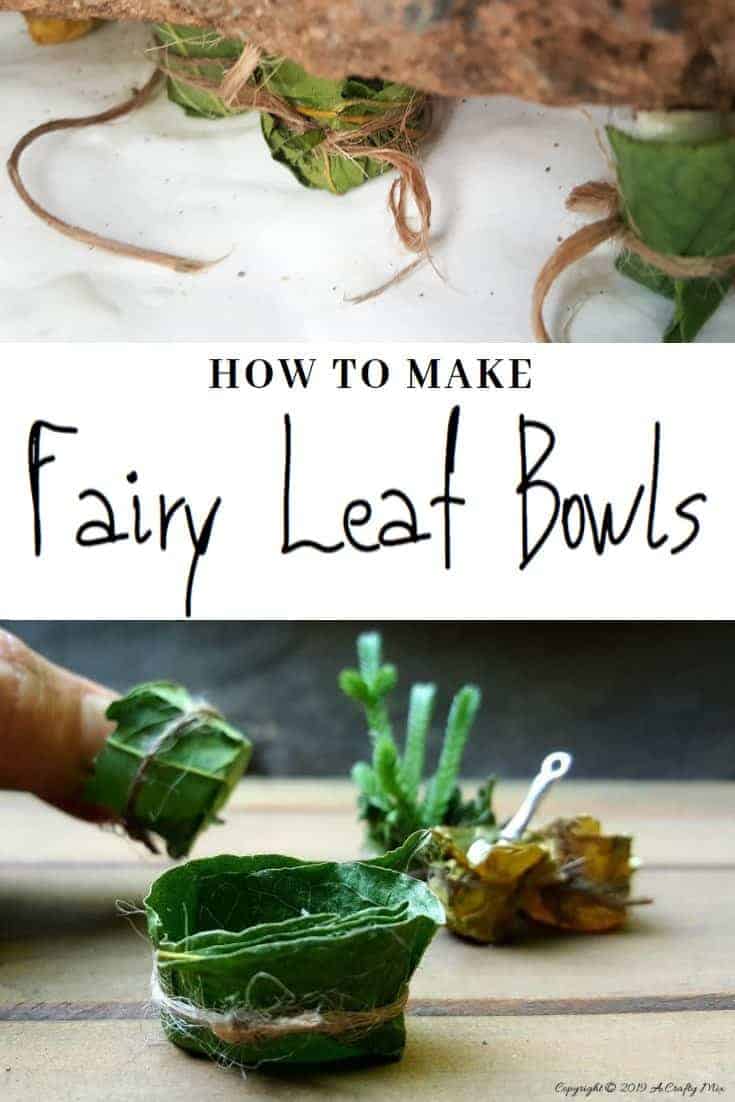
Place the mold on top of your leaf and carefully wrap the edges up around the mold, making sure that the bottom is covered. Wrap a piece of string around the leaf and tie a knot. It helps if you have another pair of hands. A small rubber band works too.
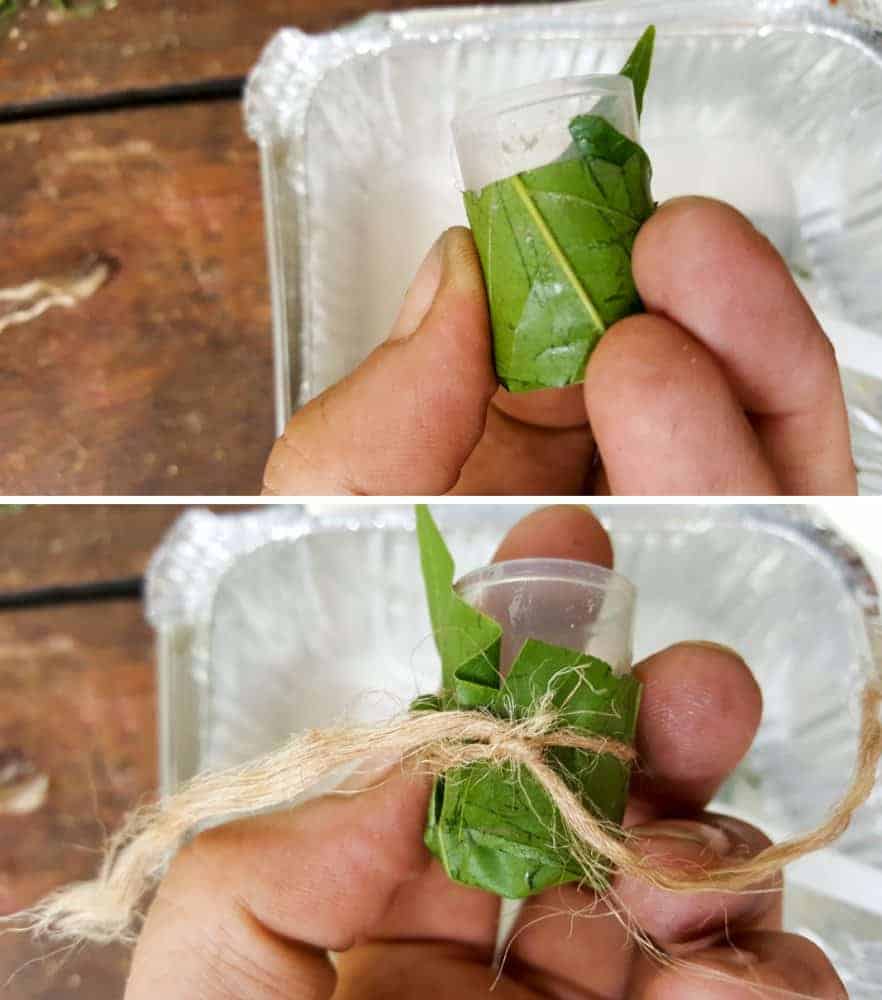
Dunk the leaf bowls in the mixture again and place them on a flat surface to dry completely.
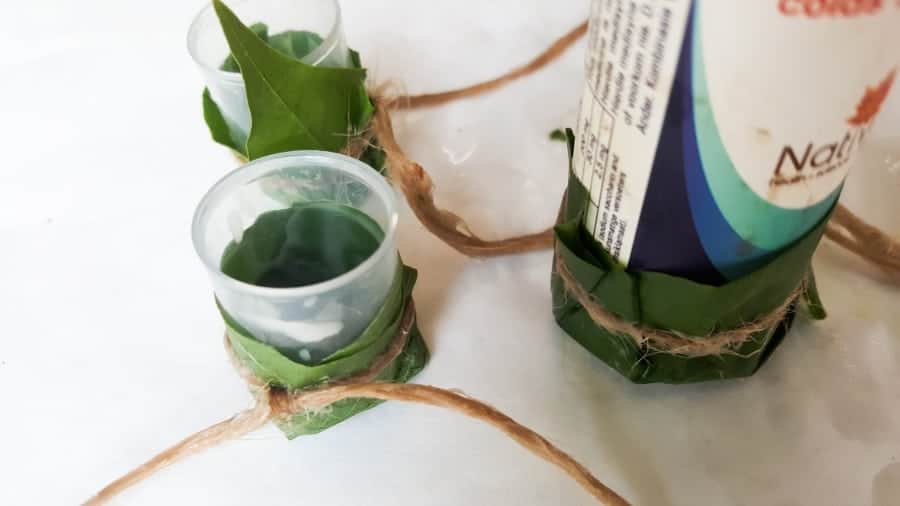
Weigh the leaf bowls down with something heavy. I used a broken terracotta tile. You want your bowls to have a nice flat bottom when they’re done.
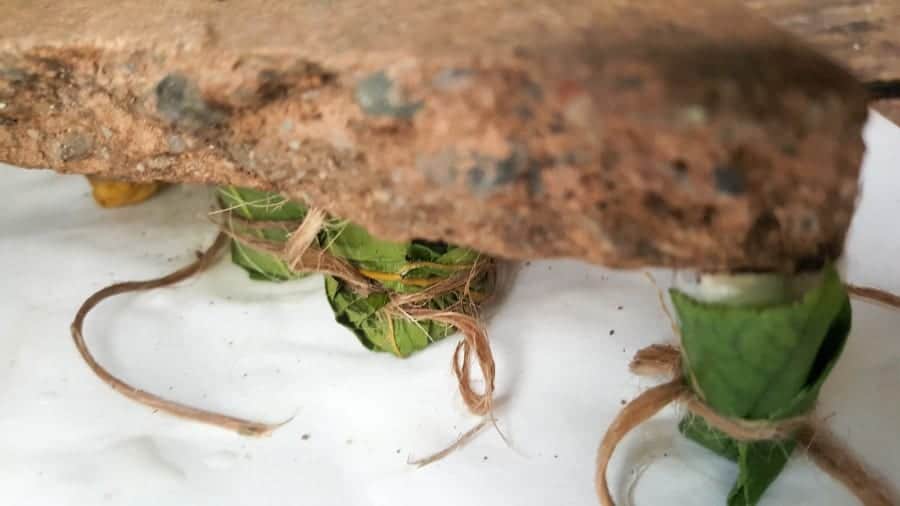
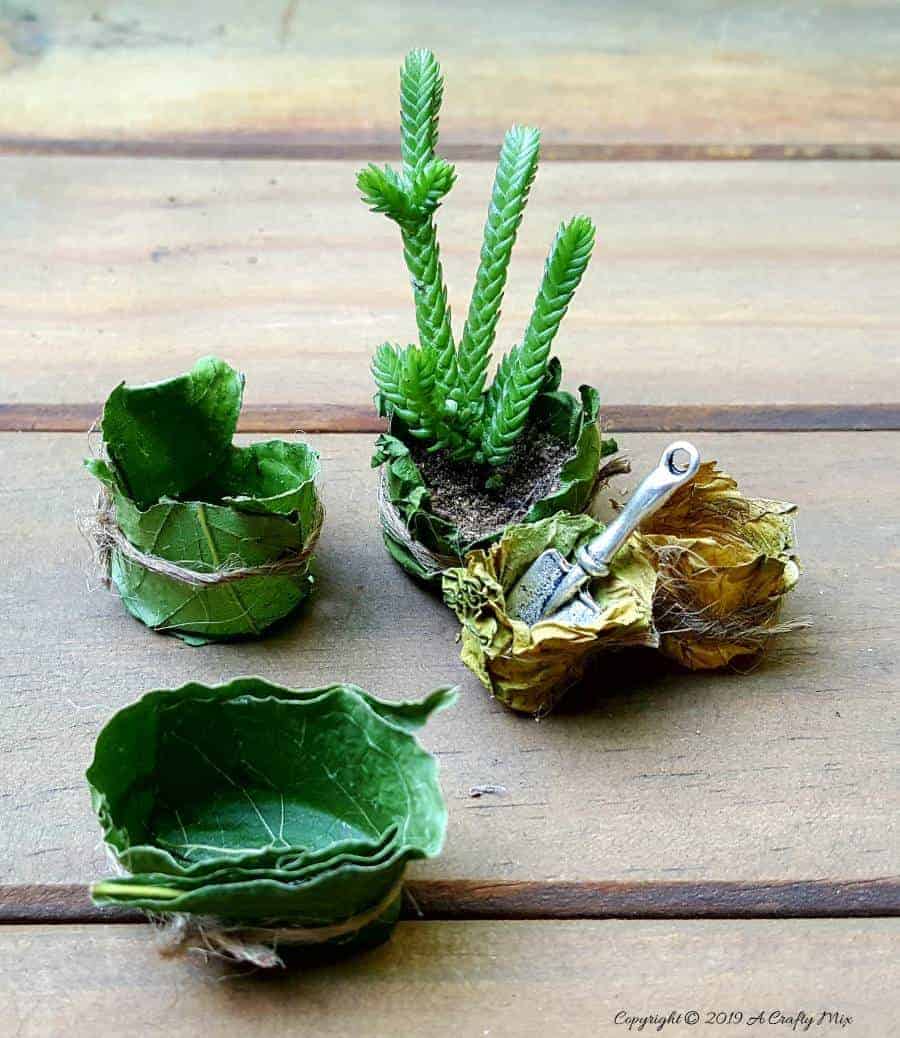
Once they’re dry (I left them overnight), gently slide the fairy leaf bowls off the molds.

Trim the string and your fairy leaf bowls are done.
How to use the fairy leaf bowls
The fairy leaf bowls make the most adorable addition to any fairy garden or doll’s house. Add them to your fairy potting bench ……
or place them on a little table.
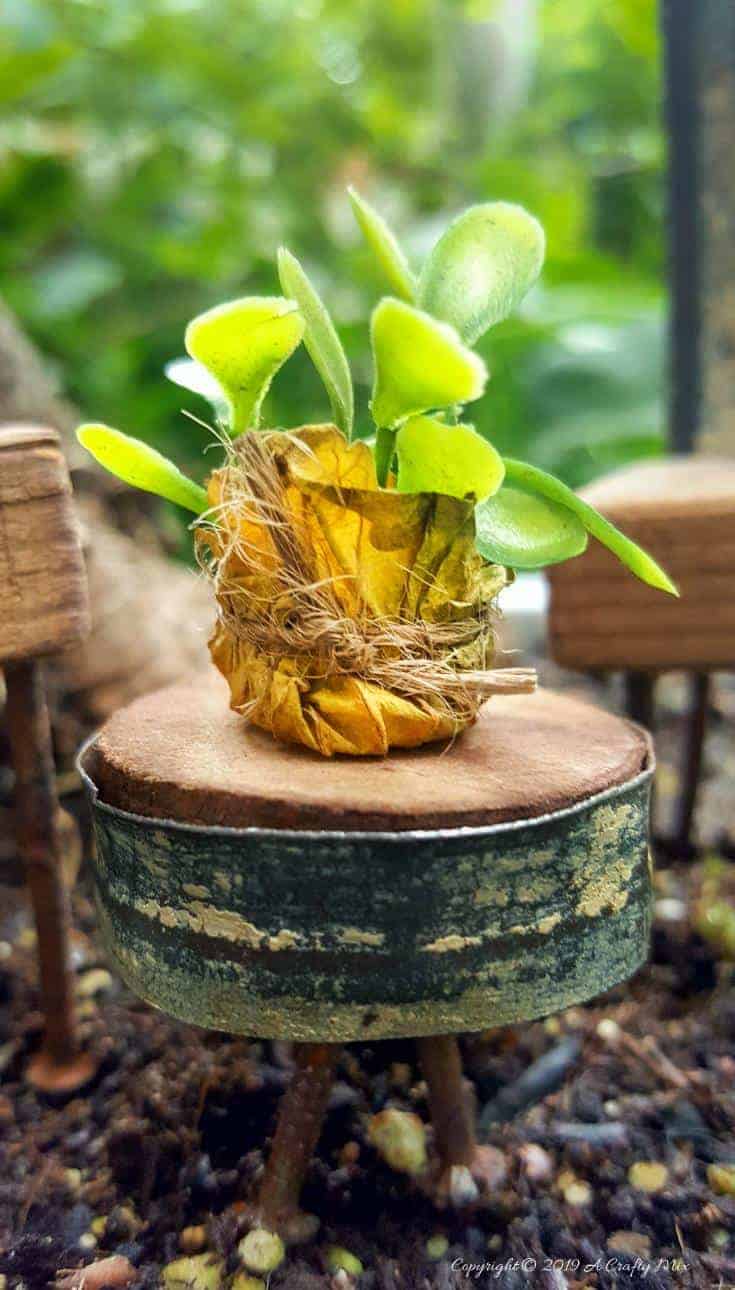
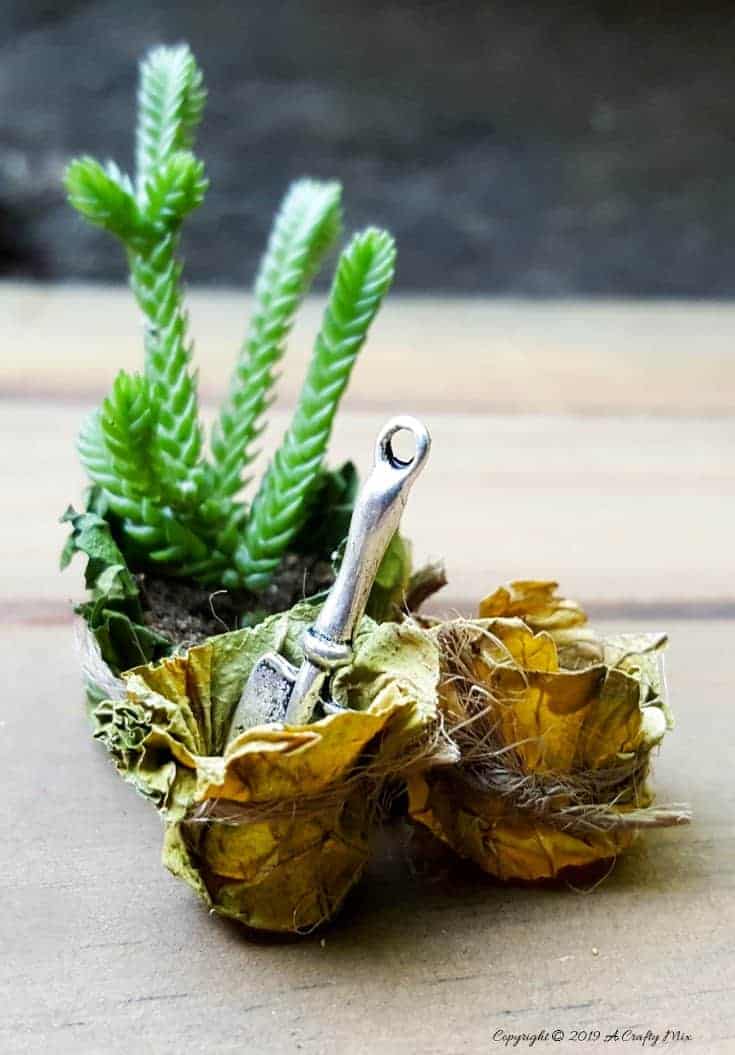
And you can even use them as mini planters. We put one of my favorite succulents in this one.
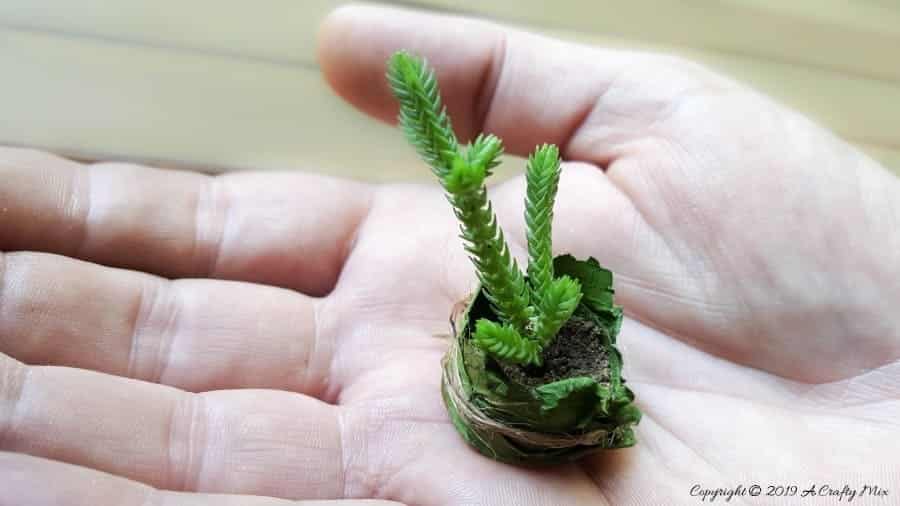
The Crassula lycopodioides also called the Watch Chain or Princess Pine, will grow anywhere and her off-shoots are delicate and small enough for these fairy leaf bowls.
And it’s a great craft to do with the kids too. They can help you find the right leaves and dunk them in the glue and water mix. Molding and unmolding the leaf bowls should be done by someone who has a steady hand though since they’re very delicate.
If you want your fairy leaf bowls to last a long time, you can coat them with a layer of resin to protect them.

If you like the idea of making fairy leaf bowls, don’t forget to pin it for later.
Caring is sharing 😉
And if you’re looking for a few more fairy crafts to make, you’ll find a whole bunch on our blog, including:
- A fairy world in a book nook;
- Working grandfather clock;
- Tiny fairy beach in a clouche;
- Adorable fairy playground in a chair planter;
- Fairy door with a stained glass window;
- A whole kokedama fairy village;
- Fairy potting bench;
We’ve also included some affiliate links below, so you don’t have to worry about finding some of the stuff we used to make the teeny tiny planters. Disclosure: Clicking on the links below, means we may receive a very small commission from Amazon. But don’t worry it won’t come out of your pocket, and it helps us come up with more unique DIY and fairy craft ideas for you 😉


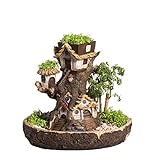
Or if you prefer to buy rather than DIY

And as always, wishing you a wonderful, crafty week filled with lots of love. Thank you for popping in for a visit.

Last update on 2026-06-03 / Source Amazon Affiliates