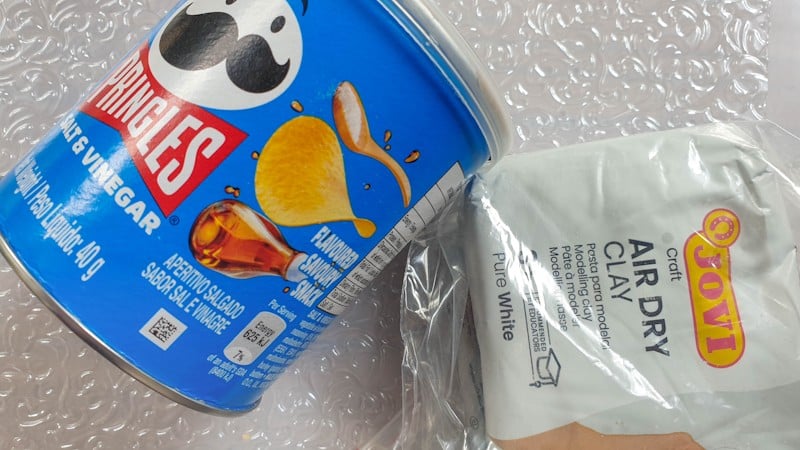
My hubby eats a lot of Pringles. A LOT!! And those cardboard tubes they come in are so handy for all kinds of things. Storage things mostly. But they’re not pretty. So instead of hiding them away somewhere, I decided to give one a total makeover and turn it into something truly special. This gorgeous vintage embossed container.
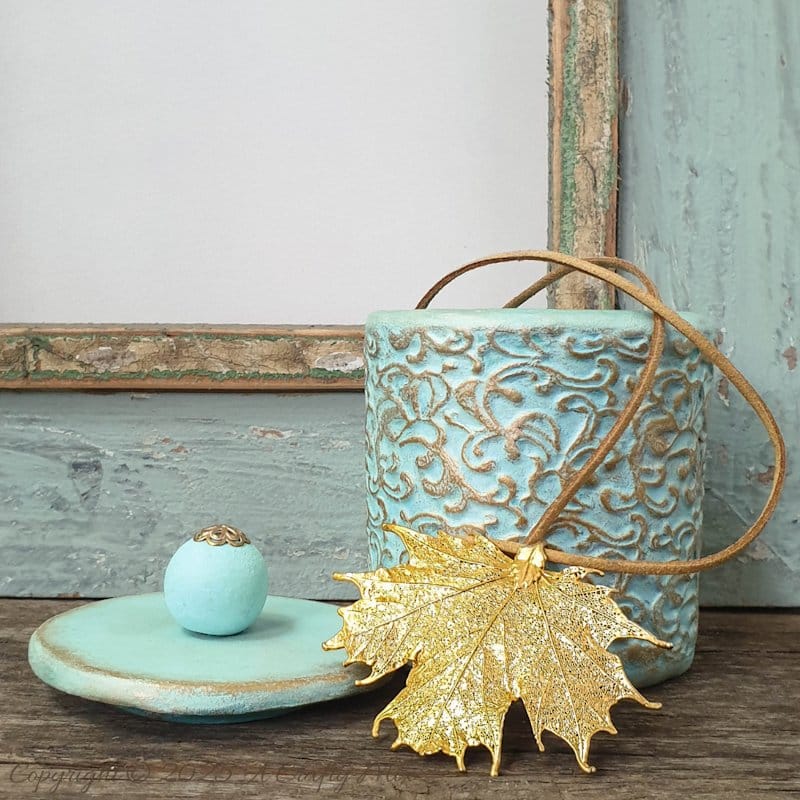
Doesn’t it look like it came straight from a boutique pottery store?

It’s perfect for storing keepsakes and craft supplies and would make a wonderful gift too.
In this tutorial, I’ll show you step-by-step how to achieve that beautiful, aged look with embossed details so you can upcycle your snack containers into elegant treasures for your home.
But before we get there, follow us on Facebook, Twitter, Pinterest, or Instagram. And don’t forget to subscribe so you’ll never miss a post!
What you need
- Empty Pringles can
- Metallic eyeshadow
- Air Dry clay
- Large wooden bead
- Metal filigree flower cup bead
- Fondant texture sheet
Make sure the fondant sheet is big enough to fit around the Pringles can. That’s the secret of the embossed finish.
If you can’t find a fondant sheet (and your husband isn’t a Pringles-munching hunk of hugs and cuddles), have a look at this tutorial that will show you how to turn a packing tape roll into storage.
Turning a Pringles Can into a Vintage Embossed Container
Right, let’s get crafting, shall we? Grab a hunk of clay and condition it between your fingers.

Place the clay on the fondant sheet and roll it out with a bottle or rolling pin.
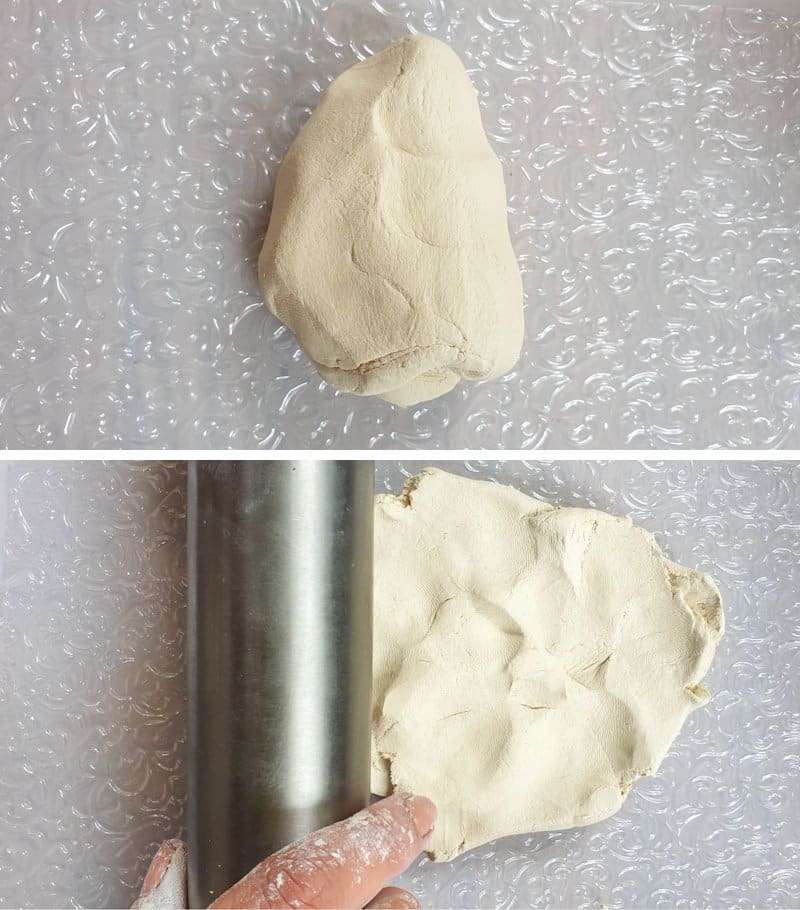
I like dusting my sheets with a little cornstarch first, so the clay doesn’t stick.

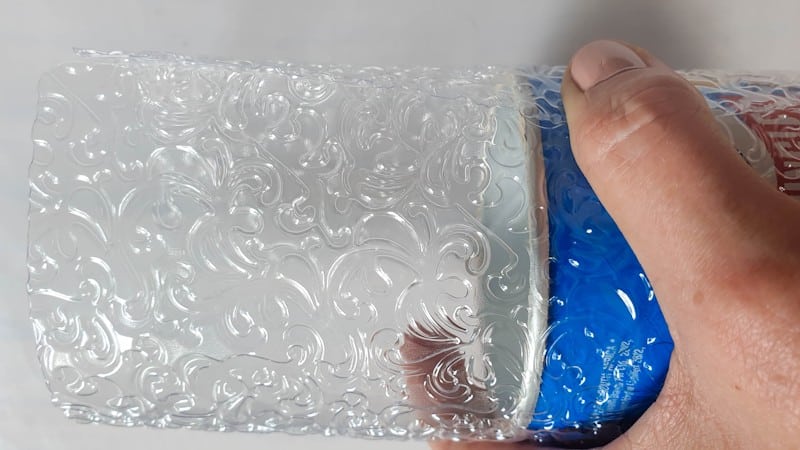
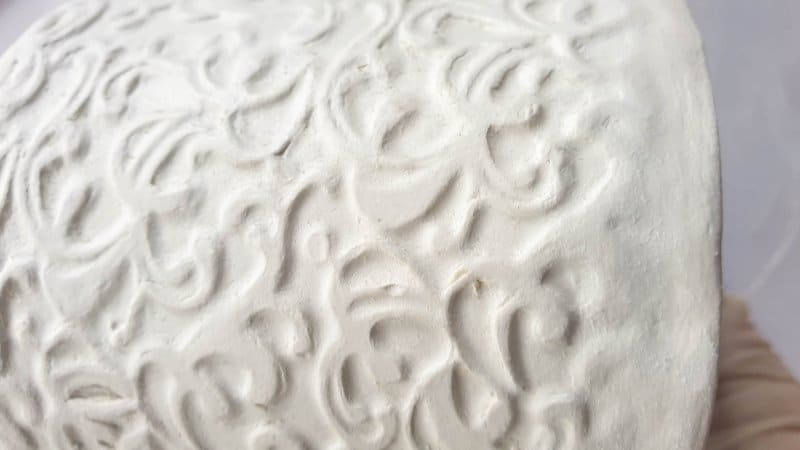
While the clay is still on the sheet, place the Pringles can on top and roll it over the clay. It leaves indents, which you can use as a guide to trim the clay.

Gently remove the embossed clay from the sheet and wrap it around the can. Wet your finger and smooth out the join.

Do the same for the top and bottom edges.

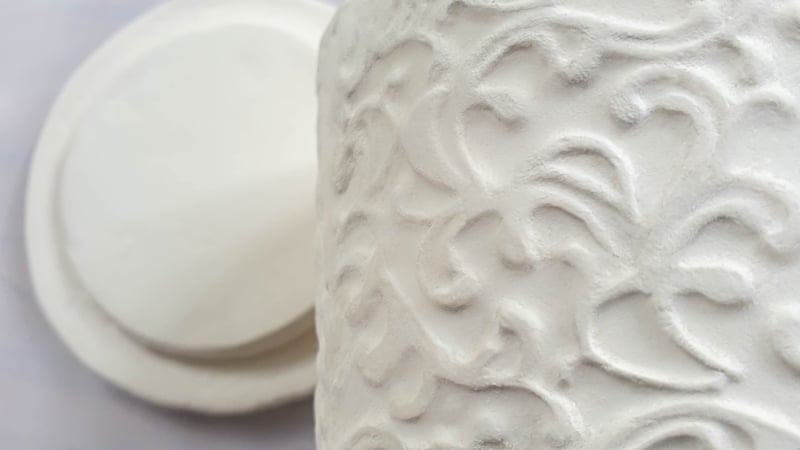
Isn’t that vintage embossed effect gorgeous?

Set the clay-wrapped Pringles can to one side to cure while you make the lid.
Making a lid for the vintage embossed container
Grab another hunk of clay and roll it out. It needs to be at least 5 mm (1/4”) thick. Find something to make a circle. It should be as wide or wider than the Pringles tin, including the clay wrapping. I used a big coffee mug. Cut the circle out.
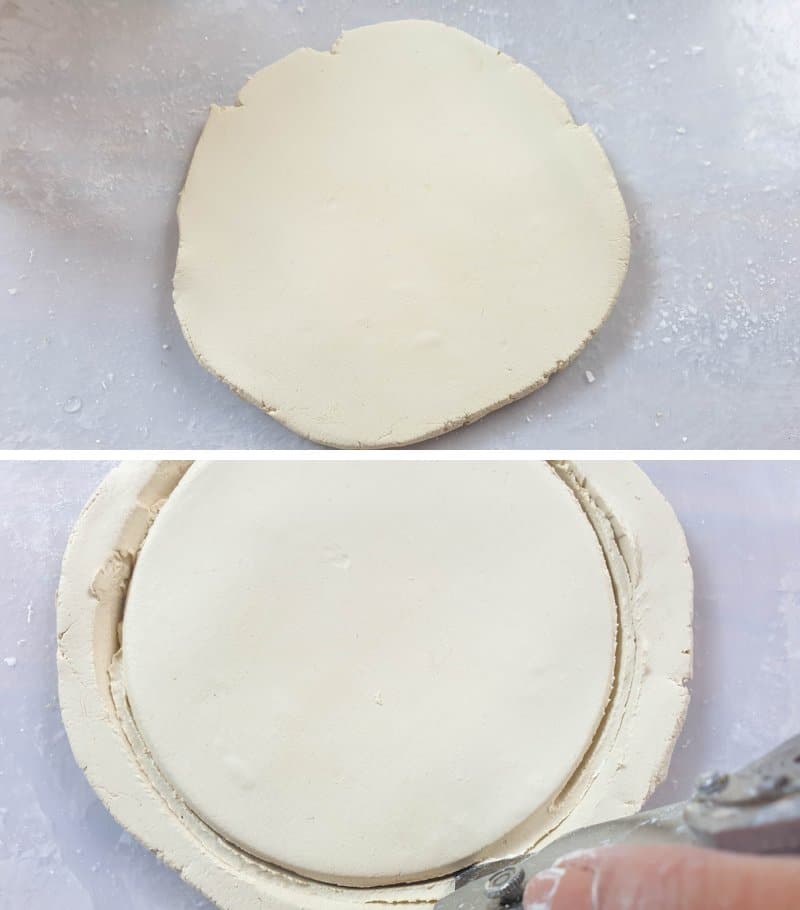
Make a smaller circle that will sit snugly inside the Pringles can. This time I just used the Pringles lid.

Set the circles aside to cure.
Dealing with shrinkage
Air-dry clay is easy to work with, but it has a downside. Larger pieces tend to shrink as they dry and lose water. Which means you may have to fix a big crack at the back.

But don’t worry, we can fix it with a fresh piece of clay. Roll out a small piece of clay and emboss as before. Place the fresh clay in the crack and use a little water to gently smoosh the wet clay over the dry clay.

The pattern won’t be perfect, but that’s okay. No one will notice unless you see the vintage container from the back. For top and bottom shrinkage, you can roll a clay worm and apply it in the same way.

Leave the vintage embossed container to cure.
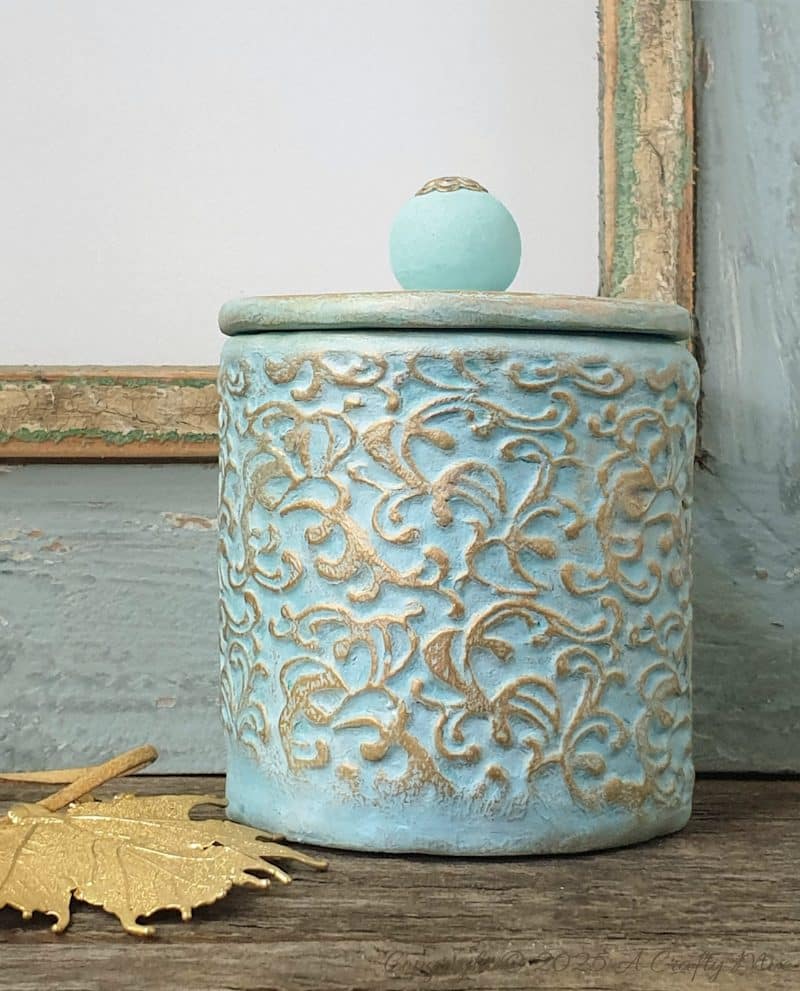
Painting the clay container
I used a combination of craft paint and makeup to add color to my container. Makeup is a wonderful medium for clay projects. You can use whatever you have at hand. Begin by applying a base coat to the vintage container. I mixed up blues, whites, and turquoise.

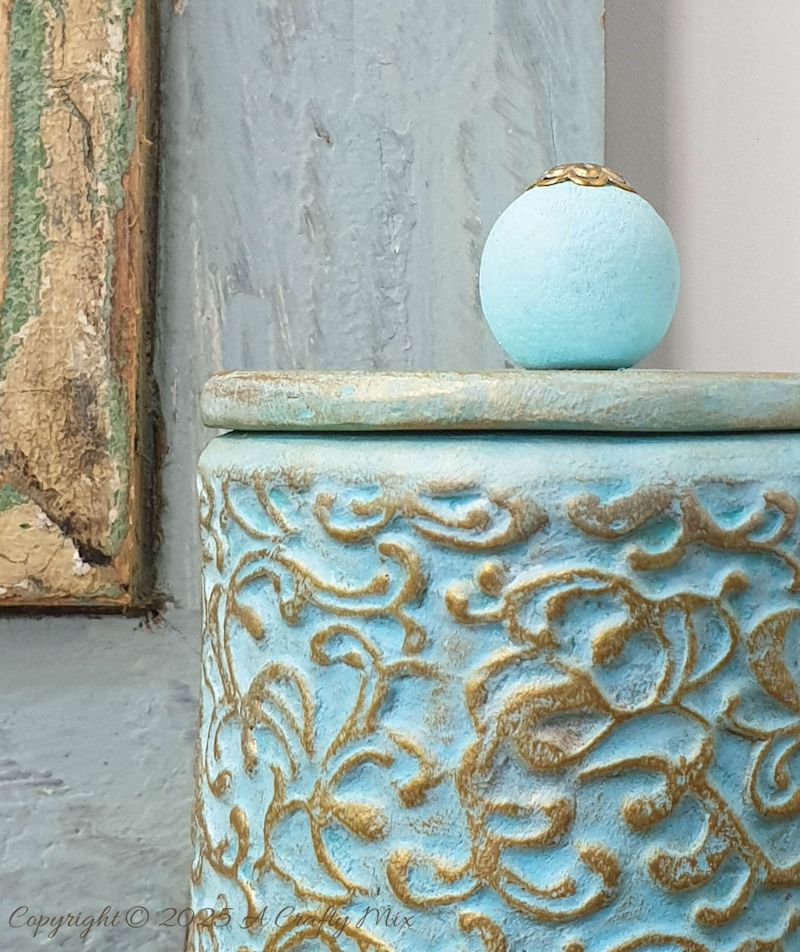
Highlight the embossed detail with a contrasting color. In my case, I used gorgeous gold from an inexpensive eyeshadow palette.

And applied it with my finger. Don’t be afraid to experiment.

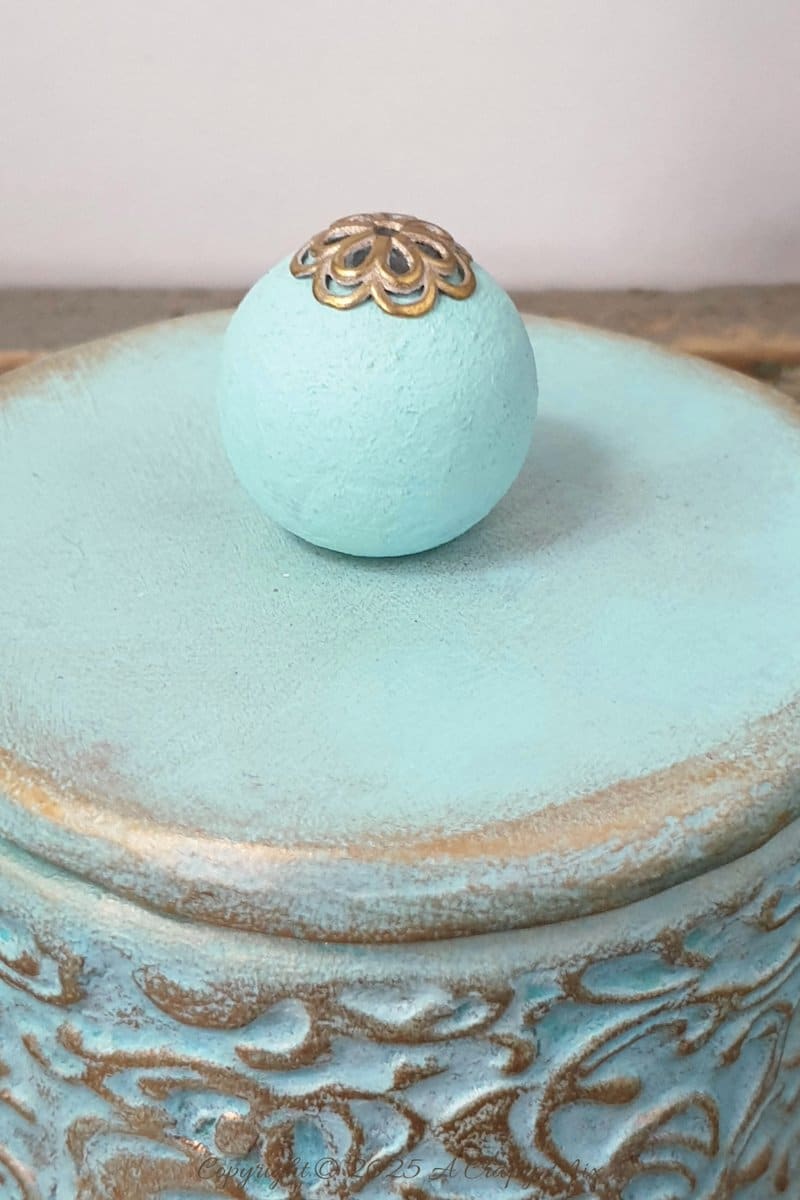
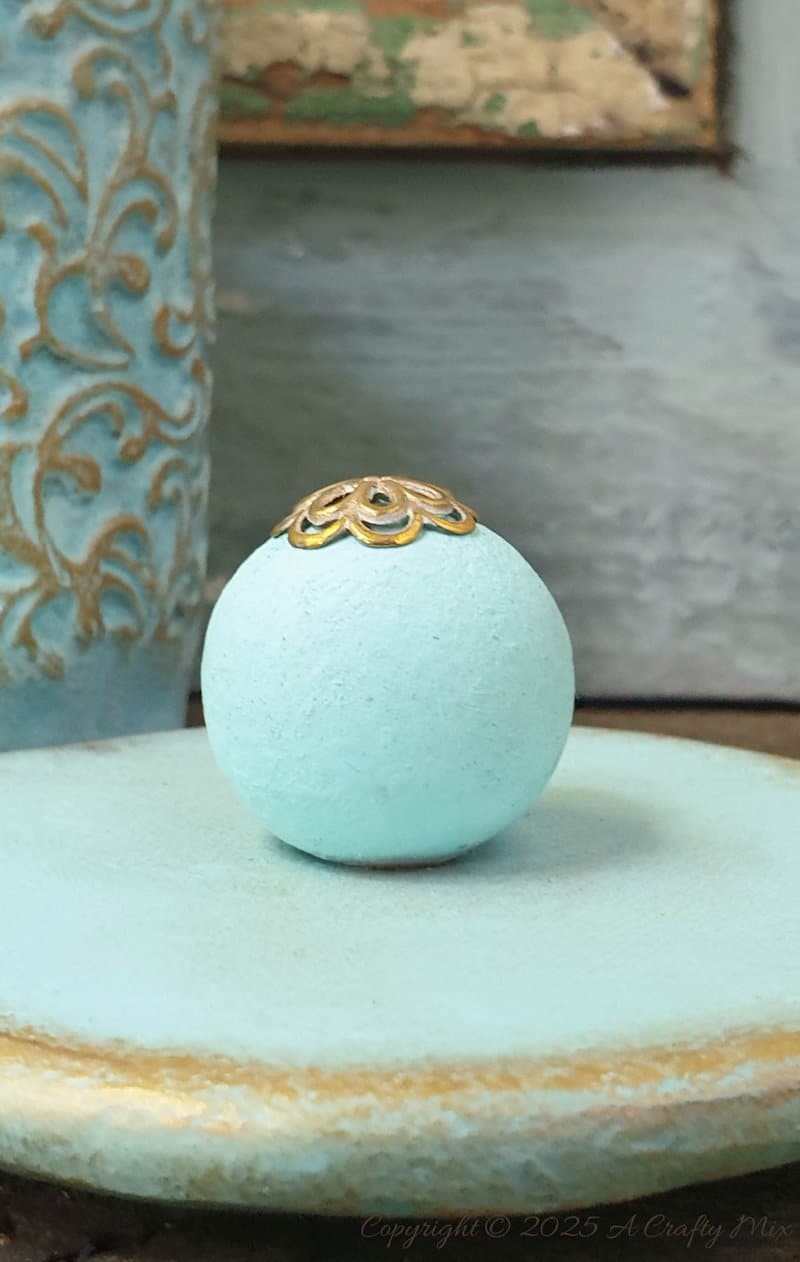
I rubbed the same gold around the lid, just to bring everything together. To make a lid-picky-uppy-thingy-ma-bobby, I used a wooden bead and a gold bead cap.

Glue the bead cap on the painted wooden bead and glue that to the clay lid.

And you’re done!!
No one would ever say it was once a Pringles can.
What do you think?

If you like the idea of turning a Pringles can into a vintage, embossed container, don’t forget to pin it for later.

Sharing is caring.

Oh, and if you’re looking for some of the things we used, we’ve got you covered. Disclosure: Clicking on the links below means we may receive a commission from Amazon. But don’t worry, it won’t come out of your pocket, and it helps us make more amazing crafts to share with you.


And if you prefer to buy rather than DIY, then maybe these beauties will appeal.


And as always, wishing you a wonderful, crafty week filled with lots of love. Thank you for popping in for a visit.

2 comments
Wow, Michelle, your embossed container looks really fabulous and amazing! I can’t imagine it was a pringles can!
Thank you, Gail. The little Pringles containers are so handy, and I thoroughly enjoyed experimenting with the fondant sheet. Now I’m itching to make a few more embossed things.