Hey everybody, I hope you had a lovely weekend. A few weeks ago, we made an adorable antique washboard from a coffee tin. We still had a piece of that tin can left over, so this weekend, we decided to make this little outhouse for our small bathroom.

It’s just big enough to hold a spare roll of toilet paper 😉

It’s easy to make, and you only need basic tools and supplies.
What You Need to Make a Tin Can Outhouse
- Scrap bits of wood at least 12 cm wide (4 7/8”)
- A medium-sized tin can
- Wooden craft sticks and a piece of hardboard
- Two small hinges and a metal clasp. Those tiny ones that people normally use to make a jewelry box
- A cheap chrome toilet paper holder (similar to this one)
- Screws, hand saw, metal file, wood glue and a protractor
How to Make a Tin Can Outhouse
Start off by determining the angle to cut the piece of wood. We used a piece of wood that was about 70 cm long and 12 cm wide, so by measuring carefully, all the bits were cut from the same piece.

When I first tried to figure out how to cut the wood, I just eyeballed the angle and drew a line until my bright spark of a daughter gave me a quick lesson in the basics of geometry. Don’t you love it when your kids are more intelligent than you are? By cutting the wood at a 60-degree angle, I would get two side pieces for the price of one cut, and the pitch of the roof would be perfect.
Life without geometry is pointless 😀
Once everything has been cut, you should end up with two side pieces measuring 26 cm (10 2/8”) on the longest side and a small bottom piece that’s 14.5 cm by 12 cm (5 7/8” x 4 7/8”).

Sand, distress or paint the pieces to fit your décor. We wanted to experiment a little, so we used a crimped wire cap brush.

I love how it digs into the wood and chips away at the softer wood while leaving the harder wood exposed.
Putting the Outhouse Together
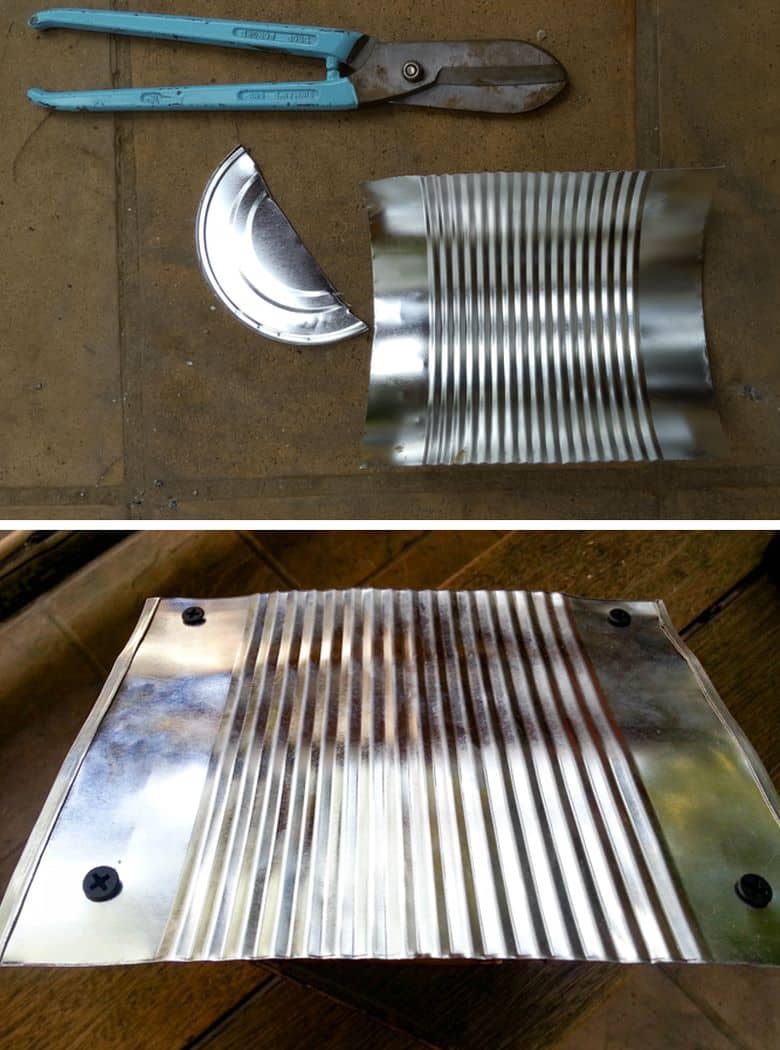
Add a little wood glue to the bottom piece and screw the two sides on. I’m sorry, I don’t have a photo of that bit. My phone was stolen before I could download those. UGH, the second time this year that happened. Anyhows, it should look a bit like a “U” when you’re done. Time to put on the roof 😀 Cut the tin can using tin snips to the right size. File away any sharp edges using long steady strokes. When you’re done, screw the cut tin can onto the top of the “U”.
To make the door, cut a piece of hardboard that fits snuggly inside the “U” shape. Glue on a few craft sticks. Ours were a little on the short side, so we measured the halfway mark on the hardboard and cut the craft sticks accordingly. Just glue another craft stick over the joins to hide them.

We stained the door and then attached it to the outhouse using two small hinges and a clasp.

Add a toilet roll holder to the bottom of the outhouse and a few posters from The Graphics Fairy to the inside of the door. Loo paper also needs reading material, right?!! 😉

I’d love to know what you think of the toilet paper outhouse. Does it work for you? Is it something you’d put in your bathroom?
If you like the idea of repurposing a tin can to make an outhouse, don’t forget to pin it for later.

P.S. Would you like to make something similar or are you looking for more outhouse-styled decor? We’ve got you covered Disclosure: Clicking on the links below means we may receive a commission from Amazon. But don’t worry, it won’t come out of your pocket, and it helps us come up with more crafty ideas to share with you


Sending blessing and love as always.

Last update on 2026-06-03 / Source Amazon Affiliates