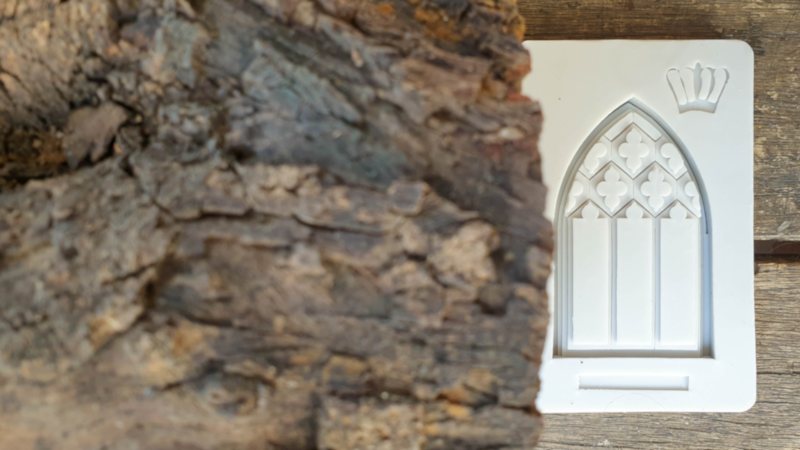
I’ve never used a mold to make my fairy doors before. It just seemed like such a waste when popsicle sticks, and takeaway dishes are my go‑to supplies. And then it happened. I saw a silicone mold on Temu. Mmm‑hmm, it had these quatrefoil motifs, and an enchanting old‑world feel about it. My fingers hit the order button before I could even blink, and that’s how I ended up making this magical medieval fairy door.
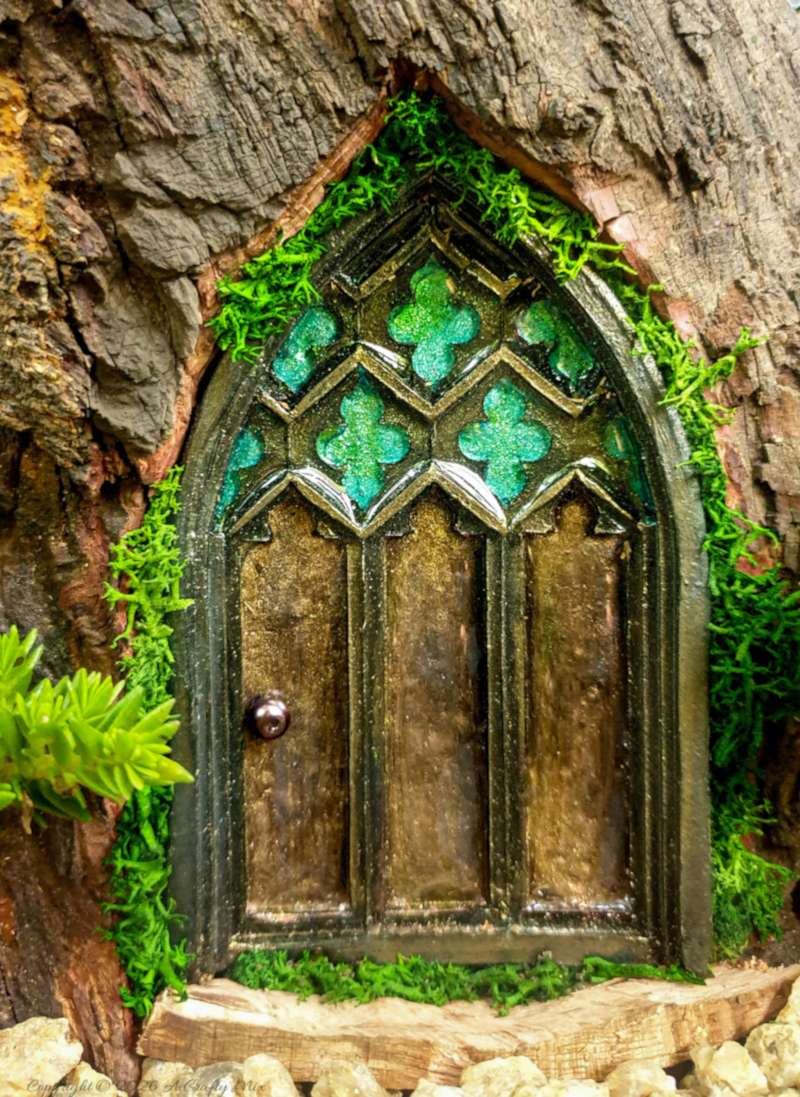
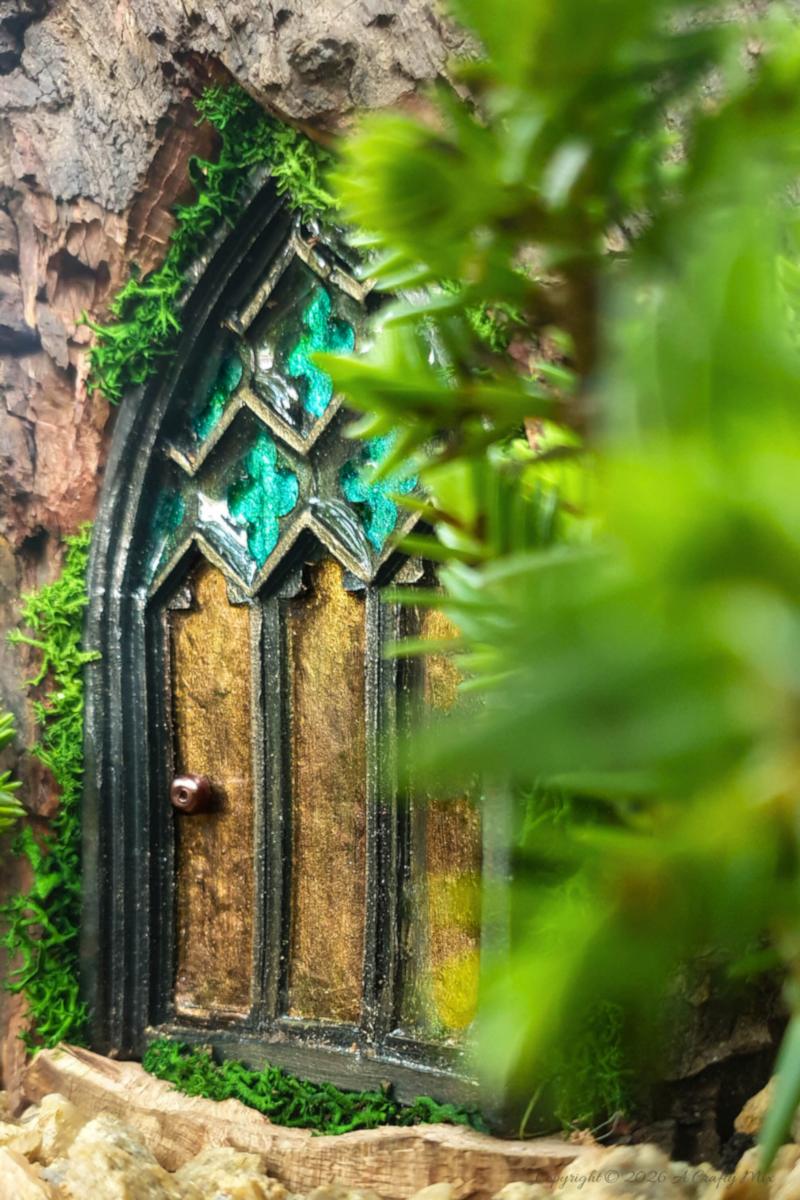
Aren’t those faux stained‑glass effects just gorgeous?
Of course, I didn’t want to lose that handmade, slightly wonky charm my fairy doors are known for, so the mold was just the starting point.
The real magic happens when you tuck that door into an actual tree stump.
A sprinkling of moss and miniature greenery helped too.
If you’d like to make your own magical doorway for the fairies in your garden, here’s what you’ll need to get started.
What you need
- Medieval silicon mold
- Polymer clay
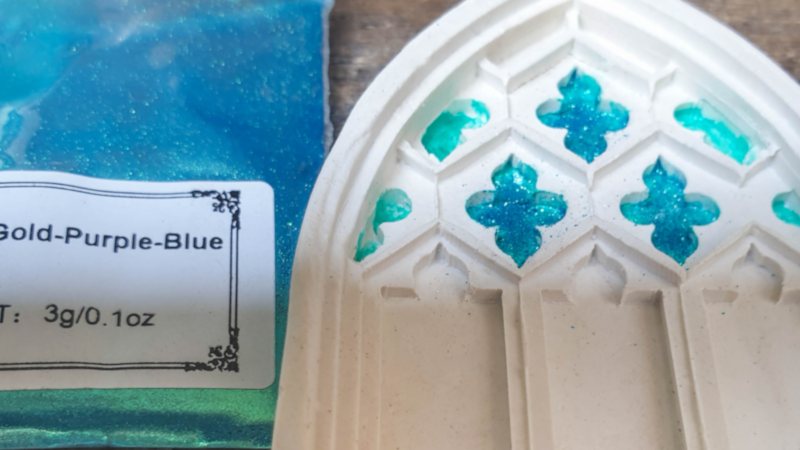
- Metallic paints
- Mica powder for the extra sizzle
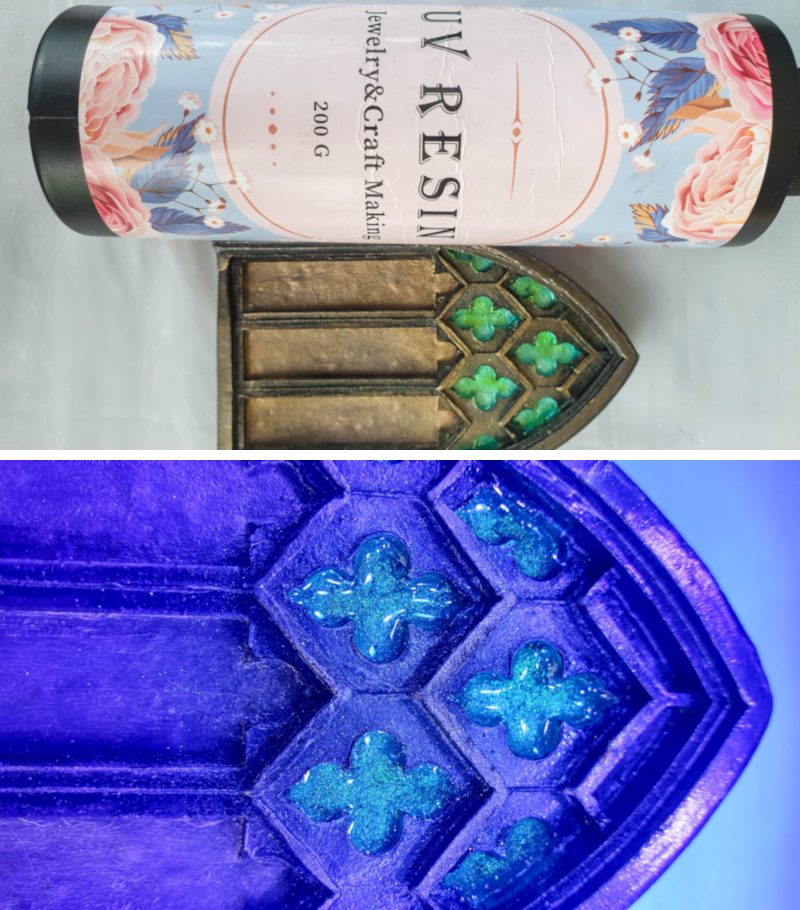
- UV Cure resin
- UV Lamp
- Small bead
To embed the door inside the stump:
- Tree stump
- Chisel or Dremel with wood carving bits
- E6000 glue
Before we get to the tutorial, follow us on Facebook, Twitter, Pinterest, or Instagram. And don’t forget to subscribe so you’ll never miss a post!
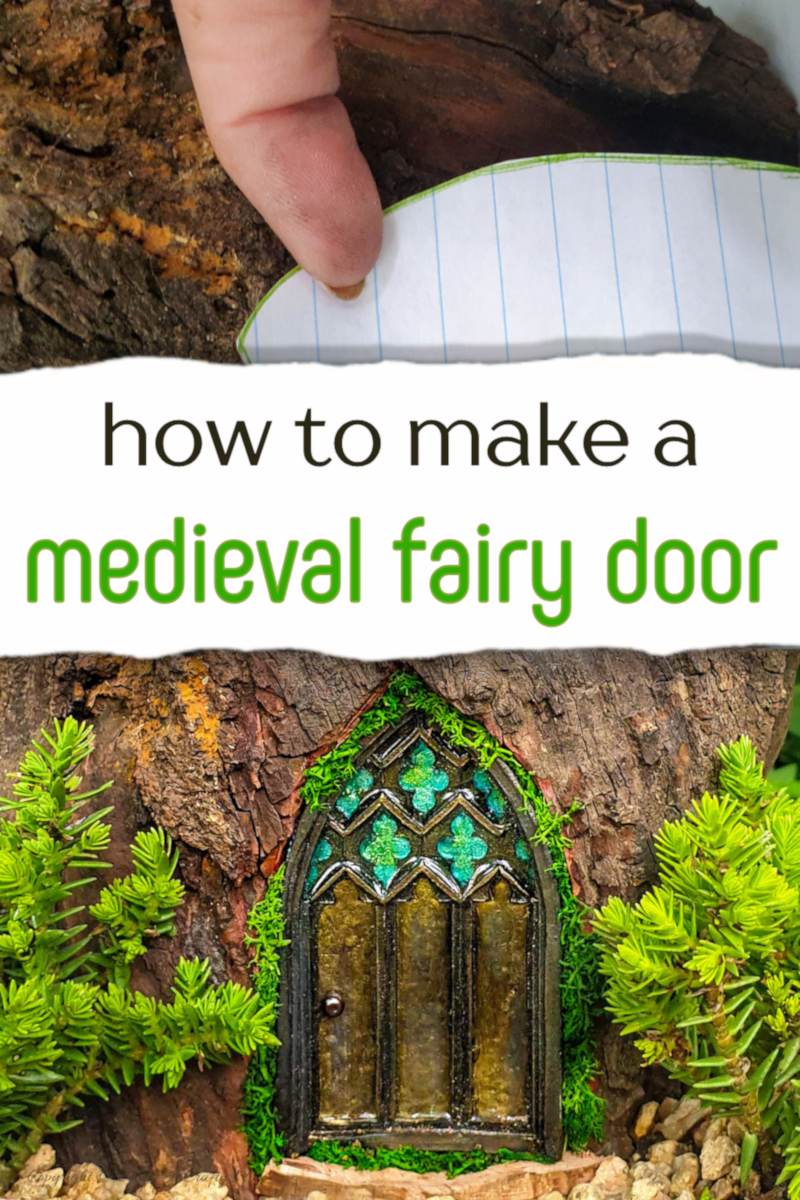
How to make a medieval fairy door in a tree stump
Just a heads up. Making the medieval door is really easy. Embedding it into the stump takes a little elbow grease, though. If you’re not in the mood for cutting and carving wood, you can skip that bit. I’ll share a few “no-carve” ways to put the fairy door on display towards the end of the post. Right, let’s get to the tutorial, shall we.
Making the fairy door
I used polymer clay to make my medieval fairy door. Once baked it’s waterproof and rock hard. Plus, it stays pliable until you bake it which means you can take your time without worrying that it will dry out. If your door is going inside, you can use air dry clay or plaster of Paris.

Condition the clay between your fingers and roll it into a worm shape. Squish the clay worm into the mold, pressing down firmly. You want the clay to get into all the nooks and crannies.
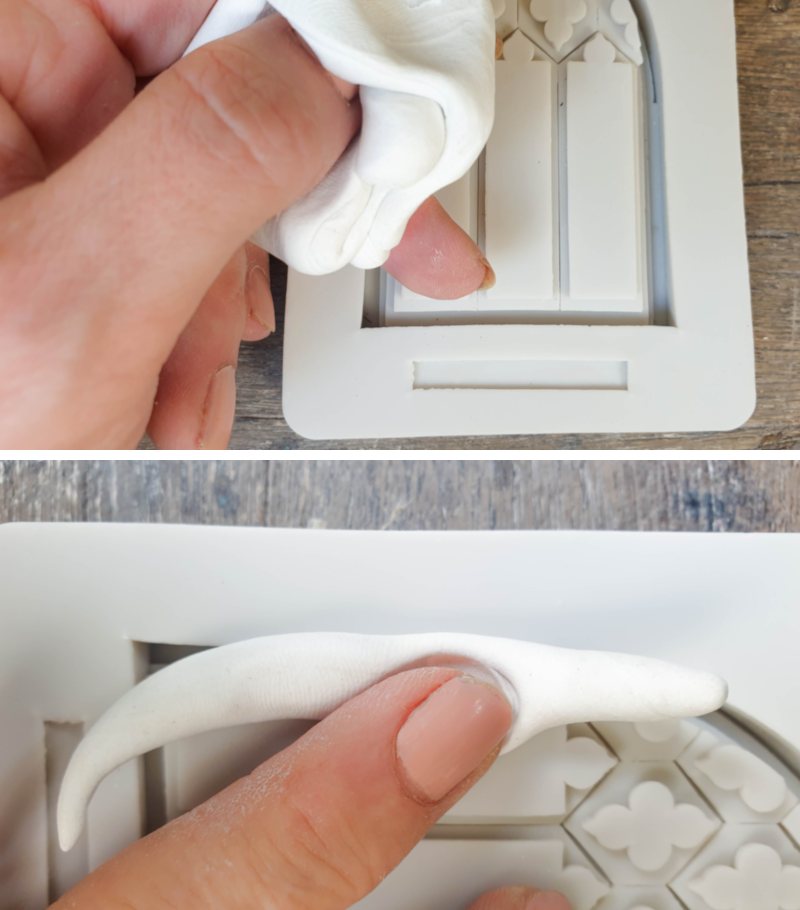
Smack the clay with your hand to make sure it gets in there.
Or use a rolling pin to smoosh it around and flatten the top.
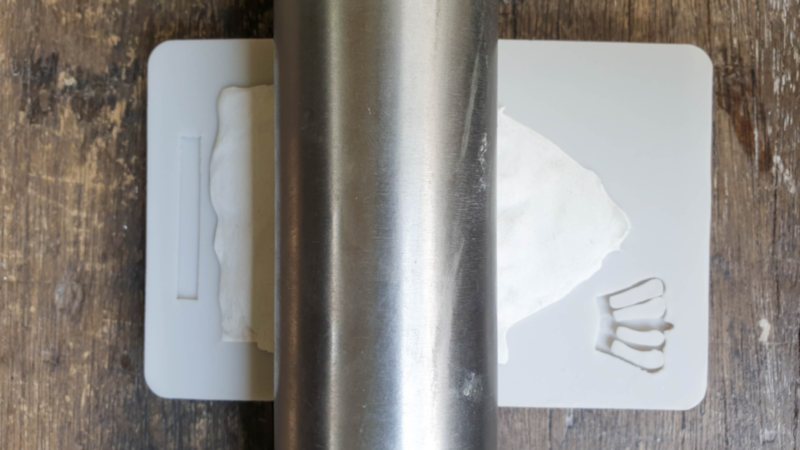
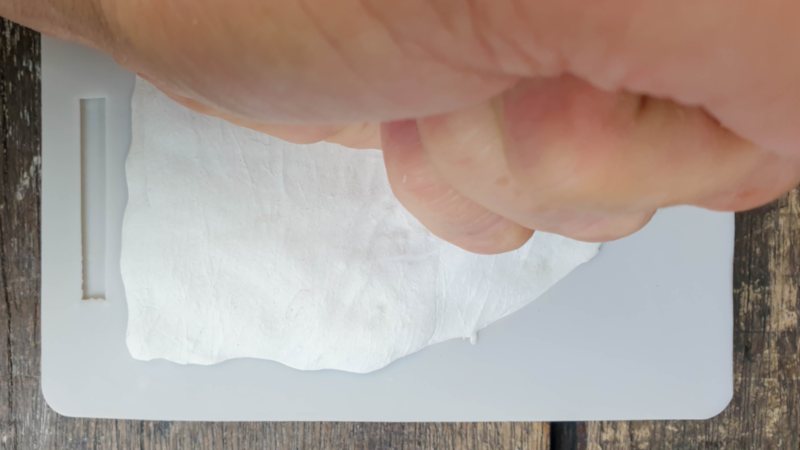
Cut away any excess and tidy up the edges.
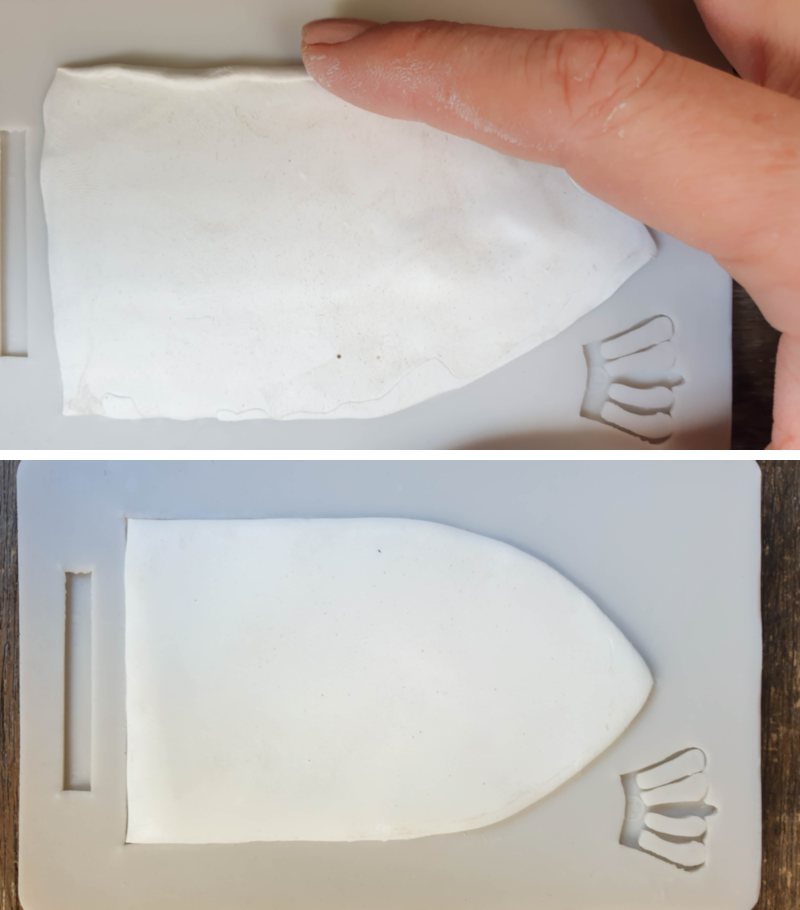
Pop the mold into the oven and bake according to the manufacturer’s instructions. Wait for the fairy door to cool down completely before removing it from the mold.
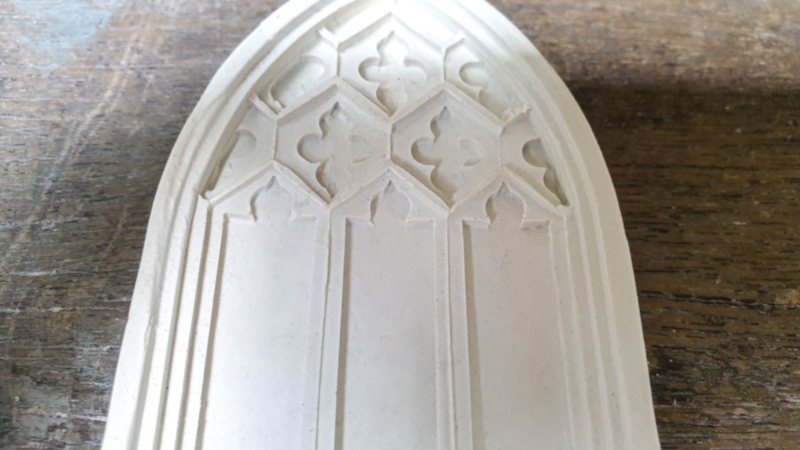
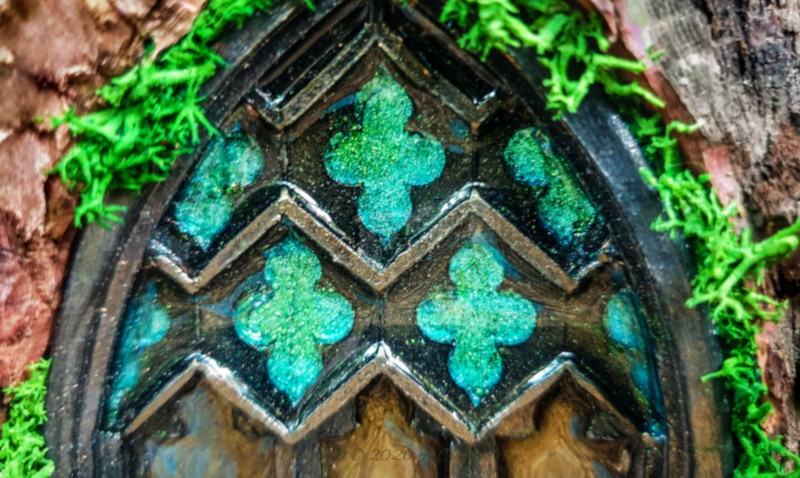
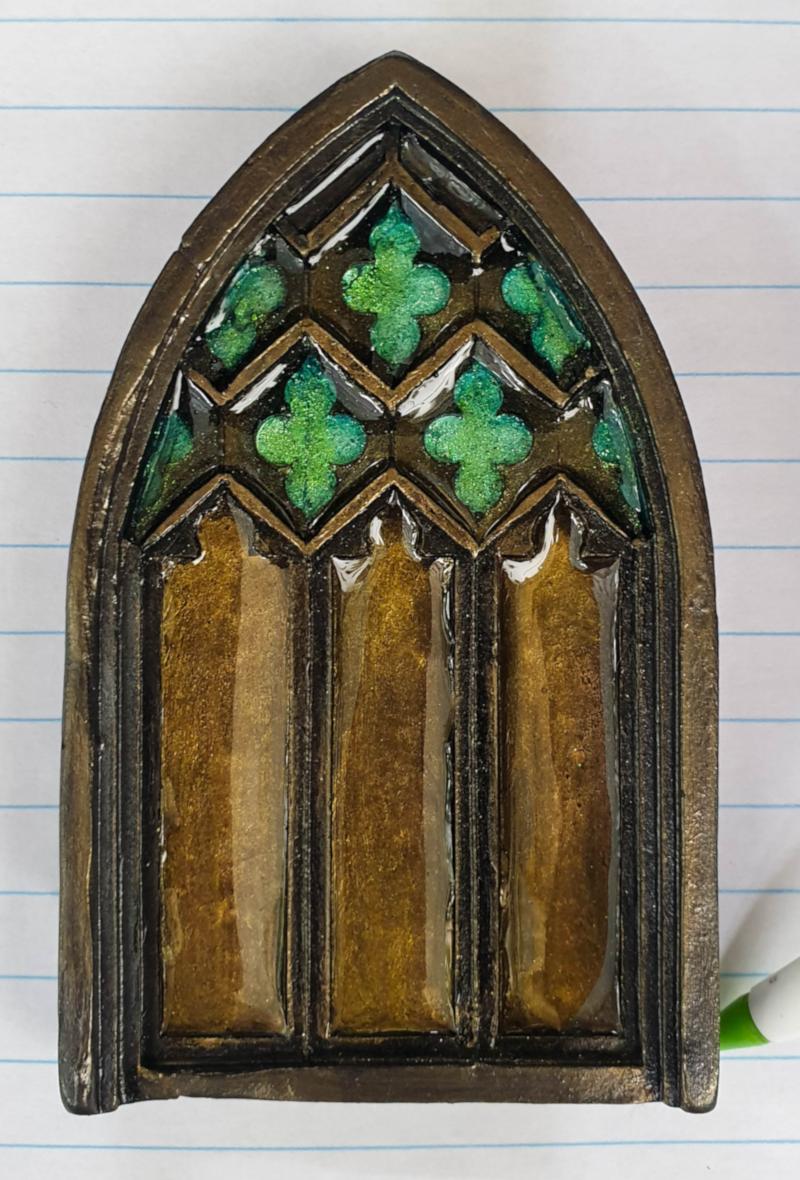
The mold I used has these beautiful little clover‑shapes under an arched top. Just perfect for creating a stained-glass effect with pearlescent paint.
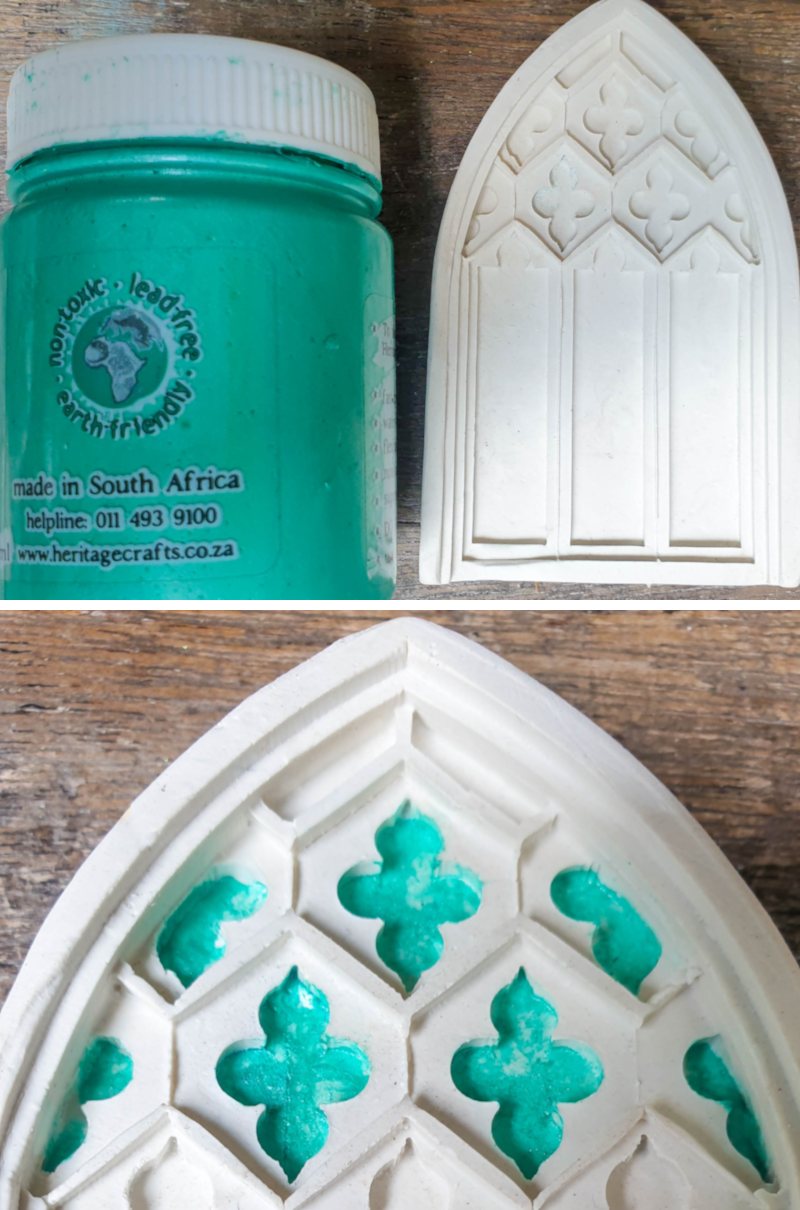
To give it that extra fairy sparkle, I added a little mica powder in the clover shapes.
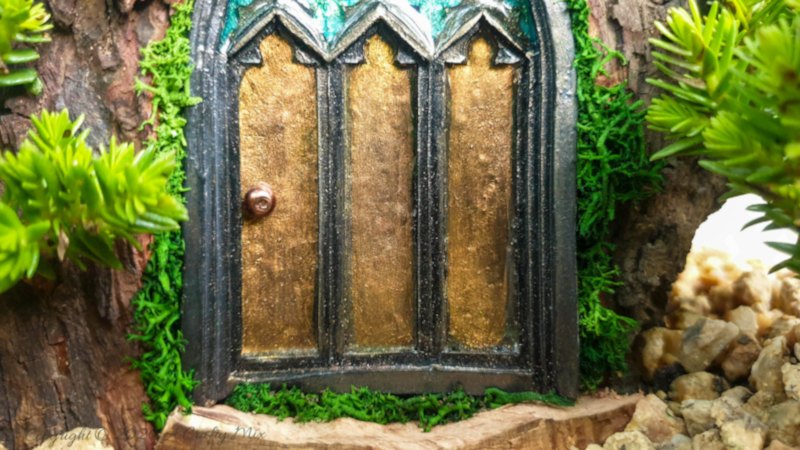
The lower panels on the medieval door got a lick of antique gold paint, while the frame is dark brown. Do what makes you and your fairies happy. Leave the paint to dry completely.

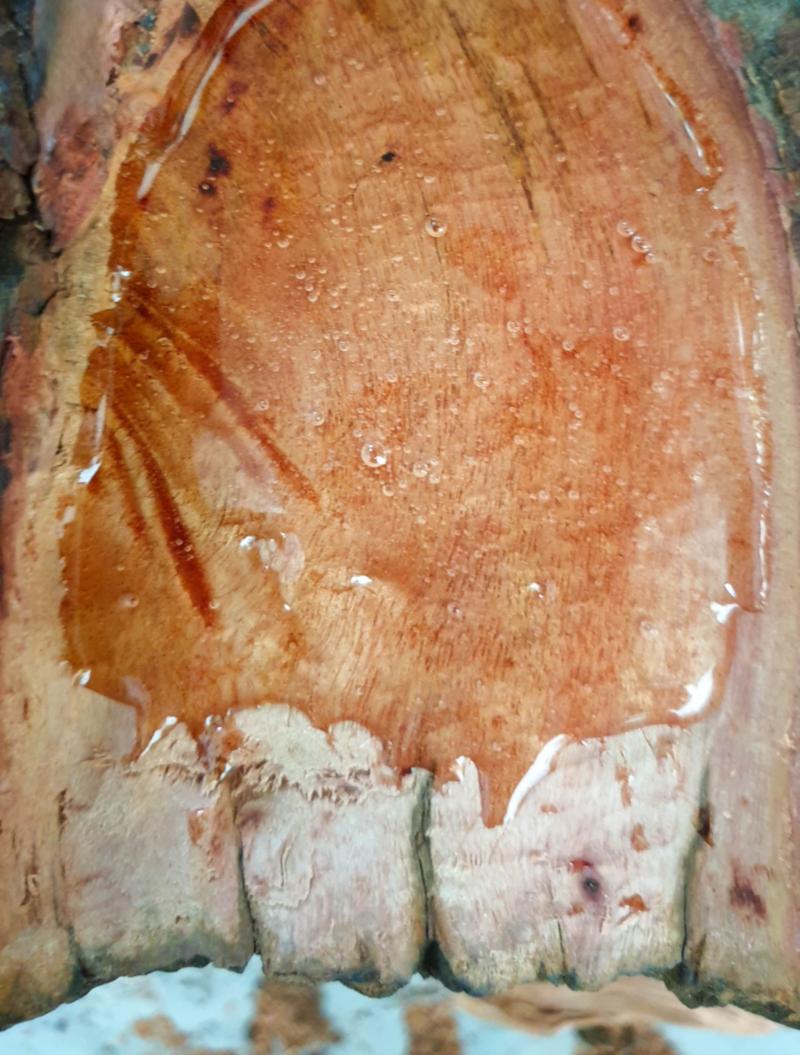
To finish off the stained-glass effect pour a little UV resin into the indents and cure under a UV light. Here you need to be a little careful. You don’t want to mess resin on the frame. If you do make an oopsie, clean the resin off with baby wipes before curing.
Okay, so that’s the medieval door done. Excluding baking time, it took me about 20 minutes. Oh, BTW, if you can’t find the right mold and don’t want to play around with resin, have a look at this fairy door with a stained glass window. It uses popsicle sticks and alcohol inks to create a similar effect.
Mounting the door in a tree stump
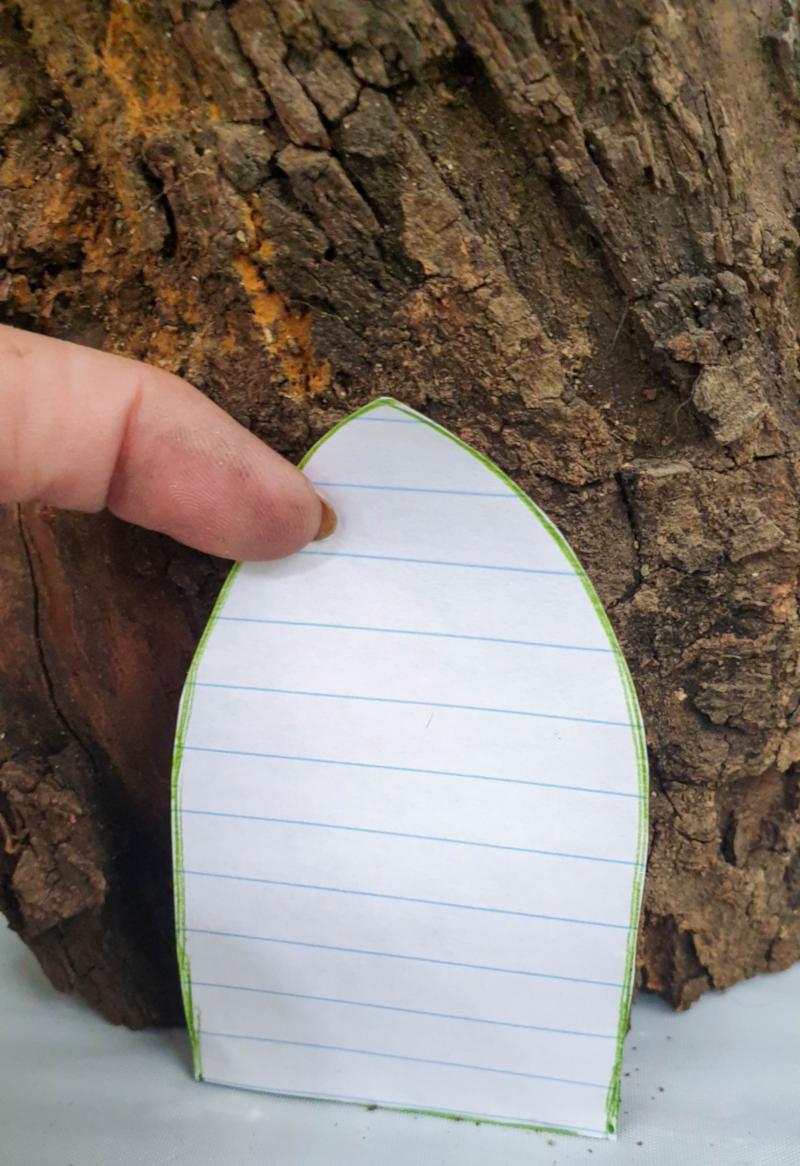
To mount the door in the stump, grab a pen and some paper and trace around the edges.
It should give you a carving template you can use as a guide.
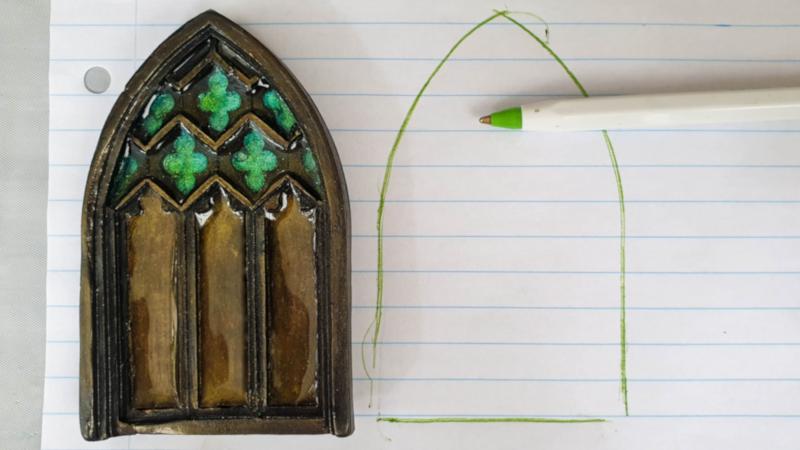
Cut the template out and find the right spot on the tree stump. Look for a flattish, level area.
When it comes to transferring the template, use a sharp craft knife to score around the outline.
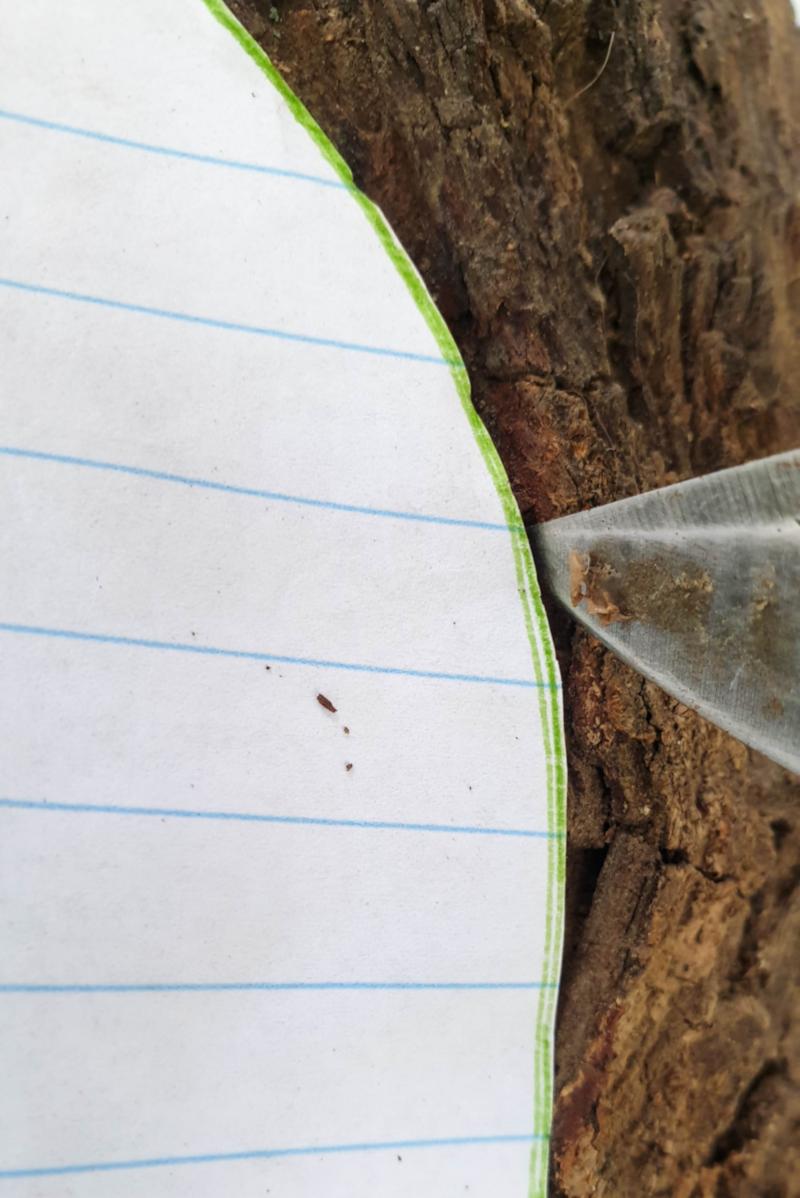
Remove the template and use a small cutter Dremel bit to define and deepen the outline.

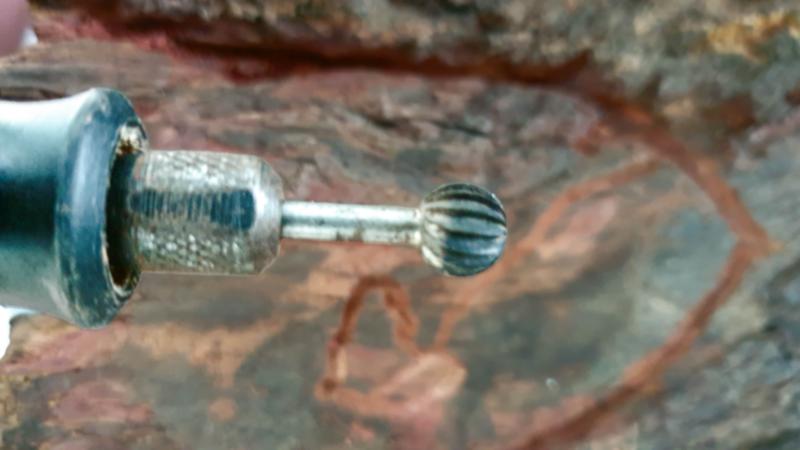
Switch to a ball burr and carve out the inside arch shape. If you’ve never used a Dremel to carve wood, have a look at this miniature sailing boat tutorial where I share a whole bunch of Dremel carving tips.
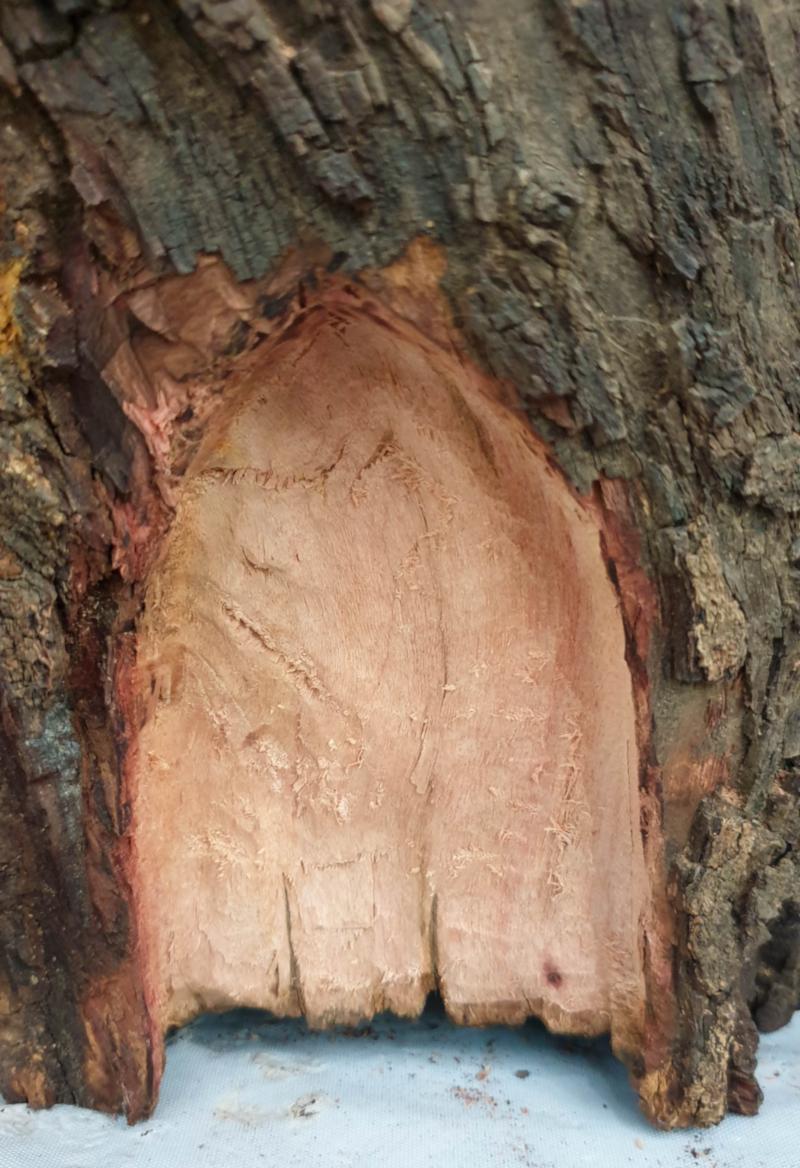
You should end up with something like this – a deep carved out arch.
Fill the carved arch with glue…..
….. and add the medieval fairy door.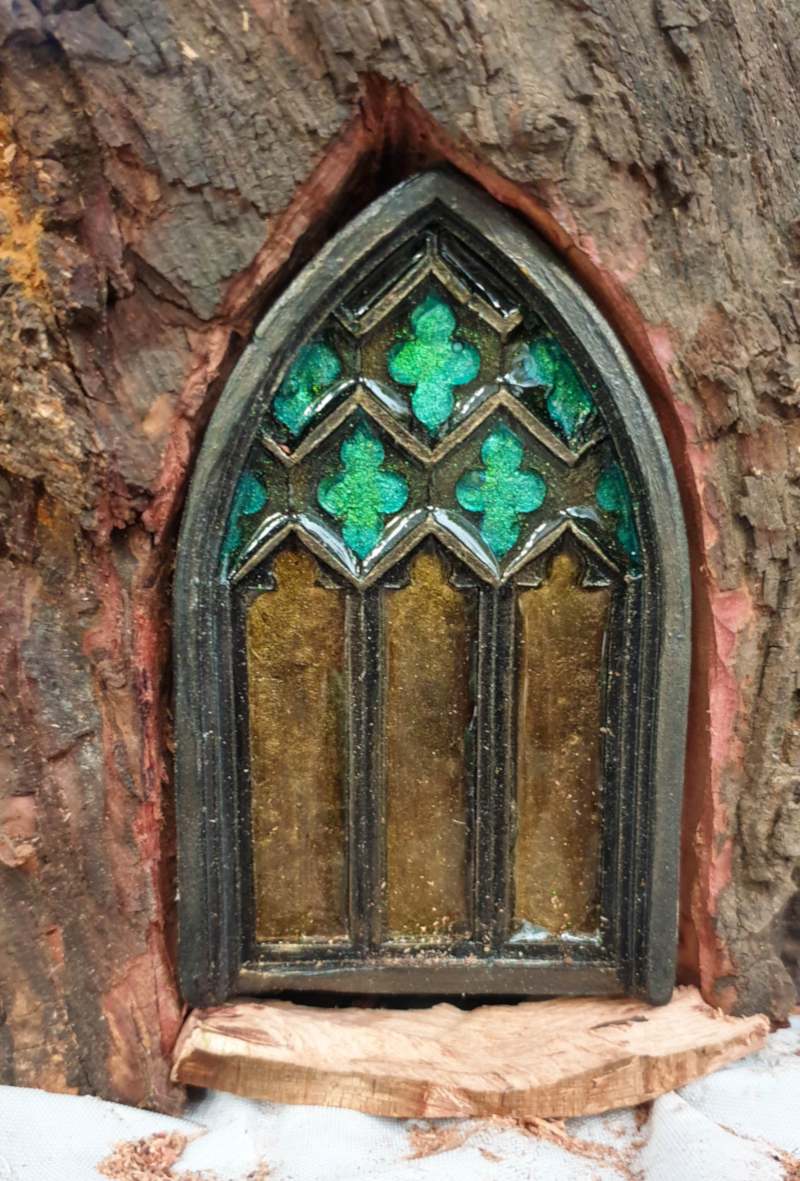
Fill any gaps around the door with moss.
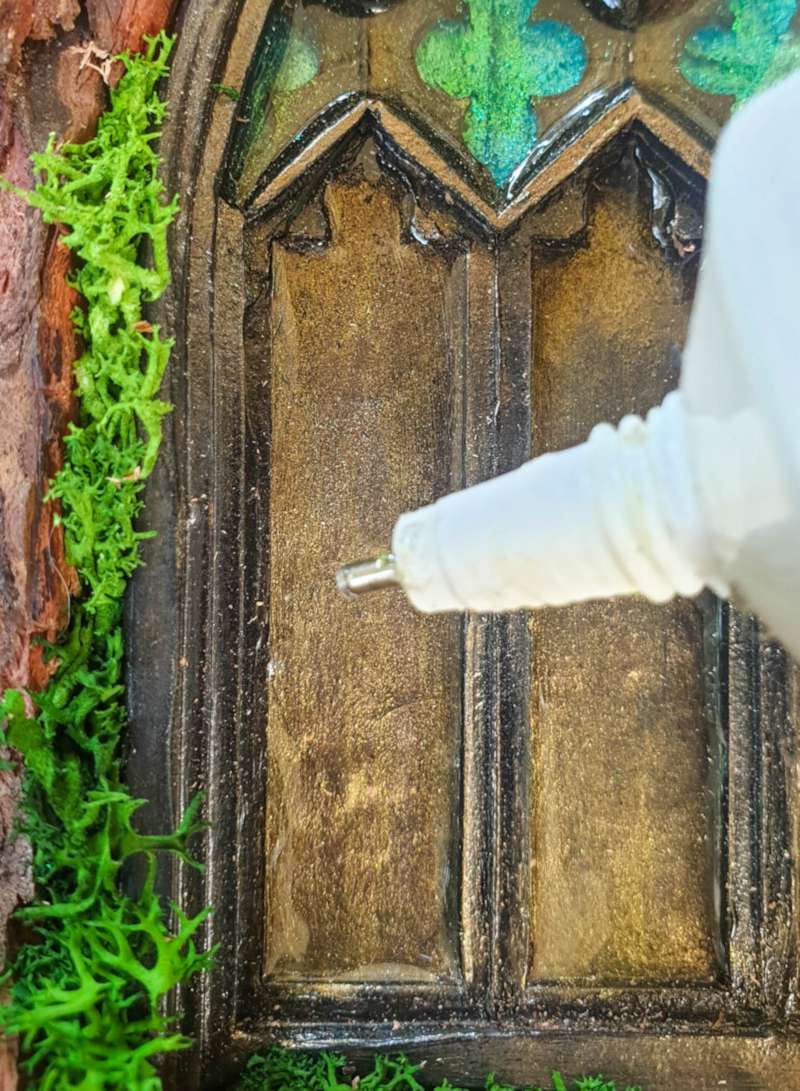
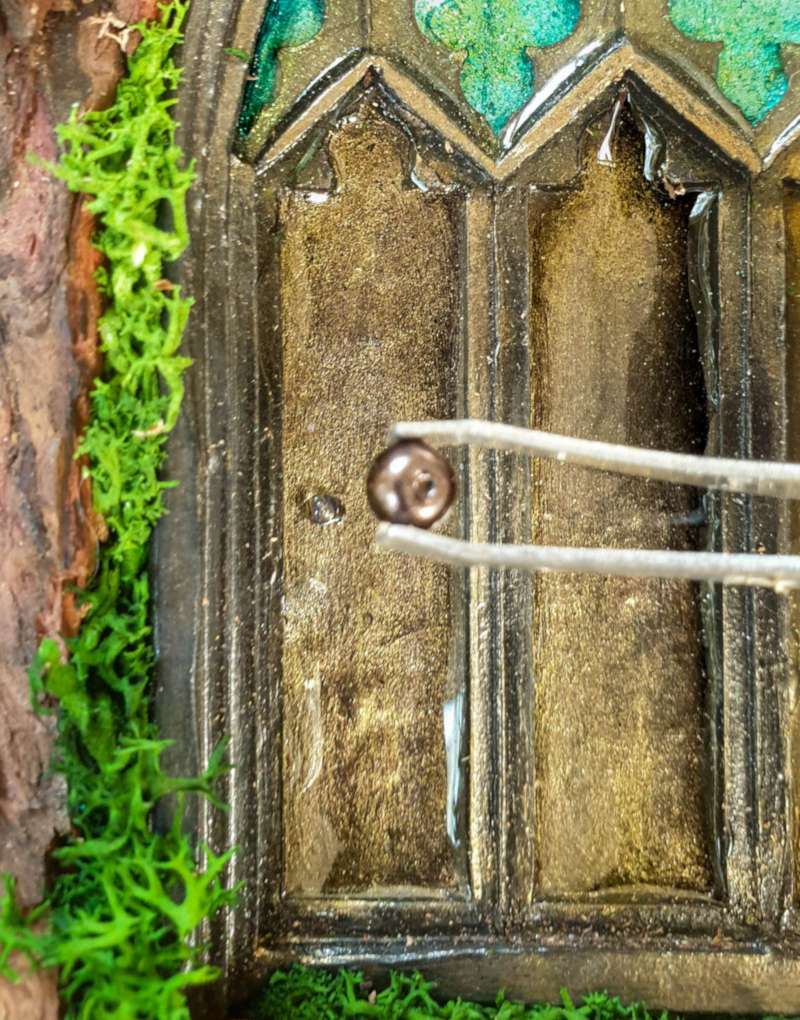
…. and glue on a small bead doorknob.
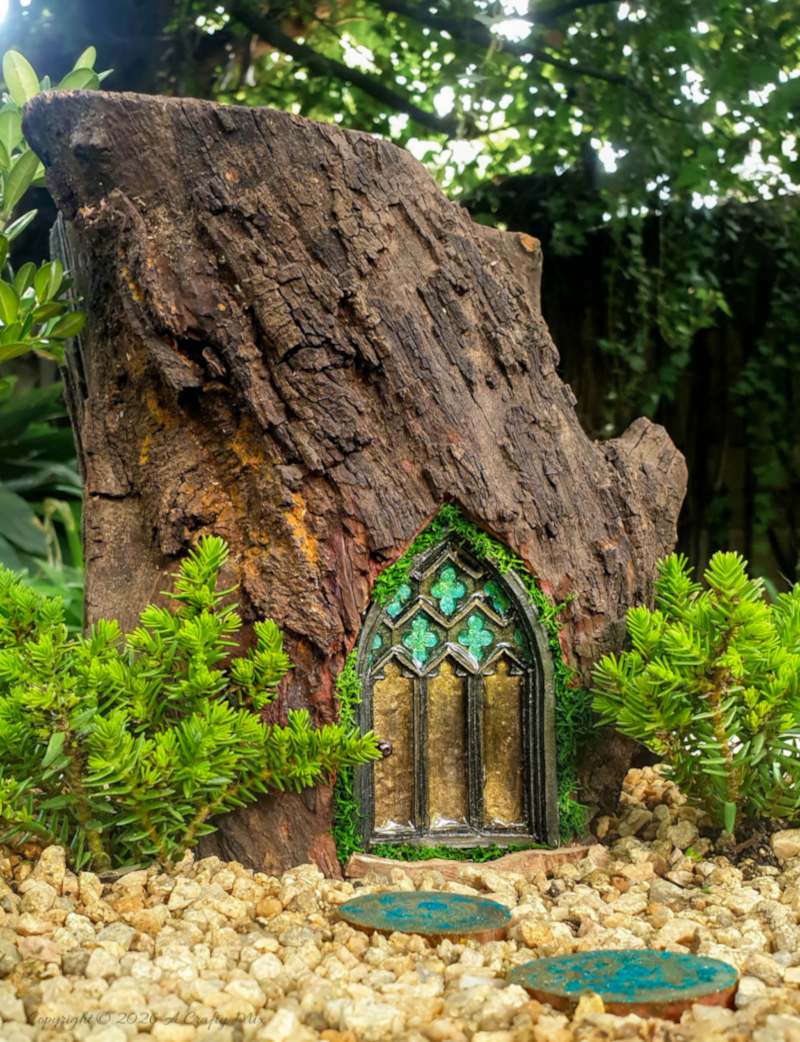
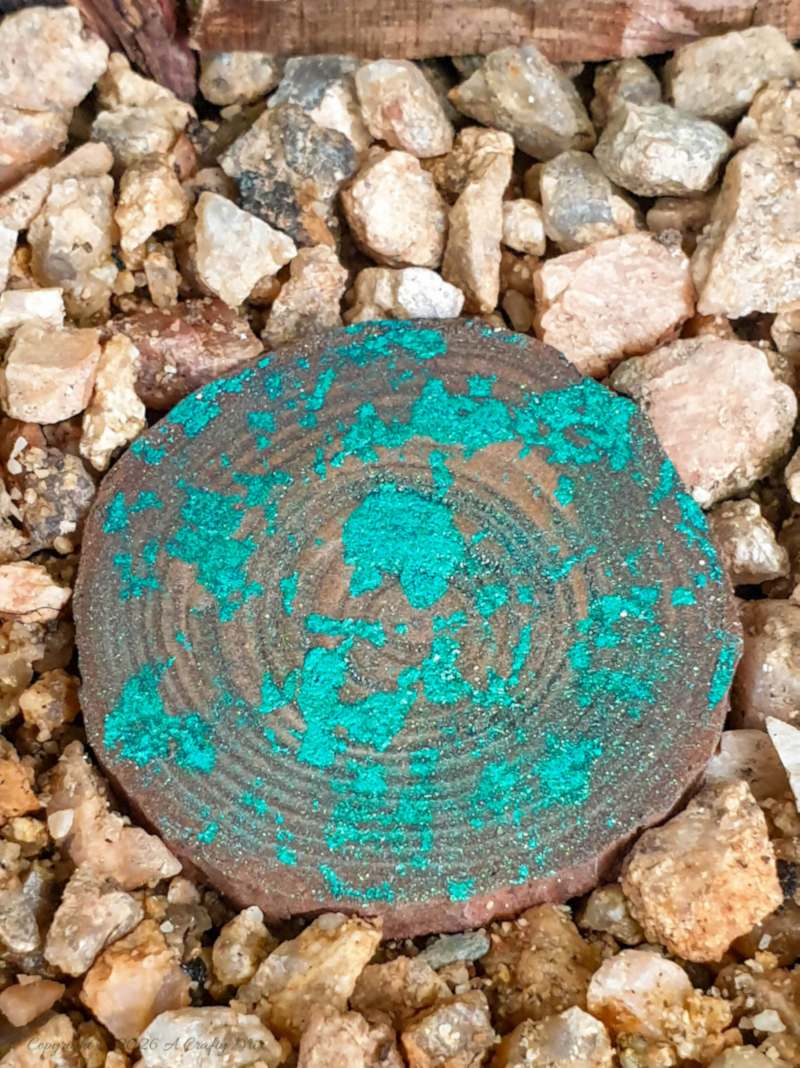
Pop the stump in a planter and add miniature trees, pea gravel and a few steppingstones.
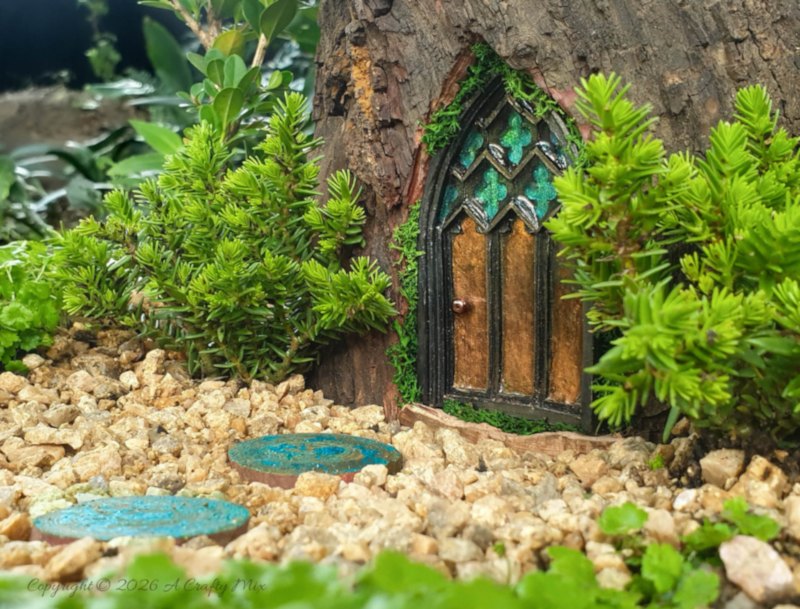
The stepping stones are wood slices decorated with paint splatters and a dusting of mica powder.
And that’s it. I’m so happy with how the medieval fairy door turned out. What do you think?
Oh and I promised I’d share a few no-crave, no-stump ideas too.
No tree stump? No problem.
Not everyone has an obliging tree stump hanging around the garden, and that’s okay. Fairies don’t mind where their doorway appears. As long as it’s sparkly and magical. Here are a few “no-carve” ideas that will work:
- Add a wire loop before baking the clay and hang the door from a tree or fence.
- Use heavy‑duty outdoor Velcro strips and attach the door onto a brick or paver and hide it somewhere in the garden.
- Glue the door to a branch or a log and pop it inside a planter.
- Drill a hole in the bottom of the medieval fairy door and insert a dowel. Stick it into a garden bed or at the base of a tree and call it a day.
If you like the idea of making a medieval fairy door, don’t forget to pin it for later.
Sharing is caring
Oh, and if you’re looking for some of the things we used, we’ve got you covered. Disclosure: Clicking on the links below, means we may receive a commission from Amazon. But don’t worry it won’t come out of your pocket, and it helps us make more amazing crafts to share with you.


And if you prefer to buy rather than DIY, perhaps these beauties will appeal.


And as always, wishing you a wonderful, crafty week filled with lots of love and laughter. Thank you for popping in for a visit.
