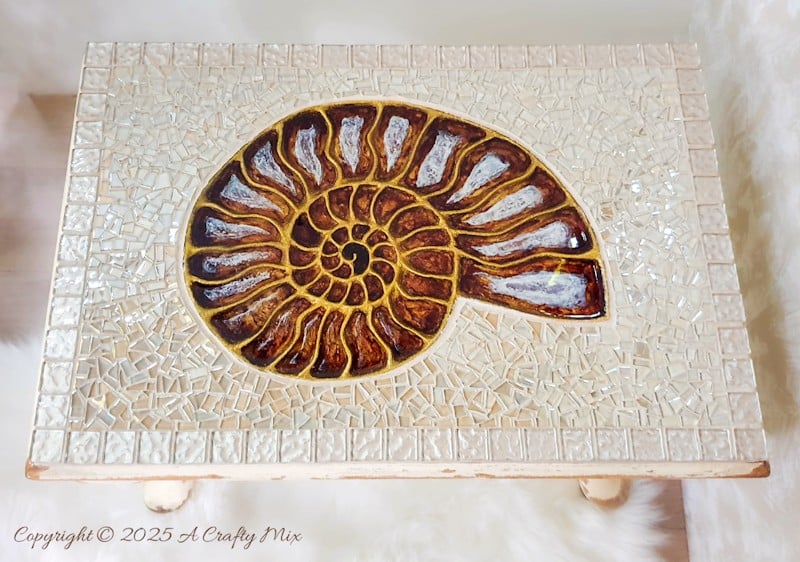
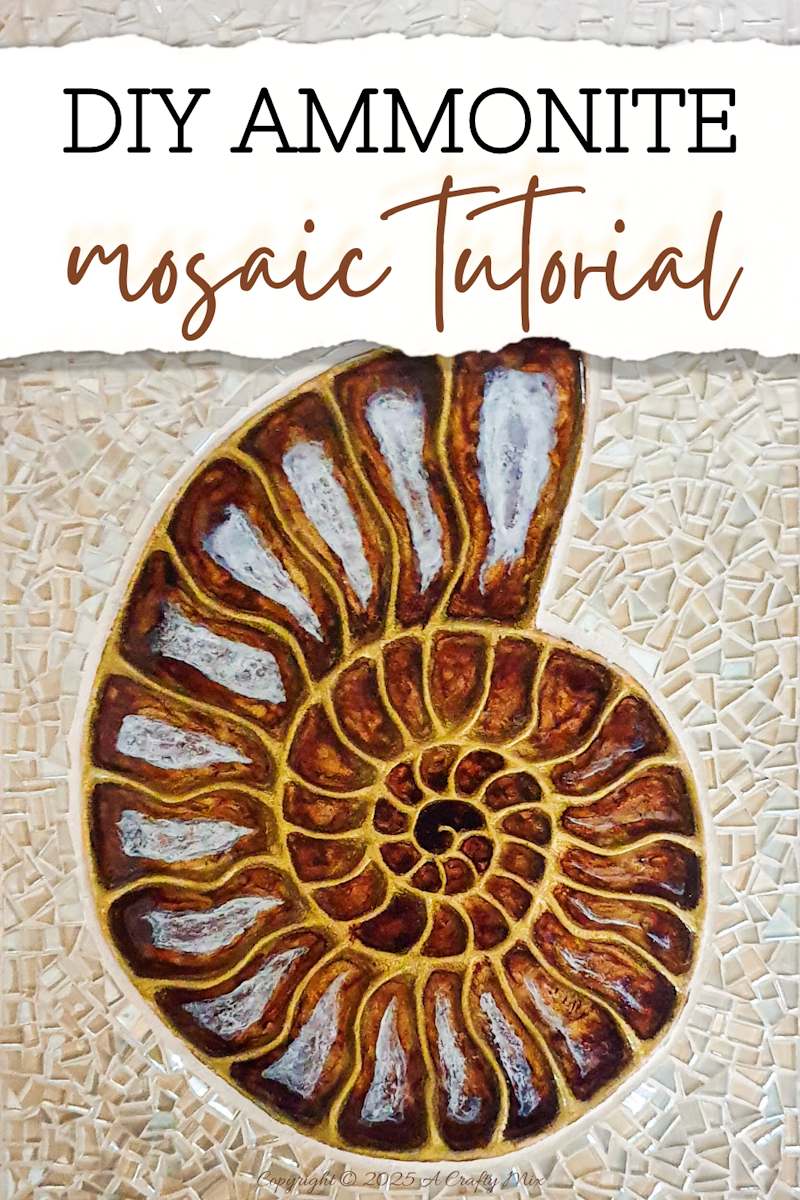
A few weeks back, my BFF asked me if I could help her salvage a small side table her mom inherited from her BFF. The table frame and legs were in pretty good nick, but the top…….. yeah, not so much. In fact, it was pretty messed up, and unless I upped my woodworking abilities beyond my skill level. Which meant I could experiment and do something a little different, like make a big mosaic tabletop with a faux ammonite inlay.
I had absolutely no idea if I could pull it off, but my BFF just said, “Go for it, I trust you”!!
So, I did, and I had a ball making this beauty.
There were a few stressful moments when I thought, “What have I gotten myself into?” Don’t get me wrong, the mosaic portion was easy and took ½ day to do.

The ammonite inlay was another story. That bit I had to figure out and say a little prayer every step of the way that I didn’t mess it up.
So, to save you the hassle, I thought I’d share a tutorial on how I made this gorgeous mosaic with ammonite inlay. Buckle up, because it’s a long one. But before we get there, follow us on Facebook, Twitter, Pinterest, or Instagram. And don’t forget to subscribe so you’ll never miss a post!
What you need
Ammonite inlay
- Resin (2-part and/or UV)
- Cardboard backing Legal Pads
- Texture paste
- B6000 Glue
- White and brown alcohol ink
- Craft paint
Mosaic background
- MDF board or suitable substrate
- Mosaic tiles
- Grout
- Glue
- Texture paste or tile adhesive
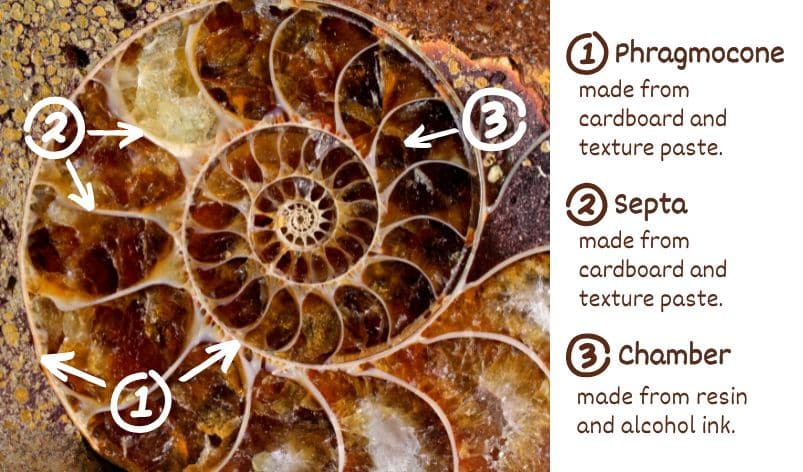
The “anatomy” of the ammonite inlay
Before we get into the ammonite inlay tutorial, it’s probably a good idea to unpack the basic anatomy of these ancient creatures. I’ve added notes to help you visualize what I used.
How to make a mosaic with an ammonite inlay
This tutorial isn’t about saving tabletops or making mosaics. They’re just the background for the ammonite. So, I’ll whizz through those bits and spend more time explaining how I made the large ammonite inlay. If you need help or tips to do a mosaic, there are a whole bunch of tutorials on the blog that will show you how.
Beginner mosaic tutorial here or making mixed media mosaics here.
You can make the ammonite inlay on any flat surface or substrate.
Prepping the tabletop
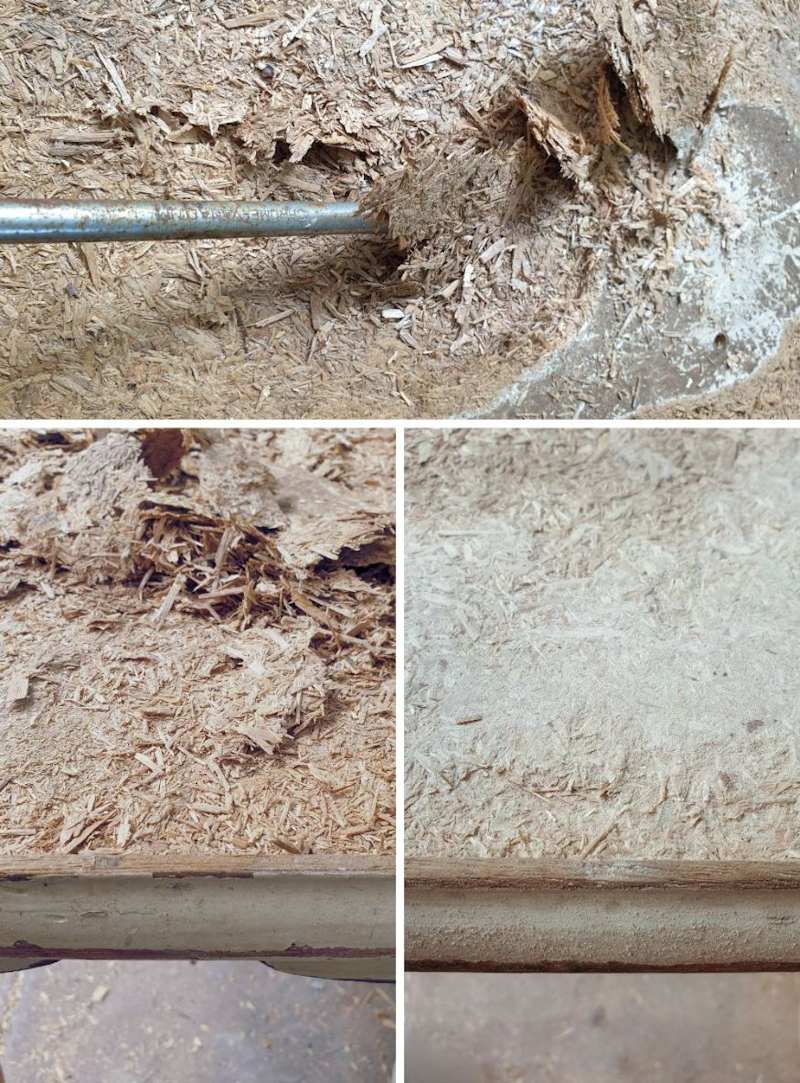
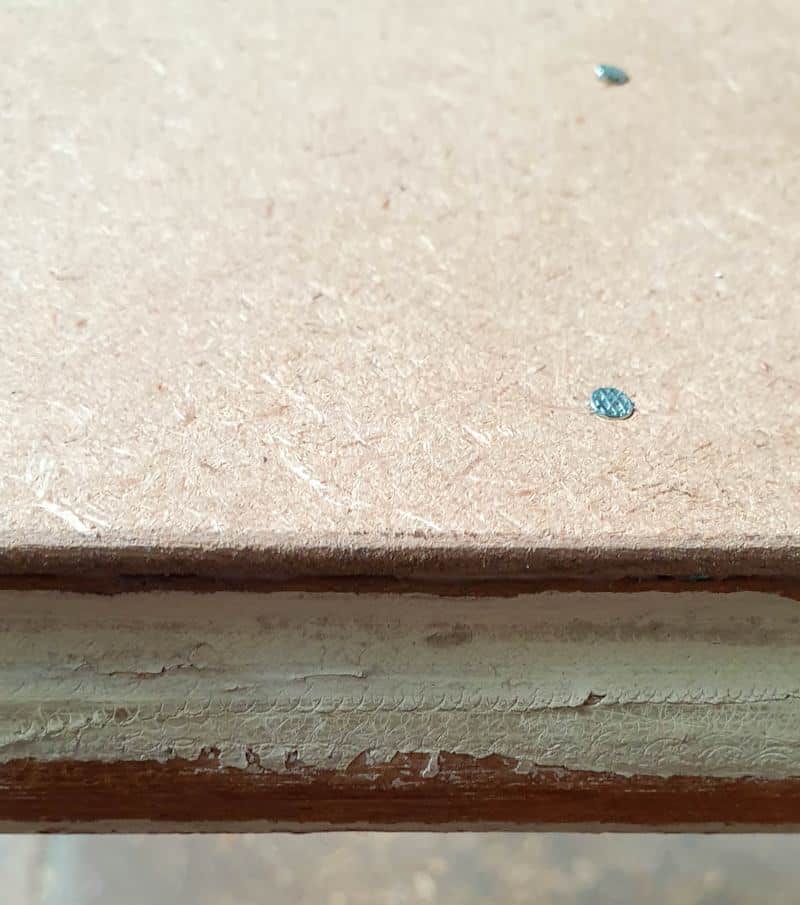
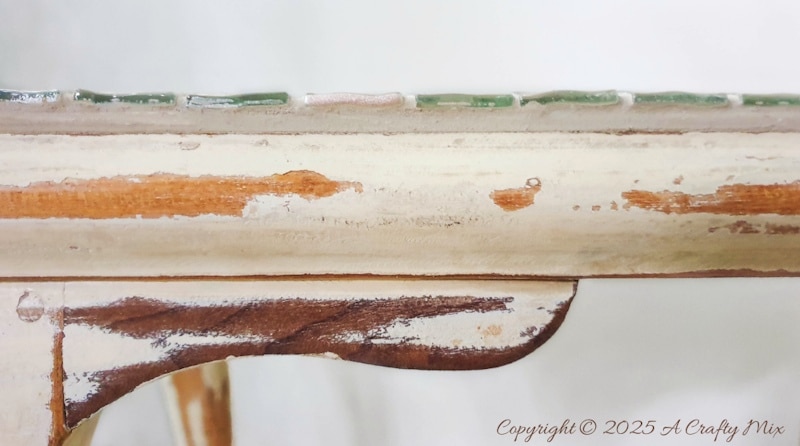
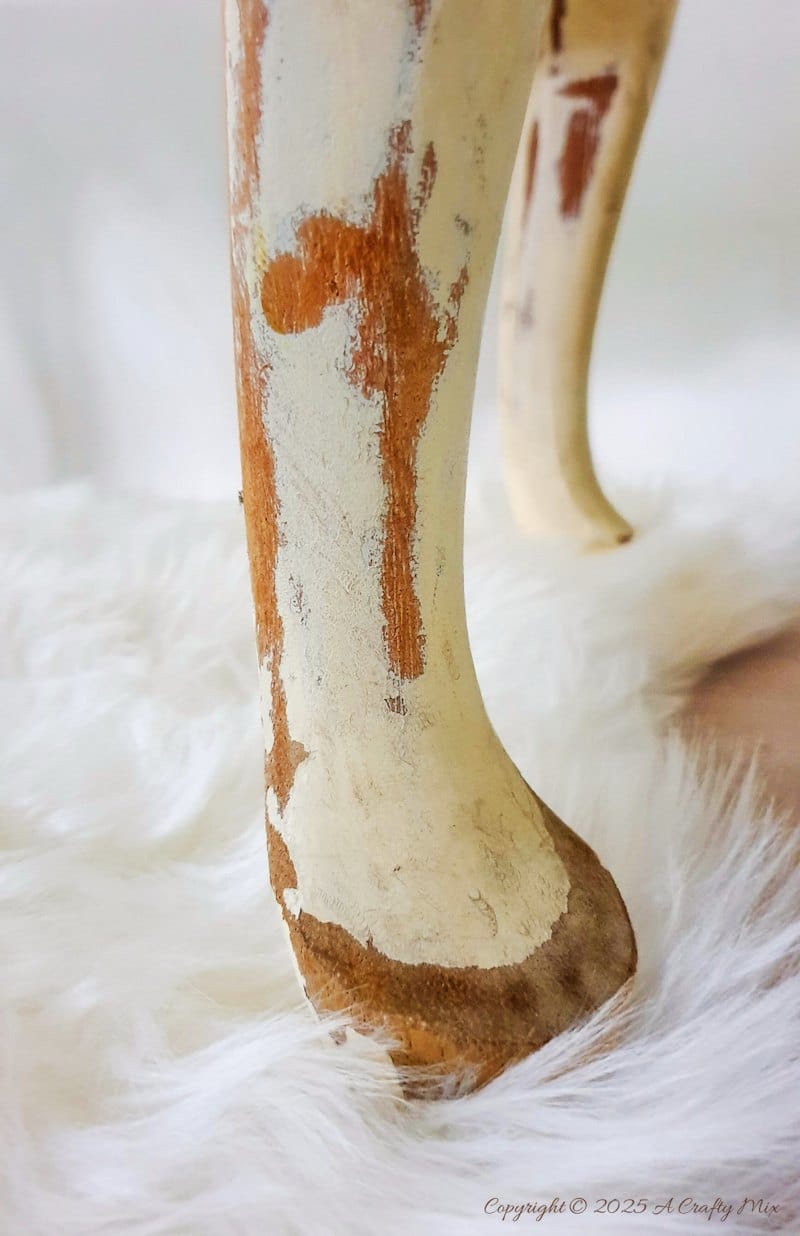
This is what the tabletop looked like before. Someone had left this poor baby out in the rain (I think), which is never a good look for particle board. There wasn’t a flat, level surface in sight. And while I enjoy mosaicking on a curved surface, it won’t work as a tabletop.
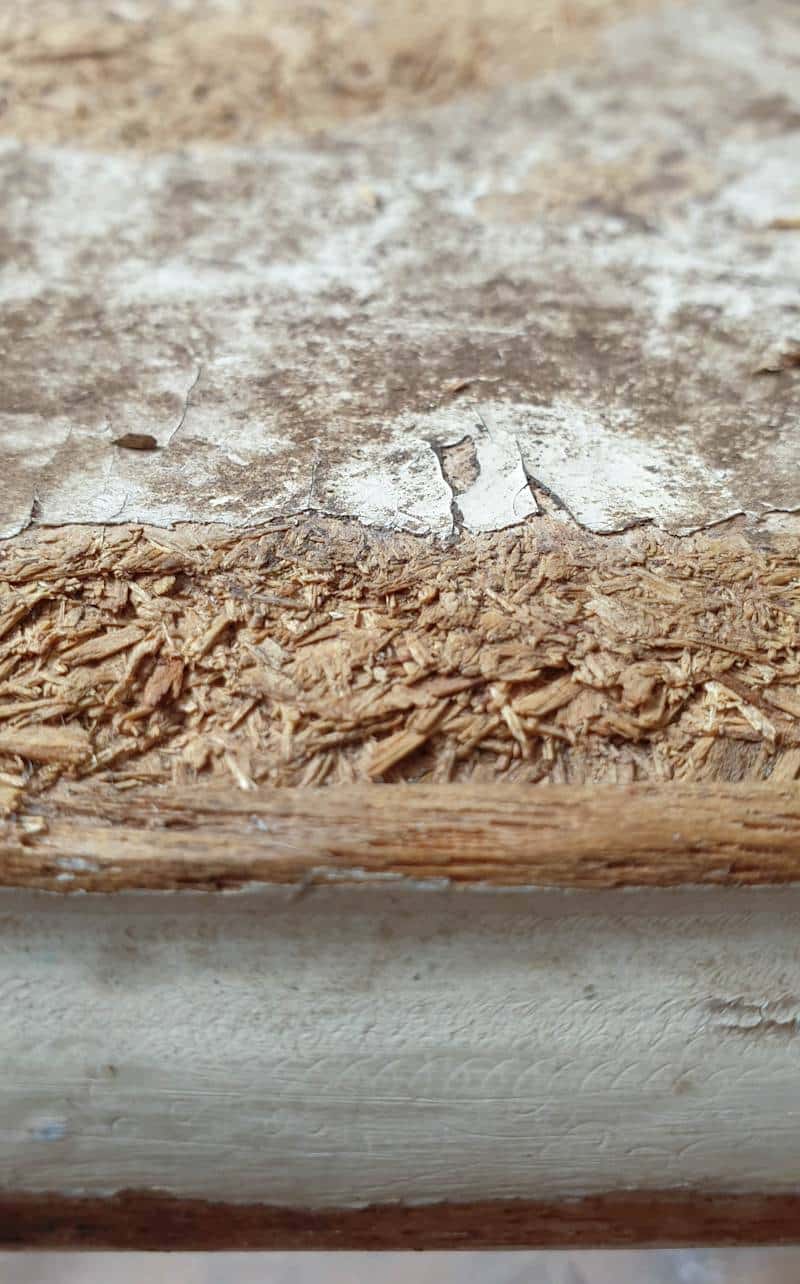
I did try to flatten things out with a lot of scraping, chiseling, and sanding, but to no avail.
I finally gave up and cut a piece of MDF to size and glued it on top of that mess.
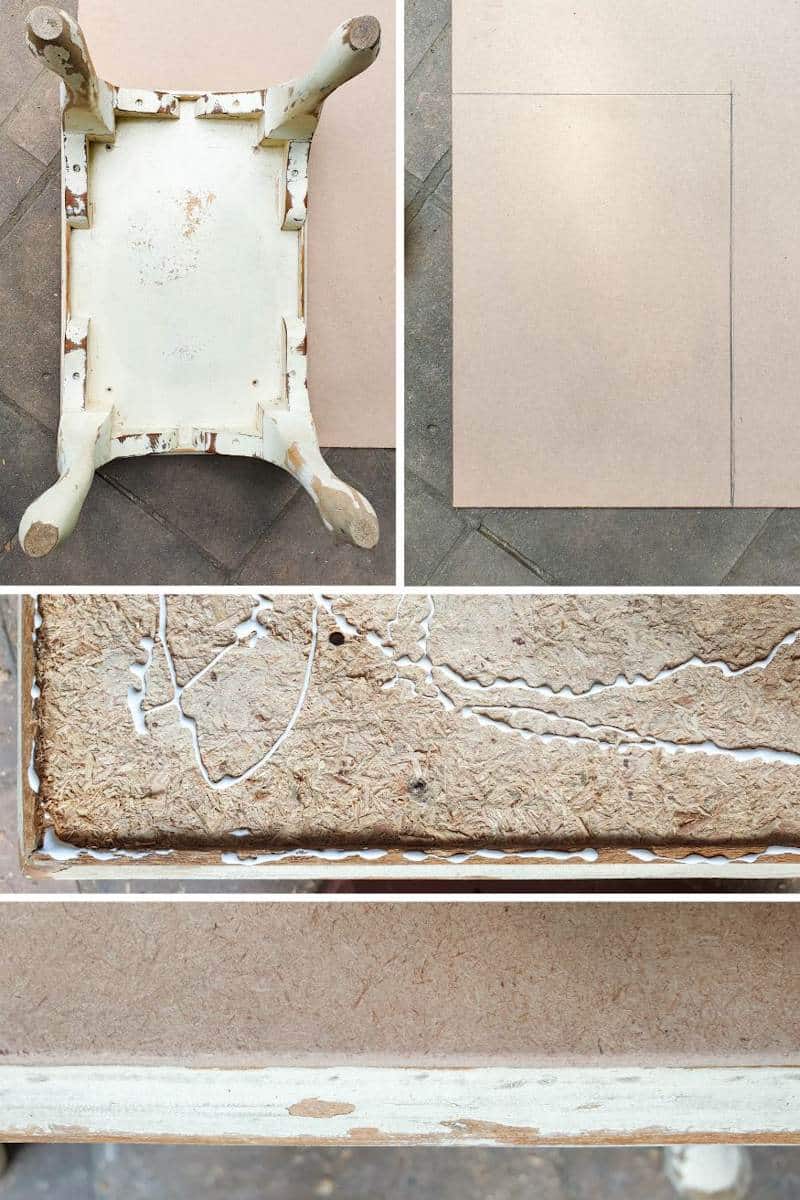
Oh, and I may have hammered in a few nails, just to be on the safe side.
The new flat tabletop got a quick lick of paint to seal it. In my experience, epoxy resin doesn’t bond well with raw MDF.

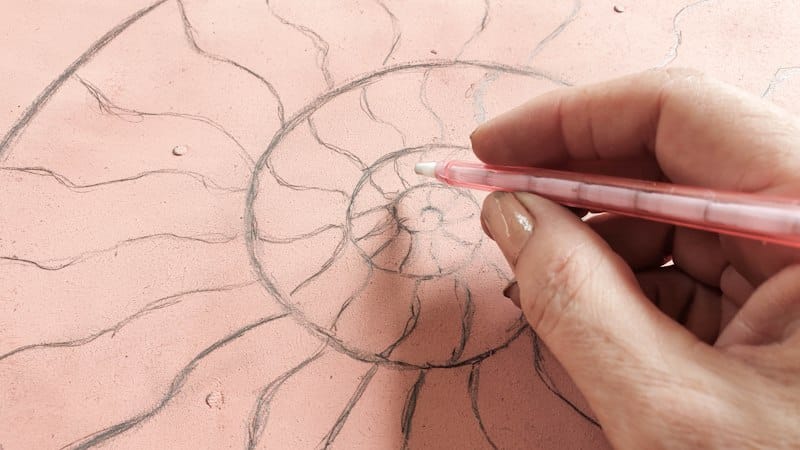
Once the paint dried fully, I transferred an ammonite image onto the top.
And taped off the legs and frame to protect them from what was coming next.
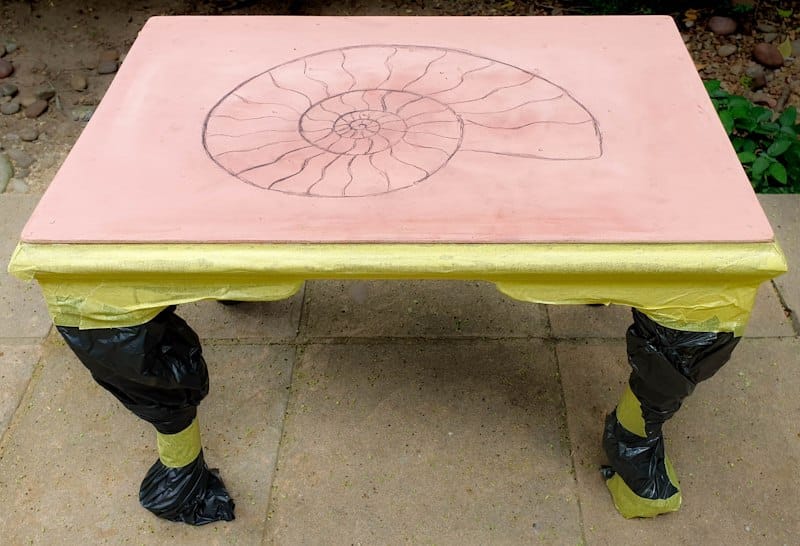
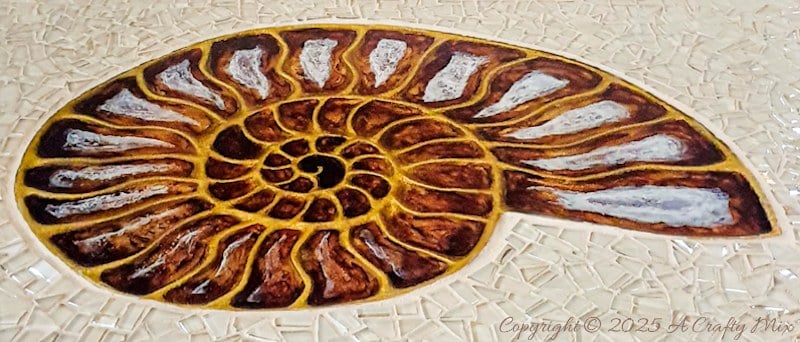
Making the ammonite inlay
Initially, I thought I’d paint the ammonite inlay and then add some resin over the top.
That changed when I realized those “just to be on the safe side” nails were not playing along.

Time for a rethink, which involved the cardboard backing from a legal pad and texture paste. I cut the cardboard into long 5mm strips.
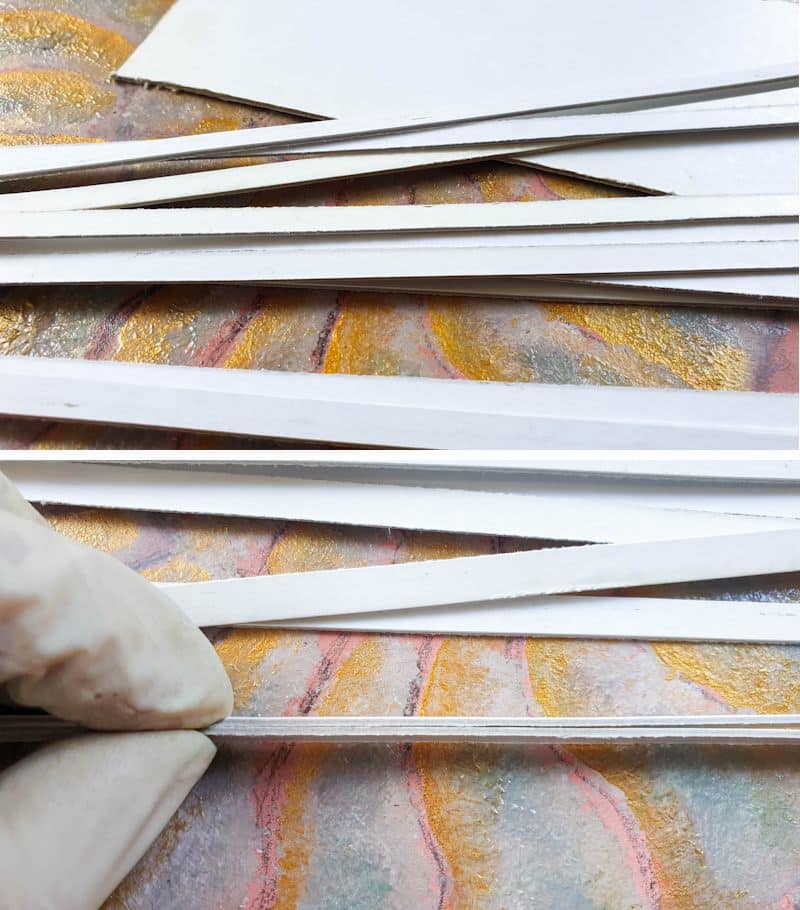
There was only one problem, though. The strips needed to be thicker and longer to go all the way around the ammonite. Easy enough to solve. Just glue them together and overlap the edges as shown below.
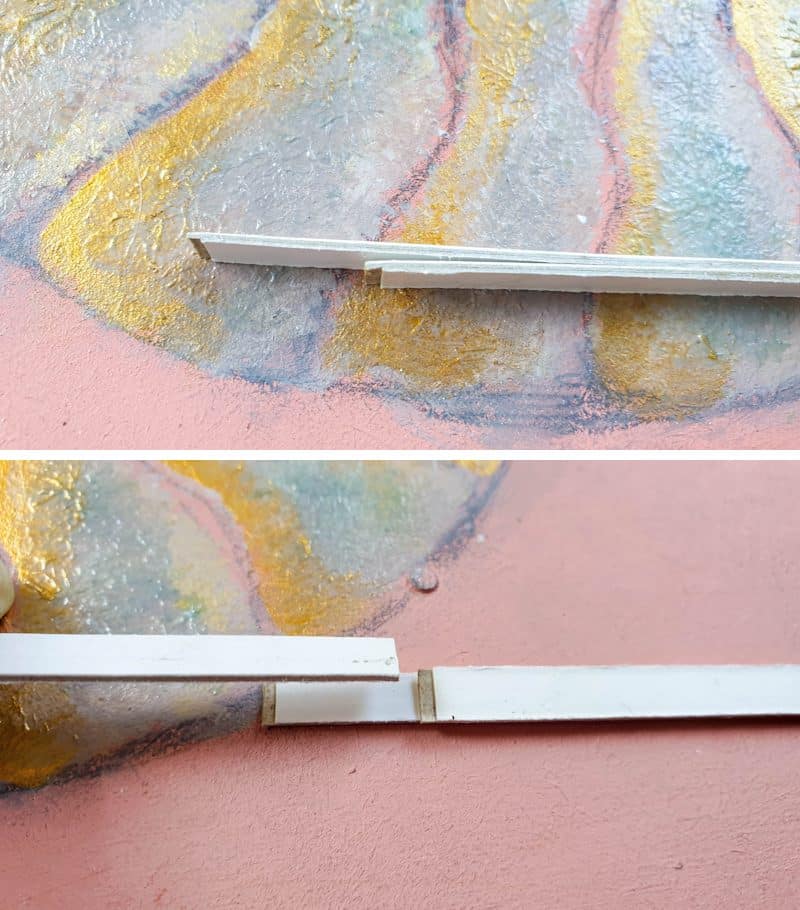
A little masking tape helps reinforce the join.
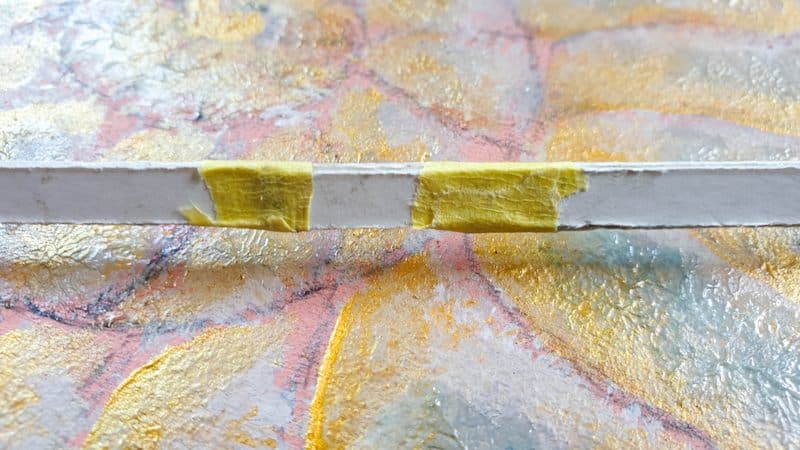
If you have a thin cardboard box, you can use that instead. As long as the cardboard bends to create that distinctive coiled ammonite shape.
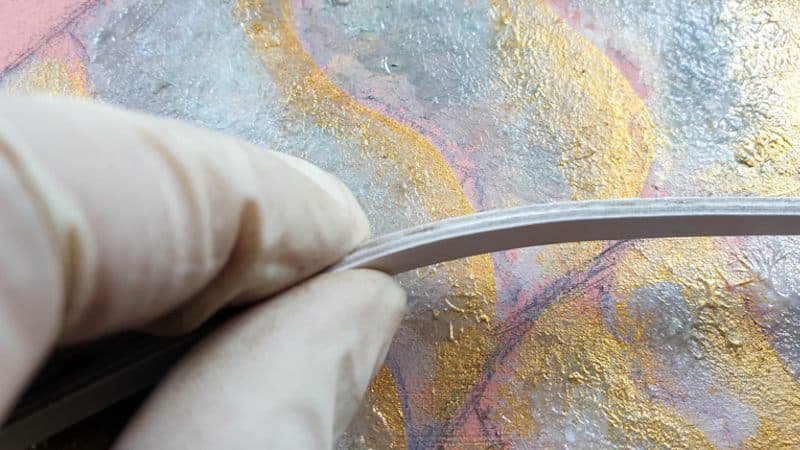
Then all I needed to do was apply B7000 ……
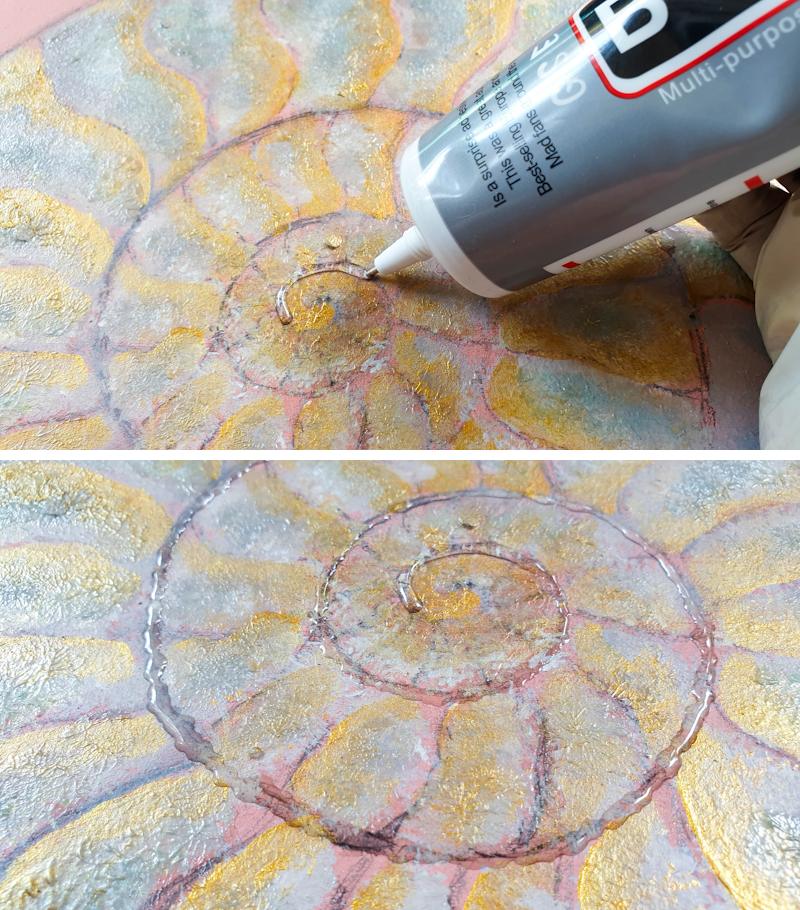
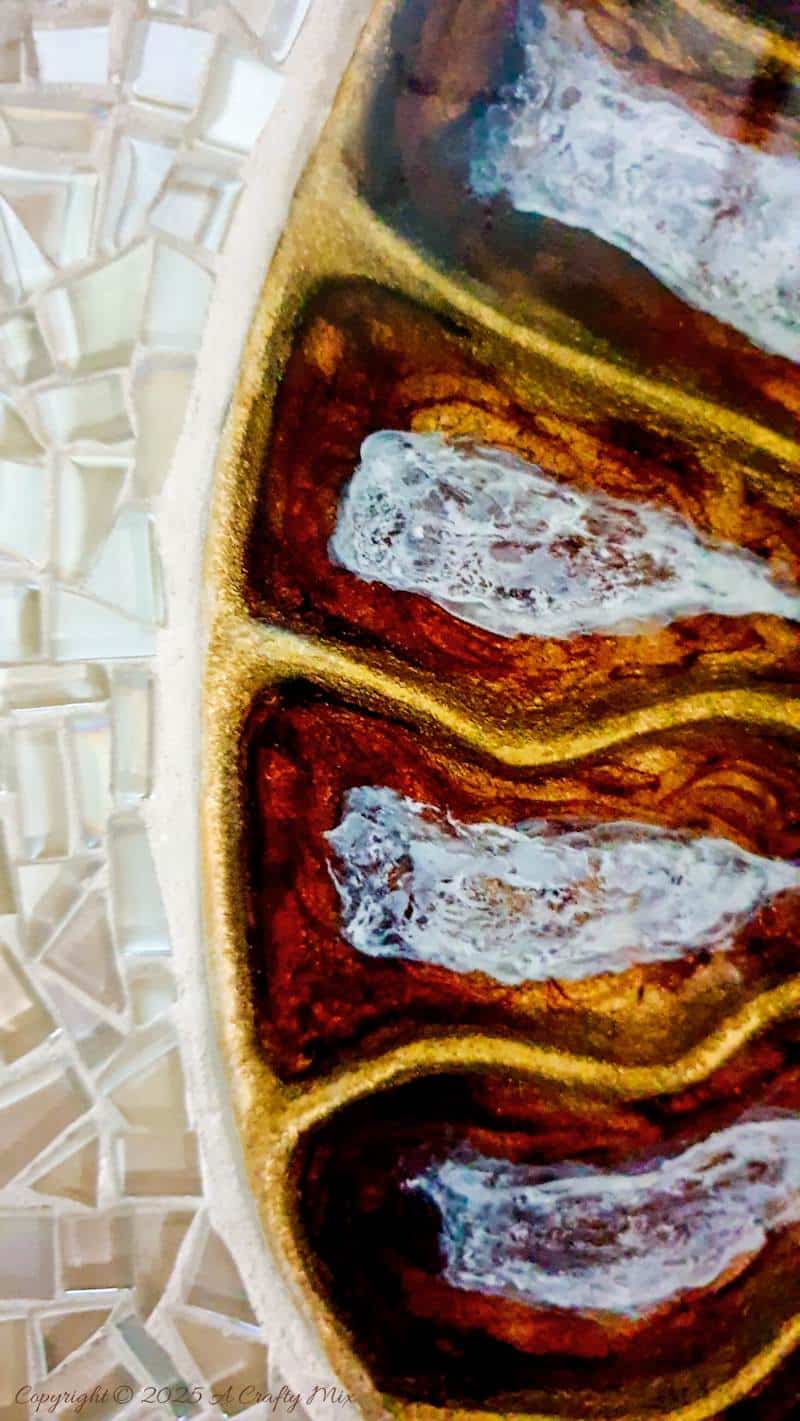
…. And glue the strips down to form the Phragmocone (aka the coiled spiral).

Smaller strips were used to make the septa, or partitions, inside the ammonite shell.
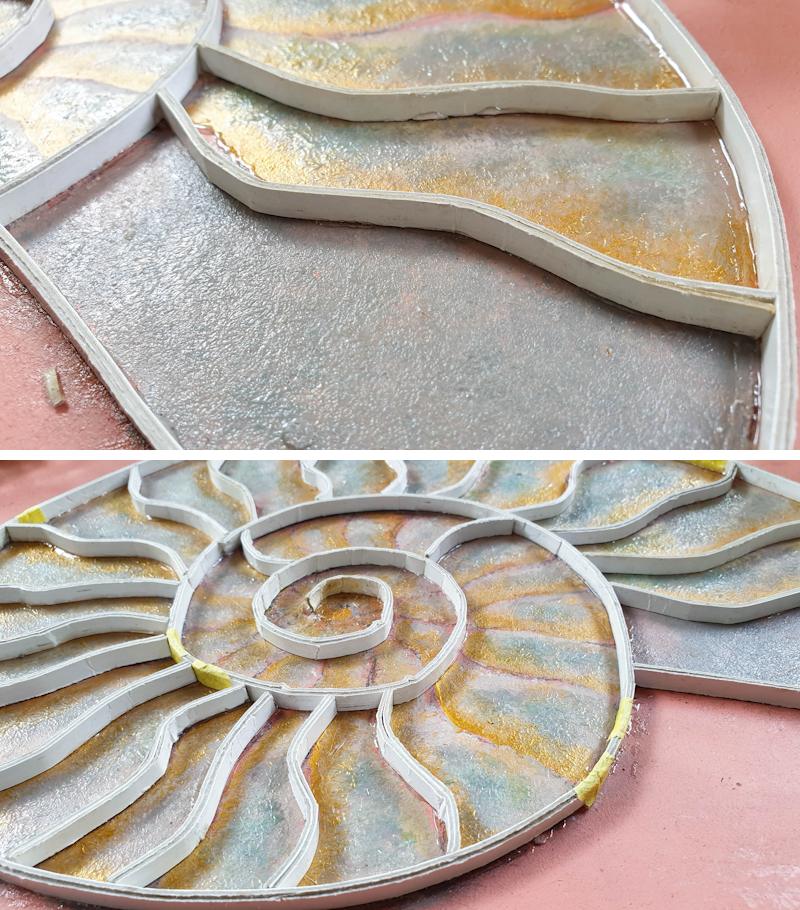
Disguising the cardboard
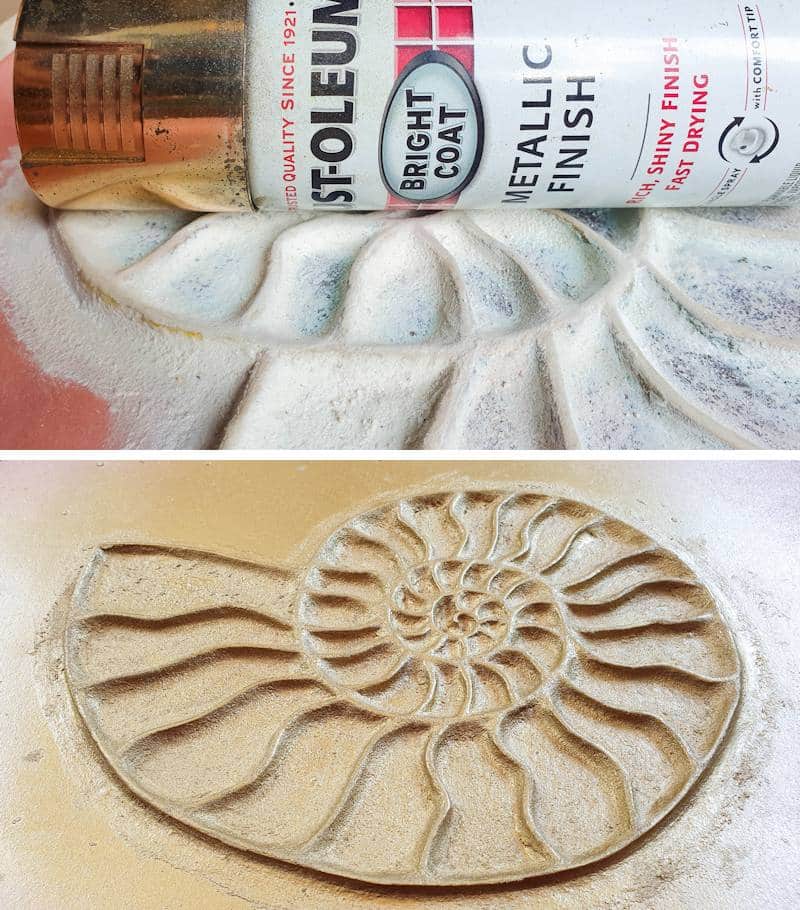
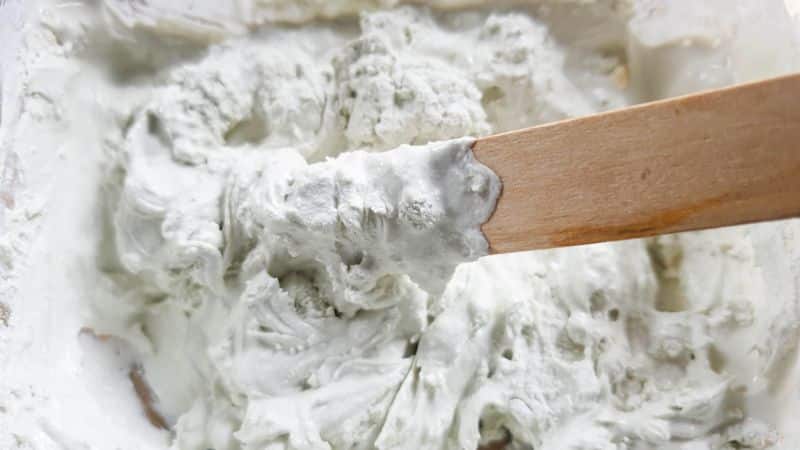
The cardboard backing on a legal pad isn’t very…… um…… pretty, so I needed a way to disguise it. And since I always have a batch of our homemade texture paste floating around, I used that.
For some of the smaller septa (where my fingers were too big to get into the grooves), the back of a pencil or a cuticle pusher did the trick.

See what you have lying around.
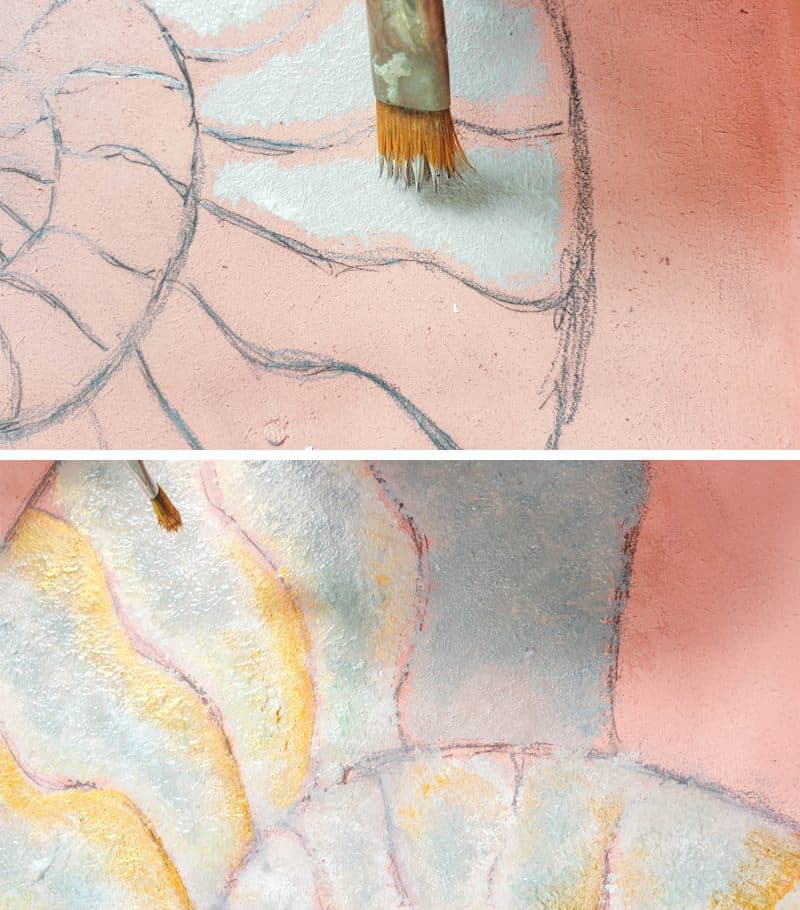
Once the ammonite outlines looked less cardboard-ish, I painted the whole thing gold.
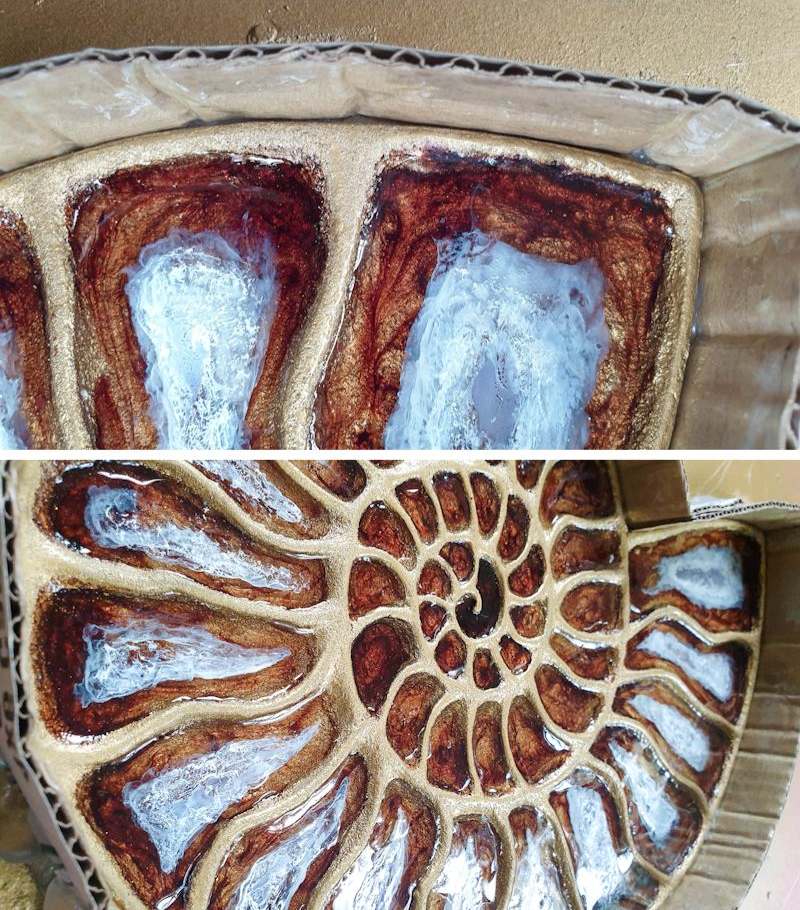
Building out the chambers
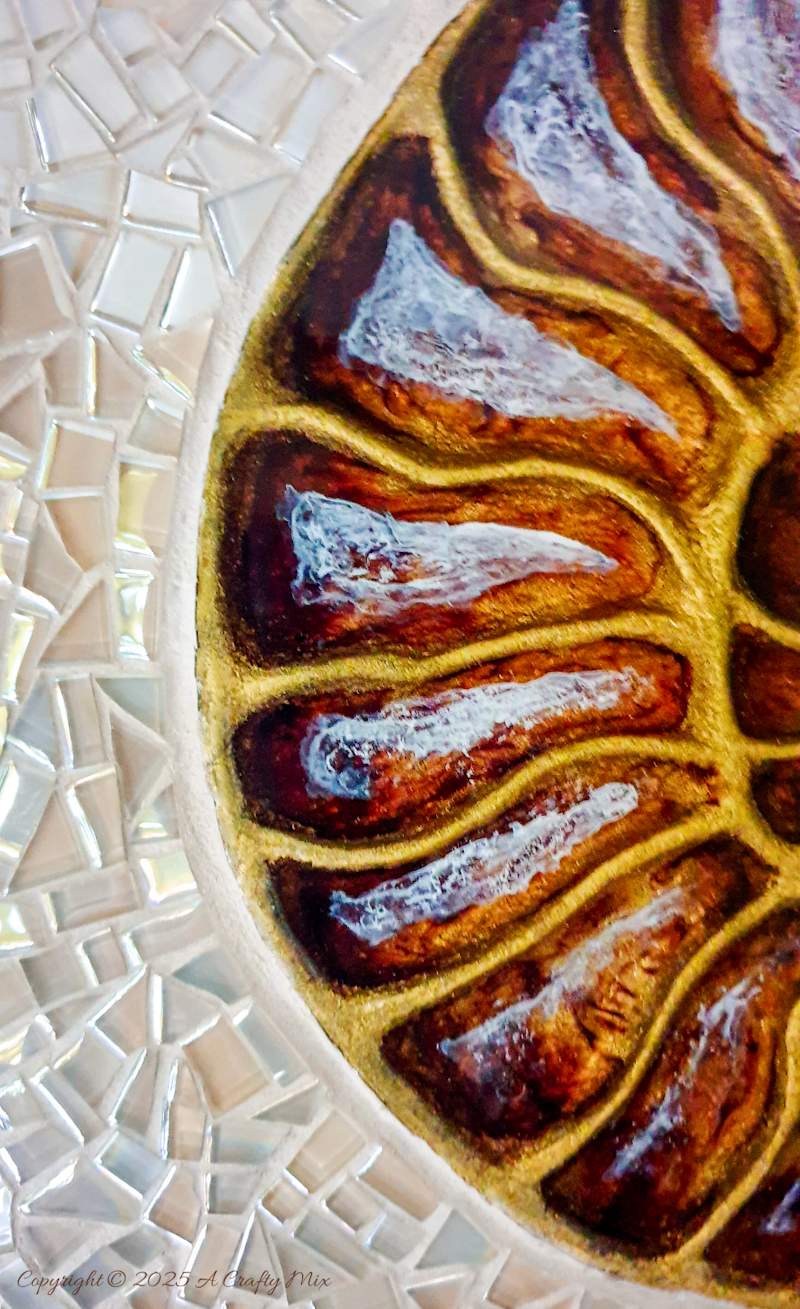
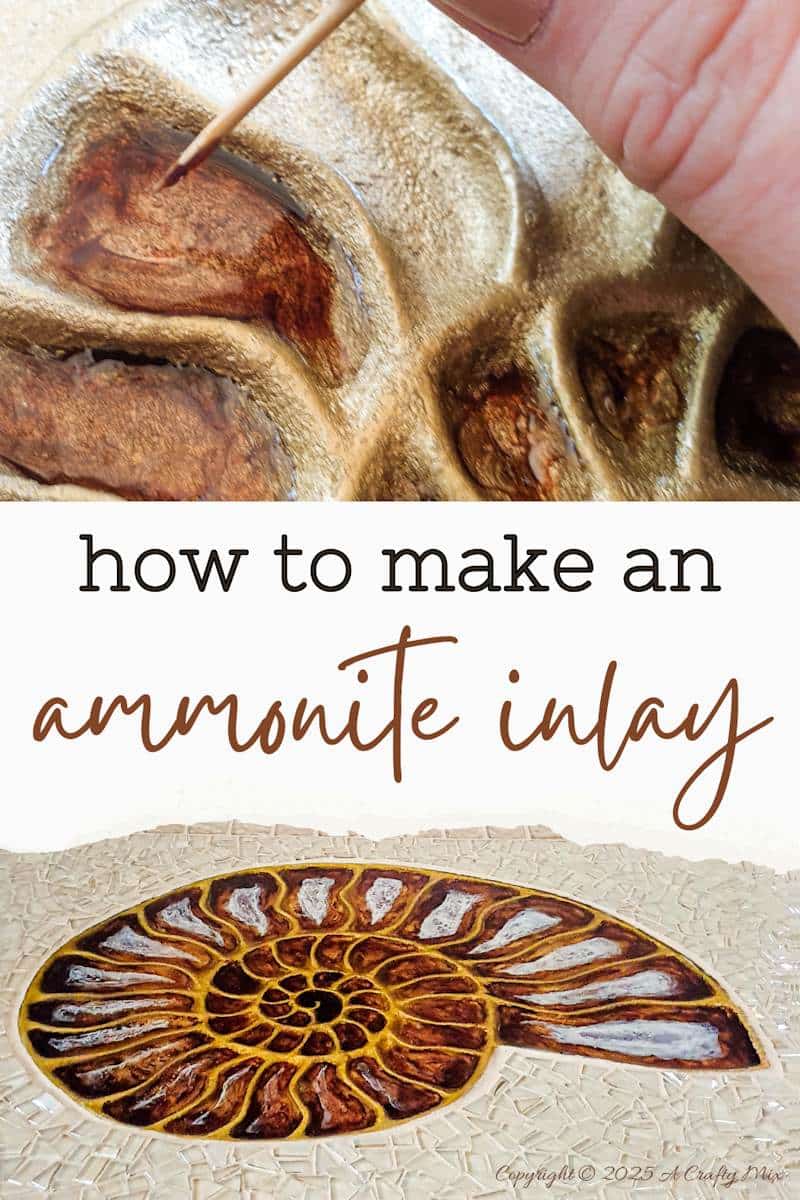
For the ammonite chambers, I used UV resin and clear coat gel nail polish. Since this whole thing was an experiment, I played around with alcohol ink and craft paint to see what kind of effects I could get. To start, I poured UV resin into the chamber. Just enough to cover the bottom and then added a drop (or three) of coffee-colored alcohol ink.
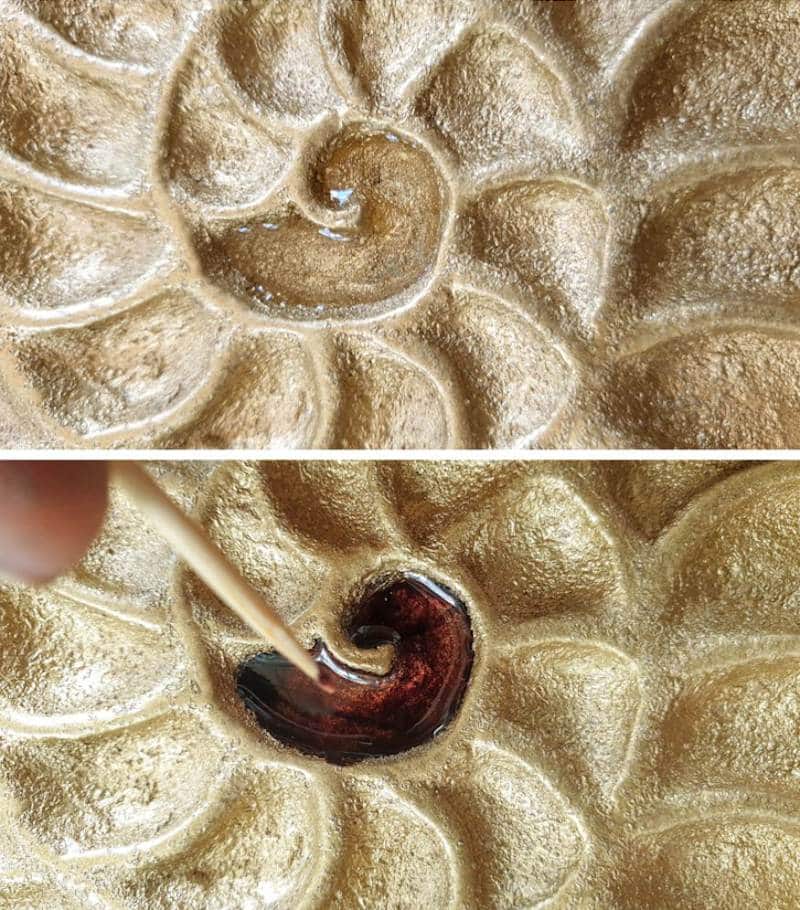
Each chamber was cured for about a minute under a UV light before moving to the next one.

Some chambers have more ink than others. Mother Nature loves being imperfectly perfect, and I wanted to mimic that.
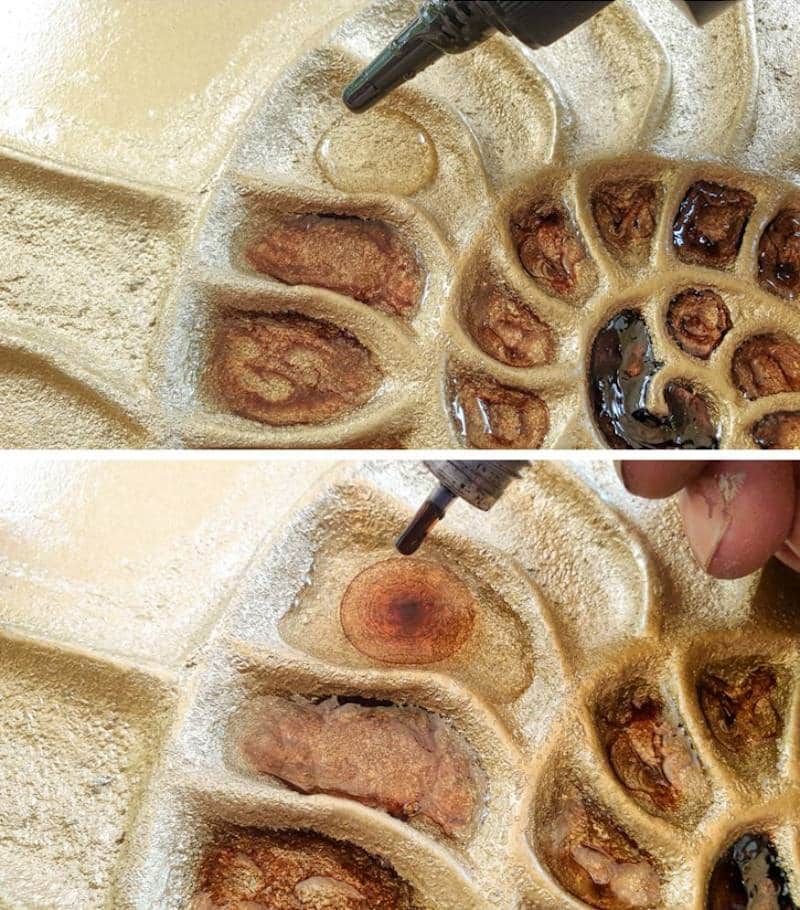
You can create interesting patterns and effects by swirling the alcohol ink with a toothpick.
I took my time with each chamber and cured as I went along.
Looking good.
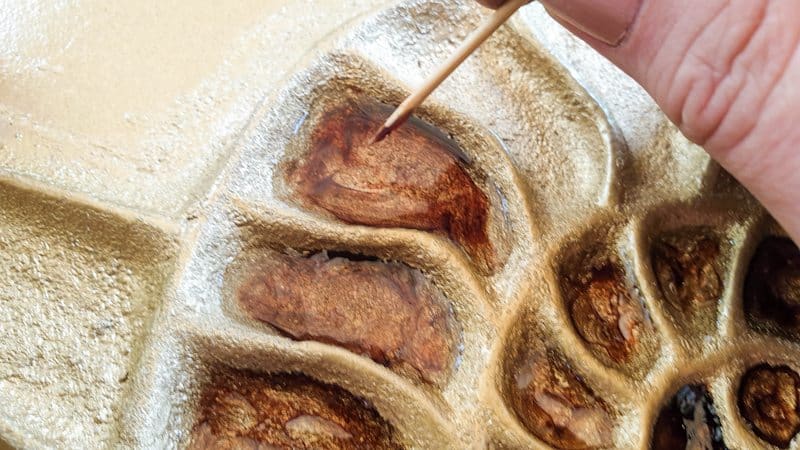
Time to experiment (again)
If you look at an ammonite slice, the chambers are normally filled with crystals that show up beautifully when polished. To achieve something similar, I used white craft paint and alcohol ink.
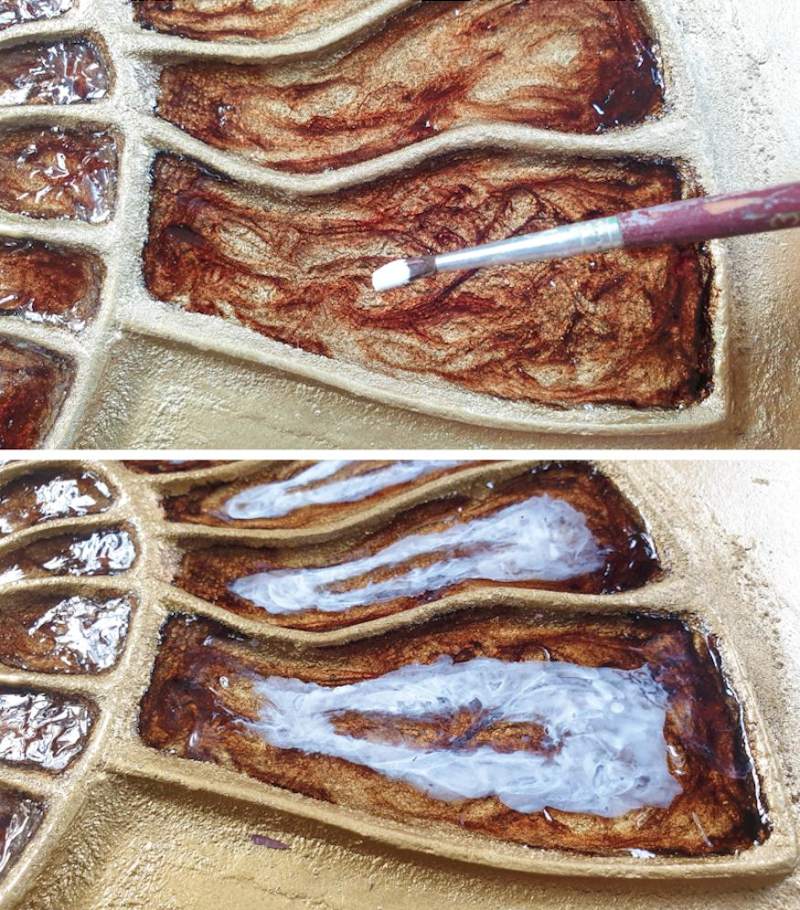
Applying craft paint and then adding a thin layer of UV resin gave me a lovely smooth finish, but it was too blockish or perfect. I don’t know what the right word is, but the edges looked contrived.
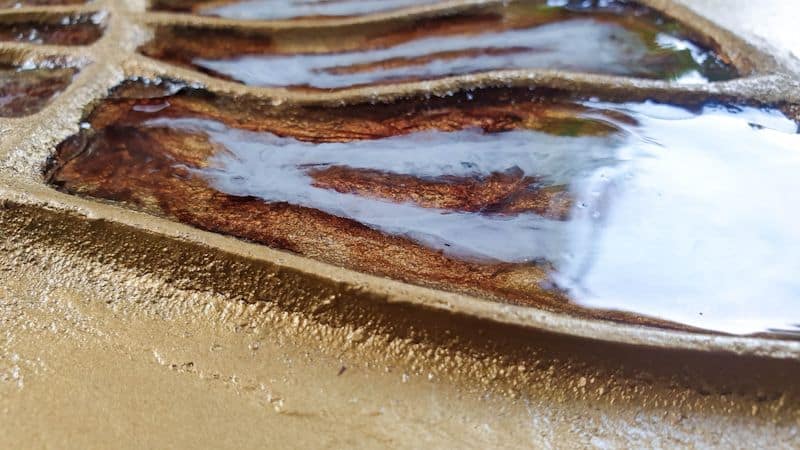
While alcohol ink did its own thing and made random cells and gave off a more translucent vibe. Here’s the bummer though: UV resin and gel nail polish tend to warp or wrinkle when mixed with alcohol ink, so the end result isn’t smooth and glossy.
But in this case, it was worth it.
Plus, we’ll be adding a final layer of resin anyway.
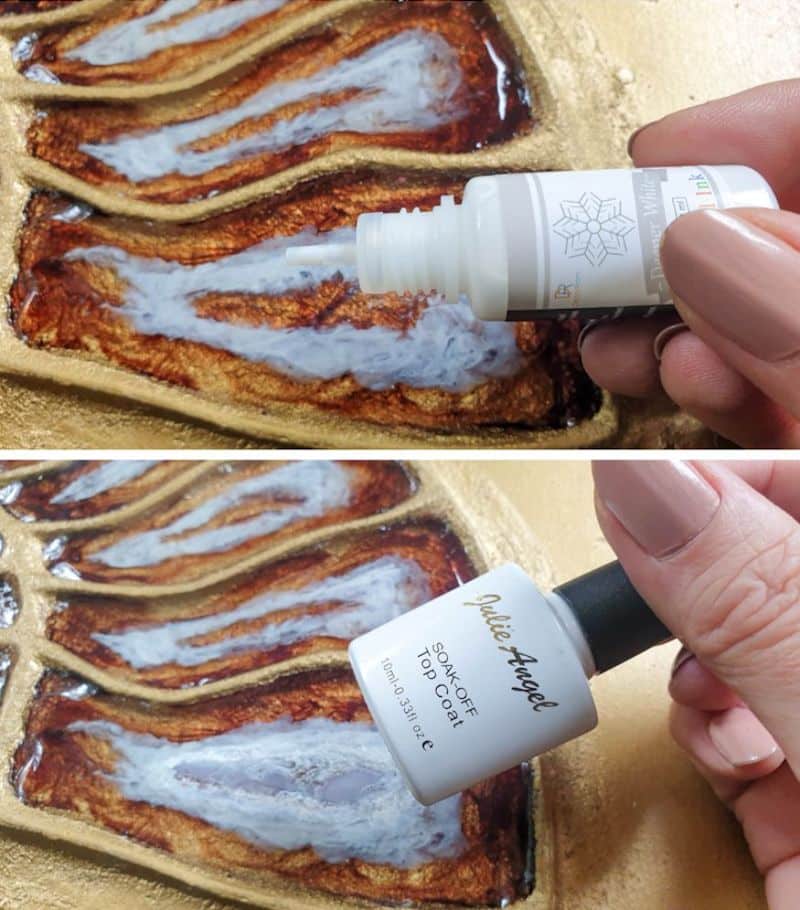
The last resin layer
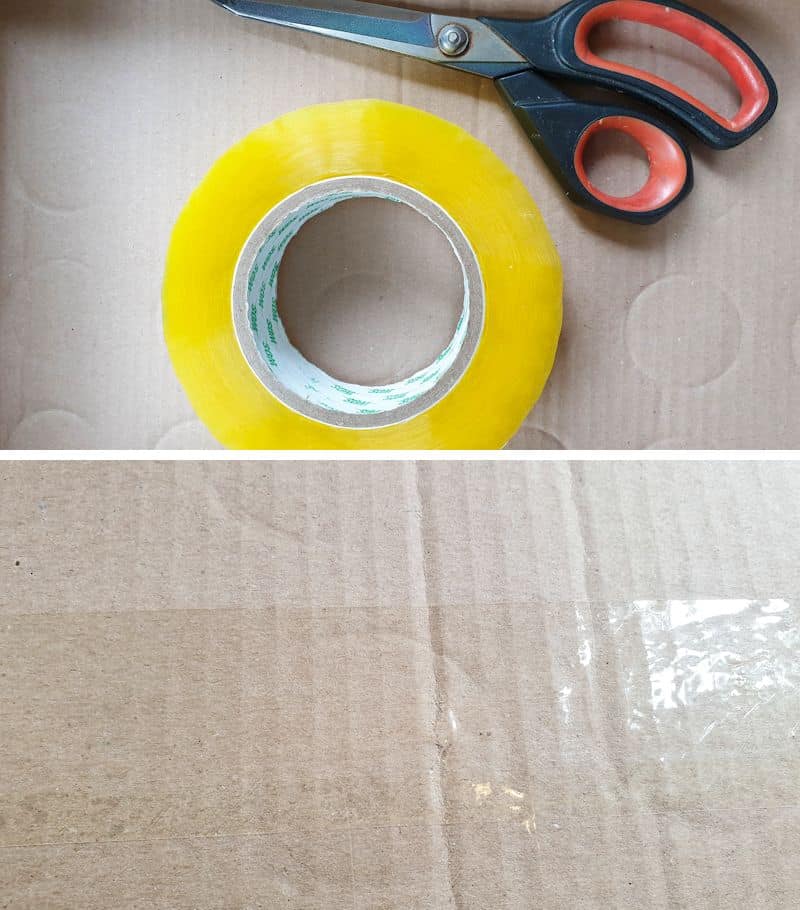
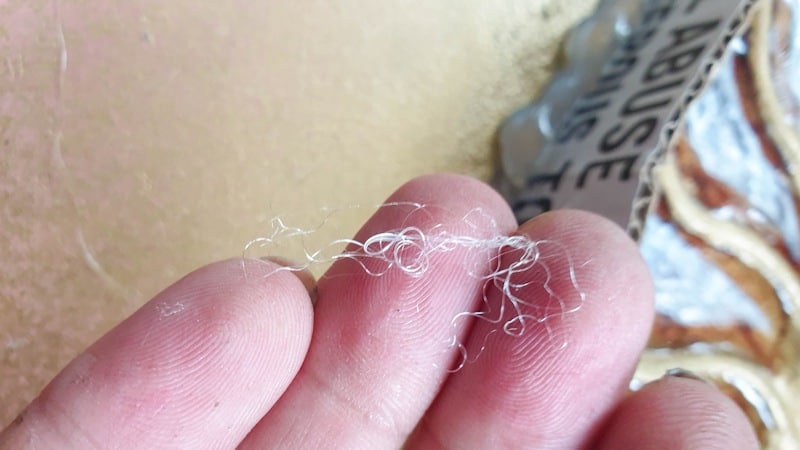
For the final layer that brings everything together and creates that gorgeous, polished look, I used 2-part epoxy resin. On a big piece like this, it’s more cost-effective and worth waiting a few hours to cure. All I needed to do was make a retaining wall of sorts using cardboard covered in sticky tape.
I hot glued the cardboard around the ammonite inlay.
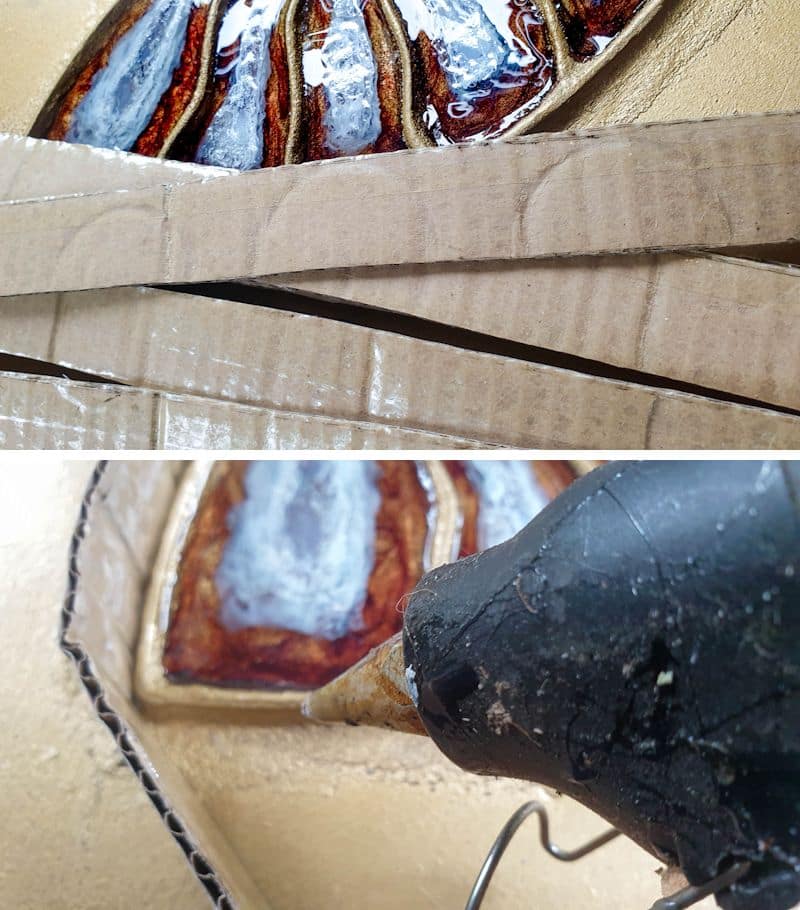
And made sure to remove those glue strings that invariably get left behind.
I mixed up a batch of 2-part epoxy resin according to the manufacturer’s instructions and added one drop of the coffee alcohol ink.
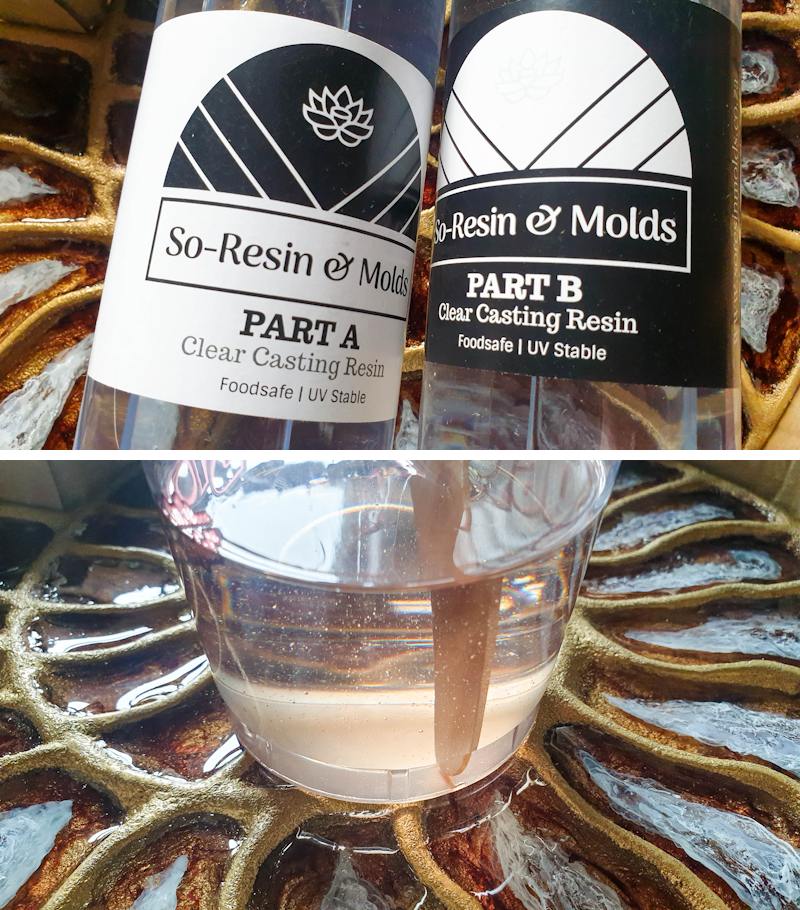
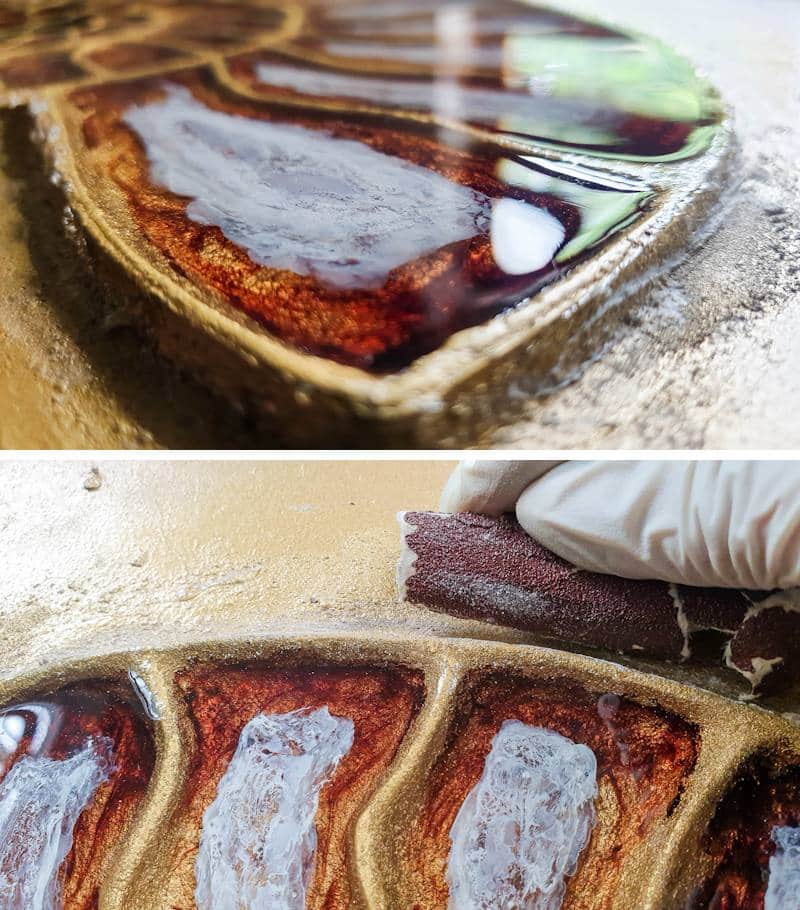
Since the resin chambers were already quite full, I only had to pour a thin layer over the ammonite to level things out. Once the resin cures, you can remove the cardboard.
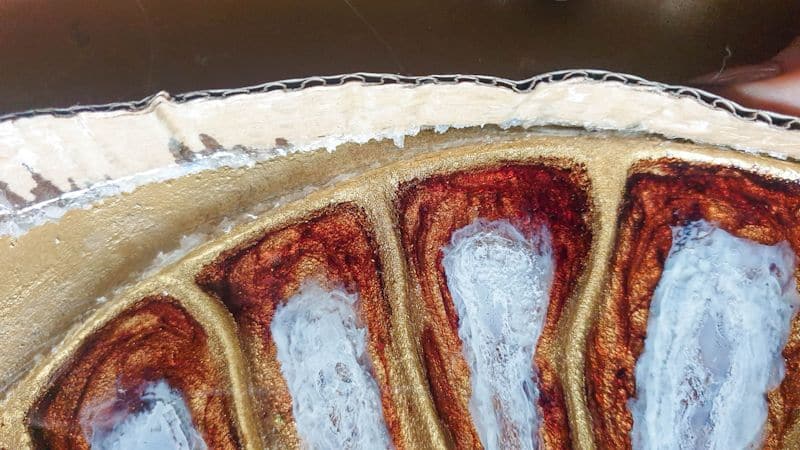
And sand or pull away any stubborn, gluey residue.
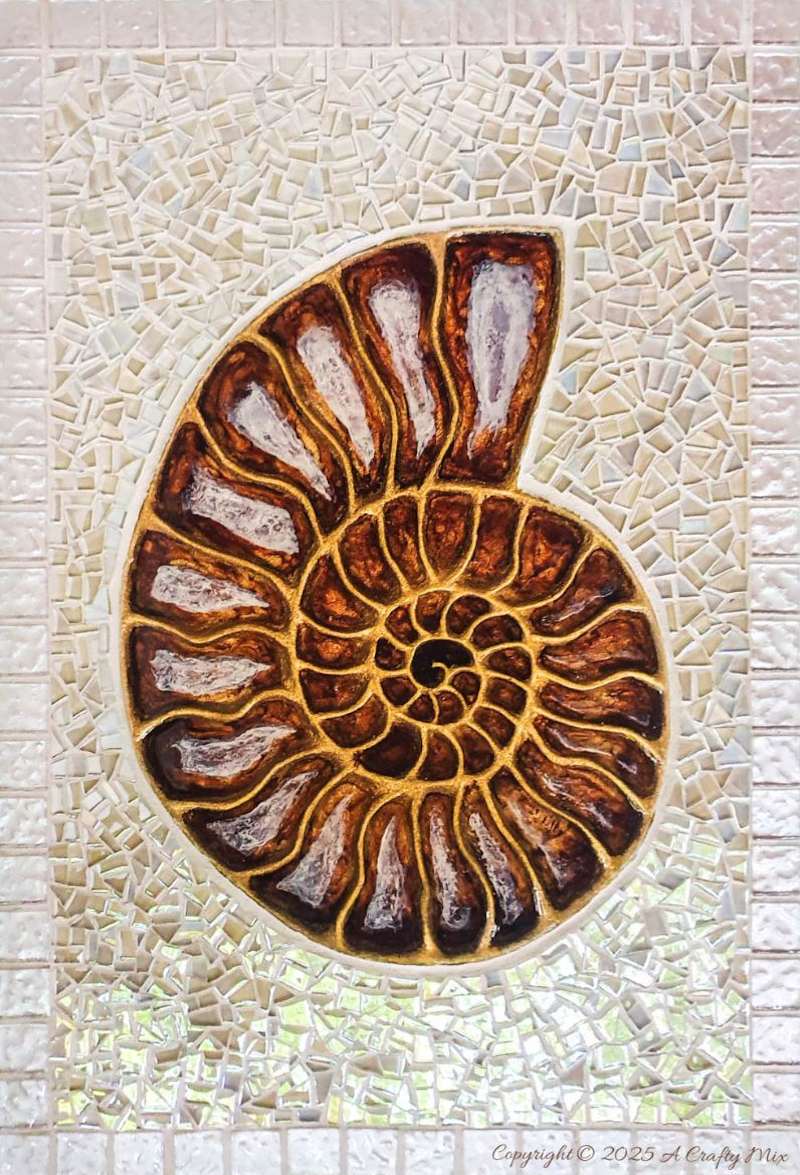
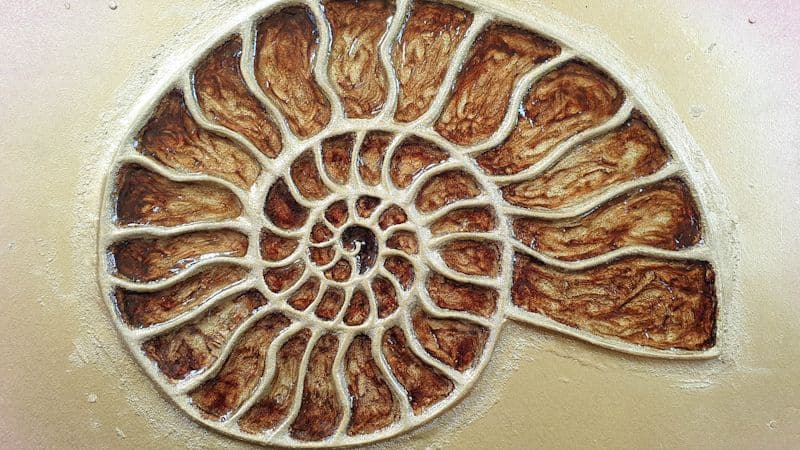
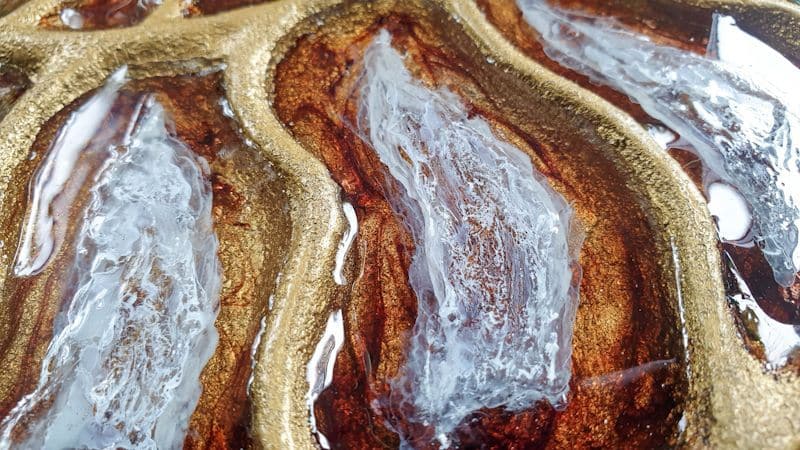
So, that’s the ammonite inlay done.
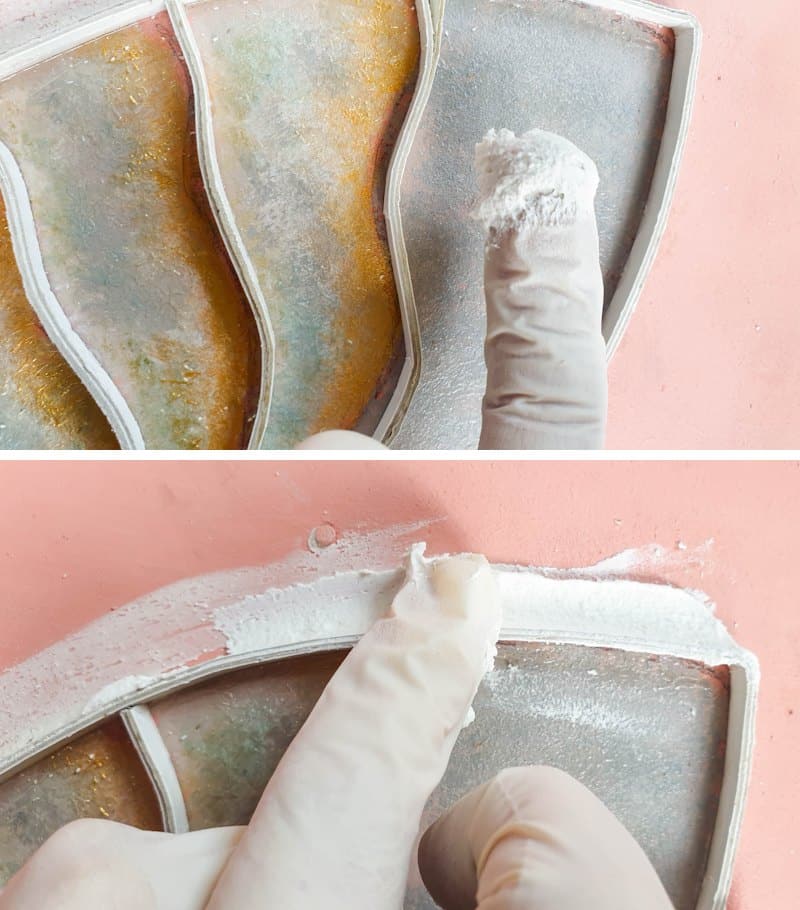
Adding mosaics around the ammonite inlay
Time to finish this tabletop with a mosaic background. If I’d thought things through a little, I would have made the ammonite inlay the same height as a mosaic tile.
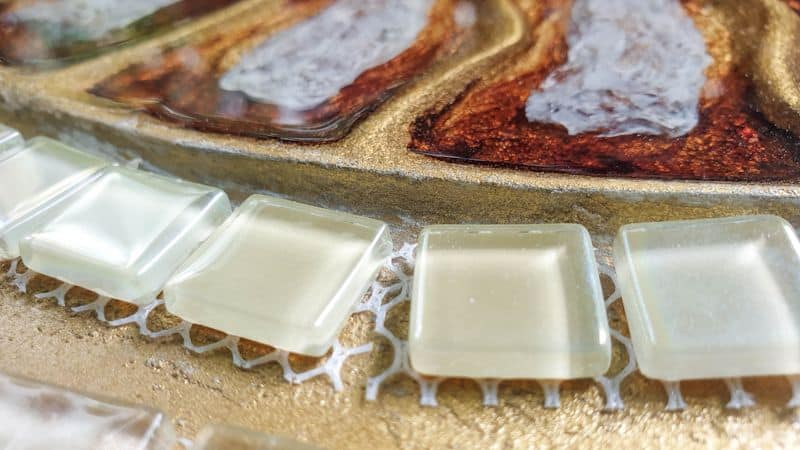
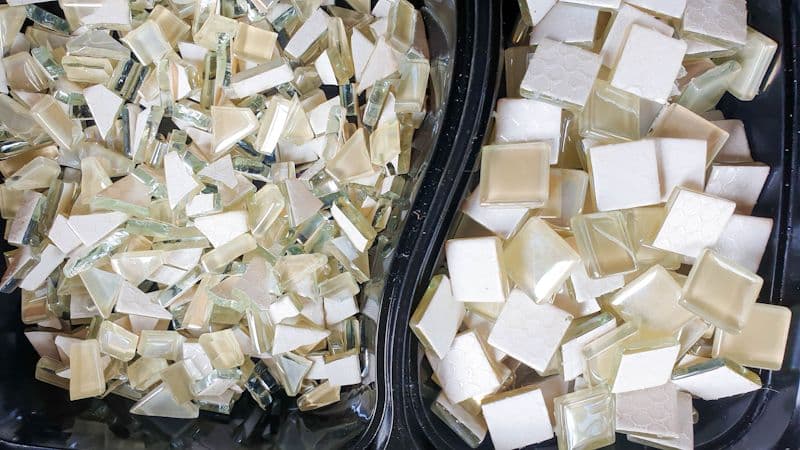
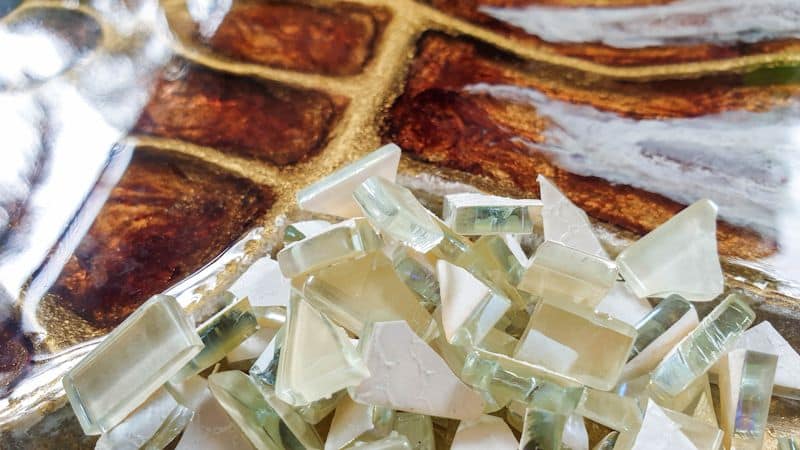
Clearly that didn’t happen, which meant coming up with a plan to raise the background a little bit. While I was contemplating my options, I cut a whole bunch of tiles into random pieces.
And masked off the ammonite with a plastic tablecloth. You know, just in case things got messy.
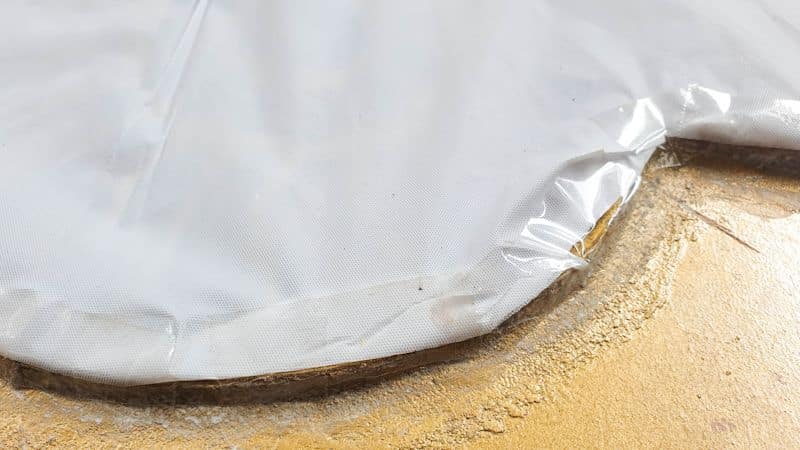
To fix the height issue, I used tile adhesive.
You can also use texture paste or plan ahead and make the inlay the right height.

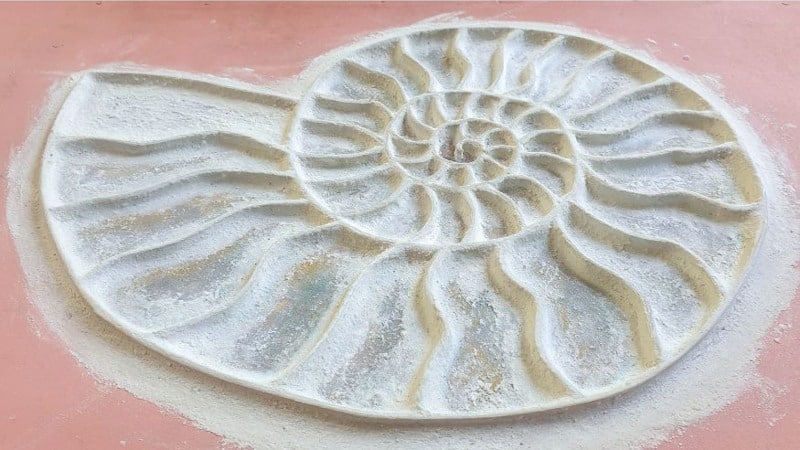
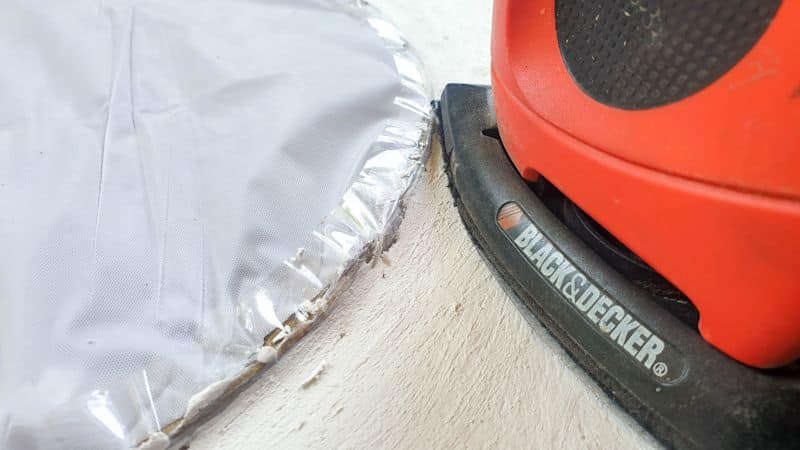
Once the tile adhesive dries, you can sand it down so there are no obvious dips.
When doing a mosaic, I tend to start with a border and work my way inwards.
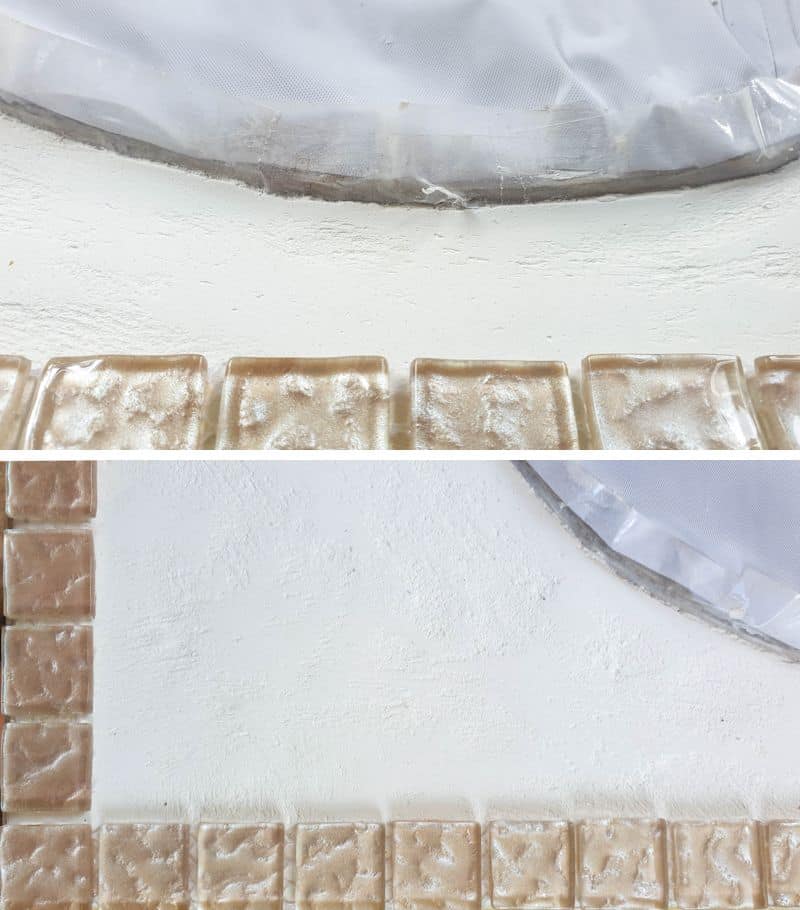
It ensures that you don’t end up with sharp, uneven edges.
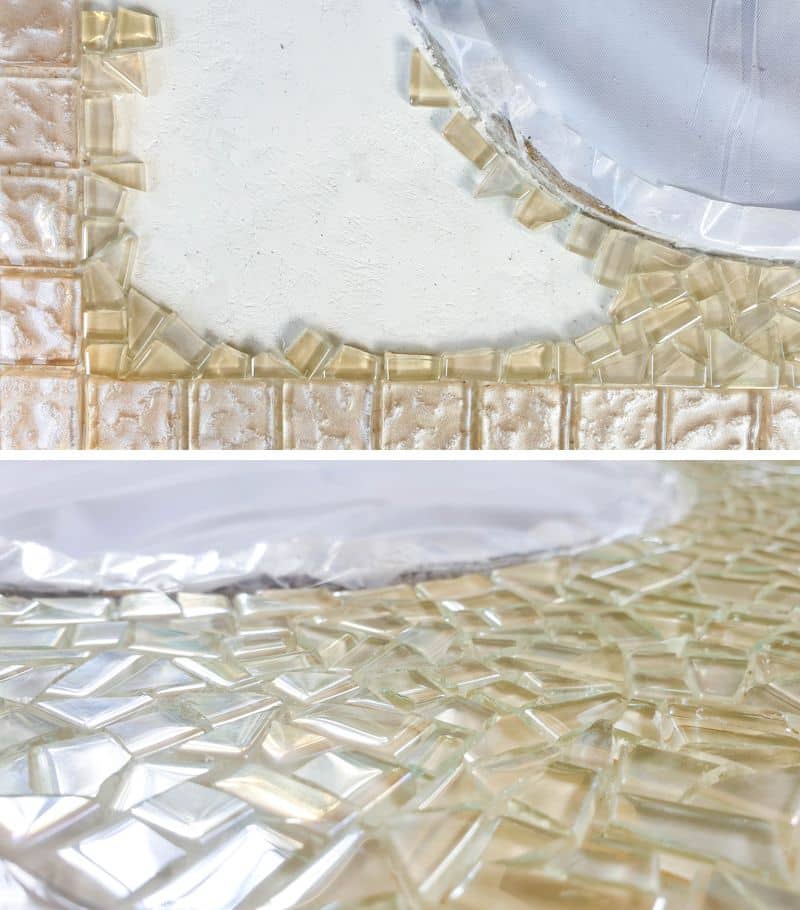
I stuck with one color so as to not distract from the inlay.
And the same goes for the grout. If you’ve seen some of our other mosaic tutorials, you’ll know how much I love my black grout, but it would have been too harsh for this one.

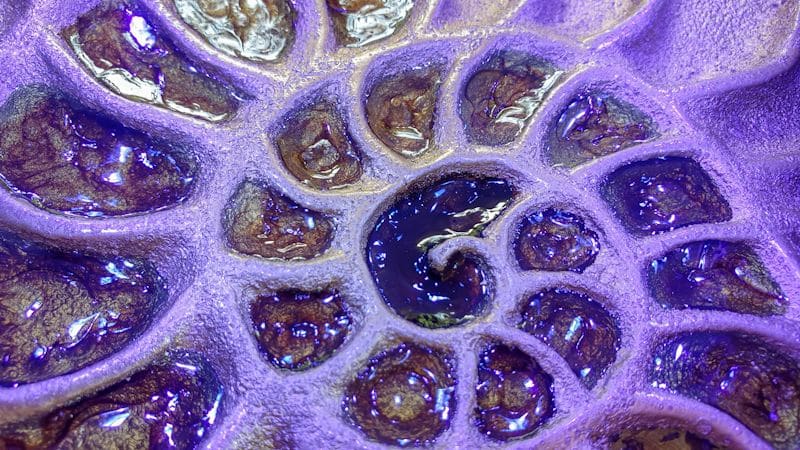
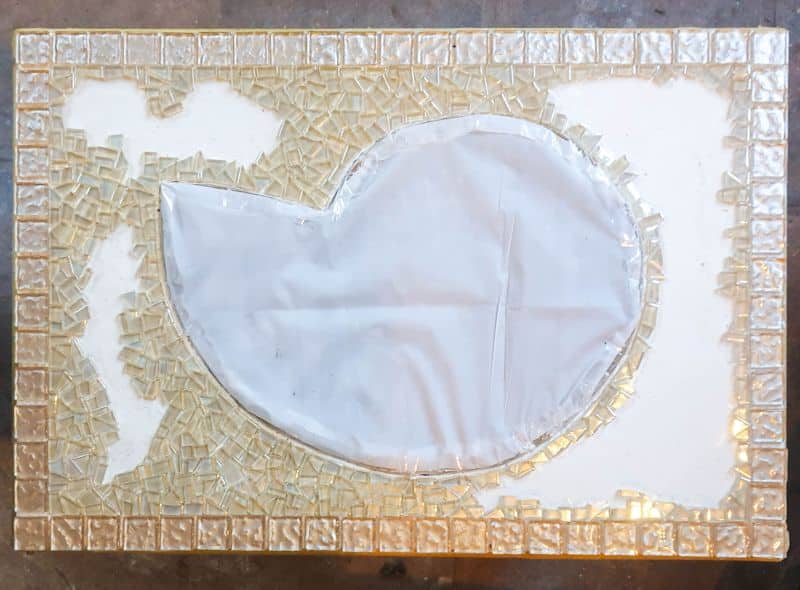
And that’s about it. Once the grout cured, I could remove the tablecloth to reveal the gorgeous ammonite inlay.
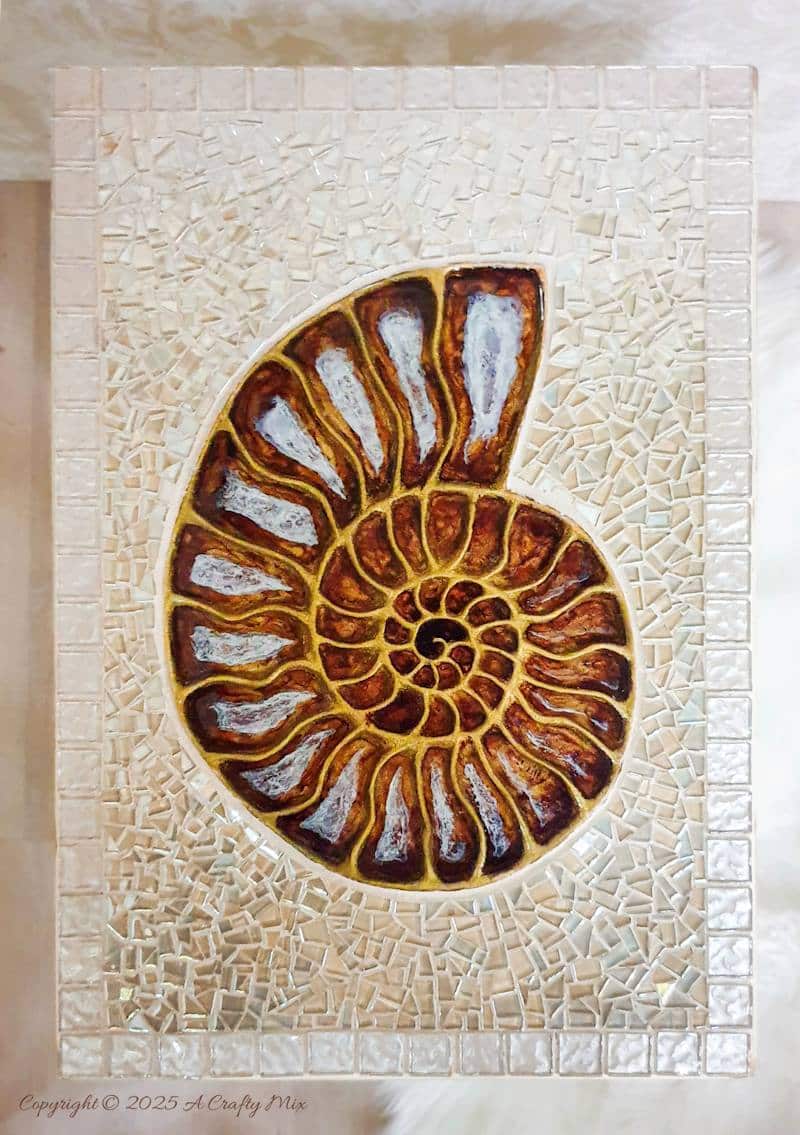
It’s one of the few times my hubby said, “Wow!!” That makes me happy. And my BFF’s mom is over the moon with the makeover.
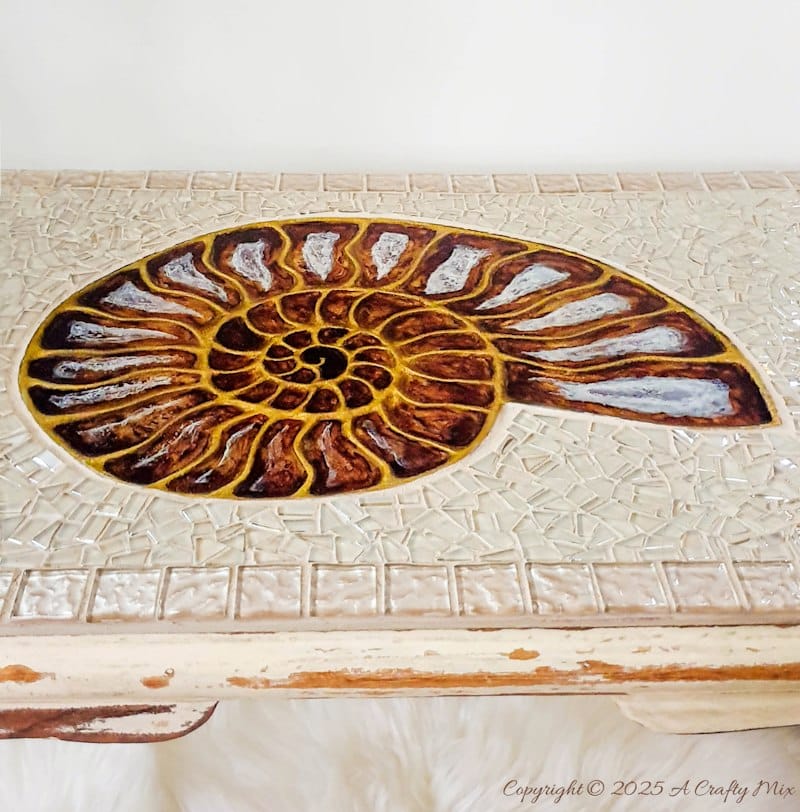
The mosaic and ammonite inlay complement the distressed edges perfectly.
Now she can stand tall.
And I don’t think anyone would guess that the inlay is made from cardboard, resin, and a dash of alcohol.
I hope I covered everything, but please comment if I missed something or it’s unclear, and I’ll do my best to answer.
If you like the idea of making a mosaic and ammonite inlay, don’t forget to pin it for later.
Sharing caring.
BTW, if you’re looking for some of the things we used, we’ve got you covered. Disclosure: Clicking on the links below means we may receive a commission from Amazon. But don’t worry, it won’t come out of your pocket, and it helps us make more amazing crafts to share with you.
To make the ammonite inlay


The mosaic background


And if you prefer the real thing, perhaps these beauties will appeal.


And as always, wishing you a wonderful, crafty week filled with lots of love and laughter. Thank you for popping in for a visit.

Last update on 2026-06-03 / Source Amazon Affiliates