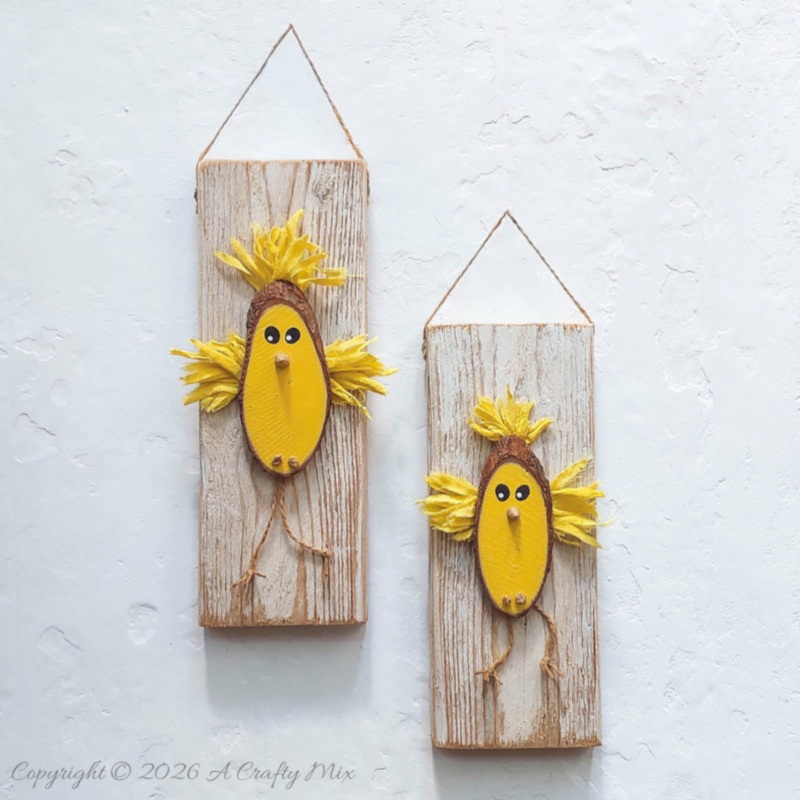
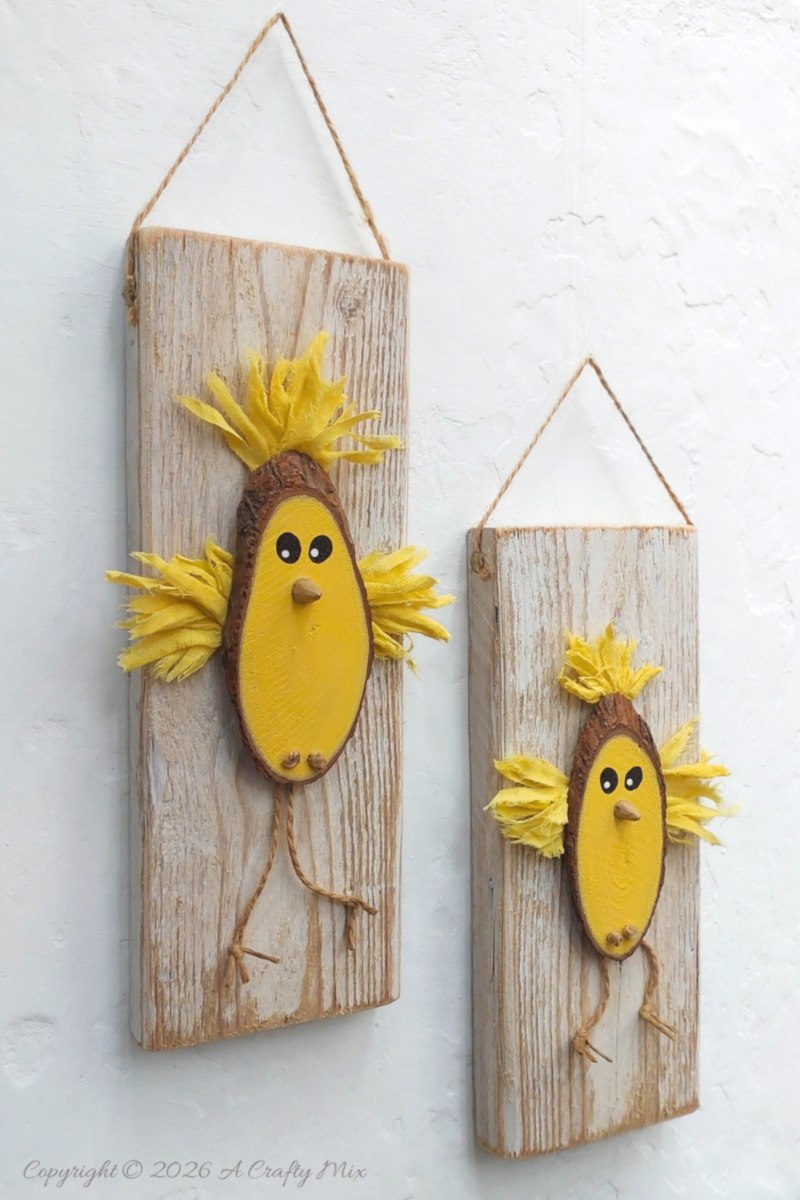
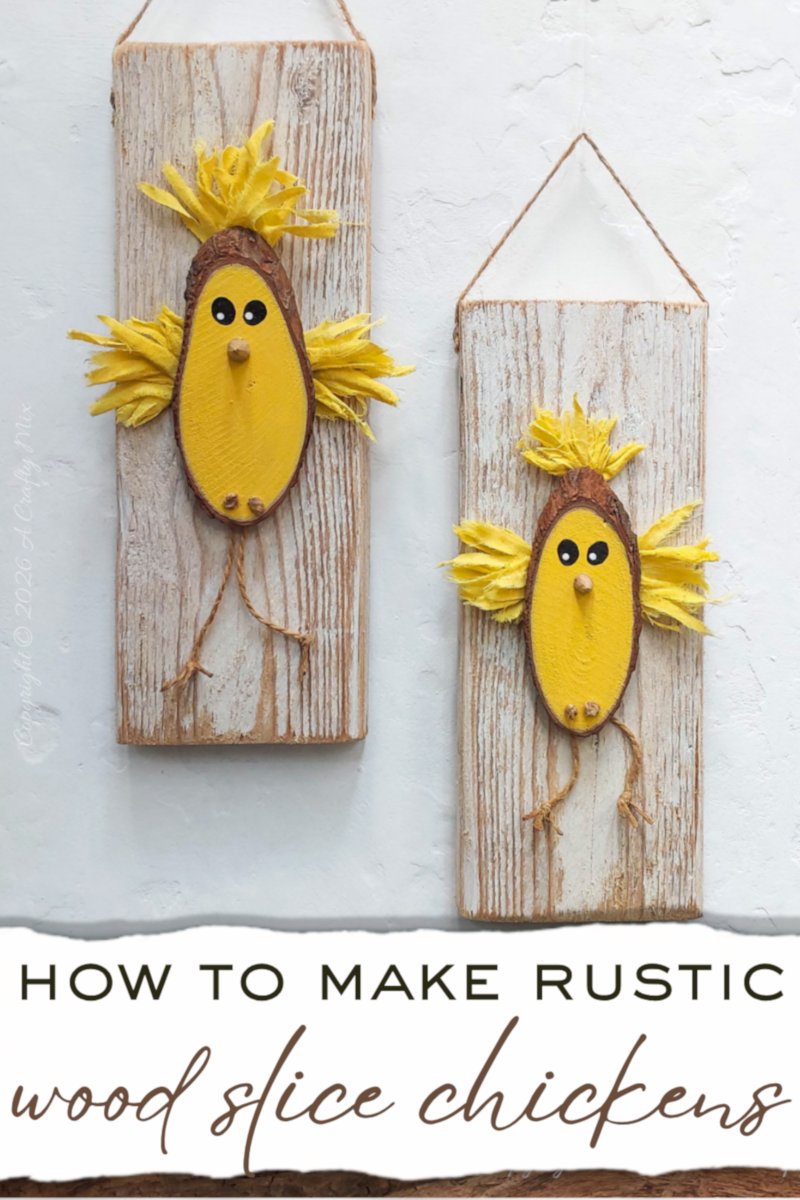
Some craft projects just make you smile the moment they’re done, and these easy wood slice chickens are definitely one of them. Even my hubby went, “awwwww, they’re very cute” when he saw them.
They’re inexpensive, beginner‑friendly, kid‑approved, and soooo adorable. They kinda remind me of our “DUCK” sign. That one always makes our tall friends laugh out loud.

With their scruffy feathers and dangly twine legs, they’re charmingly quirky. It’s rustic spring décor served with a slice of fun. (Erhmm, see what I did there?)
So, if you love simple, nature‑inspired crafts that look like you spent way more time on them than you actually did, this tutorial is for you.
But, before we get there, do me a favor and follow us on Facebook, Twitter, Pinterest, or Instagram. And don’t forget to subscribe so you’ll never miss a post!
What you need
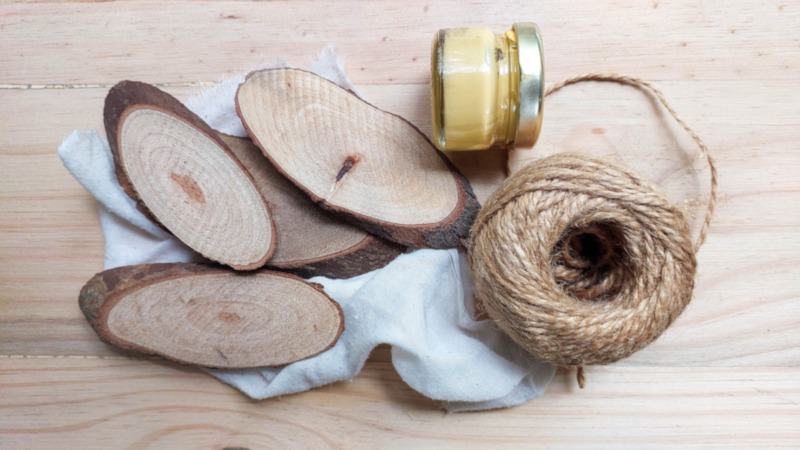
To create these character‑filled chicks you’ll need:
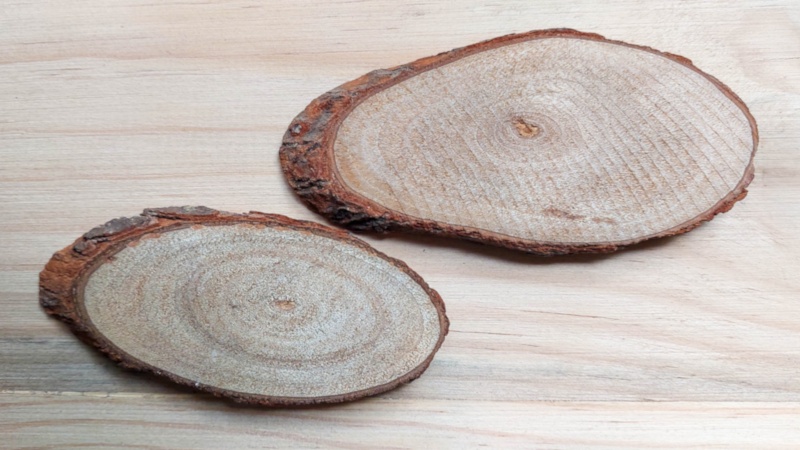
- Wood slices
- Yellow craft paint
- Paint brush
- Wood glue
- Scrap fabric
- Twine
- Drill
- Scrap wood to mount (optional)
How to make easy wood slice chickens
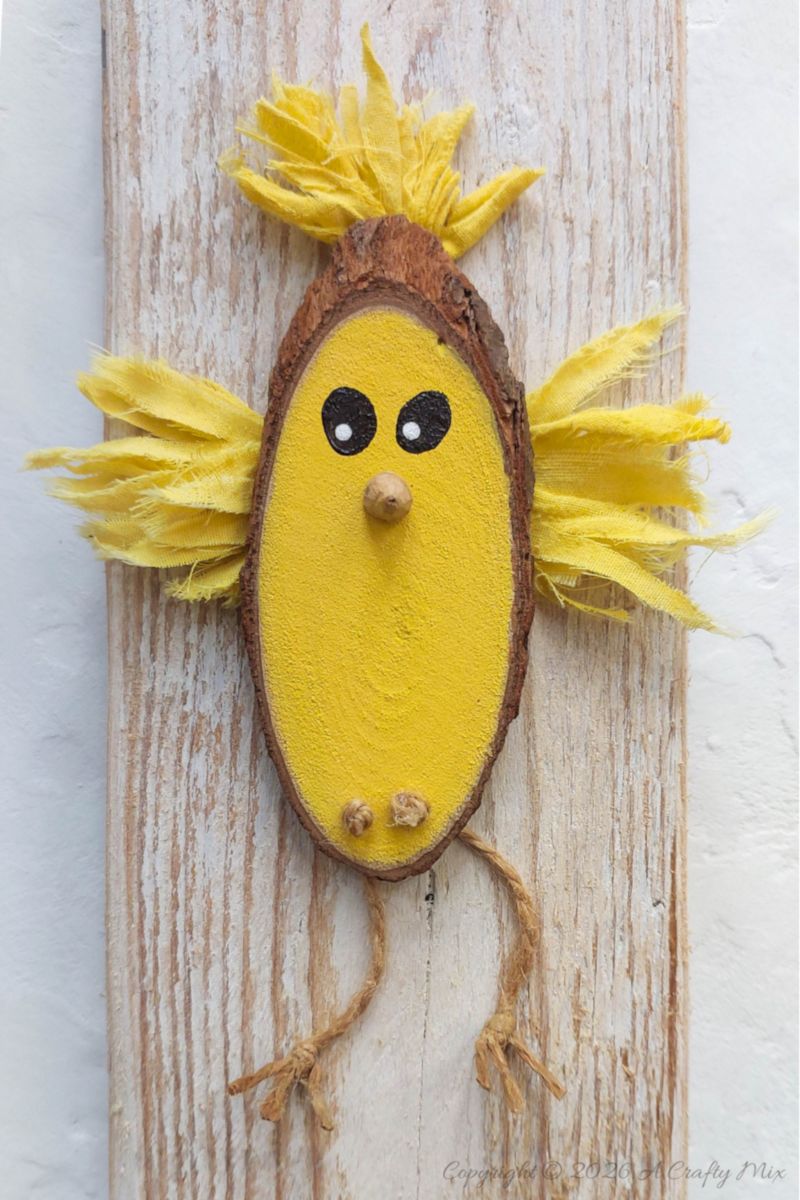
The wood slices I used were cut at an angle, which means my chickens are tall and thin. If you can only find round slices, that’s okay too. Everyone loves a well-rounded chicken, amiright?
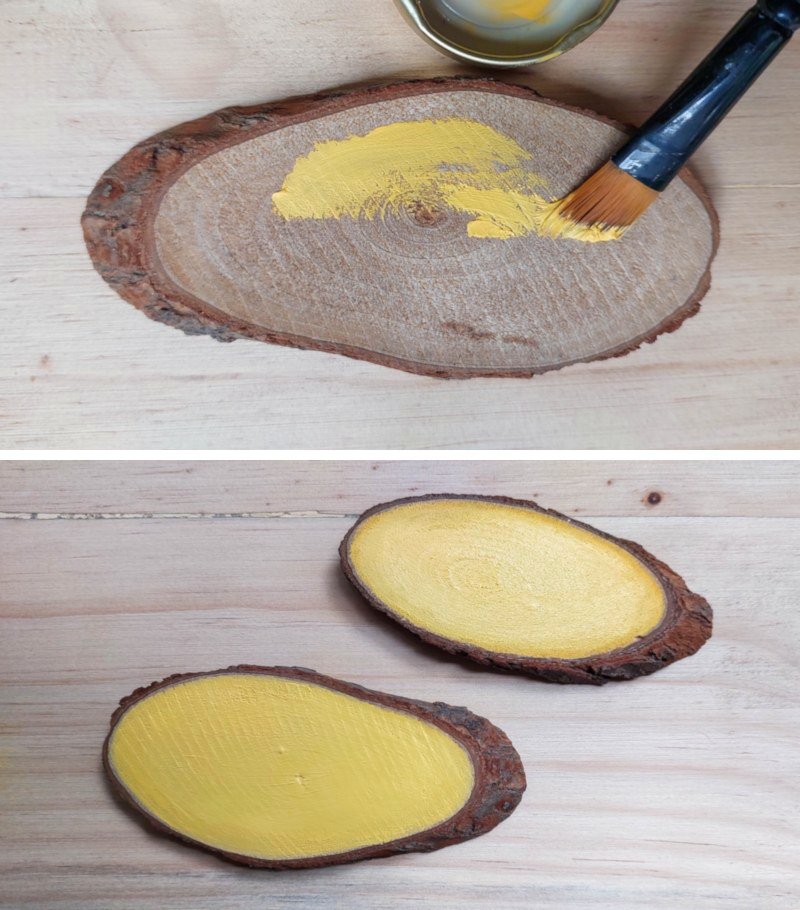
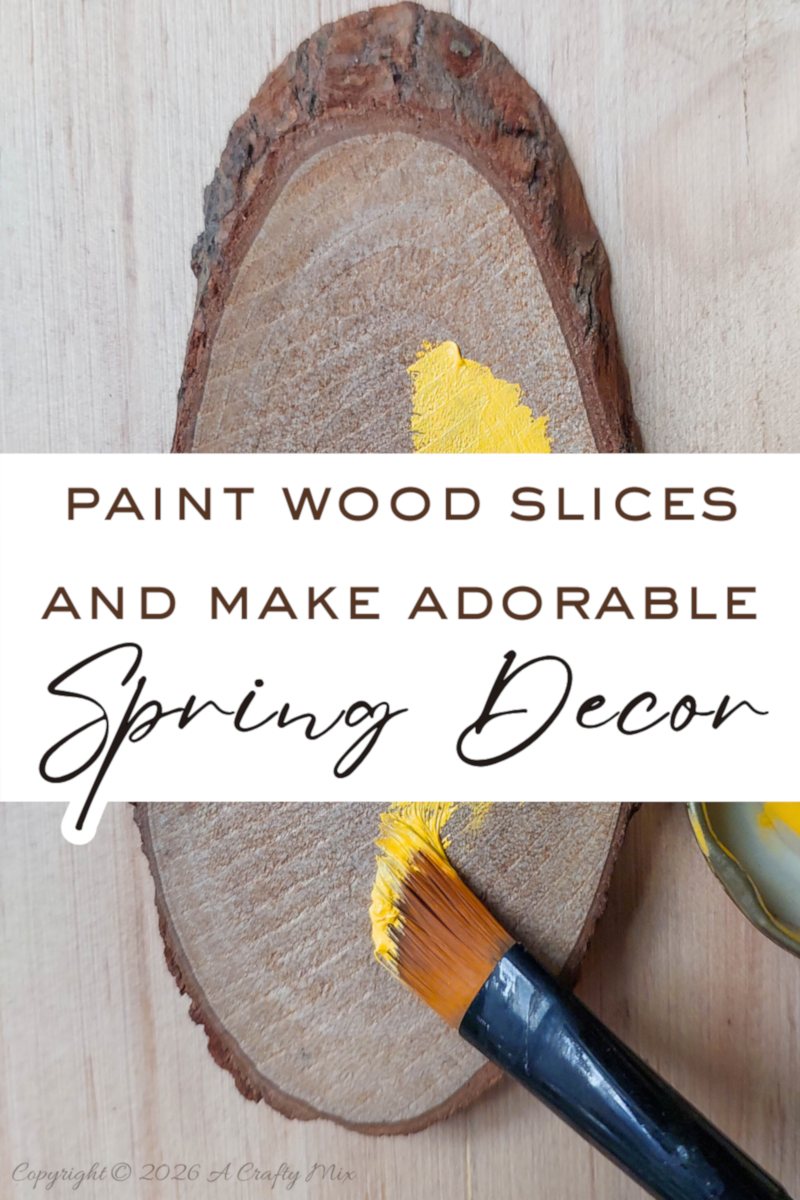
Paint the slices a bright, happy yellow. Try to keep the bark paint-free if you want to celebrate that delicious textured outline.
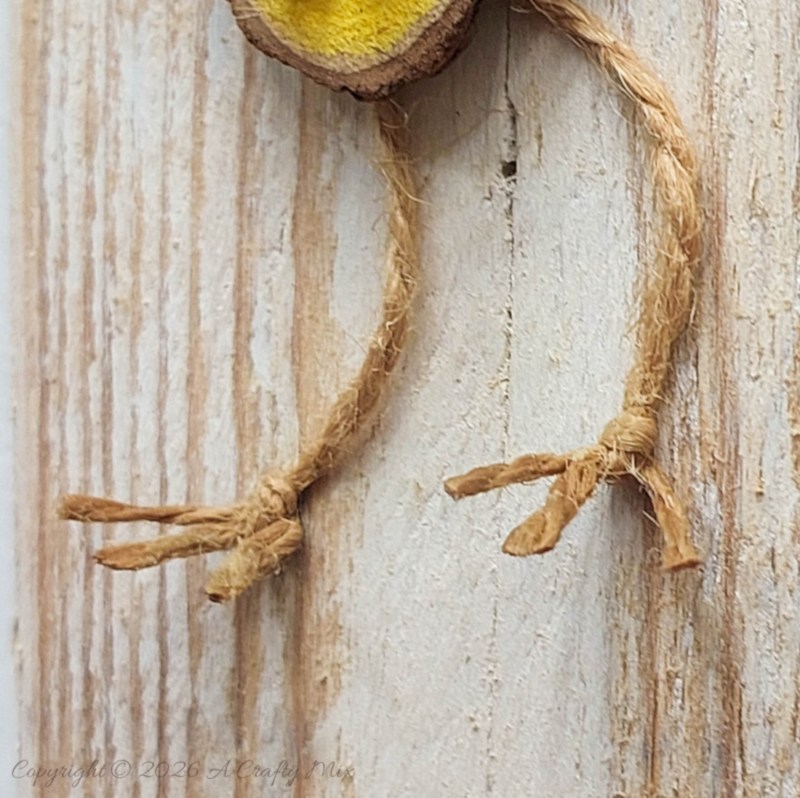
Making twine legs
It took me a few minutes to figure out how to make the legs. I considered going all out and making Baba Yaga’s chicken legs. But it was a very brief moment. Twine and wood glue is so much quicker.
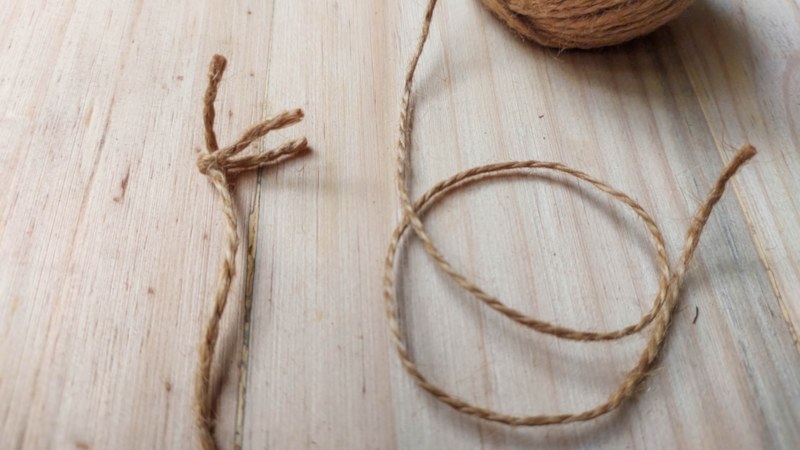
For each leg cut one long piece of twine and another a little shorter. Fold the shorter piece in half and place it under the long piece as shown below.

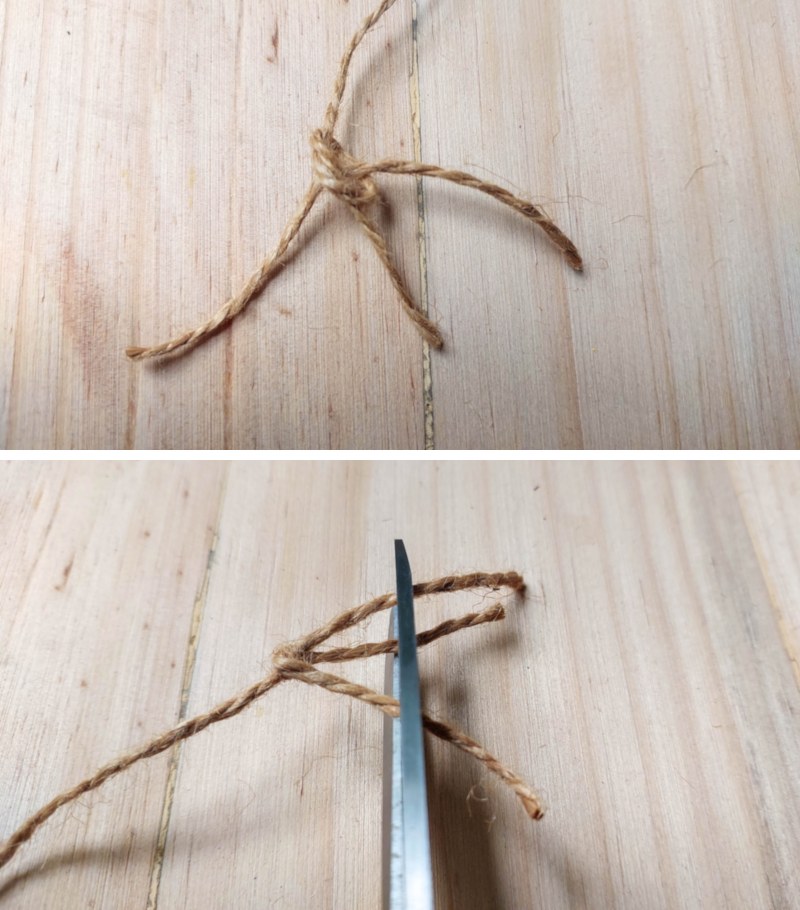
Knot the long piece around the shorter piece to make the chicken feet. Trim the feet so they’re all roughly the same length.
If you want the feet to “poke” outwards, dip them in wood glue.
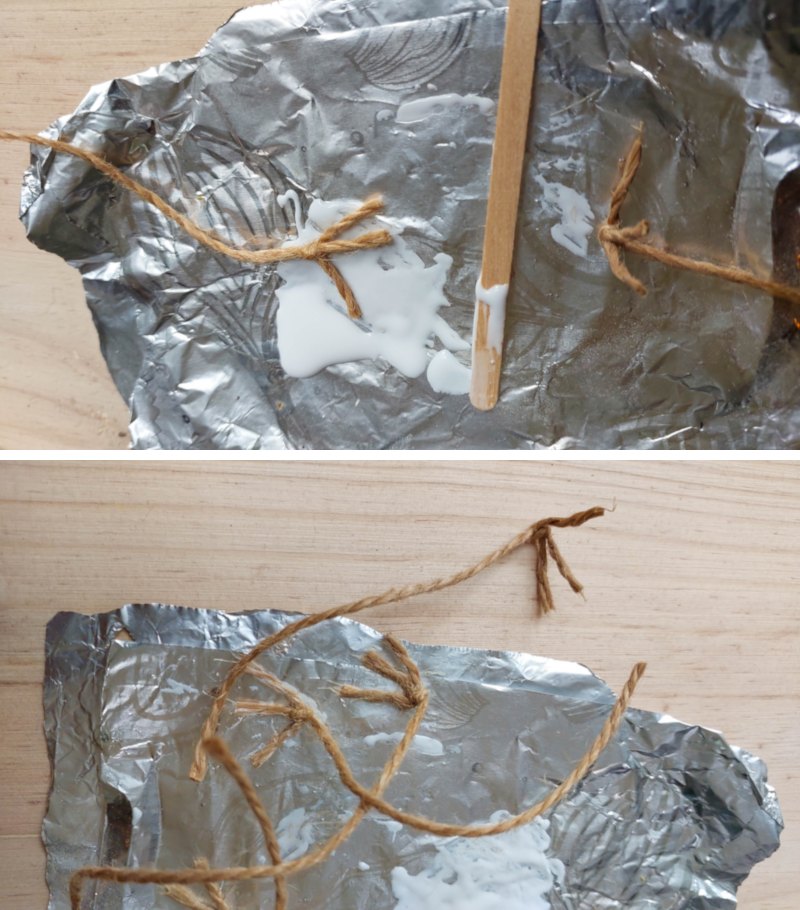
Drill two holes in the bottom of the wood slice and insert the chicken legs. Knot the twine to secure. If you don’t have a drill you can just glue the legs on.

I also added a small dab of glue to make sure the knot doesn’t come undone.

Making scruffy wings and things
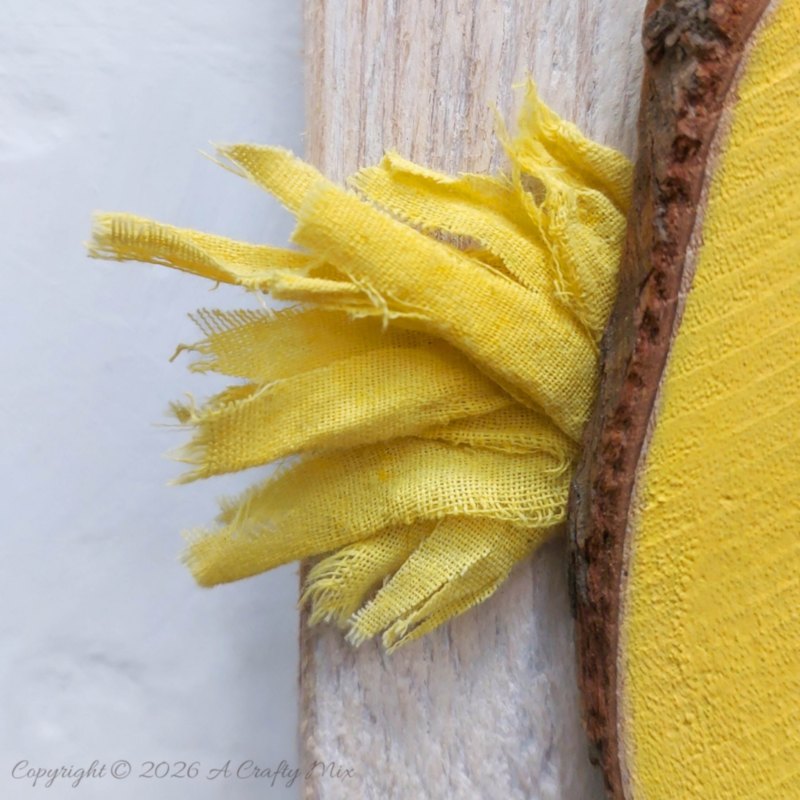
Besides the legs, the wood slice chicks get their quirkiness from their scruffy wings and that feathered, hairdo thing on top of their heads.

They’re all made with strips of fabric. For a neater look you can cut the fabric into strips. I just ripped mine before dunking them into a watery paint mix. I didn’t have any yellow fabric in my stash.
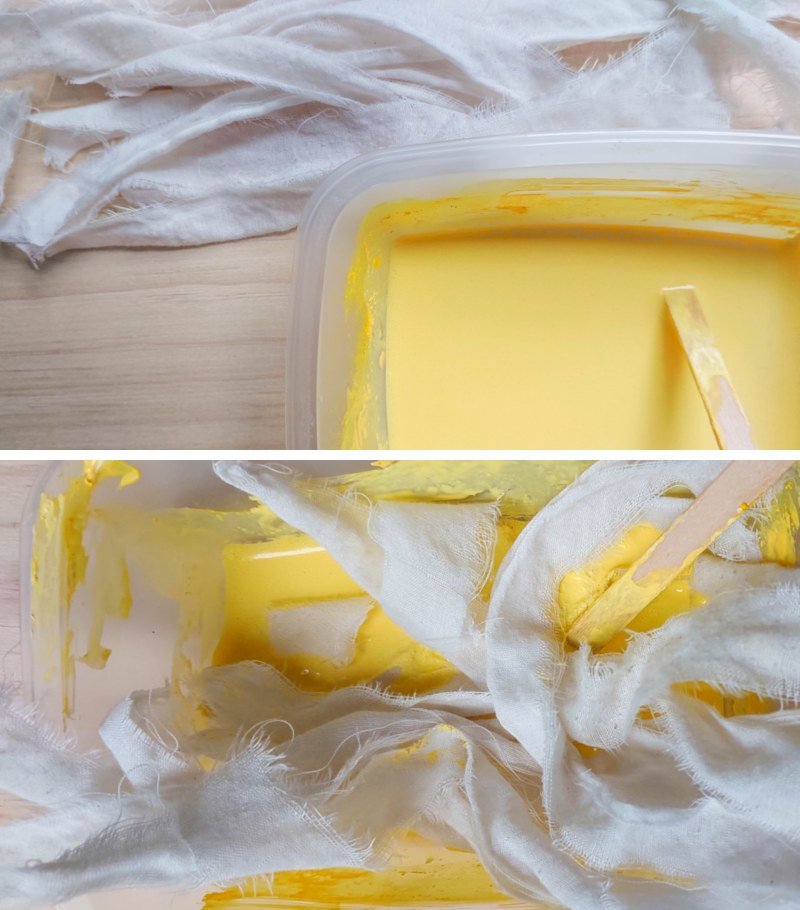
If you are dying your fabric with paint, make sure to really smoosh it into the watered-down paint so it absorbs fully before leaving the strips to dry.
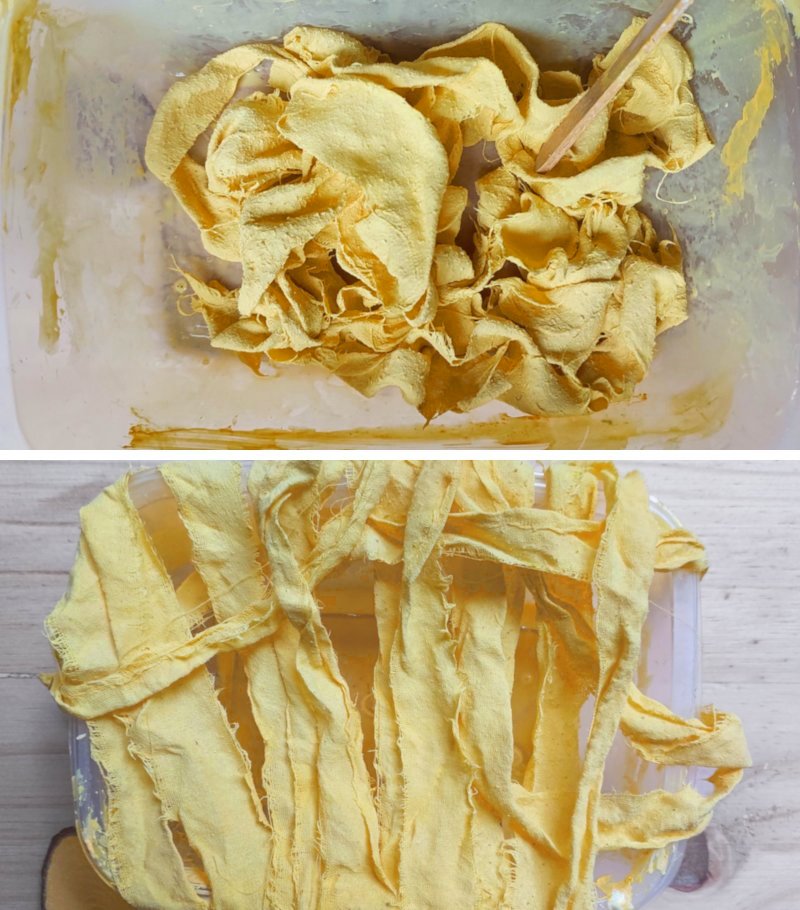
Cut or tear the fabric into shorter strips and glue them onto the back of the wood slice chickens.

Once the glue dries, flip the chickens over, paint on some eyes, and glue on a beak. To make the beak I simply used a craft knife to sharpen a twig. If the twig is soft enough you can use a pencil sharpener. You can also draw the beak on or make a small clay one.
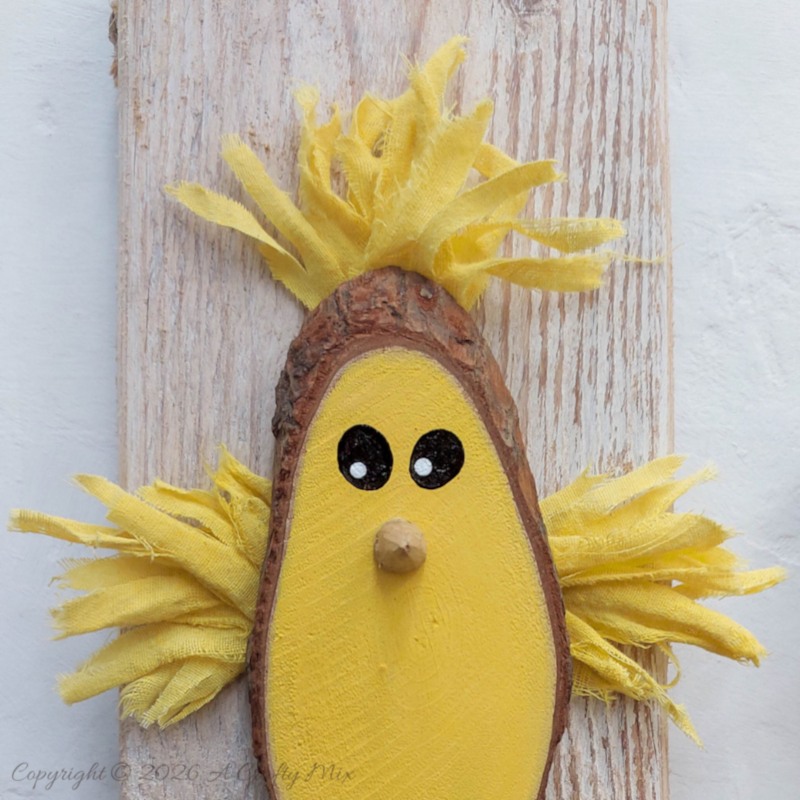
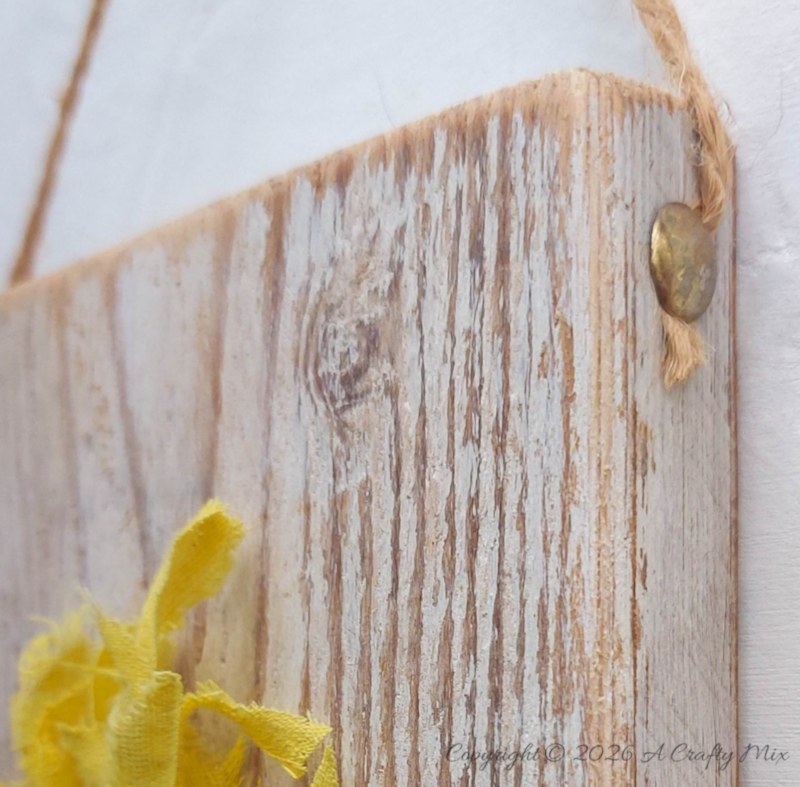
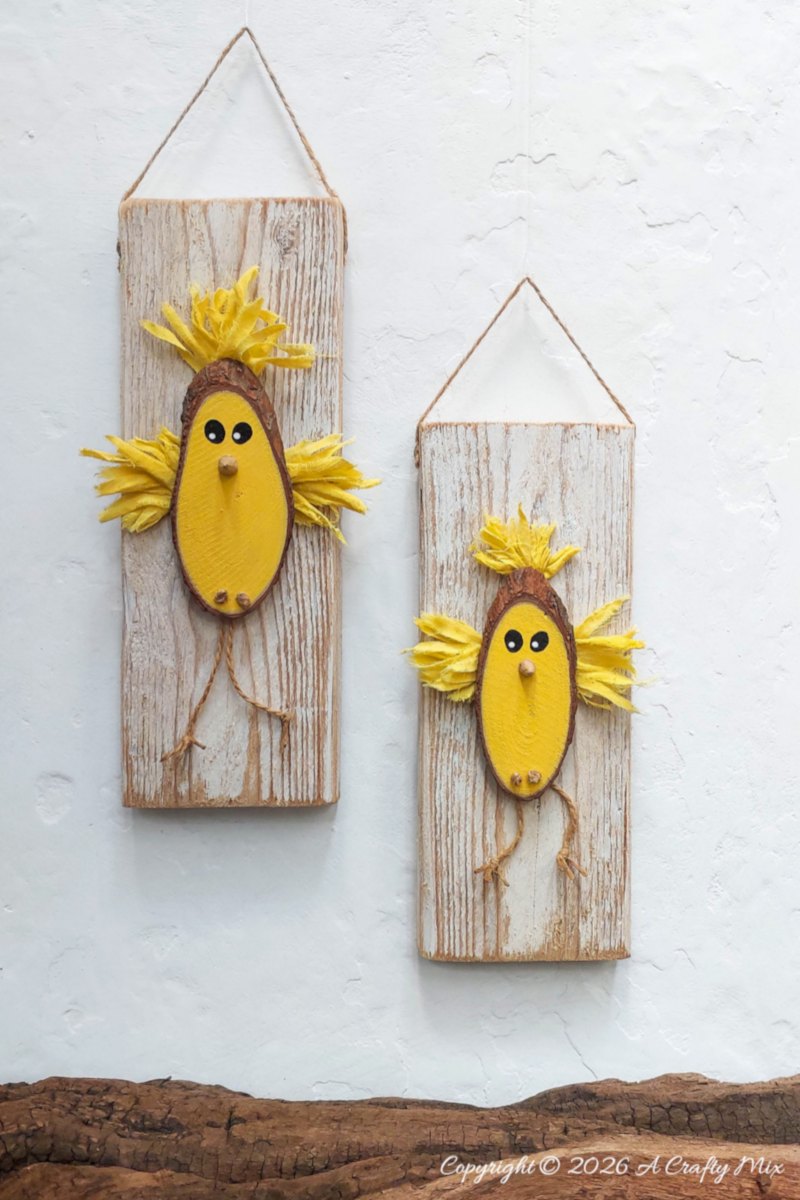
To display these cuties, I glued them to white-washed pallet scraps…..
….and used twine and thumb tacks to hang them on the wall.
They would make adorable fridge magnets too.
The wood slice chicks are a lovely way to ease into spring without going full pastel overload.
And they add a fun pop of rustic, spring happiness to our decor. BTW, if you have extra wood slices, this tutorial will show you how to turn them into rustic egg cups.
If you like the idea of making wood slice chickens, don’t forget to pin the tutorial for later.
Sharing is caring.
Oh, and if you’re looking for some of the things we used, we’ve got you covered. Disclosure: Clicking on the links below means we may receive a commission from Amazon. But don’t worry, it won’t come out of your pocket, and it helps us make more amazing crafts to share with you.


Or if you prefer to buy rather than DIY, then here you go.

Until next time, keep creating, keep upcycling, and may a sprinkle of crafty magic follow you wherever you go. Thank you for popping in for a visit.
