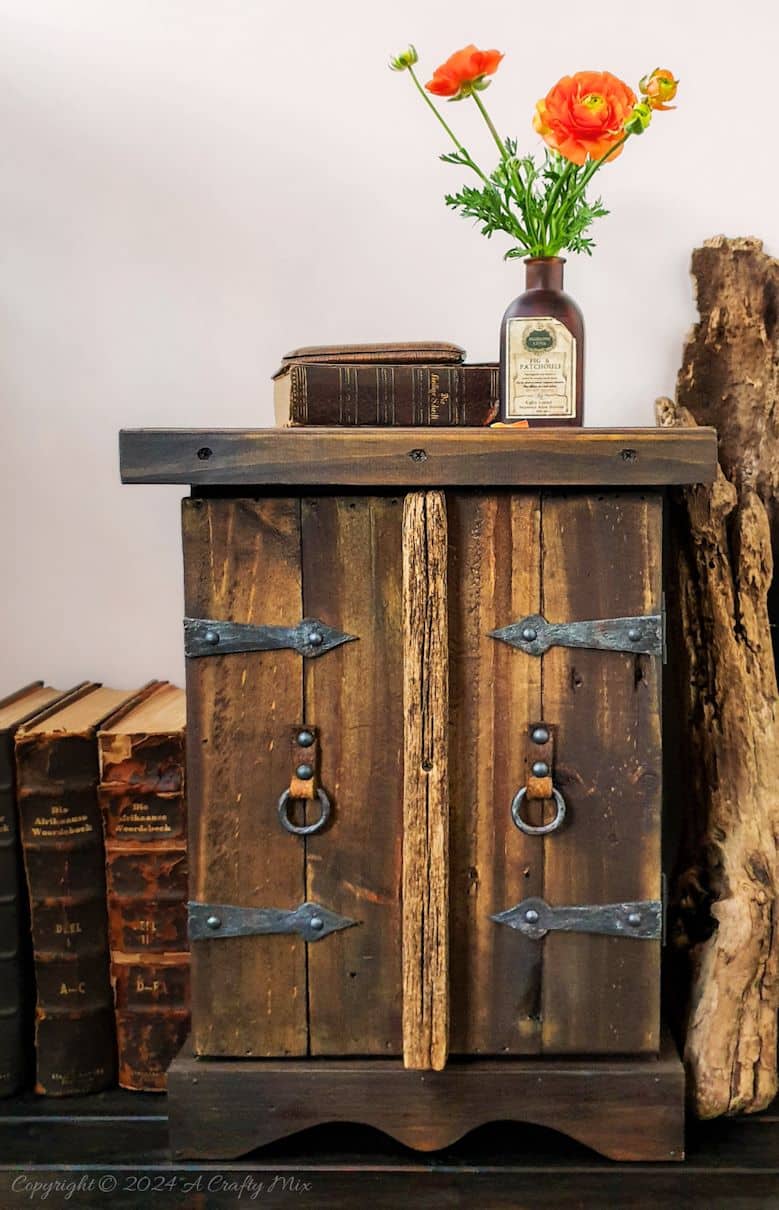
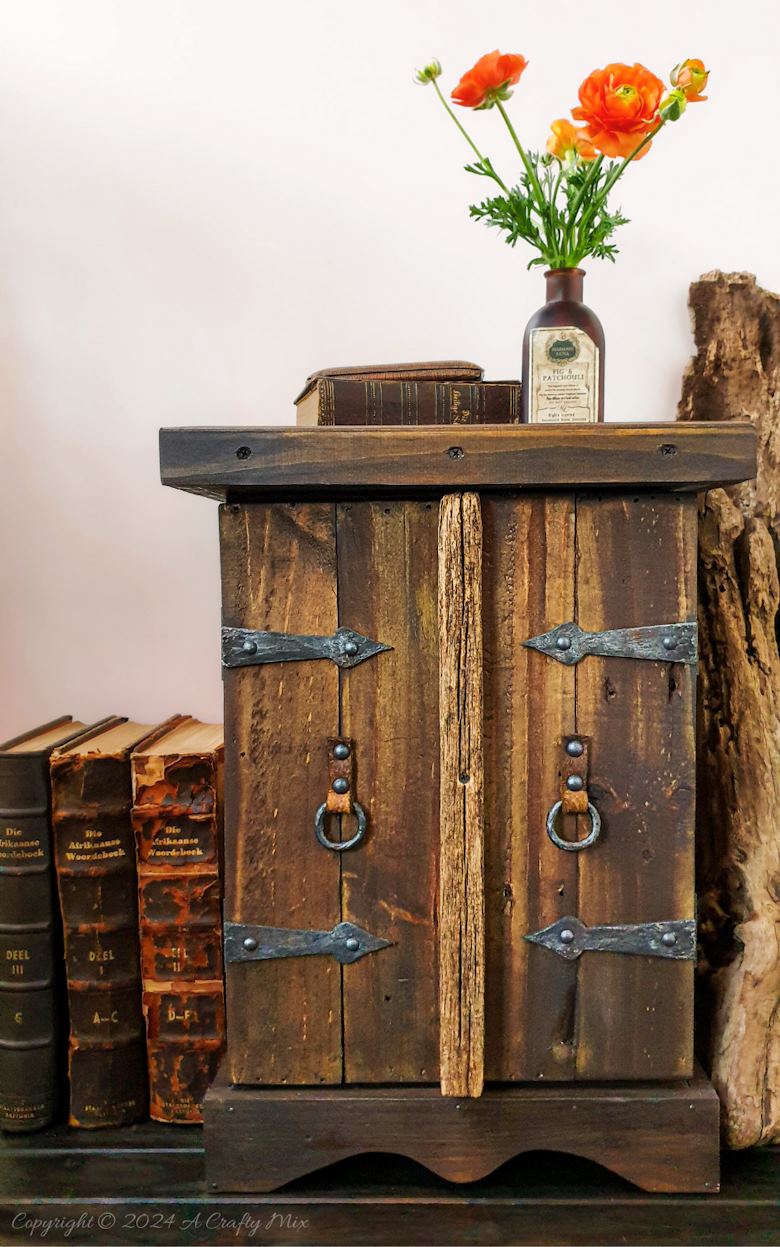
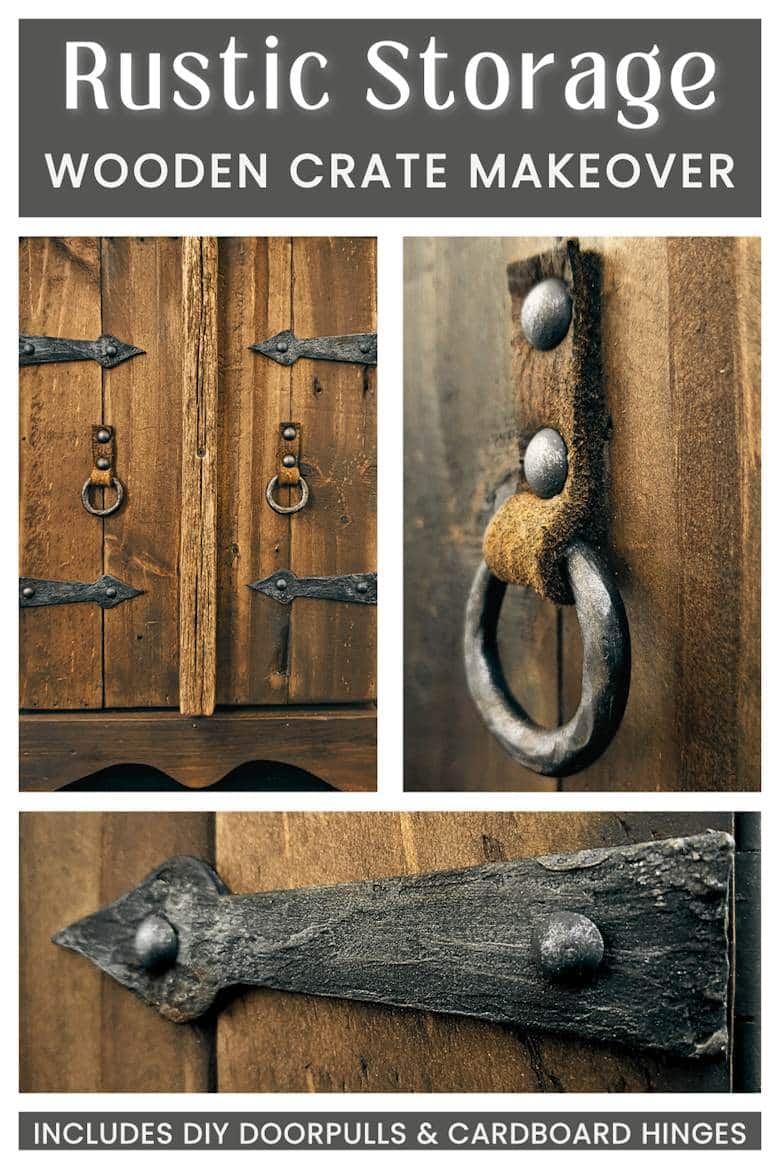
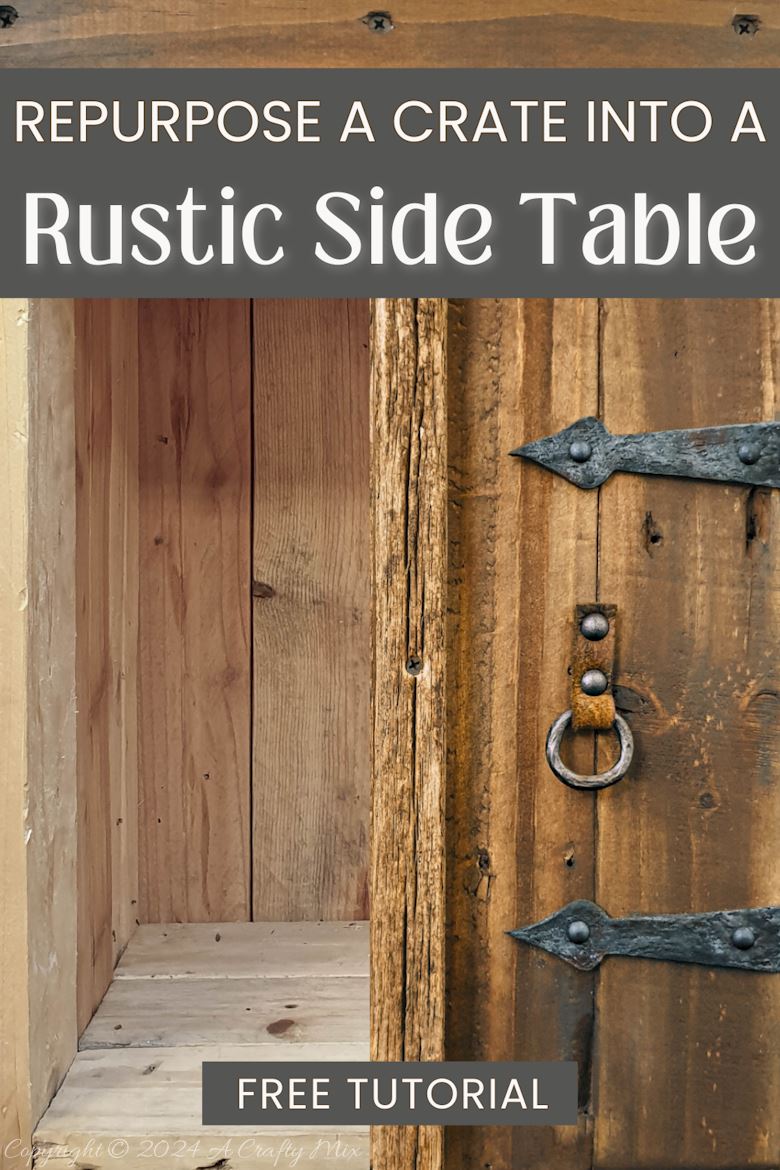
In a world full of throw-away stuff, one of my favorite things to do is figure out unique ways to repurpose the discarded into something new and unexpected. Case in point, this revamped rustic side table that started as a simple wooden crate.
I even reused a broken door to make the table top. But more about that in a little bit.
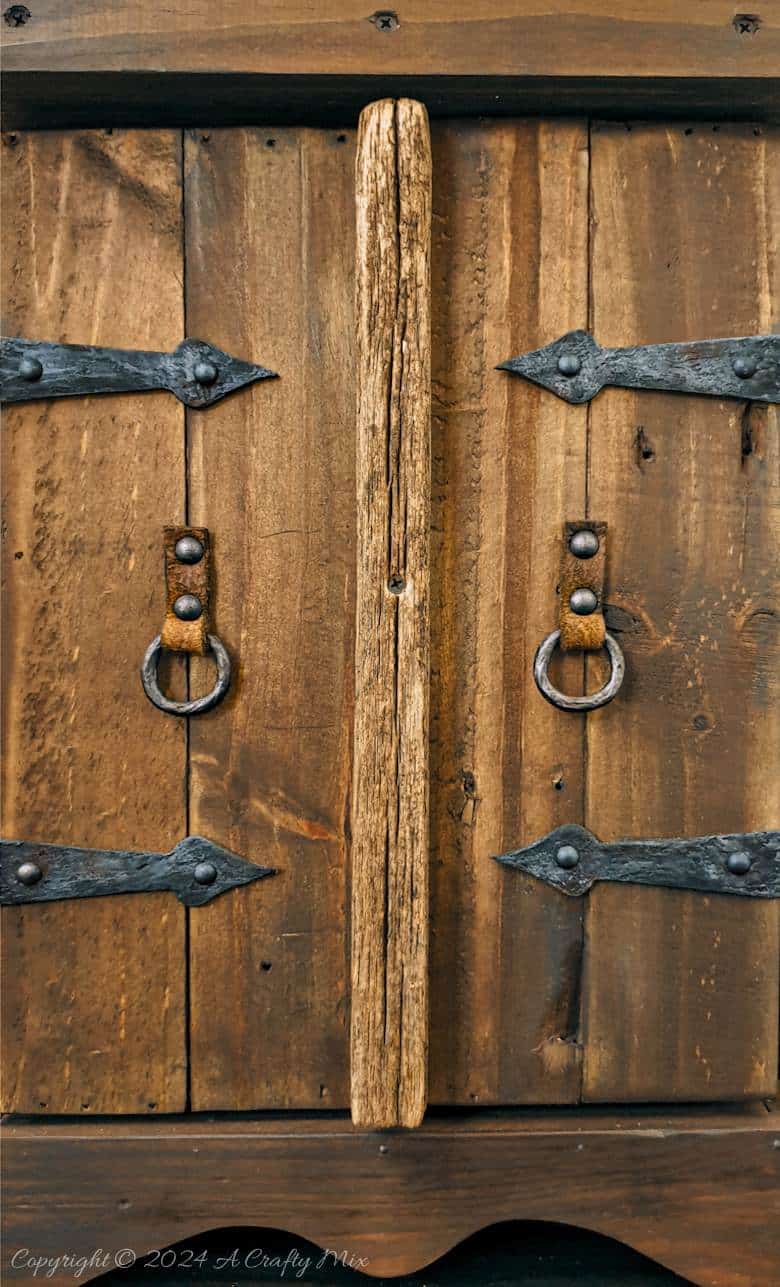
The repurposed wooden crate side table has been stained and dressed up with hammered, faux metal hinges and primitive door pulls, all of which are made entirely from scraps.

It reminds me of something you’d find in a medieval castle.
With its weathered texture and natural imperfections, it exudes a sense of well-loved, handmade authenticity, which I love.
In this free tutorial, I’ll guide you through the process of turning a humble wooden crate into a rustic side table full of character. I’ll also show you how to create custom door pulls and make faux metal hinges using cardboard. But, before we get there, why not follow us on Facebook, Twitter, Pinterest, or Instagram? And don’t forget to subscribe so you’ll never miss a post! Oh and grab a cup of your favorite brew, it’s a long one 😉
What you need
Side table base
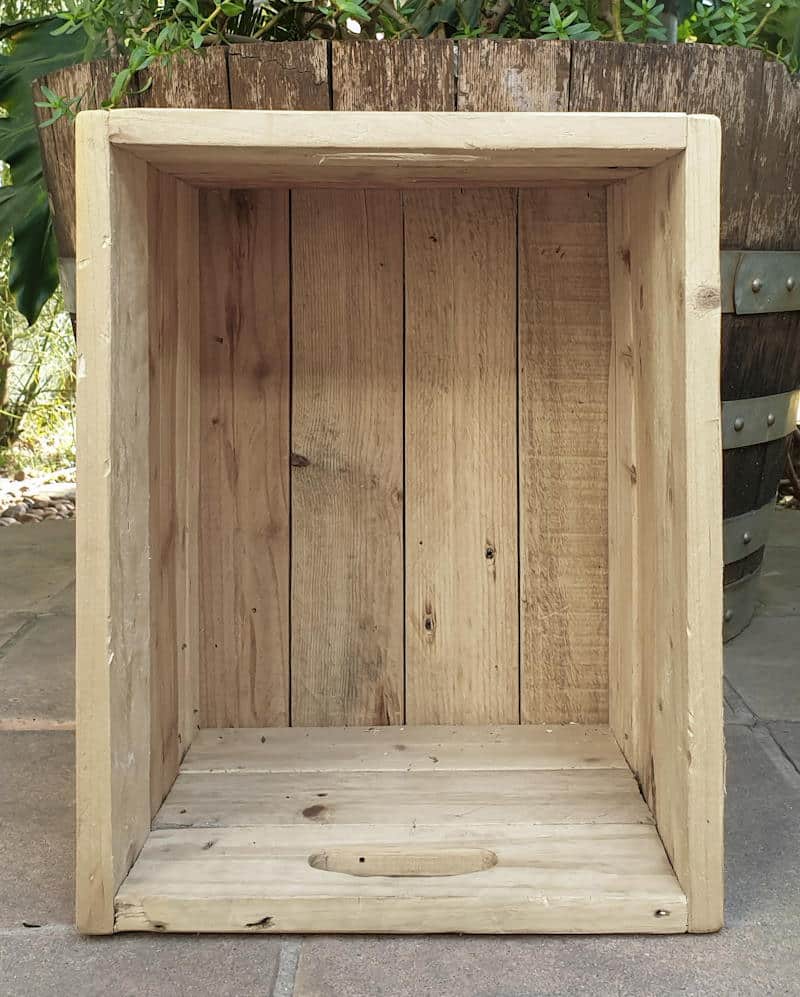
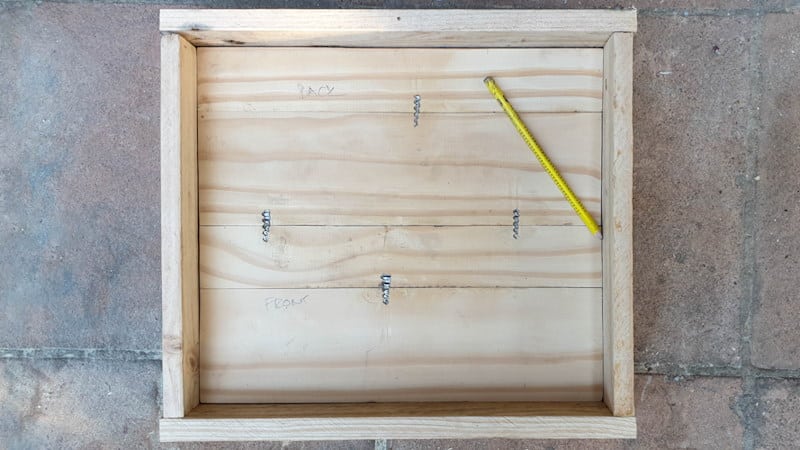
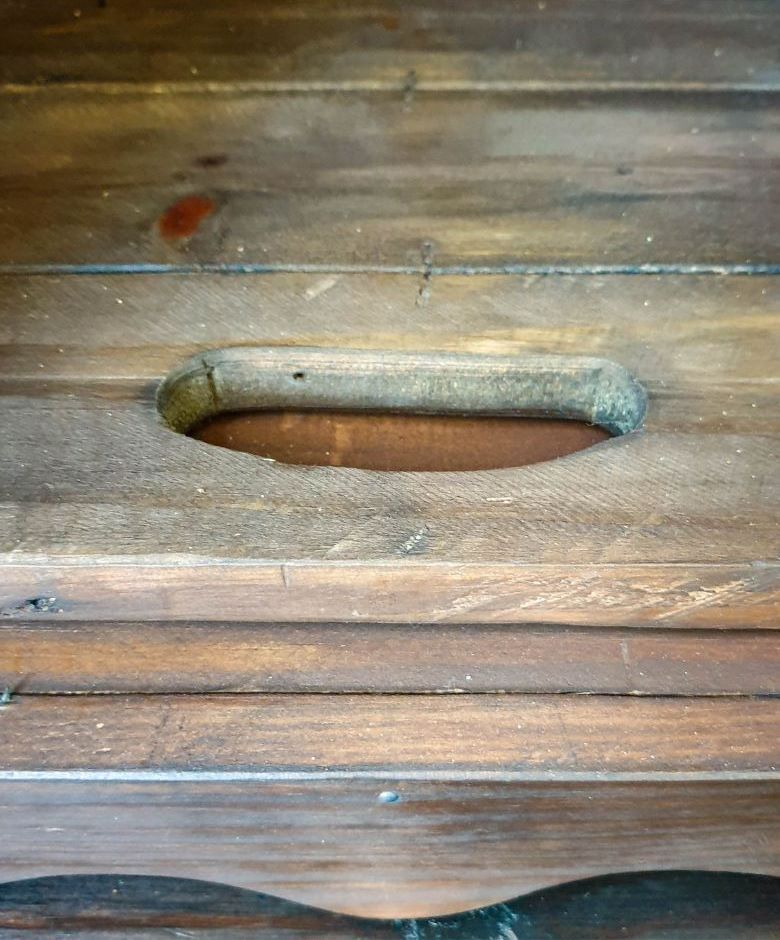
Probably the most important thing when transforming a wooden crate is the crate itself. You can either make your own or take the easy way out and buy one. You’ll find them at most stores, and they come in different shapes and sizes. Look for a rectangular crate that’s big enough for your space and made from solid wood. Crates with open slate sides are not suitable for this DIY project. Don’t worry too much if the crate has “handle holes” on the sides. We’ll be covering them up when we give the rustic side table a new top and bottom.
You’ll also need:
- Wood stain
- Hinges
- Wood glue
- Scrap wood. I used pallets and salvage wood from an old door.
Faux hinges
- Cardboard
- Sharp craft knife or scissors
- Texture paste
- Black and silver craft paint
- Thumbtacks
Door pulls
- Craft clay
- Leather scraps
- Tube or small bottle
- Thumb tacks
Tools
- A jigsaw or table saw
- Sandpaper
- Brushes and sponges for staining and finishing
- Screws and a drill
- A willingness to try – the best tool of all 😉
How to repurpose a wooden crate into a rustic side table
Cutting the bits
The first thing we need to do is make the crate look less crate-ish and more like a functioning side table with doors. Scrounge around in your stockpile of wooden scraps and look for planks that can be used to make a door (or doors), bottom, and top for the little table. I have no idea how to use fancy woodworking apps (sorry), but you basically want to trim or cut the planks to look something like this.
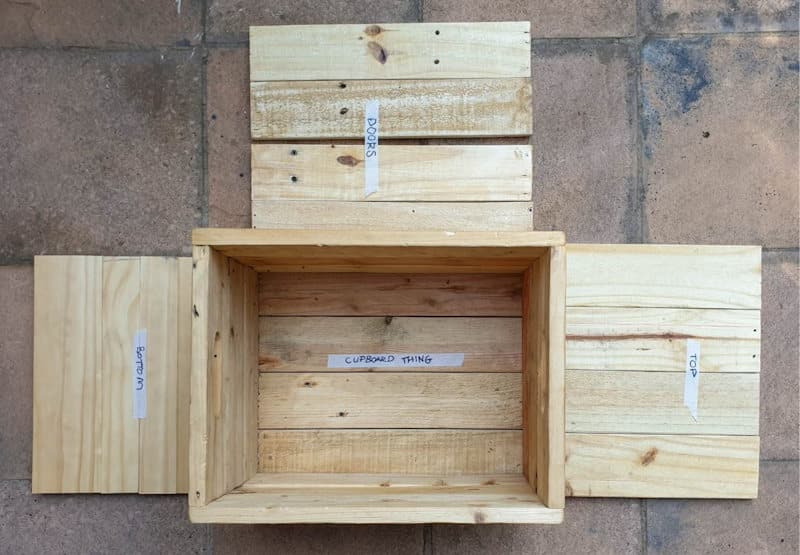
Both the top and the bottom are a little wider than the crate.
Joining the planks
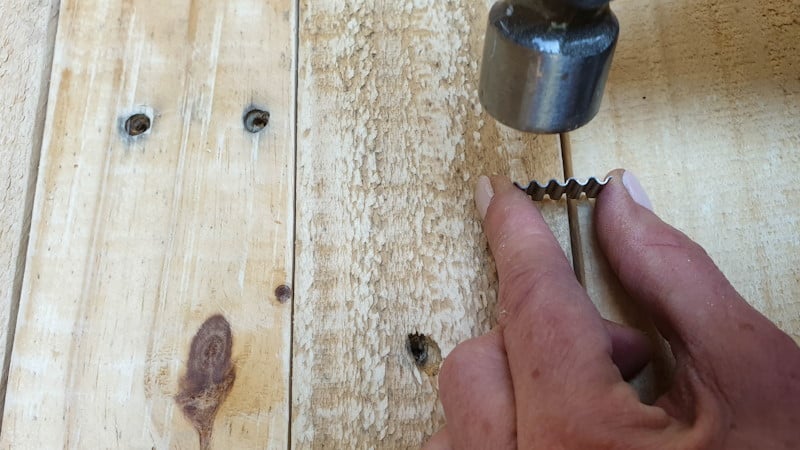
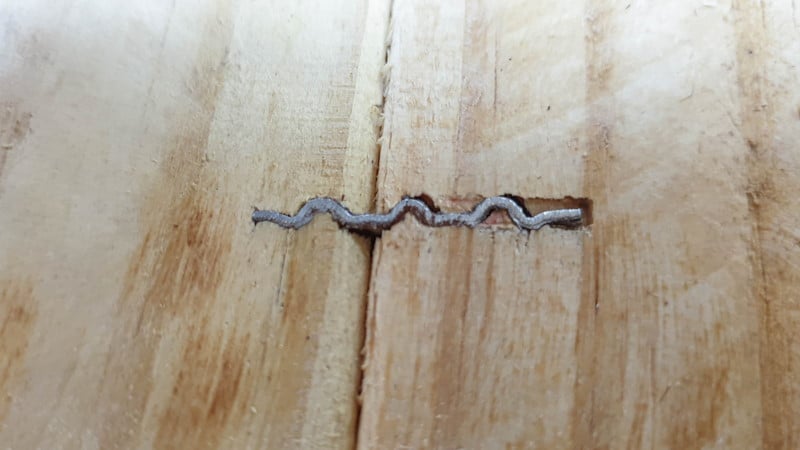
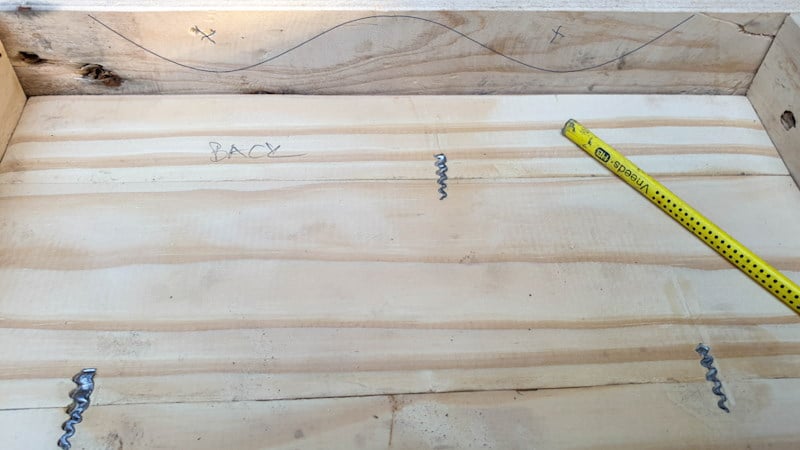
Join the door, top and bottom planks together. I used small, zigzag-shaped metal connectors aka corrugated fasteners.

They’re incredibly effective for joining wooden planks together. Line the planks up, side-by-side, and place the corrugated fastener across the join where the planks meet. Tap the fastener a few times so it bites into the wood.
Check that the planks are aligned and flush against each other before hammering it in all the way. Depending on the length of the join, you may need to insert multiple fasteners.
My pallet scraps were just not wide enough to make one solid door, so I made two. There’s still a small gap between the two doors but that was a problem for later. Your pieces will probably look a little different to mine.

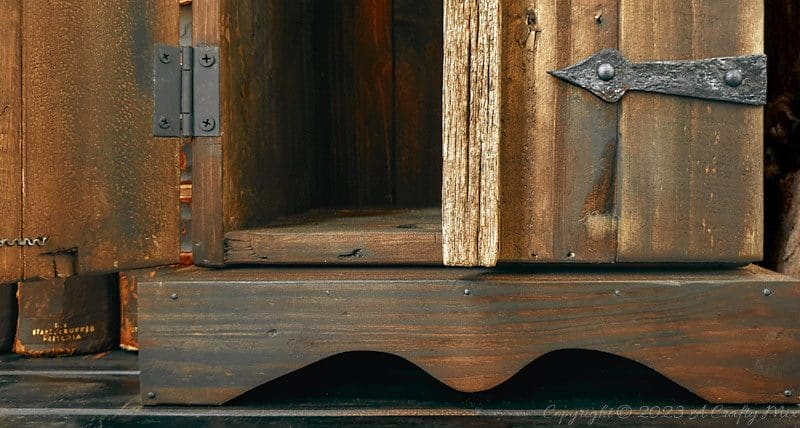
Giving the wooden crate extra height
If your crate is a little on the short side, like mine, you can add feet or a base plate (I think that’s the right word). Oh wait, google just told me it’s called a “toe kick, slab style valance”. You learn something new everyday 😀 So at the risk of making a complete fool of myself, I’m just going to share a brief overview of how I made the toe kick thingy to give the side table extra height. Lay the bottom joined planks on a flat surface and measure the sides. Cut four planks using the measurements as a guide. You basically want to create a box frame around the bottom planks.
To add a decorative touch, I drew a simple curly shape onto the frame and cut it out with a jigsaw.
Glue and screw the box frame to the bottom planks.
Sanding and Painting
Clean and lightly sand the wooden crate, doors, top and that toe kick thing. Don’t go overboard. You still want it to look a little rough around the edges. This repurpose project is all about celebrating imperfections. Stain or paint the pieces to suit your décor. I went for rich, warm, moody tones to compliment the rustic look I wanted.
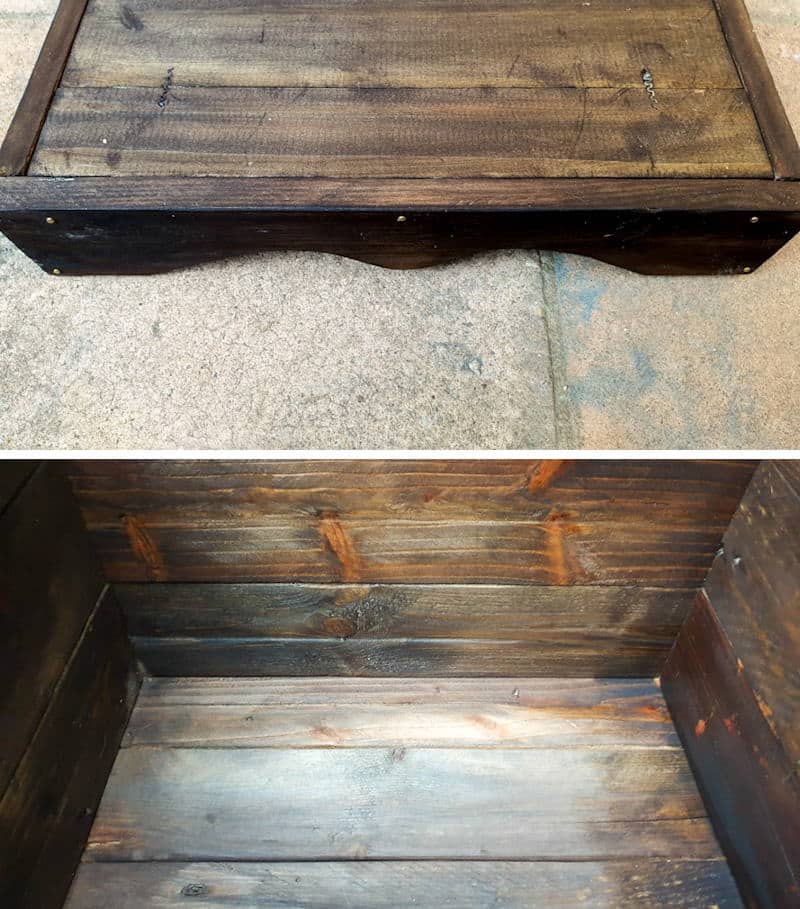
It’s starting to look more like a side table 😀

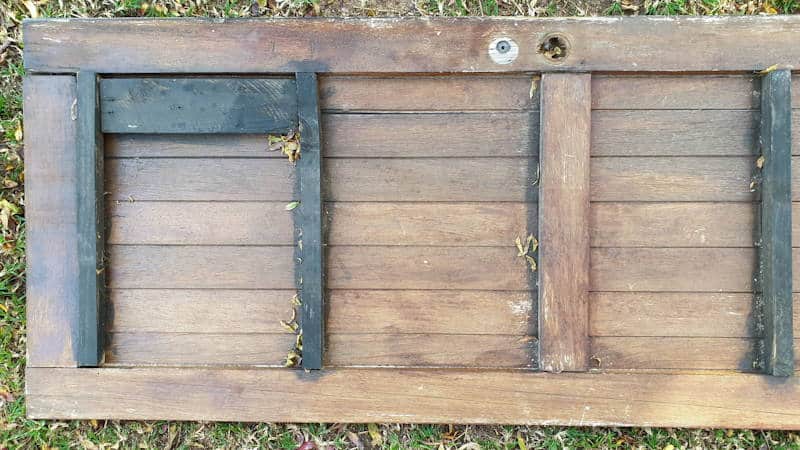
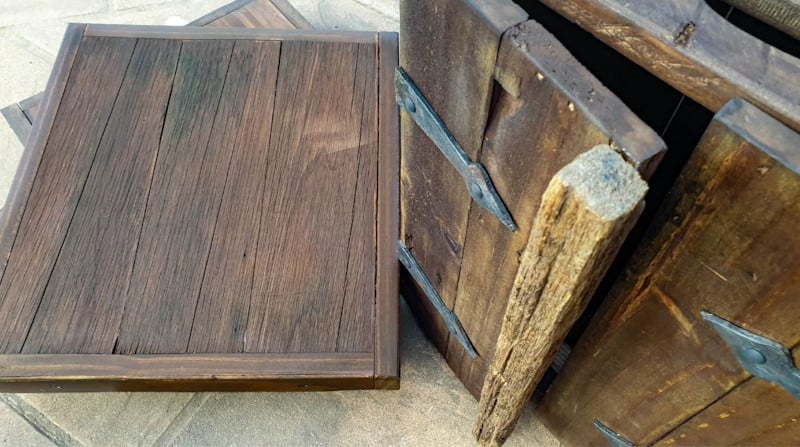
Isn’t that color just gorgeous? It was at this point that I realized the top I’d originally cut for the table was to ……. flat and blegh. It needed something a little more solid and bulky to balance out the new toe kick valance. None of my pallet scraps were thick enough and that’s where the wooden door came into the picture.
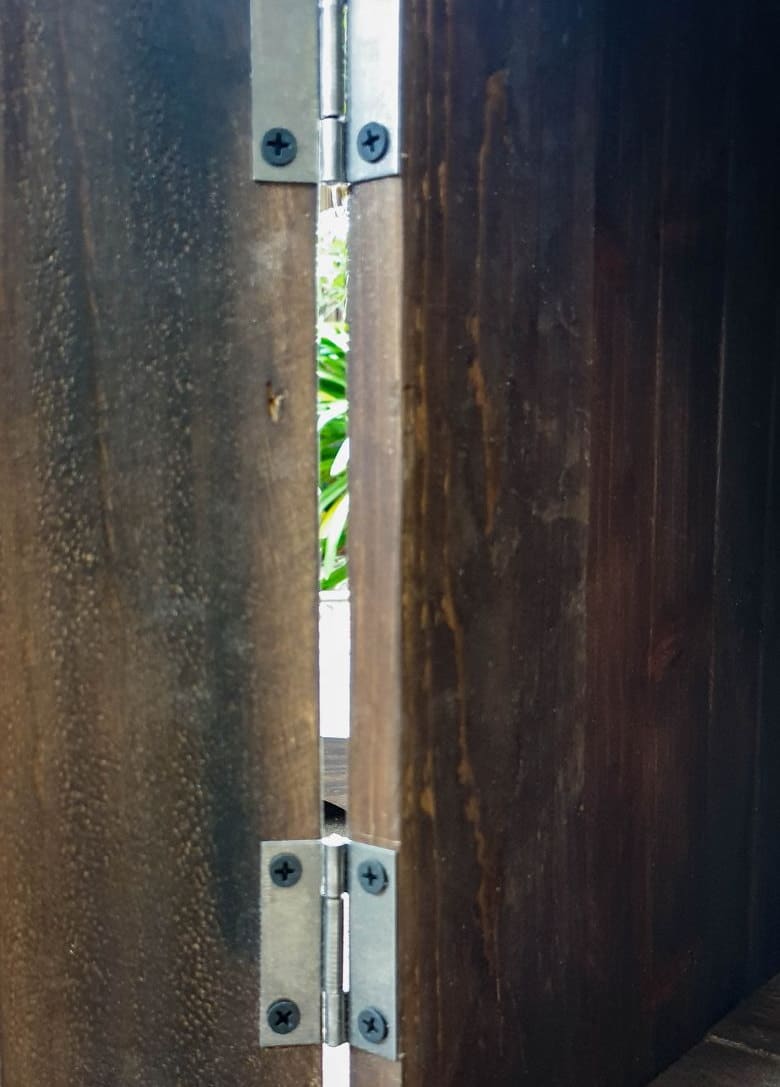
Broken door to the rescue
That poor thing was literally falling apart at the seams before we finally decided to replace her a few months back. She did have good sturdy bones that were worth saving though.
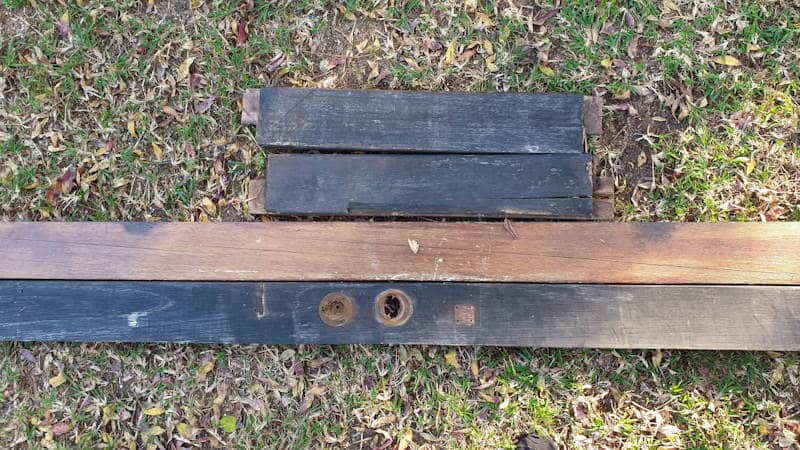
The only problem….. all the salvaged bits had these grooves in them.
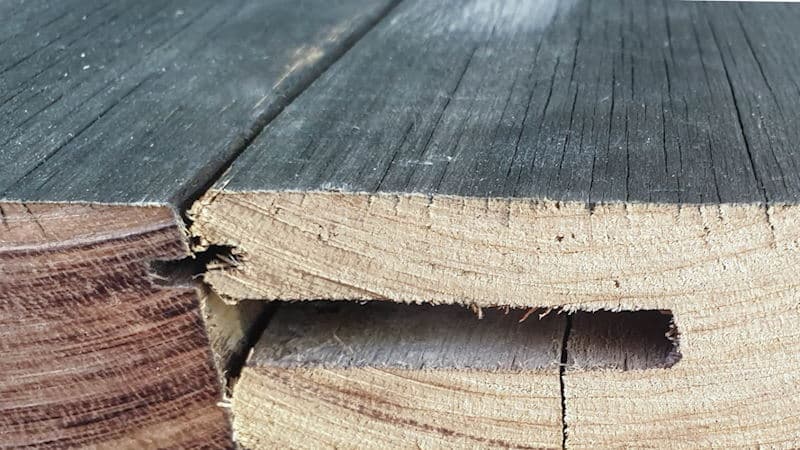
Easy enough to solve with a heavy sanding with all kinds of grits to get rid of that dark black color and a wooden trim.
That’s so much better.

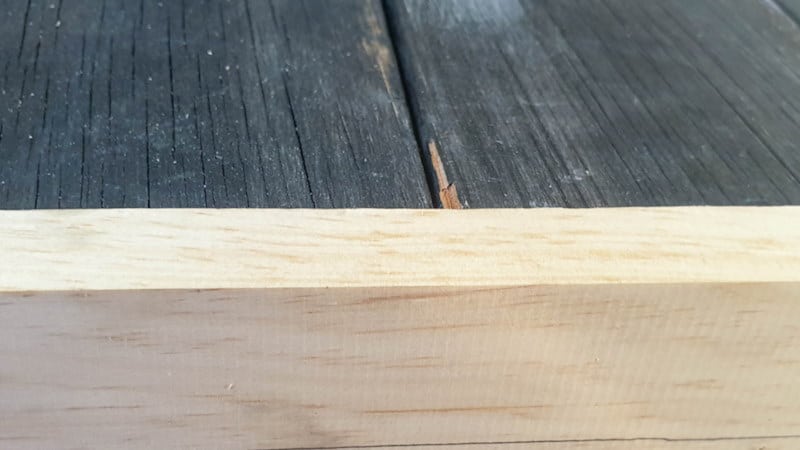
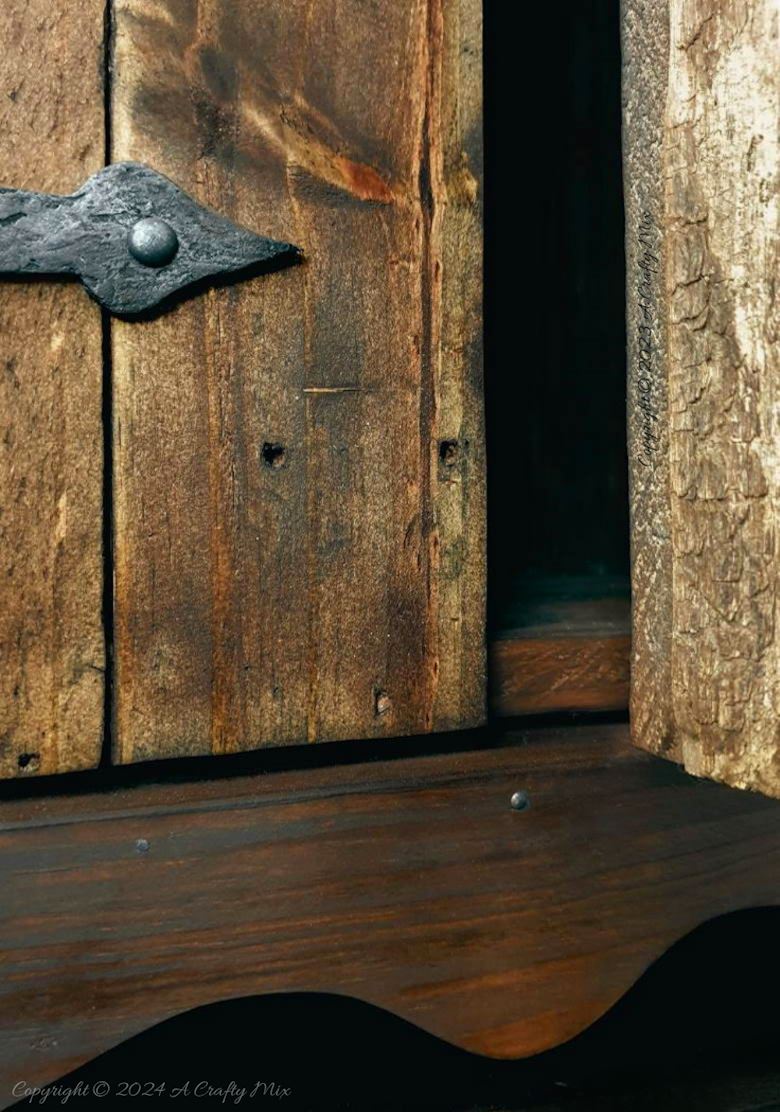
Fitting the rustic doors
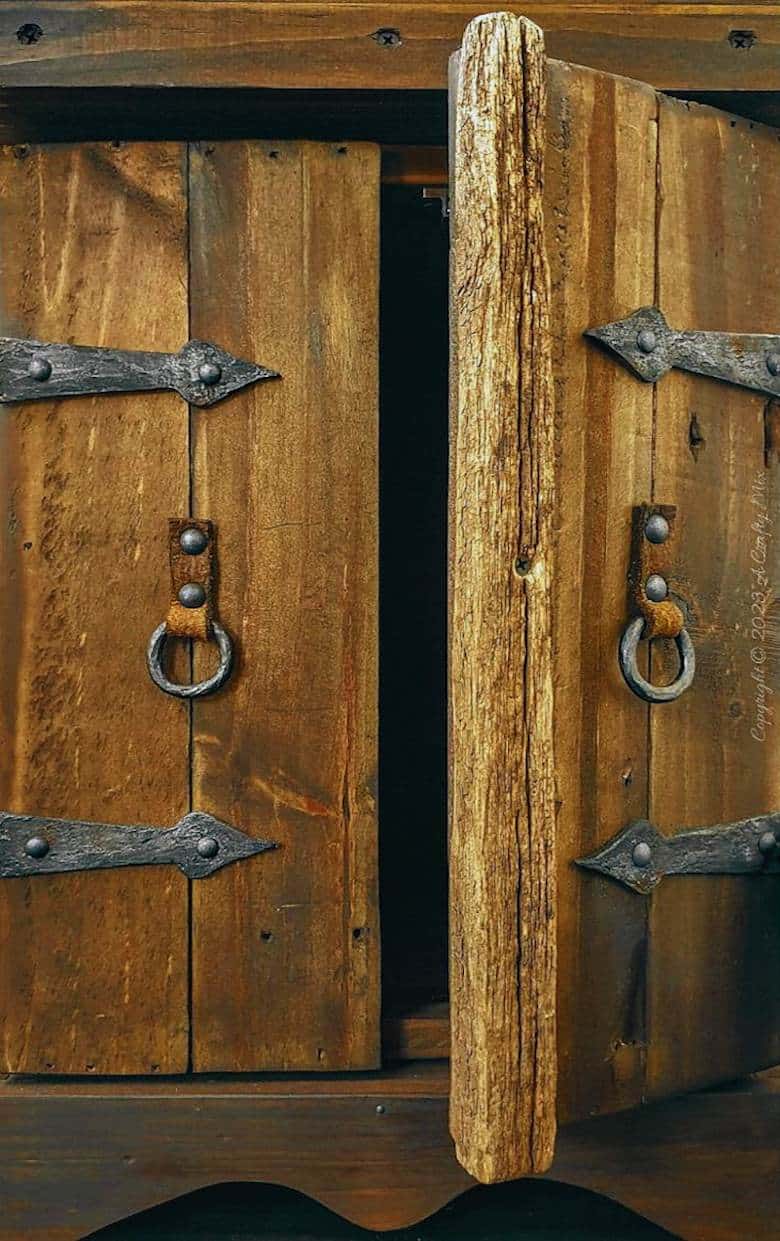
I mentioned earlier that none of my planks were the right size to make a single door wide enough for the wooden crate. Which is why I opted for two slim doors. However, that still meant I’d have a gap between the doors that would spoil the whole look. To hide the gap I used a clunky, well weathered 2 x 2. Well, I think it used to be 2 x 2. I’m not 100% sure. Either way, the 2 x 2 was glued and screwed onto a long edge of one of the side table doors.

You can get an idea of how big the gap was in this pic. No-one will see it once the doors are up.

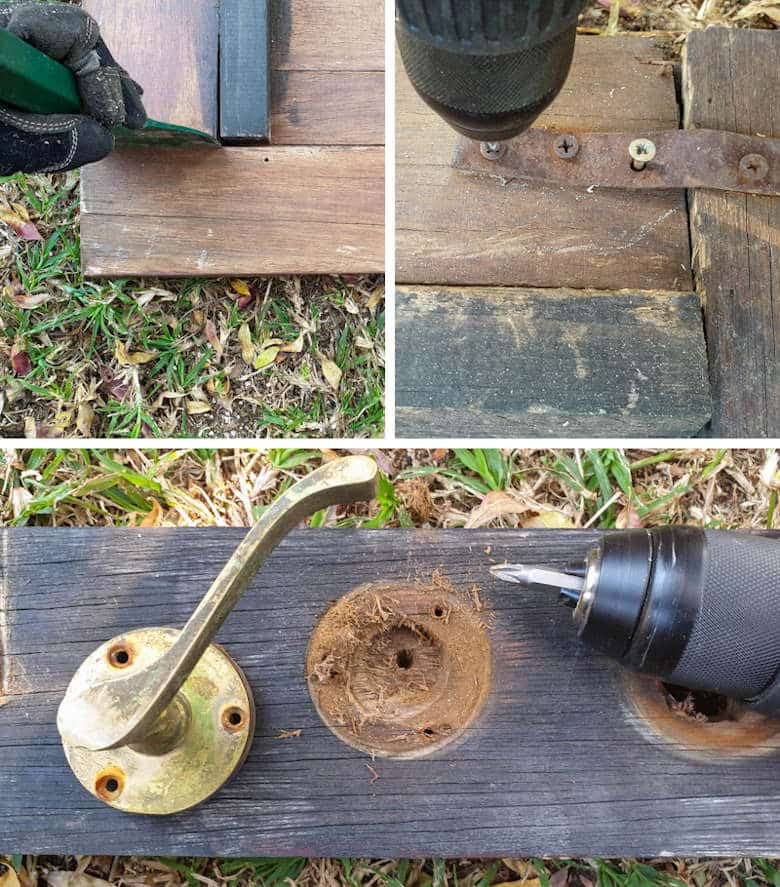
Once the glue dried, I could add the real hinges and hang the doors.
Right, that’s the prep work done. Now I just needed to make some mock metal hinges and door pulls and put the repurposed wooden crate rustic side table together.
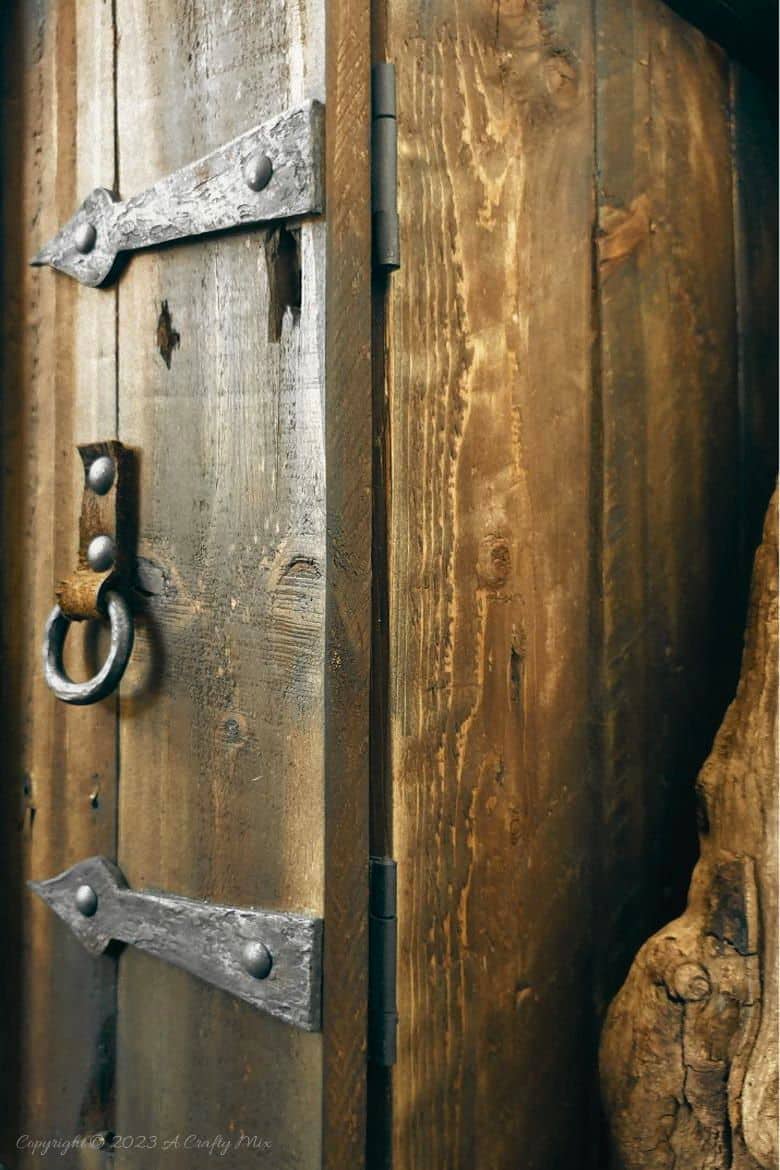
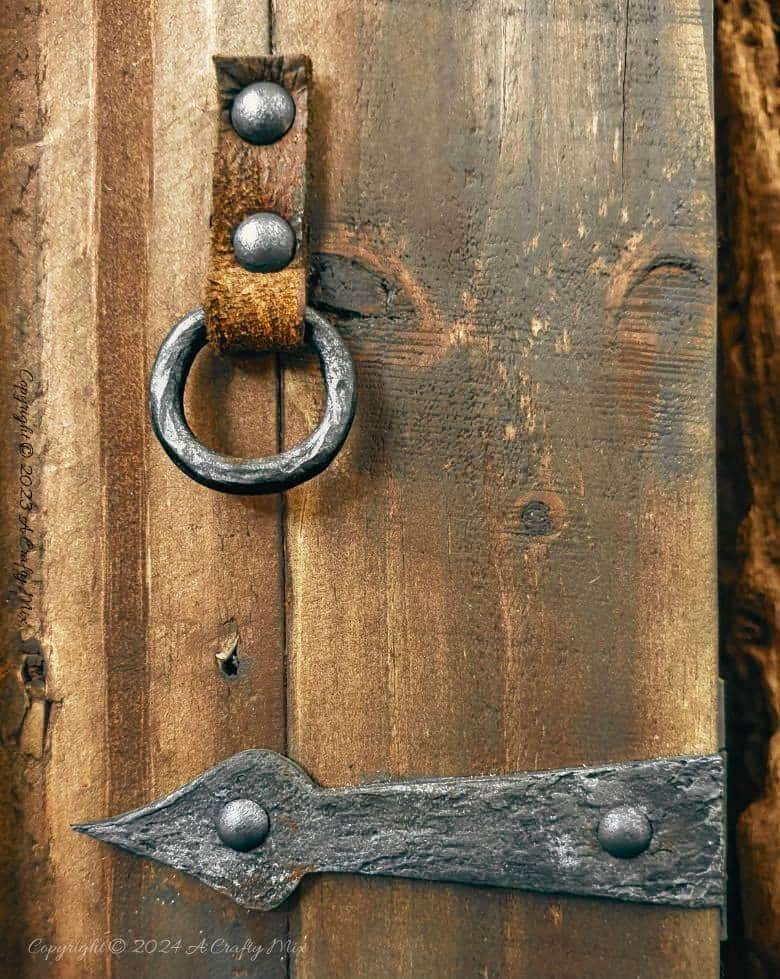
How to make mock metal hinges
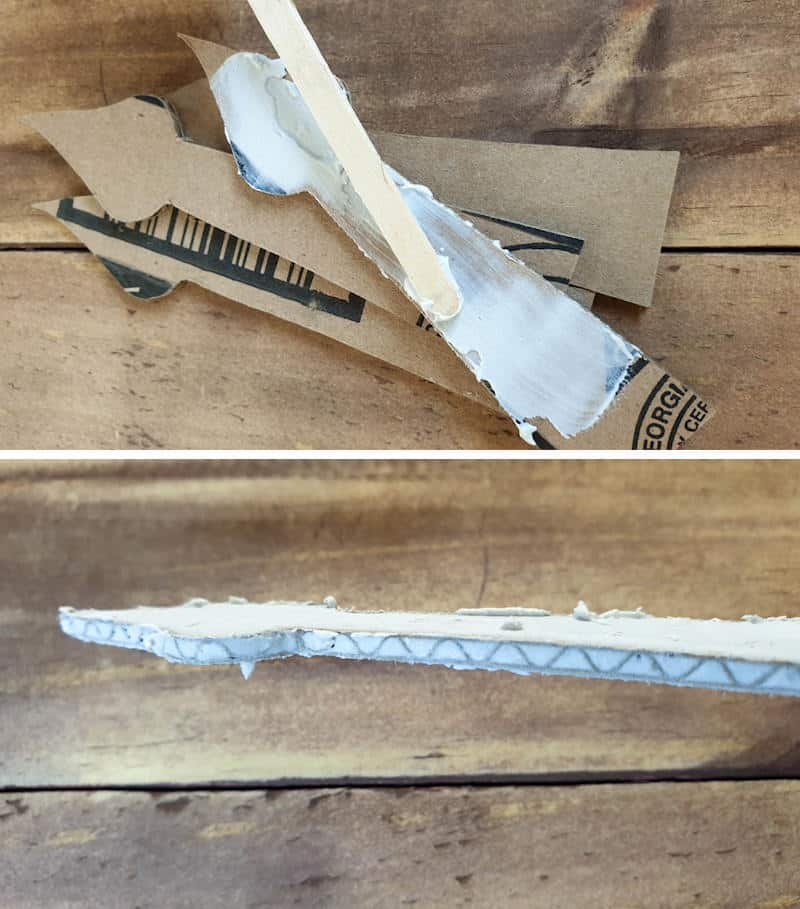
To make the mock hinges I used a sturdy cardboard box, sharp craft knife, texture paste (homemade recipe here), and craft paint. If you want to add studs, you can use thumbtacks or a hot glue gun.

First off, draw a rough template of a hinge on a piece of paper. Try to keep the shape as simple as possible unless you have a scroll saw or fancy cutting tool. Transfer the image to a piece of cardboard and cut out 2 equally sized hinges for each door.

Mix up a batch of homemade texture paste or grab the store-bought version and use a craft stick to smear it all over the cardboard hinges. Haphazard is good. You want some peaks and valleys. Be sure to cover the sides of the cardboard to hide the wiggly waggly bits and apply two to three layers. Leave each layer to dry before applying the next one.
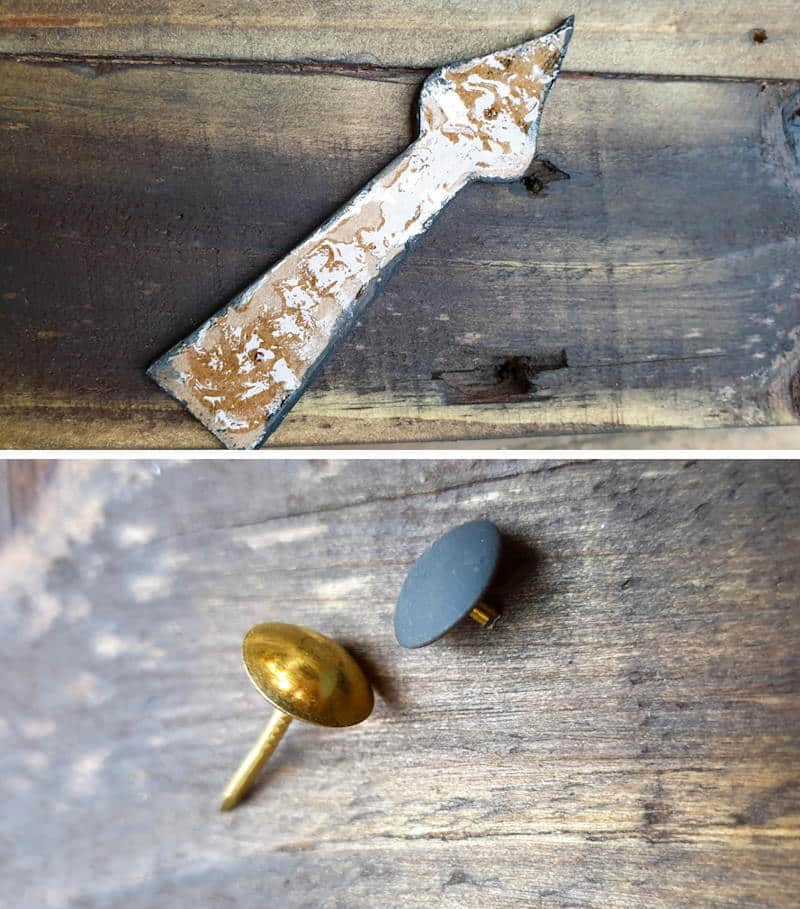
Paint the cardboard hinge black, followed by silver.
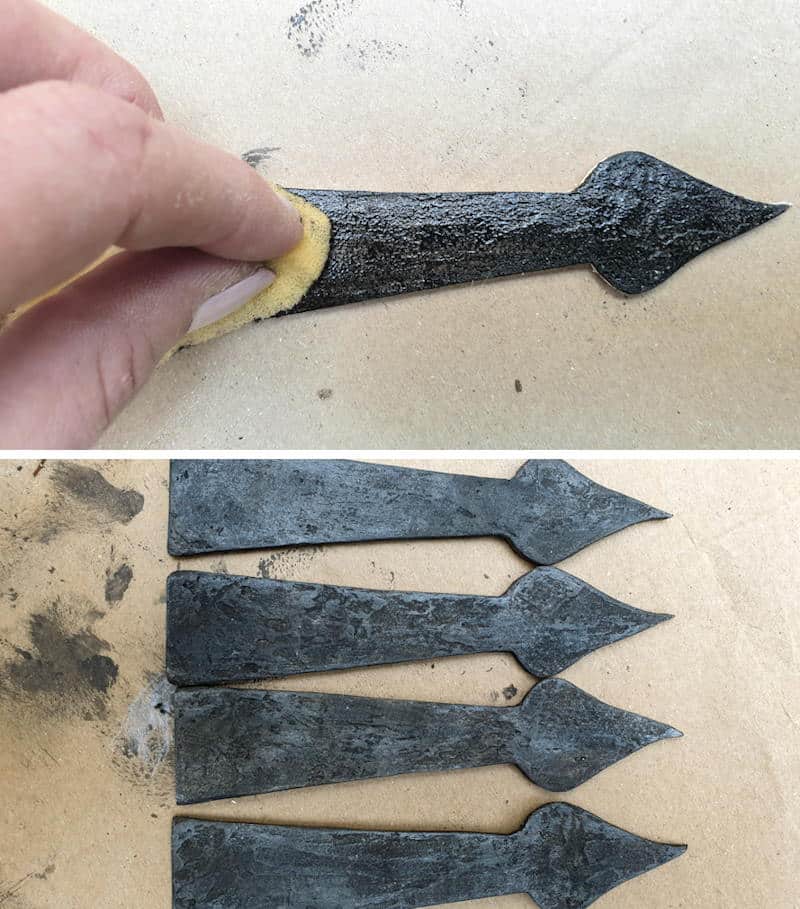
Dab on a small amount of brown to mimic rust spots. You can get a full tutorial on how to paint something to look like metal using ordinary craft paint here. Once the paint dries, glue the hinges onto the doors. Add a few thumb-tack studs.
And voilà! You’ve just made some super cool mock metal hinges out of good old-fashioned cardboard.

Next up the door pulls.
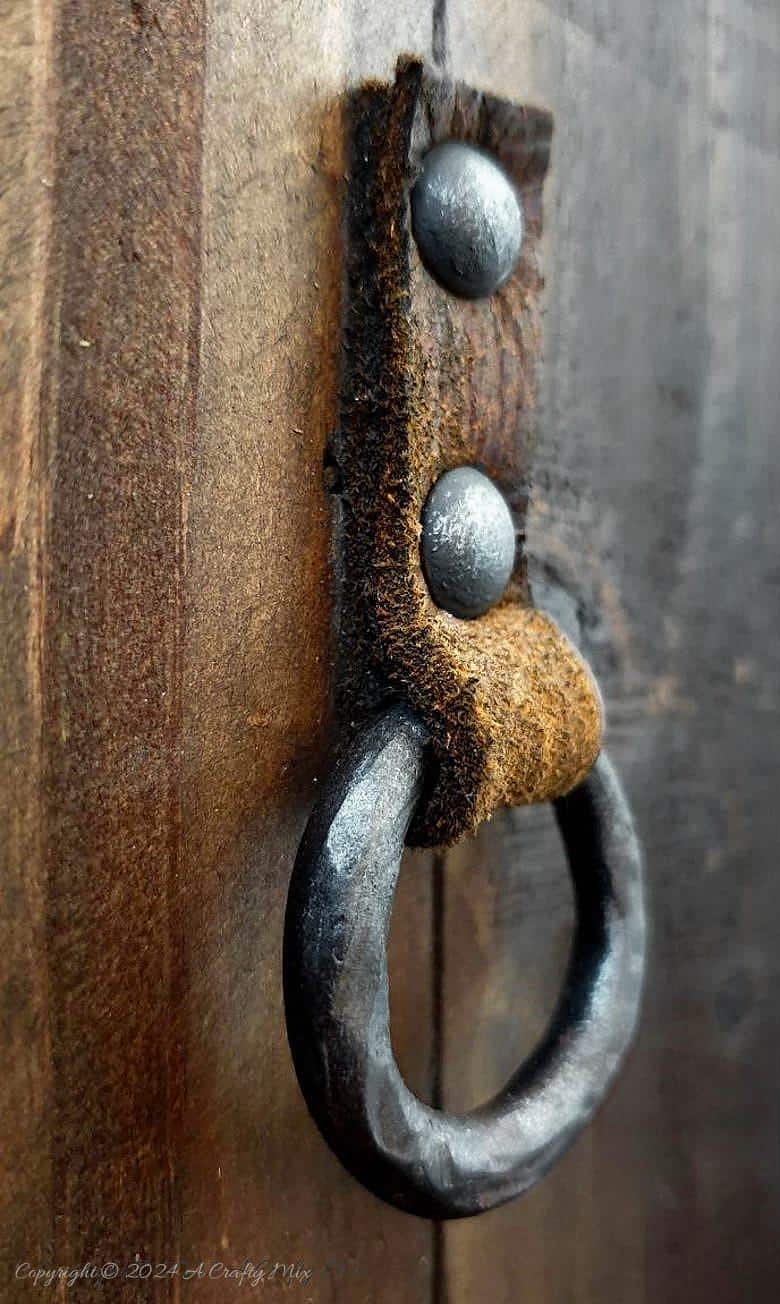
How to make faux metal door pulls
This part had me scratching my head a little. Cardboard is perfect for faking a look, but I wasn’t sure it would be strong enough to pull a door open. But clay is. I used Sculpey, but air dry clay should work too. Knead the clay between your fingers and roll it into a looooong worm.
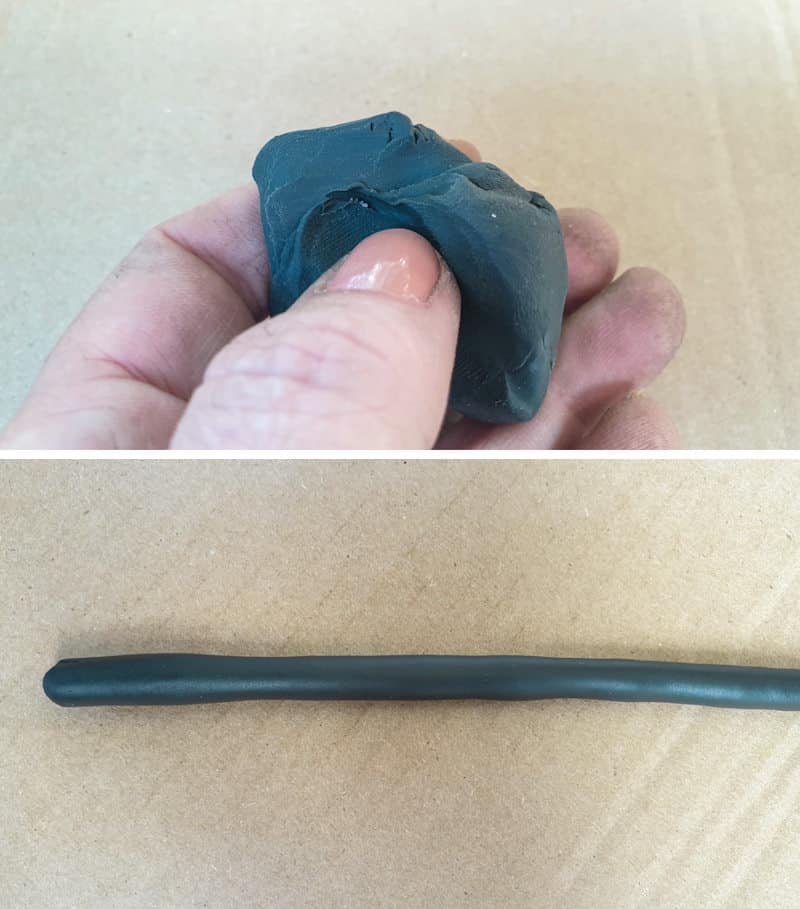
Wrap the worm around a small bottle or tube and trim the overlapping ends.
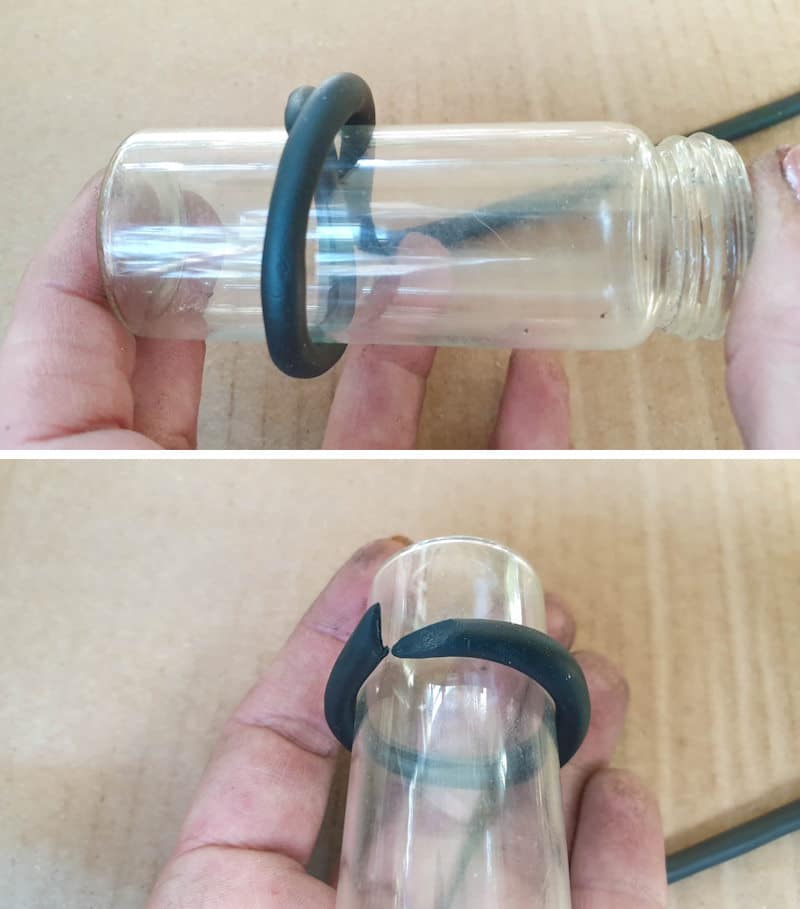
Squish and smoosh the trimmed ends together to form a ring.
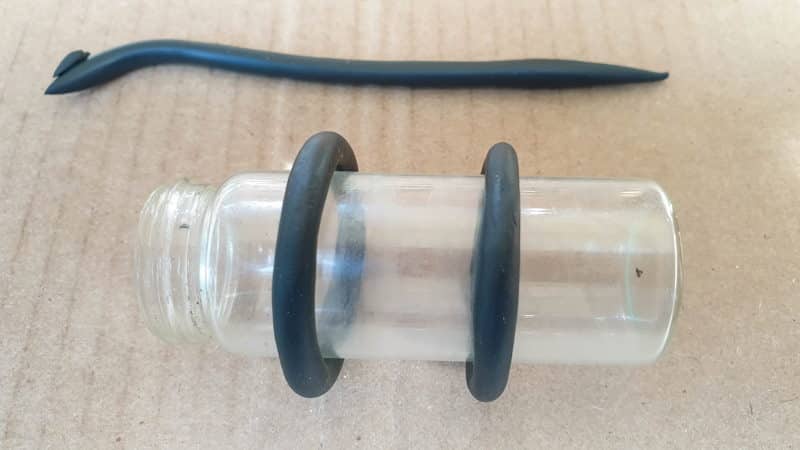
Gently slip the rings off the bottle and bake according to the manufacturer’s instructions. Leave the rings to cool down completely before painting. Since I used black clay, I just added a teeny bit of silver paint to mine.

Cut a thin strip of leather for each ring. I used some bits I had left over from making this boho Tillandsia planter. If you don’t have any leather scraps lying around, see if you can find old belts or shoes in your cupboard or at the local thrift store.
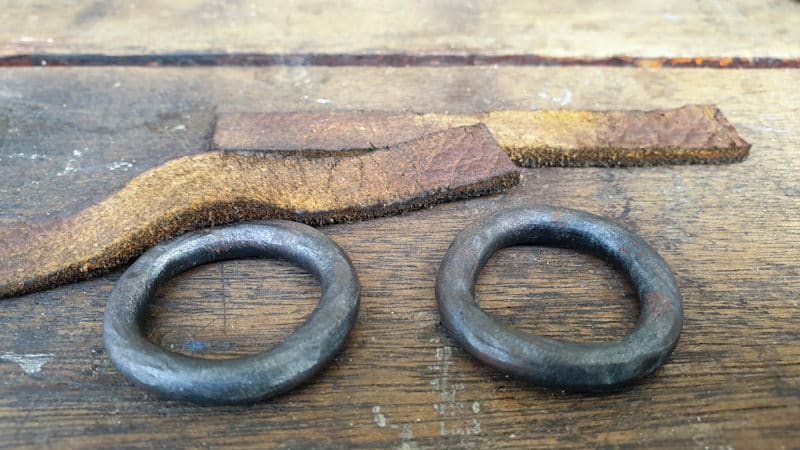
Thread the leather strip through the ring and fold it in half.
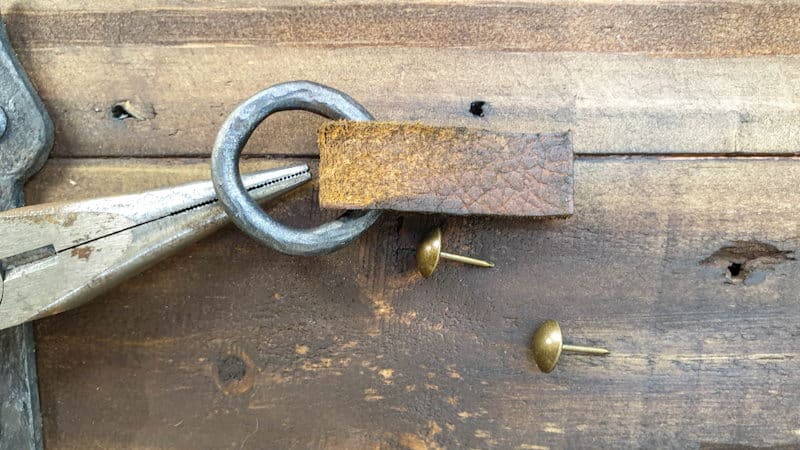
Glue the strip to the door and finish off by hammering in two thumb-tacks.
Putting the rustic side table together
We’re almost done, I promise. We just need to put all the pieces together.
Center the wooden crate on the new, bulked up top and screw it on.
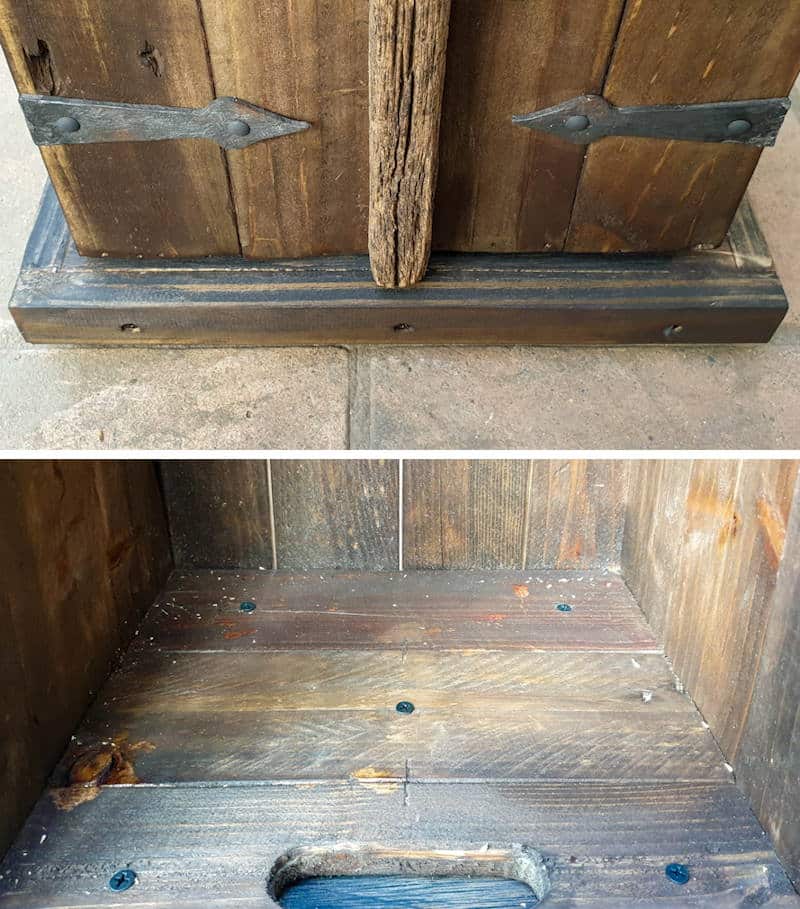
Repeat for the bottom kick plate.
And that’s it. The rustic cabinet was done.
Not bad for a wooden crate repurpose 😉
When I tell people that it’s handmade from salvage stuff, they give me that “You’re joking, Right!!” look.
And no-one believes me when I share the secret to making the hinges. Just imagine all the doors, boxes, and mini treasure chests you could pimp out with inexpensive cardboard dressed up as metal.
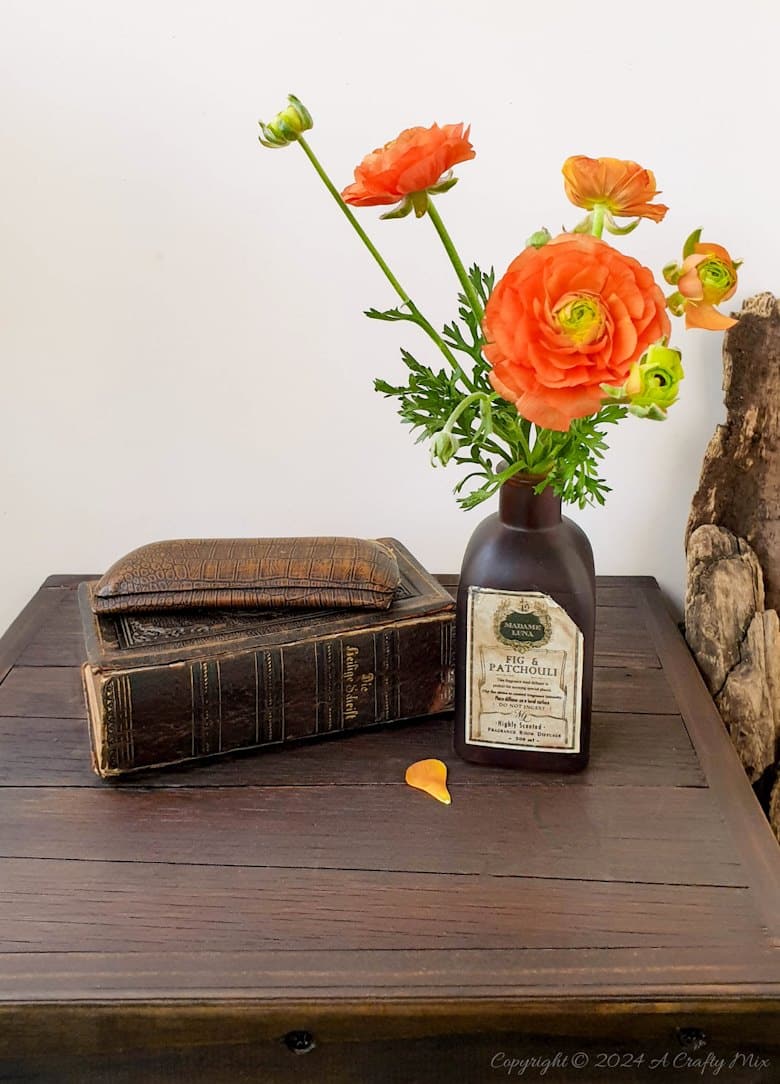
The charming, repurposed, rustic side table infuses warmth, character, and nostalgia into our space.
What do you think? Have you repurposed a wooden crate into functional decor for your home?
If like this rustic repurposing tutorial, don’t forget to pin it for later.
Sharing caring 😉
Oh, and if you’re looking for some of the things we used, we’ve got you covered. Disclosure: Clicking on the links below, means we may receive a commission from Amazon. But don’t worry, it won’t come out of your pocket, and it helps us make more amazing crafts to share with you 😉
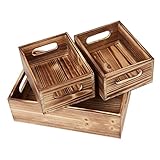


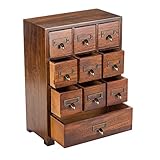
And if you prefer to buy rather than DIY, then maybe these beauties will appeal.


And as always, wishing you a wonderful, crafty week filled with lots of love. Thank you for popping in for a visit.

Last update on 2026-06-03 / Source Amazon Affiliates