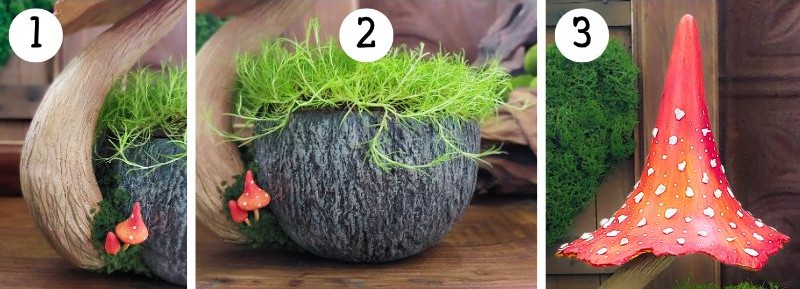
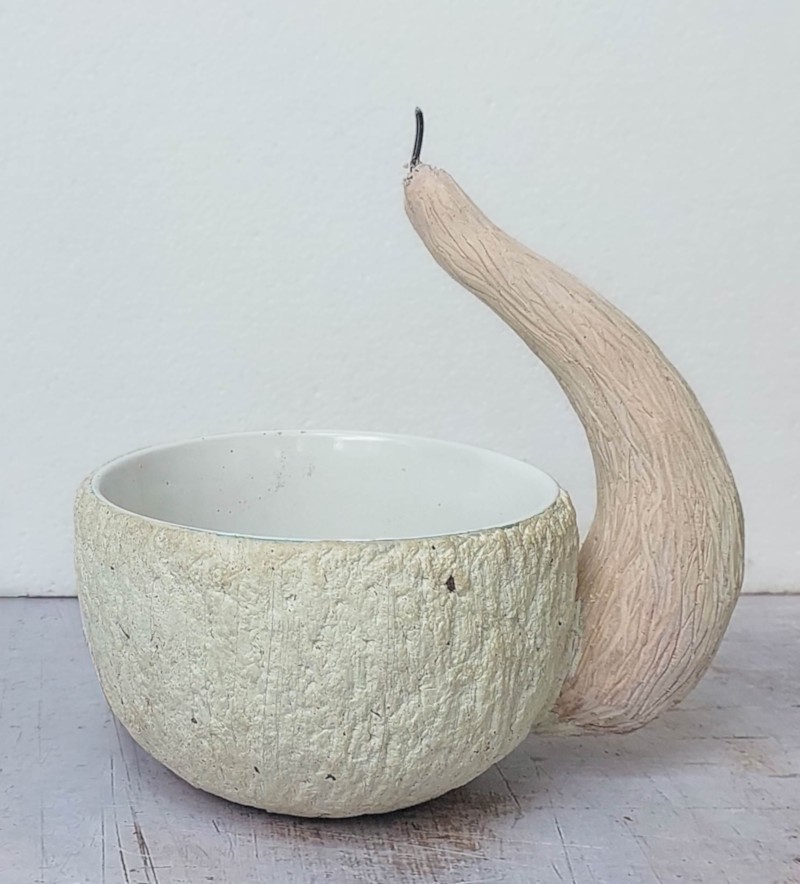
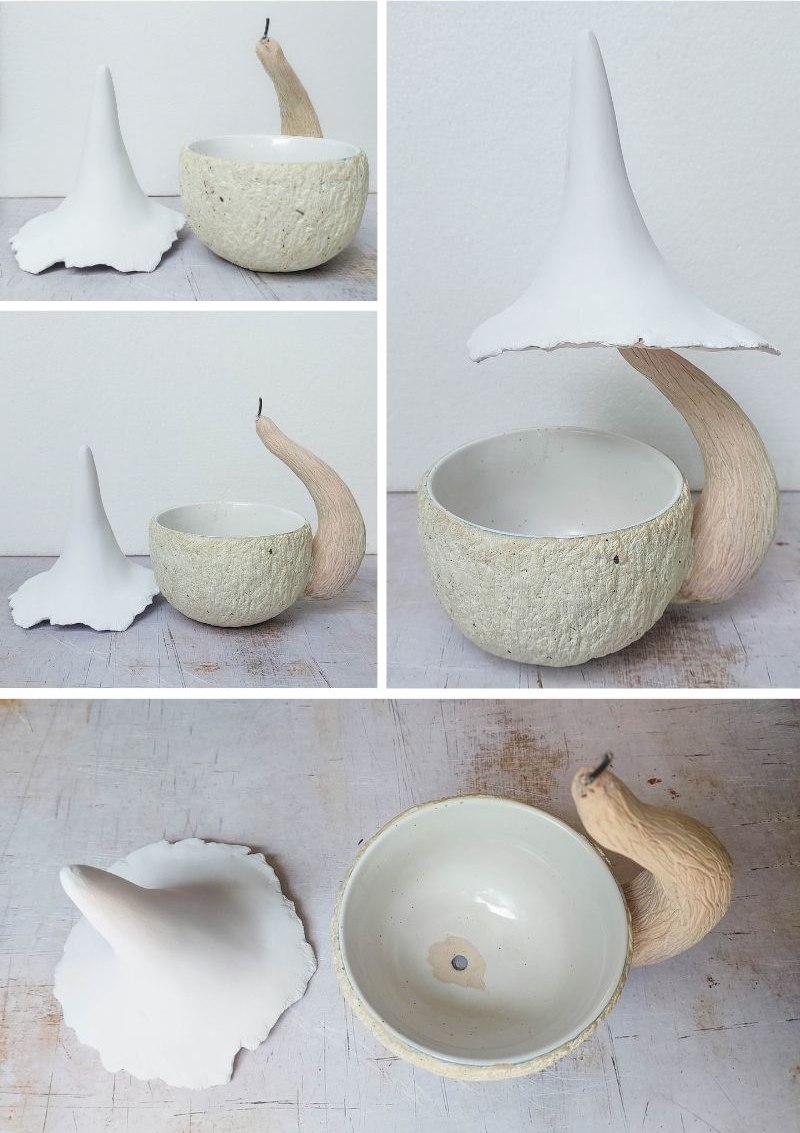
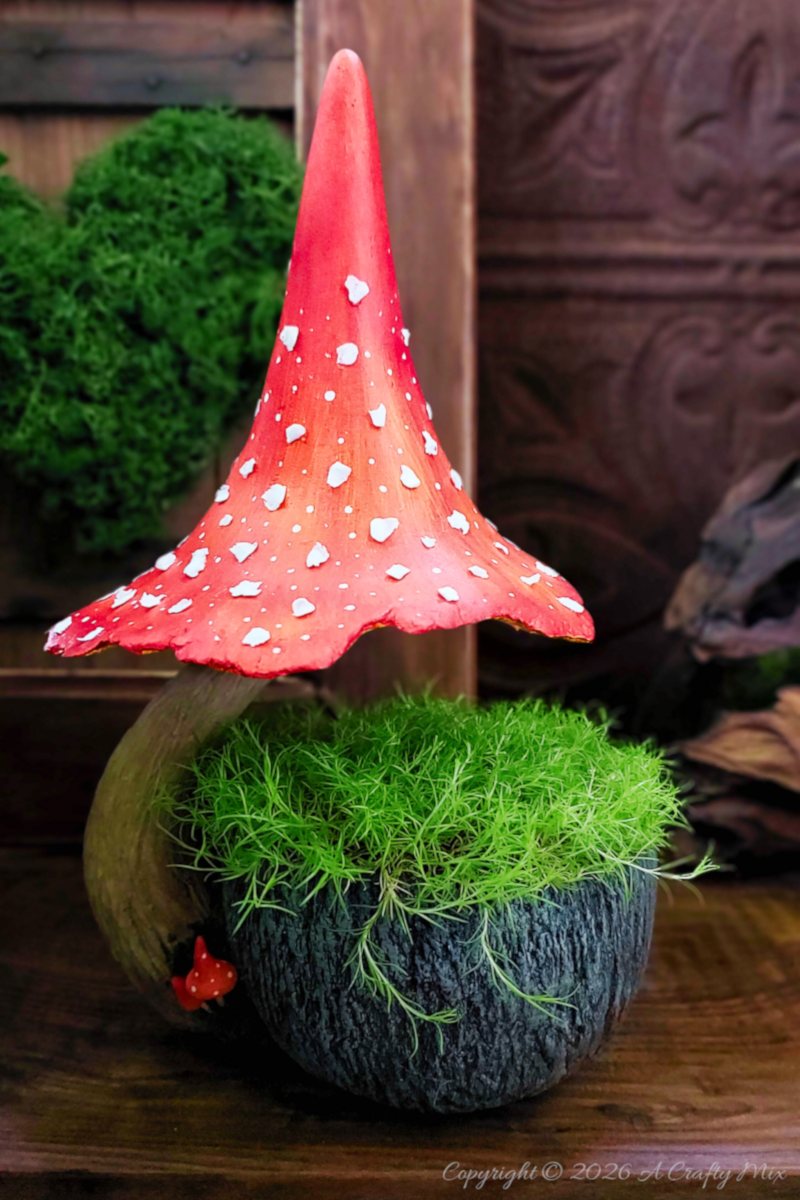
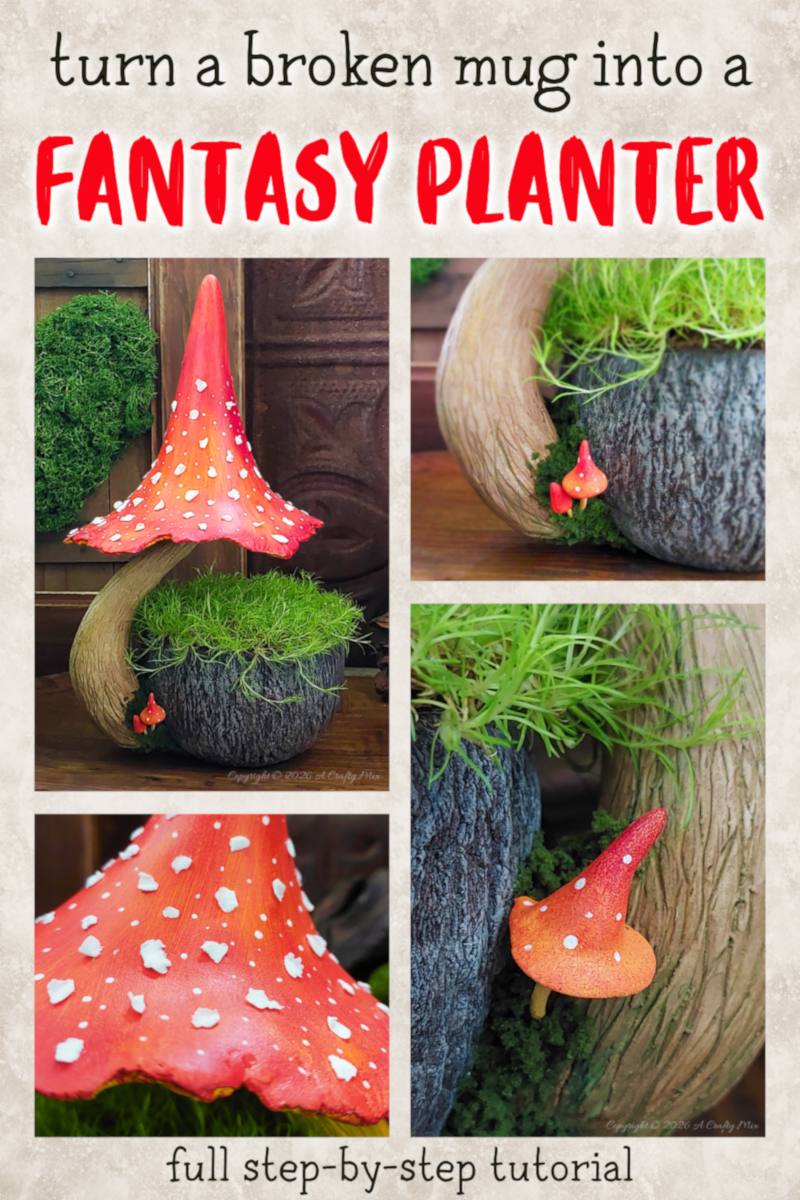
Would you believe me if I told you this fantasy planter started its life as a broken mug?
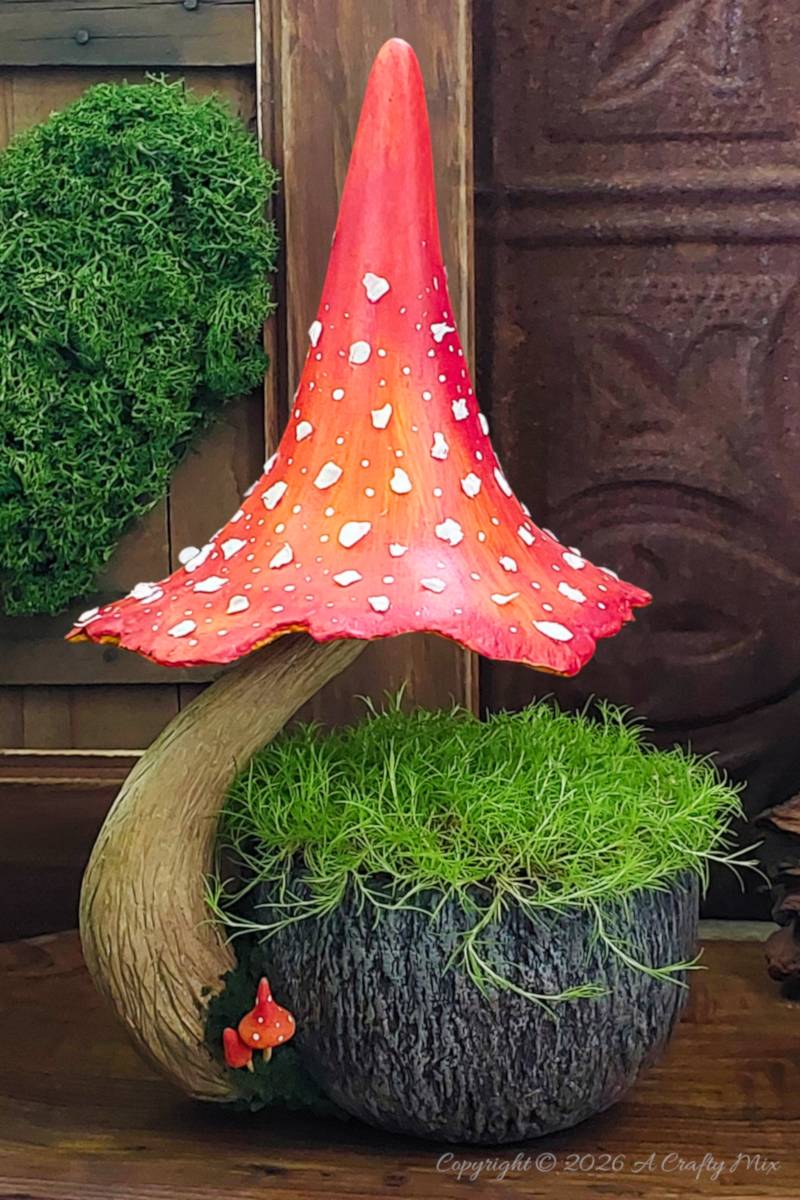
Yup, see the little mushrooms at the base? And that curved stalk? They’re hiding the damage that should have sent this poor mug straight to the bin.

There’s a large, spotted, removable mushroom cap balancing on top of the stalk.
Mmmm, does that make it a toadstool rather than a mushroom? Probably. Anyhoos, it’s there to help the moss stay cool and moist. It reminds me of a tiny forest floor under a canopy which ties the fantasy scene together.

In this tutorial I’ll show you how to upcycle your own broken mug into a whimsical mushroom-topped planter.

But before we get there, do me a favor and follow us on Facebook, Twitter, Pinterest, or Instagram. And don’t forget to subscribe so you’ll never miss a post!
What you need
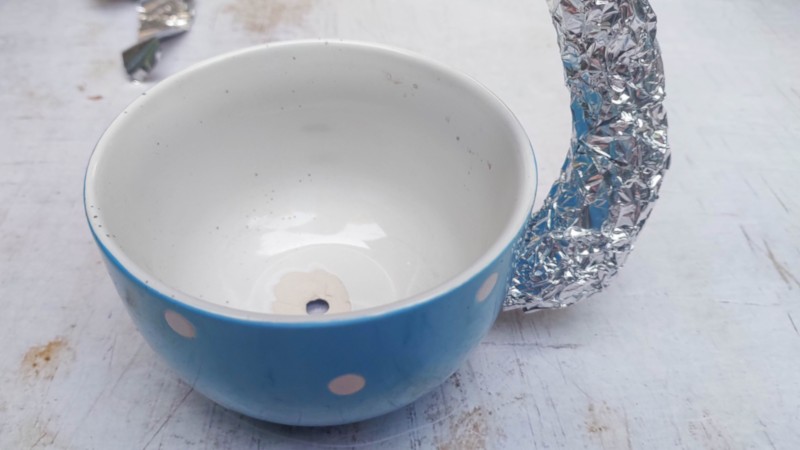
The hidden star in this tutorial is an old soup mug. It lost its ear many, many moons ago, but I couldn’t bear to throw the mug out. It was my daughter’s favorite when she was a little person.
She’s all grown up now, but the mug stayed in the back of the cupboard. Why? I don’t know, but I’m glad it did. You’ll also need:
- 12-gauge jewelry wire
- Clay
- 2-part epoxy clay
- Air-dry or polymer clay
- Foam clay (optional)
- Craft paint
- Moss (optional)
- Tin foil
- Duct tape
- Glue
- Drill and small drill bit
How to upcycle a broken mug and make a fantasy planter
There are three main parts to this fantasy planter:
- Part 1: The broken handle stalk
- Part 2: A woody mug exterior
- Part 3: Mushroom/toadstool top
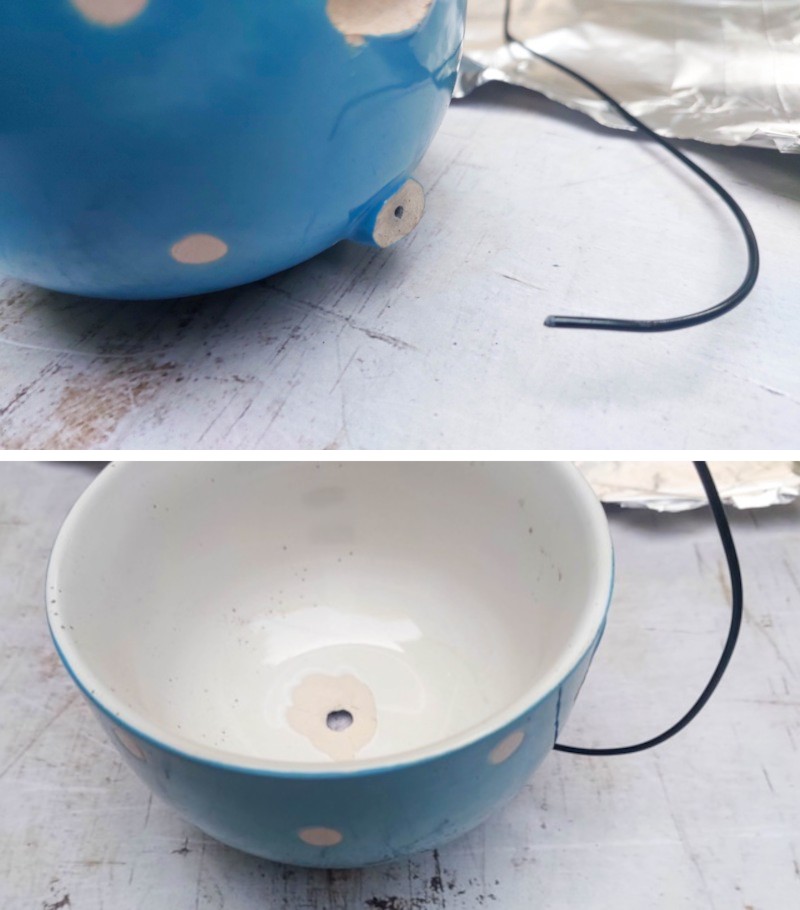
I’ll start with the making a mushroom stalk that will disguise the fact that the handle broke. You can skip parts 1 and 3 if all you want to do is put a faux woody exterior over the cup. Oh, and if you going to use the mug as a planter, please drill a drainage hole in the bottom.

Hiding the break with a mushroom stalk
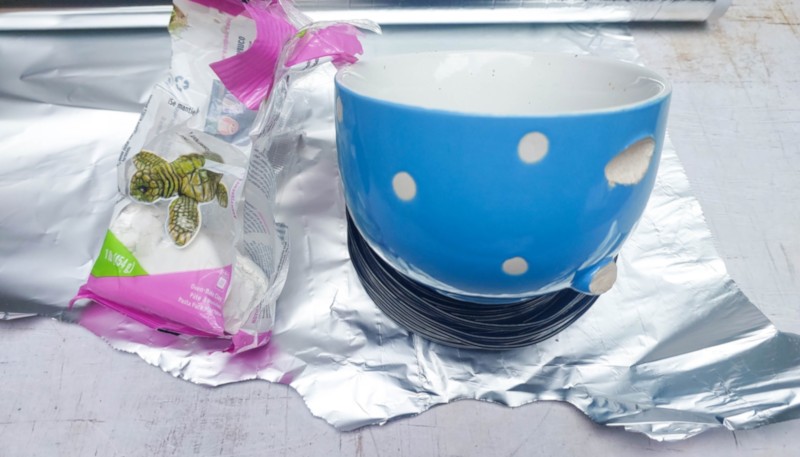
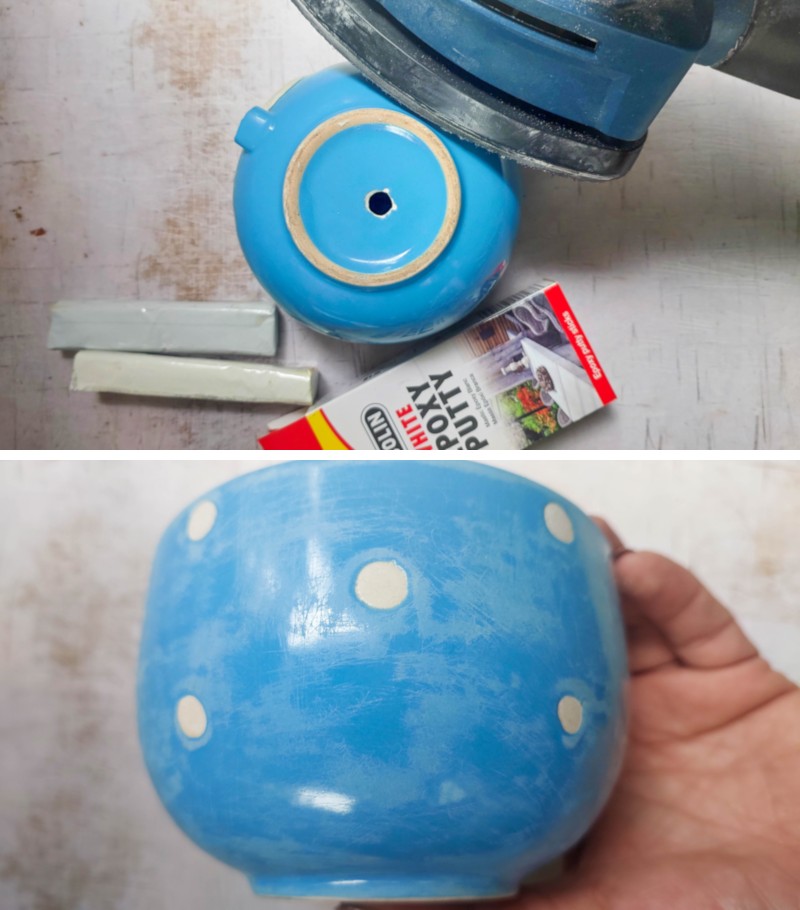
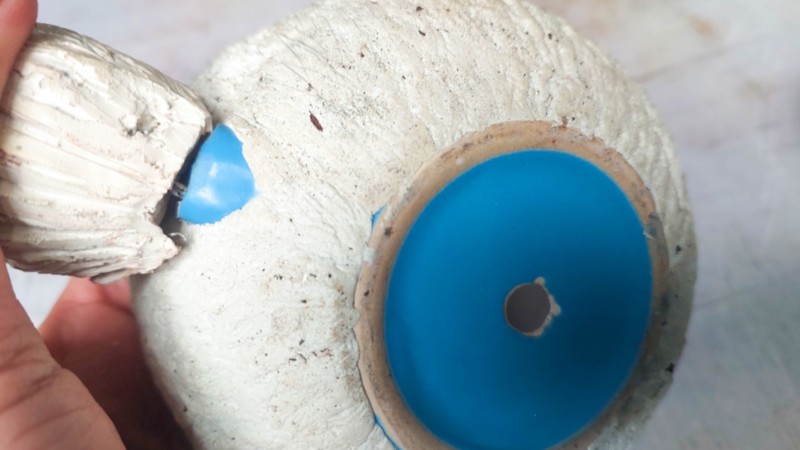
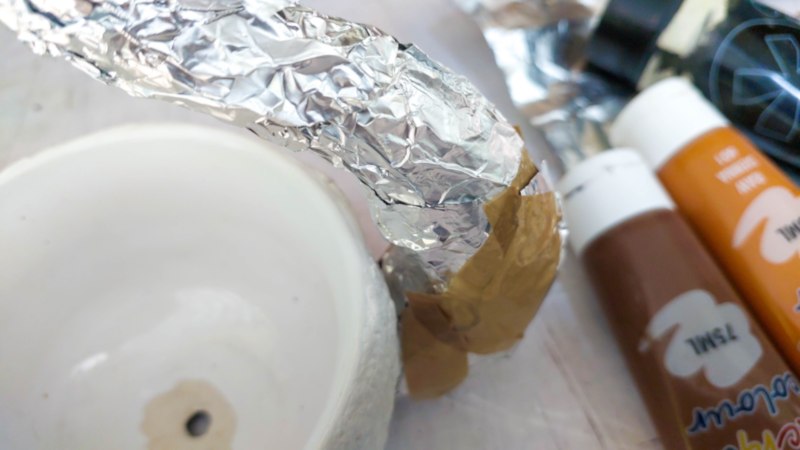
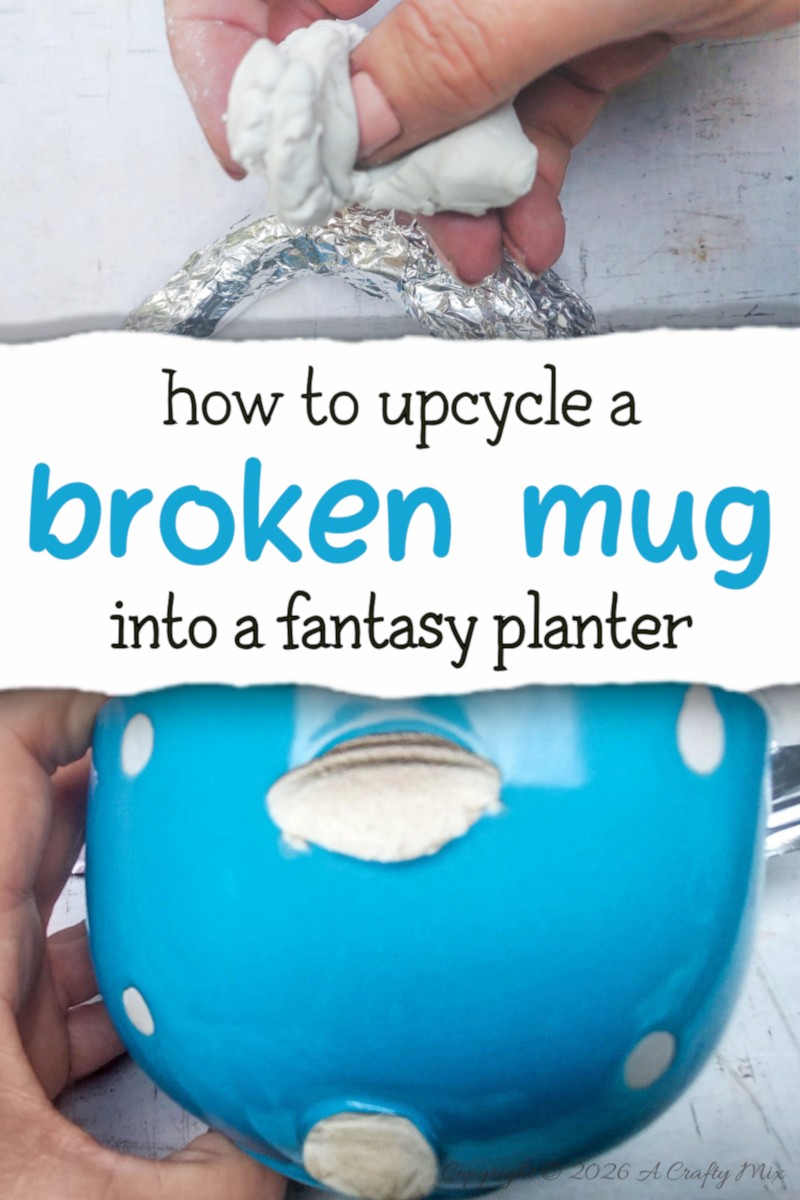
My handle broke off right against the mug. If yours has an odd break you may need to chip any sticky-outy bits away first. To make life easier I drilled a hole into the bottom break.
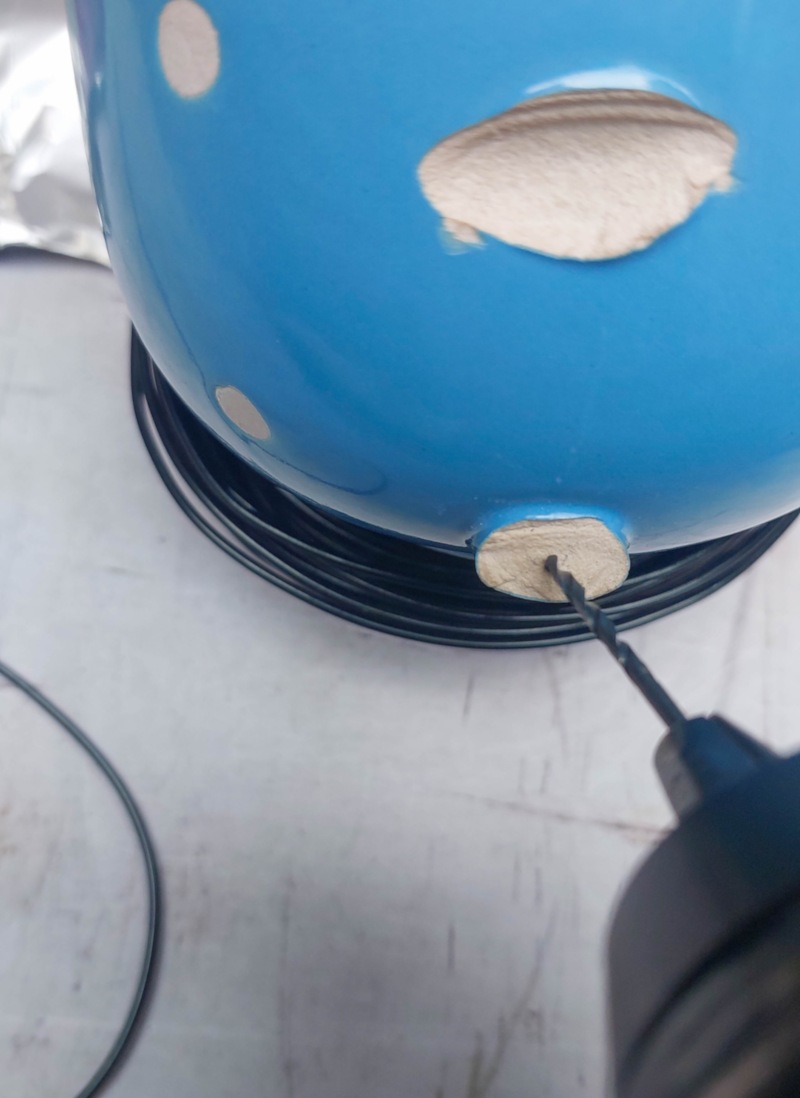
That way I could stick a “stabilising skeleton” wire into the hole while building out the stalk.
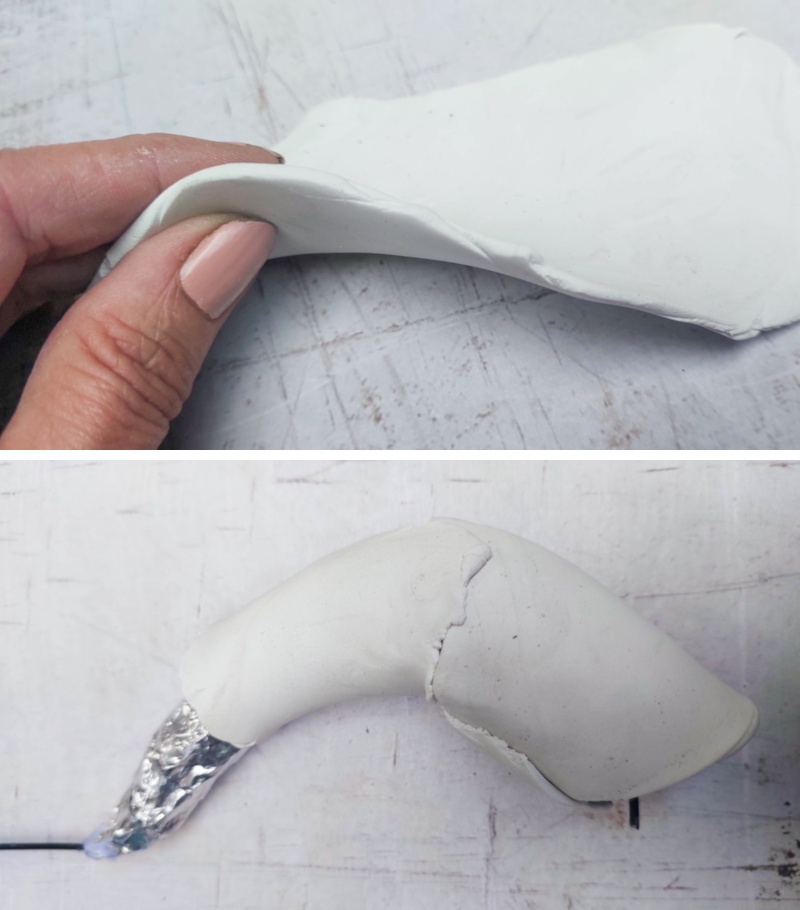
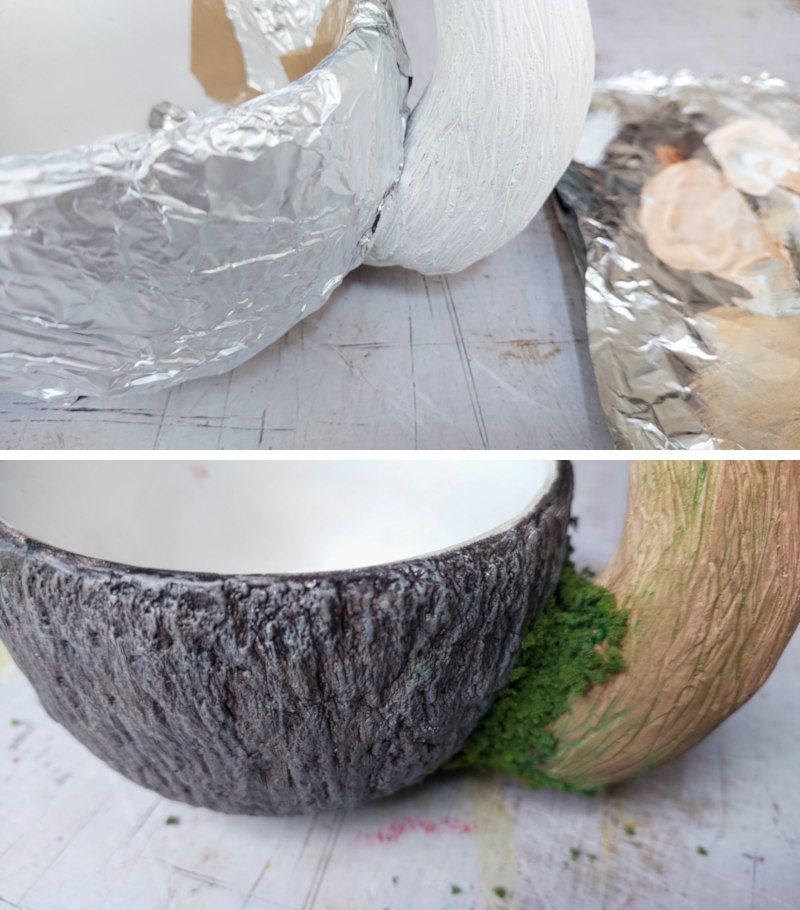
Using the shape of the mug as a guide, bend the wire to form a curve away from the cup. Tear tin foil into strips and pad out the wire skeleton. You’re looking for something that’s thicker at the base where the stalk joins the cup.
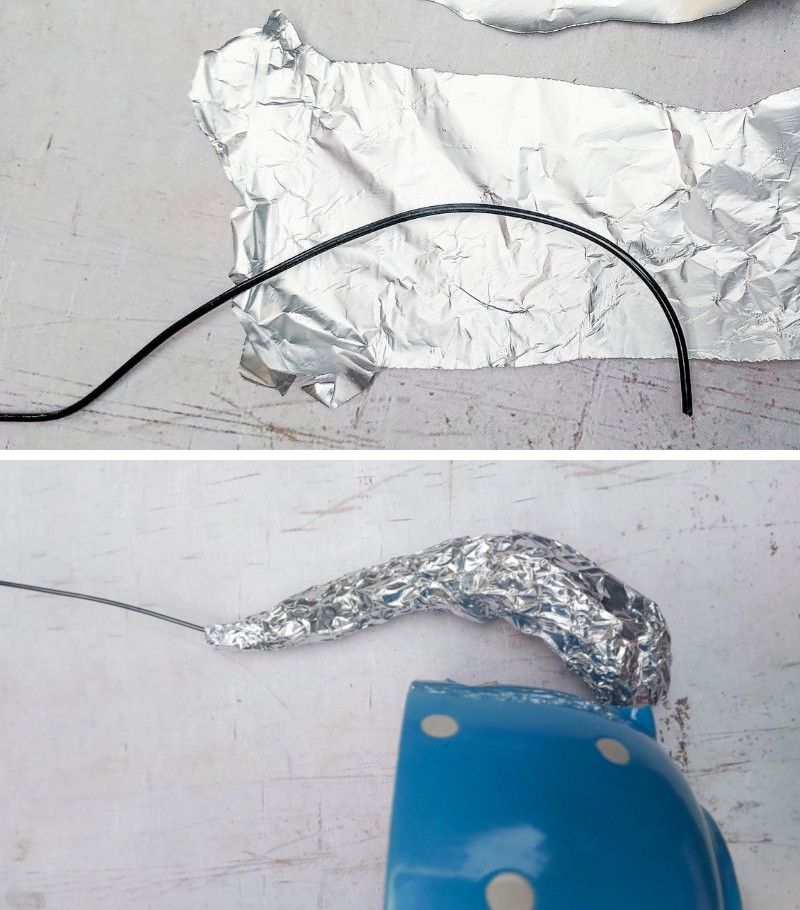
Bend and shape the wired foil until you’re happy with the form.
Grab a hunk of clay and condition it between your fingers.

Use a rolling pin or bottle to flatten the clay into a ¼” thick pancake (about 5mm). Wrap the clay around the wired foil shape smoothing as you go. If the clay starts drying out or becomes difficult to work with, just dip your finger in water and rub it over the joins.
Use a piece of wire to carve wiggly waggly lines that run from the top of the stalk down towards the base. It creates a lovely texture.
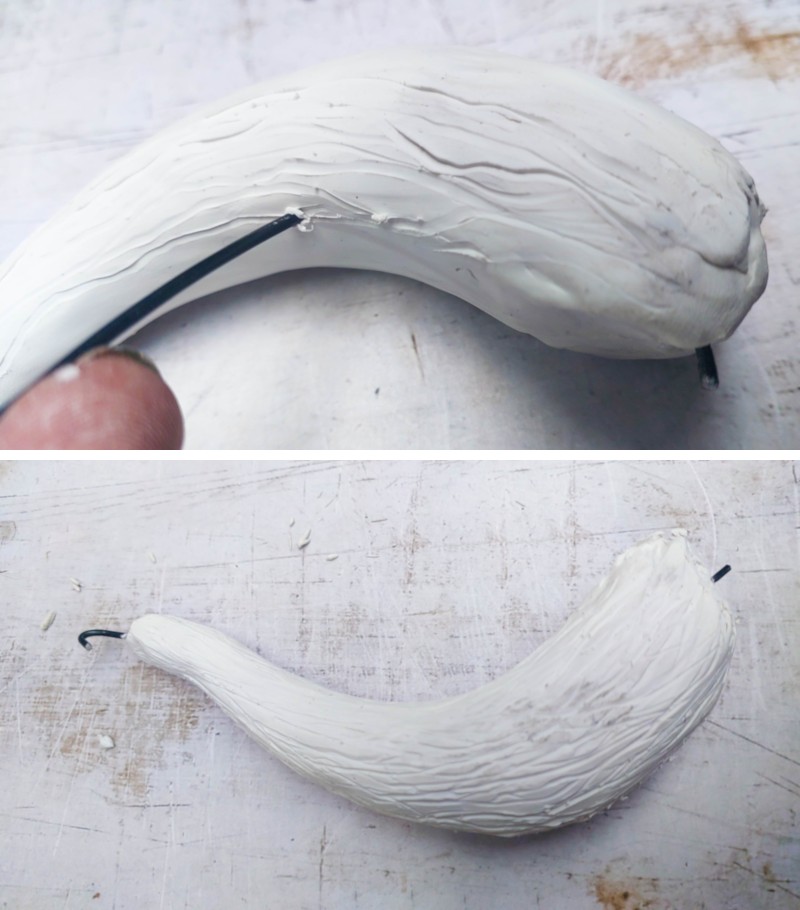
Bake or cure the clay stalk according to the manufacturer’s instructions.
Giving the mug a woody textured exterior
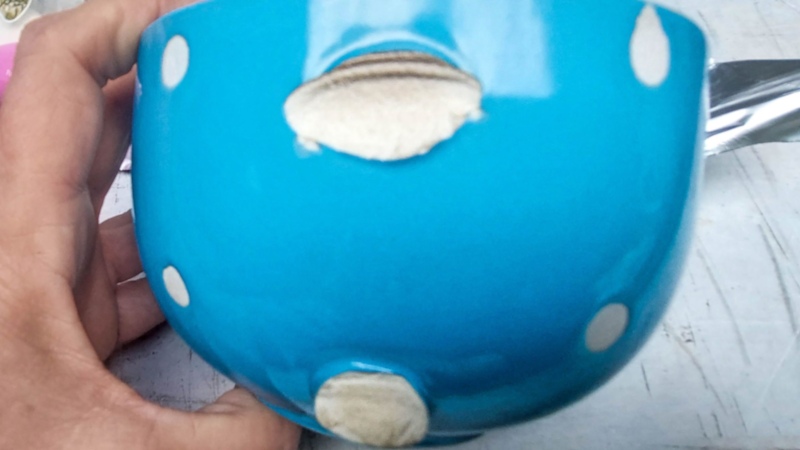
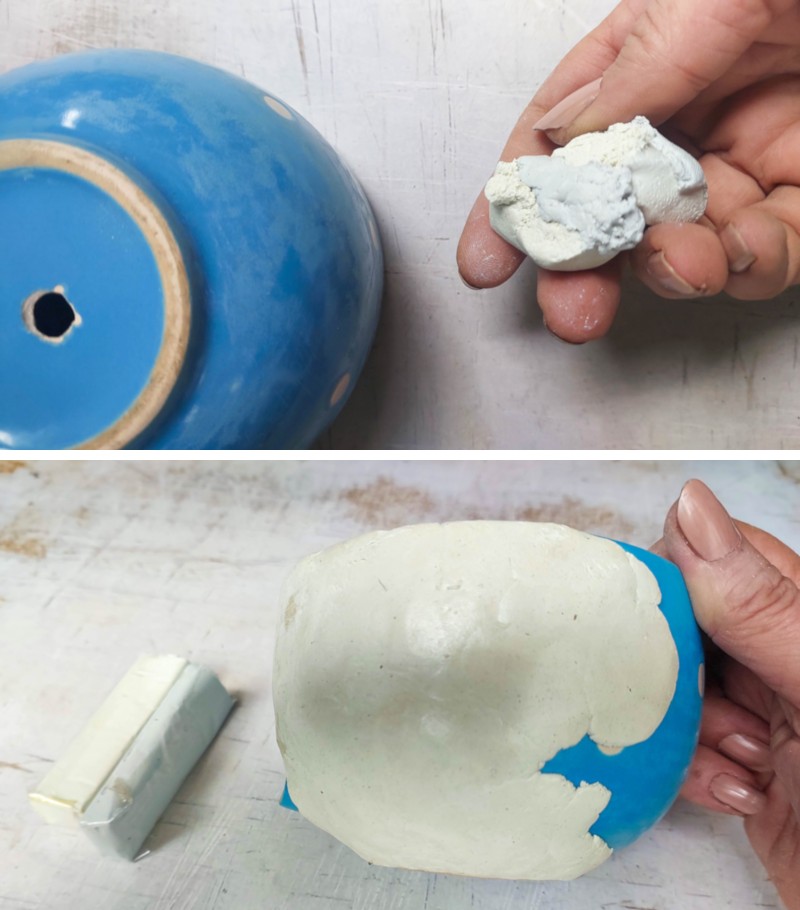
Glazed ceramics don’t always take to well to adding texture. They need a little prep first and it’s best to use an epoxy clay if you want lasting results. It doesn’t shrink like other clays and it sticks really well.
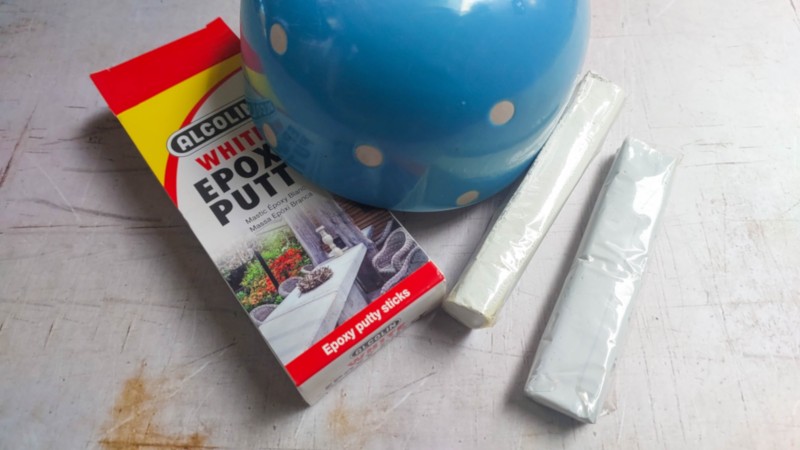
I would also suggest giving the mug a good sanding. You want to roughen the glaze up so the clay has something to stick too.
Mix the epoxy according to the manufacturer’s instructions. It’s normally two equal balls smooshed together and mixed really well. Mix small amounts at a time so the clay doesn’t dry out too much before you can apply the wood texture.
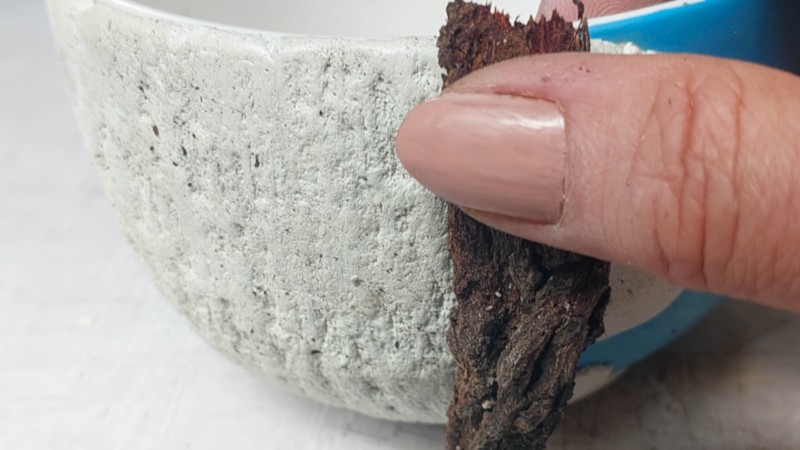
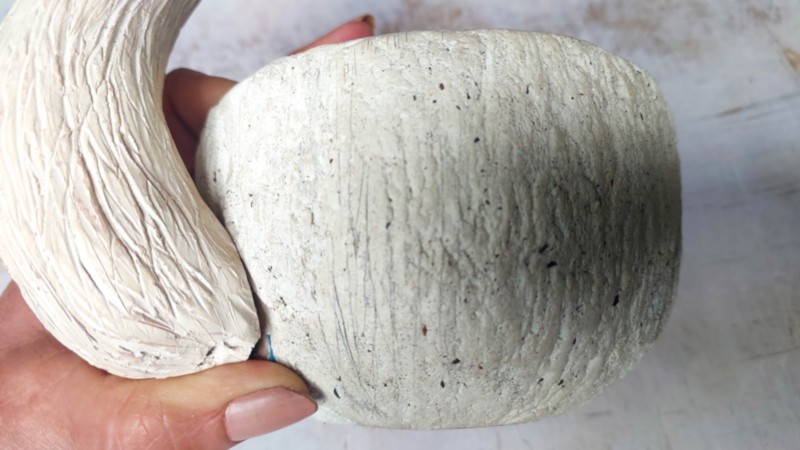
I found one of the easiest ways to make a woody texture is to use ….. well wood. It’s nature’s free gift to texture lovers all over the world. Just grab a piece of bark and press it into the clay while it’s still “wet”.
When you get to the broken ear/handle section, push the (hopefully) cured mushroom stalk into the clay.
If your creation is anything like mine, there will probably a big gap that need filling.
And unless you have more hands that normal, that mushroom stalk is going to flip flop all over the place. I used duct tape and a small pebble to keep my stalk upright and angled a little away from the mug.
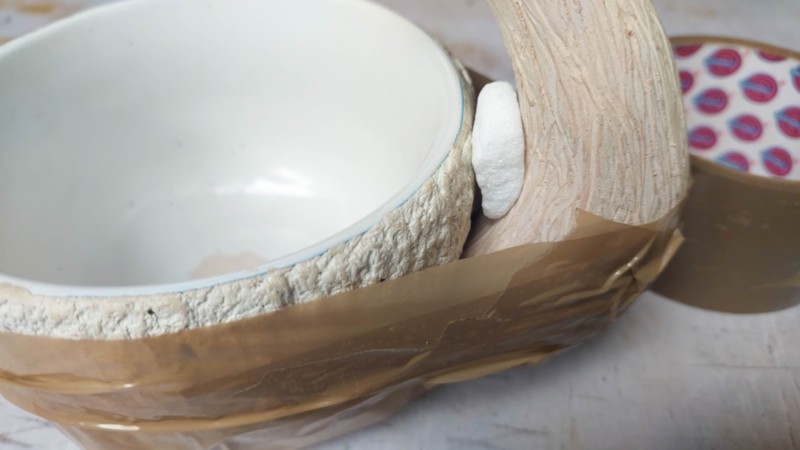
If you can’t find the right sized pebble, scrunch up some tin foil. Fill any gaps with some more epoxy clay.
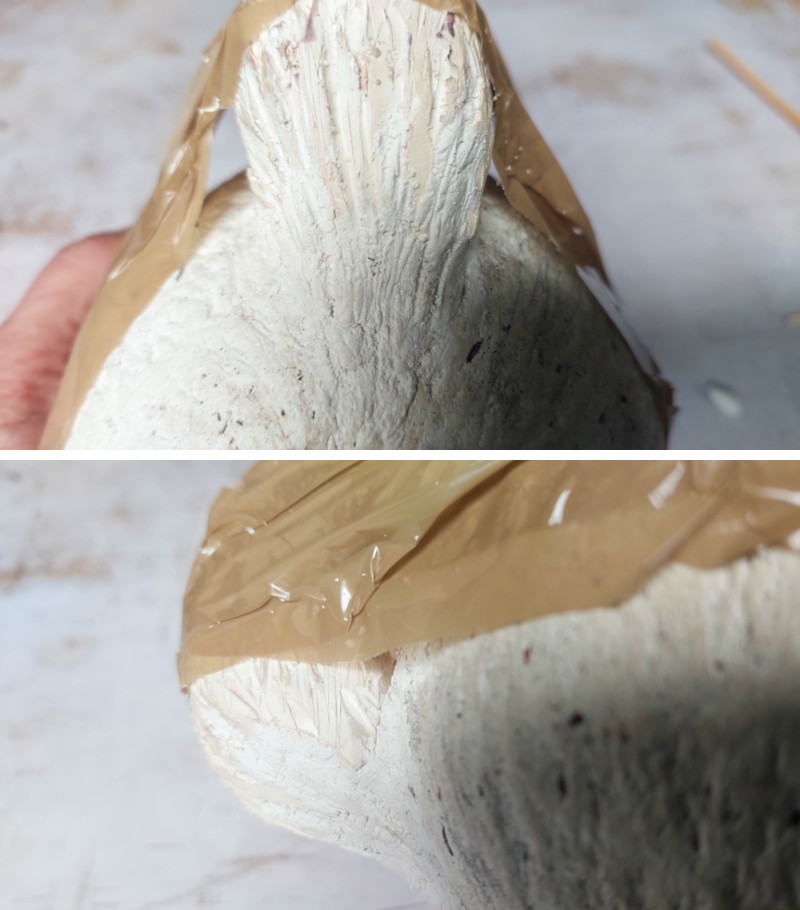
And set the mug fantasy planter to one side to cure.
We’re almost done. The next part is my favorite – making a mushroom top.
Mushroom/Toadstool top
I still don’t know if this is a toadstool or a mushroom so bear with me if I swop between the words. Technically it’s probably a toadstool since I’ll be adding spots later. Either way, we’ve shared a ton of mushroom tutorials on the blog:
- Curly top mushroom
- Enchanting light up mushrooms
- Pumpkin fairy studio with a mushroom roof
- Succulent mushroom planter
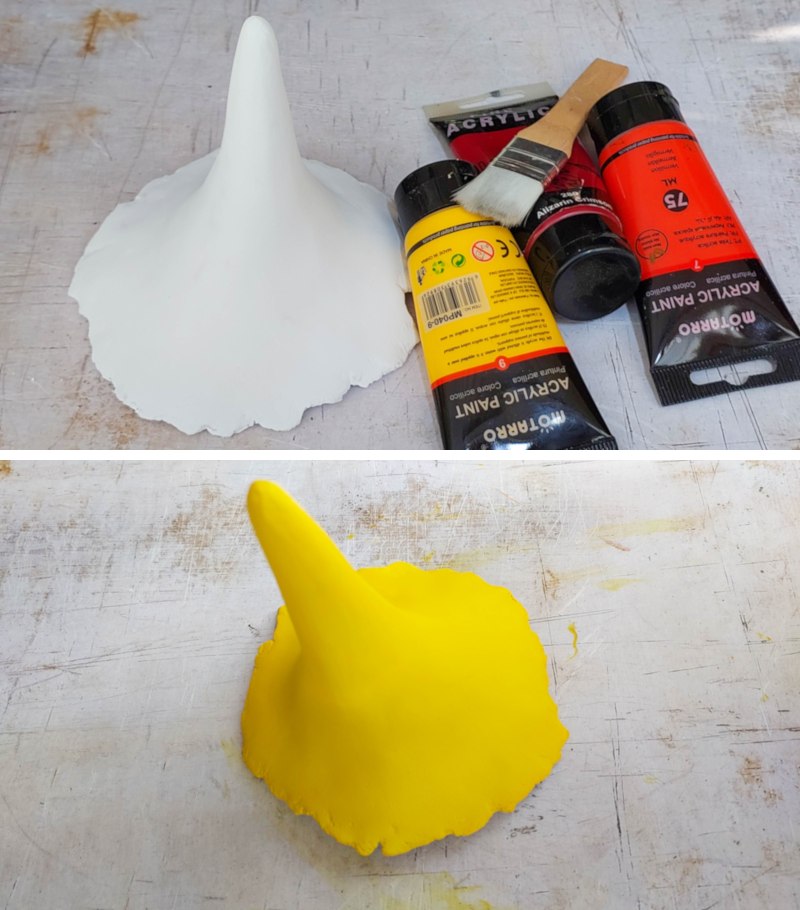
The top for my fantasy planter is a variation of the curly top mushroom (minus the curl). Oh, and I made a hole in the bottom of the mushroom top, so I could take it on and off the stalk.
As long as the mushroom top balances on the stalk and looks in proportion to the planter, you can use any of the tutorials to make yours. Hint: I’d go for the curly top one since there’s a video you can watch to see how it’s done. Just saying 😉
When all the bits and pieces are ready you can start painting. I’m a messy painter. I try to be careful but it never works out. If you’re the same, wrap the stalk in foil, while you paint the woody exterior. Reuse the foil when you’re ready to tackle the stalk.
For the woody exterior I used black, brown and a hint or raw sienna.
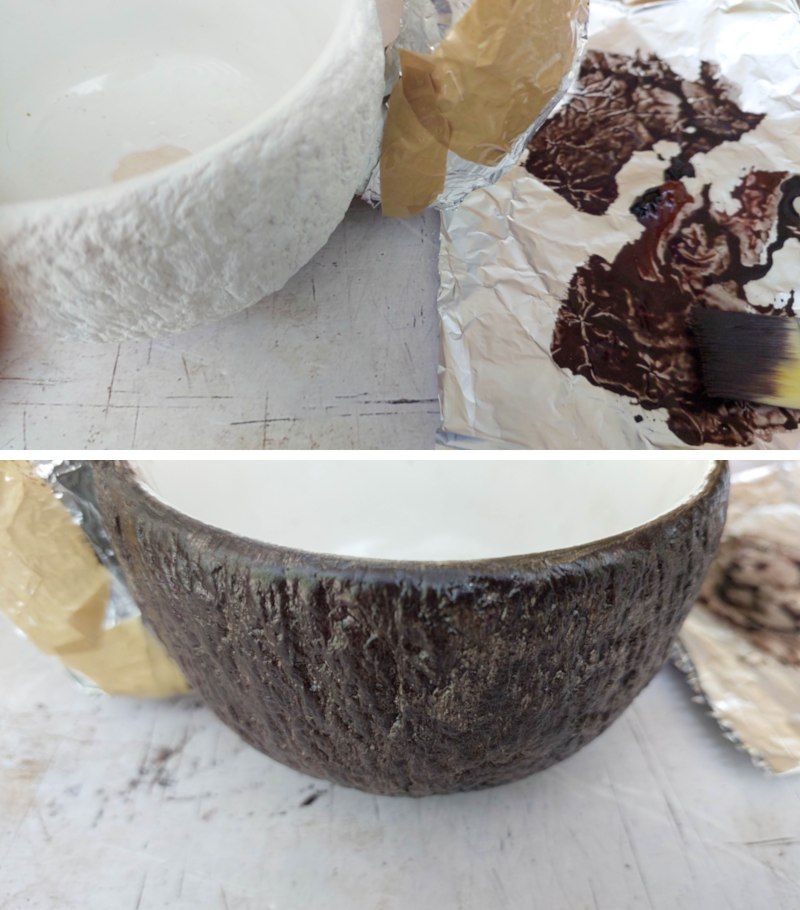
To highlight the barky ridges lightly brush on some white.
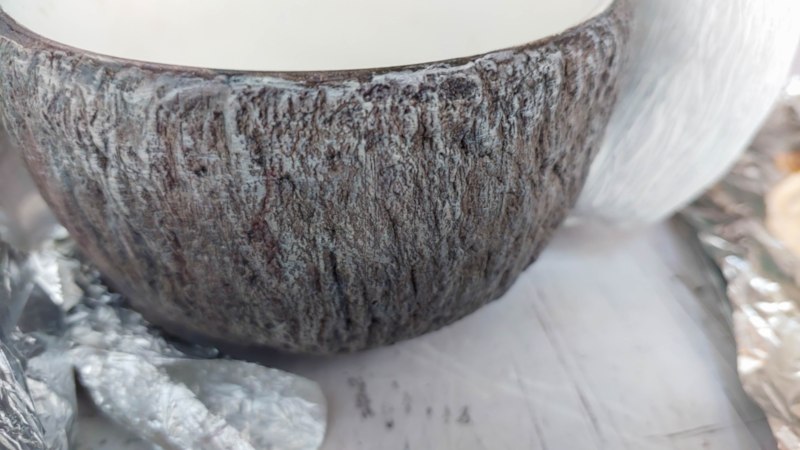
The stalk was done by mixing raw sienna with white. I also dabbed on hints of green powdered food coloring and glued some moss around the base.
And finally, the mushroom top. That one is done in yellows, oranges and reds. To create a warm base the whole top was paint bright yellow, followed by a watered-down orange and then red.
If you look at these little mushrooms you can see the WIP as each layer builds on the next.
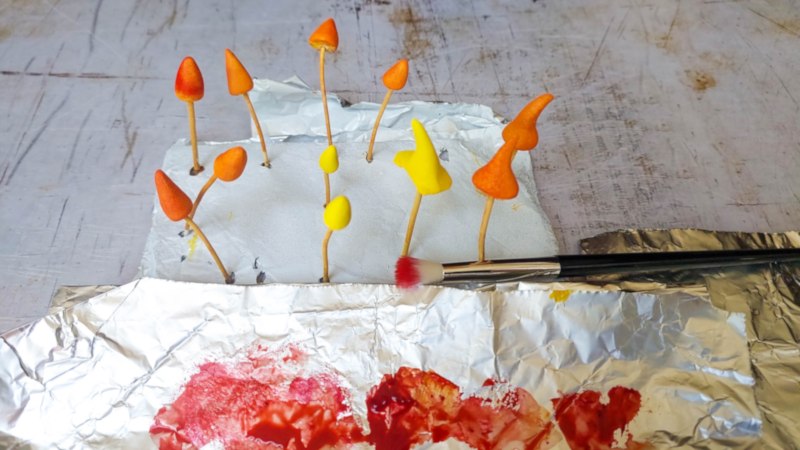
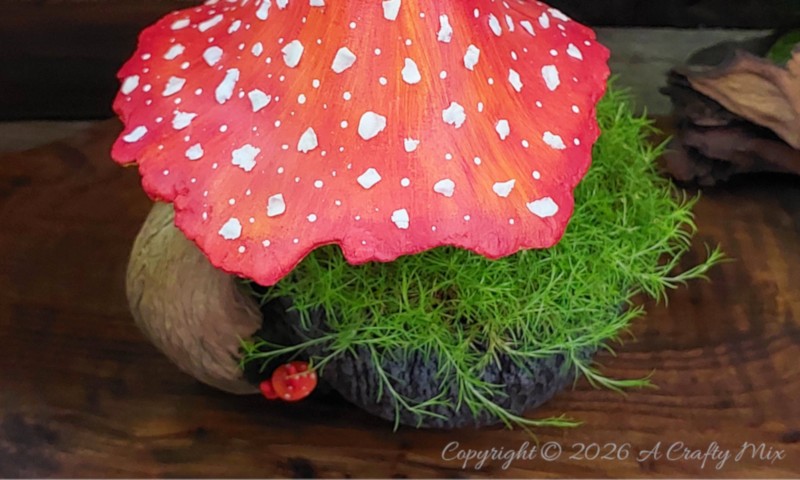
The stalks on the little mushrooms are made from jewelry wire, that have been painted the same color as the big ear stalk. It makes them easier to bend when they need to go into a tight spot.
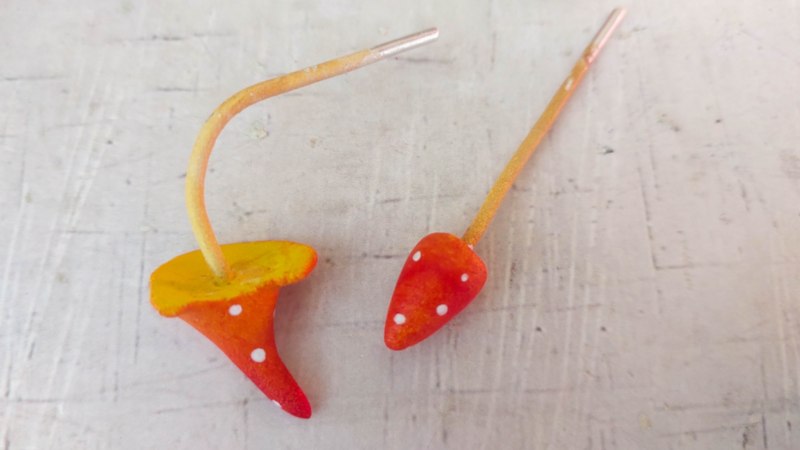
To add the dots (which technically turns the mushroom into a toadstool) I used foam clay. Just grab a chunk, flatten it out, and then rip off small, thin pieces. It gives the dots this lovely “I’m not perfect”, raised effect.
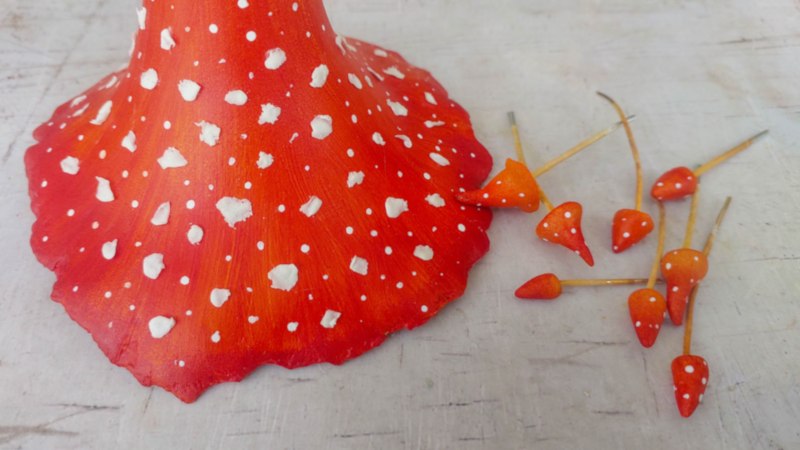
You can also paint the dots on. If you’re using foam clay wait for the dots to dry before gluing them on. To finish the fantasy planter off, drill small holes around the larger stalk and glue the small mushrooms inside.

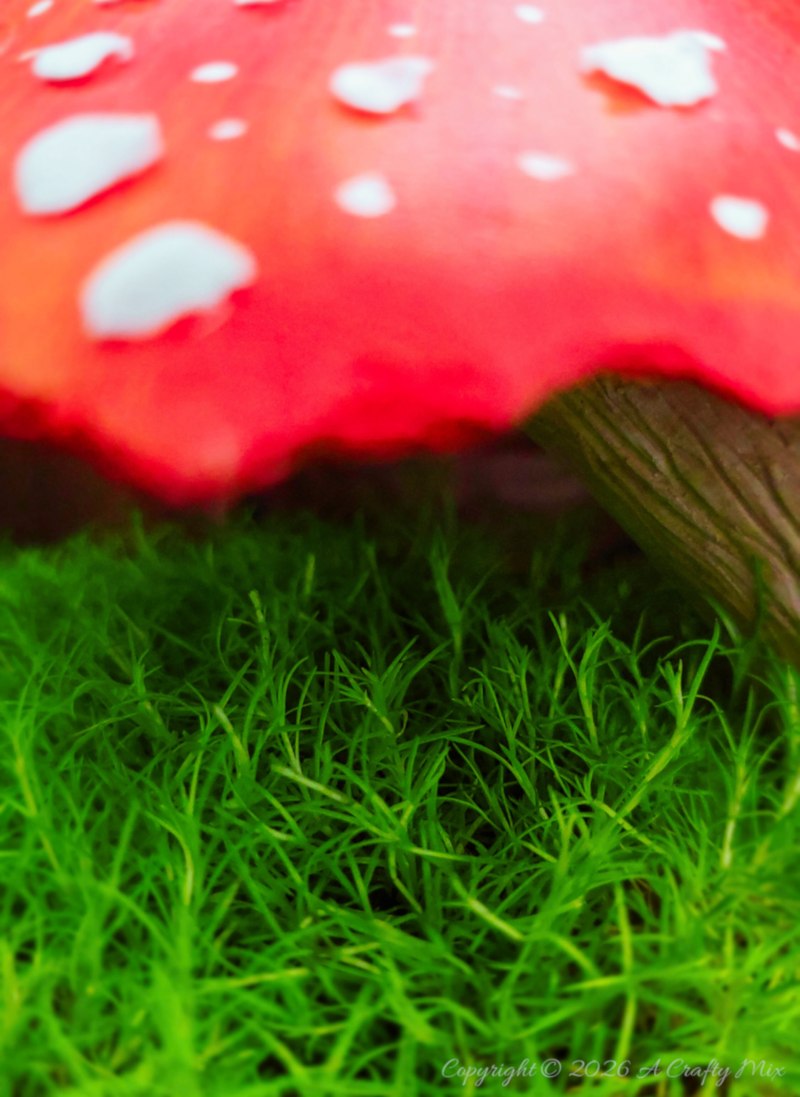
Find a low growing, shade lovely plant and add it to the planter. I chose Irish moss (Sagina subulata). It’s a luscious, low-maintenance groundcover that fits the woodland look I was going for.

Irish moss thrives in a humid environment but needs well draining soil so make sure to add a few pebbles in the bottom of the planter.
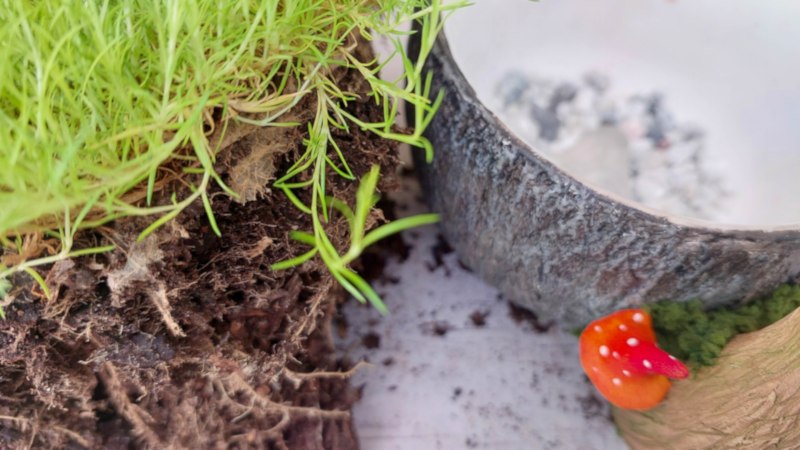
The other thing she needs is regular watering, but that won’t be a problem if she’s living in a fantasy planter.
I purposefully made the mushroom top detachable, (you can simply lift it off the stalk).
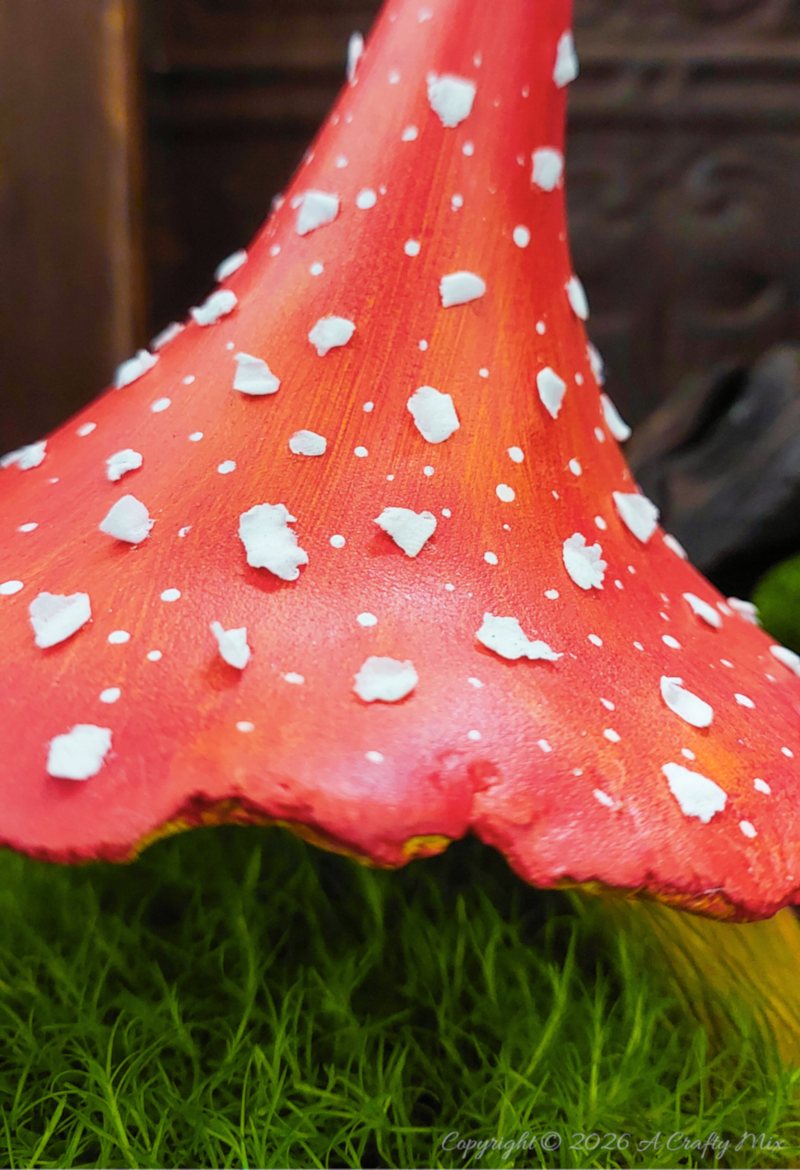
It makes it easy to take off if I need to water the moss or she outgrows her new fantasy home.
Oh, before I forget, you can find a whole bunch of unique and whimsical mug and teacup planter ideas here. It’s worth a visit to get more inspiration.
If you like the idea of upcycling a broken mug into a fantasy planter, don’t forget to pin it for later.
Sharing is caring
BTW, if you’re looking for some of the things we used, we’ve got you covered. Disclosure: Clicking on the links below means we may receive a commission from Amazon. But don’t worry, it won’t come out of your pocket, and it helps us make more amazing crafts to share with you.


Or if you prefer to buy rather than DIY, then here you go.


And as always, wishing you a wonderful, crafty week filled with lots of love and laughter. Thank you for popping in for a visit.

Last update on 2026-06-03 / Source Amazon Affiliates