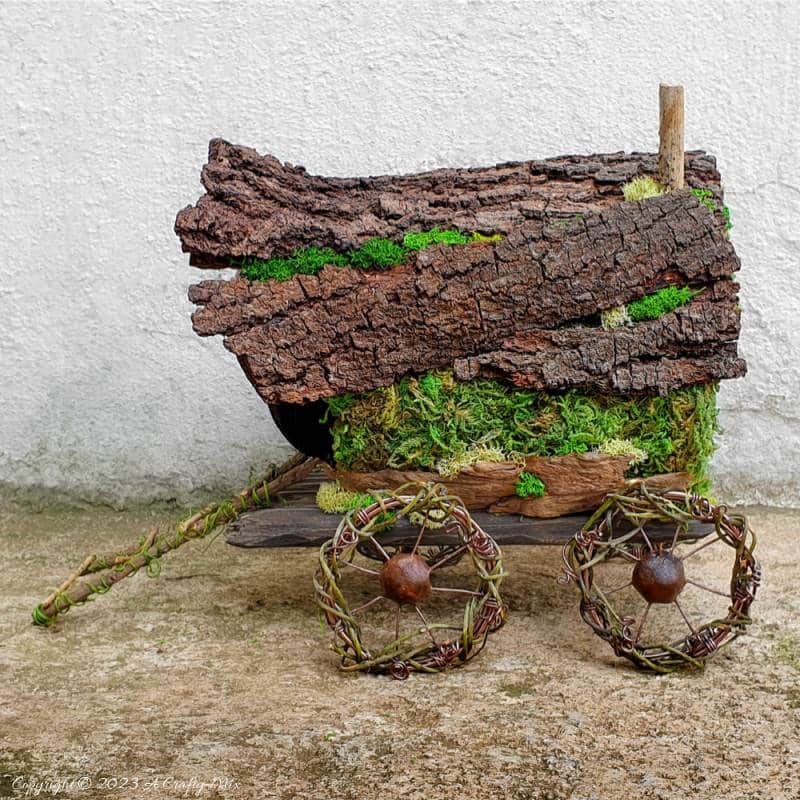
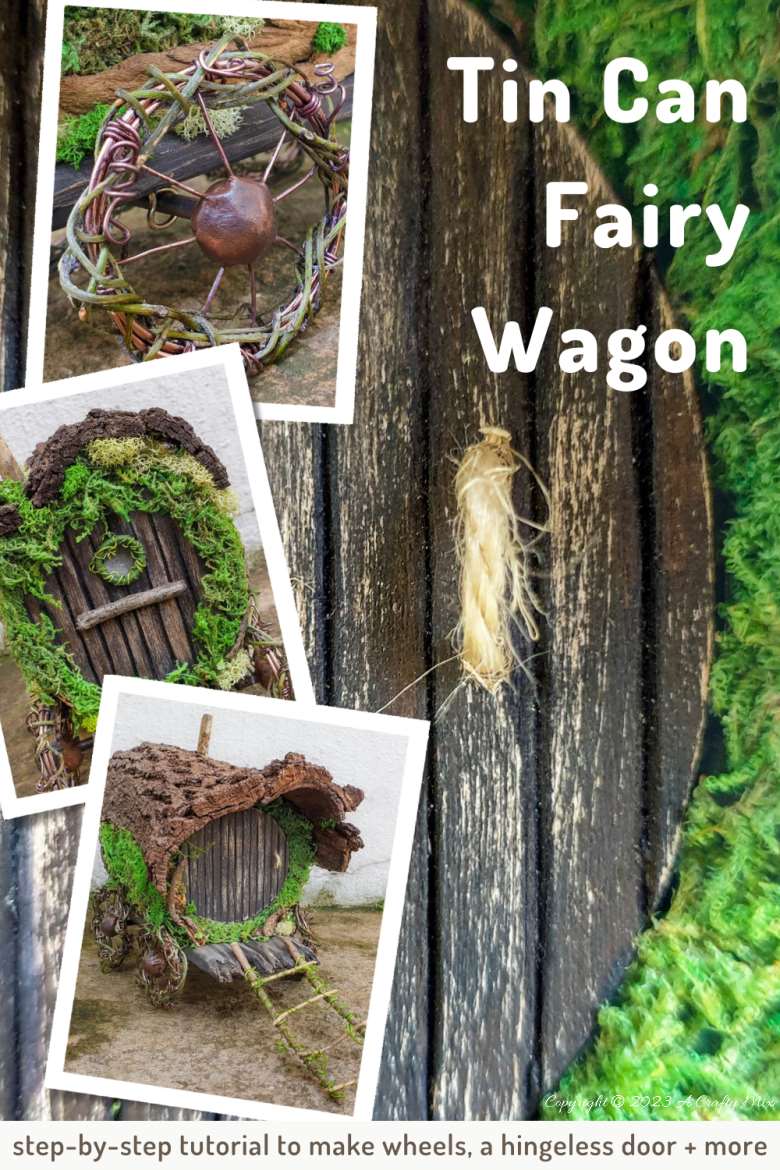
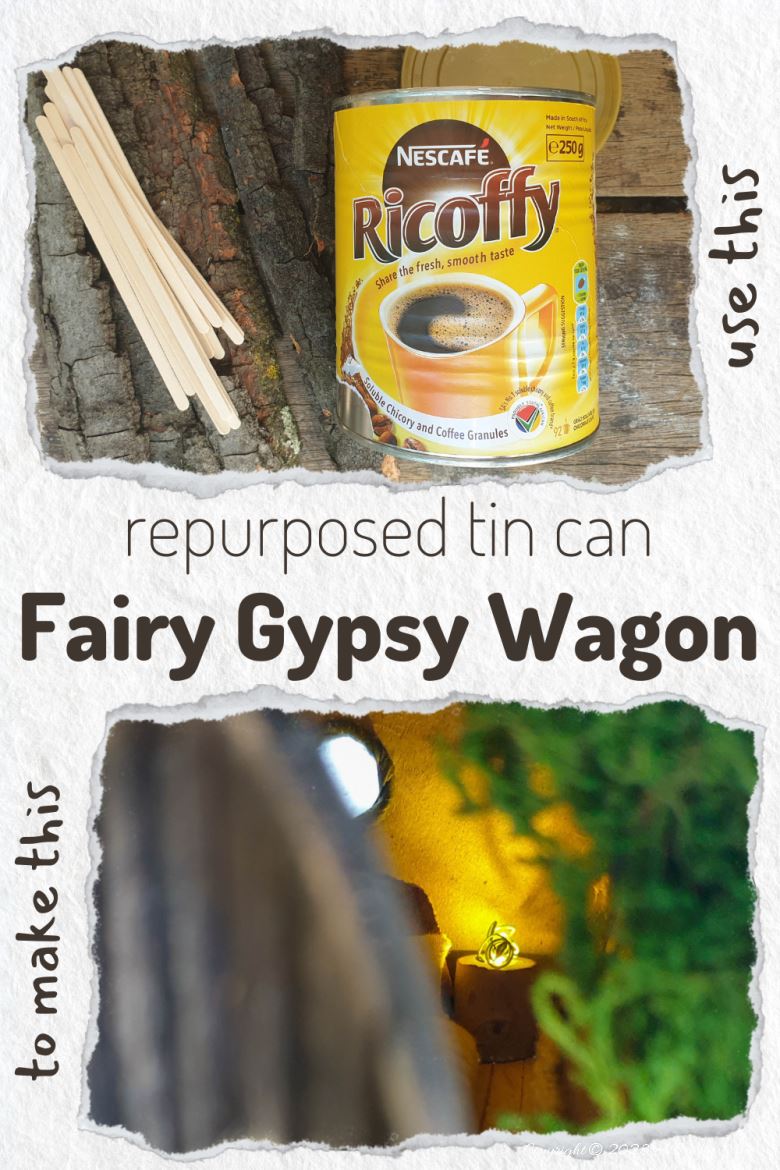
Fairies are often associated with magic and nature, and legend has it that these mythical creatures are attracted to beautiful objects and love handmade, recycled crafts. And since we’re big fans of fairies and upcycling, I thought we should share how we repurposed an empty tin into this adorable fairy Gypsy wagon.
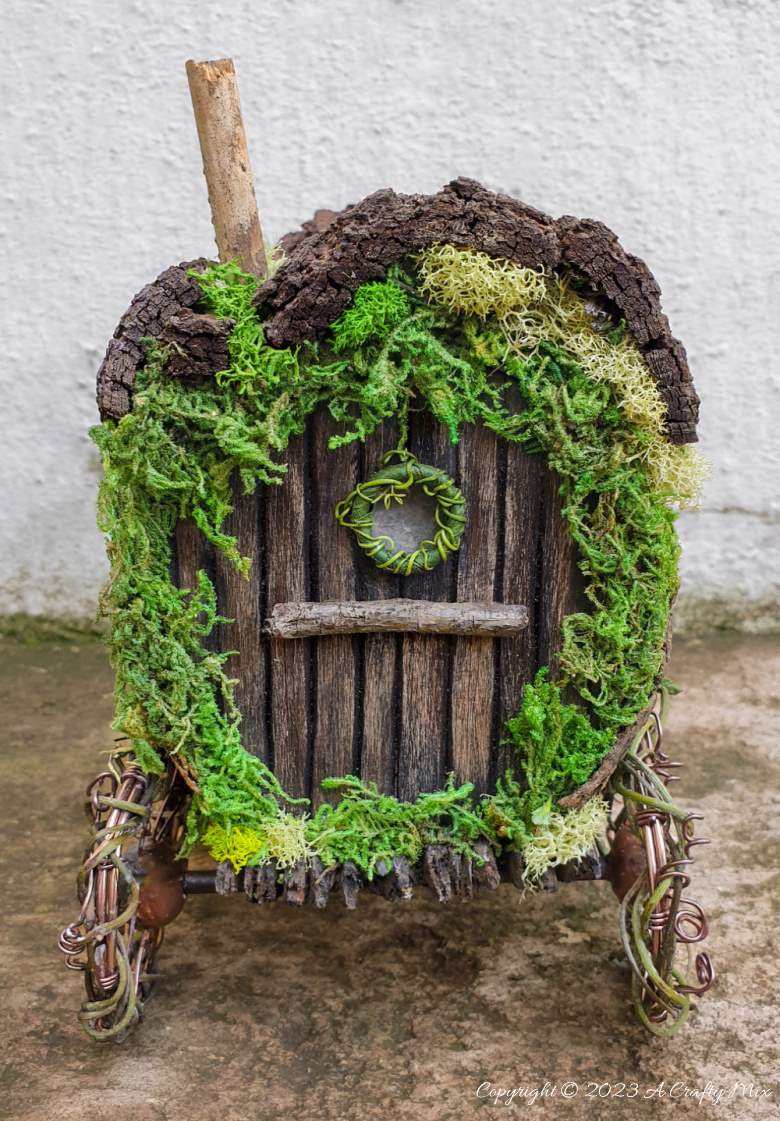
I hope its whimsical appearance and dreams of a nomadic, free-spirited lifestyle will appeal to our fairies’ sense of adventure and wanderlust.
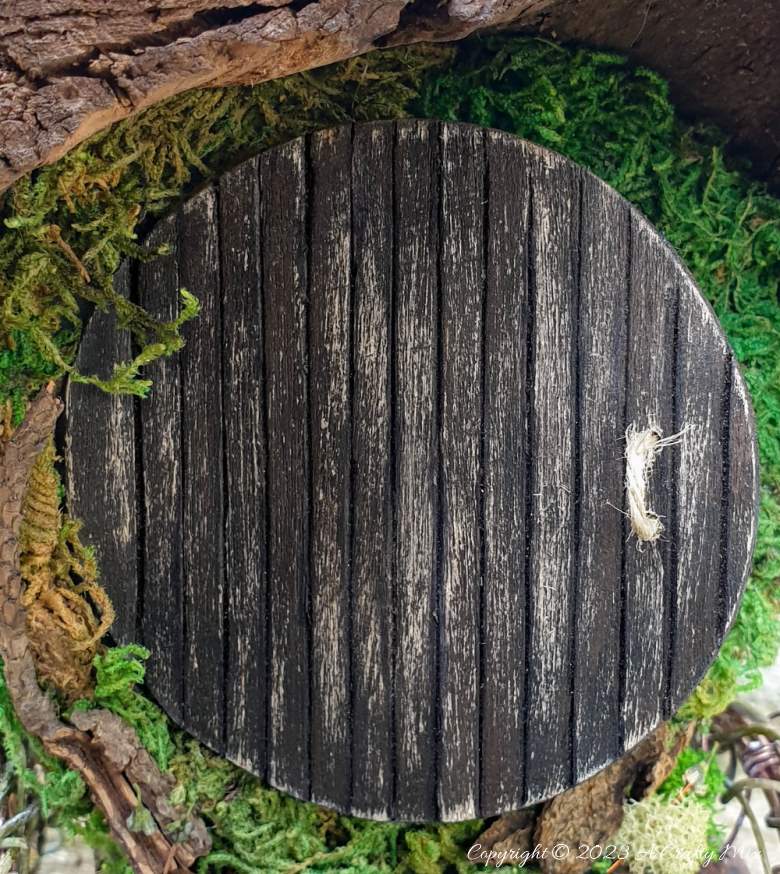
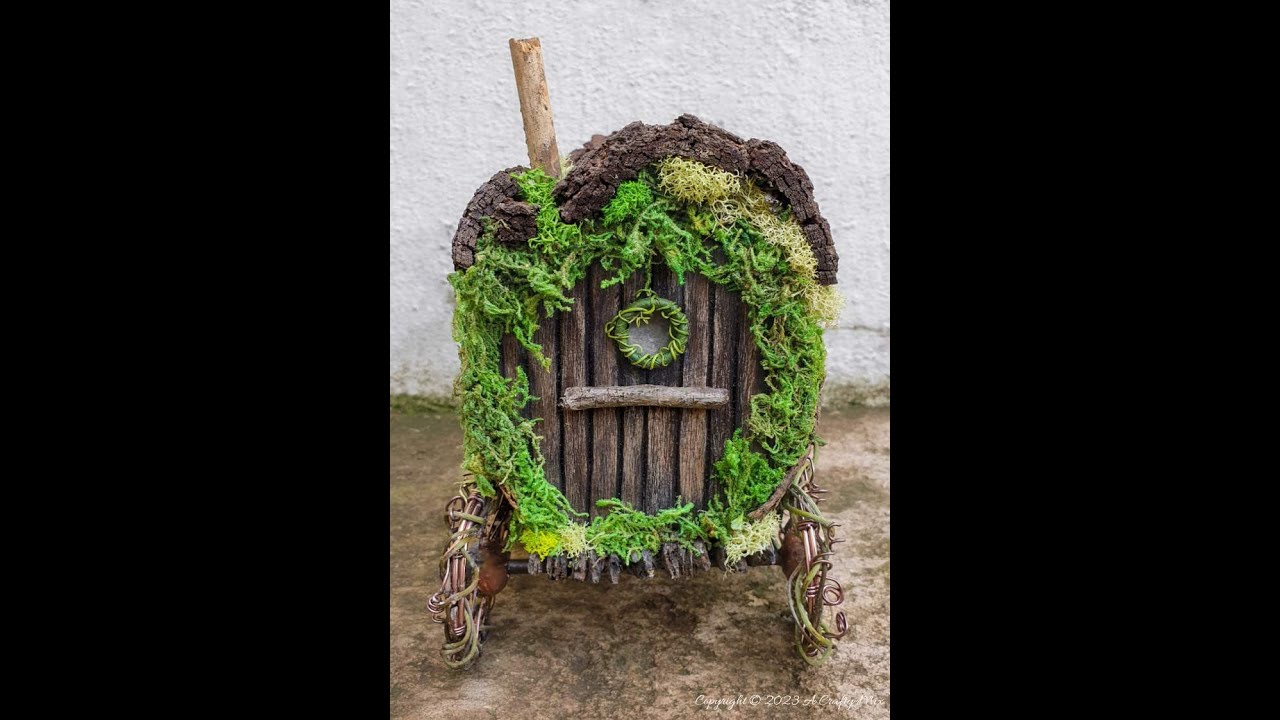
It has a small round door that opens and closes on a hidden hinge.
I’m guessing these fairies may be friends with the hobbits.

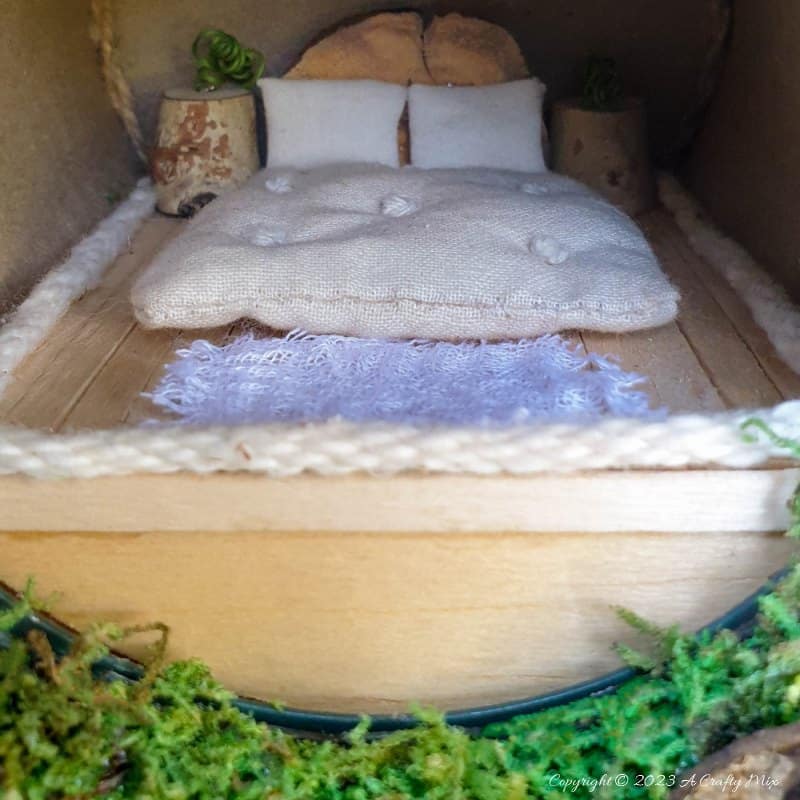
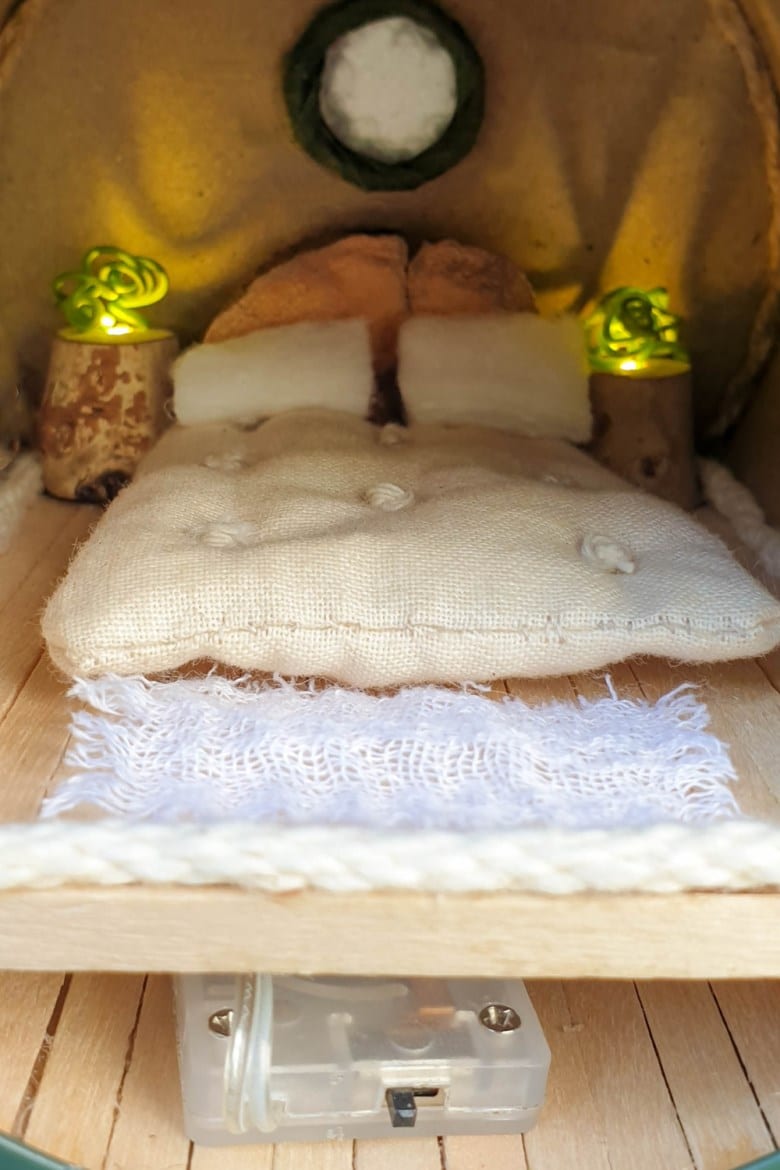
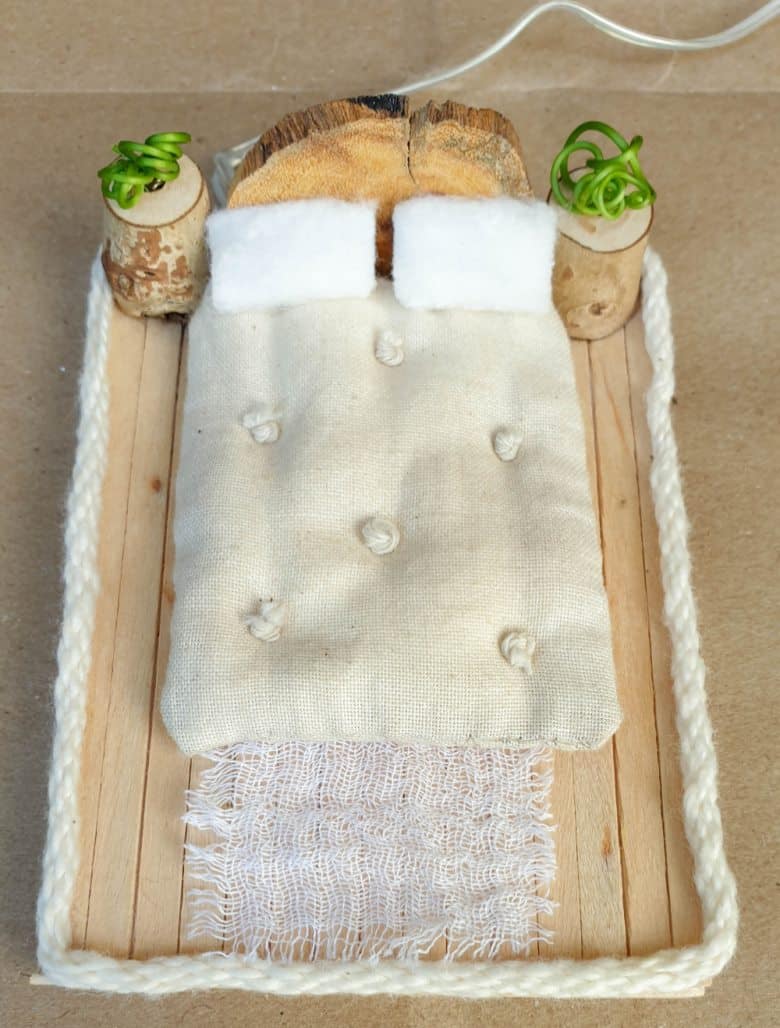
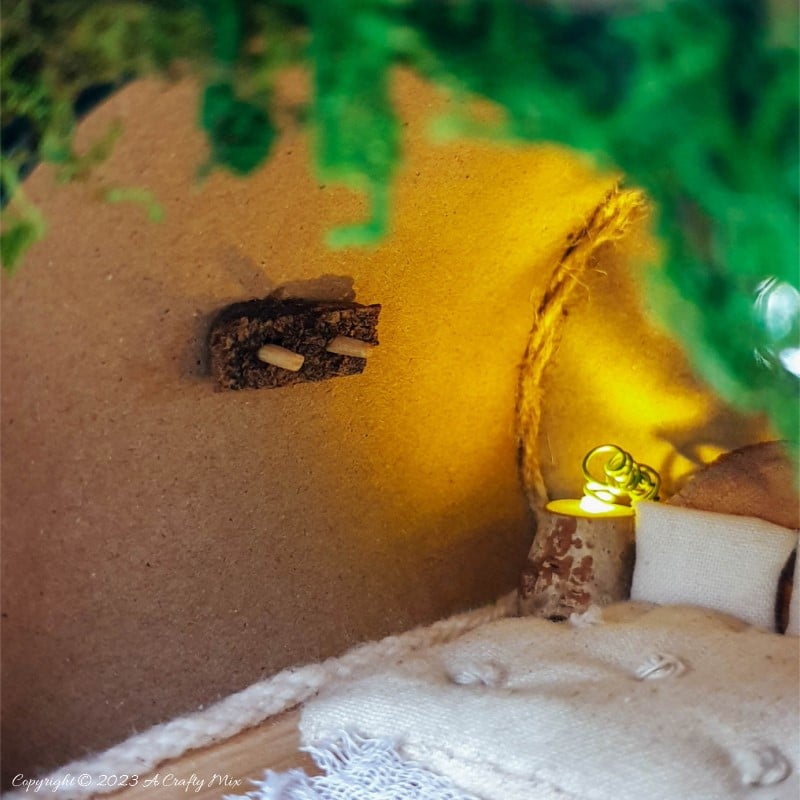
The interior of a fairy wagon is designed to be warm and cozy. I added a tiny headboard, a tufted mattress, and bedside tables with lights. They all rest on a popsicle stick platform. I don’t think the fairies would appreciate rolling around on a bare tin can.
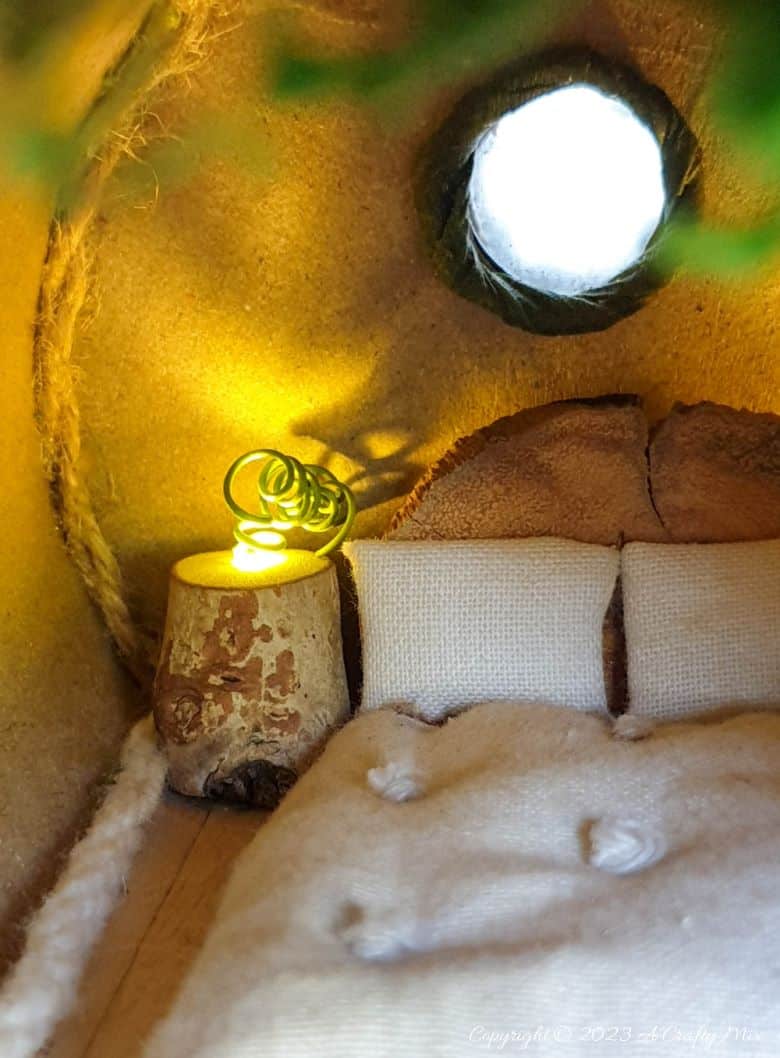
Plus, the platform hides the wiring for the lights. You can add whatever you like to decorate the wagon interior.
In this tutorial, I’ll show you how to repurpose a tin can into a Gypsy wagon with vine wheels and a door that opens and closes. But before we get there, follow us on Facebook, Twitter, Pinterest, or Instagram. And don’t forget to subscribe so you’ll never miss a post!
What you need
Tin can wagon body
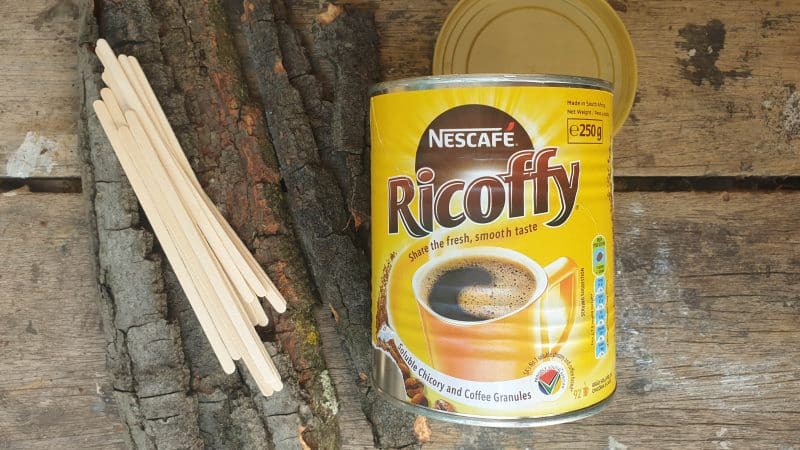
- An empty tin can with a lid
- Craft sticks
- Moss and bark chips
- E6000 glue
- Scrap wood
Wagon wheels
- Skewers
- Jewelry wire (20-gauge and 14-gauge)
- Soft, green vines
- Air dry clay
- Paint

How to make a tin can fairy Gypsy wagon
Just a heads up, this is a long one. There are so many little details I’d like to share with you. We’ll start with prepping the tin can before moving on to turning the tin can into a Gypsy wagon.
Prepping the tin can and lid
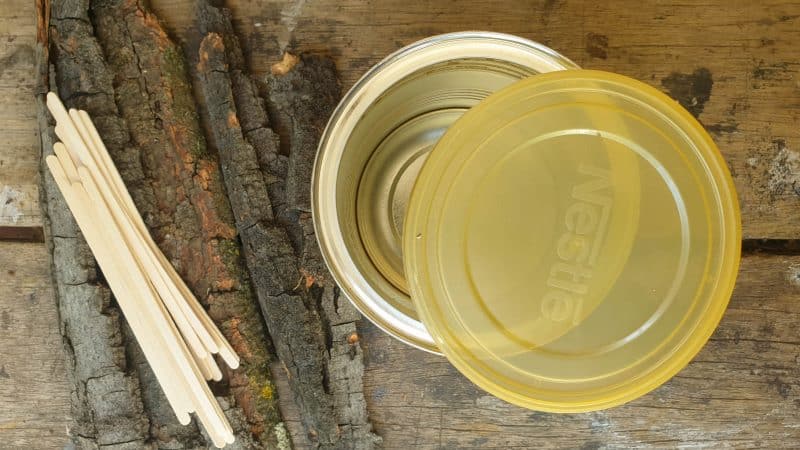
If you want a door that opens and closes, the tin can must have a plastic lid similar to this one.
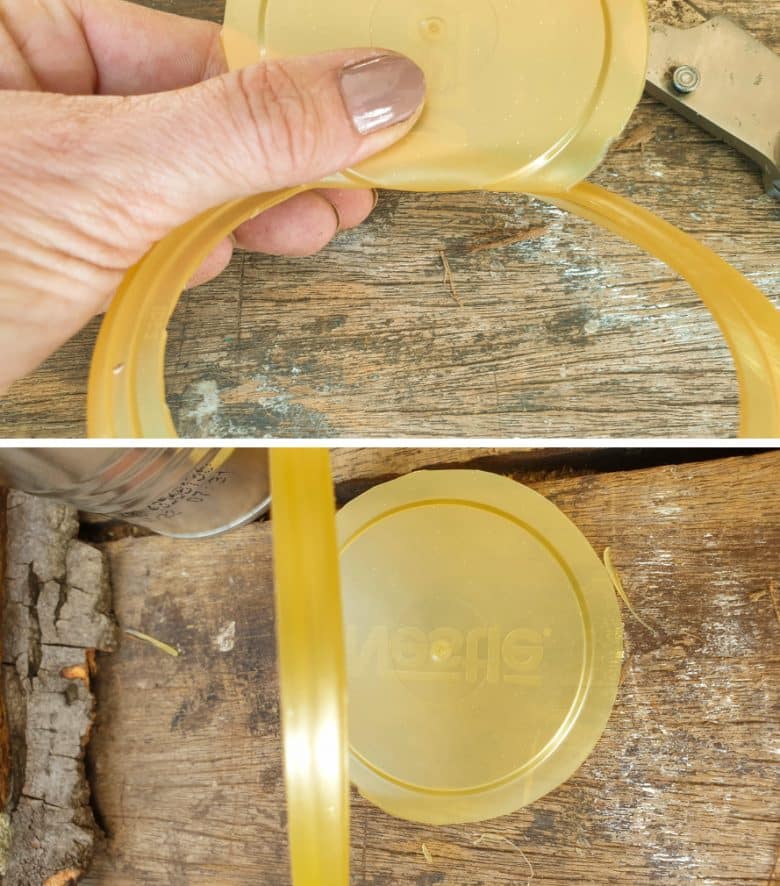
Using a sharp craft knife, cut around the inside of the lid, about 1/2 cm or ¼” from the outside. Don’t cut all the way around. Leave a piece uncut. This uncut piece will act as the door hinge.
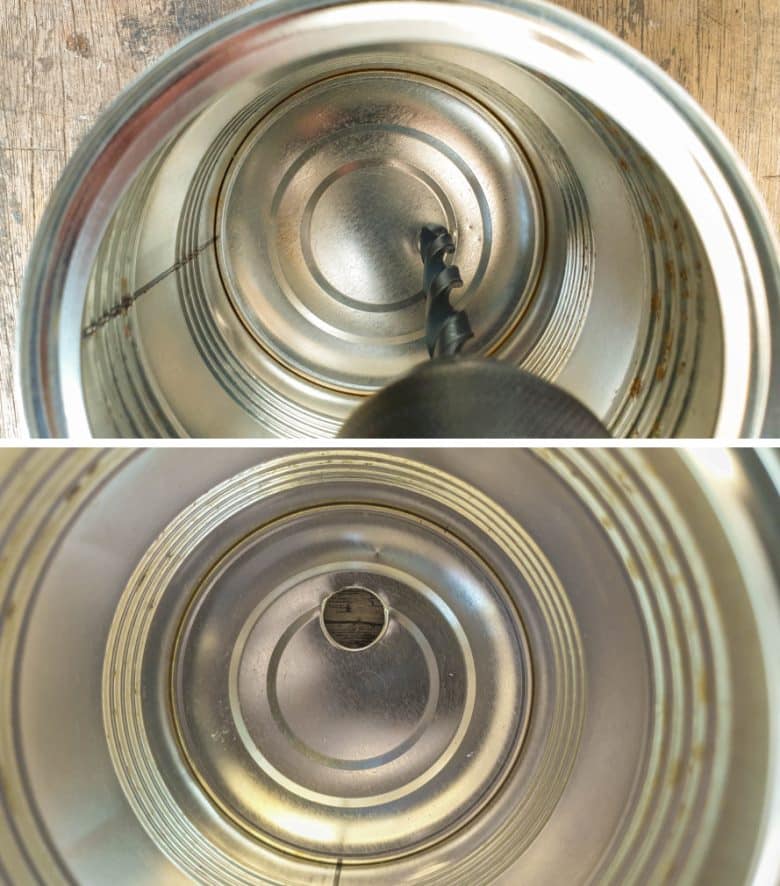
Drill a hole at the back/bottom of the tin can for the window.
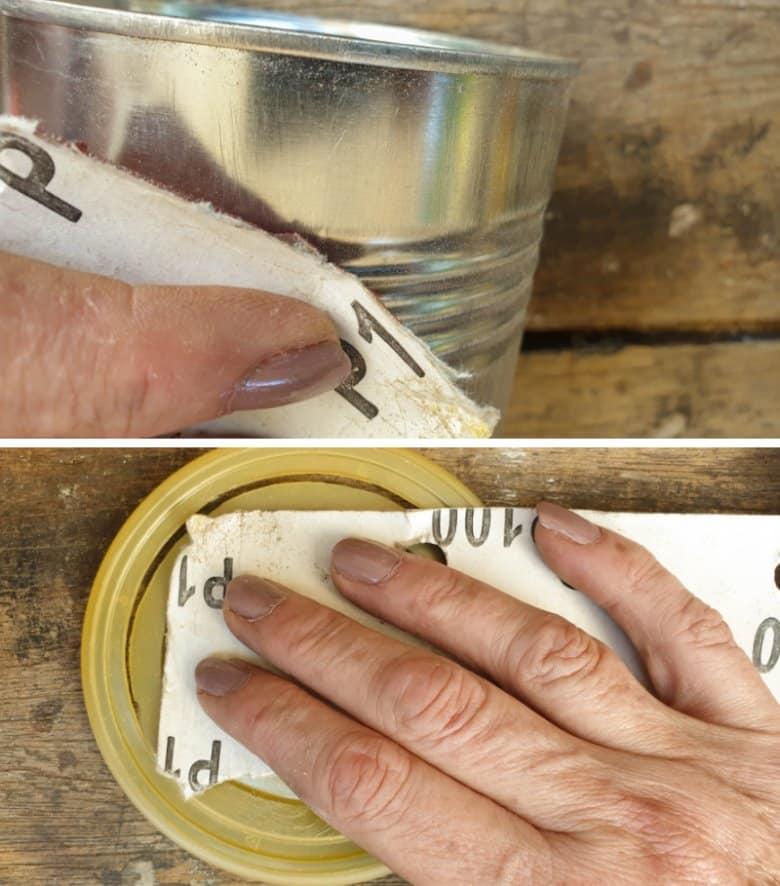
Roughly sand the tin can and plastic lid.
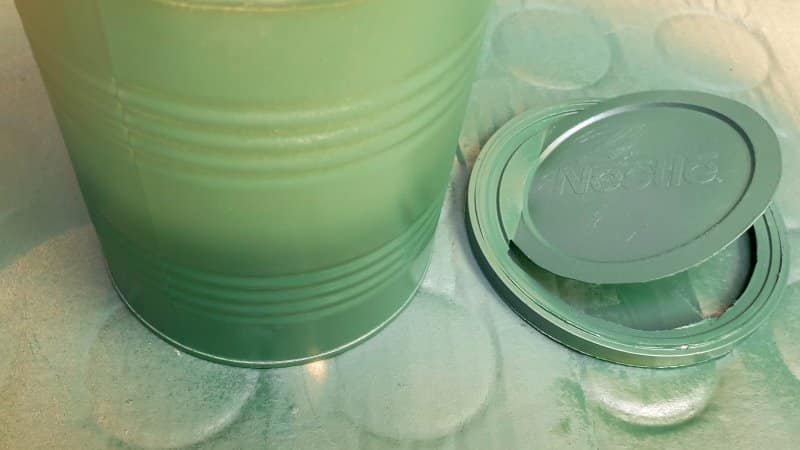
Give the tin can and lid a good wipe and paint them both. I chose green for my fairy wagon. If you prefer, you can paint yours with bright colors to mimic a traditional Gypsy vardo.
While you wait for the paint to dry, we can start making the wooden back and door panels for our Fairy Gypsy wagon.
Making the wagon back and door panels
Creating panel templates
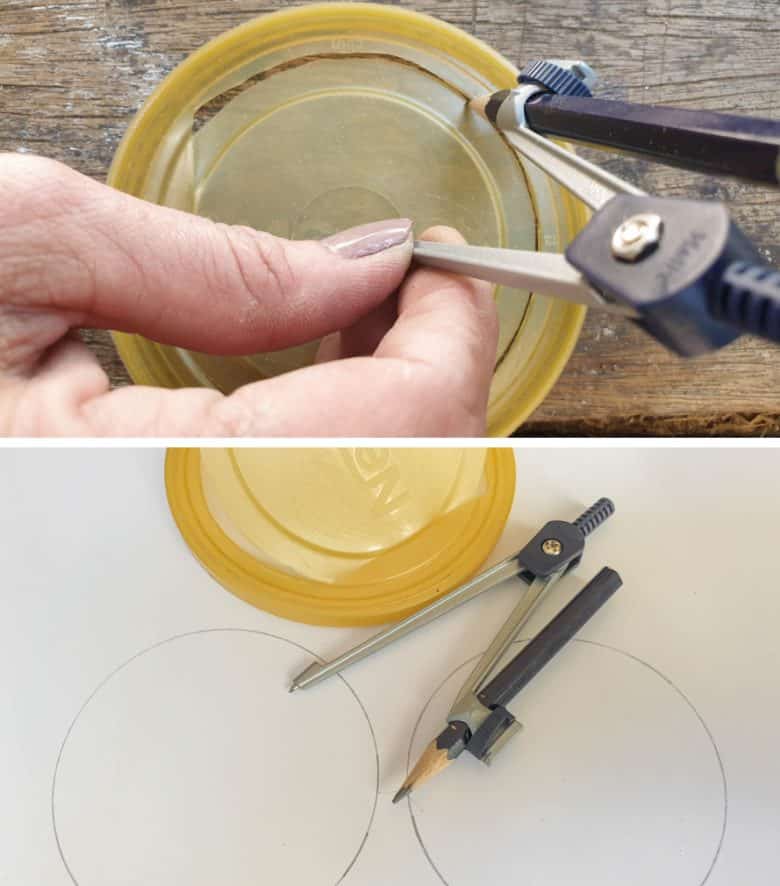
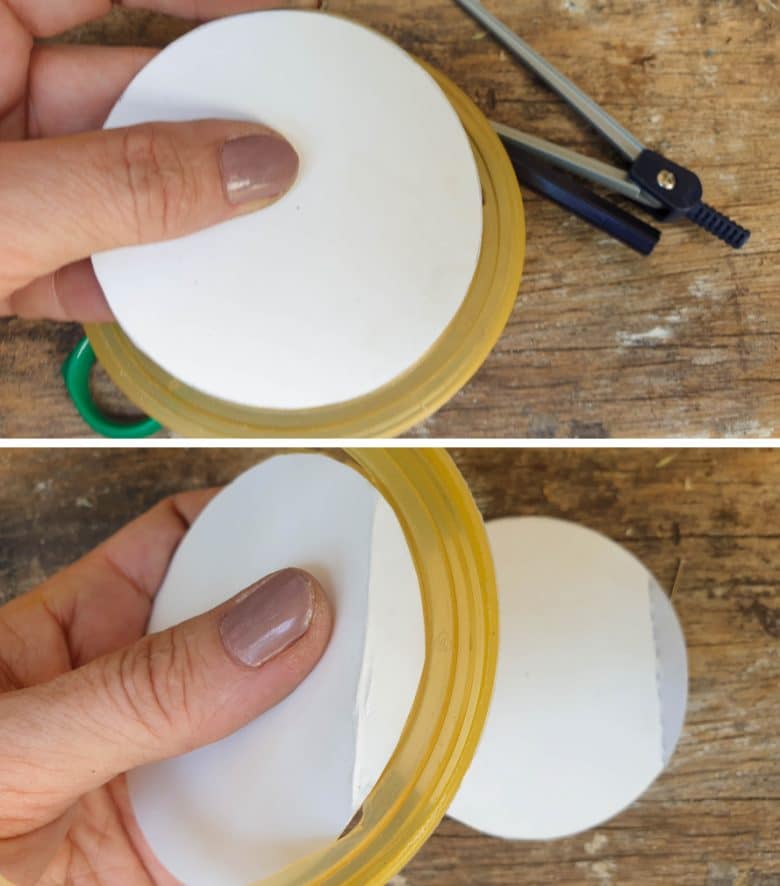
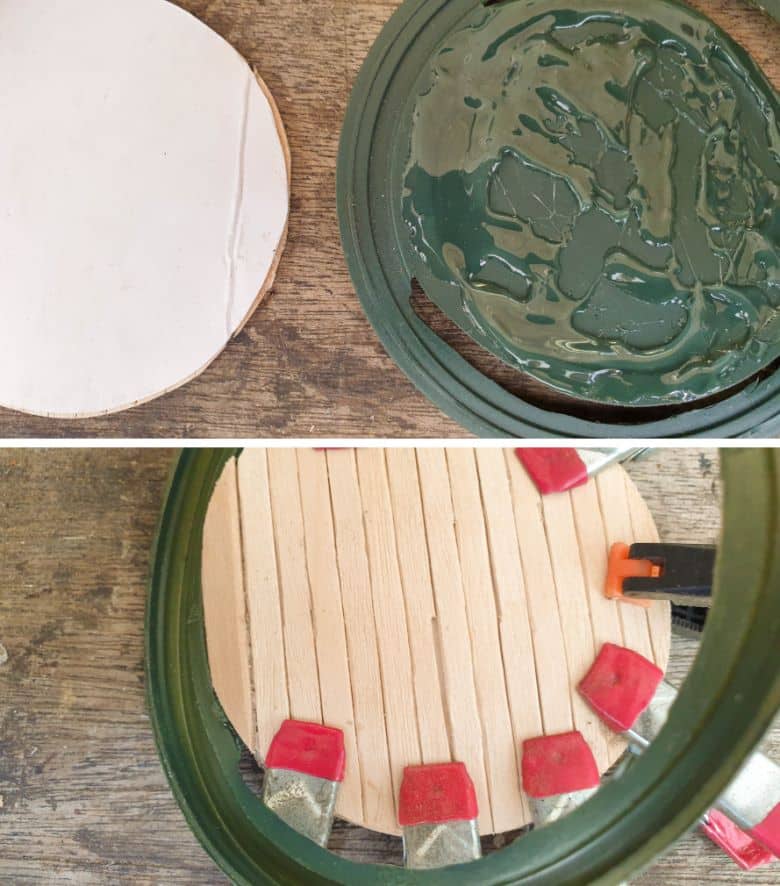
Using the inner cut lid area as a guide, cut two equally sized circles from cardstock.
Mark and fold the uncut hinge area on each circle and put it to one side.
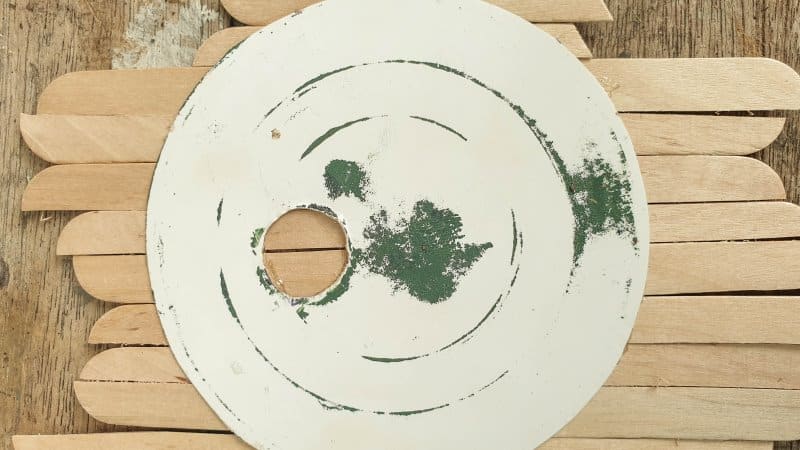
Trace around the bottom of the tin can and cut a cardstock circle to fit. Make a hole in the cardstock for a window.
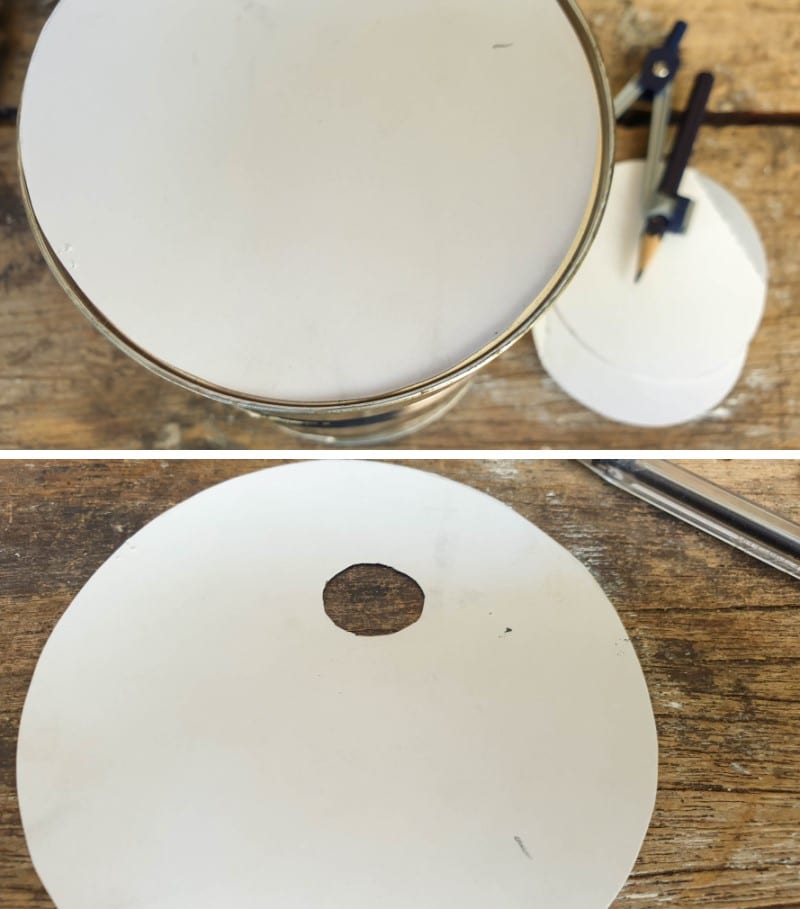
Test fit the circle to check that the window cut out on the cardstock lines up with the hole you drilled in the tin can. Adjust where necessary. We’ll be using the circles as a template to clad the door and make a back panel for the fairy wagon.
Making the door panels
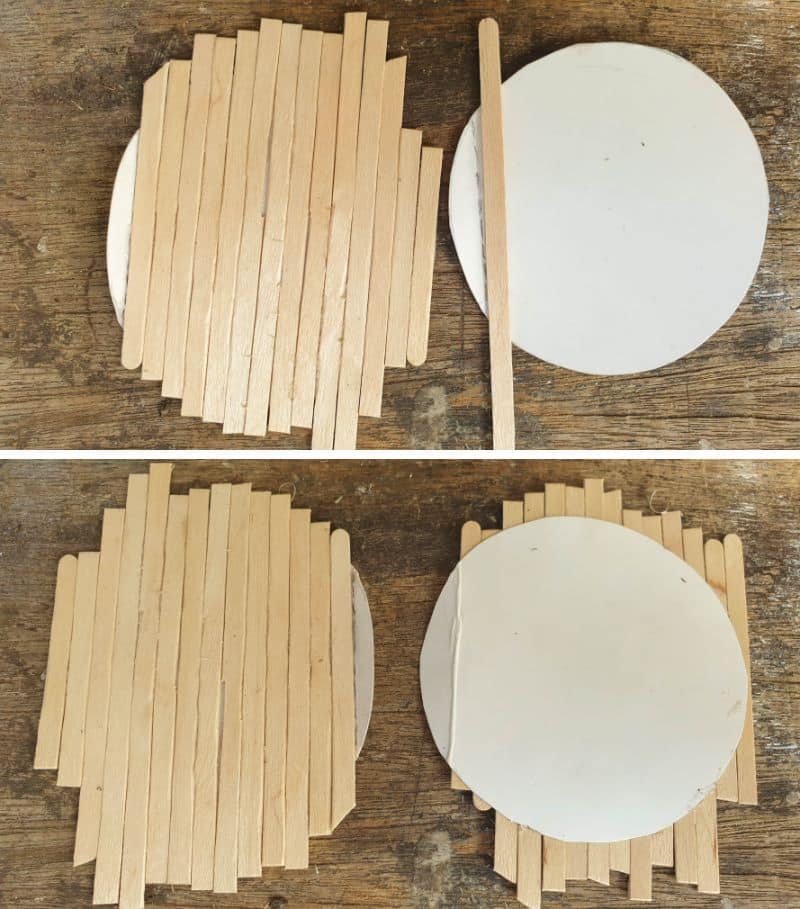
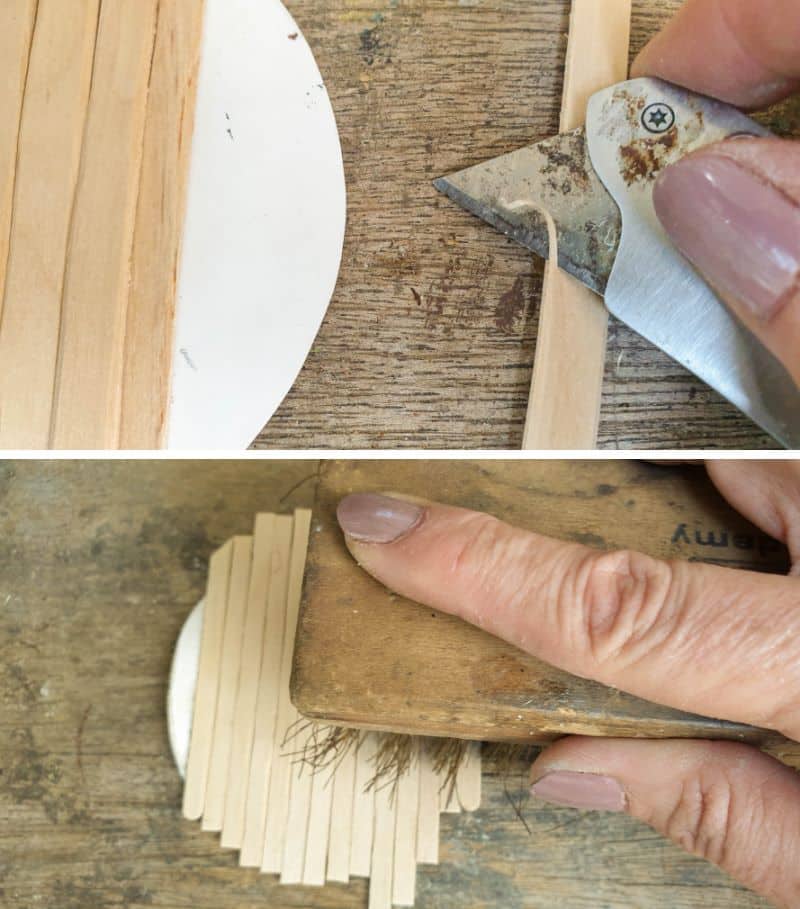
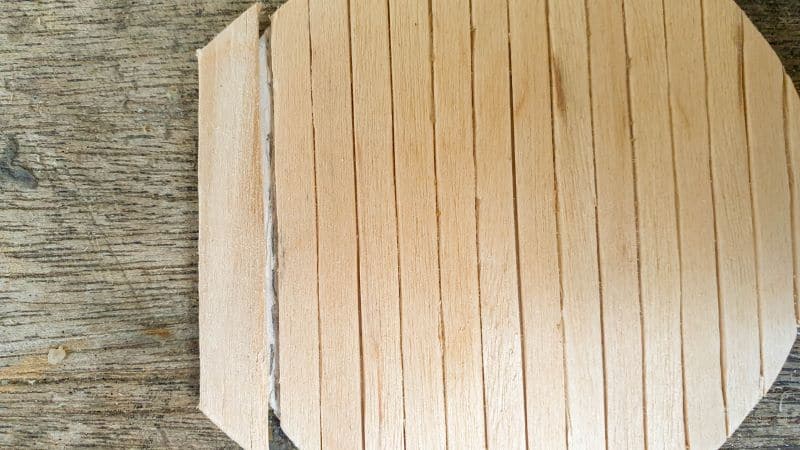
Using the cardstock door circles, glue craft sticks down on one side of both circles. When glueing the sticks, start at the hinge fold line and work your way outwards. Trim the excess away with a sharp craft knife.
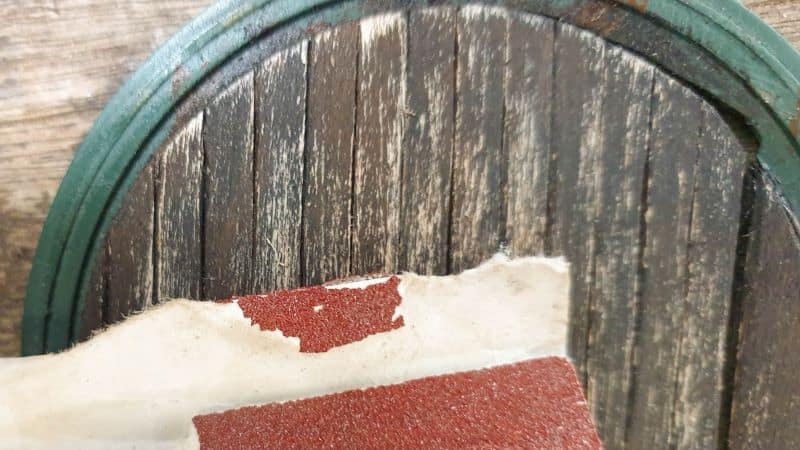
To give the sticks more character and a weathered and worn appearance, you can use a craft knife to carve knicks on the long edges. Sanding with 80-grit sandpaper or a wire brush will add to the distressed look.
Leave a small gap and glue a craft stick on the hinge side of the circle, as shown below. That small gap is really important. Without the gap, the sticks will “clash” against each other when you open the door, and they may come unglued.
Line each hinge on the door panels up with the hinge on the plastic lid and glue the panels down, one on the front and another on the back of the door. Clamp the door panels together while you wait for the glue to dry.
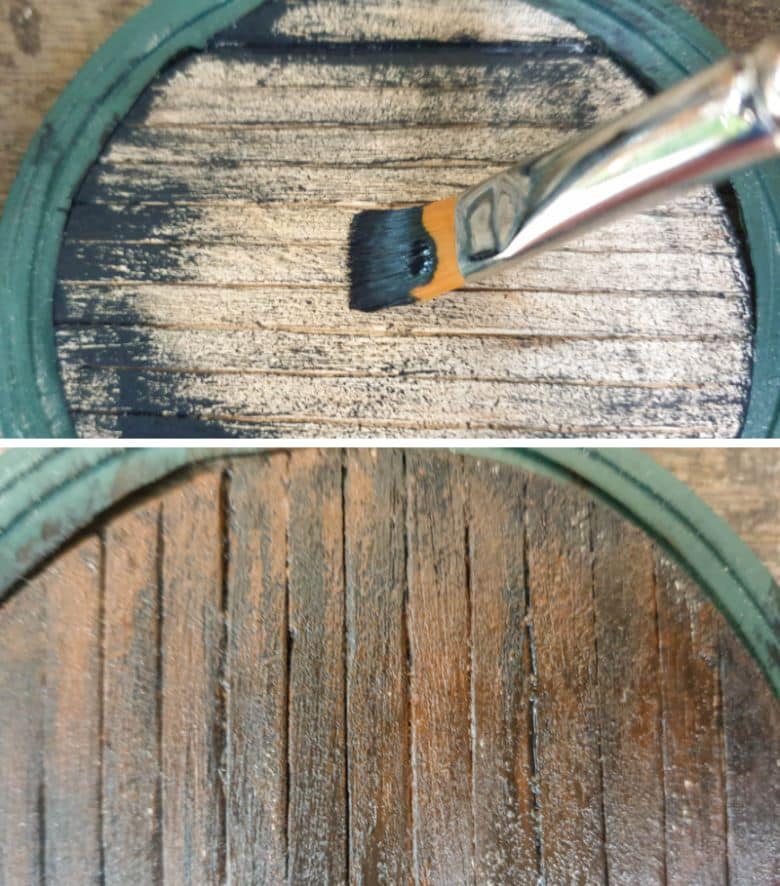
Once the glue dries, paint or stain the door panels in a color of your choice. I dry brushed mine with a watered-down black acrylic paint and then added layers of light and dark brown over the top, sanding in between layers.
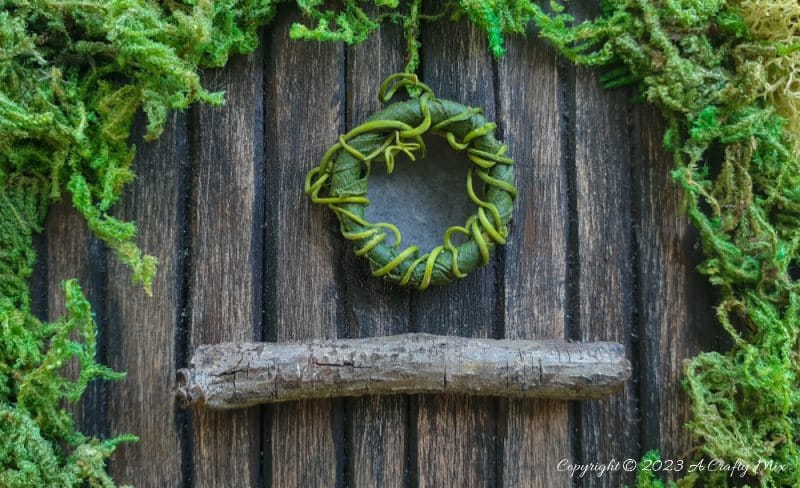
To make a door handle, drill two small holes in the lid door and thread twine through. Knot either end.
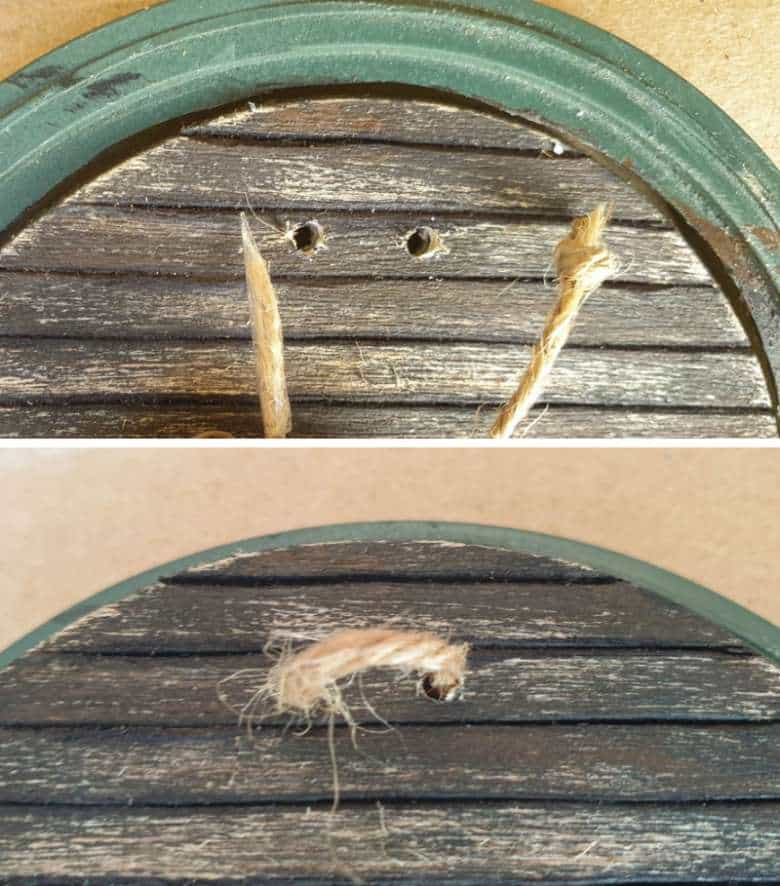
A pretty bead or small twig will also work as a door handle. They can both just be glued down without drilling holes.
Making the wagon back panel
The wagon back panel is made in much the same way as the door panels.

Glue wooden craft sticks onto the back panel cardstock circle. I used tongue depressors for the back panel.
Once the glue dries, trim the edges of the craft sticks using the cardstock circle as a guide. To make a hole for the window, you can use a craft knife, scroll saw, or a drill with a hole saw drill bit.
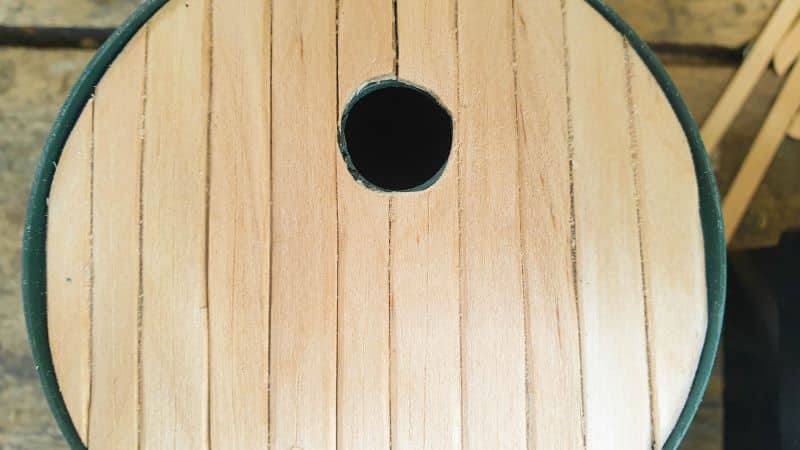
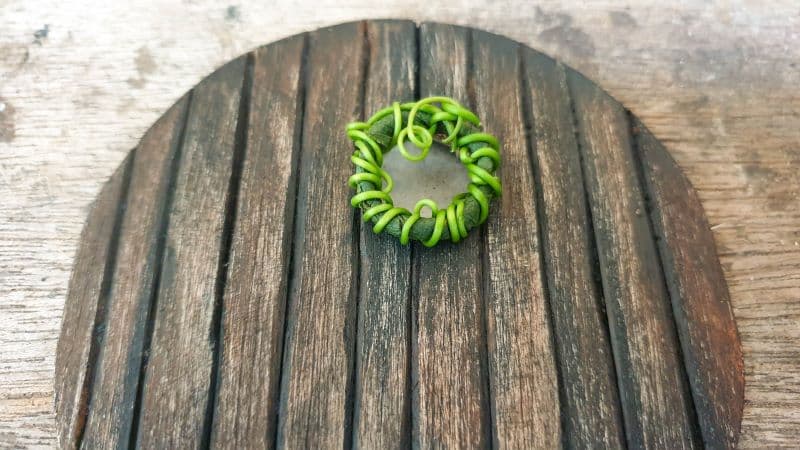
For the windowpane, tape a piece of wax paper over the hole. The beautiful thing about using wax paper for a windowpane is that it looks like frosted glass. You can also use a piece of plastic or make a stained-glass window. Glue a vine frame around the window or make one from a slice of wood.
Line the window on the back panel up with the hole in the tin can Gypsy wagon and glue the panel down.
Fairy Gypsy wagon’s interior walls
When it comes to the wagon interior walls, you can do pretty much anything. Mod Podge some napkins on to make wallpaper or paint the inside. I decided to keep my interior simple and used a brown paper bag as wallpaper. The join between the wallpapered back and sides is hidden under a piece of twine 😉
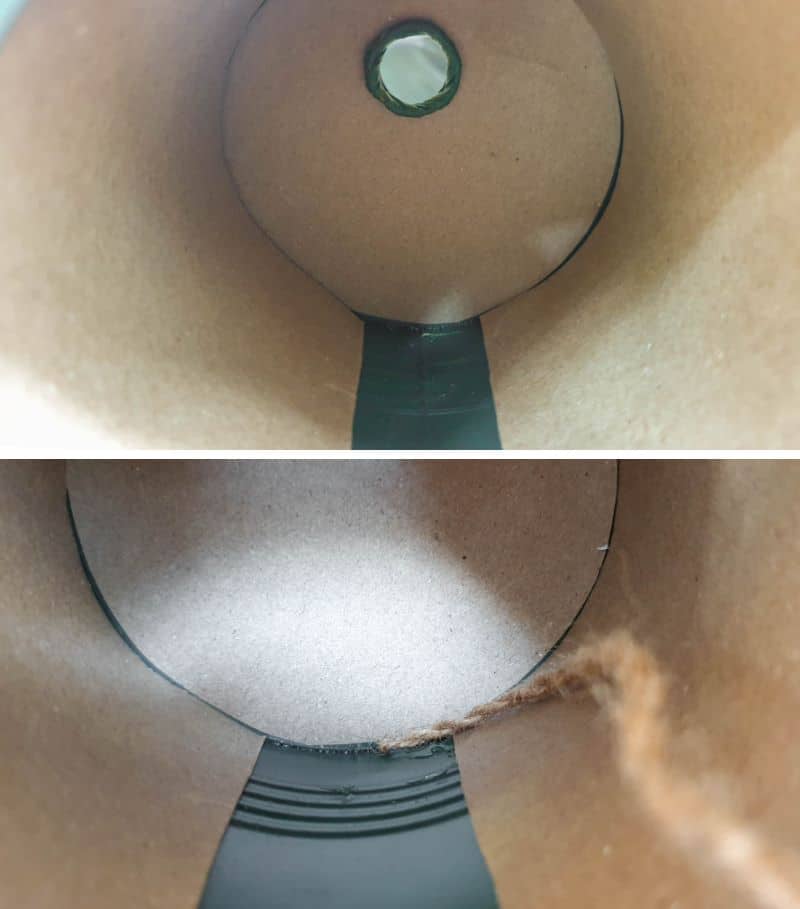
The interior window frame is simply a wire circle wrapped in florist tape, which is then glued on.
Making the wagon wheels
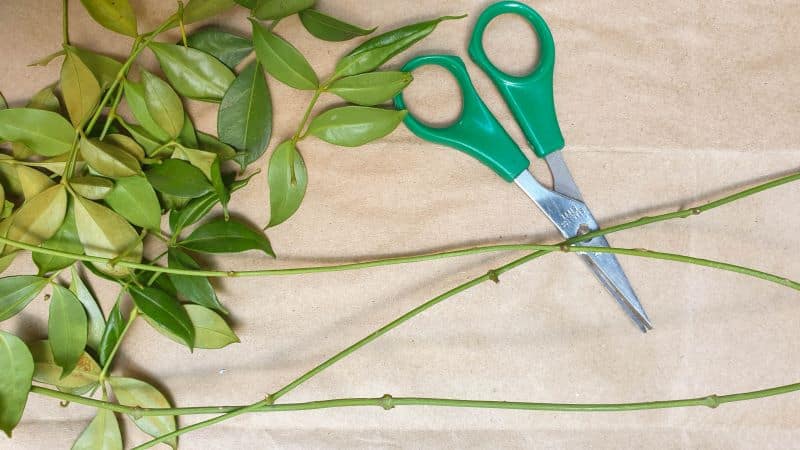
To make wheels for my tin can Gypsy wagon, I used jewelry wire and soft, green vines. Remove the leaves from the vines. If you don’t have any vines in your garden, you can use this lunchbox caravan tutorial as a guide to making wood slice wheels instead. You can also purchase premade wheels online.
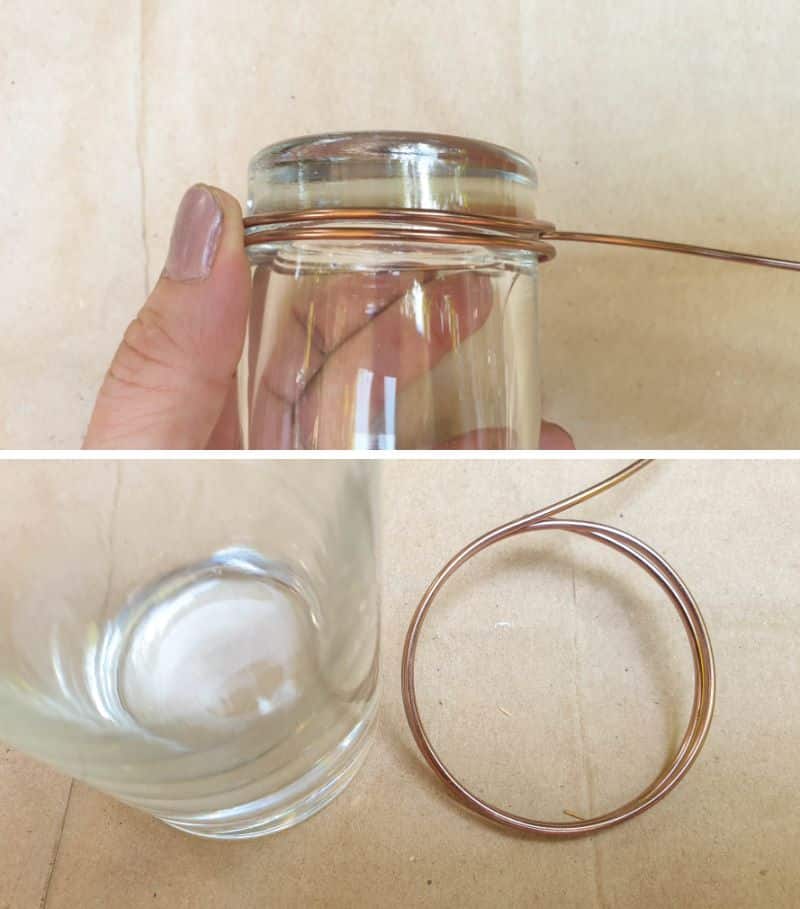
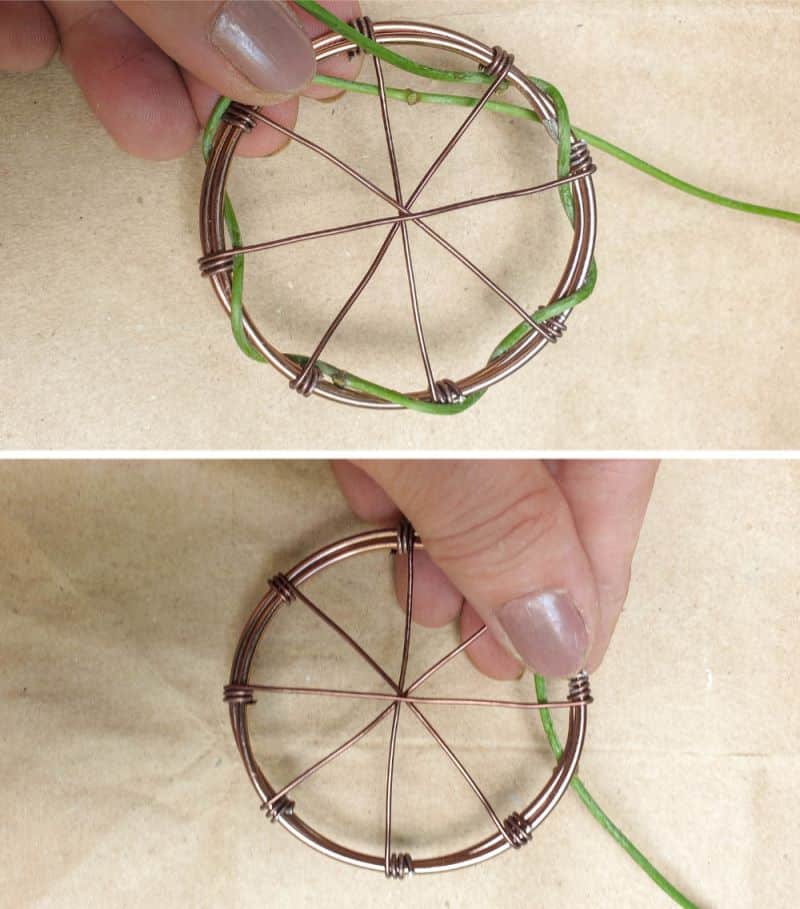
Use a glass or tube as a sizing template for your wheels. Wrap a length of 14-gauge jewelry wire around a glass twice. You’ll find a handy wire gauge cheat sheet in this wire art tutorial.
Remove the wire circle and cut away any excess. Using a thinner 18 or 20-gauge wire, create spokes by wrapping the wire diagonally across the circle, as shown below.
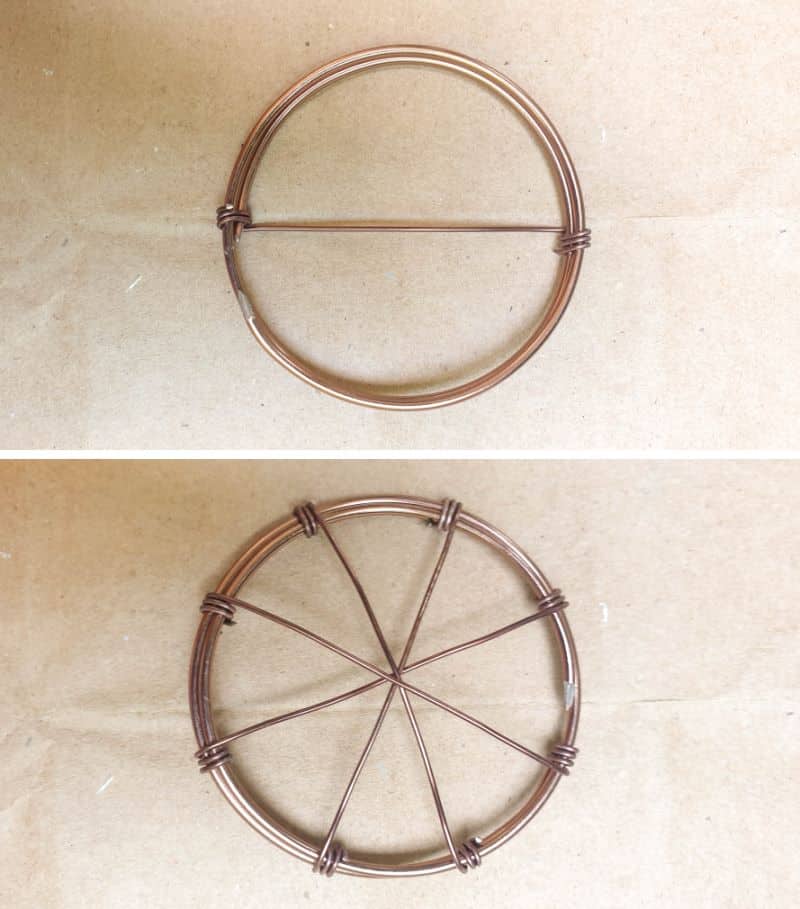
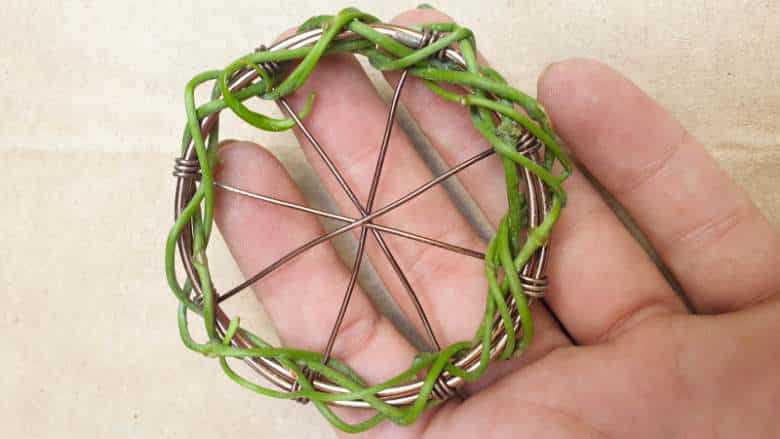
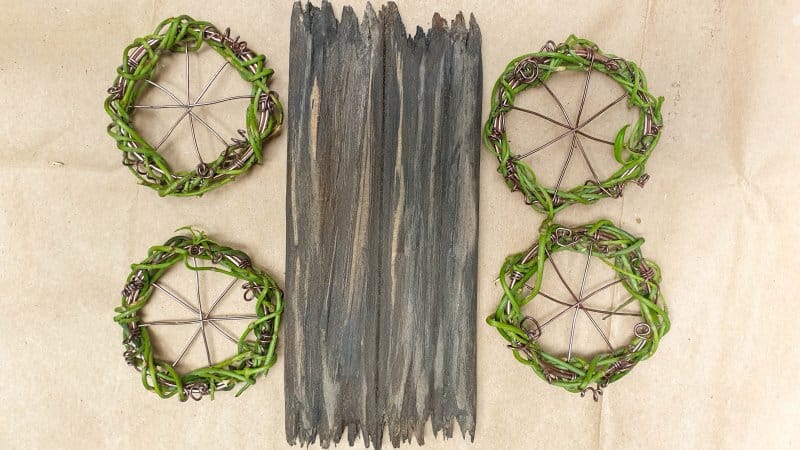
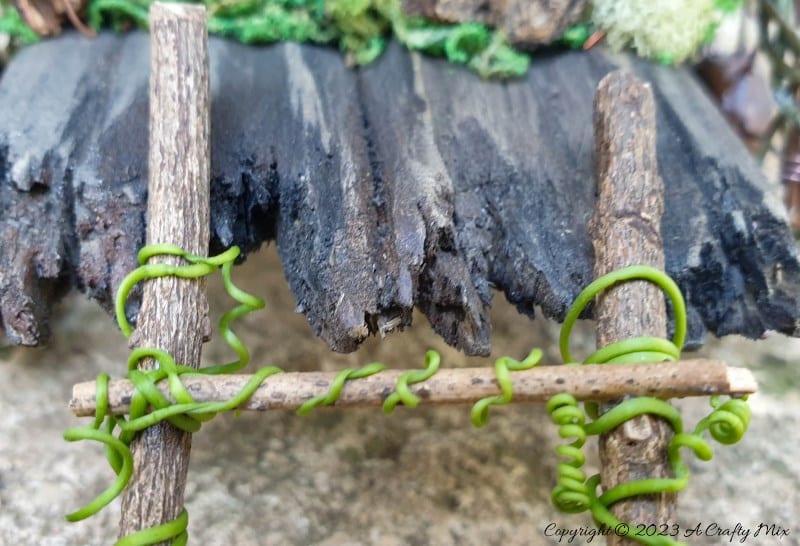
Line the spokes up in the centre of the wire circle. Weave and wrap flexible green vines around the wire circle. You can wrap as many as you like as long as all four wheels end up roughly the same thickness.
There are about three layers of vines wrapped around my wheels.
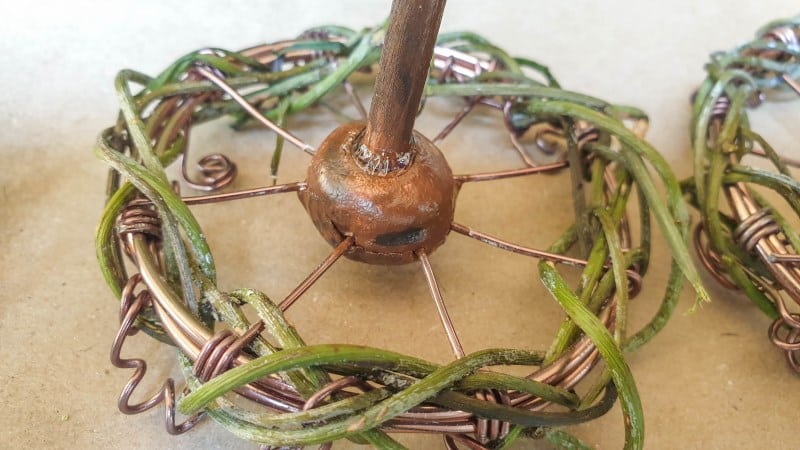
Roll a small ball of air-dry clay and insert a cut skewer into the ball.
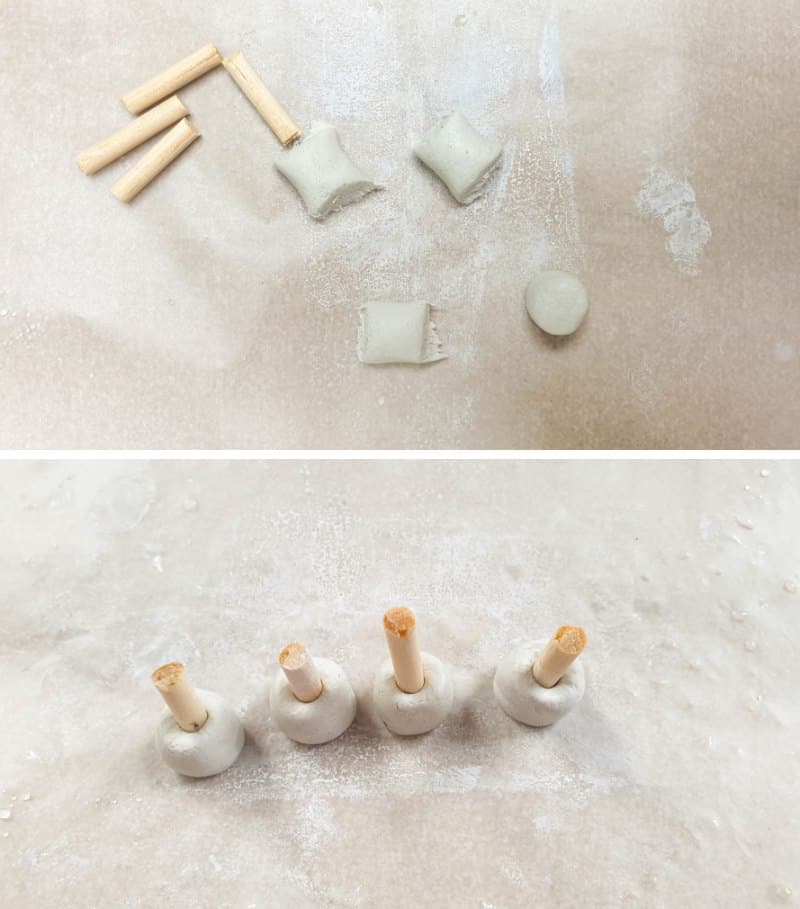
The little skewer acts as a placeholder for the axle while the clay dries. Squish the skewered clay balls over the centre of the wire spokes and leave them to dry.
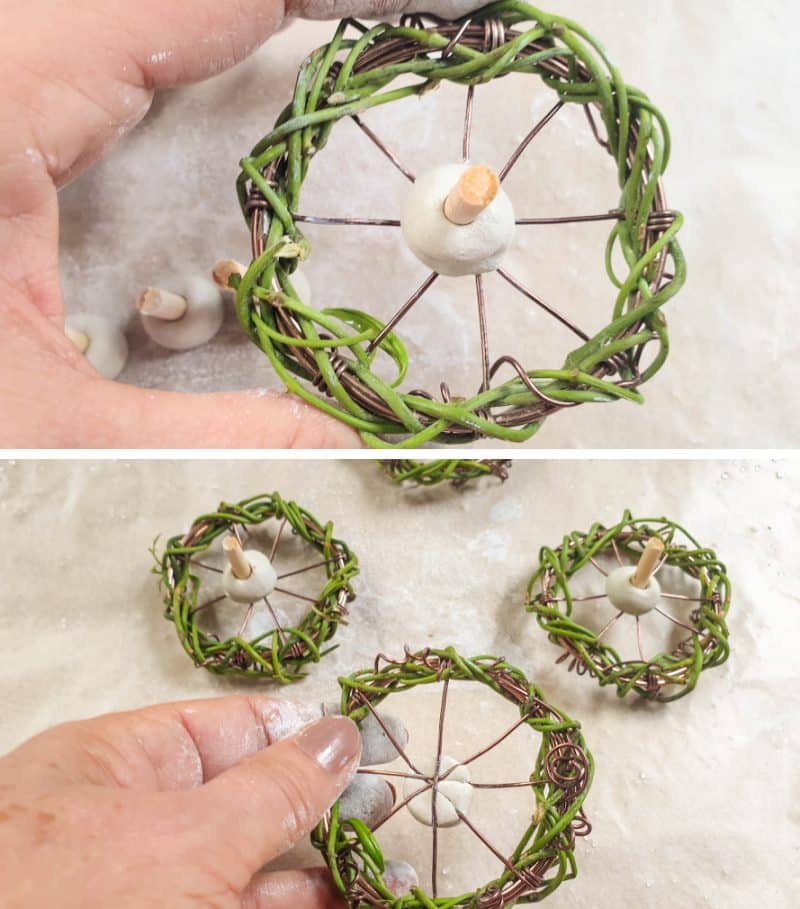
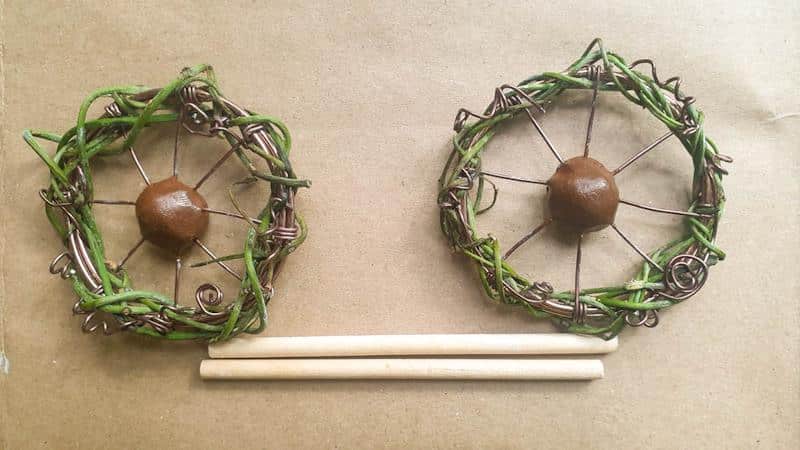
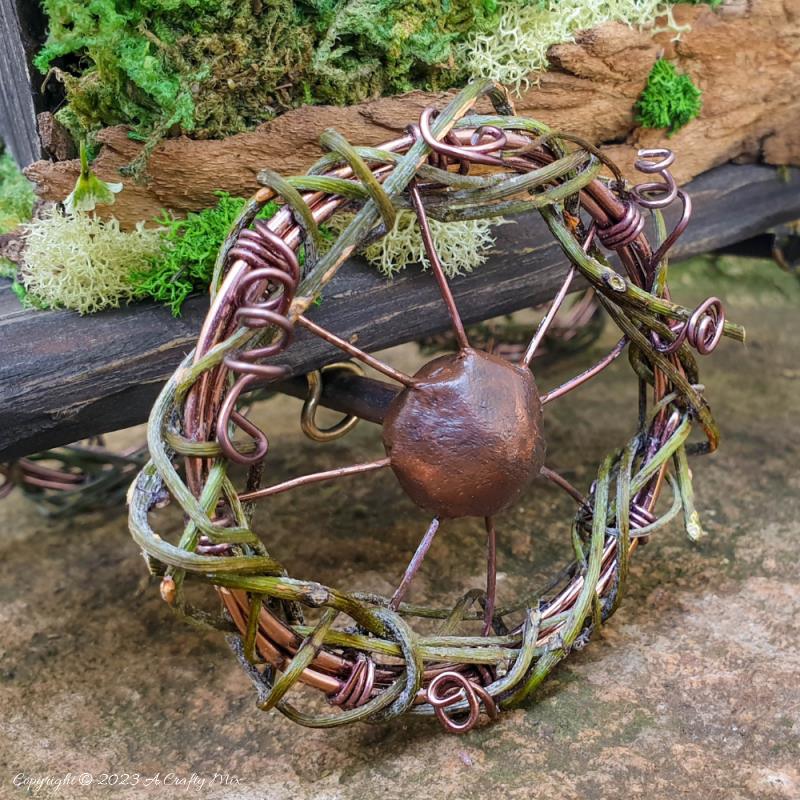
Once the clay ball has cured, remove the skewer and flip the wheels over. Add another clay ball on the other side to make a “hub cap”.
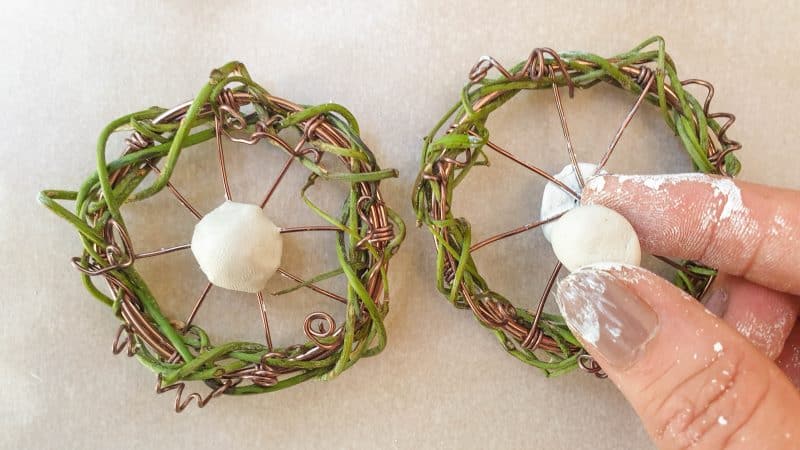
Leave the clay to dry completely before painting the wheel centres.
Making a base for the wheels
I was in two minds about how to put the wheels of the fairy wagon; I could:
- Drill four holes directly into the Gypsy wagon body and slide the skewer axels through them before adding the wheels, or
- create a base and attach the axles and wheels to that, and then glue and secure the wagon to the base.
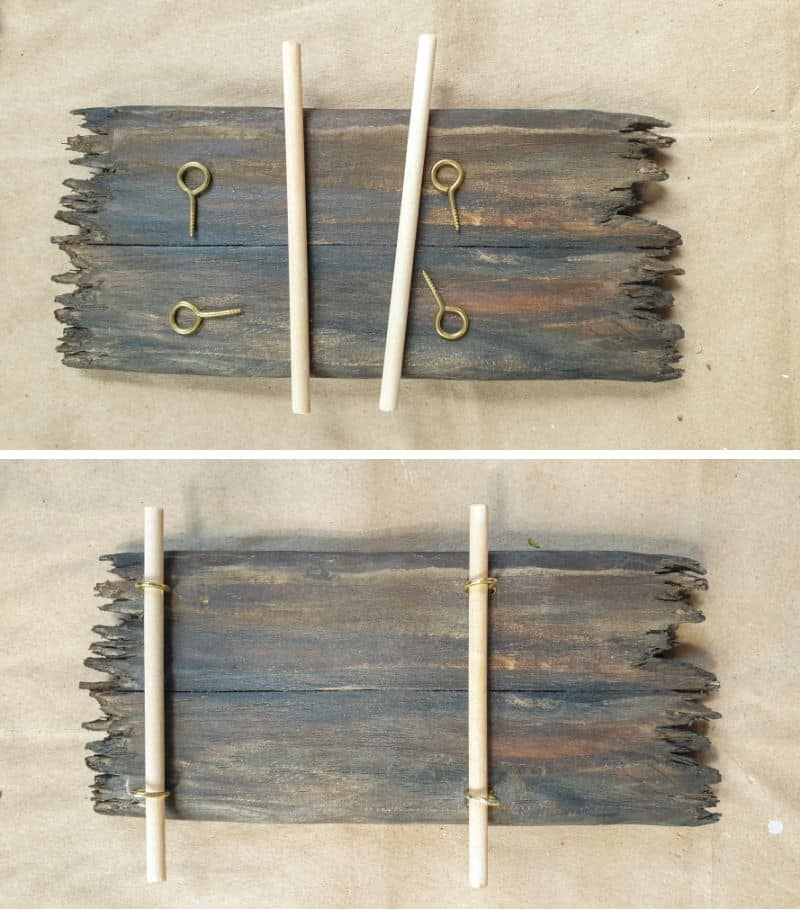
I wasn’t 100% sure I’d be able to drill four perfectly lined up holes on opposite sides of the wagon, so I went for option number 2, which only involved drilling two holes into the bottom of the wagon. It did, however, mean I would need to make a base first. Easy enough to solve. Cut a piece of wood that is wide and long enough for the wagon body to fit on. Make sure there’s enough space on either side for all four wheels to turn without bashing into each other. I used a piece of wood that I’d made a while back using this jagged edge tutorial.
Add four eye hooks on the bottom of the base. These will hold the skewer wheel axles.
Place the tin can wagon body on the wooden base and drill two holes through the wood up into the Gypsy wagon body.
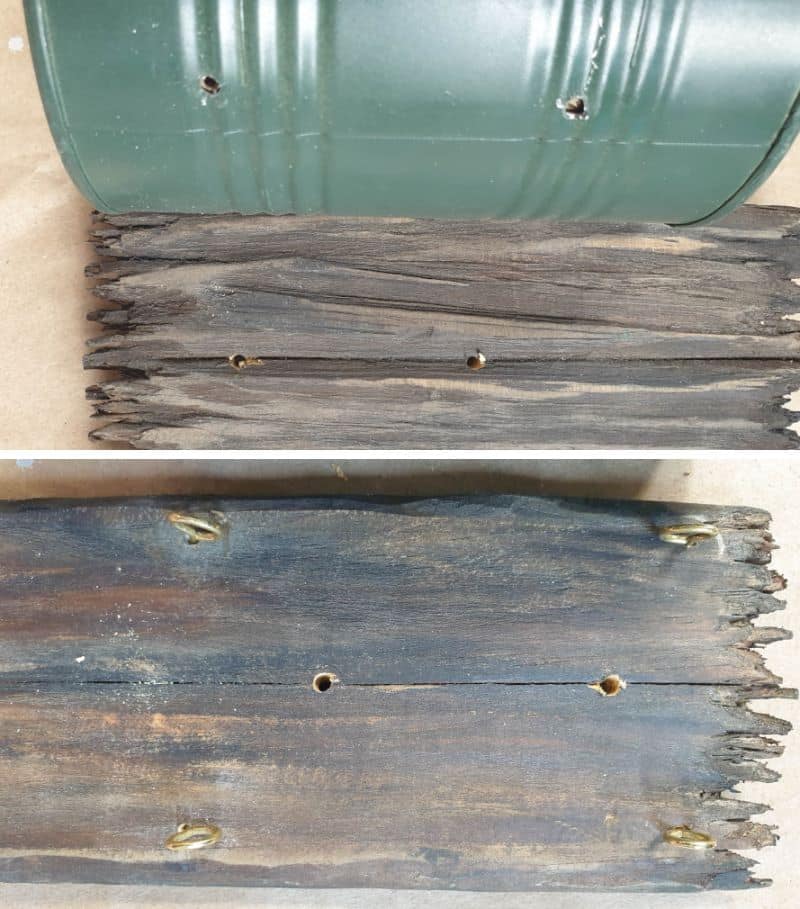
Secure the base to the wagon body with glue and wire. In hindsight, I should have drilled the holes for the base right at the beginning while prepping the tin can. Please learn from my mistakes and do this bit upfront.
We’ll add the wheels last so the little wagon doesn’t drive around while we finish up the interior and add the roof.
Fairy Gypsy wagon exterior walls
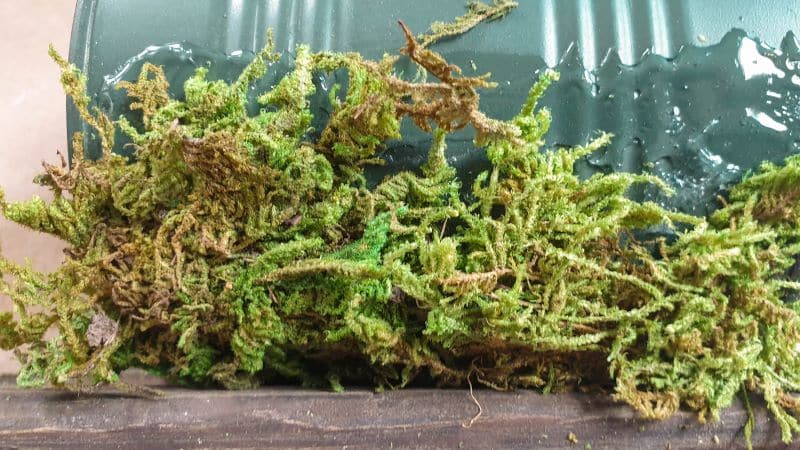
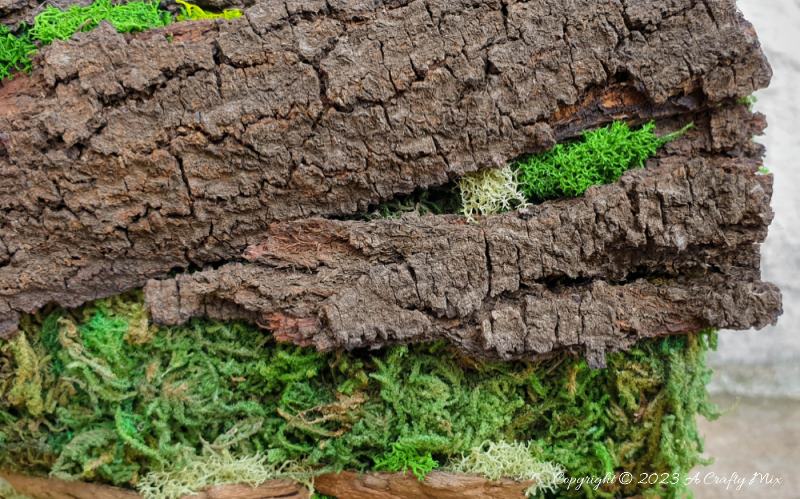
To complement the rustic, earthy vibe of the fairy wagon, I chose to cover my exterior walls with preserved moss and bark chips. Once again, this part is entirely up to you. A traditional Gypsy wagon, or Vargo, is usually brightly painted and highly decorative. The tin can I used had funny little ridges and didn’t lend itself to decorative painting techniques. To apply the moss and bark chips, add an even layer of E6000 and squish the clumps of moss into the glue.
Psssst…. did you know you can make your own fake moss using a bath sponge?
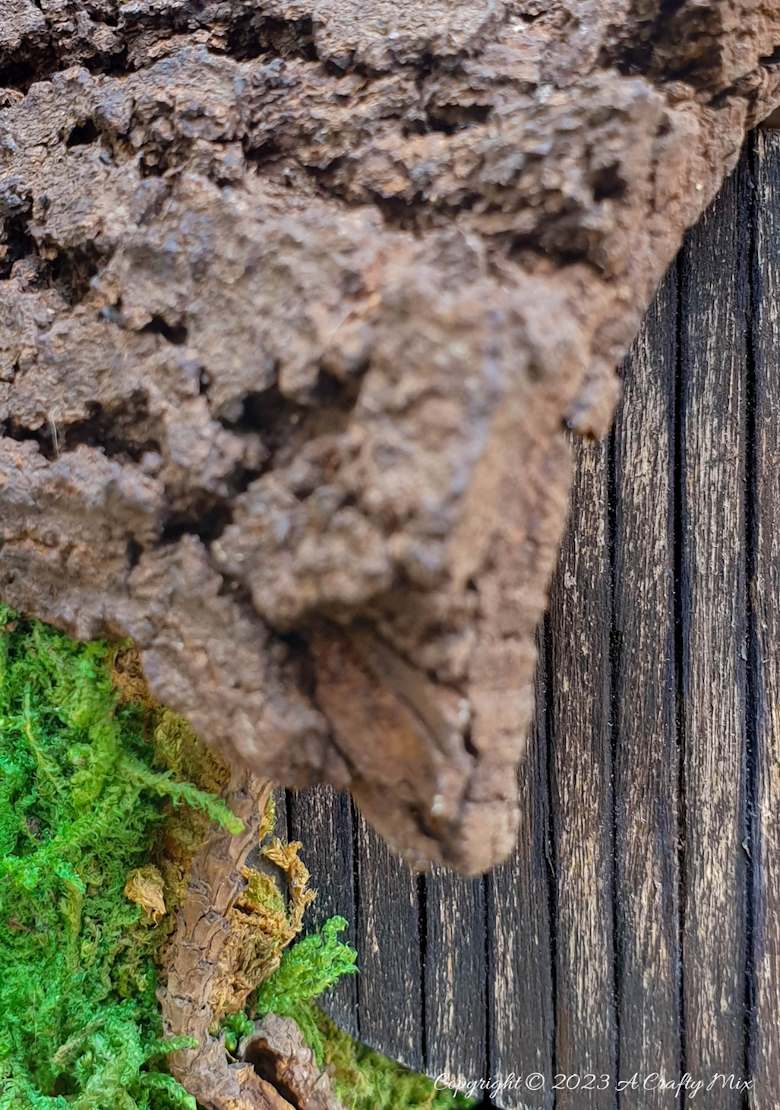
Adding a bark roof
Like our lunchbox caravan, this Gypsy wagon called for a bark roof. You can either use lots of thin strips of bark or wet a solid strip and leave it to dry over the can. It will bend and take on the curve of the can. My roof is one large piece of bark and a thinner sliver. They’re both glued on with copious amounts of E6000. Tie the roof down with twine while the glue dries.
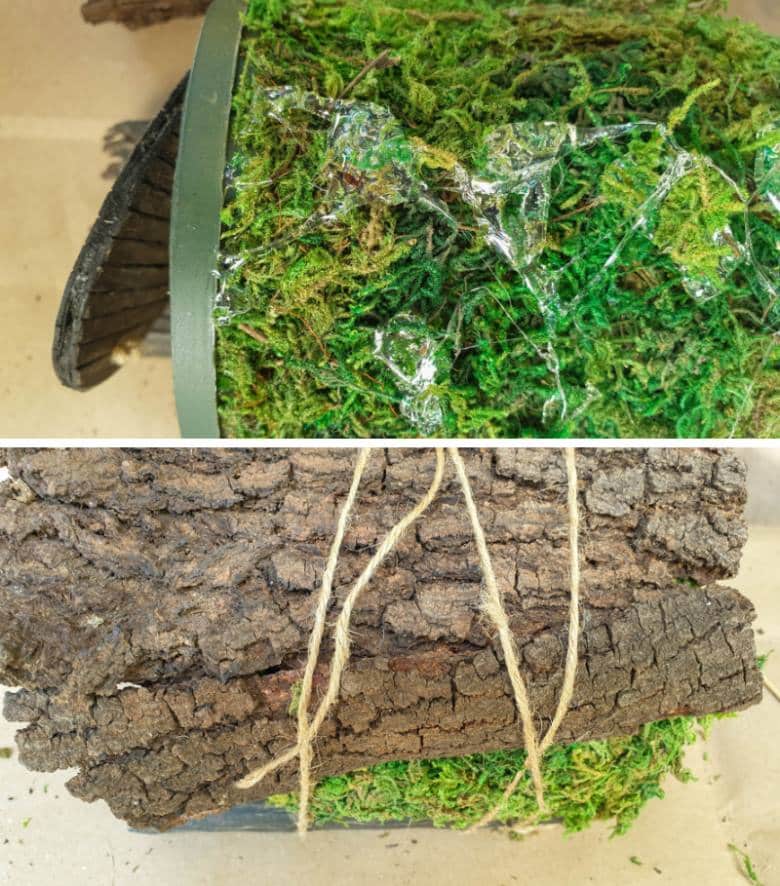
Fill any gaps between the bark with moss. I love using foraged finds to make fairy crafts. It always makes everything look more authentic.
Decorating the interior
Depending on the tin can size, you can decorate the interior in so many different ways. Mine is a medium-sized coffee can that’s only 12.5cm high and 10cm wide (about 5” x 4“). So there’s not a lot of room. Just enough for a tufted mattress, wood slice headboard and two bedside tables with working lights.

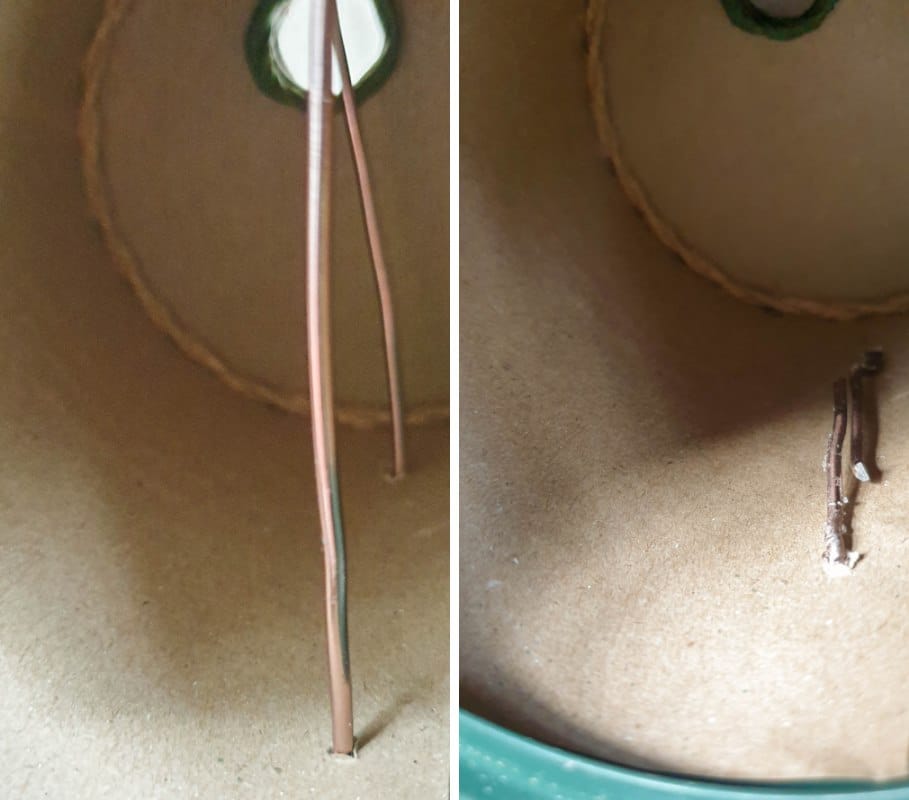
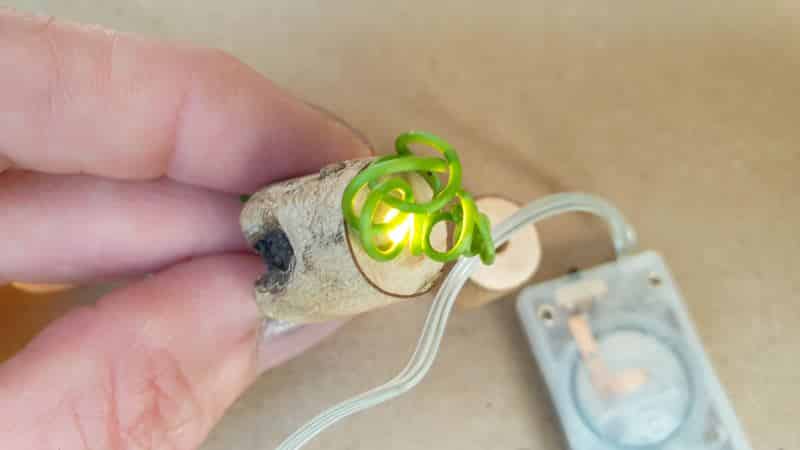
The bedside tables are two little stumps of wood with a hole drilled down the middle to hold the lights.
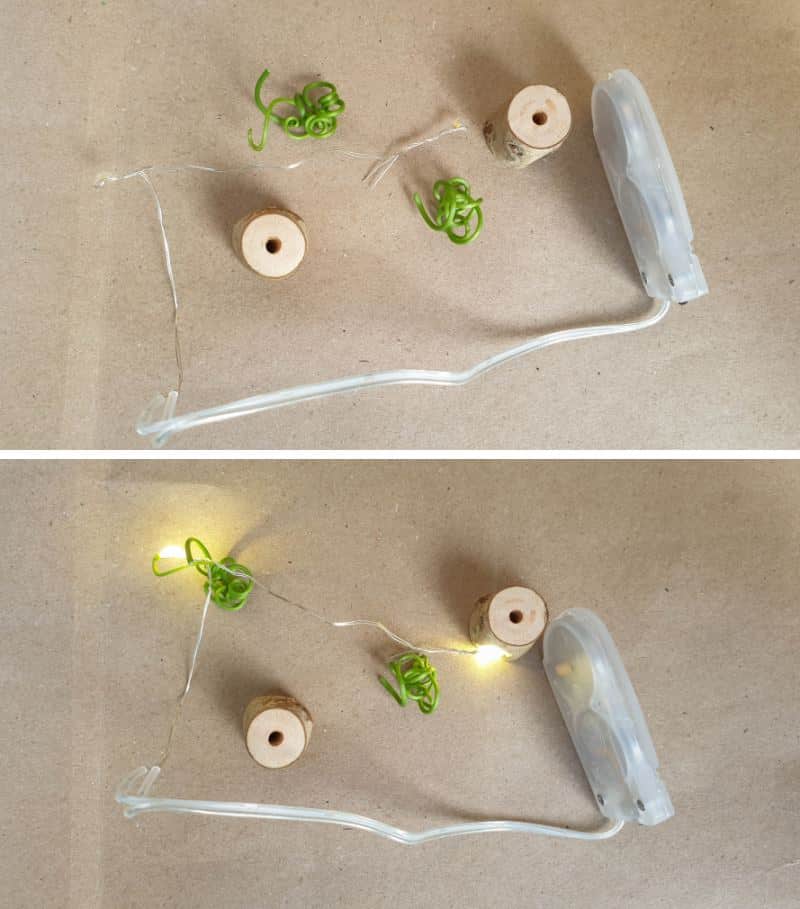
Pssst, did you know you can cut battery-powered fairy string lights, so you only have a few bulbs?
I built a deck from stirrers and hid the wiring for the lights underneath.
As always, when working in tiny spaces, I build my miniatures outside and then move them into place once all the fiddly bits are done. It makes things so much easier.
It’s also a good idea to glue everything down before putting the bits and bobs inside the wagon. For easier access, only add the lid door after the interior is done.
Finishing up
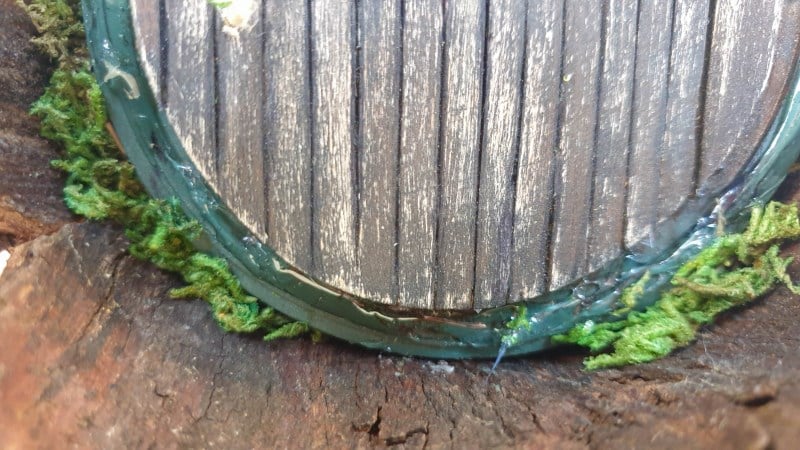
Once you’re happy with both the interior and exterior of the fairy Gypsy wagon, glue the door on and add moss to disguise the plastic frame.
Insert and glue one wheel onto each skewer axel.
Slide the axel through the eye hooks and glue on the second wheel.
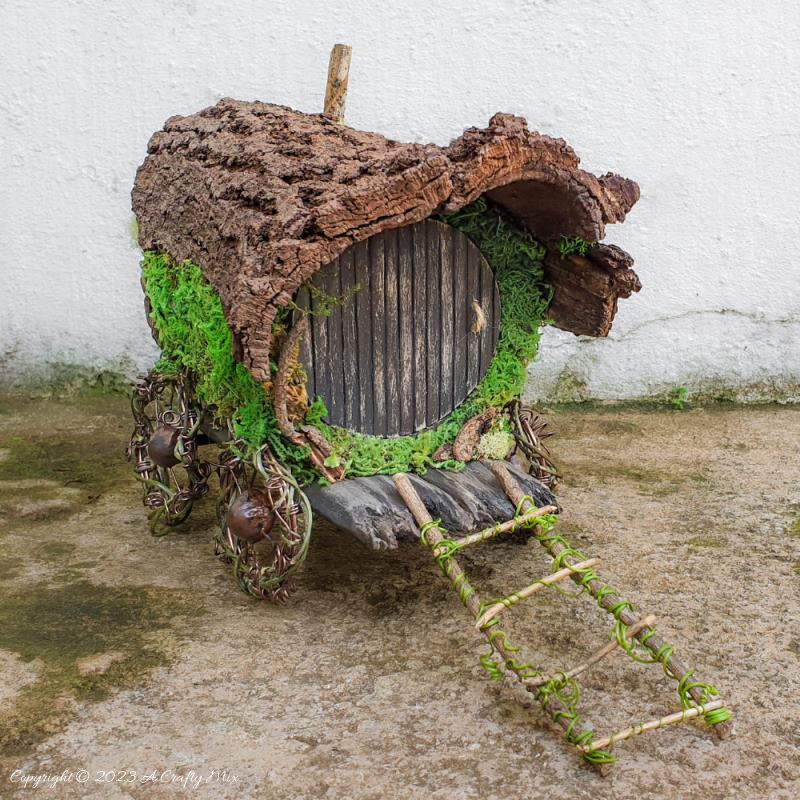
Make a small ladder by glueing twigs together.
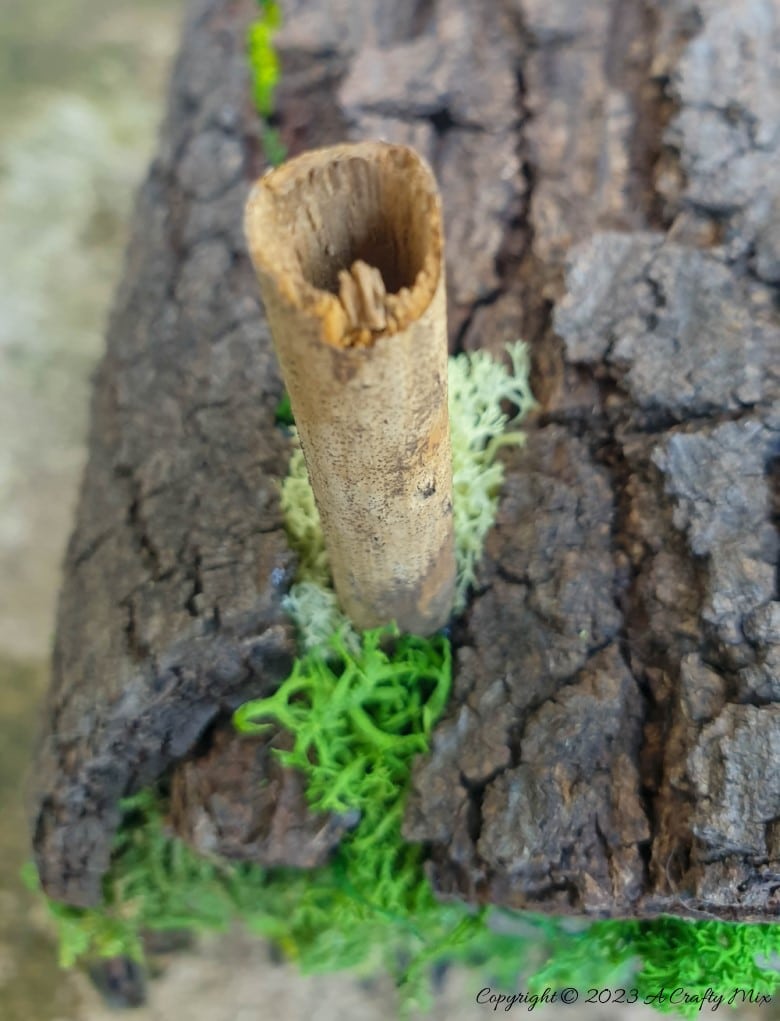
And glue on a small hollowed-out twig for a chimney.
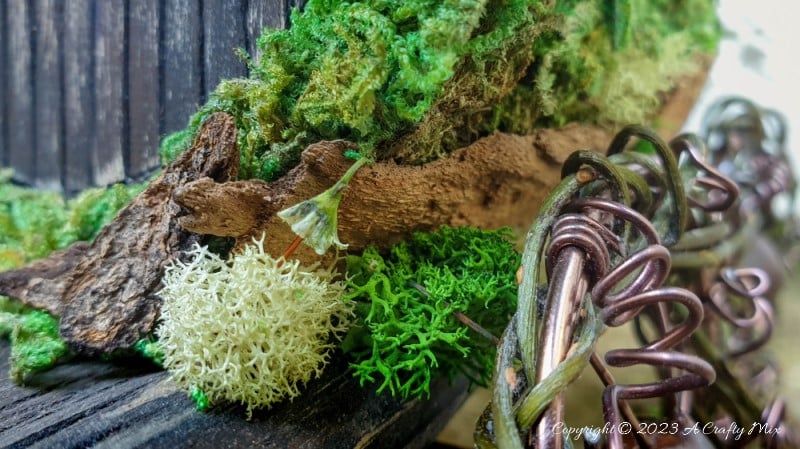
Add bark chips, lichen, and other interesting bits to finish the little wagon off.
And that’s it. You’re all done.
Making a fairy Gypsy wagon is a great way to get those creative juices flowing and tap into a world inspired by the magic of fairies.
This repurposed wagon took me a weekend to complete and can be used as a decorative element in your home or as a focal point in a fairy garden.
I hope you enjoyed the tutorial as much as I did putting it together for you. Sorry that it was so long. Overall, the key to turning a tin can into a fairy Gypsy wagon is to let your imagination run wild and have fun with the process.
Oh, before I forget. Here’s a quick video tour of the fairy Gypsy wagon where I show you how to turn those little bedside lights on and off.
If you like the idea of repurposing a tin can into a fairy Gypsy wagon, don’t forget to pin it for later.
Sharing is caring.
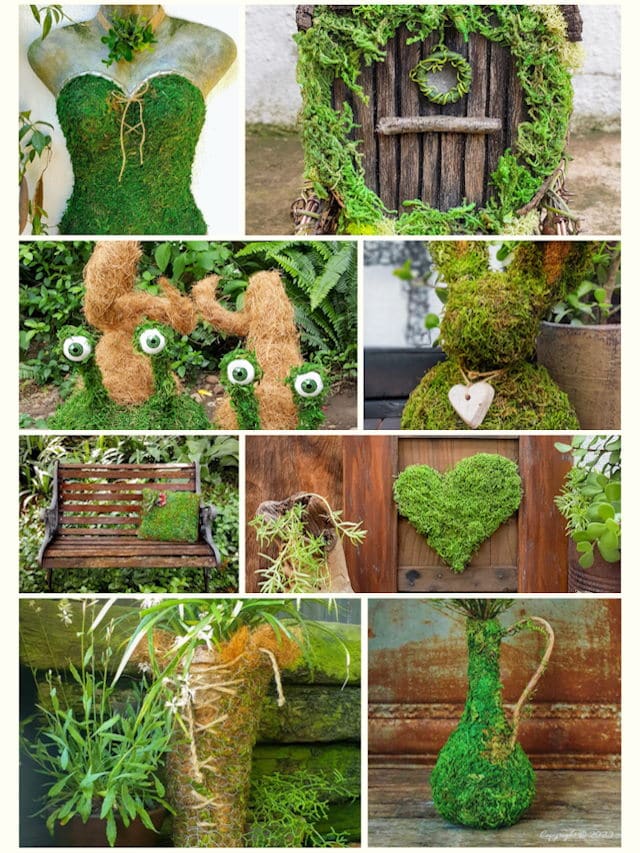
Want a few more lush, green moss tutorials? We have a whole bunch on the blog for every skill level. Just scroll through the web story below and click on the “Get Tutorial” link at the bottom of each image.
BTW, if you’re looking for some of the things we used, we’ve got you covered. Disclosure: Clicking on the links below means we may receive a commission from Amazon. But don’t worry, it won’t come out of your pocket, and it helps us make more amazing crafts to share with you 😉


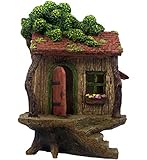
And if you prefer to buy rather than DIY, then maybe these beauties will appeal.
And as always, wishing you a wonderful, crafty week filled with lots of love. Thank you for popping in for a visit.

Last update on 2026-06-03 / Source Amazon Affiliates