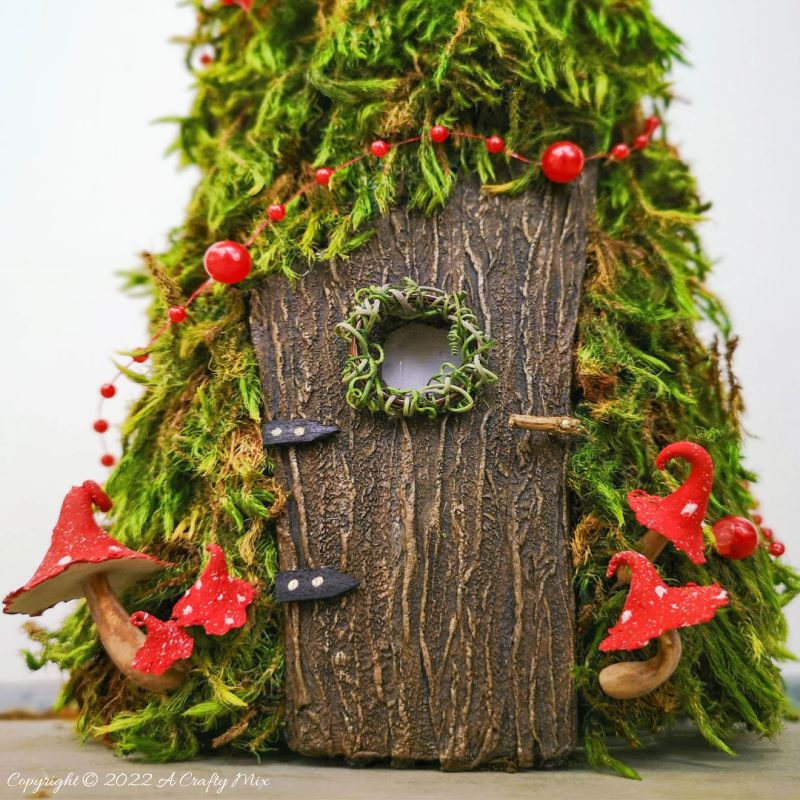
Every year around this time, we start planning a cat-friendly Christmas tree. Our purr babies are notorious when it comes to the real thing. If they see a hint of tinsel, or shiny, dangling bauble, all hell breaks loose. But that’s okay, coz it means we get to share alternative tree ideas that are both unique and affordable. This year, we made a few handmade paper trees to decorate our festive tablescape and this mossy, cone fairy Christmas tree.

She looks perfect on a mantle or as a centerpiece, and you can keep her up all year long. Just remove the red bead garland and star, and poof, she turns into a coned-shaped fairy abode.

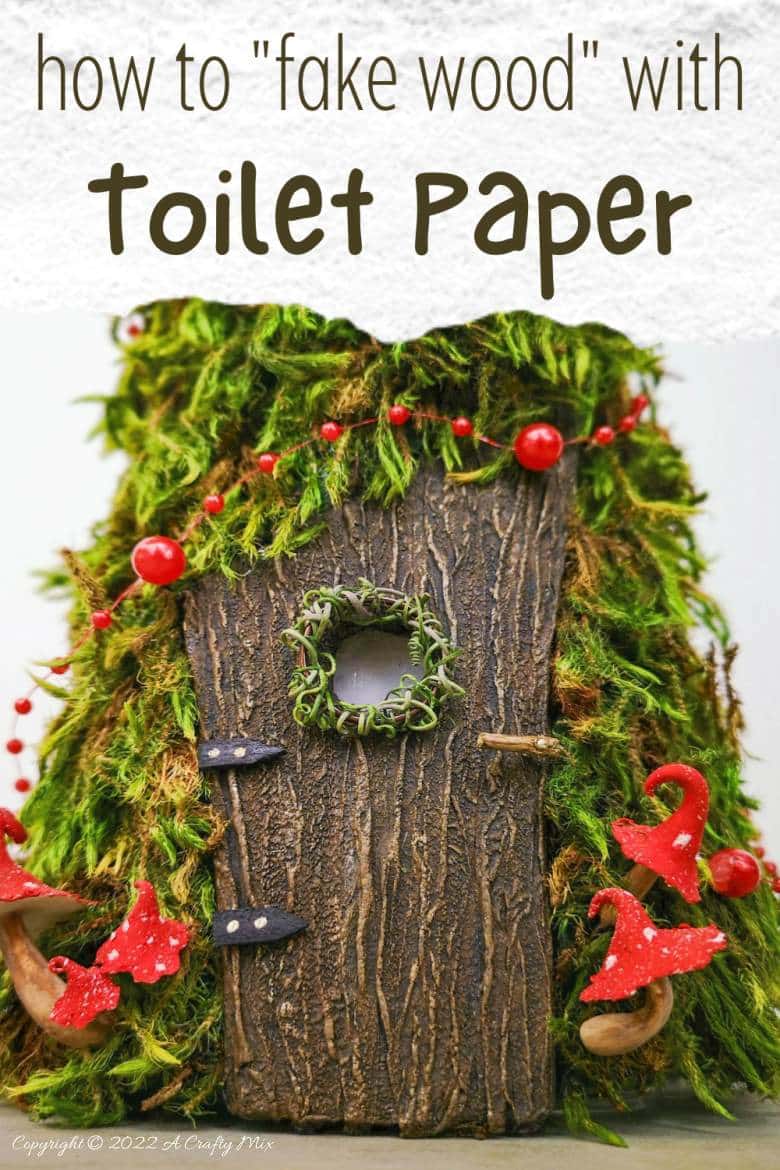
In this tutorial, I’ll share how to make a cone fairy tree with vine-wrapped widow frames …..

…. and how to create a wood texture using kitchen toweling or toilet paper 😀
As an optional extra, you can wire the fairy cone tree up, so she lights up at the flick of a switch.

Okay, before we get to all those tutorials, be sure to follow us on Facebook, Twitter, Pinterest, or Instagram. And don’t forget to subscribe so you’ll never miss a post!
What you need
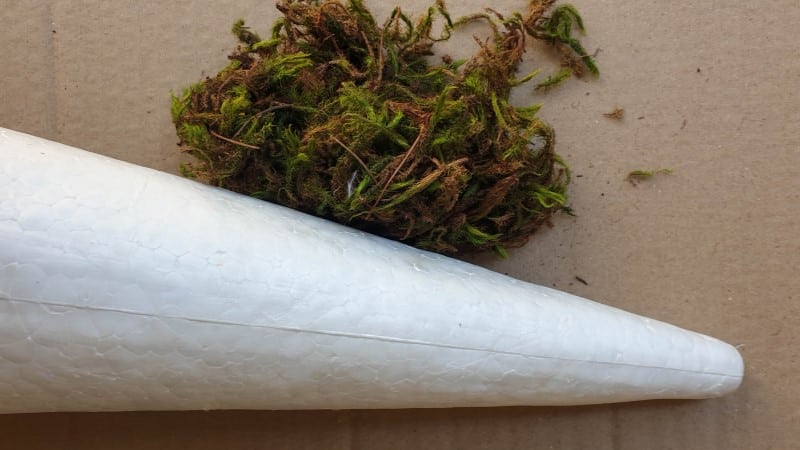
- Large polystyrene cone
- Moss
- Clear glue
- Craft paint (green, black, warm, rusty brown, and a lighter brown)
- Sturdy cardboard
- Kitchen toweling
- Jewelry wire
- Soft vines or tendrils
- Fairy lights
- Bead garland (optional)
- Clear takeaway dish or lid
- Sharp craft knife
- Masking tape
How to make a cone fairy Christmas tree
Prepping the polystyrene cone tree
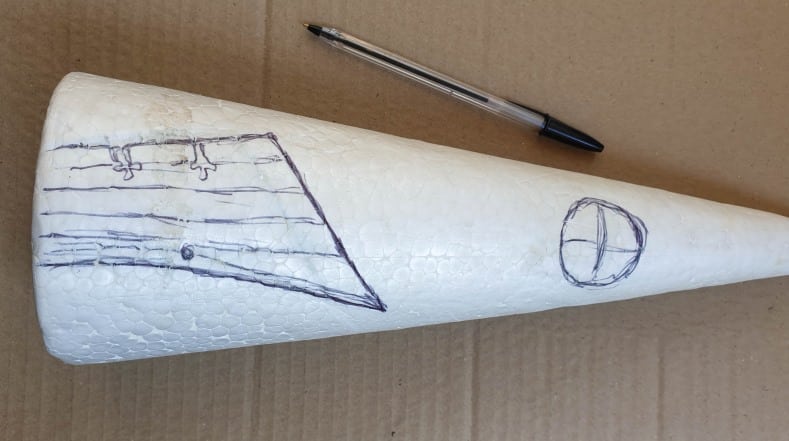
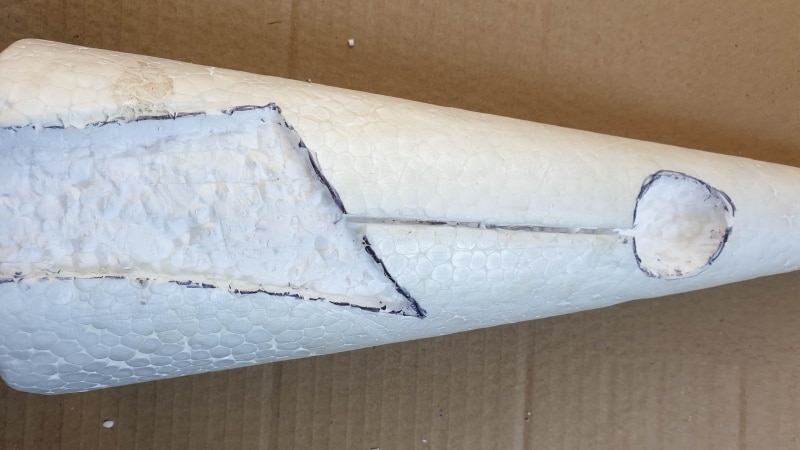
Use a pen to draw a door and window on the polystyrene cone. I went for a slightly upward-curving door and round window.
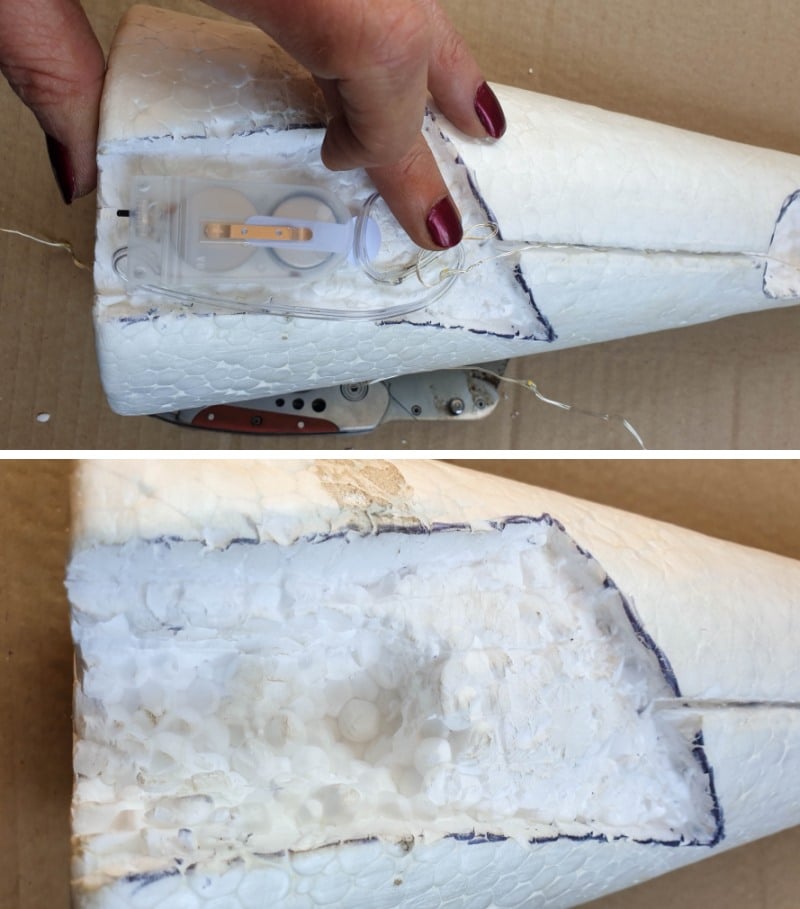
Cut around the door and window shapes with a sharp craft knife and remove some of the polystyrene. We’ll be adding the battery pack behind the door, so make sure it’s deep enough.
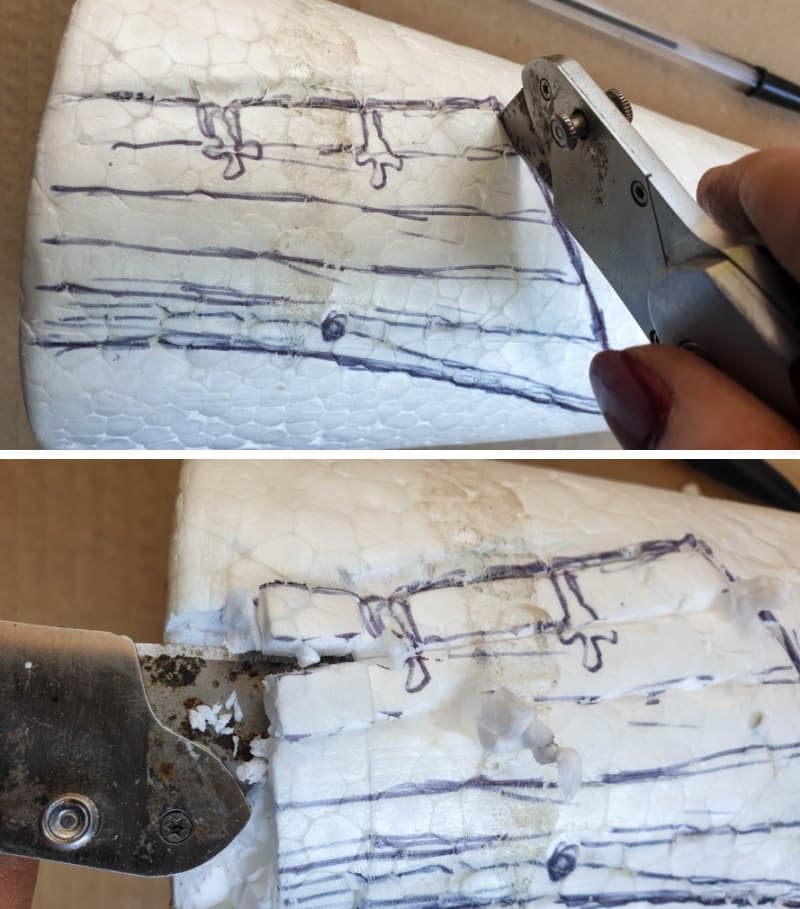
Cut a slit between the door and the window. The slit needs to be just wide enough to fit the fairy lights.
Test fit the battery pack and lights remove a little more polystyrene if need be.
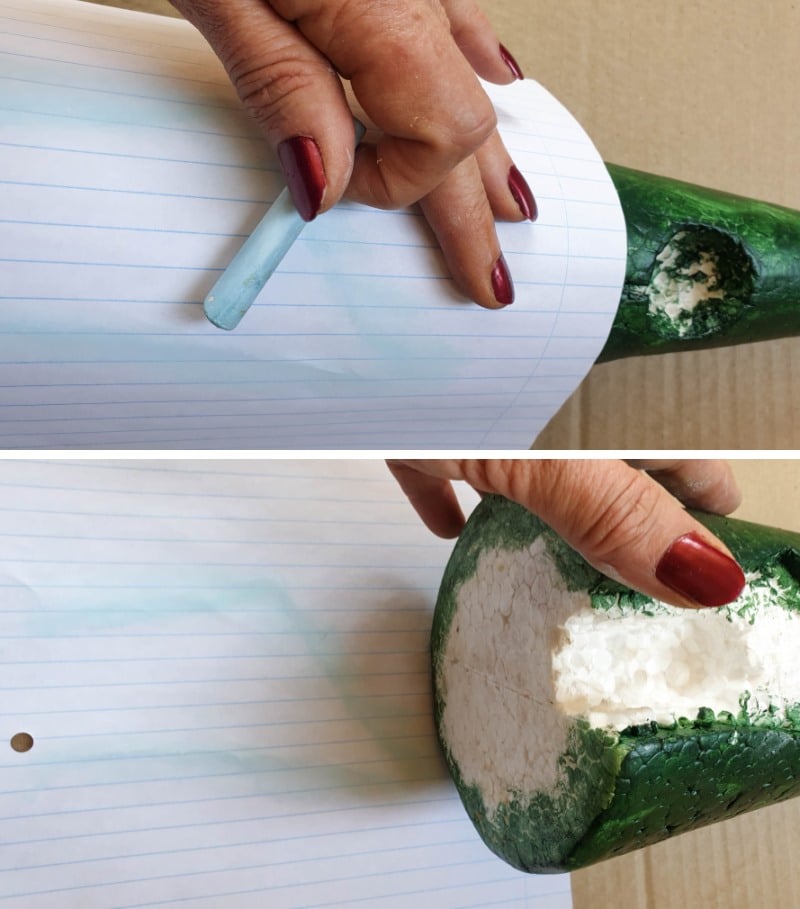
Once you’re happy with the door and window cut-outs, paint the cone green.

Whenever I add moss to a form, I always paint it green first. That way, if I miss a spot, it’s not so obvious. Craft paint works best if you’re painting polystyrene. Spray paint will just chew it away, and it will look like those kitties really did get their claws in and ripped everything to shreds.
Making the fairy door with toilet paper or kitchen toweling
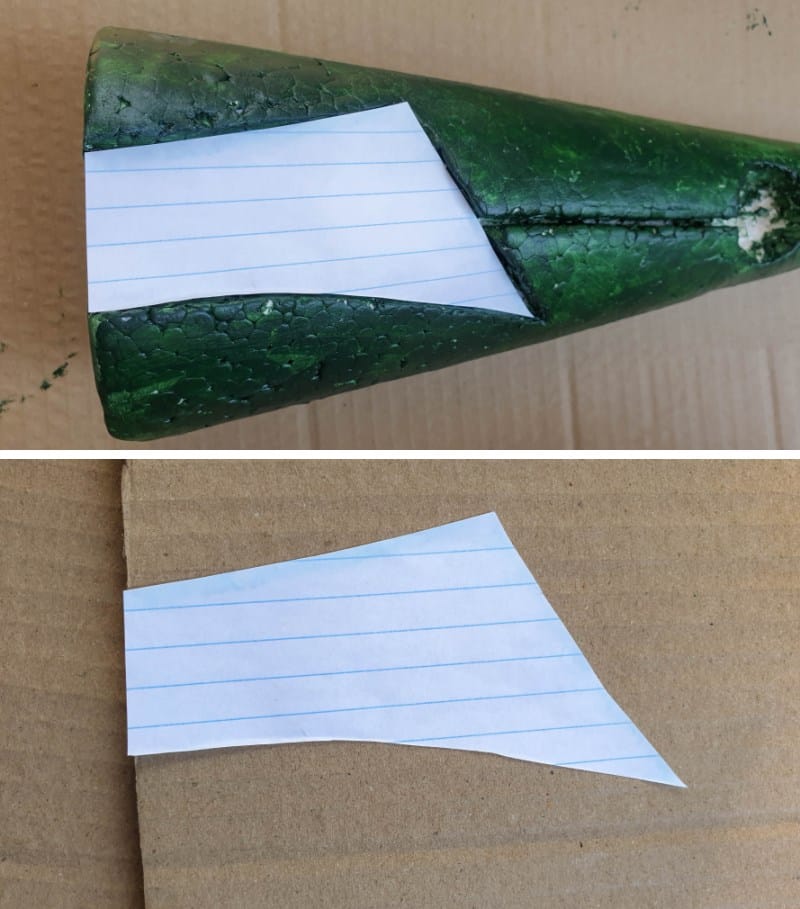
We’ve already shared a tutorial on how to make a fairy door using ice cream sticks, so I thought I’d show you how to make one with cardboard and give it a faux wood grain with paper. To make the door, use a piece of paper and chalk to create a template first.
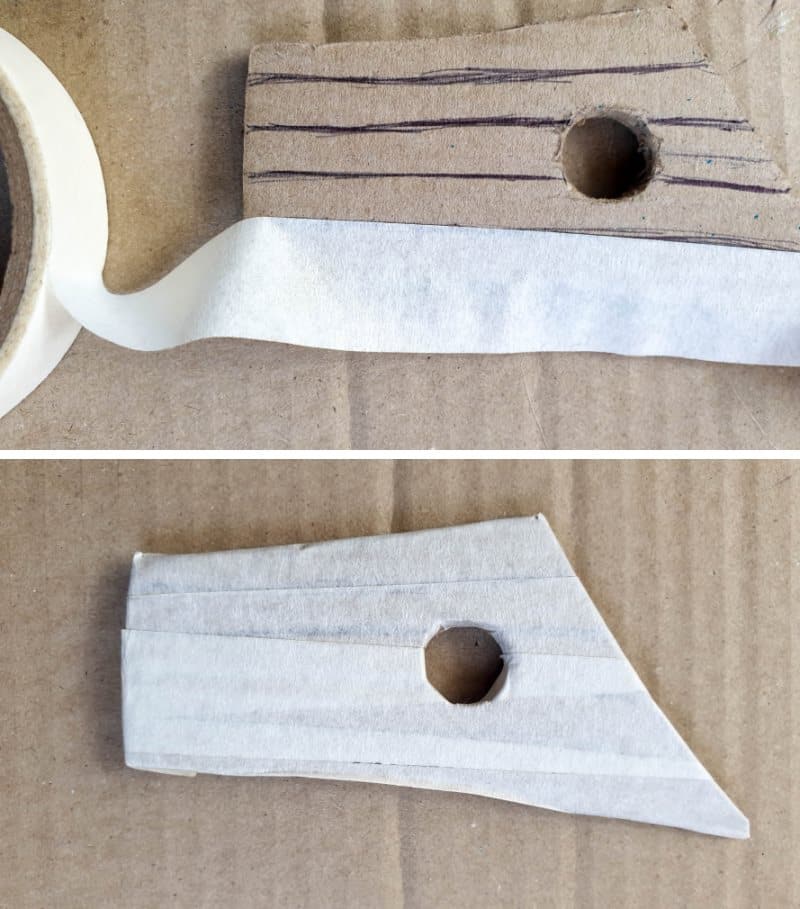
Transfer the door template to a piece of cardboard and cut it out.
If you want a little “peephole” window, make a hole in the door first, before covering the door with masking tape. It’s going to get wet and soggy in a minute 😉 so it needs a little protection.
I used mod podge, kitchen toweling, and toilet paper to give the door a wood grain texture. The toweling creates a thicker grain, while cheap toilet paper (the one that’s like bum sandpaper) makes a thinner grain.
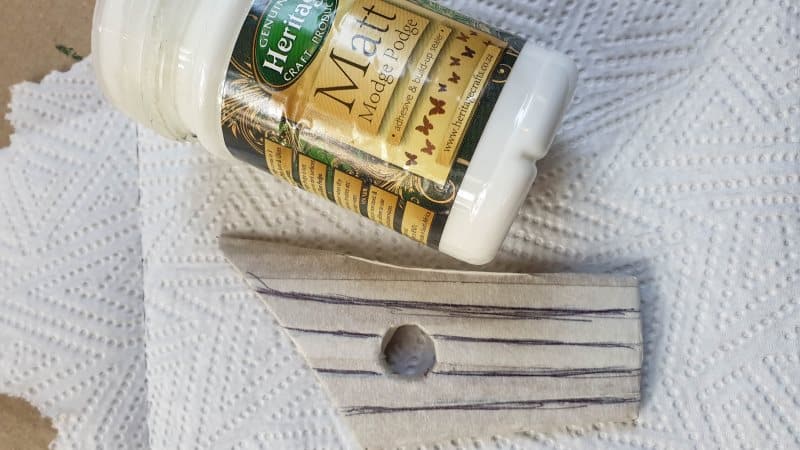
Tear strips of kitchen toweling or paper and dunk them in a 50:50 water to mod podge mix.

Lay the strips of paper on the door going in the same direction. Twist and scrunch the paper up a little, so it resembles the bark of a tree.

Leave the mod podged, paper door to dry completely before painting. I used black, warm rusty brown, and a lighter brown to paint mine.

Start by painting the entire door black. Once it dries, add a little rusty brown paint over the top. Not too much; you still want to see some of the black paint underneath.
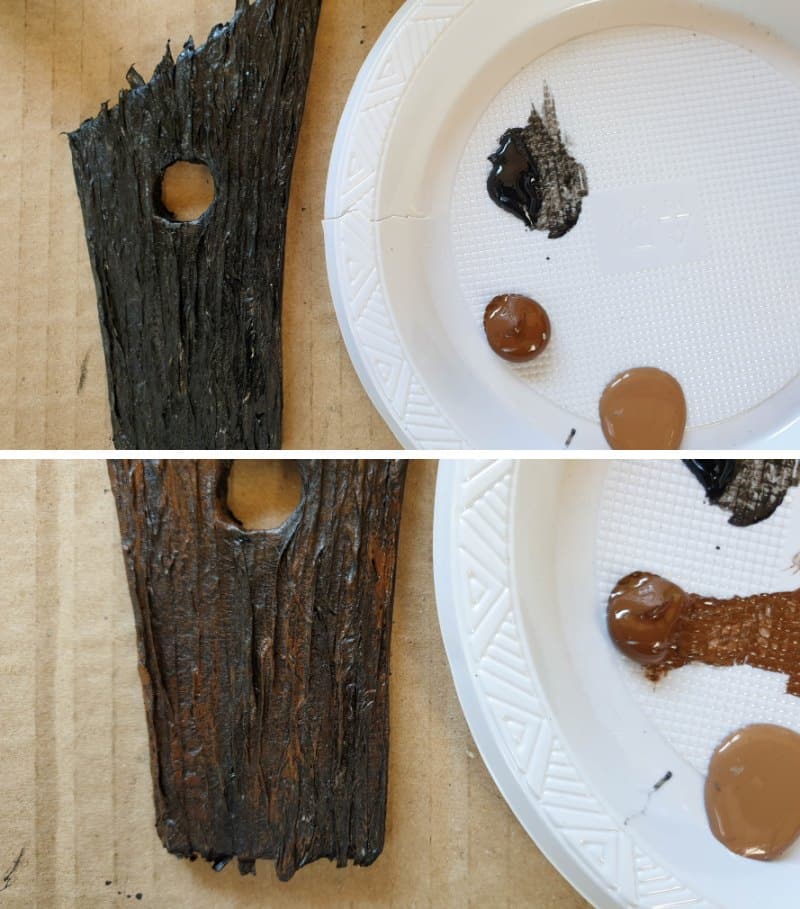
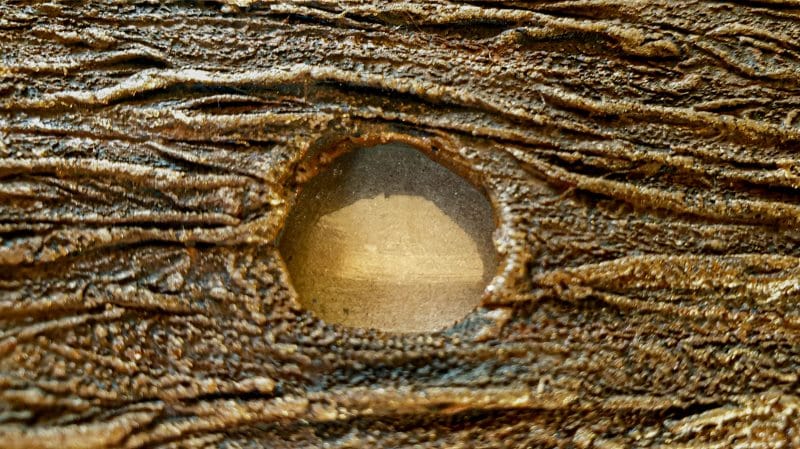
Dry brush a little light brown over the door to highlight the peaks.
Put the door to one side while you wire up the cone fairy Christmas tree.
Wiring up the cone
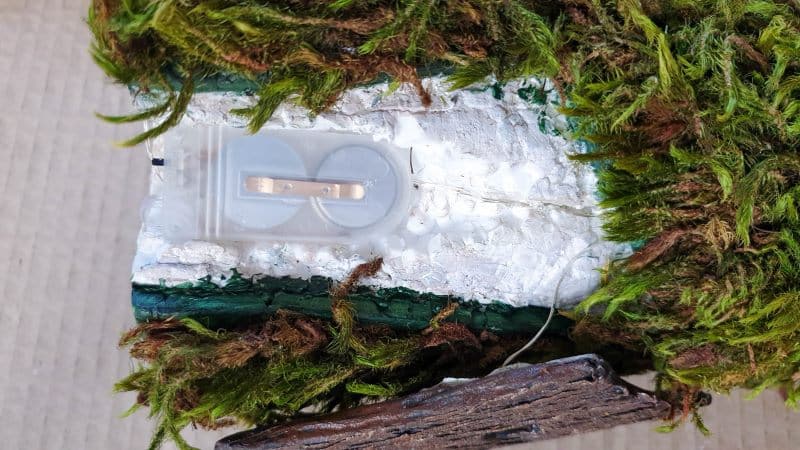
Place the battery pack inside the hollow you made earlier. Make sure the switch faces downwards. That way, it’s easier to switch the lights on and off. Guide the fairy lights up through the slit and curl them inside the window cut-out. Keep a length of fairy lights for the door. Guide the lights down the slit again and add the rest of the fairy lights in the door hollow.
Cut a piece from a clear takeaway container that’s big enough to cover the windows. Clear plastic containers are great for making glass in miniatures. I used an organza ribbon for a curtain. The ribbon curtains hide the wiring. If you prefer, you can make miniature stained glass windows instead.
Check that the lights work, and then use masking tape to cover the slit and tape the windows and curtains in place.
Paint the masking tape, so it blends in with the rest of the cone.

Adding the moss and finishing up
Add a good dollop of clear glue and stick the moss down onto the cone, avoiding the window and door area.
Wait for the glue to dry completely before inserting the battery pack in the door hollow and gluing the door on.
The next step is optional, but it does finish the little windows off nicely.
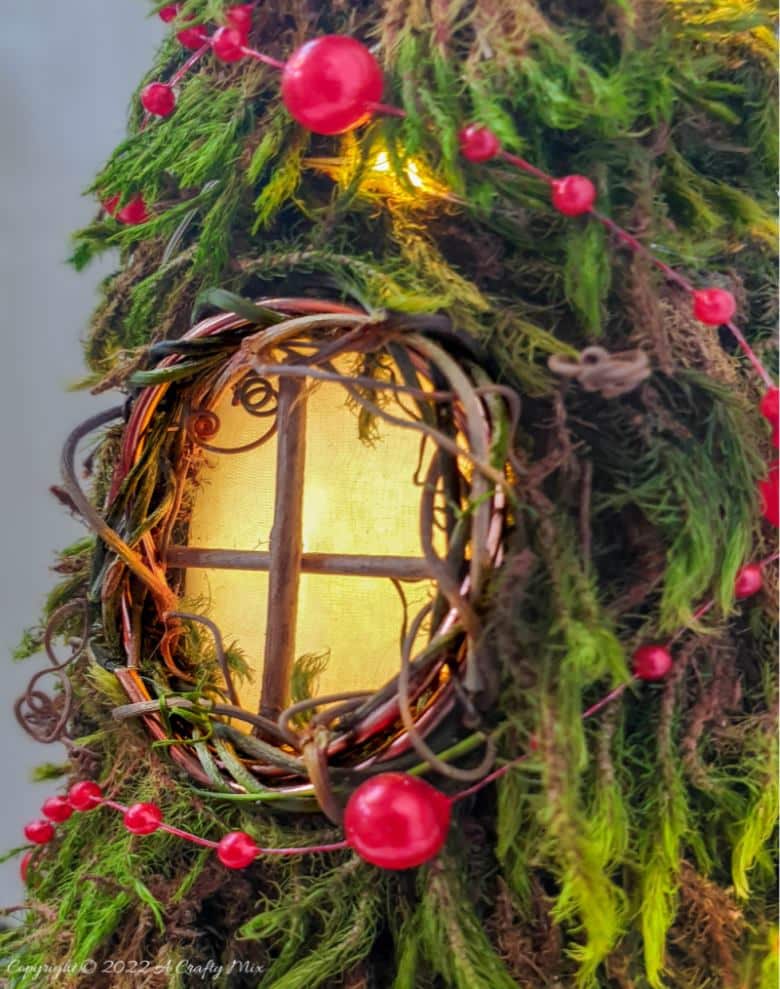
Making vine-wrapped window panes and finishing off
Grab some jewelry wire and wrap it around a tube or cylinder that’s roughly the same diameter as the window.
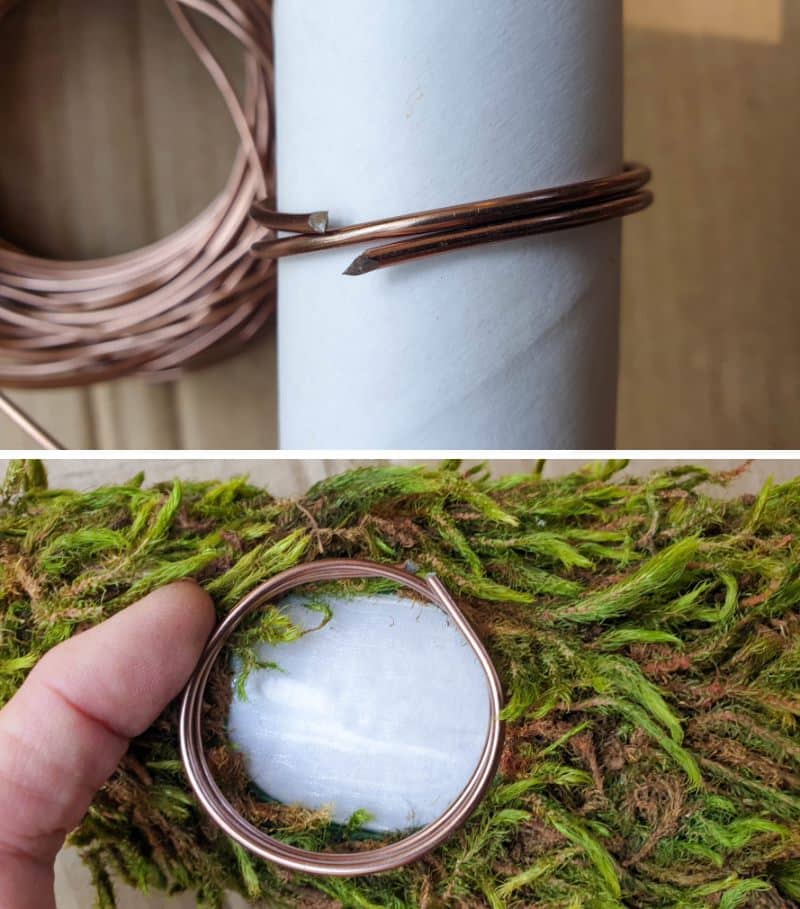
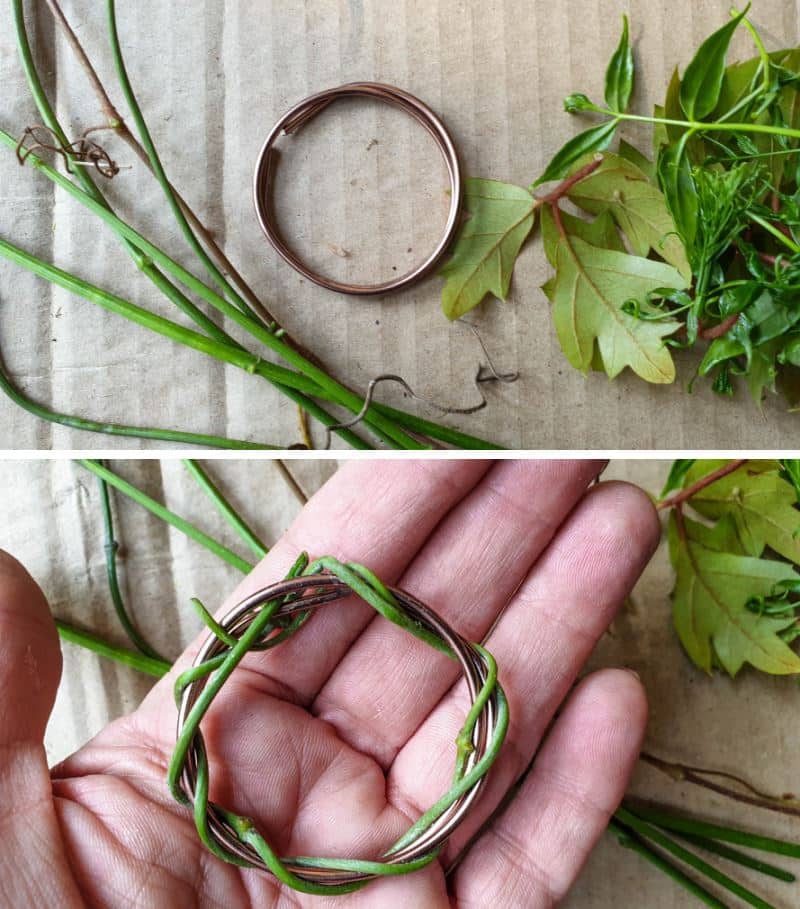
Take a stroll through the garden and collect green vines and tendrils. Remove all the leaves and weave the vines around the wire ring.
Glue the vine rings around the windows.
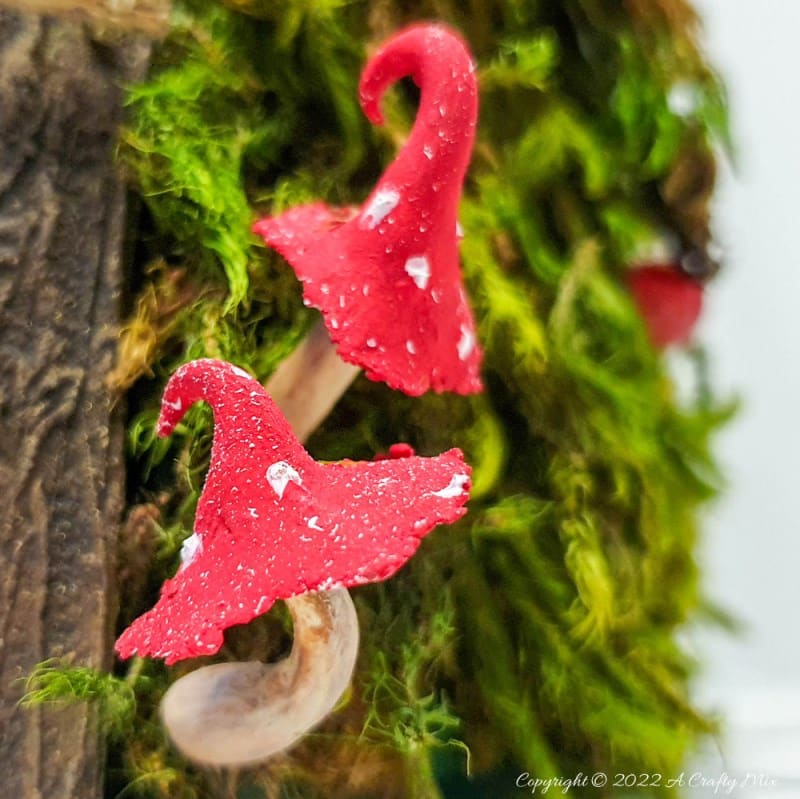
Add a few curly top mushrooms to the base of the cone fairy Christmas tree.
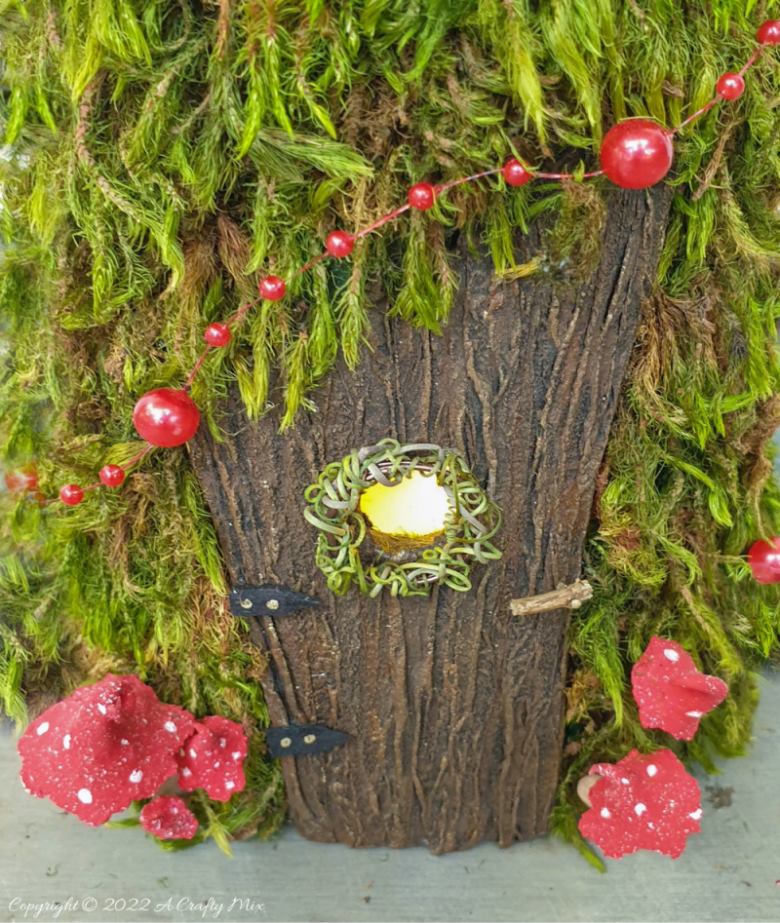
Don’t you just love the contrast been the bright red mushrooms and the mossy green Christmas tree?
Wrap fairy lights around the tree and add baubles or a bead garland for some festive cheer.

What do you think? Would you make yourself a cone fairy Christmas tree?
If you like the idea of making a fairy cone Christmas tree, don’t forget to pin it for later.

Sharing is caring
Oh, and if you’re looking for some of the things we used, we’ve got you covered. Disclosure: Clicking on the links below means we may receive a commission from Amazon. But don’t worry, it won’t come out of your pocket, and it helps us make more amazing crafts to share with you 😉


And if you prefer to buy rather than DIY, then maybe these beauties will appeal.


And as always, wishing you a wonderful, crafty week filled with lots of love. Thank you for popping in for a visit.

Last update on 2026-06-03 / Source Amazon Affiliates