

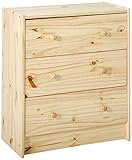
I have always loved those pictures of vintage suitcases stacked one on top of the other. There’s just something about the look that makes me think of a life well-traveled and filled with adventure. Those stacks of suitcases evoke memories of faraway places and conquering the unknown. I wanted my own stack of suitcases sooo badly. But they’ve become horribly expensive, and it’s quite a challenge finding a set that looks good together. We do, however, have a very boring pine chest of drawers, or bureau as it’s called in America, that desperately needed a makeover.

We’ve had the chest of drawers for about 20 years now, and her bones were still good, unlike that other cupboard that was falling apart. The drawers slide nicely, and there’s tons of storage space for all our t-shirts and jerseys. But she needed a facelift. Kinda like her owner 😉 And the only facelift I wanted to give her involved these really battered suitcases that we found at the local hospice.
Sometimes when things are falling apart they may actually be falling into place

There was even a tatty old handbag thrown into the mix.

I think I paid R40 for everything, which included two briefcases, the handbag, 4 floppy suitcases, and one of those old cardboard school suitcases. That’s not even $5, but they were really badly damaged.
Okay, before we get to the tutorial, be sure to follow us on Facebook, Twitter, Pinterest, Instagram, and hit that subscribe button below, so you never miss a post 😉
Right, let’s get to that tutorial.
How To Repurpose a Chest Of Drawers into a Stack of Suitcases
To start the makeover, we removed everything worth saving from those battered suitcases. The handles, locks, buckles, straps, bits of leather, even the tags, if they were pretty enough.

Some of the handles were easy to remove, and for some of the others, we had to use a combination of tin snips, hammer, and brute force to get them off 😀

Once the suitcases had been totally destroyed, we had everything we needed to turn that boring dresser into a vintage stack of suitcases.
Getting the Chest of Drawers Ready for her Makeover
We removed all the drawers and took the little wooden knobs off.

Using lots of elbow grease and a sander, we stripped the varnish and gave the dresser’s frame a deep lustrous coat of Rustoleum’s American Walnut stain and sealer to match the decor in our bedroom.

Then it was time to start playing around. The hubby and I both work full-time as IT geeks (aka nerds) for large banks, so the only time we can DIY is usually over a weekend. Fortunately for us, most banks in South Africa have an IT freeze during December, which means we can’t work. And that gave us more than enough time to tackle the drawers.
Each Drawer Needed to Look Unique
I really wanted them all to be different and still form a harmonious whole. So I needed to limit myself to colors from the same temperature family or find one or two colors and then use variations of those colors. Because the dresser had been stained in a rich brown, we decided to stick with the warmer tones. The first drawer we made over was this one.

We sprayed the whole drawer with metallic copper, which seemed like a good idea, but as soon as we put the drawer next to the walnut-stained dresser, it looked too cold and, well, metallic!! Bling, bling definitely didn’t fit the whole vintage feel we were going for. To tone her down, we used a piece of hessian as a stencil before applying a coat of brown paint over the metallic paint.

Keeping The Real Suitcase Look
One of the other things I really wanted to do was retain that tactile feeling of a real suitcase. So we used contact adhesive to glue some of the leather we’d salvaged from the damaged suitcases to cover the drawers. The drawers are quite wide, so the leather had to be joined. The salvaged suitcase buckles were perfect for hiding the small gap where the leather came together. We just glued them over the join.

And if you don’t have enough salvaged leather bits to cover a long drawer and hide the joins, you can always turn one drawer into two suitcases 😉

Oh and save those leftover faux leather bits so you can use the pieces to repurpose DVD cases to make an awesome vertical garden. All the suitcase handles were screwed onto the front of the drawers.

And the locks, buckles, and straps were either glued on or screwed on.

And for the lip of the suitcase, I used a permanent marker and a ruler.
Adding Fun Labels
No stack of suitcases is complete without a stamp or sticker to show where you’ve been, right? The Graphics Fairy was my go-to place to get a few of those. As luck would have it, one of the labels was for Sinclair’s conditioning powder. Can you guess what the hubby’s surname is 😉

I have to be honest. The dresser facelift took us way longer than I thought, but I’m really happy with how it turned out.

Every drawer is unique, and besides the time and the stain, it only cost us about R150 for the whole makeover. That’s about $10 😀 And since the handles are all screwed into the drawers, pulling them open is a breeze. We used a thread sealant called Loctite on the screws before we screwed them in, just to make sure they didn’t come loose. Those babies ain’t going nowhere 😉

What do you think? Was it worth the time? I really wanted to write a post about how we changed each drawer, but looking through all the photos, I forgot to take a whole bunch. So the best I can do is share some tips if you’d like to do something similar.
Tips on how to repurpose a chest of drawers into a stack of suitcases
- Look for really, really damaged suitcases. The ones with big rips in them and bent frames. All you want is the “hardware” (the handles, locks, buckles, and interesting bits). If the locks don’t close, that’s also okay. You can just glue them shut.
- Before painting or staining the dresser, choose a color palette that matches or compliments your existing decor. We have terracotta tiles throughout the house, so we tend to stick with warmer colors.
- Choose a muted, neutral color for the dresser’s frame to anchor the piece. The walnut stain we used creates a beautiful backdrop to showcase each drawer.
- Don’t worry too much if the suitcases don’t match. Everything can be painted. We used a wash of acrylic paint to “warm-up” the leather that we stuck on the drawer second from the bottom. Even the hardware can be painted to fit your color scheme
Never underestimate the power of paint
- If you don’t want to glue leather onto the drawers, you can play around with interesting stencils or just paint each drawer before adding the hardware.
- Add interesting touches, and don’t be scared to mix and match the salvaged bits. Look at pictures of actual suitcases and try and mimic the look. We used bits of leather on the corner of some of the drawers and stuck them on with glue and thumbtacks.

- To create a “lip” (the portion where the lid goes over the suitcase) just use a ruler and a sharpie to draw a line all the way across. About 1/3 of the way down from the top.
- Make sure to align the handles in the center of the drawers before screwing them in. You don’t want your luggage chest of drawers to look like it’s going to topple over 😉
- Treat each drawer as an individual work of art. Take your time. We tackled one drawer a day and experimented with all the bits and pieces until we were happy before sticking or screwing everything down.
- A few labels or stamps add to the vintage feel. The Graphics Fairy has a whole bunch that you can download for free. She’s the best.
- Don’t be afraid to give it a try. It may take a few days but flipping boring furniture into a statement piece for your home is worth every second.
Every time I look at the chest of drawers, erhmm, I mean stack of suitcases, I feel like a modern-day Jonathan Livingstone Seagull, dreaming of a world of travel. I’m ready to pack up and go at a moment’s notice 😉 And she looks so lovely with our room divider nightstands.

But I would love to know what you think of the idea of turning a boring dresser into a stack of suitcases. Is it something you would do?
If you like the idea of repurposing a chest of drawers into a stack of suitcases, please don’t forget to share and pin it for later.

By the way, if you’re struggling to find some of the things we used, I’ve got you covered. Disclosure: If you click the links below, we may receive a commission from Amazon. But don’t worry, it won’t come out of your pocket, and it helps us come up with more unique DIY and craft ideas for you.

And if you prefer to buy rather than DIY, then perhaps these beauties will appeal.


And as always, wishing you a wonderful, crafty week filled with lots of love. Thank you for popping in for a visit.

Pssst, if you’re looking for another really cool idea to turn a boring cabinet into something that “Wows,” then you’ll love this Chinoiserie-inspired makeover.
Last update on 2026-10-02 / Source Amazon Affiliates
281 comments
This is one of the best makeovers I’ve seen on Hometalk. You have a great sense of style and artistic flair. I especially appreciate how you made each drawer to be so unique. It’s an excellent transformation. It must be great fun having it in your home.
Keep up the ingenuity!
Thank you so much, Patricia. It still makes me smile every morning when I wake up 😀
I love it, you did a great job! I don’t see myself tackling it, but maybe you’re for hire? 😉
😀 I wish. Sadly I have a full-time job and can only do crafts and DIY on the weekends. I do hope you’ll give it a try one day, maybe with a whole bunch of friends?
This DIY is the classiest ever……ever. Congratulations.
THank you 🙂
The best DIY project idea I’ve seen in awhile. You guys got my creativity flowing.
If it’s a good piece of furniture can be a family keepsake that’s passed down to the family tree
Thank for sharing.?
You’re welcome and I’m so glad our suitcase dresser/bureau inspired you
Wow, what an amazing transformation, I also love the stacked suitcase look, and made one from a old bedding chest, but it was no where as spectacular as yours, as I just hand painted it all, also lol referring to your sticker Sinclair, quess what my Maiden name was ? thank you for sharing your ideas absouloutly love it. ❤️
Sinclair’s are very special people ❤ and I bet your handpainted chest is beautiful too Elaine.
THIS CREATIVITY IS AWESOME…GREAT
Thank you very much
Very clever and unique looking. Love it. One of a kind.
Thank you Meg, I really appreciate that
Best makeover yet! So inspiring.
Thank you so much Jan
WOW! I’m feeling so inspired right now! This is exactly what I was looking for! You’ve done an amazing job with this and I’m off to look at your other projects!
I don’t know when you originally posted this but it’s October 2020 and you’re still inspiring 🙂
Well done!!
Thank you, Sam ❣ I’m so happy to hear that. We made the chest of drawers in December 2016 and she still gets so many compliments when people come to visit, so I’m guessing she’s a keeper
OMG, this is GENIUS!!! I truly think this is the BEST repurpose DIY I have ever seen!!! I absolutely love what you have done (as if you couldn’t already tell!!) and ….well… I just can’t say enough about how much I LOVE this project!!! Brawo!
Awwwww Karolyn, thank you so much. She was worth every second and still makes me smile every morning when I wake up
First time I’ve seen your work and I am SO impressed. This is absolutely wonderful. For some reason I have never been a fan of the stacked suitcases, but I LOVE this and if you’ll ship it to me I’ll put it in the living room with a spotlight on it!! You guys are extremely talented both in thinking up designs and then creating them. Thanks for sharing with the rest of us.
Oh Wow, Gloria. Thank you so much. It makes it doubly worth it when our readers let us know they enjoyed a tutorial or idea.
Your concept for the old suitcases is fascinating. I love the whole idea and hope to find time to try it myself soon. Question: do you have any ideas of what to do with the old Samsonite bright color luggage of the 60’s. Mine are in great shape but no one wants them. Any ideas?
Mmmmm, good question Patricia. I would add some legs and turn it into a side table. It would be fun to store all my sewing and knitting stuff inside and have it handy while I’m watching TV
That is a great idea. I am going to start looking for the old Samsonite cases.?
Good luck on your hunt, Kathleen. People throw them out all the time.
Absolutely beautiful. I love the suitcases transformation so much
Thank you, Maria 😀 We’re still so happy with how it turned out.
Fantastic
Thank you very much Diane
This is really out-of-the-box crazy thinking and I Love IT. Can hardly wait to create something with the luggage obsession I have. Thanks for Sharing!!
You’re most welcome Phyllis and I’m so happy you like the idea. Have fun making yours
Great attention paid to detail, looks fabulous!
😀 Thank you
Absolutely beautiful, unique and brilliant. ❤️
😀 Thank you so very much Phyllis
Michelle, that is the most awesome DIY project I have ever seen. I absolutely love it.
Thank you so much, Hope. We’re so happy with how it turned out
I liked the new suitcase-bureau — Each time you put something “away”, you could pretend you were packing for your next trip 🙂
I absolutely love that idea Melanie. It makes packing things away so much more special
This just came up on my feed, 2/19/10, this is brilliant. Great job.
Whoooo Hooo, thank you, Andrea
WOW!!!!!! for the first time i don’t have anything to say I am speechless lol
I love it so much!!!!
OMG!!! This is the most beautiful dresser I have ever seen!! You guys are amazing. I would love to try this but feel I would not be as successful. Thank you for sharing.
Oh Connie, how I wish I could give you a hug and tell you that YOU can do this and it will be a huge hit. Most of the work is in the sanding and prepping the chest of drawers and then it’s just painting, cutting and gluing. I hope you give it a try ❣
This is one of the most amazing dressers I’ve ever seen. This is THE MOST AMAZING DIY project!! Wow!!!
Thank you so very, very much ❣
Gorgeous..all that effort paid off..
? Thank you so much Kaz
Love this idea
Thank you very much
You did a great job, love it!
Thank you, Ann