Do you believe in the magic of upcycling? I sure do. Especially when I get to rescue a forlorn plastic bottle from the rubbish heap and turn it into this cute gothic witch for Halloween.

With her spindly legs and wide-eyed gaze, she’ll make a welcome addition to your house of oddities this spooky season.

And don’t even get me started on that mop of hair. (Psst, it literally used to be a mop).

In this tutorial, I’ll show you how to conjure up your own adorable gothic witch. But, before we get there, do me a favor and follow us on Facebook, Twitter, Pinterest, or Instagram. And don’t forget to subscribe so you’ll never miss a post!
What you need
For the witch body and head
- Empty plastic bottle
- 4” Polystyrene (Styrofoam) ball
- Small Black tutu or tulle fabric
- Needle and thread
- Old mop or wool/yarn
- Black spray paint primer
- Flesh colored paint
- 120-grit sandpaper

My upcycled plastic bottle witch stands 23″ tall (without her hat). If you’re using a small bottle, look for a smaller polystyrene ball. If you’re using a huge bottle, then a bigger ball would be more appropriate, unless you want a witch with a tiny head. It’s up to you.
Feet, arms, legs and hands
- 12 – 14 gauge galvanized wire
- Drip Irrigation tubing (1/2” or ¼”)
- Aluminium foil
- Masking tape
- Glue
- Air-dry clay
- Craft paint (black)
- Scrap wood to mount
- Hammer and Steel Wire Fencing Staples

No-sew hat
Depending on the size of the polystyrene ball, you can either buy one of those inexpensive pointy hats or make one. My adorable gothic witch has a small head, so I made my own. Plus, I’m not a big fan of the cheap ones. They look flimsy, and, IMHO, she deserved better.
- 2 x Black felt or cardstock (16” x 16”)
- Scissors
- Glue
- Measuring tape
- Pins
- Chalk or a light pencil for marking
- Something round
- Ribbon and other decorative bits (optional)
Optional extras
- Small broom – easy tutorial to make your own here
- Little pumpkins
How to make a cute gothic witch
There are various parts to this little witch, but we’ll start with the most important bit, the upcycled bottle skeleton or body.
The witch’s bottle body
I buy inexpensive vodka in a plastic bottle to make homemade starch for our beginner-friendly macrame trees. You can use whatever bottle you have lying around, as long as it’s plastic. Remove the label and lightly sand the bottle before painting it black.

Cut three lengths of galvanized wire.
- 2 x legs (three times the height of the bottle)
- 1 x arm (three times the width of the bottle)

Always wear eye protection when working with wire. It’s sharp and can poke your eye out if you’re not careful. Put the shorter arm piece to one side while you work on the legs and feet.
Making the legs and feet
Bend one end of the leg wires into an oval to form a base for the feet.

Use the bottle as a guide for how big the feet should be. I gave my gothic witch quite big feet to balance those thin, adorable, spindly legs.

Using fencing staples and a hammer, attach the wire feet to a solid wooden board. This will help anchor and stabilize the little gothic witch.

Loosely scrunch up a ball of tin foil and shape it into a dome.

I found the easiest way to get a tightly packed dome is to smack the foil ball with a hammer on a flat surface.

You want something that’s the same size or slightly bigger than the wire feet. Wrap the foil domes in masking tape.

Glue the feet down on top of the wire.

Grab a hunk of clay and condition it between your fingers. Roll the clay out so it’s about 1/4” (5mm) thick.

Place the clay over the domed feet and trim away the excess.

Leave the little feet to cure completely. Air-dry clay shrinks while it dries, so there will probably be a gap. Don’t worry about it for now. We’ll hide it in a minute.

Paint the clay feet black, and while you’re at it, you can stain or paint the board too.

To hide the shrinkage gap, glue some leather cord, ribbons, or twine around the bottom of the feet. It adds a nice touch and looks like shoe soles.

To disguise those wiry legs, cut a piece of irrigation tubing.

Slip the tubing over the legs. If you don’t have any tubing, you can paint your legs black or use loooooong black balloons instead. The ones that clowns use to wandangle into animals.

Making arms and hands
The arms are done in much the same way, except they won’t be wearing shoes, and we’ll add the tubing after we attach the body. I did give my cute gothic witch clay hands similar to the ones I made for these sneaker-wearing pot head planters.

Remember to poke a hole in the bottom of the hands, while the clay is still wet, so you can glue them to the arms. Once the hands cure, paint them black and put them to one side for later.
The witch’s head
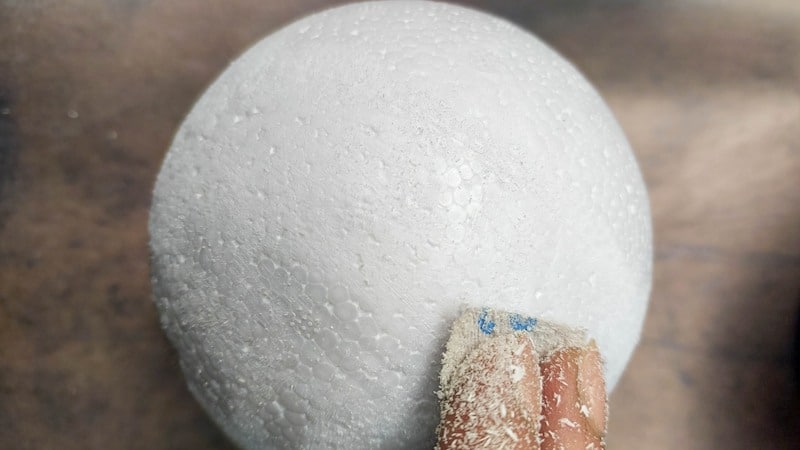
I used a polystyrene ball for my witch’s head. Also known as Styrofoam, it’s lightweight and easy to find. The only downside …… it’s not smooth.

Easy enough to solve with a little bit of 180-grit sandpaper. Use light circular motions and wear a mask. That polystyrene dust gets everywhere, and it’s clingy.
Use a sharp craft knife to make a hole on one end of the ball for the bottle neck.

If you’re using a mop like mine, make another hole on the opposite side to fit that metal thingy that joins the mop to the handle.

I have no idea what mops look like in other countries, so I’m going to leave this step a little open-ended. If you don’t have an old mop, you can glue wool or yarn on your witch’s head instead. But I would suggest first painting her little face before adding the hair.

The witch’s face doesn’t have to be fancy. Two large round eyes with white flecks, a clay blob nose, and a grin are all you need. If your ball is still a little rough, you can add multiple coats of paint, sanding between each one. Oh, and another handy trick. You can use makeup instead of flesh colored craft paint to get the right skin tone. Just seal it afterwards with clear matte mod podge.
Putting the body together
Now that we have all the body parts, we can start putting this cute gothic witch together. Use something sharp to poke two holes in the bottom of the plastic bottle.

Poke another two holes on either side of the bottle towards the top. Thread the arm wire through the top two holes.

This was the most frustrating part of the whole craft. It’s like threading a needle, except there are two holes to deal with. Secure the arms with a little bit of glue and slip some irrigation tubing over them.

Push the wire legs up through the bottom holes and through the neck of the bottle. You should end up with something like this.

Dressing the witch
To make a dress, simply cut a length of tulle that’s slightly longer than the bottle. Use a running stitch (in-and-out stitch) and sew along the top edge of the fabric.

Pull the stitches to gather the neck.

Tie the dress around the bottle neck and knot at the back to secure. For a fuller dress, add multiple layers of tulle.

Find the arms under the layers of tulle and make a small slit for the armholes.

Thread the arms through the holes.
Making a hat
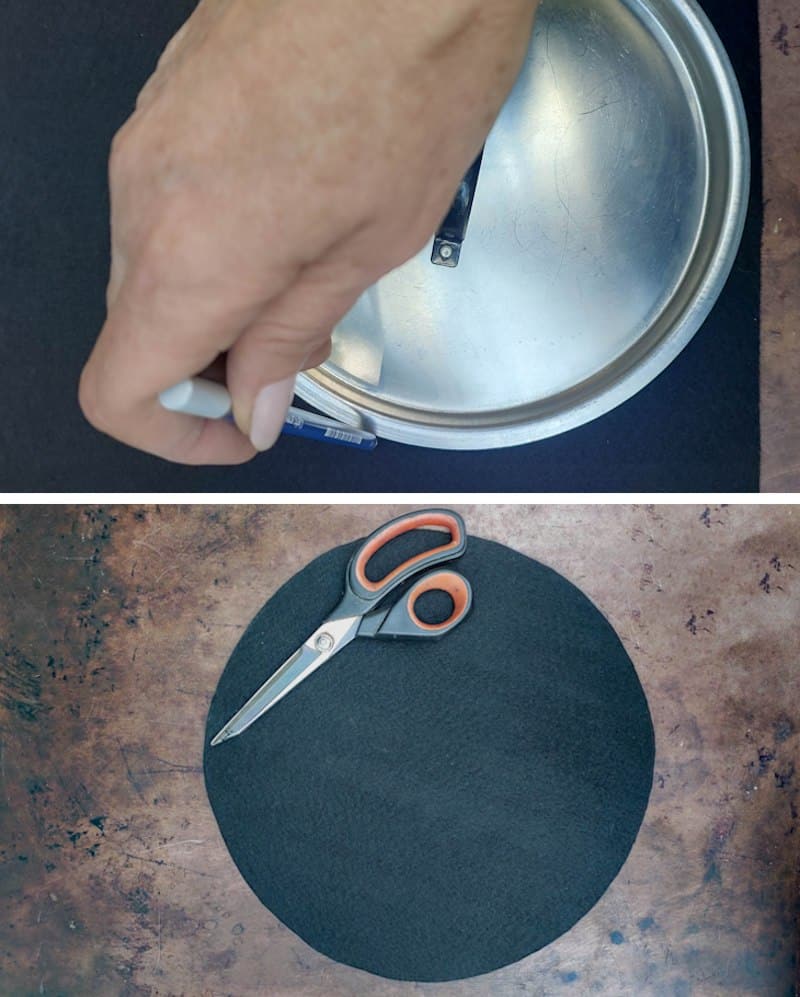
Making a pointy witch hat is really easy. To make the brim of the hat, look for a round object that’s 4-5 inches wider than your witch’s head.

I used the lid of a pot. Place the object on one of the felt squares and trace around the edges with chalk or a white pencil. Cut the circle out.
Cut a smaller circle that’s about 1” wider than the head inside the first one. You should end up with a donut shape.

Take the second piece of felt and fold the edges around to form a cone shape. Pin the edges together and test fit the cone over the head. Adjust the overlap to fit. You want the bottom of the cone shape to be 2-3 inches wider than the head.

Once you’re happy with the fit, glue the overlapping edges. Trim away the excess felt at the bottom of the cone.

Slip the brim over the cone and mark the point where it sits on the cone. We’ll use that line as a guide to cut slits in the bottom portion of the cone.

Remove the brim and cut the slits to the mark. Place the brim back over the cone and glue the cut slits to the bottom of the brim.

If you flip the hat over it should look something like this.

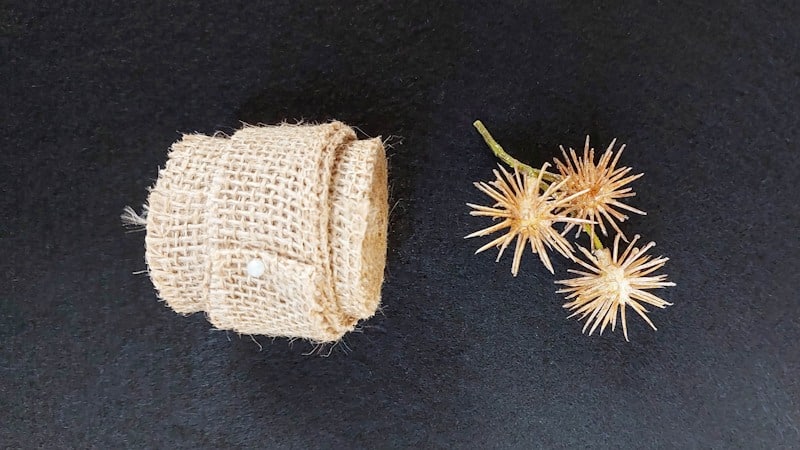
Decorate the hat with ribbon, twine or a few dried flowers for an extra witchy flair. I added bur-reed and a burlap (hessian) ribbon to mine.

Putting everything together
Almost done. Glue the clay hands to the arms.

If you have a small broomstick, glue it to one of the hands.

I made my broomstick using a beautifully twisted piece of vine and twine. You can see how to make a broomstick at the bottom of this witch-in-a-cauldron tutorial. If you don’t want to make a broomstick, you can add a small wand or leave her hands free to dish out hugs.

Stick the head with that gorgeous mop of hair on top of the bottle and add the hat.
And poof, just like that, a forlorn, empty plastic bottle is transformed into a cute gothic witch.

She’s one of my favorite upcycled Halloween creations. And I’m so happy I found a use for that old mop too. What do you think?

Whether she stands on a mantel, waves through the window, greets friends at the door, or keeps watch over a pumpkin patch, I hope she inspires you to look for magic in the discarded.

Don’t forget to share your thoughts or photos. I’d love to see how your little witch turns out or where she ends up casting her spell.
If you like the idea of upcycling a plastic bottle into a cute gothic witch, don’t forget to pin the tutorial for later.

Sharing is caring.

Oh, and if you’re looking for some of the things we used to make this cute gothic witch, we’ve got you covered. Disclosure: Clicking on the links below means we may receive a commission from Amazon. But don’t worry, it won’t come out of your pocket, and it helps us make more amazing crafts to share with you.


Or if you prefer to buy rather than DIY, then here you go.


I hope the little upcycled witch brings as much joy to your space as she did to mine. Until next time, keep creating, keep upcycling, and may a sprinkle of crafty magic follow you wherever you go. Thank you for popping in for a visit.

2 comments
Oh my… your adorable witch is such a cutie! Looks NOTHING like a plastic bottle or old mop head! This project is witchcraft in itself!
LOL, thank you Donna. I’m so happy I found a use for that old mop, and it suits her perfectly.