
Sometimes it’s just fun to play around and create for the pure joy of it — case in point this little concrete pear. When our blog was MIA a few weeks ago, I went into a total downer. And when this girl gets down, she goes shopping for food. Does anyone else do that? So while walking around our local store, I spied a plump, little green pear with the cutest butt ever. Weird, I know. If I’m not feeling up tin cans to make a washing board, I’m checking out the butts on pears 😀 Anyways she came home with me and rather than chopping her up for a fruit salad, I decided to make a “two ingredient” mold, and immortalize her as a paper weight instead.

Kinda cute right?!!! She’s been drizzled with a rich copper paint sauce. If I ever master the art of cooking I’d love to make a baked pear dish with a drizzle of sauce. It looks like something that could be served in a 5-star restaurant. Okay, maybe not 😉 So since the only recipes I know how to follow are those that involve a strange mix of ingredients, let me share how to make a silicone mould or mold, using only two ingredients that can be used to cast almost anything.

But, before we get to the tutorial, be sure to follow us on Facebook, Twitter, Pinterest, Instagram, and hit that subscribe button below, so you never miss a post.
Right, let’s get to the tutorial. It’s easy, fun, and will open up sooooooo many new crafting possibilities.
Two Ingredient Casting Mold
- Silicone – the cheap stuff that smells like vinegar works best
- Maizena or cornstarch
If you can’t find cornstarch or you’re allergic, you can use tapioca starch or rice flour.
The Other Stuff
- Whatever you want to mold. I used my shapely pear 😉
- Plastic knife for mixing
- Mixing container
- Caulking gun
- Sharp knife
- Super Glue
- Gloves

How to Make a 2-Ingredient Silicone Mold
Prepping the Form for Molding
Wash and dry the pear, or whatever you decide to cast. Since I’ll be filling the mold with concrete once it’s dry, I stuck a pen lid into the bottom of the pear. It helps keep the pear upright while the mold sets and will leave a hole that’s the right size for pouring in the concrete mix later.

See what I mean about the cute pear butt 😉 I stuck the pen lid into a bit of polystyrene before mixing up the mold. It’s a trick I learned when painting polystyrene balls.
Mixing the Two Ingredient Mold
Put your gloves on and throw some cornstarch into a container. Cut the tip of the silicone tube off and put it inside the caulking gun. Squeeze silicone into the cornstarch. Roughly the same amount. Then add some more cornstarch on top of the silicone and mix. If you’re using your hands, wear gloves. Things get very sticky. You can also mix the two ingredients in a plastic bag to limit the mess. Oh, and it’s probably best to do this outside. Cheap silicone has an incredibly strong vinegary smell.

When it looks like it’s almost mixed, start kneading the mixture until it forms a stiff paste that resembles playdough. If the mixture is too tacky or sticky, add some more cornstarch. If it’s too dry and flaky, like in the piccy below, add more silicone.

Molding an Object
Once it’s ready, flatten it out a bit and wrap it around the shape you want to cast. About 7 to 10 mm thick is perfect. That’s about 1/4” to 3/8”. Make sure you squish it into all the nooks and crannies.

Sit back and wait for it to dry, probably about ½ hour depending on the silicone you used. Use a sharp knife to cut the mold and remove your form.

The two ingredient mold is very pliable so you can just peel it off. If you’re molding a pear, please don’t eat it. Rather wash it off again and add it to the compost heap.

The mold captures details beautifully and depending on how thick it was applied holds its shape really well.

Use super glue and carefully glue the two halves back together again, and it’s ready for casting.

Casting the two ingredient mold
You can either use concrete or plaster of Paris. I didn’t have to add any kind of release agent, I simply mixed up some concrete and poured it inside the mold. Just make sure you shake it around a little to get rid of any air bubbles. Once the concrete sets, carefully cut along the seam lines and remove your form.

This easy two ingredient mold can be reused over and over again, just wash it off, and you’re good to go.

To finish the pear off, I used some copper paint to create that 5-star restaurant look and added a bent, rusty nail as a stalk. The leaf is a piece of metal that had been lying outside in the rain for a few months.

A little bit of rust always works for me.

Don’t you just love that combination of concrete, copper, and rust?

Just a word of warning. Once you make your first mold, everything looks moldable 😀 We’ve turned an old broken doll into a garden ornament, transformed a bell pepper into an colorful jewel, and even created our own Egyptian cartouche using the two-ingredient mold. And since the mold is silicone-based you can use it to make candles too. Even teeny, tiny ones.
And if you like the idea of making your own silicone mold, don’t forget to save it to Pinterest so that you can find it again!

Let me know what you think. What would you mold?

Oh and if you don’t want to go to all that trouble and find some of the materials we used, we’ve got you covered. Disclosure: If you click on the links below, we may receive a commission from Amazon. But don’t worry it won’t come out of your pocket, and it helps us come up with more unique DIY and craft tutorials to share with you 😉

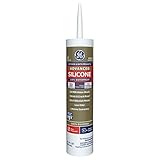


Or if you prefer to buy rather than DIY then perhaps these beauties will appeal.


And as always hope you have a wonderful week, filled with love and lots of interesting new finds. Thank you for popping in for a visit.

Last update on 2026-09-30 / Source Amazon Affiliates
200 comments
Thank you Michelle! I live in South Africa and it’s refreshing to see products that are common household products in a South African household. Oh my gosh, I can’t wait to try, but life is in the way at the moment, got a go to work.? But I’m on to you girl, you have yet another follower!
? Well hello Adele and thanks so much for following along on our crafting journey. So happy you found us in the big internet world. It does get frustrating when you see beautiful crafts and we can’t get the products here in South Africa. You’re going to love playing with this mold and it’s so affordable too. Hope you had a lekker day at work and enjoy making all kinds of things.
Looks beautiful. Did you do anything to the cement to get the finish you have. Maybe it’s just the photo but it looks a different colour to raw cement. Love your work.
Thank you so much Melissa. I did use a concrete stain on the pear after it was cast. If I remember correctly it was an iron-based stain similar to the one I used on the concrete pumpkins (https://acraftymix.com/blog/stained-concrete-pumpkin-planter/)
I love this!! Would this silicone mix work to be poured onto an object for a flat mold?
It would yes ? We used it to make a wood nymph. You can see that tutorial here – https://acraftymix.com/blog/wood-nymph-garden-ornament/
Michelle–Im thinking of using this type of mold to make stuff out of liquid polymer clay…can it be safely baked in an oven while the clay is still inside the mold? …LOVE this stuff! –Marjie in Illinois
Oh my Majorie, that’s a very interesting question. I have no idea. I’ve never tried to bake something inside the mold. Mmmmm, I do have a green pepper mold lying around some air-dry clay. Let me test it for you and I’ll let you know.
Absolutely not! A chemical reaction will occur with silicone when heated . Will blister and ruin your project.
Thanks so much for that Trish. I did find some heat resistant silicone which might work. Apparently it’s heat stable up to 300 degrees celsius. It’s a bit more expensive than the ones I normally buy but I’m keen to test it out. I’ll let you guys know how it turns out.
Hi can this mold be use for epoxy resin??
I’ve never tried epoxy resin but I don’t see why it shouldn’t work. I would suggest making a small mold and testing it first though and make sure to mix the silicone and cornstarch really well, so any loose cornstarch bits don’t cloud the resin. It will probably wash off too once you’ve made the mold, but just in case ?
Hi. I would like to make a mould for table legs. Can this be done and using fibre glass can the mould be used over andover
Yes, the mold will work for table legs. You’ll need quite a bit of silicone and cornstarch if you’ll be doing a whole life-sized leg and the mold will need to be supported in some way so it doesn’t sag. The molds are reusable up to a point, but I think that also depends on the type of silicone used. I still have the pear mold and we’ve probably made 5 or 6 pears with it. Then there’s another one we made with green pepper and I only used that one three times and the 3rd green pepper looked a little lumpy? I’ve never tried fiberglass, but I don’t see why it shouldn’t. It works with resin. Have fun and please let me know how it goes Andrena
Silly question…how did you attach the stem? Your pear is absolutely beautiful!
I’m so happy you like the pear Sheryl and no question is ever silly. I drilled a hole into the top of the pear and then glued the rusty nail stem inside
I never knew mold-making could be so simple!
Are there substances other than concrete which may be used in this kind of mold?
Hey there Kathy, we’ve used plaster of Paris and resin in the molds and they both work well.
Absolutely great. Can I use this to create veiners for making clay flower?
Yes you can Trisha. The silicone picks up all those tiny details beautifully
Hi, I’m glad I came across this tutorial as the ingredient list is way less than other tutorials I have seen. Do you think this mold would hold up to isomalt usage?
Hi Angela, I’m sure it would, just look for food-safe silicone. It’s a bit more expensive though. The silicone I used was the really cheap stuff and has a strong vinegar smell, so that’s probably not a good idea for isomalt.
This is a good alternative for lack of sculpture supply sometimes! this is a great guide!
Thank you so much, Micheal. We use the mold all the time and it works out so much cheaper too
I have a question-do you think this could work on larger objects? Trying to make a mold for a moose horn to use for a memorial for my late father-in-law? Would it work w/large box/crate?
? I’m not sure Therea. The biggest thing we molded was a large cast-iron pot (30 cm tall or about 11,5″). We had use a lot of silicone and cornstarch to make the mold so it was strong enough to hold the concrete we put inside. The mold had to be mixed in batches so it didn’t dry out too. I’ve never seen a moose but I believe they’re really big and looking at pictures of their horns you’ll have to think carefully about how to cut the mold off so it can be joined together again. They’re quite intricate with all those curls and whirls. I hope that makes sense and I’m so sorry for the loss of your father-in-law ?
Thank you so much for the support and time you have taken to write the material and instructions for the project. Pics and all. Love it. Plz let me know of any other ideas and projects.
You are most welcome Wanda, so happy you enjoyed the tutorial. You are welcome to subscribe to our newsletter. The button should be on the right if you’re on a laptop or desktop and down at the bottom of the screen if you’re on mobile
Hi Michelle, Thank you for lifting my spirit. i’m an addicted crafter like you. Use to make teeth out of porcelain and gold and other metals. Well the crafter in me started to take impressions with dental materials. The victims were herbs little branches with berries, insects. Yes anything small that would fit in the casting machine. what fun and cute and beautiful things I made. I all so made castings with alginate impression materials and plaster of my sons face when he was 15. He still has it. NOW your impression material is much cheaper and I am retired now, so this is just for me. I have a little trick to make things rust fast. Vinegar and salt 2:1. Spray or dip iron things leave 24 to 48 hours, you have rust. Now a question? what paint and technique did you use for the copper drizzle? Thank you again I’m following you.
? And you just made my day. I so enjoy getting beautiful comments like yours. Wow, those casting that you did sound so incredibly interesting. I wish I could see them. You have my mind going all over the place right now, just thinking about all the fun, natural stuff out there I can experiment with. Thank you so much for the salt and vinegar recipe too. I’m going to give it a try. WRT the paint, I used copper acrylic paint and poured it on in layers, waiting for each layer to dry so it could have some “depth”.
Thank you for the inspiration. I have a small ceramic turtle I want to make from cement. I hope I can do as good as job as you did. I’m apprehensive to make the mold because of how my turtle has the legs and head. Unlike the the pair that is just one solid cavity.
Hey there Karla, I’m sure your turtle will turn out beautifully. You may need to figure out where the cut the mold off. It’s difficult to give advice without a picture of the little turtle but I would try cutting the mold around her middle if that makes any sense. So you’ll end up with a front half and a back half. You can leave a hole at the top for pouring the cement. That way it will fall into the legs first. Be sure to shake her around every time you add more cement so it goes into all the nooks and crannies and her head area. I’m not sure if you saw the wood nymph that we made using the same mold – https://acraftymix.com/blog/wood-nymph-garden-ornament/. She’s about 1 1/2″ (4cm) and all the details are spot on, even her teeny, tiny little nostrils. Just experiment and have fun.
You sure were right about the pear butt! What a clever and attractive paperweight. Using the rusty nail and scrap tin for the stalk and leaf is genius at work. Just beautiful!
Thanks so much Kathleen. ? Isn’t that pear butt just the cutest thing ever.
What a wonderful idea! …. and the result is fantastic. The mind boggles with ideas that you could use this for. I’m in awe of your blog and your creativity (I’ll have some of what she’s having 🙂 – I’m signing up to your Twitter so I don’t miss anything.
?Thanks so much for that Susan and I’m sure with all the beautiful pieces you create you are going to make some amazing molds
Oh Michelle, I’ve somehow missed this post. This is sooooo cool! I had no idea that you can make a mold with these ingredients. Thank you so much for sharing! Right now I don’t have an idea for a mold but I will certainly keep this method in mind.
It’s such a fun thing to do Julia and the best thing, it doesn’t damage the original piece you used to create the mold. Sooooo guess what my lovely friend, I’ll be making molds of those beautiful brooches of yours real soon ?
Hi Michelle. Greetings from ireland. I too have been looking for a cheap effective mold. This should work beautifully. Berries etc. (Everything)! I would like to say you are one of the very few people who reply to all comments. Very frustrating to ask a question and no reply. Thank you for tutorial. I am signing up right now. You are exactly the tutor we all need. Many many thanks. Buzzing with ideas. Fondant doll faces for a start. Food safe silicone…. you are awesome! Deborah.
Ooooooo, you’re going to have so much fun Deborah, and thanks so very much for subscribing to all the way from Ireland. ?
How clever and creative is that and can’t believe how easy it is to make a mold. Brilliant using a rusty nail for the stem and love how you finished your pear, especially the copper sauce running down. Again, you never cease to me amaze with your creativity, Michelle 🙂
? Thank you Marie, I’m having so much fun right now and making all kinds of moldable things
How clever!!! You really come up with the best projects Michelle! I love how you used a nail for the top of the pear! So creative!
Awww Sam, thanks so much. That rusty bent nail just seemed perfect for the pear with the cute butt ?
This is absolutely fabulous. I am putting this on my to-do list.
I’m so glad to hear that Debra and knowing you, you’ll come up with some really amazing mold ideas too
This is so cool Michelle! I’ve never thought of making my own molds, I didn’t know how easy it would be. Your pear does have a cute butt, lol. And turned out so pretty. Love the concrete, and rust together.
I swear that pear had the cutest butt I’ve ever seen on a fruit ?
Fo you think this would work on a small animal skull? I find quite a bit of things nature has left behind while landscaping.
A small skull might be tricky Kayla, but worth experimenting with. I would probably cut the skull in half lengthwise before making the mold. You can glue the two bits together after casting. That way you should get all the details and skulls are usually pretty symmetrical so you’ll have two molds to experiment with. Just an idea, I haven’t tried molding a skull before
Woooooow!! This is so freaking awesome and it looks so easy to make. I saved it 😀
It’s really easy, as long as you get the dough-like consistency right you should have no problems Ana. Enjoy
I wish I could sit inside your mind with you for a day wow! I just love how this turned out! Gosh, now I feel compelled to try casting something too lol. I love the drizzle over top…it looks good enough to eat! You are so talented lady….I am always in awe of you!
? Thank you Carolann, and your welcome to fly over here anytime. Just think of all the fun we’ll have together