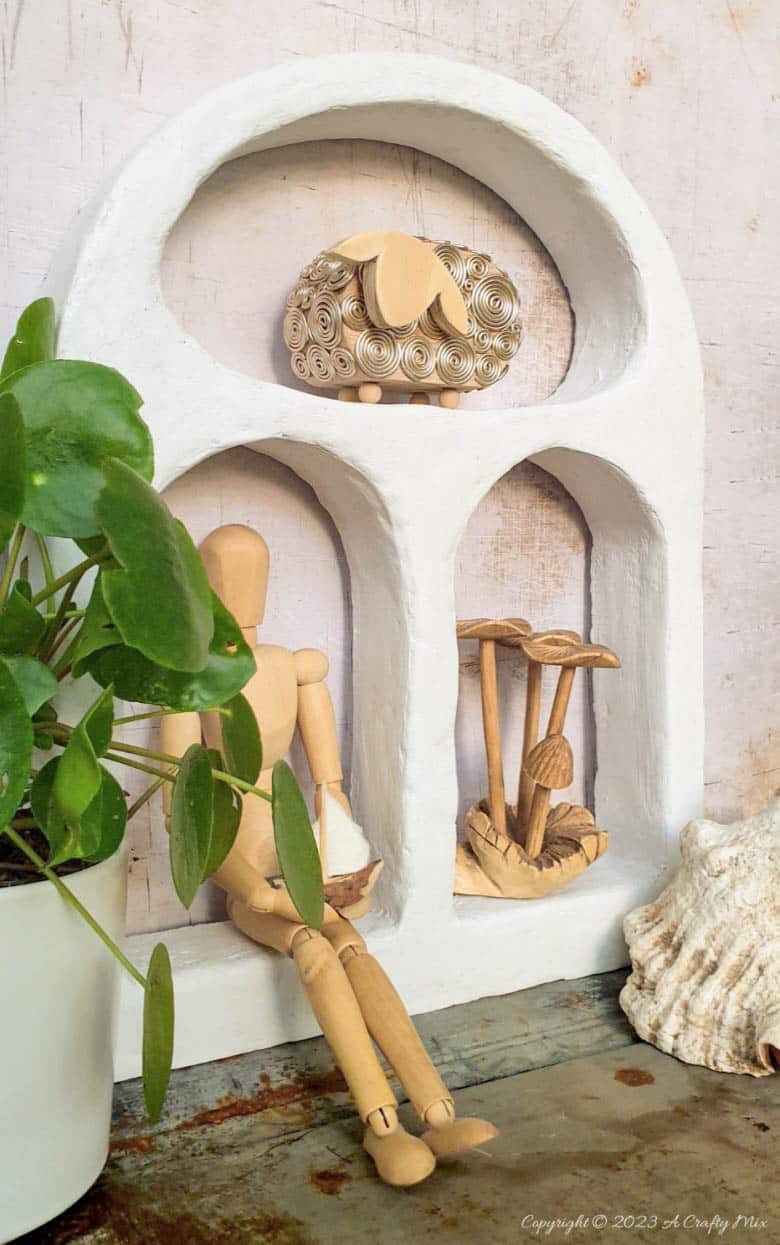
Over the years, we’ve collected so many unusual knick-knacks. Some we bought, while others have been hand-crafted with love. They all bring back special memories, and I needed a way to organise them and show them off. And what better way to do that than this custom-made, Flintstone-inspired concrete shelf?
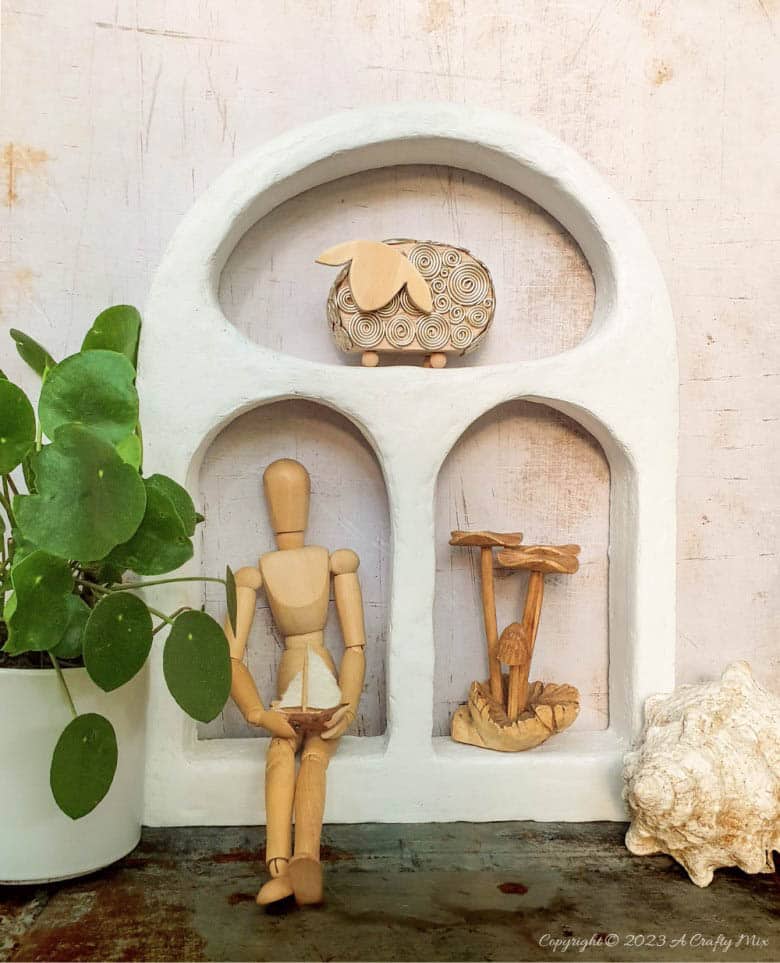
It’s a little bit of boho with a whole lot of “yabba dabba doo” thrown in for fun 😀 and I love it.
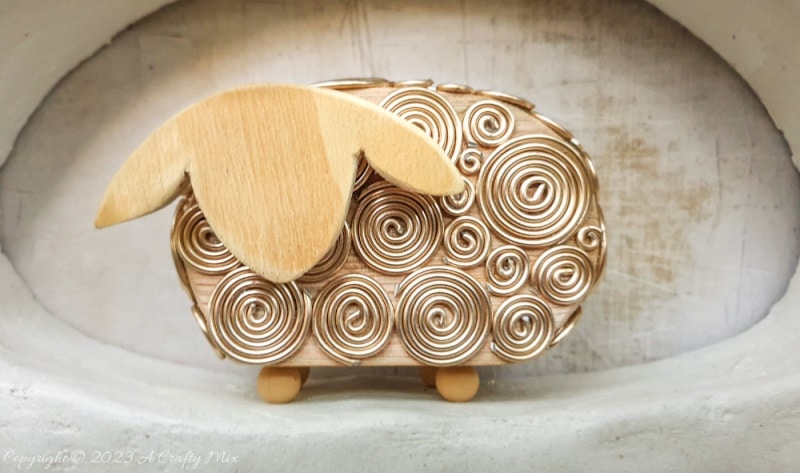
Each compartment (is that the right word?) can be sized to fit whatever you’d like to display, like a wire sheep I made a few months back.

The Flintsone-inspired shelf is surprisingly easy to make too.

My little shelf measures 37 cm x 28 cm (14.5″ x 11″), but you can make yours bigger or smaller to suit your needs.
Right; before I share how I made this concrete shelf, be sure to follow us on Facebook, Twitter, Pinterest, or Instagram. And don’t forget to subscribe so you’ll never miss a post!
What you need
- Concrete mix (cement and water)
- Aluminium Tape
- Sturdy cardboard
- Perlite or vermiculite
- 60-80 grit sandpaper
- Paint (optional)
How to make a Flintstone-inspired concrete shelf
The mold for the concrete shelf is made from good, old-fashioned, inexpensive cardboard. We save all our cardboard boxes for crafts like this one.
Making the cardboard mold
On a large sheet of sturdy cardboard, sketch out how you’d like your Flintstone shelf to look. The sides, top, and gap between the compartments should be at least 2cm (1”) thick.

I adjusted the bottom to make it a little thicker, so the shelf has a solid base to rest on. Use a sharp craft knife to cut out the sketch, including the compartments where the trinkets will go.
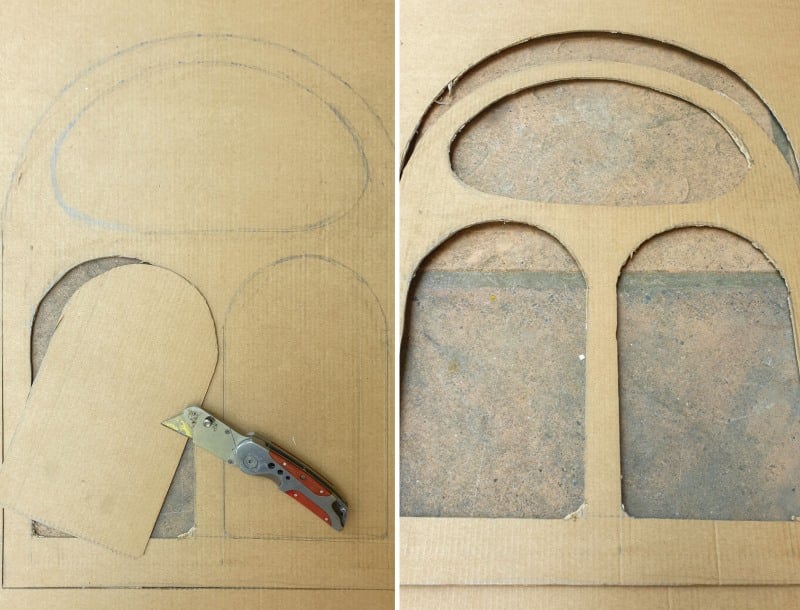
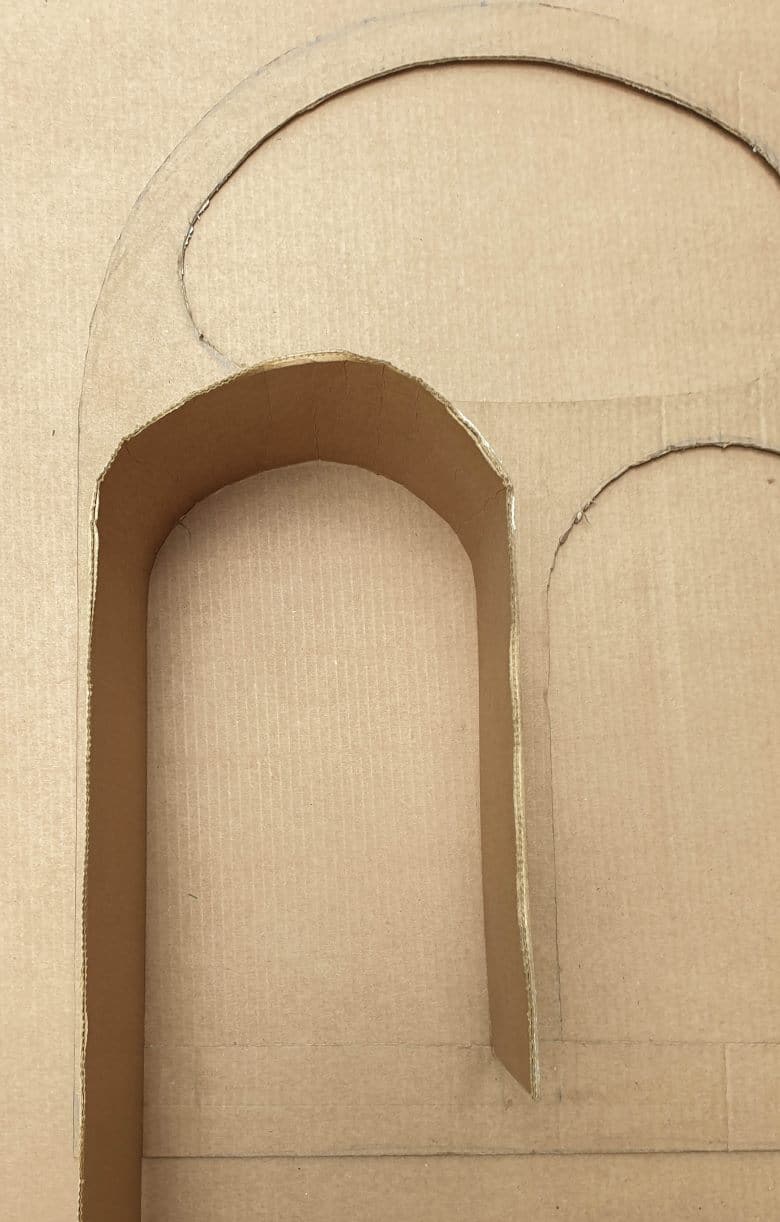
Before moving on to the next step, consider how deep you want the compartments to be. They should be deep and wide enough for your keepsakes to rest on. The depth will determine how wide to cut a bunch of cardboard strips. I wanted to use this Flintstone shelf for small trinkets, so my strips are about 10 cm (4”) wide.
Bend and shape the cardboard strips around the cut-out pieces.
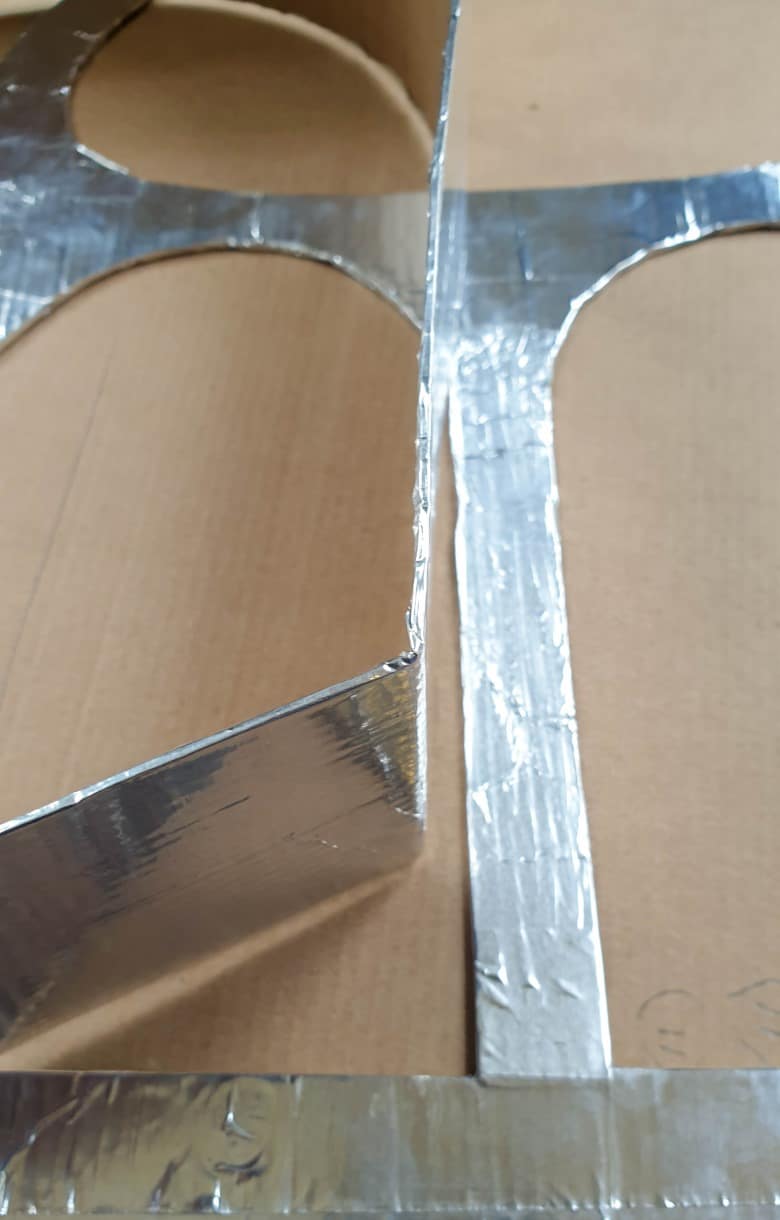
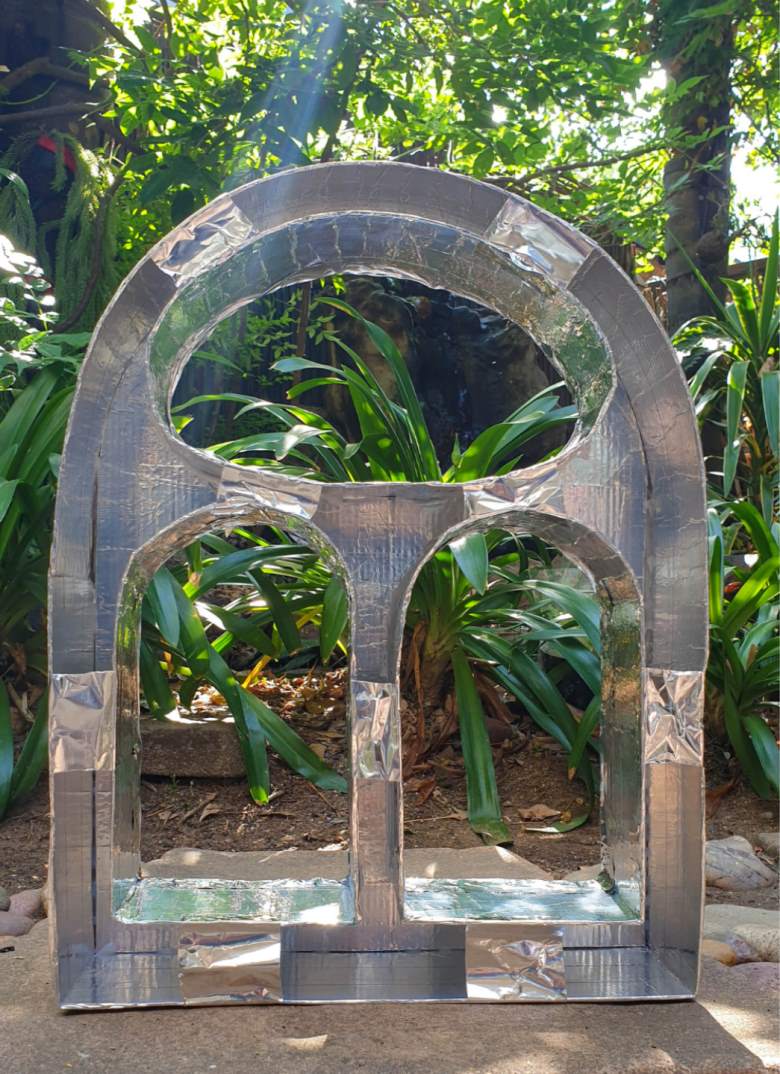
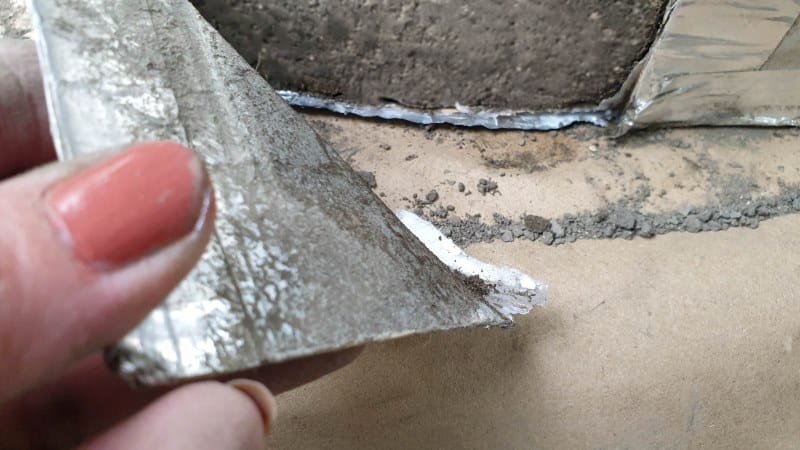
Wrap the strips and cardboard shelf cut-out in aluminium tape to make them waterproof.

We always have a roll of aluminium tape on hand. It’s inexpensive, weather-resistant, and can be used to make all kinds of things, like a beautiful chain of hearts garden mobile or concrete arch candleholder.
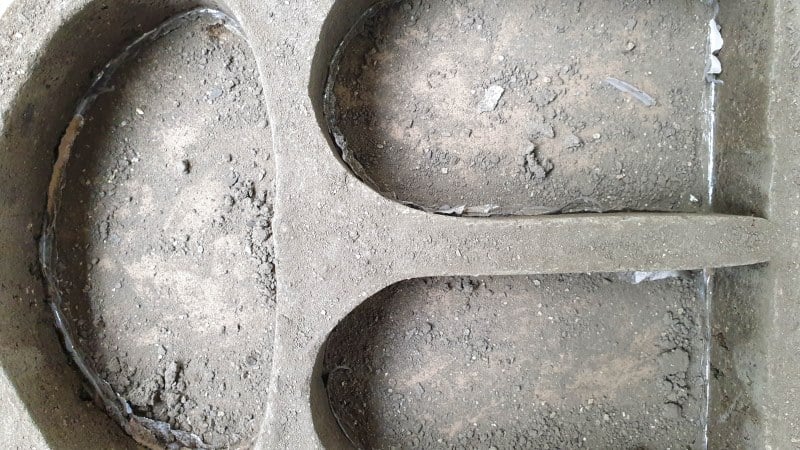
Hot glue the covered cardboard strips around the shelf cut out to form the mold.
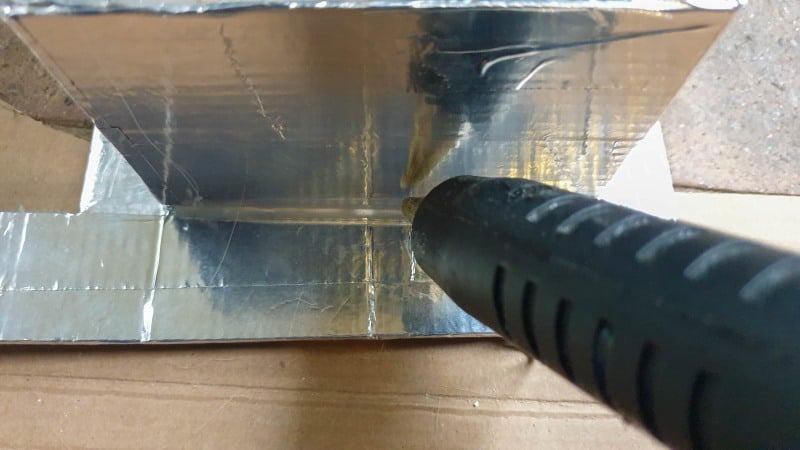
You should end up with something like this.
I added bits of aluminium tape to the sides to keep them stable. In hindsight, it wasn’t necessary, and they just got in the way of pouring the concrete.
The most important thing is to have fun with the process of making it. It doesn’t have to be perfect!
Mixing and pouring the concrete
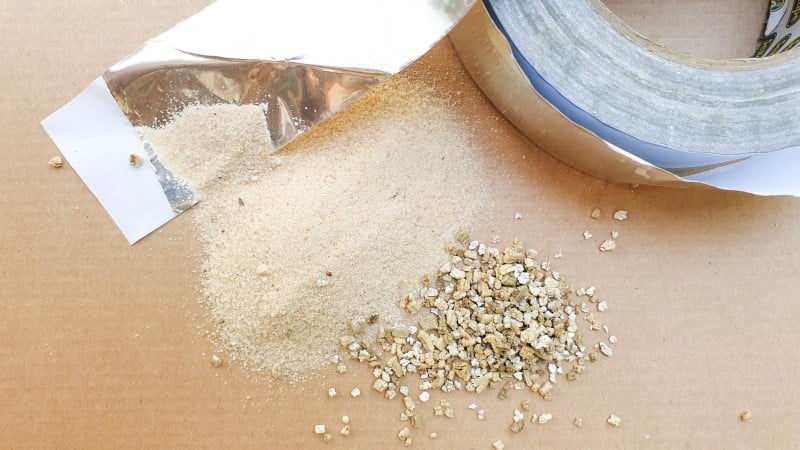
I wasn’t sure if I’d hang this display shelf or pop it on something. To be safe, I mixed some vermiculite into my concrete to make it lighter.
How to use vermiculite in a concrete mix
Pre-wet the vermiculite before adding it to the dry cement, and mix it well before adding the water.
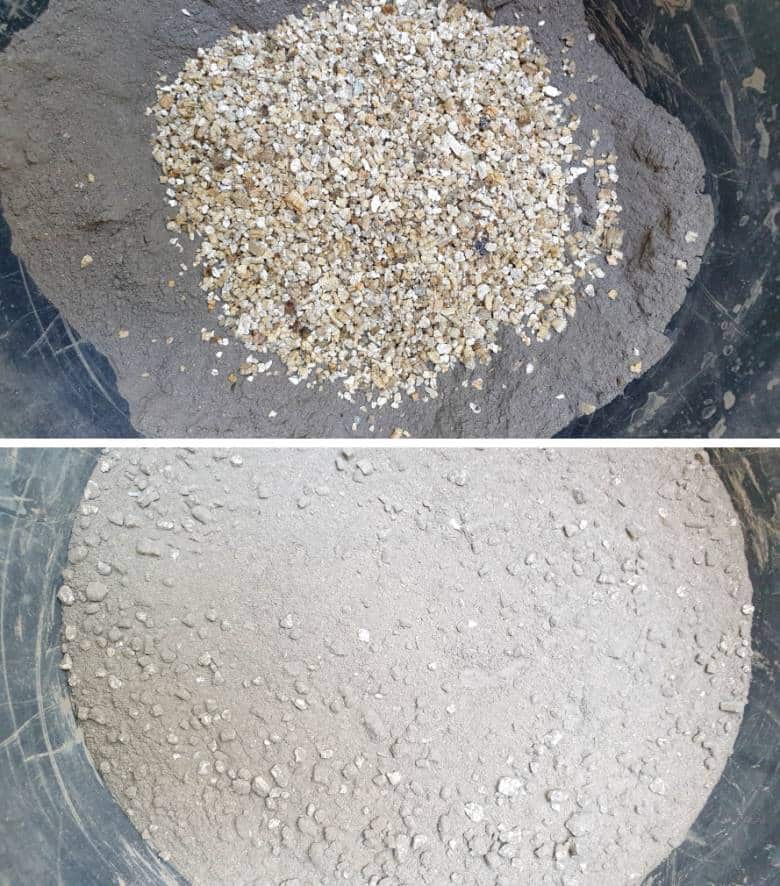
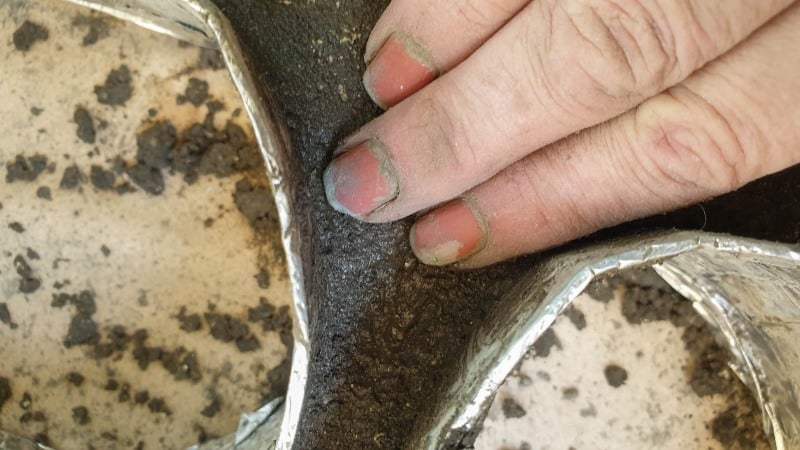
I used two parts vermiculite to one part cement. The more vermiculite you add, the lighter the shelf will be, but you lose some strength. For something small like this Flintstone shelf, it’s not a big deal. Add just enough water to the mixture to bind the cement and vermiculite. If you make a ball, it should hold its shape without collapsing into a watery puddle (too much water) or flaking apart (too little water).

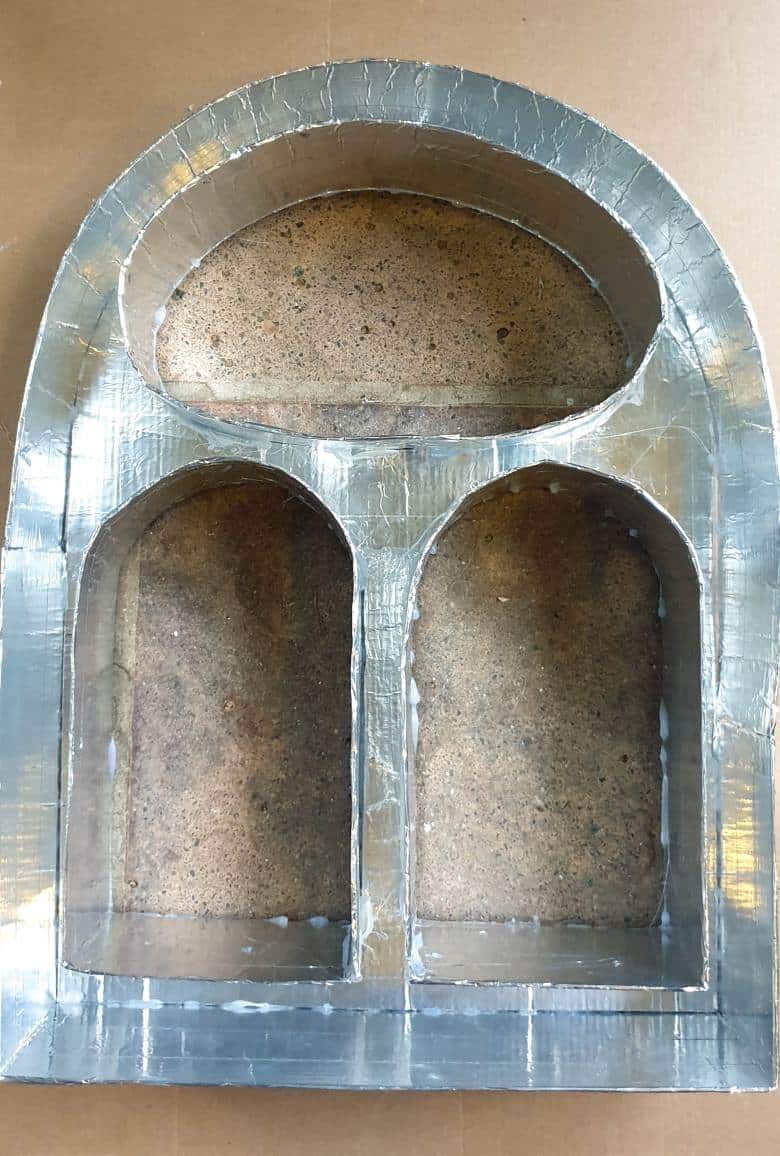
Place the aluminium-covered cardboard shelf mold on a level surface. Scoop the concrete mix into the mold and press it down firmly into all the nooks and crannies. Tap the mold’s sides to remove any air bubbles and leave it to cure.
Demolding the concrete shelf
Once the concrete sets, cut the outer aluminum-covered cardboard away.
It should peel off without any problems.

Sand the Flintstone-inspired shelf with 60 – 80 grit sandpaper.
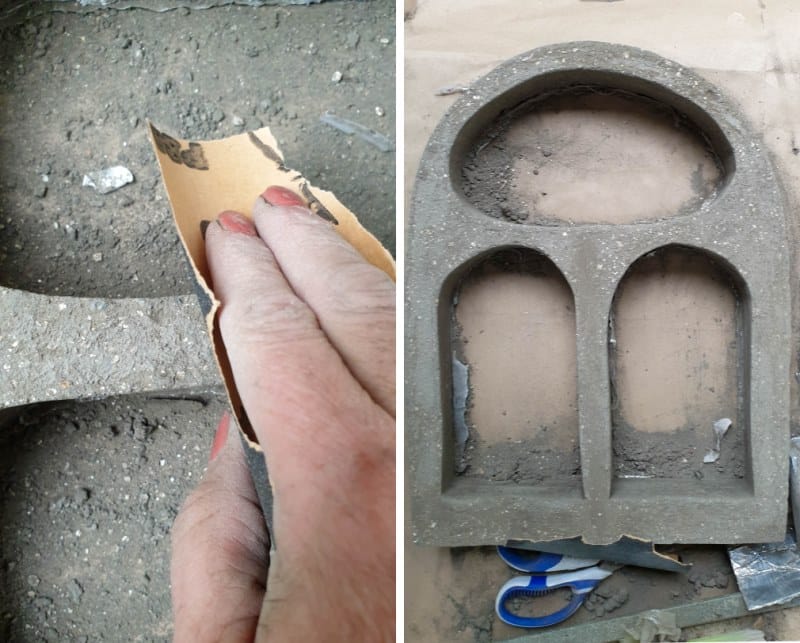
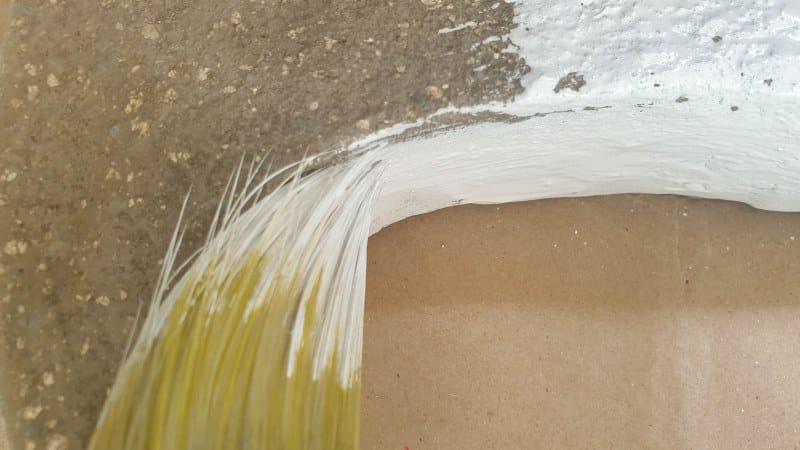
Paint the shelf to suit your décor, or leave it au naturelle 😉
You can hang the concrete shelf on the wall or put her on a table or mantle. It’s great for showing off all those special little things.
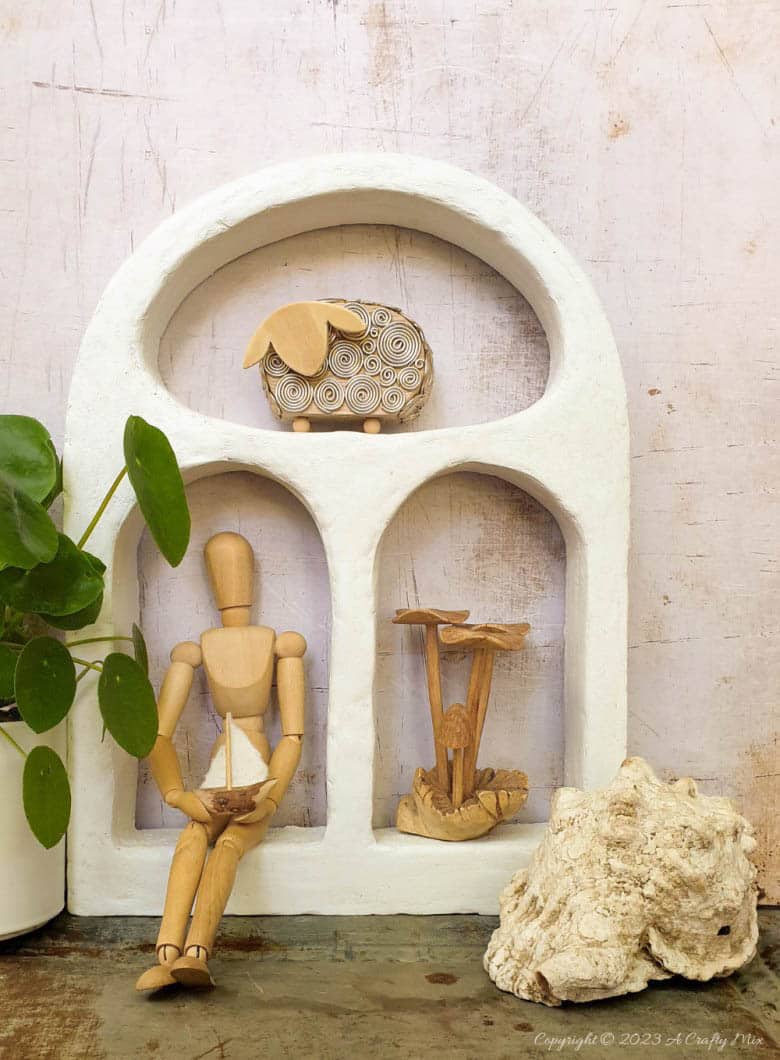
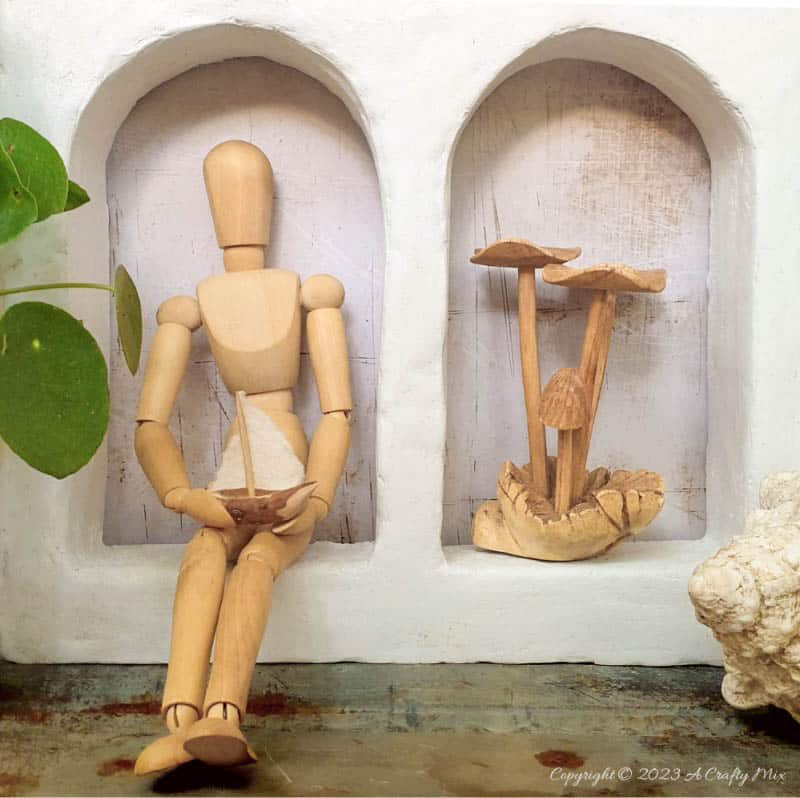
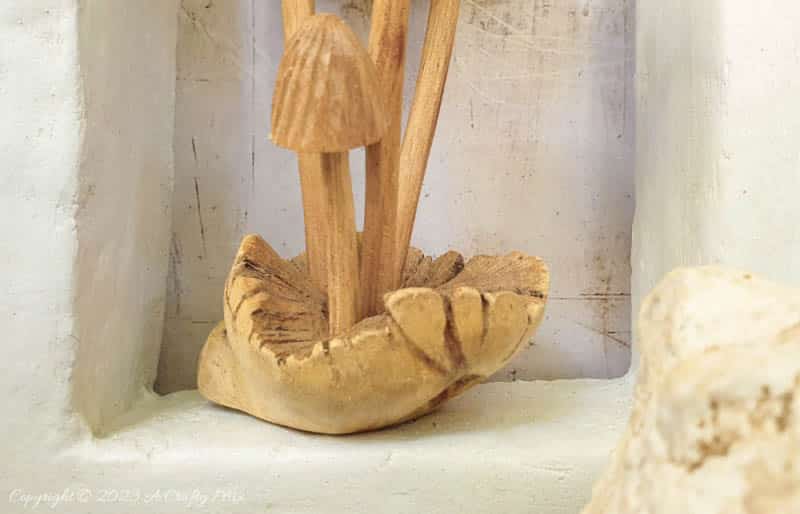
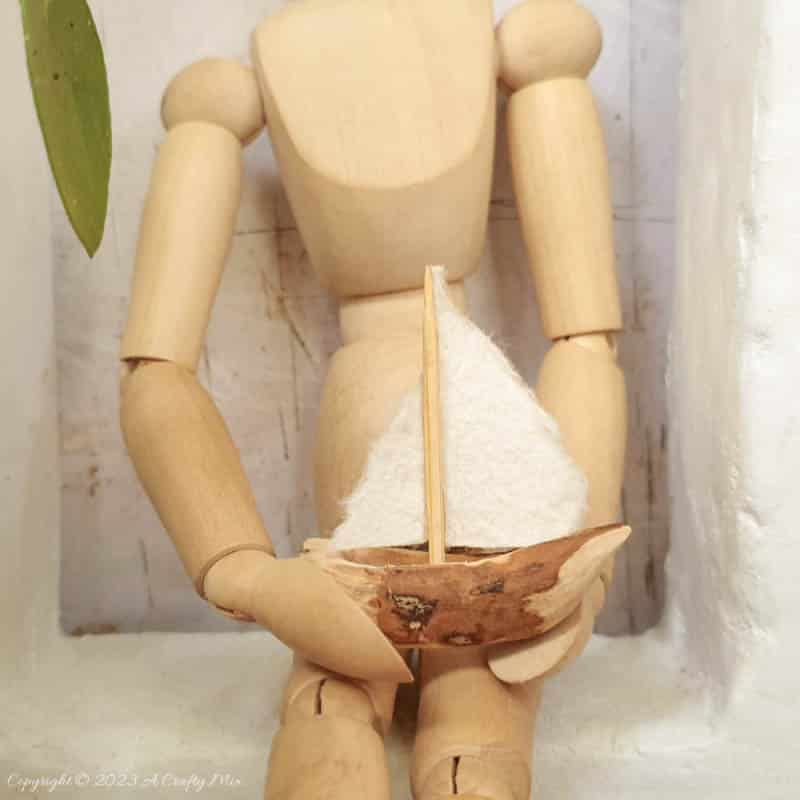
They’re not just for knick-knacks, though. You could use them to show off your crystal collection or favorite family photos. This one holds one of our carved, miniature sailboats.
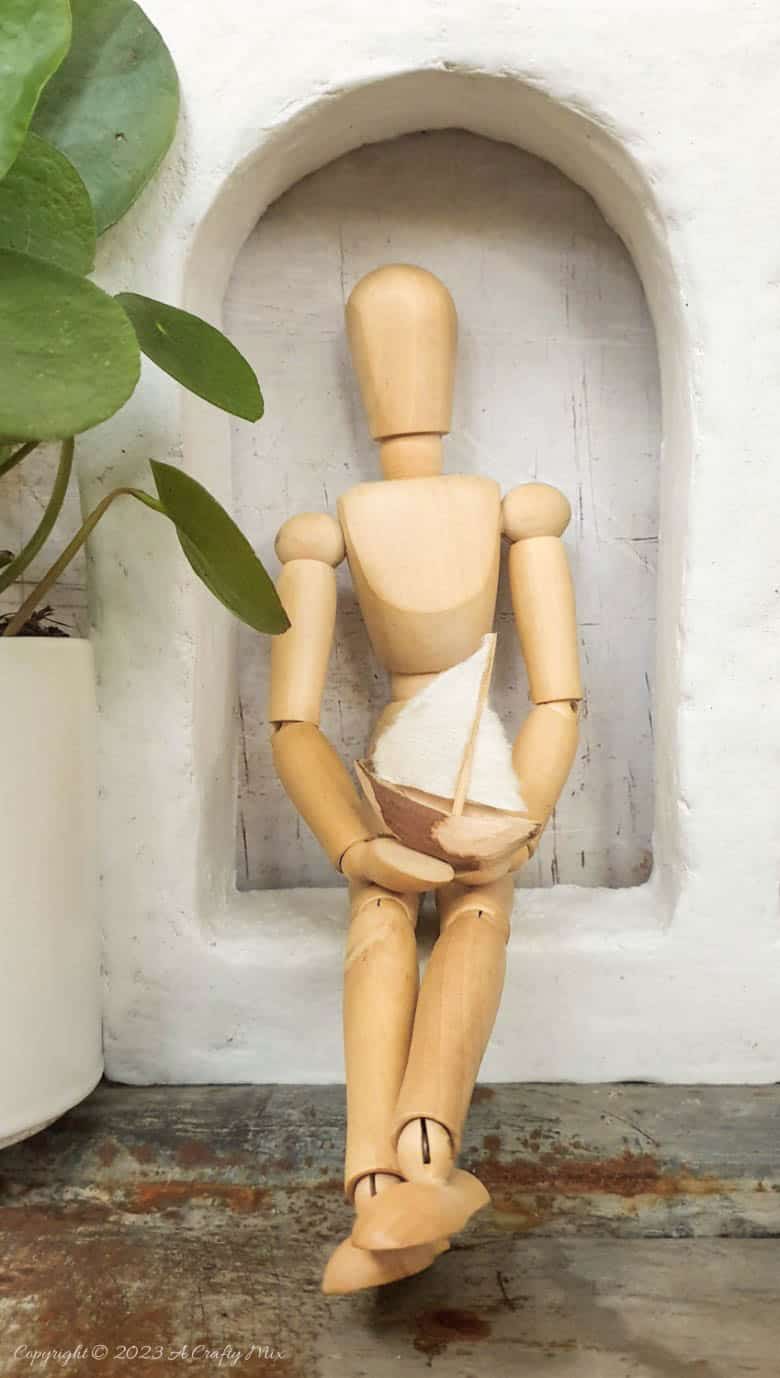
That little thing would get lost if I didn’t have somewhere safe to keep her.
The shelf can be used as a focal point in any space, and it’s great for organising and showcasing keepsakes. And because it’s handmade, you’re guaranteed that it will be unique too.
Since this Flintstone-inspired version is concrete, it can also be used outside.
It would also look lovely filled with a collection of succulents or air plants. What would you put inside?
If you like the idea of making a Flintstone-inspired concrete shelf, don’t forget to pin it for later.

Sharing is caring.

Want to see more out-of-the-box cardboard crafts and home decor ideas? Here are a few of our favorite tutorials.
More unique ways to organise stuff
My friends from the IBC collaborated with us to come up with other creative ways to get organized and keep things tidy.
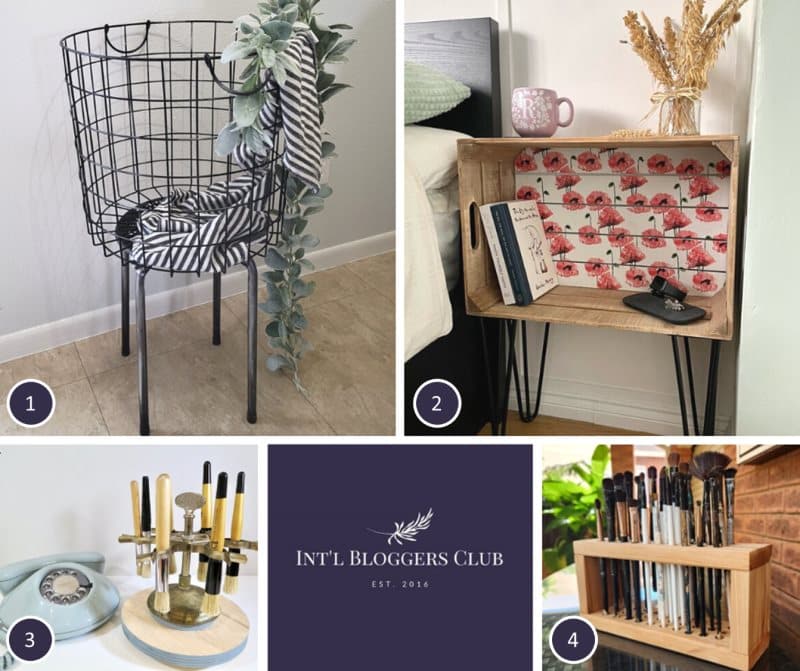
- If your laundry basket always gets in the way of the vacuum cleaner, this idea by 5th Sparrow No More is genius.
- I’ve always wanted a bedside table with loads of storage for my books, and this crate version from Tea and Forget Me Nots is calling my name.
- I have a lot of paintbrushes lying all over the place, so I love this repurposed paintbrush holder from Birdz of a Feather.
- And when you can’t find the right bits to repurpose, this wooden one crafted by Anita at Unique Creations is a great alternative.
Oh, and if you’re looking for some of the things we used, we’ve got you covered. Disclosure: Clicking on the links below means we may receive a commission from Amazon. But don’t worry, it won’t come out of your pocket, and it helps us make more amazing crafts to share with you 😉


And if you prefer to buy rather than DIY, then maybe these beauties will appeal.


And as always, wishing you a wonderful, crafty week filled with lots of love. Thank you for popping in for a visit.

Last update on 2026-06-03 / Source Amazon Affiliates