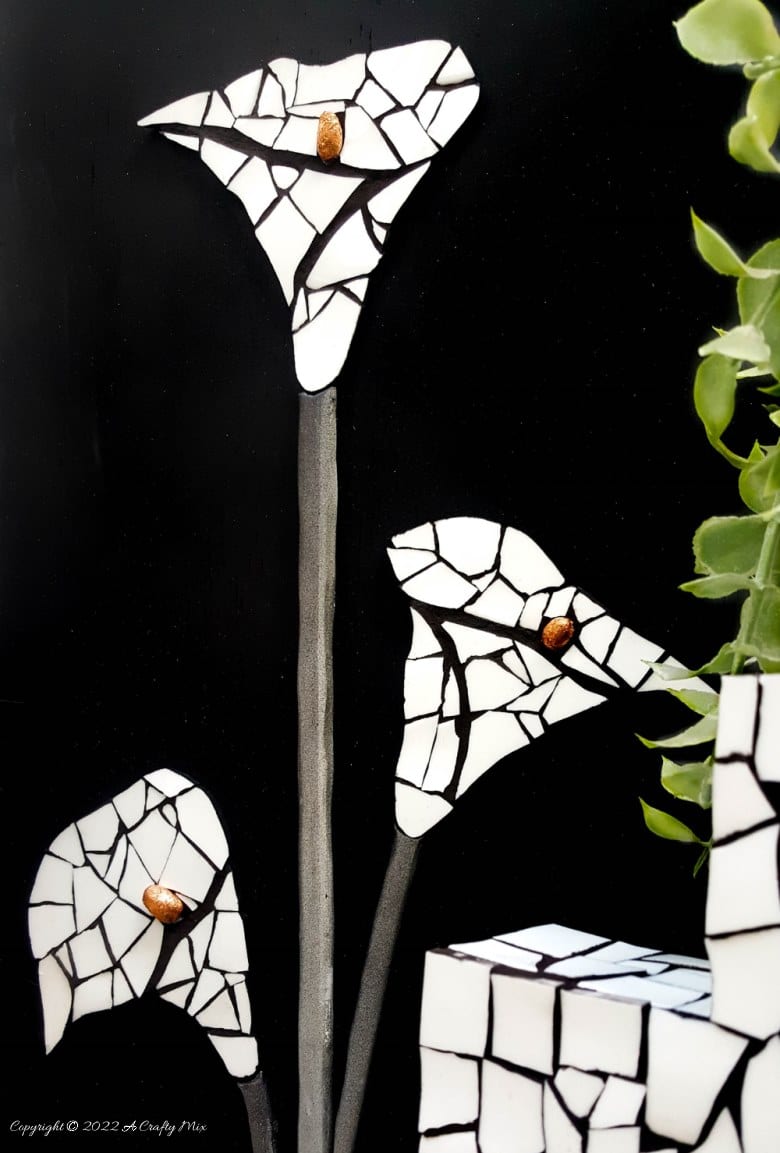
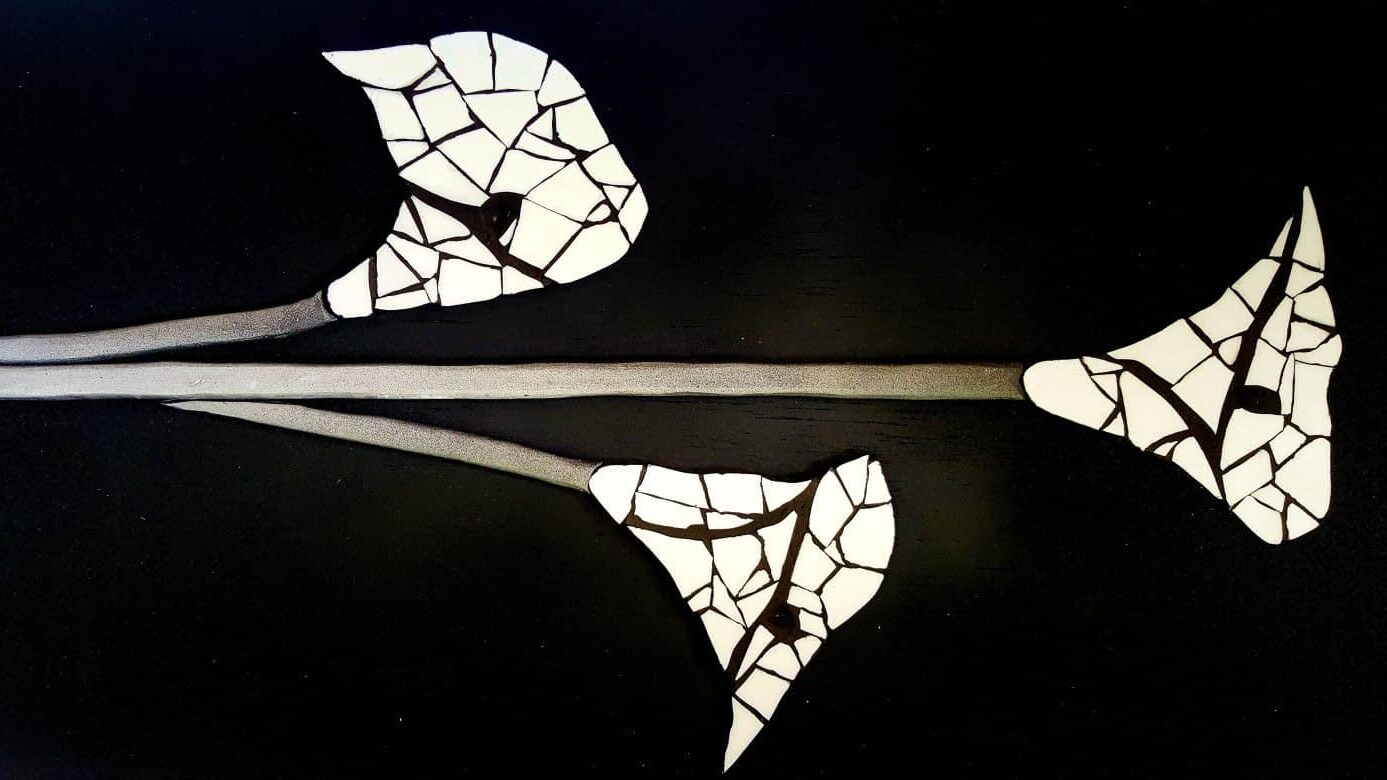
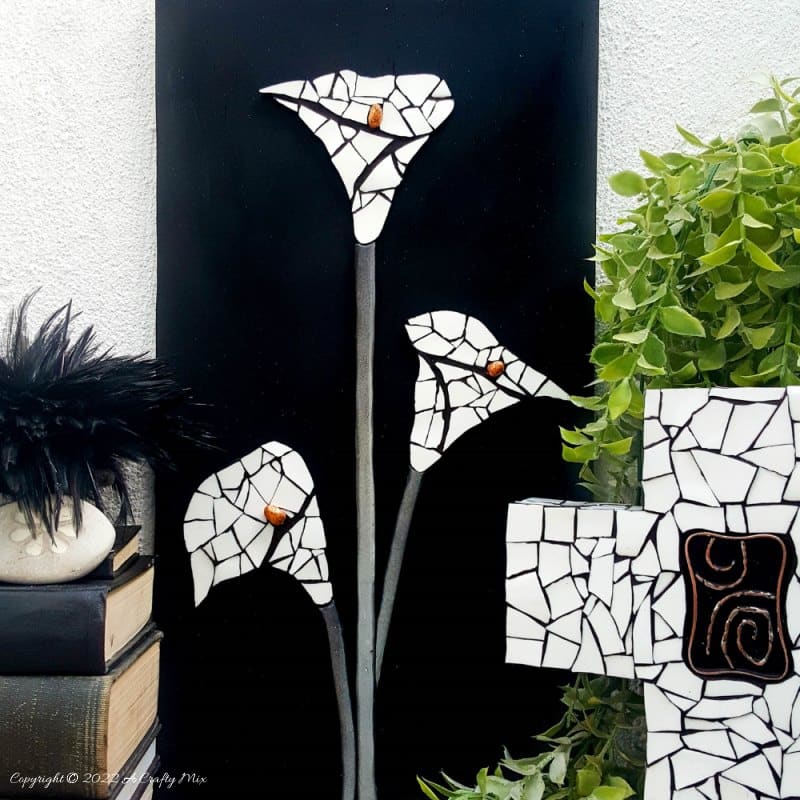
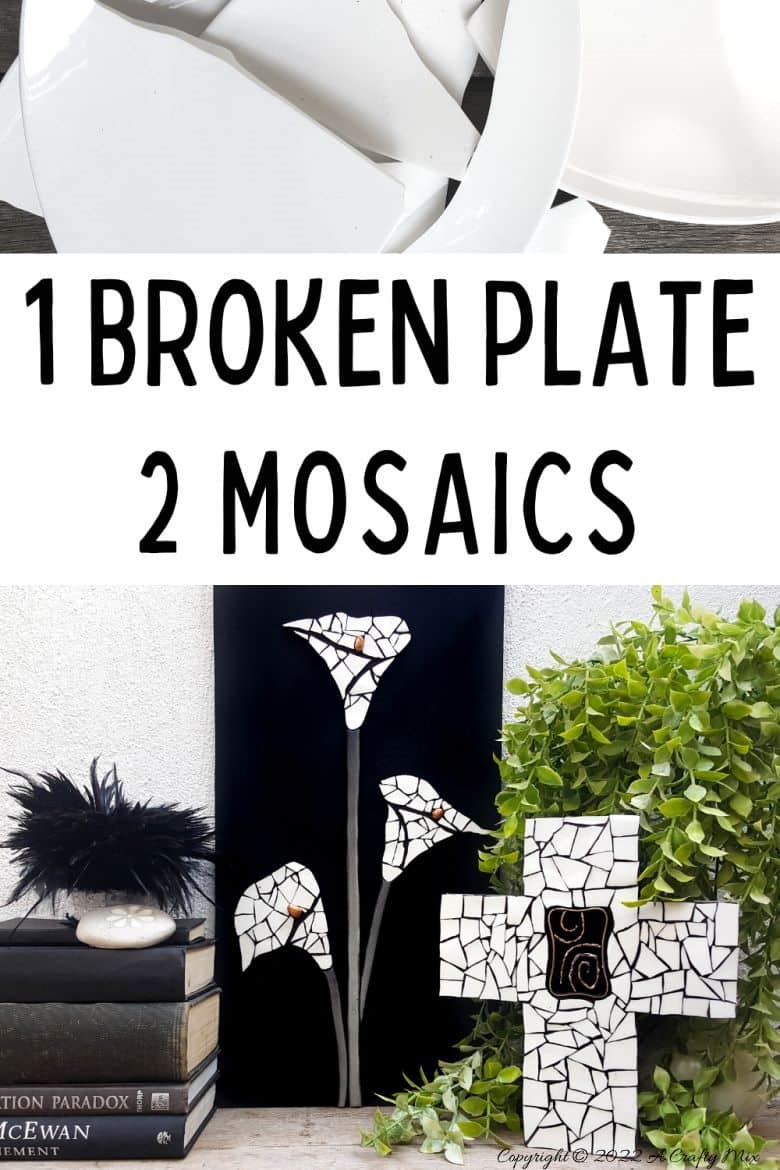
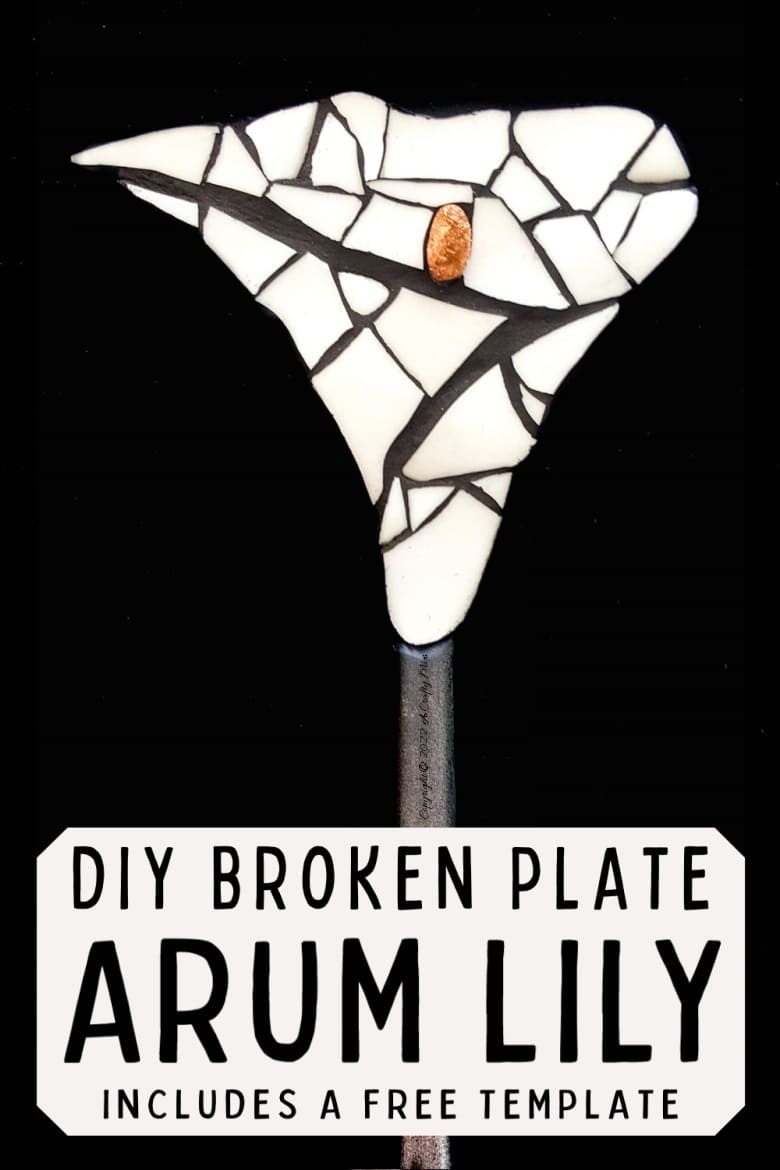
Ugh, I dropped one of our China plates the other day. And it was one of my favs too. Has that happened to you? Fortunately, a broken plate is the perfect starting point to make unique wall art like this arum lily mosaic.
Now I’m not encouraging you to break some plates. Unless you want to, of course. You can also use inexpensive white bathroom tiles. We made some gorgeous oversized mosaic flowers for our garden using those.
But if one of your plates does have a slippery accident, then go for it.

Each arum is about 10 cm high (4”), so it doesn’t have to be a big plate.

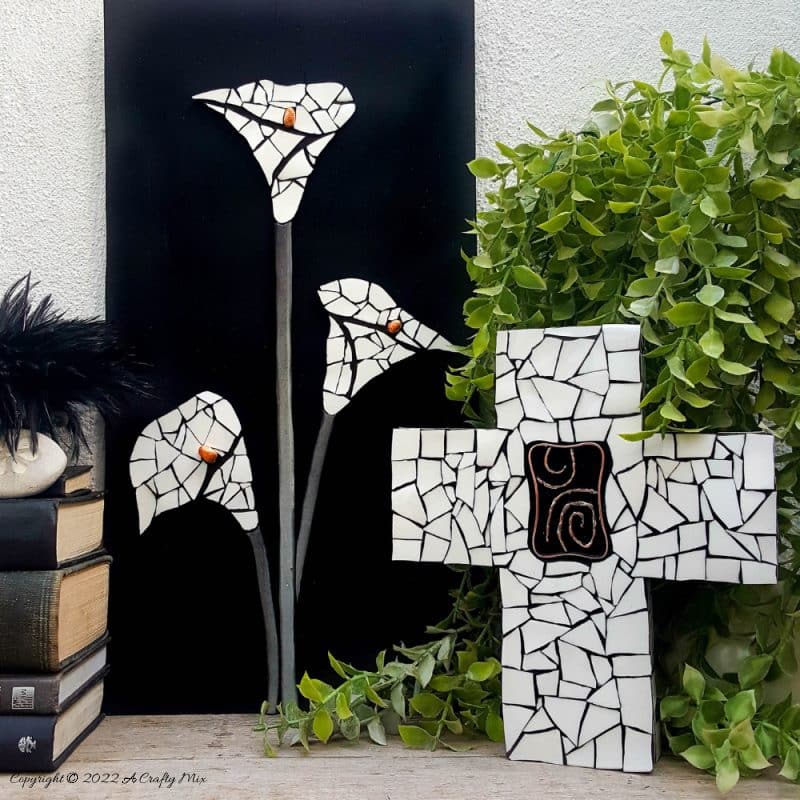
The one I broke was a large serving plate, so I had enough bits to make a cross too.
Okay, before I show you how to use a broken China plate to make an arum lily mosaic, be sure to follow us on Facebook, Twitter, Pinterest, or Instagram. And don’t forget to subscribe so you’ll never miss a post!
What you need
- Broken China Plate
- Mosaic Mesh
- Glue
- Black Grout
- Airdry clay
- Backing board
- Copper leaf (optional)
- Masking tape
- 60 or 80-grit sandpaper
- Tile nipper
- Free Arum Lily Template to work from
How to use a broken China plate to make an arum lily mosaic
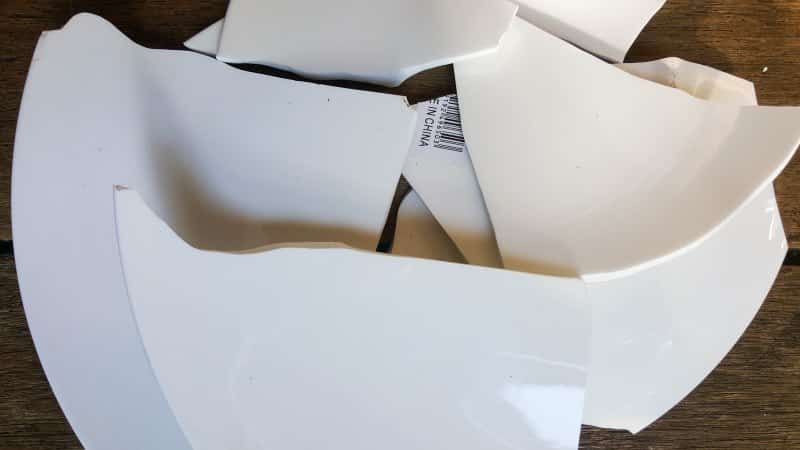
My plate broke into a few large pieces, which aren’t suitable for a mosaic. Easy enough to solve. Place the broken bits in a strong plastic bag and use a large pebble to gently break them into smaller pieces.

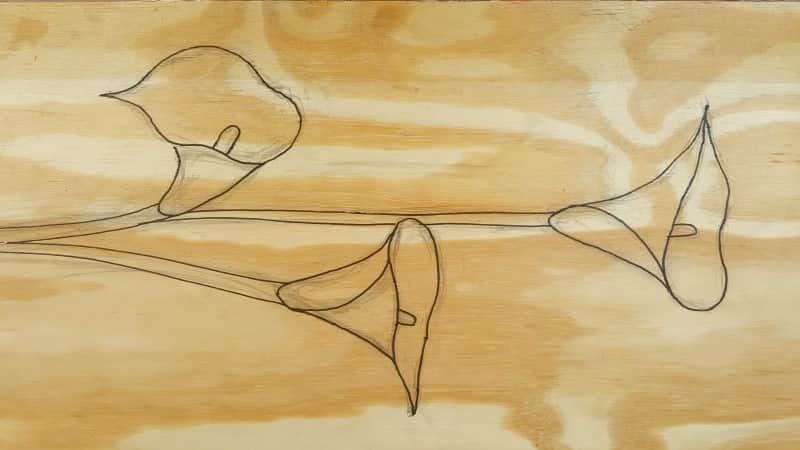
Print out and trace the free arum lily printable onto a piece of wood.
Wrap the board in cling film (saran wrap) to protect it.
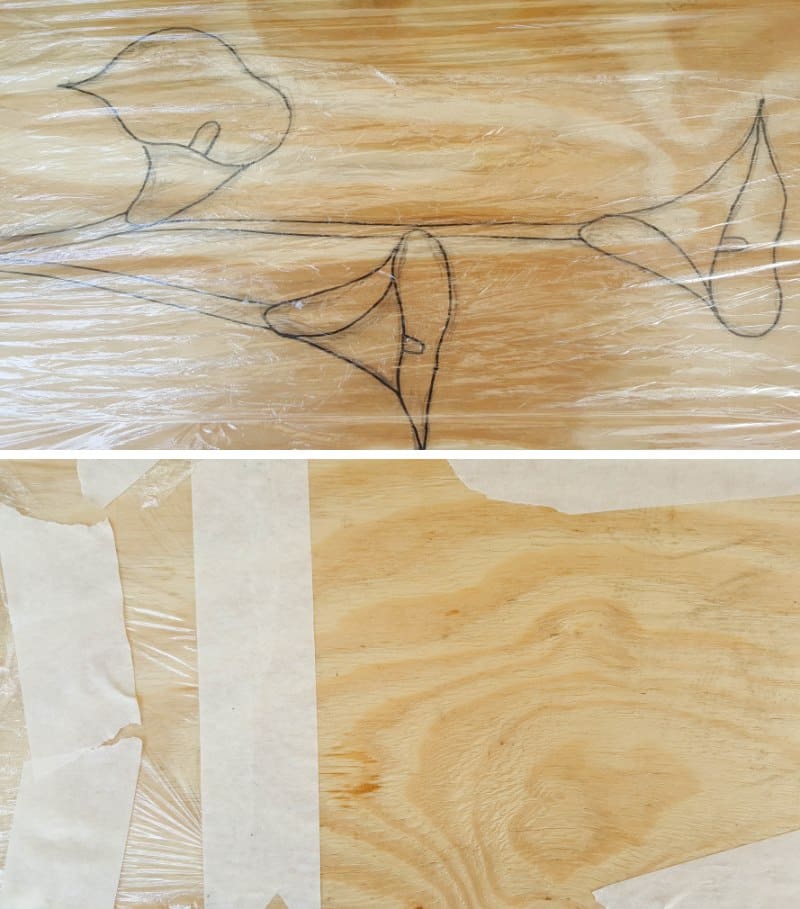
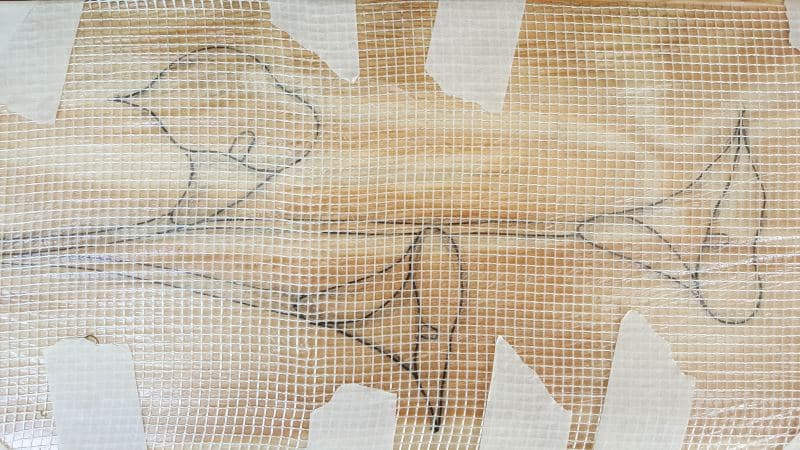
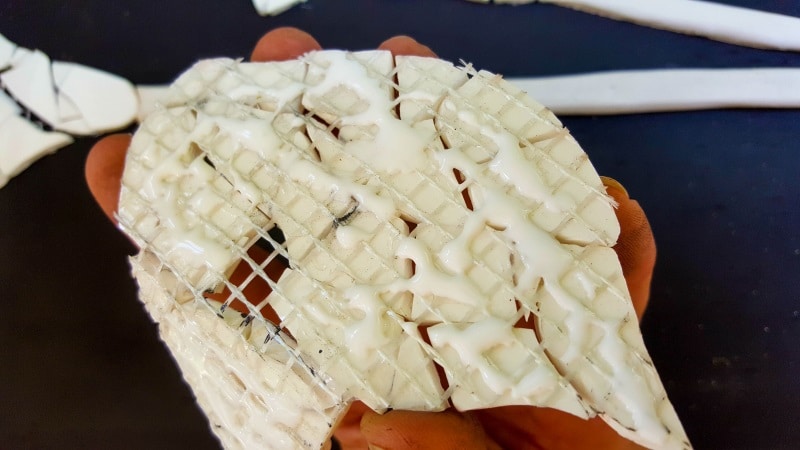
Cut a piece of mosaic mesh and tape it down over the plastic wrap.
We’ll be gluing our mosaic arums lilies onto the mesh.
Why use a mosaic mesh
Using a mesh to make mixed-media mosaics like these arum lilies is so practical and easy. You can create a mosaic directly onto an image, and the finished piece is lightweight and easy to transport. For someone like me who makes a lot of mosaics, that’s a game changer. I can store the “ungrouted” works in a safe place until I’m ready to mount and grout them onto their permanent home. You also have so much freedom when it comes to combining shapes. And if you’re planning on building the piece up over a long period of time, the mesh is a lifesaver. The individual images can be made ahead of time and put together when you’re ready.

Once your mesh has been taped down, you can glue your tiles or whatever broken bits you’re using down in the normal way. Don’t use too much glue. Just enough to hold the tile in place. You can get more beginner-friendly mosaic tips here.
Cutting and shaping broken China for mosaics
If your bits are of different thicknesses, sort them into piles. You want to use similar thicknesses for each arum.

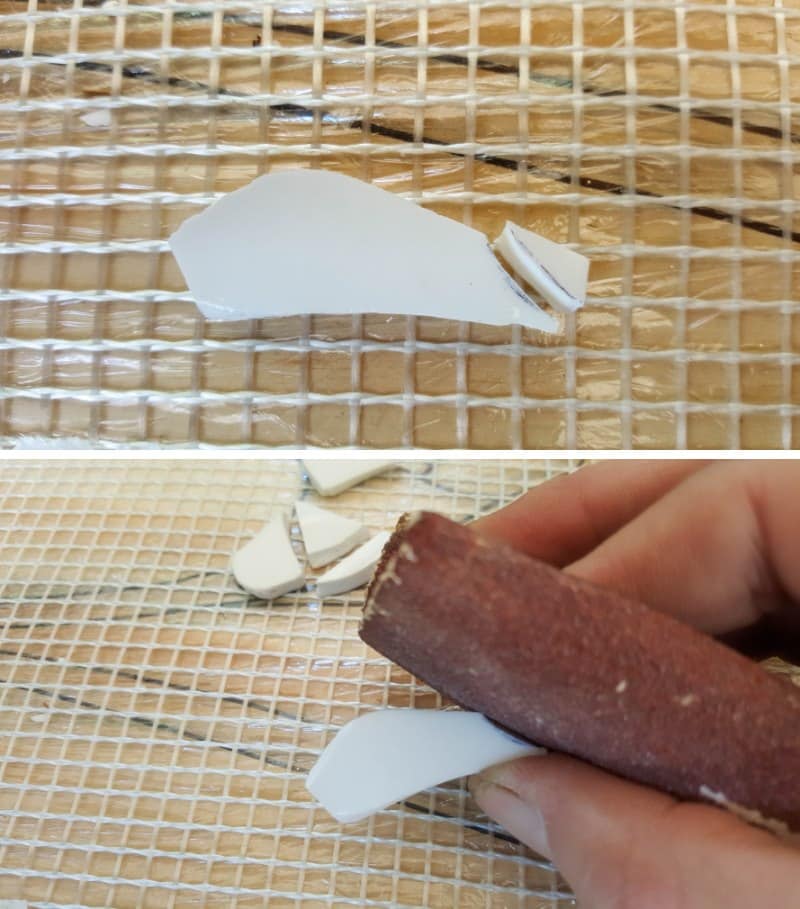
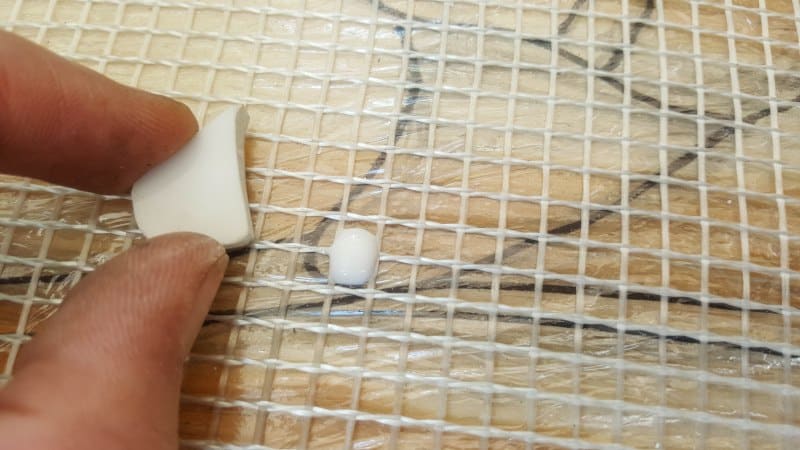
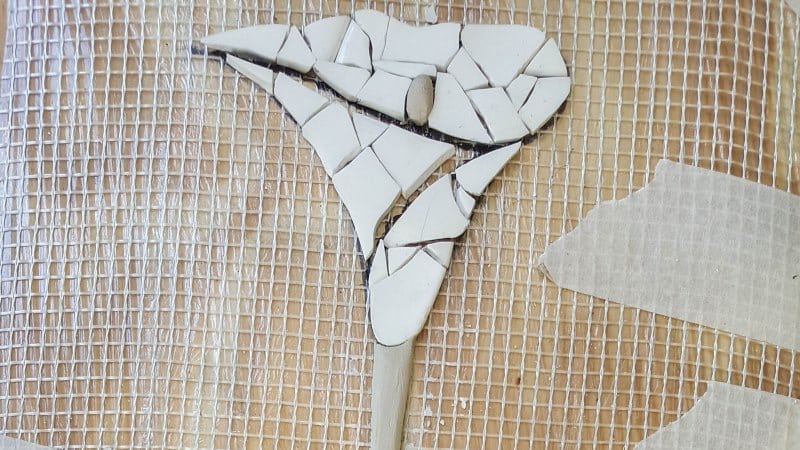
When making a beginner-friendly mosaic like this, I always work from the outside inwards. Not only does it help get the outline right, but it’s easier to cut a piece to fill in gaps on the inside than to cut one to fit on the outside when the other pieces are already in place. Look for a broken bit that’s almost the right shape. Place the bit on your image and mark with a pen where to cut. To cut, place the edge of your tile nipper on the pen line and press down firmly.

Use 80-grit sandpaper to smooth and shape the edges. China plates are fired at a lower temperature than porcelain and the little glass tiles you find in craft stores, making them much easier to shape.
Interesting fact, back in the day bone China was made from finely crushed cow bones and in some rare cases human bones. Eeeeeeek!!! I don’t think I’d want to eat off of something like that. Anyways, back to the tutorial. When you’re happy with the cut shape, glue the broken China bits down.
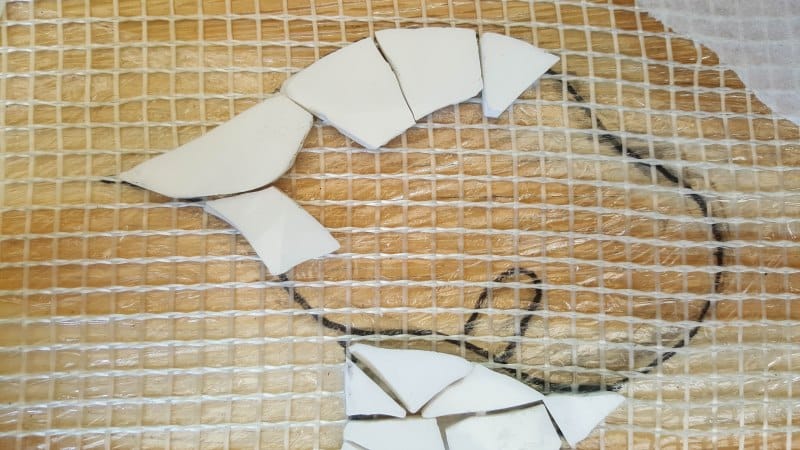
You only need a small dollop of glue and if your arums are going to be inside, normal craft glue works perfectly. For mosaics that will be used outside my glue of choice is either Wellbond, E6000, or an exterior tile adhesive. Once the outside edges are done, cut and add more broken bits to fill the gaps on the inside.
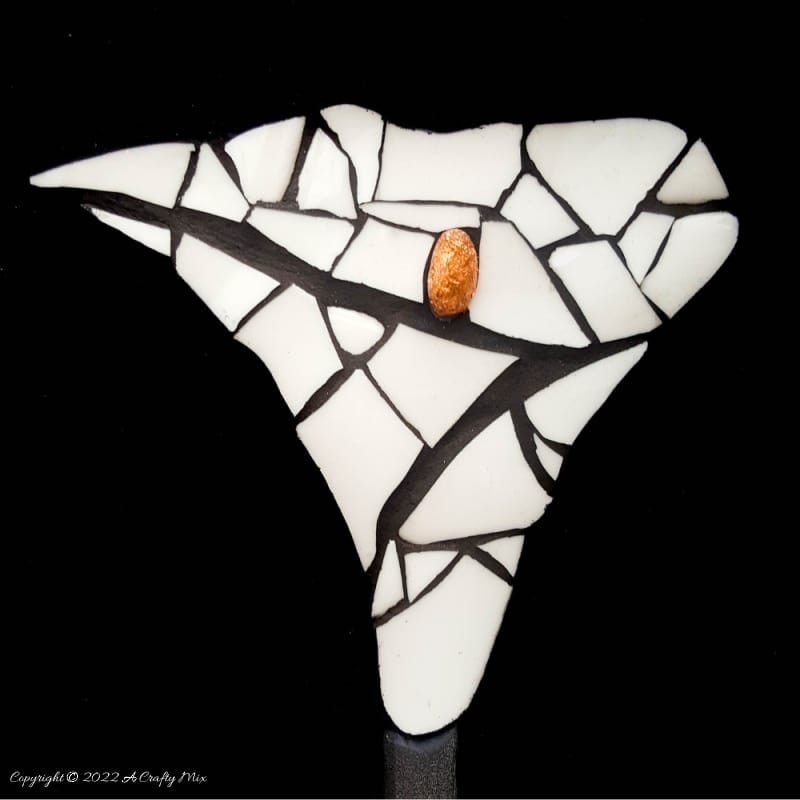
Try to keep the gaps between the inside pieces smaller and leave a larger gap where the petal of the arum overlaps. It helps to define the shape of the arum after they’ve been grouted.
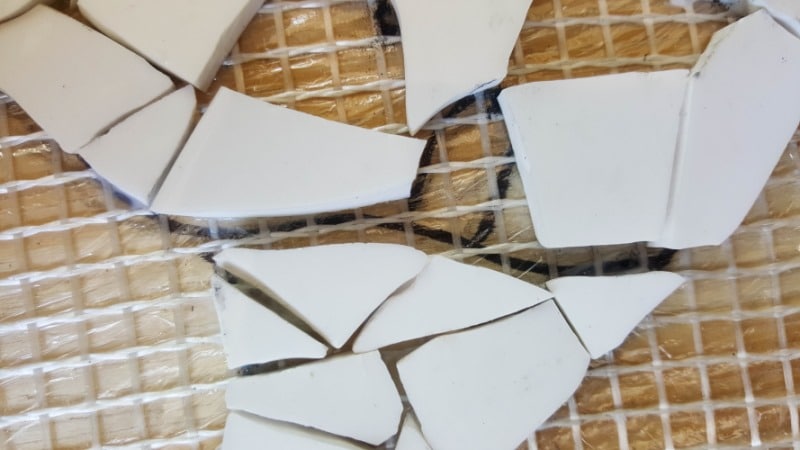
Continue nipping, shaping, and sanding the broken bits until the Arums are complete.
Making the stalks and spadix
To add some variety and interest I chose to make the stalks and spadix from air-dry clay. Roll the clay into a long sausage and place it on the image.

Trim away any excess and leave to dry. For longer stalks place a book on top of the clay while it dries to prevent the clay from curling upwards.
Put the stalk and spadix to one side while you finish off the rest of the mosaic.
Finishing off
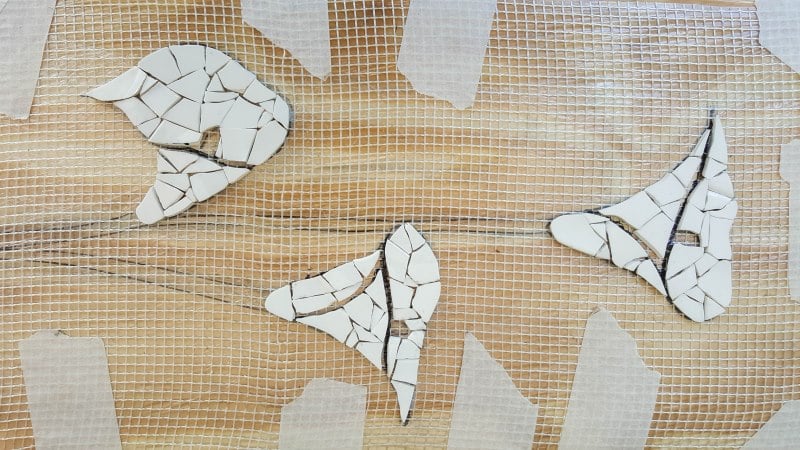
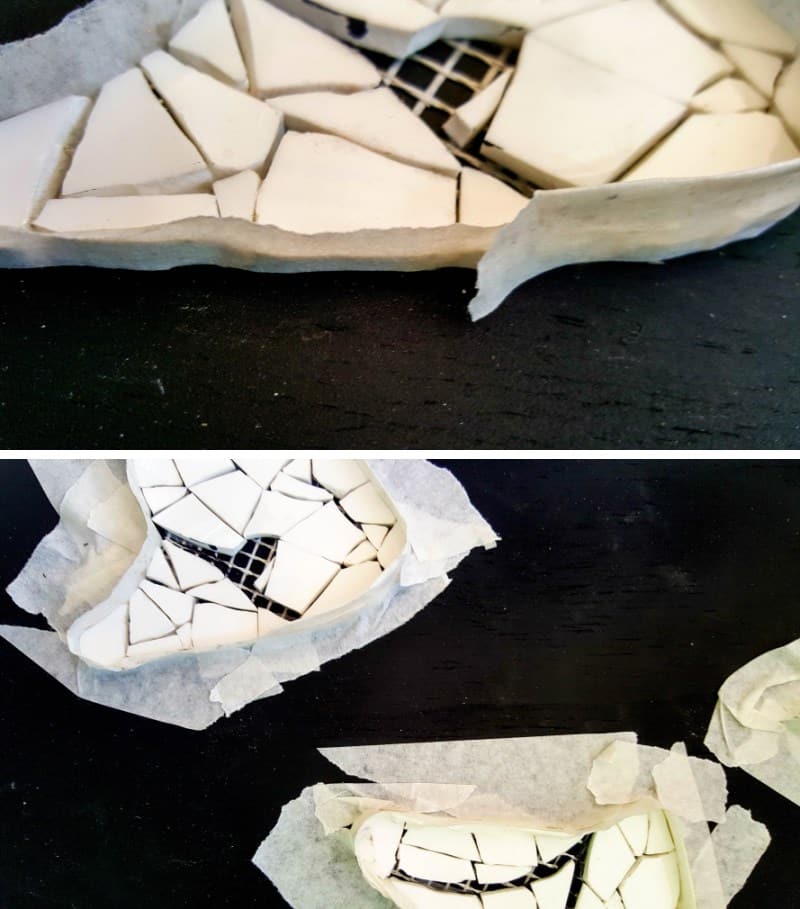
Once the glue is fully dry, remove the mesh from the wooden board.
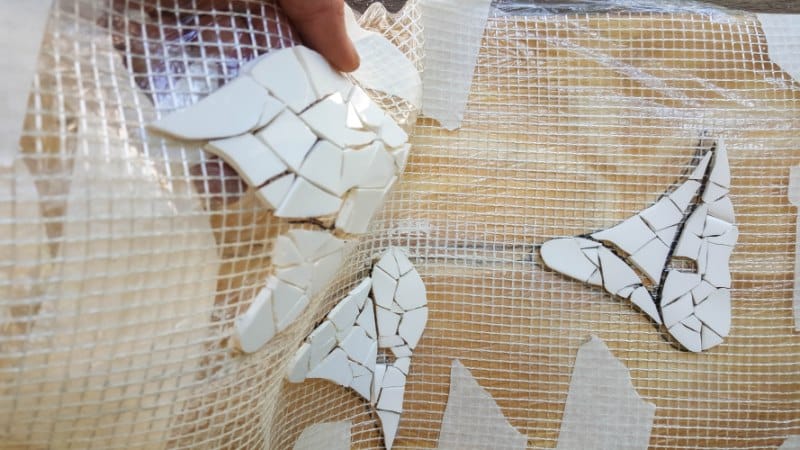
Trim the excess mesh around the arum lily mosaic away with a pair of nail scissors and remove any cling wrap that may be stuck.
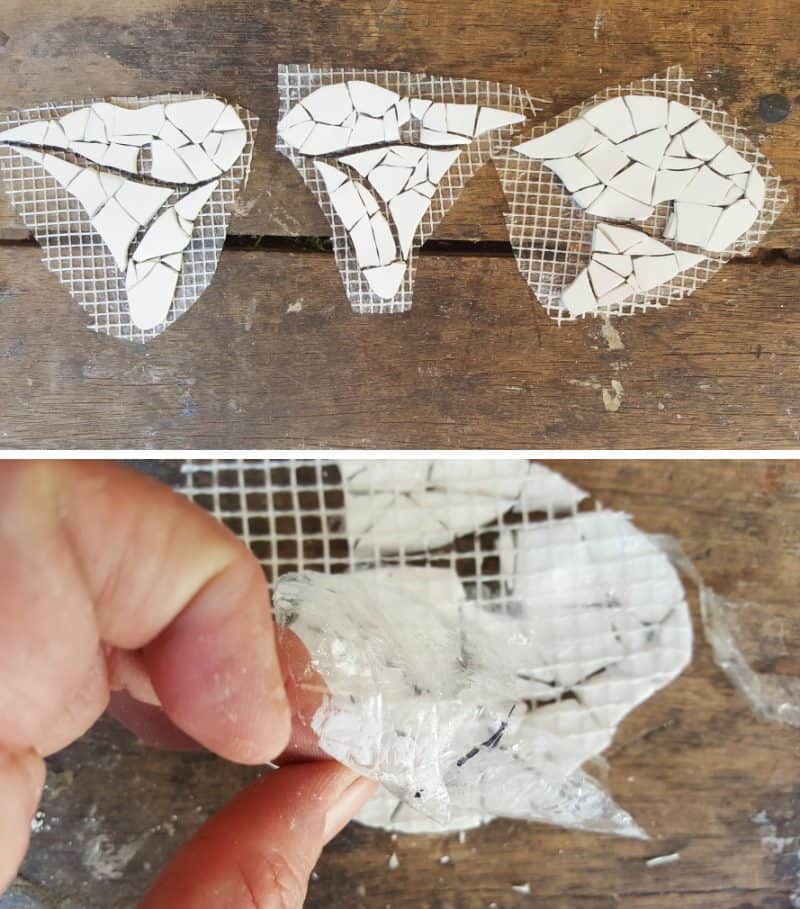
Your mosaic arums should look something like this. If there are any obvious bumps or weird shapes you can sand them down, before moving on to the next step.
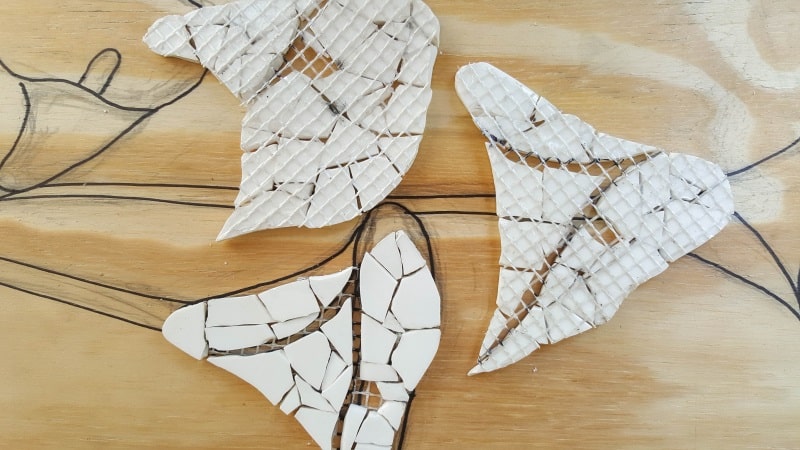
Since I’ll be using black grout to finish these arums off, I painted my board black to match. Place the arums on the board to get a sense of where they should go.
When you’re happy glue them down.
Once the glue is completely dry, use masking tape to mask off the area around the arums.
The masking tape serves two purposes; it keeps the grouting messiness to a minimum and it will help create a clean grout outline around the arums. Mix the grout according to the manufacturer’s instructions.

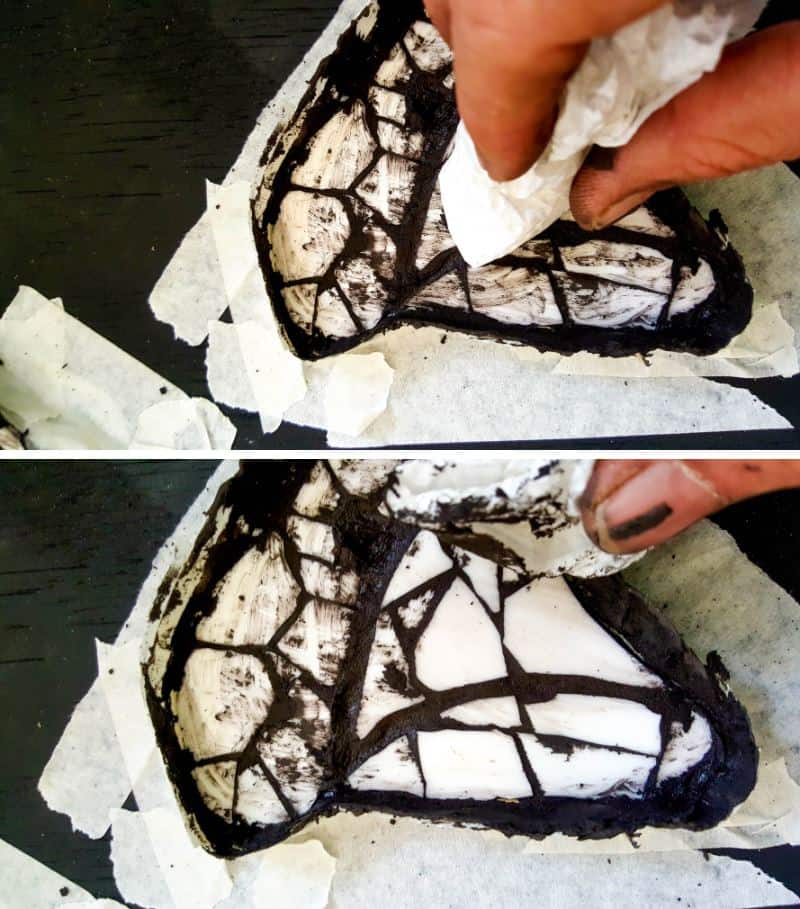
Put a dollop of grout on the arum. Since grout applicators or squeegees don’t normally come in small sizes, I use a broken ice cream stick to spread the grout into all the nooks and crannies. A credit card will also work.

Use a damp kitchen towel or clean rag to remove any excess grout. Leave the grout to cure fully.
And finally, glue the clay stalk and spadix in place.
The arums are a great beginner project, especially if you use a broken China plate.
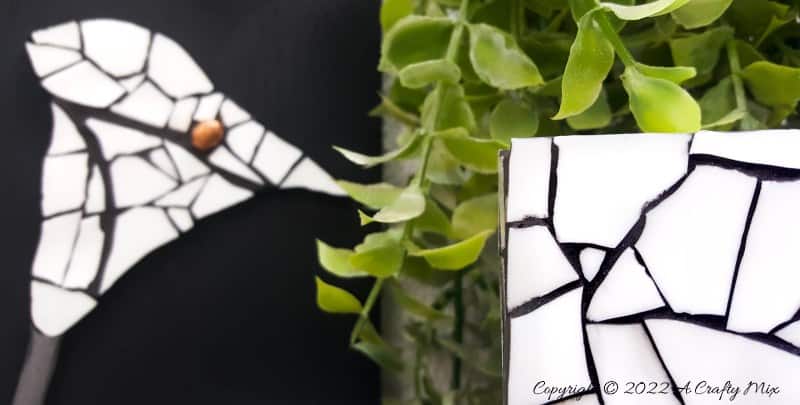
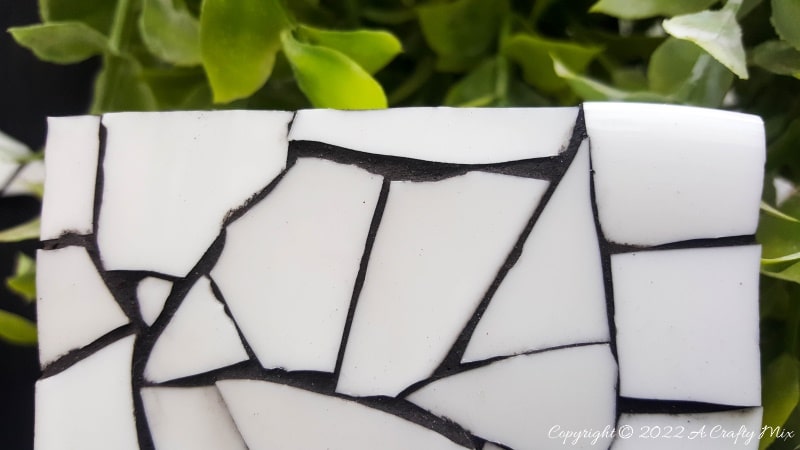
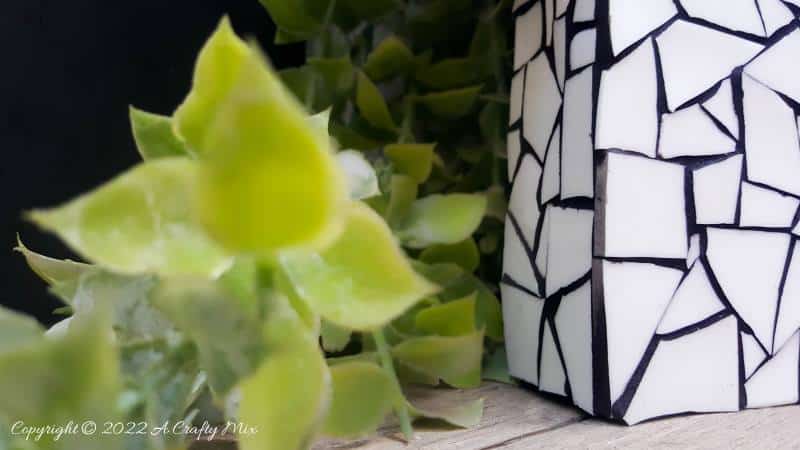
And if your plate is a big one like mine, you’ll have enough pieces left over to make a cross too.
Well, that’s not 100% true, but I used a large silver charm to fill in a gap.

And only the front and sides of the cross have been mosaicked. The back is raw. I figured no one would notice, so all good.
What do you think? Have you used a broken China plate to make a mosaic? What did you make?

If you like the idea of using a broken China plate to make an arum lily mosaic, don’t forget to pin it for later.
Sharing is caring
Oh and if you’re looking for some of the things we used, we’ve got you covered. Disclosure: Clicking on the links below, means we may receive a commission from Amazon. But don’t worry it won’t come out of your pocket, and it helps us make more amazing crafts to share with you 😉


And if you prefer to buy rather than DIY, then maybe these beauties will appeal.


And as always, wishing you a wonderful, crafty week filled with lots of love. Thank you for popping in for a visit.

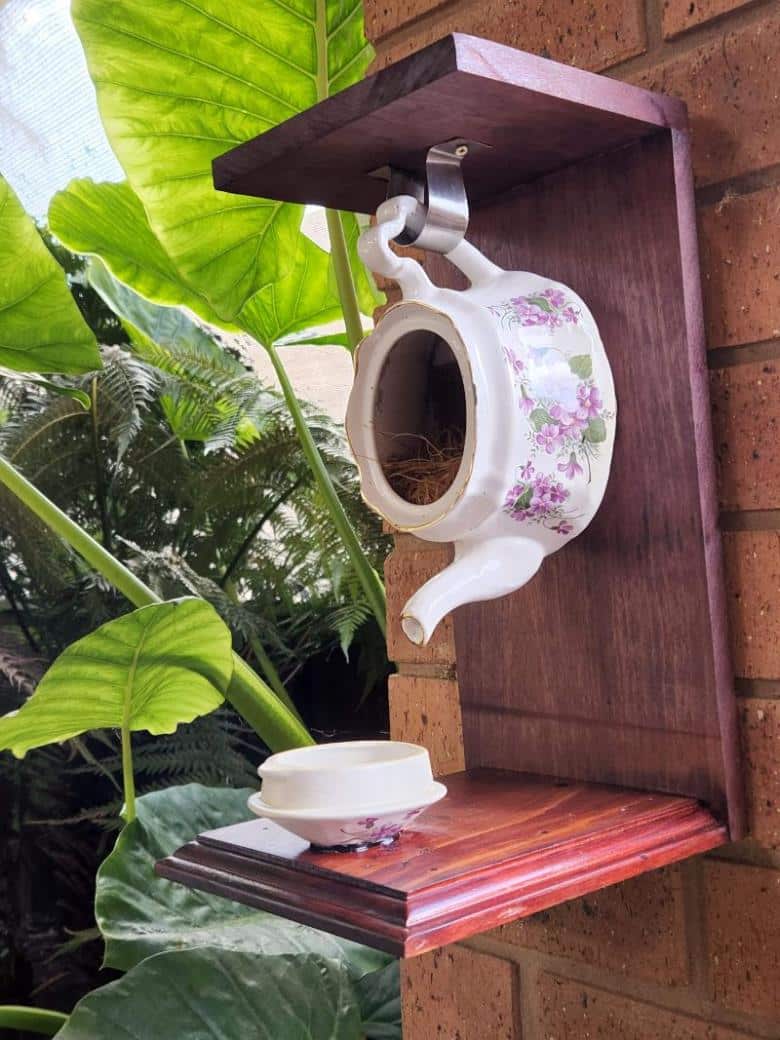
Psst, if you have a China teapot that you don’t use anymore, my friend Anita repurposed one into this adorable birdhouse, and she shared a full tutorial on how she did it too.
Last update on 2026-06-03 / Source Amazon Affiliates