If you’ve been following our blog for a while, you’ll know how much we love our fairy gardens and all things miniature. A few weeks ago, we shared a tutorial for making a miniature teddy bear. That little bear was part of a bigger project; making this fantasy wrought iron fairy daybed for a friend of ours.

Isn’t it just adorable? And it’s not hard to make either if you use this super-secret wire-working weapon 😉
But I’m getting ahead of myself. The fantasy daybed is a fun and whimsical addition to any fairy garden or doll’s house. All fairies need a special little place where they can unwind after a long day of making magic and sprinkling fairy dust 😉
Okay, before we get to the tutorial, be sure to follow us on Facebook, Twitter, Pinterest, Instagram, and hit that subscribe button below, so you never miss a post 😉
What You Need To Make a Fantasy Fairy Daybed
- A block of wood
- Pop rivets
- Wire Cutters and needle nose pliers
- Jewelry wire
I used 12 and 20-gauge copper wire. The higher the gauge, the thinner and softer the wire is. You can read more about wire gauges in this post.

We’ll start with the easiest part; the base for the daybed.
Making the Base For The Fairy Daybed
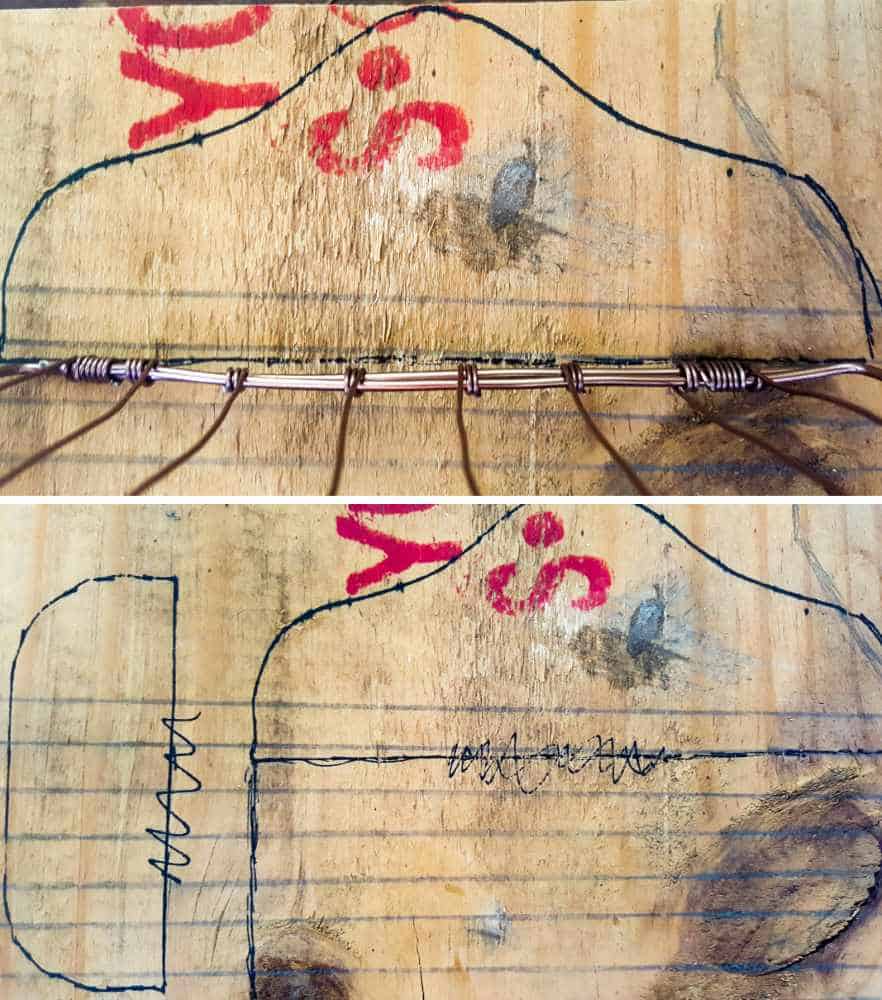
Using the thickest jewelry wire bend it into a rectangle overlapping one of the long sides as shown below. Wrap some of the thinner wire around the overlapping sides to help keep the shape. Divide the long sides into roughly equal parts and wrap the thinner wire across the width of the base.
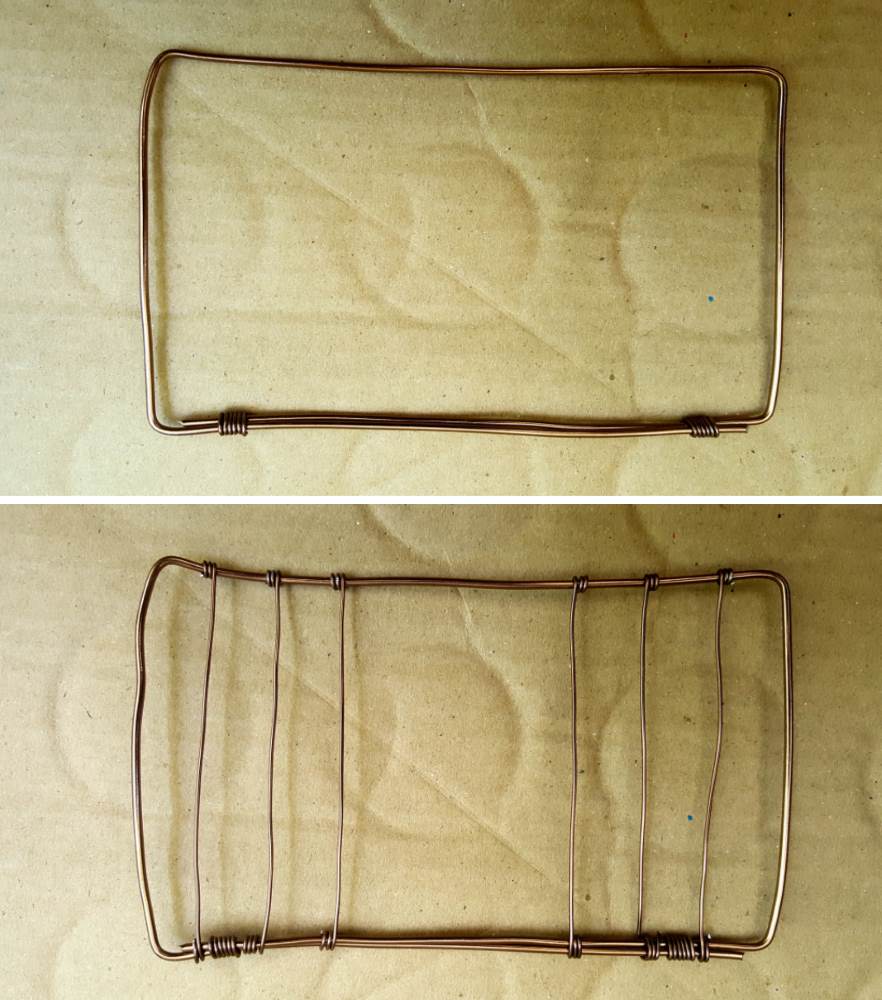
Don’t worry too much if they’re not exactly the same distance, we’ll be making a tufted mattress for the daybed in a little bit. To make the back and sides we need to create a template first.
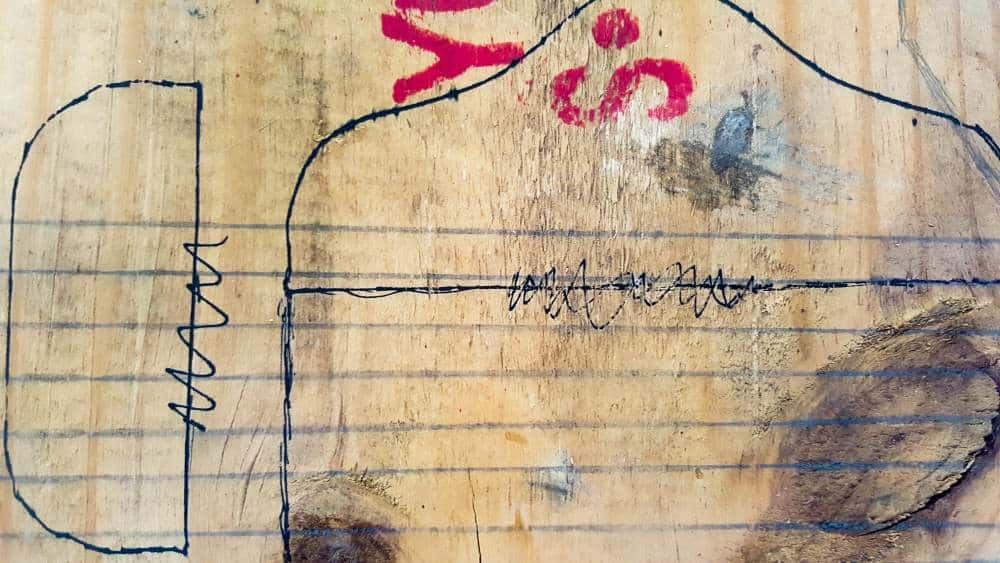
Creating a Template For The Back And Sides
After sketching a few ideas, I decided to keep the sides simple and give the back a curved shape. If you’d like to use the same design you can download a rough template here.
Transfer the design onto a piece of wood, using the base of the fairy daybed to make sure it’s the correct size and balanced.
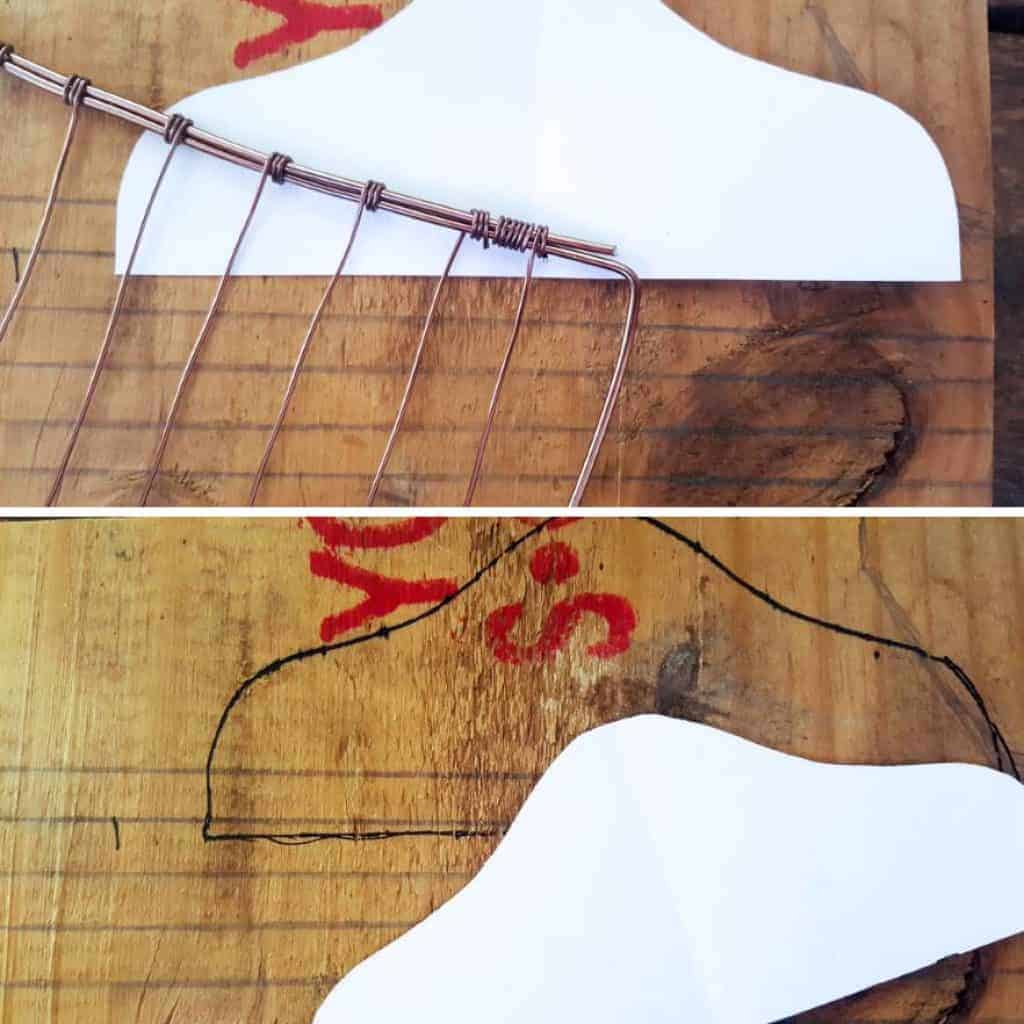
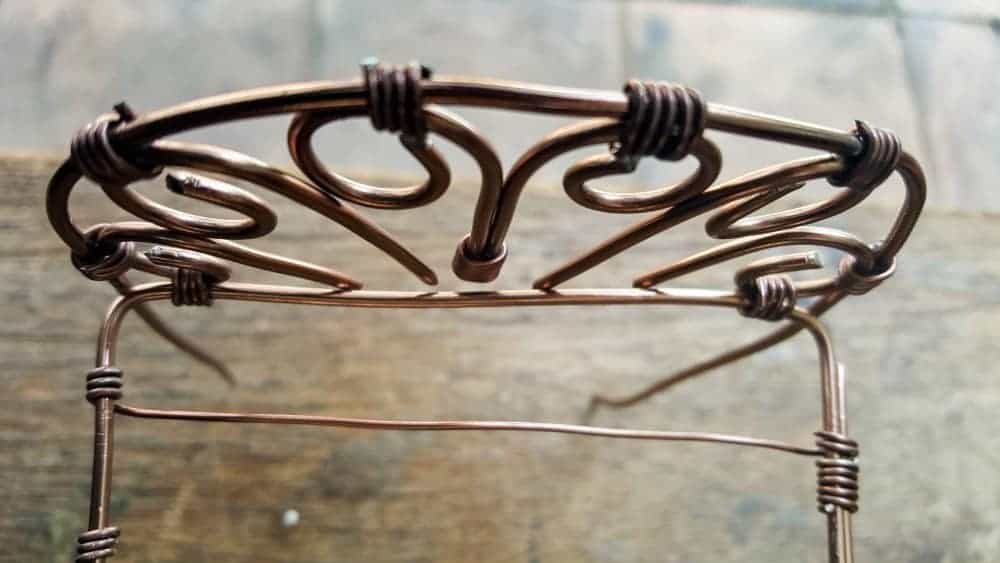
You should end up with something like this.
Once you’re happy that the back and side are in proportion, drill holes along the outline and insert the pop rivets. Since 12 gauge wire is a little more challenging to work with, the pop rivets make it much easier to bend into shape. They act as a guide when we create the back and sides.
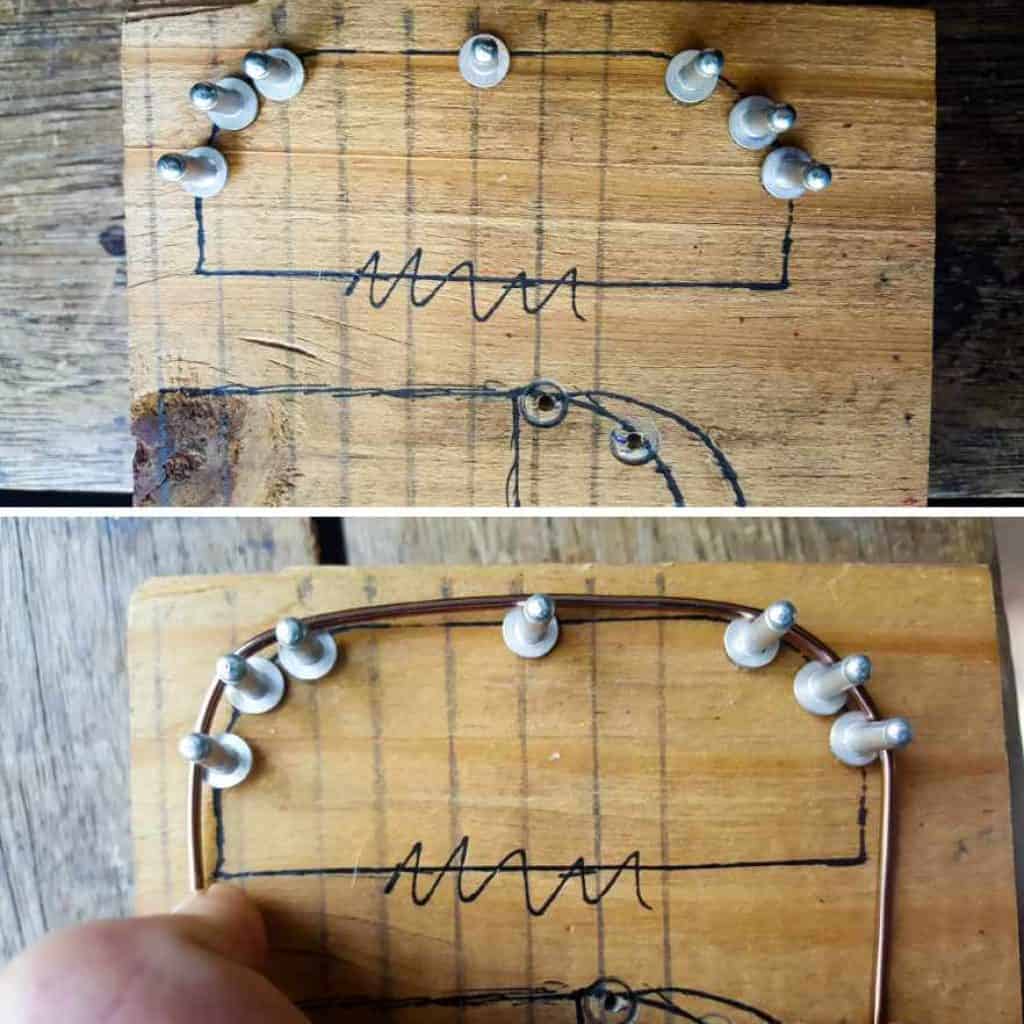
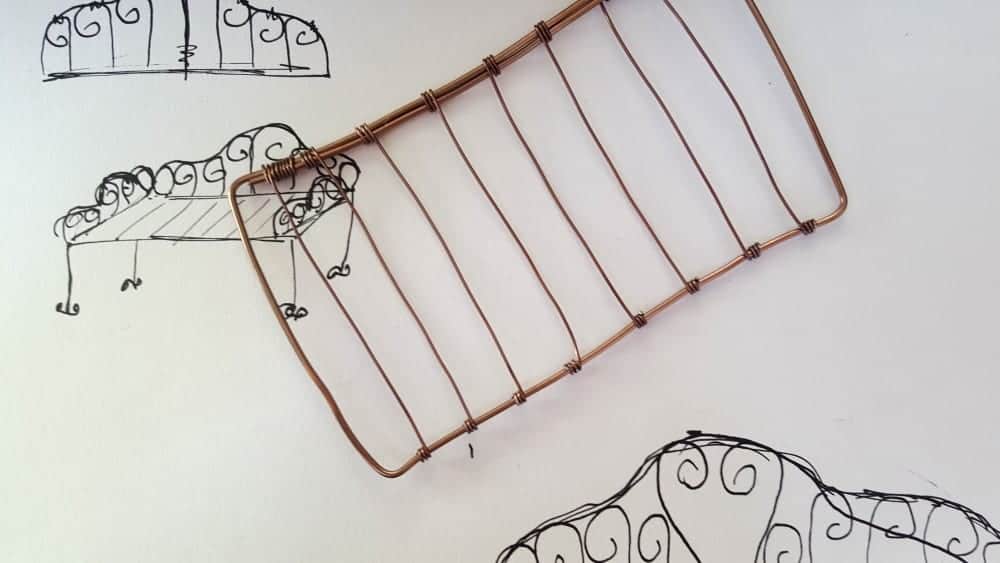
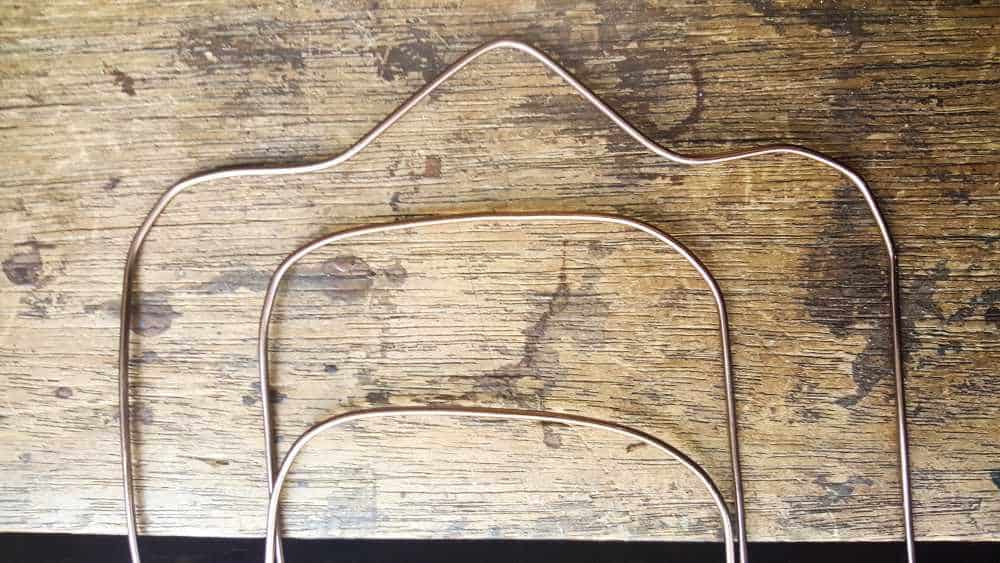
Cut a piece of the thicker wire (in our case the 12 gauge), taking into account how long you want the legs to be, and wind it around the pop rivets. You’ll need to make two side pieces and one back piece.
Create decorative “panels” by bending the thicker wire into different shapes. I went for a simple curly whirly shape, which I attached to the back and sides with the thinner wire. If you find the wire panels move around too much you can add a tiny bit of super glue to help keep them in place.
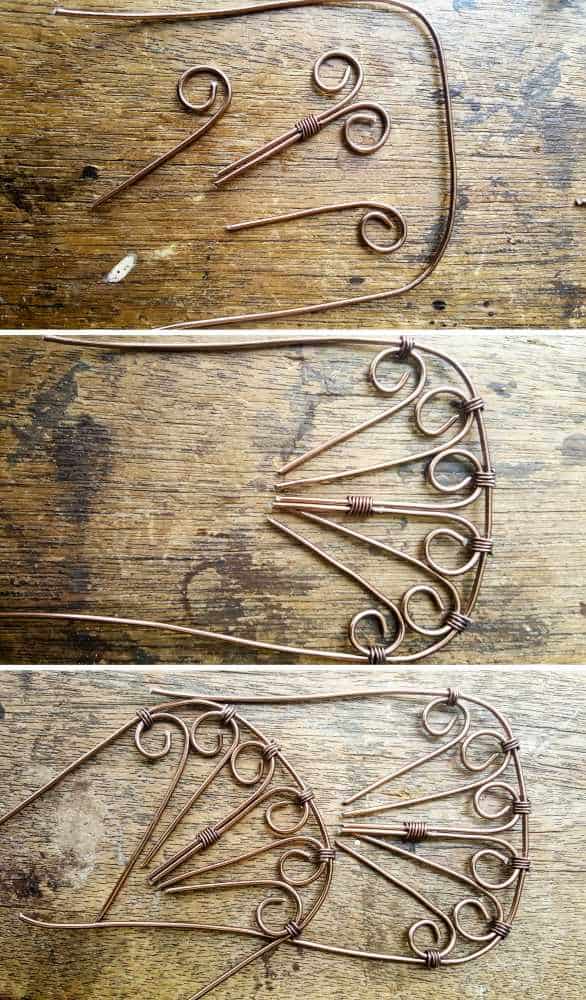
You should end up with something like the piccy above. Attach the back and sides to the base of the fairy daybed using the thinner wire. Tidy up any scraggly bits of wire by trimming them away with wire cutters.
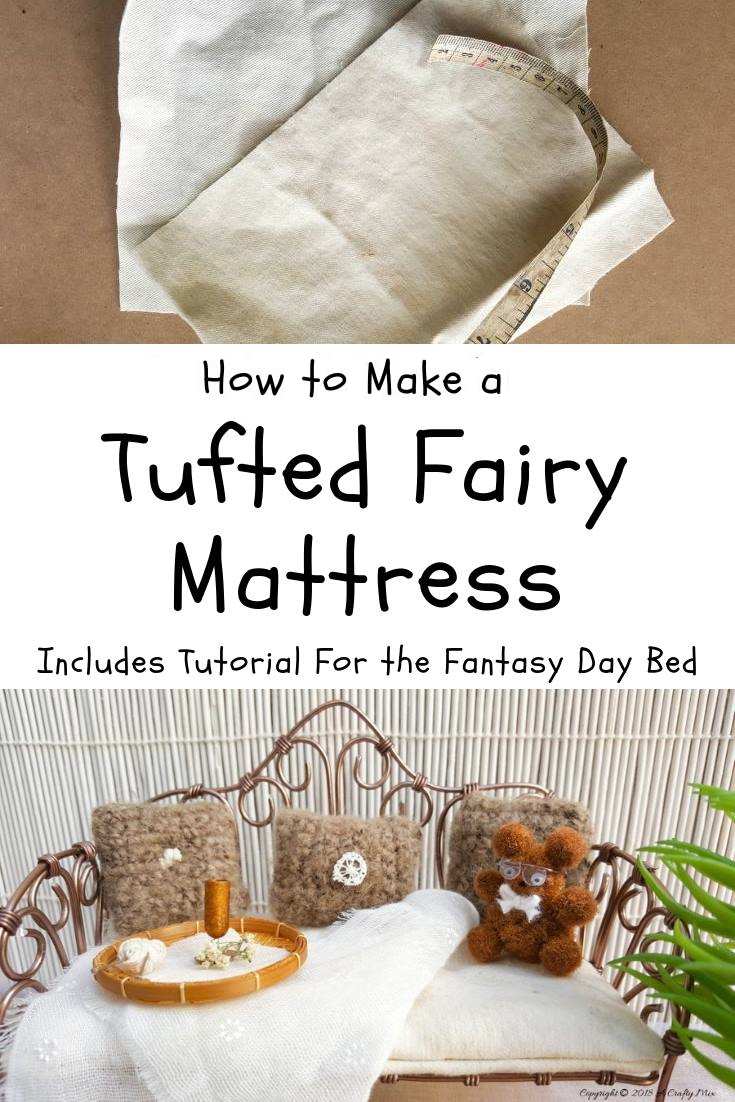
Making a Miniature Tufted Mattress
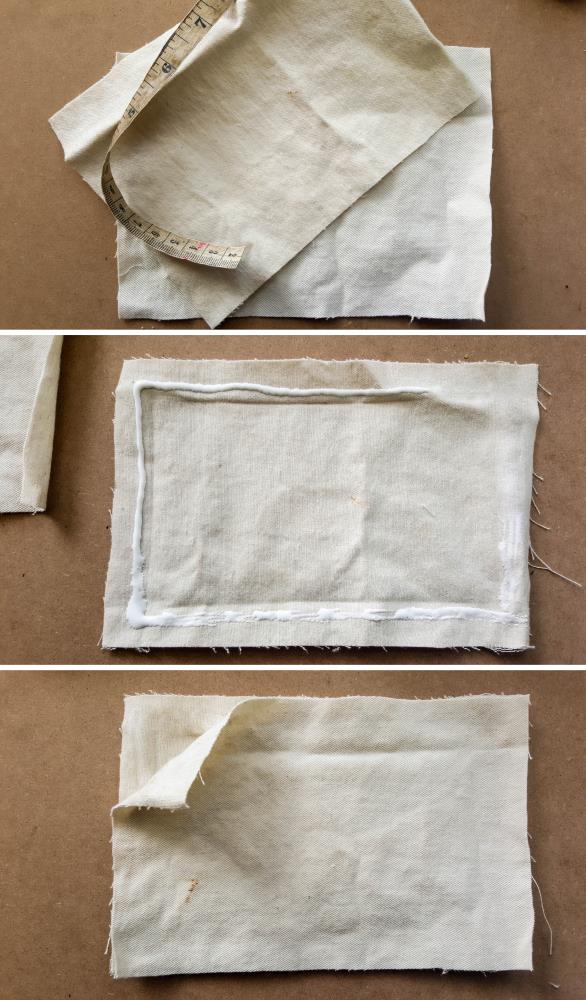
To complete the fantasy daybed, I made a small tufted mattress using scrap pieces of fabric, cotton thread, and fabric glue. The little mattress is super easy to do and I love including them in our fairy crafts. If your fairy daybed is going outside, I would suggest making the mattress from a piece of waterproof fabric. This little one is going inside a terrarium with faux plants. Measure the base of the daybed and add a seam allowance of about 1 cm (1/2″) all around. Cut two pieces of fabric based on the above measurements. Add fabric glue on the edges, leaving a gap on one side, and glue the two pieces together.
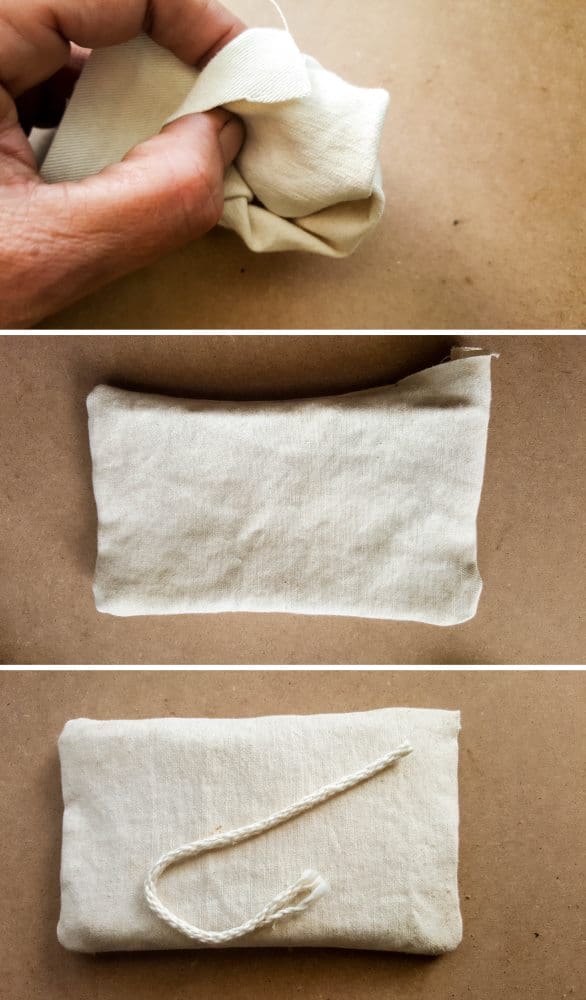
Once the glue dries, flip the mattress cover inside out and stuff, before gluing or hand stitching the open edge closed.
Now for the fun bit, hand-stitching and tufting the little mattress. Use thick cotton or embroidery thread and a sewing needle. Double-knot the thread so it won’t pull through the fabric. Start at one corner, about an inch in, and pull the thread through the mattress and out the other side. Make another knot to secure and cut the thread. Repeat on the other corners.
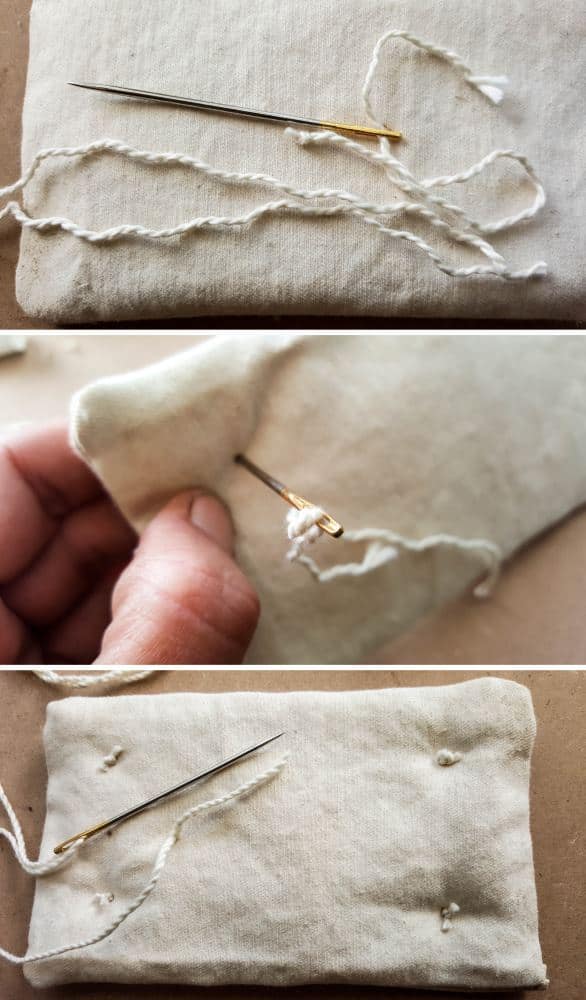
Add more “tufts” working your way inwards. My stitches are spaced about 2 cm (1″), with the middle row staggered.

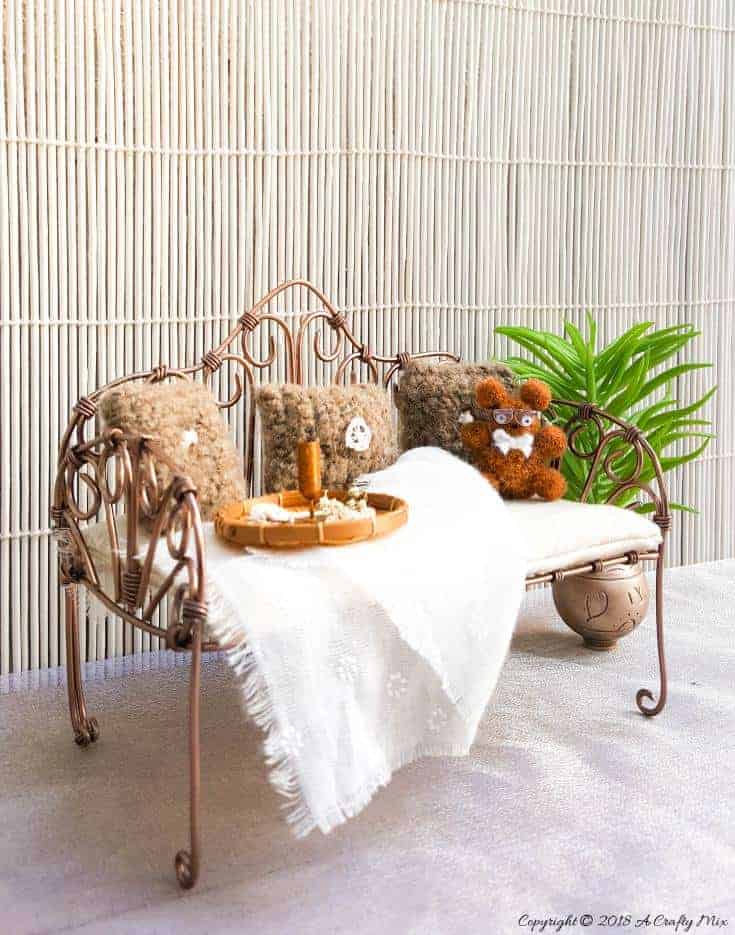
That’s it. The fantasy fairy daybed is all done. Add a few cushions, pretty linen, and that miniature teddy bear.
Wanna see some pretty after-shots?
Here she is all dolled up for her photoshoot.
What do you think?
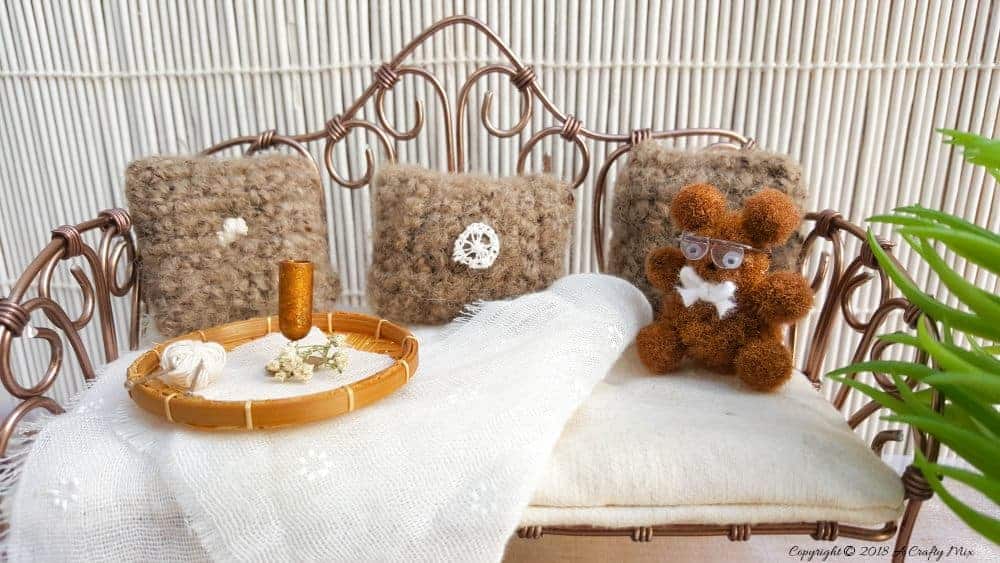
And if you really want to spoil your fairies, you can add a little tray, a goblet filled with golden mead, and a ball of wool with knitting needles. Pssst…. The wine goblet is a pill capsule that’s been painted in a rich copper color with a thumbtack stuck on the bottom for the stem.

A special friend of ours crocheted those little pillows you see in the back.
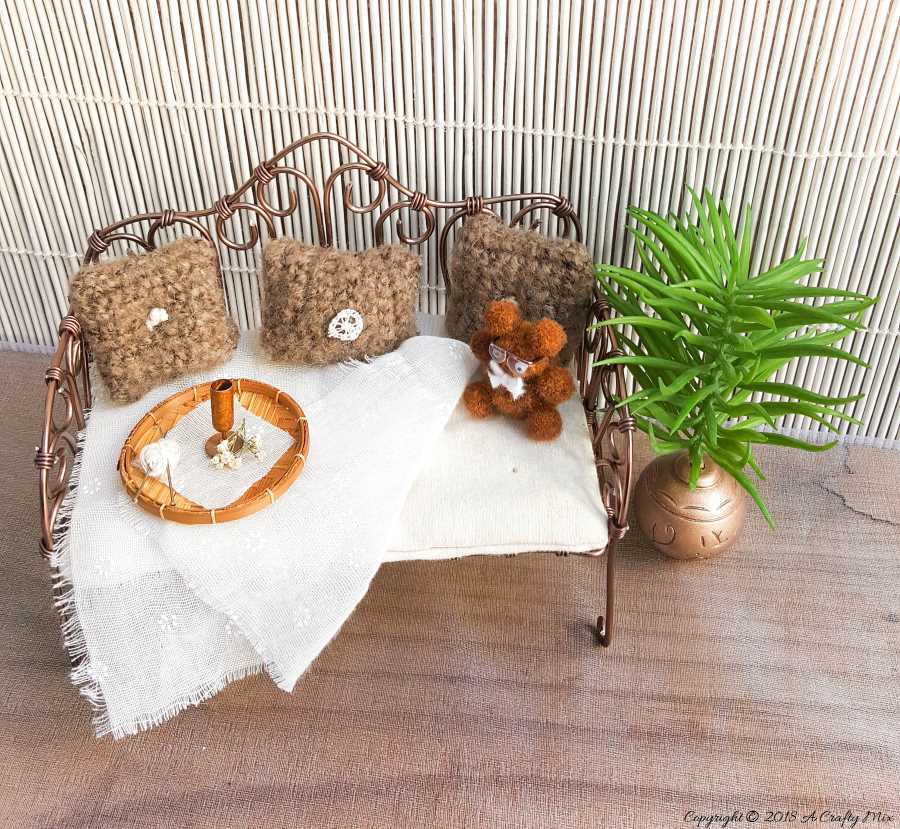
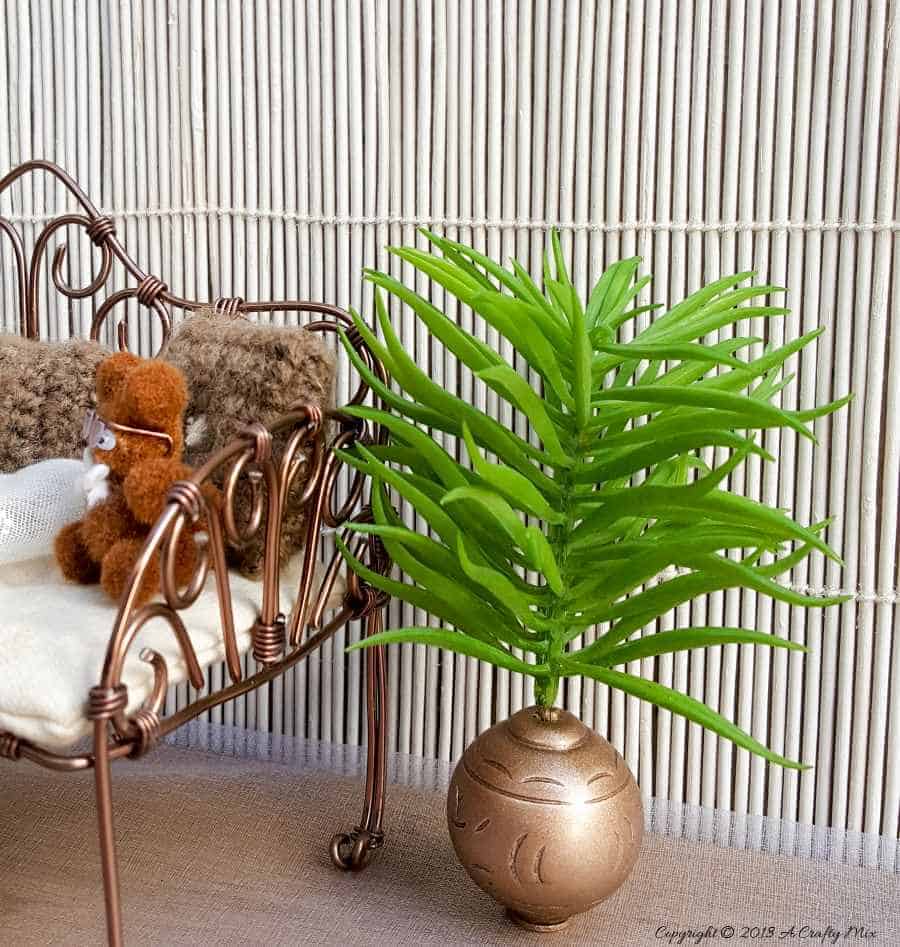
The perfect spot for fairies to relax and unwind. They even have a little teddy bear to snuggle with.

And a pot plant made from a large bead and faux greenery.
I would love to know what you think of the fairy daybed. Is it something you would make for your fairy garden?
And don’t forget to pin it for later if you’re keen to make something similar

BTW if you’re looking for some of the things we used, we’ve got you covered Disclosure: Clicking on the links below, means we may receive a commission from Amazon. But don’t worry it won’t come out of your pocket, and it helps us come up with more amazing craft ideas to share with you 😉


And as always, wishing you a wonderful, crafty week filled with lots of love. Thank you for popping in for a visit.

Last update on 2026-06-03 / Source Amazon Affiliates