In partnership with Fujifilm and Instax South Africa
Sometimes the universe goes ka-ching and the stars align and things happen. Case in point. While making a few wire picture frames to add to our gallery wall, we got an email from Fujifilm and Instax South Africa. They wanted to find out if we’d like to play around with the new Instax Share SP-3 SQ. Of course, we said YES!!! It prints Polaroid styled photos that remind me of the piccies my Mom took of us as kids and they look so cool in those frames. It’s like they were meant for each other.
I don’t know about you, but I love the old world charm of a Polaroid and the frames let them shine without being overbearing. But before I share the wire picture frame tutorial with you, let me quickly tell you a little more about the Instax Share SP-3 SQ.
What’s the Instax Share SP-3 SQ?
Such a big name for a teeny tiny little printer that fits in the palm of your hand 😉 It looks like a space ship with these lights on the front that shows battery life and how many prints you can still make. There are two buttons on the side; one to turn the printer on and the other to reprint a photo. You can print any images from your phone’s gallery or social media channels, like Instagram or Facebook wirelessly to the printer.
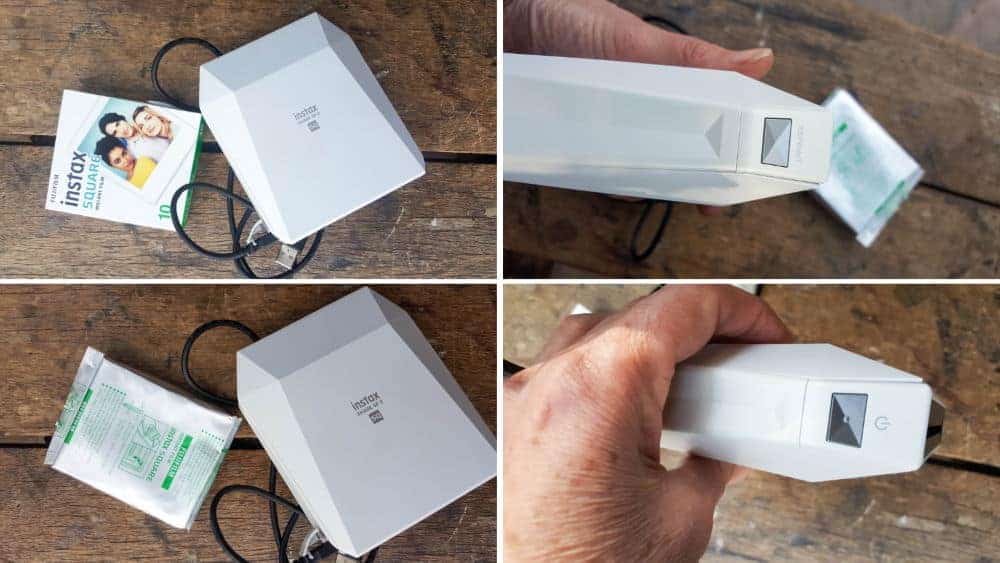
The setup was pretty straight forward too. Just download and install the app on your mobile, switch the printer on, connect with wi-fi and you’re good to go. The app has a whole bunch of fun templates and filters you can play with to edit your image, before sending it off to be printed. It takes maybe 10 seconds to print the image and the photo takes about 5 minutes to develop. Just like the good old days. The hubby and I were like little kids watching those pictures appear 😀
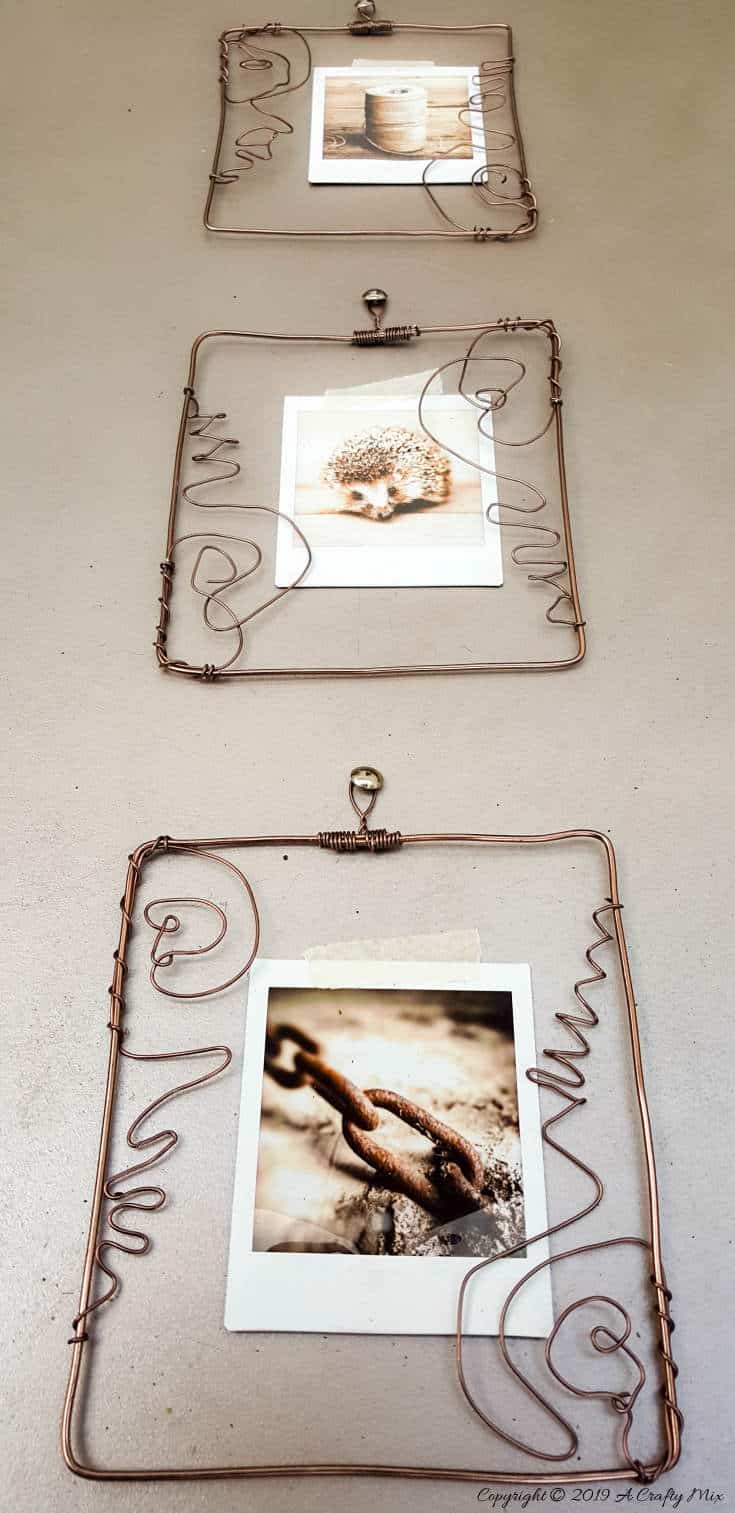
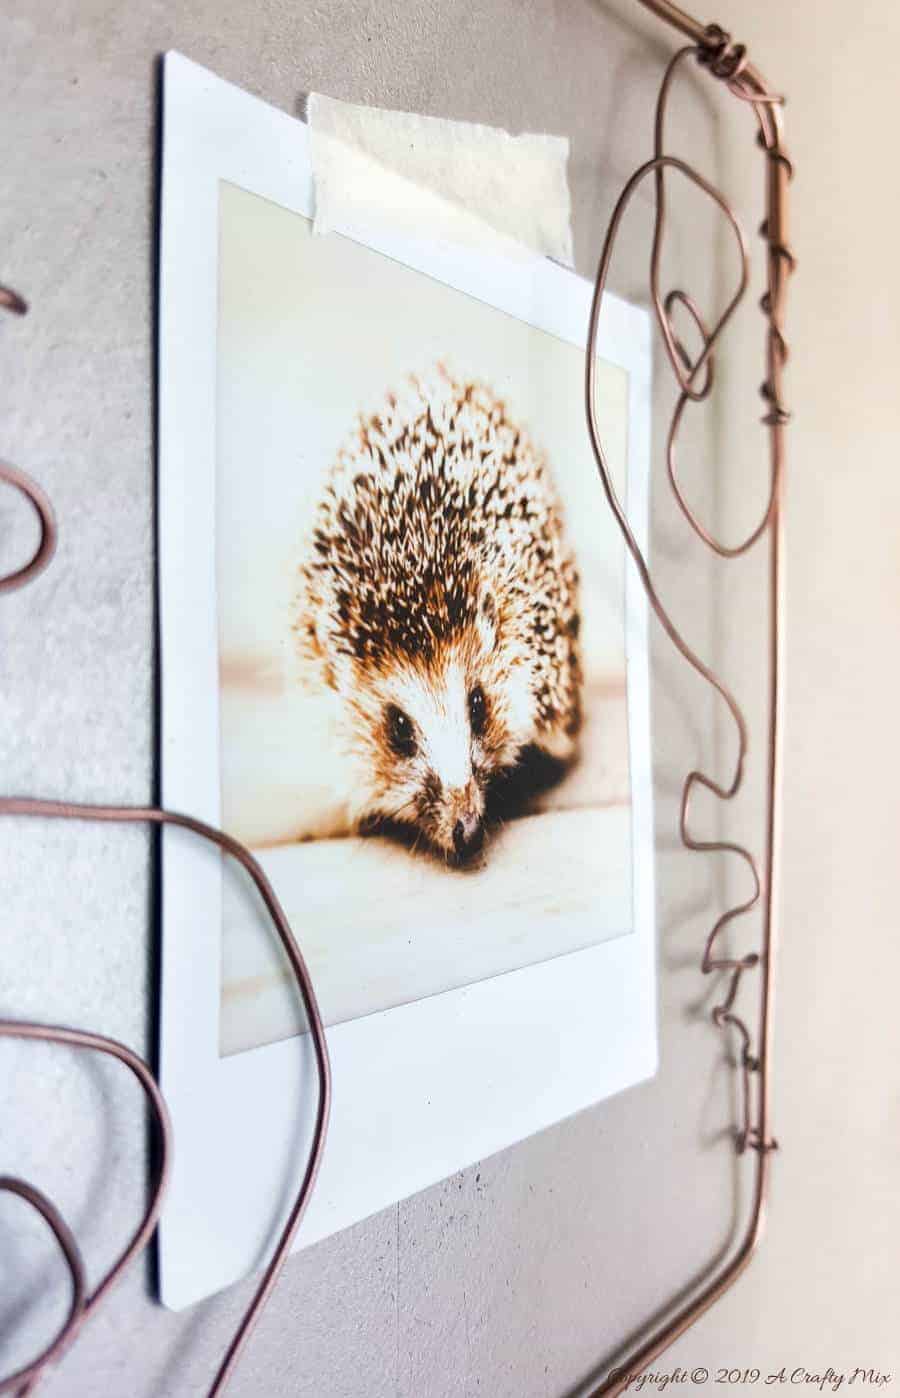
And the print quality is gorgeous. 318 dots per inch. I can just imagine how much fun it would be to have one of these printers at a wedding or birthday bash. The photos would make such lovely mementos of the day. For the wire picture frames, I choose three images and applied the sepia filter before printing them.
Pretty cool right?? Now any time I want to change the images I can just remove them and stick a new one in the frame. And since we really enjoyed playing around with that little printer, with the big-name 😉 we have a whole bunch of images to choose from too.
Right, before I show you how to make these, be sure to follow us on Facebook, Twitter, Pinterest, or Instagram. And don’t forget to subscribe so you’ll never miss a post!
Okay, enough of my waffling, I promised you a tutorial to make wire picture frames to show off your photos and art.
What you need to make wire picture frames
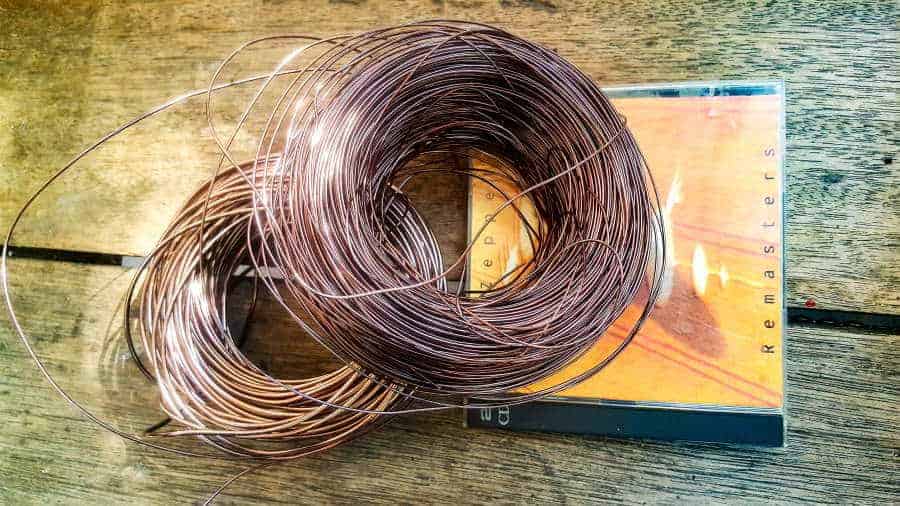
- Jewelry wire, 12 gauge, and 18 or 20 gauge. You can read more about gauges here.
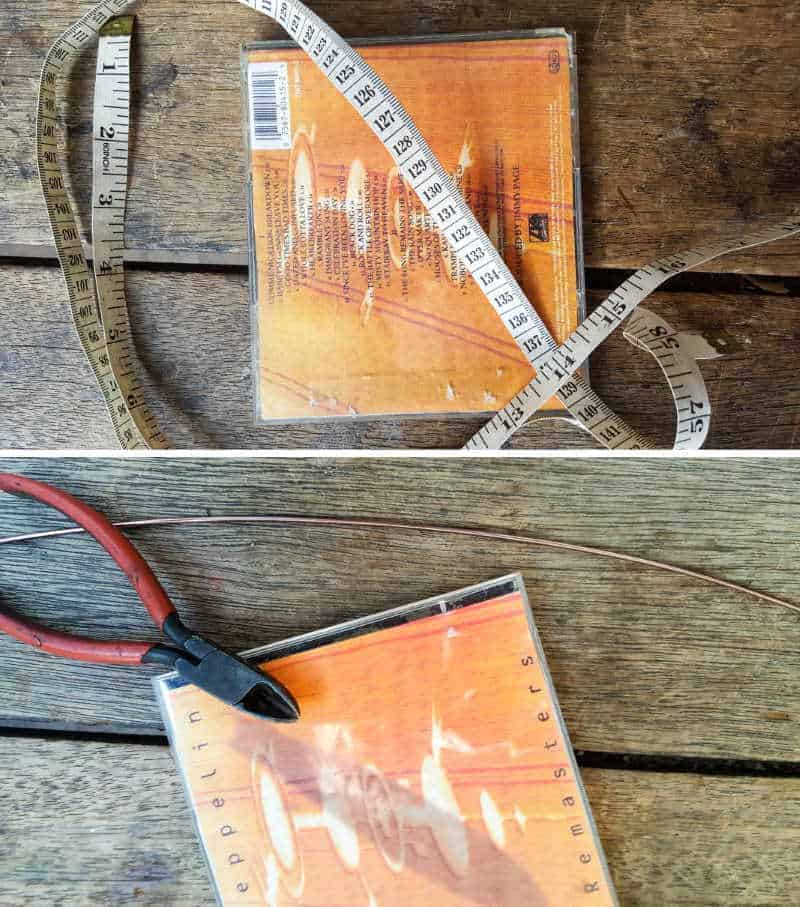
- Wire cutters and needle nose pliers
- Pictures, photos, drawings, cute quotes etc.
- Something to use as a template for creating the basic frame
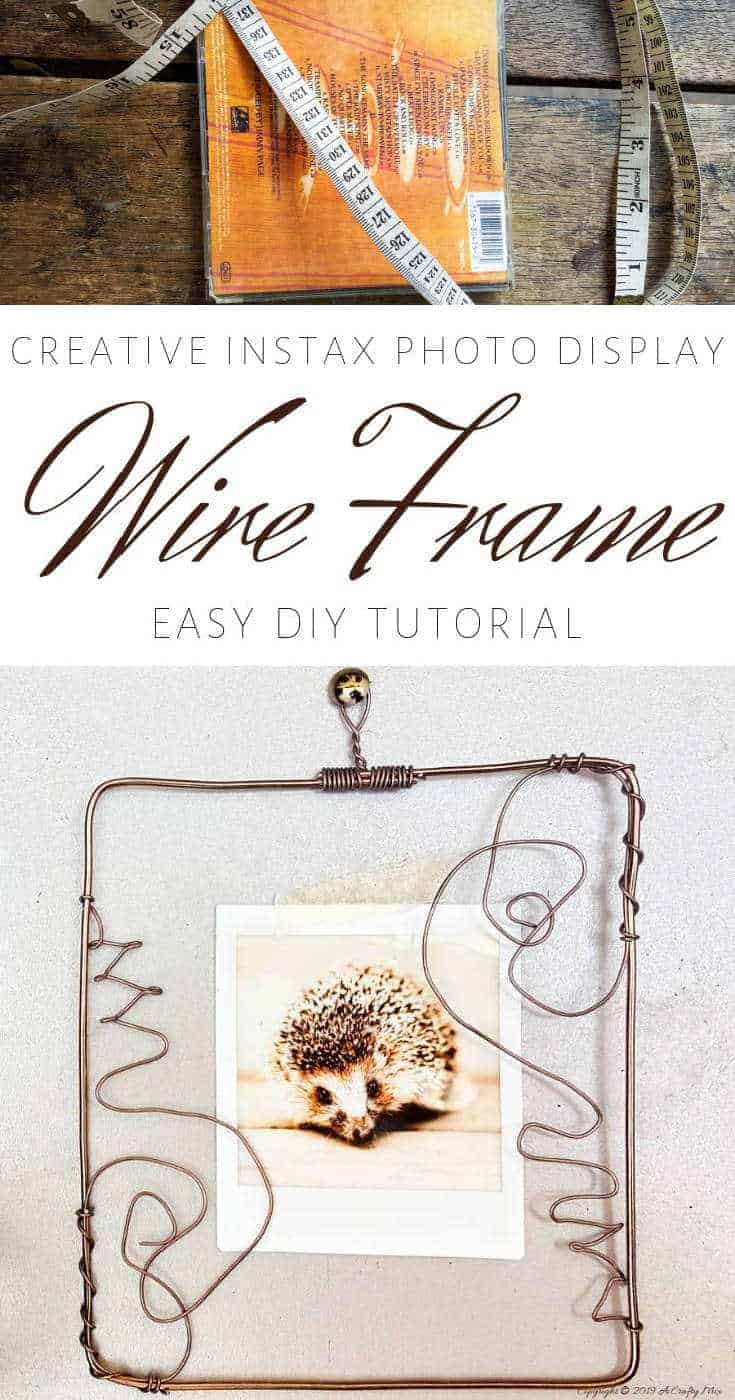
For these frames, I used a CD case. It was the right size, but a piece of wood, cardboard box or old wooden frame will work too.
How to make wire picture frames
These little frames are almost as easy as the “Easiest Frames Ever”. Almost 😉 The trick is getting the basic frame squarish, which is where the block of wood or CD case comes in so handy. Measure around whatever you’ll be using as a template, add 2” and cut a piece of the 12 gauge wire according to the measurements.
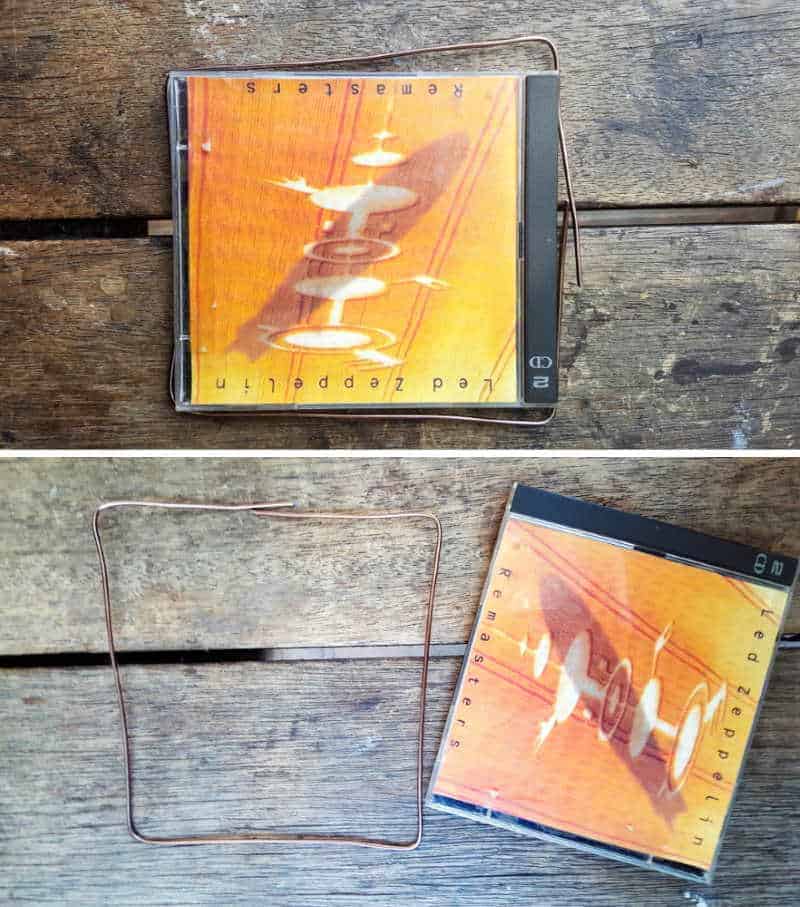
Mark the top middle point of your template. The CD case I used already had a small marking so I just used that. Starting at the top, wind the wire around the template overlapping the wire at the top middle point.
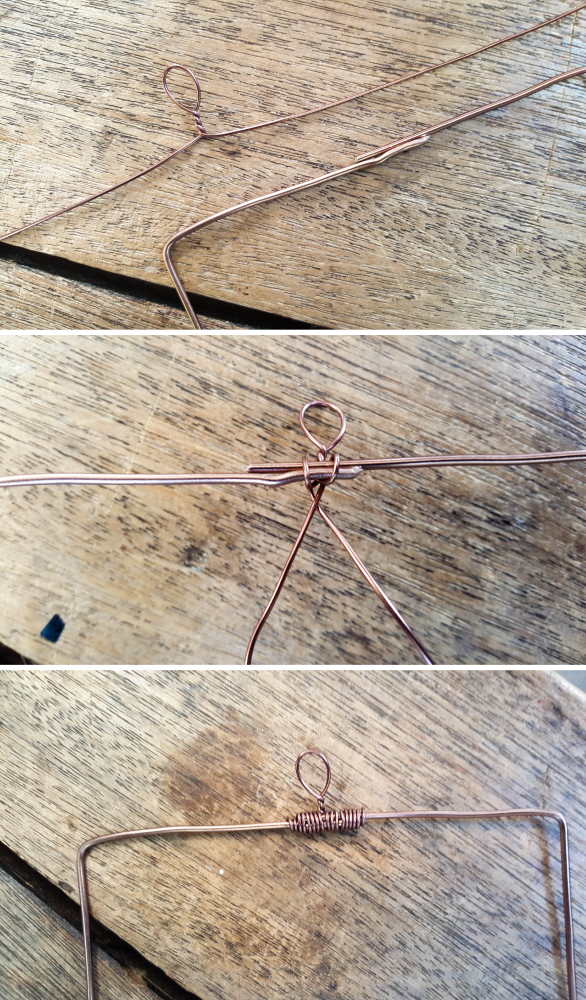
Cut a piece of the thinner wire and bend it in half to make a small loop. Wind the extra bits of wire on either side of the loop tightly around the overlap to close the frame.
Time to get creative with those frames
Once the basic wire frame has been formed, you can get creative on how to embellish it. Confession time. There’s this little bitch Miss Perfect inside my head that always tries to interfere and wants to do things just right. If you have one of those voices in your head too, tell them to hush up 😉
It's not about perfection; it's about the joy of creating.
And when you create something with wire it’s always easier if you let your hands do the talking instead of your head. To make the embellishments, cut a few strands of the thinner wire and bend, twist, scrunch or squiggle interesting shapes and forms. Don’t overthink things, just do it 😉
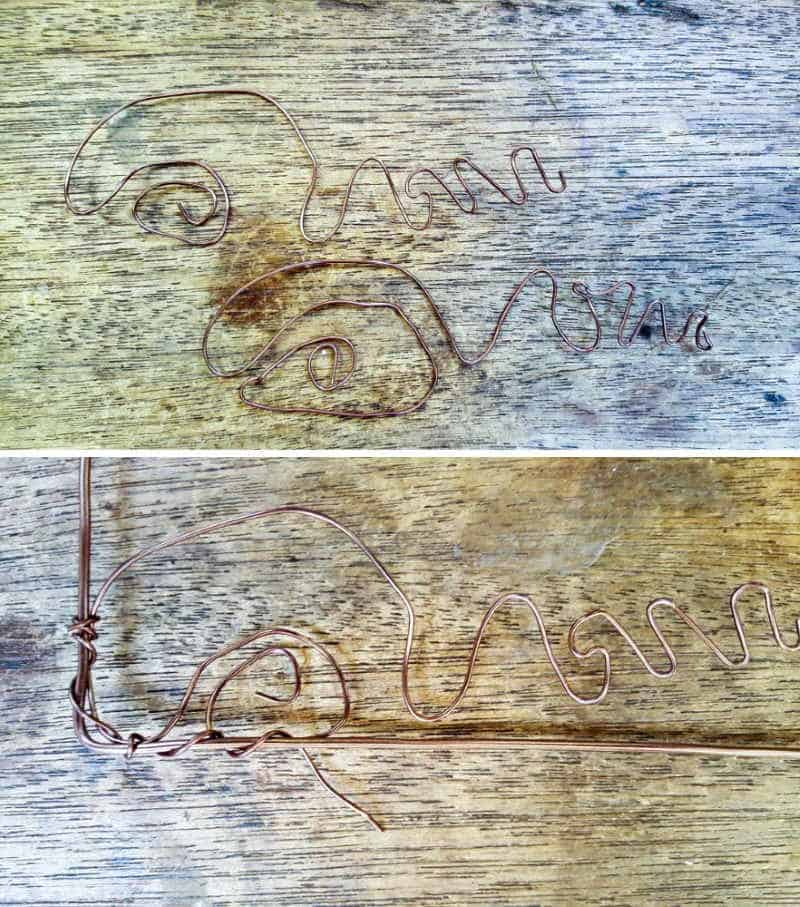
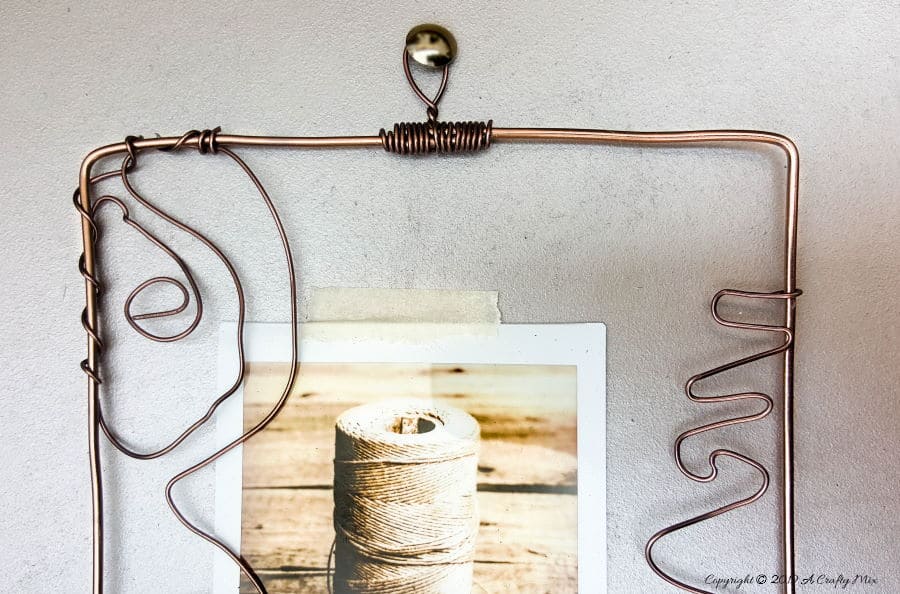
When you’re happy with your squiggles and squaggles (that’s a word right?), attach them inside the wire picture frames with a bit of the thinner wire to finish them off. Hang and enjoy.
The photos are stuck inside the frames with masking tape so they’re easy to change around. If masking tape isn’t your thing you can use some twine and pegs like we did with this yardstick photo display. Or you can make those squiggles and squaggles 😉 bigger and slip the photo in between the wire.
The frames hardly weigh a thing, so you can hang them on a mobile and add the photos on with a peg or bulldog clips.
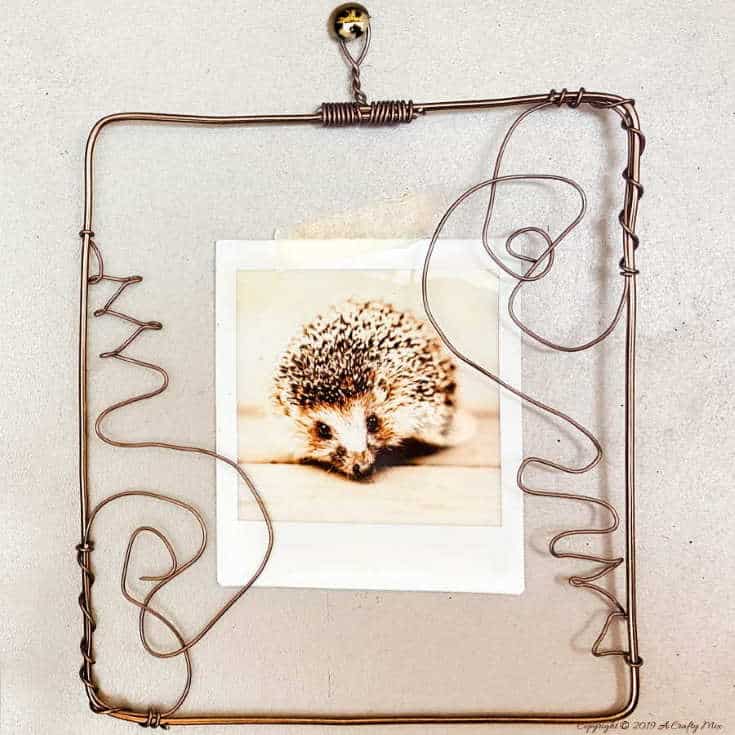
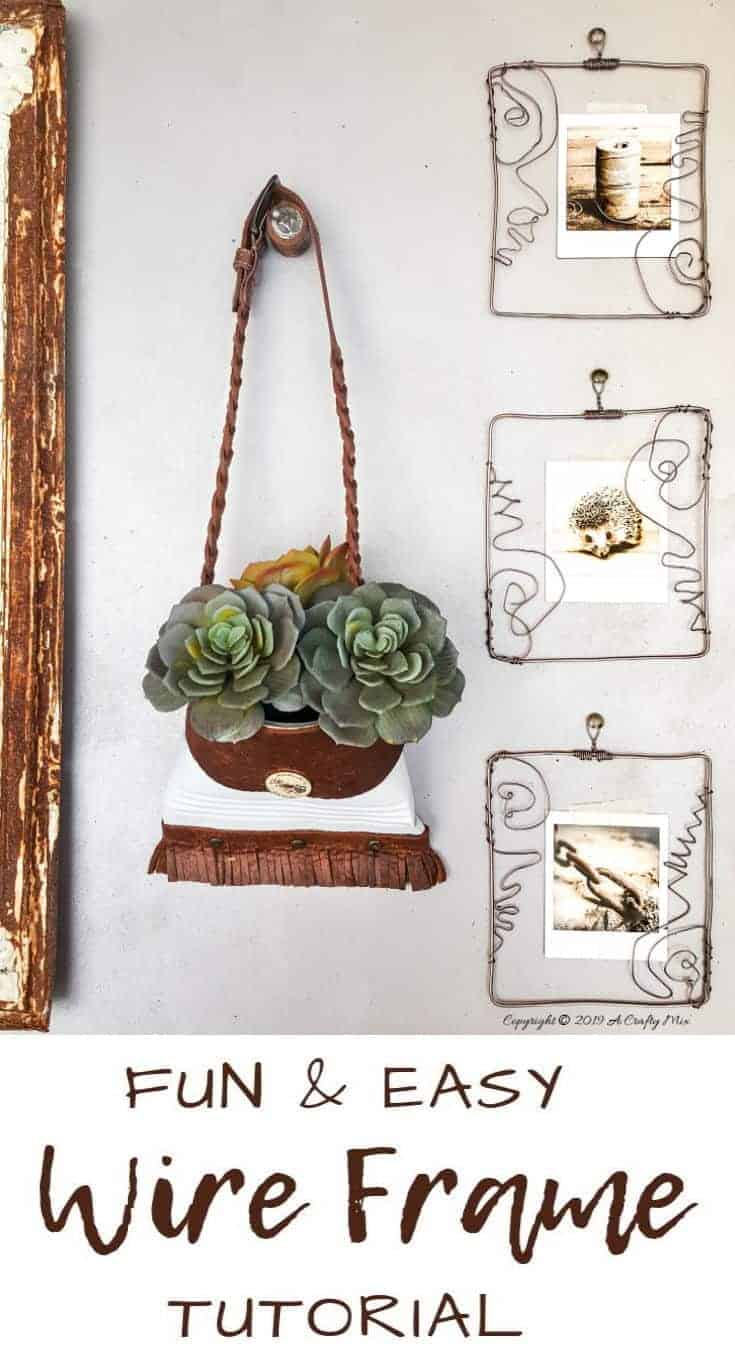
Don’t you just love that cute little hedgehog?
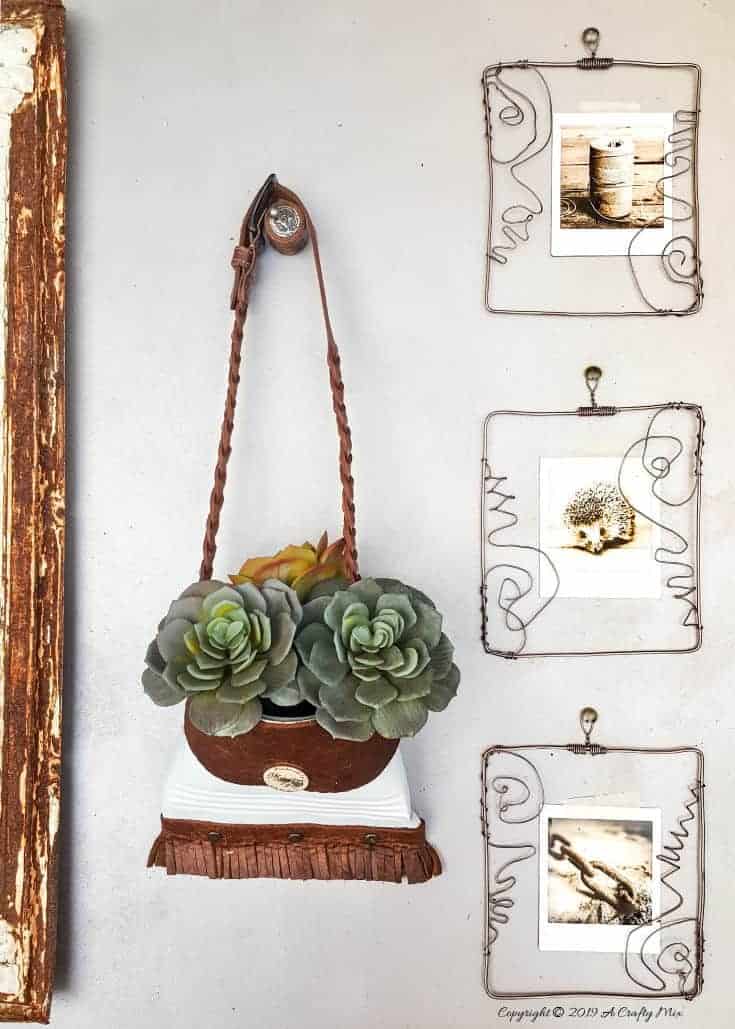
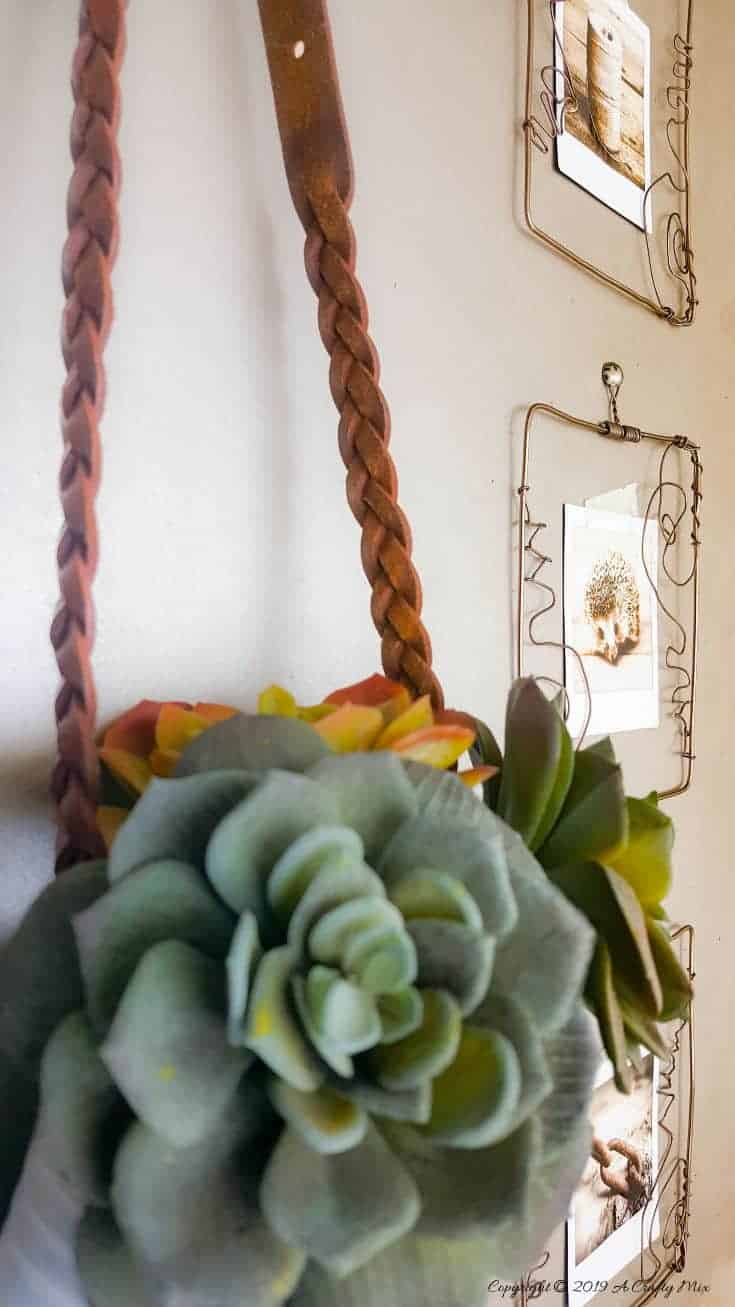
The frames add a lovely, free-spirited vibe to our gallery wall, which I’m really happy about. They’re pretty versatile too. You can add quotes or post-it reminders or use them to showcase the kid’s latest work of art. We hung our creative wire picture frames alongside a tin can handbag filled with faux succulents.
I’d love to know what you think of the wire picture frames. Is it something you would put on your gallery wall?
If you like the idea, don’t forget to pin it for later.
Oh and if you’re looking for some of the things we used, we’ve got you covered Disclosure: Clicking on the links below, means we may receive a commission from Amazon. But don’t worry it won’t come out of your pocket, and it helps us come up with more amazing craft ideas to share with you 😉

And if you prefer to buy rather than DIY


Until next time, hope you have a beautiful crafty week.

Last update on 2026-06-03 / Source Amazon Affiliates