
Creating wall art isn’t something that should only be done by the pros. You can make your own with this DIY wire dress tutorial. They’re elegant, whimsical, and loads of fun too.

Don’t get me wrong, I absolutely love supporting our local artists, but if the only art you can afford is mass-produced, you may just want to get those creative juices flowing and make one a few of these instead.

And it’s such a fantastic feeling knowing that you made something yourself, am I right?
Okay, before we get to the tutorial, be sure to follow us on Facebook, Twitter, Pinterest, and Instagram. And don’t forget to subscribe to our monthly newsletter so you’ll never miss a post!
What you need to make the wire dress
I love using wire to create art. It’s so relaxing, and the wire seems to take on a life of its own as you bend and twist it around a form. For the wire dresses, I used 14 and 20 gauge black jewelry wire. We had a whole bunch left over from when we made the tree of life.

Besides the wire you’ll also need:
- Wire cutters and needle nose pliers
- Rough sketch of a dress. You can download the ones I used here – dress 1 and here – dress 2. Just right click on the picture and select “Save Image As”.
- Paper and printer
- Sticky tape
- Protective glasses – wire tends to jump around a lot while you’re working with it, so those glasses are essential. You don’t want to stab your eyes out
All righty then, let’s make some art, shall we? Before you start, you need to enlarge and print your rough sketch.
How to Enlarge and Print at Home
To enlarge a sketch, you can either get a print shop to do it for you or do it at home using this video tutorial. Simply upload the sketch and choose a size. It’s pretty straightforward. If you do it at home, you need to tape all the pages together to form one large sketch or template.

Making the Wire Dress
We’ll be using the enlarged sketch to guide us while we make the dress. Tape the thicker wire (14 gauge) down somewhere on your sketch. When making the dresses, I usually start at the top and work my way down. With the first dress, I started in the middle of the neckline where the little bow goes…..

And on the second dress, I worked my way around the buttons first before doing the rest of the dress. Just follow the sketch lines with the wire and tape it down as you go. Sticky tape is your best friend when it comes to making wire art.

Don’t worry too much if the wire and the sketch don’t match up exactly. Let your hands guide you and go with the flow. For sharp bends, you may need to use your needle-nose pliers. Or if you’re really strong, you can do it by hand. I find that the pliers make it much easier to get the exact curve bend.

When adding interesting details, like flowers and ruffles, it’s best to use thinner wire. It’s more forgiving, easier to work with, and great for joining two pieces together.

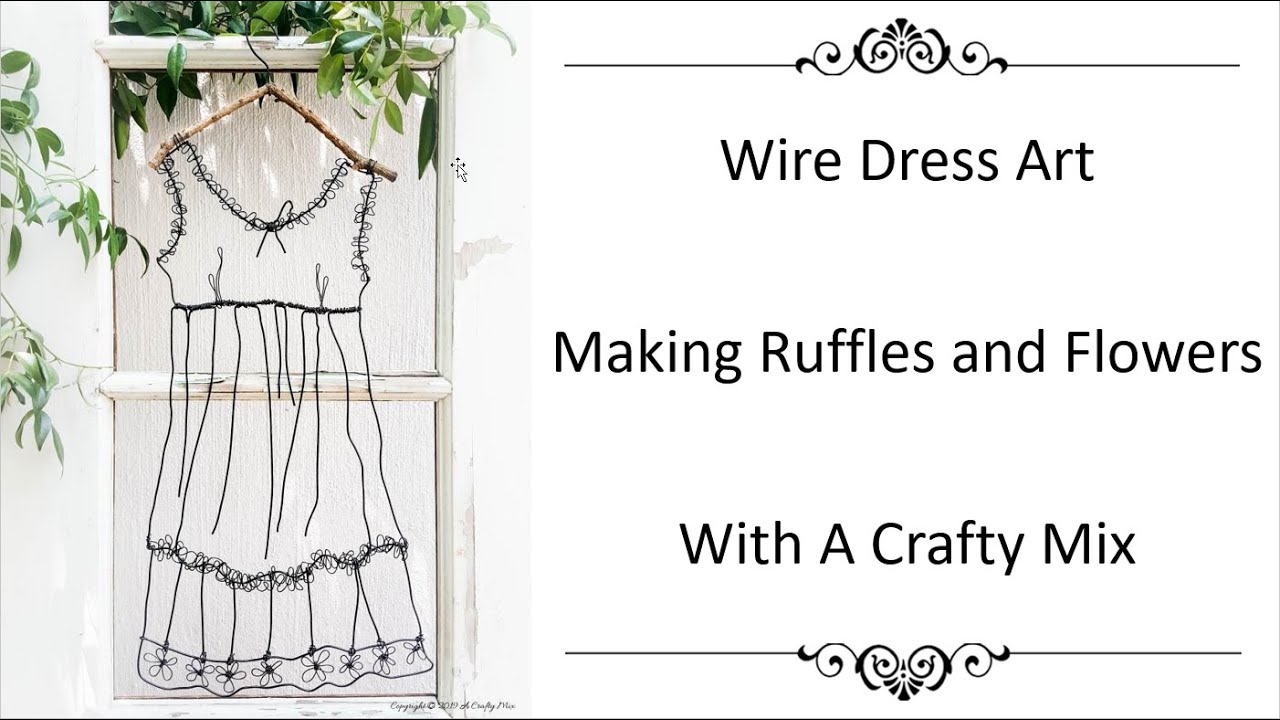
You can watch the video below to see how I did those. For more wire-bending tips and tricks, you can have a look at how I made Mozart.
Making a Branch Hanger
To finish the wire dress off and add something a little more special, I made some hangers using dried branches. They would look lovely hanging from a piece of driftwood too. To make the branch hangers, look for V-shaped branches or twigs that are about an inch thick.
Drill a hole through the branch at the point of the “V” and insert a hook-shaped piece of wire.

Use the thinner wire to attach the dress to the hanger.

Embellish the dress any way you want to. Ruffles or gathers work well ……..

……… or trim the wire dress with some flowers. It’s entirely up to you.

I would love to know what you think of the wire dresses.

Is it something you would make to hang on your wall?
If you like the idea of making a wire dress (or two), don’t forget to pin it for later.

Pssst; if you want to try your hand at some other wire art projects, here are a few to get you started:
- Art Deco wire birdcage
- Writing with wire
- Creative wire picture frames
- Bicycle wheel tree of life
- Matilda the Spider’s web
- Wire kitty memorial
- Large wire flower
- Wired sheep
And if you’re looking for some of the things we used, we’ve got you covered. Disclosure: Clicking on the links below means we may receive a commission from Amazon. But don’t worry, it won’t come out of your pocket, and it helps us make more amazing crafts to share with you 😉


And if you’d prefer to buy rather than DIY, then these beauties will work.



As always, here’s wishing you a beautiful, love-filled week. Happy crafting, my friend. Thank you for popping in for a visit.

Last update on 2026-10-03 / Source Amazon Affiliates
62 comments
What a beautiful piece of art, Michelle! I am so impressed by how lovely and creative this piece is. From the simplicity of the pattern to the end result, it is stunning. Thank you for sharing your incredible ideas.
You’re so welcome, Meegan and I’m really happy you like the wire dresses too.
This is fantastic! So clever making a pattern to go by. I love it! Pinned!
Thank you, Kim. Glad you enjoyed the tutorial and the pattern does make it so much easier when you’re a beginner.
This is really gorgeous, at first glance, it looks like a drawing sketch. Brilliant what you crafted it in wire.
I really love making wire art and the dresses are one of the easy ones that make a huge impact.
WANT for my garden but I’d have to make a way scaled-down version…totally art-challenged here, but you inspire me to try a teeny wire bit.
I’m so happy to hear that Cat. I hope your scaled-down version makes you want to make more. Wire art is so rewarding and you can make so many lovely things. Have fun
Wow, that is so pretty, it truly looks like a beautiful dress hanging and moving in the wind.
Thank you, Laurie. They’re whimsical and add something special to any space
What a cool idea for outdoor art!
Thanks so much, Maria. The wire dresses are definitely a hit and make quite the statement.
I’m not able to get the full tutorial what am I doing wrong
Oh dear Terry, I’m sorry to hear that. Are you struggling to download the images or is the written tutorial in the blog post unclear?
I LOVE THIS!!! <3 I have been really interested in doing wire/wall art for sometime now…I live in Texas and as you might guess barbed wire is plentiful. I know it is a much thicker wire than is in the video. Other than using a larger needle-nose pliers, do you have any pointers on how to simplify bending the thicker barbed wire?? Looking forward to seeing more of your projects!
Hey there Kim, so glad you like the dresses ? Other than pliers and really thick leather gloves ? basic wooden shapes help a lot. Softer wood works best. We’ve cut pine circles, triangles, and a square and use those to help shape the wire around. I hope it helps and that you have lots of fun making your wire art creations
You ARE a local artist!
? That’s so special, thank you. You’ve just made my day
I have loads of wire hangers. Would that type of wire work with this type of project? Not exactly sure what gauge it is.
Hey there Sandy, wire hangers could work, but they’ll be a little more difficult to bend. They’re normally a 10 or 12 gauge. If you can’t find jewelry wire I would suggest going to a hardware store and bending the various wires they sell. If you can bend it with your hands and it doesn’t jump back it will work. You can also ask for baling wire – that’s a 14 gauge. Best of luck and shout anytime if you need more info
When I click on the links you provided for the pics you made, they are the same one. Do you have the sketch of the dress that you actually show in this tutorial?
Thank you so much for pointing that out Michele. I’ve fixed the link so you should be able to download the sketches of both dresses now.