
Have you ever dabbled with wire art? I remember way back when in art class making little birds and sculptures from bits of wire that the telephone company had donated to the school. So I thought I’d see if I still had the knack and share some wire art tips with you too.

Did you know that wire art dates back to 3000 BC? Egyptians made the most amazing sculptures and woven jewelry, and in the early 20th century, many artists took the concept to a whole new level. Wire is such a lovely and forgiving medium to work with. We have a stockpile of the stuff that we use to sculpt the tree of life and wire dress wall art. Depending on the gauge or thickness of the wire, it’s really easy to shape too. You can twist, wrap, braid, coil, weave, and even crochet with it.

Okay so let’s get to those 7 quick tips for making your own wire art. Be sure to follow us on Facebook, Twitter, Pinterest, or Instagram, and don’t forget to subscribe so you’ll never miss a post!
7 Quick Tips for Making Wire Art
Tip #1 – Find an Interesting Picture
Before you start, you’ll need some reference images. Pick interesting pictures that have a recognizable form – silhouettes and line drawings are an excellent place to start. You can even turn your favorite word into wire art or try making a small spider web. A rough sketch or doodle works too.

You’re welcome to right-click on Mozart and download him to practice your wire art. Something like a brick or a ball is not going to cut it though. Your wire art will end up looking like, …….. well a round circle or a big old, boring rectangle.
Tip #2 – Get into the Mood
I need to get into the right mood before I create something. Put on some music, get a cup of your favorite brew, and get comfy. Well as comfy as you can because you need to put some of those super sexy, protective eyeglasses on. Warning – ridiculous reality shot coming up.

LOL, thank goodness I brushed my hair before putting that hat on. Not the prettiest look, but trust me that wire will jump all over the place.
Tip #3 – Wire Buying Wisdom
The best and cheapest wire can be found in a hardware store. They usually have a huge selection of galvanized, copper, brass, and aluminum wires to choose from. Baling wire is really cheap, but it may leave an oily residue on your hands. So be warned. Keep some wet wipes nearby. Craft stores normally sell jewelry wire in lots of pretty colors, but it’s more expensive. Another alternative is to use florist wire, which you can find in most chain stores. Save any wire off cuts. They come in handy for so many thing. I’ve used them in this “LOVE” photo holder and to make the small flowers on our wire dress wall art.
Tip #4 – Gauging Your Wire
A wire is measured in a thing called a “gauge.” The higher the gauge, the thinner and easier the wire is to bend. It sounds kinda back to front, right?!! It confused me terribly when I first started, but there’s a perfectly simple explanation. A gauge measures the diameter of the wire in a fraction of an inch. So an 8 gauge wire has a diameter of 1/8″, and a 20 gauge wire is 1/20″. Somewhere along the line, they drop “1/” bit. To make things a little easier I put together a basic wire gauge cheat sheet.

When it comes to wire art, it’s easiest to use something between a 12 and 20 gauge. The 12 gauge is the most difficult to bend with your hands though, and you may need some pliers.

Tip #5 – Sticky Tape is Your Best Friend
Seriously, that wire will jump all over the place, ALL THE TIME!! When you start, stick your wire down. As you follow the form and lay the wire down over your picture, stick it down. When you’ve bent that wire in just the right way, stick it down. If you’ve made the cutest little curly, whirly bit, stick it down. Okay, you get the point. Sticky tape won’t just make it easier to create and keep a form, it will stop that pesky wire from jumping around and poking you in the face. Nuf said.

Tip #6 – Handy Wire Art Tools
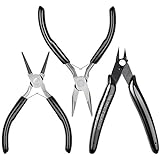
Most of the time, I use my hands to sculpt and form the wire, but pliers come in handy too. Especially if you want to make a sharp bend. They’re also great for joining and twisting two pieces together. Oh, and you’ll also need wire cutters. Mom’s sewing scissors just won’t cut it. Okay Mom’s scissors will cut the wire if it’s soft enough, but she may never talk to you again, so it’s probably safer to use the right tool for the job.

Tip #7 – Let Your Hands Do the Talking
If you’re in the right mood, your hands will almost take on a life of their own. You’ll twist and braid and loop and turn the wire, and before you even realize it, you’ve created a form. Trust me on this one. Let your fingers do their thing and just have fun. Don’t forget those safety glasses and don’t poke your eye out.

Bonus Tip – Displaying Your Wire Art
There are so many different ways you can show off your work. Suspend the wire art inside a frame as I did with Mozart, hang it from a mobile or inside a bicycle wheel, or use a block of wood or a stone as a base. Anything goes! For this Mozart inspired wire art, I choose to make a very basic, thick frame from pallets.

And just in case no-one recognizes Mozart, I mod podged a music sheet on to the back.

The wire art portrait was suspended by drilling a small hole on either side of the frame and gluing that wiry Mozart inside.

By suspending the Mozart it adds a whole other dimension to the wire art. I love the shadow play in the background when the candlelight bounces off the portrait.

I do hope you found the wire art tips useful and if there’s anything you’re still not sure about, please let me know in the comments. I’ll do my best to answer.

Pssst; if you want to try your hand at some other wire art projects, here’s a few to get you started:
- Gorgeous wire dresses
- Writing with wire
- Wired Sheep
- Art Deco wire birdcage
- Bicycle wheel tree of life
- Wire Kitty Memorial
- Large Wire Flower
- Creative wire picture frames
- Matilda the Spider’s web (not picture below)

And if you enjoyed the 7 wire art tips please don’t forget to share.

Sharing is caring.

And for your convenience, I’ve added some affiliate links below. Disclosure: If you click on them, we may receive a commission from Amazon. But don’t worry it won’t come out of your pocket, and it helps us come up with more unique DIY and craft tutorials for you 😉


Anyways I do hope you have an amazing week filled with lots of love, creativity, and good music.

Last update on 2026-10-01 / Source Amazon Affiliates
55 comments
Really great tips about Art Michelle! , I am a artist myself Loved your website am a big fan
Thank you so much Varum. That’s so lovely to hear.
Thank you, this is awesome and helpful information. I teach high school art and this is my first year teaching sculpture. I am looking for wire that will make a lovely sound when tapped. I bought some Wire Sound wands a number of years ago (they make great attention getters) I would love to have my classes create these wands and give them to our elementary music teachers to include in their percussion instruments. I bought a 16 gauge wire at a craft store and it bends nicely, but doesn’t make sound when tapped. The one I have is easily double the gauge. It is silvery color, and I’m pretty sure it is aluminum or an aluminum mix. Would you know what type wire it may be? On a limited and small budget, I need to make sure I am ordering the right wire for this. Thanks in advance for your help!
Hey Jenny, thank you so much for your lovely comment. Jewelry wire or the wire you find at craft stores normally has a copper core and is “Dead soft” wire, which means it bends really easy. That’s ideal for making wire art where you need a lot of flowing lines, but it’s not suitable for something structural or where you need really, really sharp curves. The softness is also the reason why the wire doesn’t make an audible sound. You can “harden” craft wire by flattening it with a hammer (the kids may enjoy that since they can be blacksmiths for a day 😀 ) but it still won’t produce that beautiful sound. Have a look at your local hardware store for aluminum tubes or pipes. They come in different diameters and lengths and could be a budget-friendly alternative. Baling wire would also work.
Nice work, but surely that’s Beethoven not Mozart?
LOL Ruby, I wouldn’t know. I never met the guys, but looking at their picture online, I think you might be right ?
This is awesome! Love your finished project! Thanks for the tips. I will definitely be trying to make my own creation.
I’m so happy you enjoyed the tutorial Lisa and knowing how incredibly talented you are, I can’t wait to see how your wire art turns out
Hi Michelle Totally love this project but Im sorry the best part of this tutorial is your photo! Hahaha so cool! Thats exactly the look isnt it? U go girl ?
LOL, it’s a look I wear soooo well ? ? ? ?
I am just getting started.
I will get back to you.
Thank you
Love it! I looked for affiliate link to the sticky tape that you use but didn’t see one. Can you tell me the brand and size you like best please? Thanks!
Hello Maggie, I don’t really have a preferred brand as long as it’s sticky it will work. I’ve even used duct tape when my sticky tape goes missing ? The sticky tape is the best thing to use to keep the wire from jumping all over the place while you’re tracing the picture.