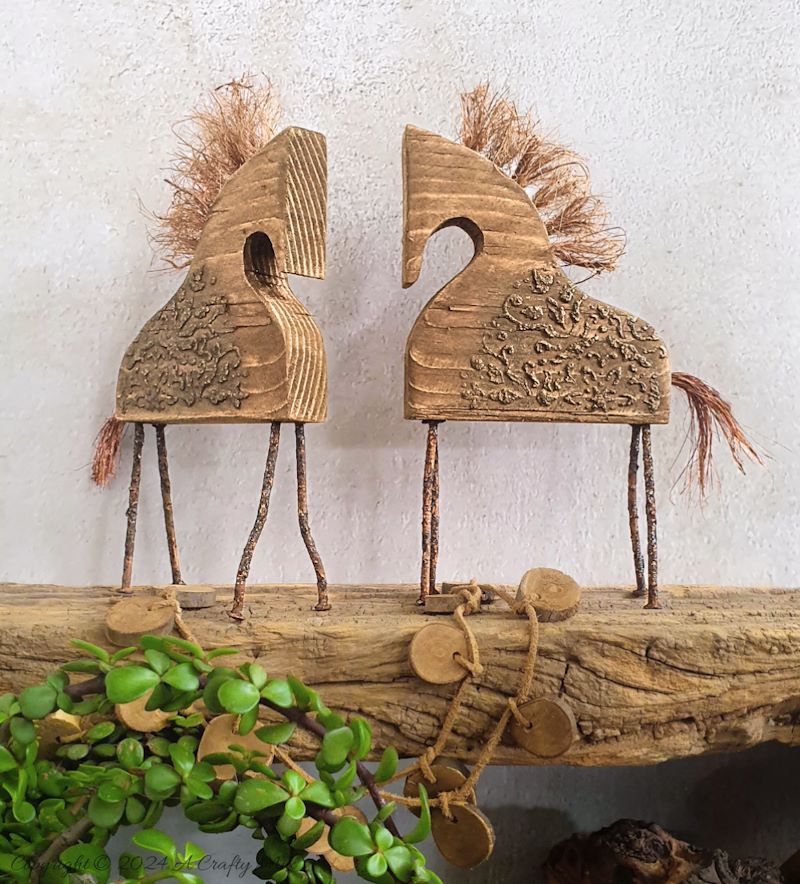
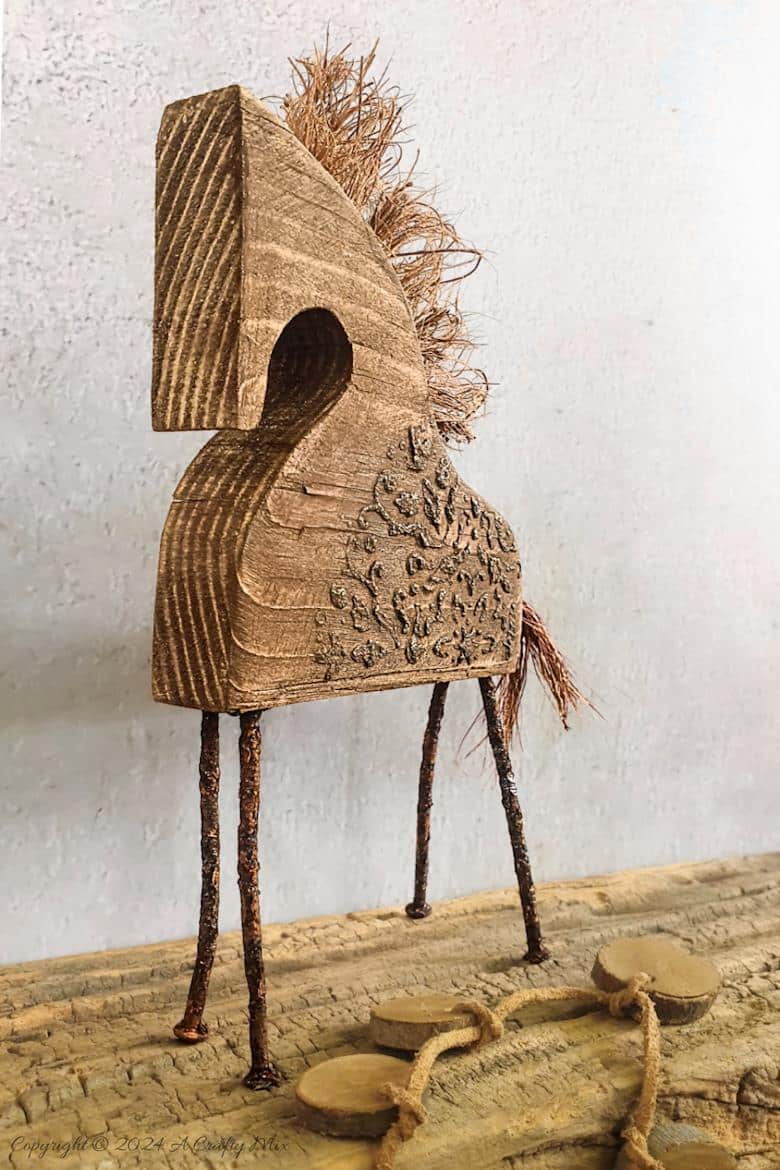
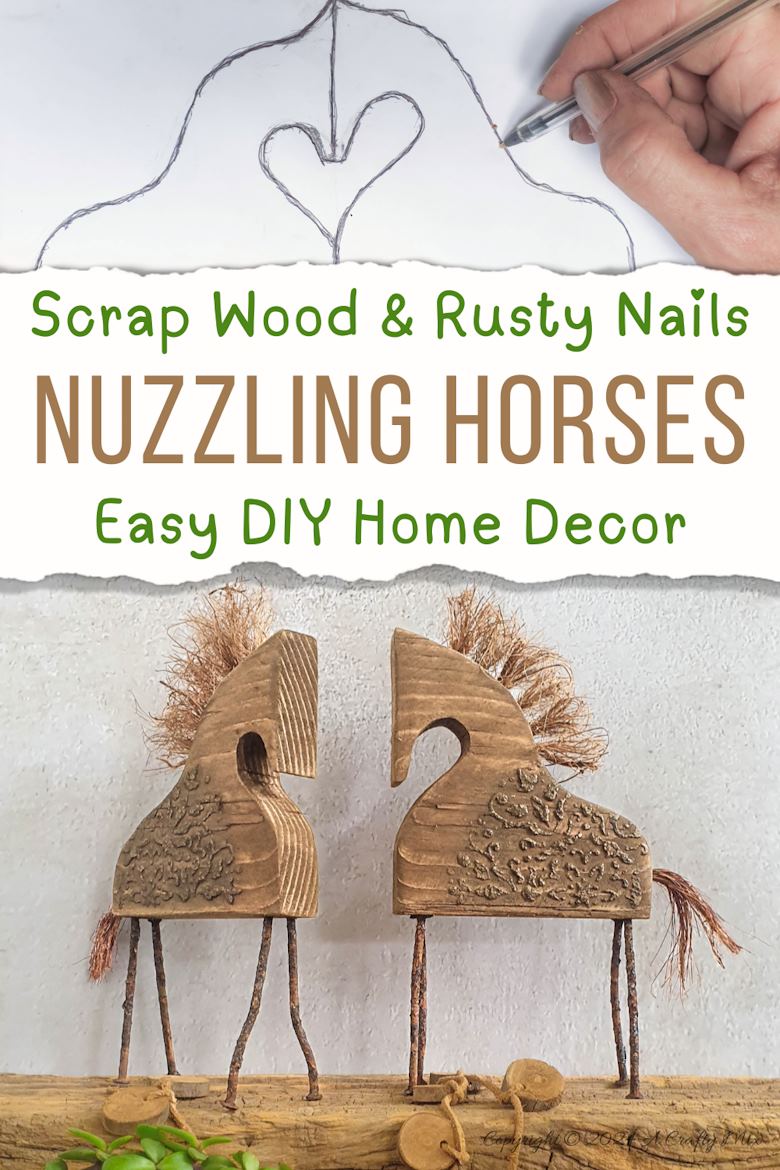
We have a huge pile of wood off-cuts waiting patiently for inspiration to strike. Some were salvaged from pallets and others are left-over bits I couldn’t bear to part with. Today’s crafty idea involves one of those “I’m keeping you” pieces and rusty nails we rescued while dismantling the aforementioned pallets. Meet my DIY, scrap wood nuzzling horses with a rust-infused stencil.
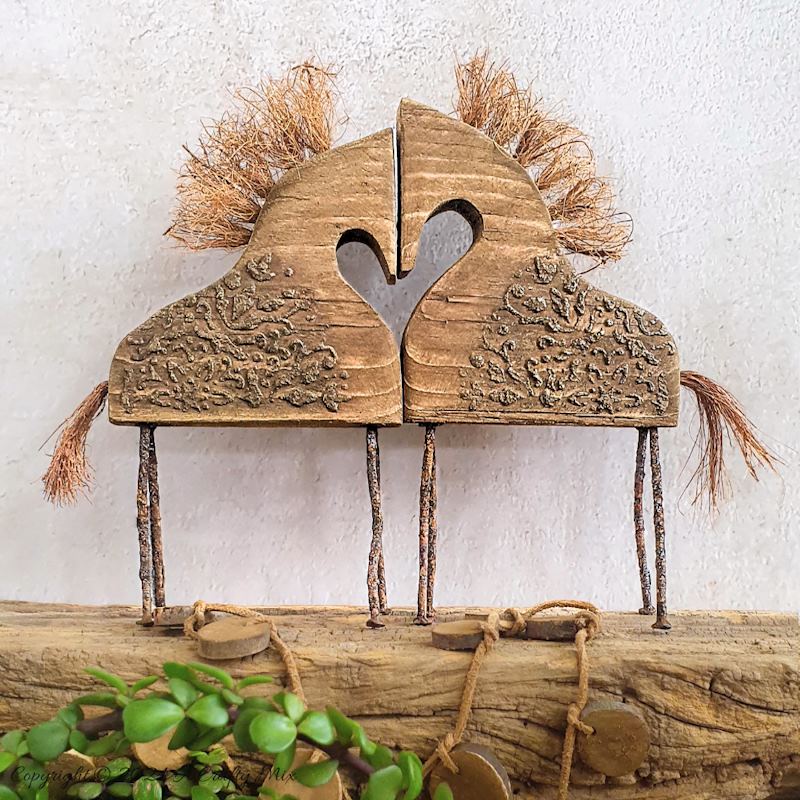
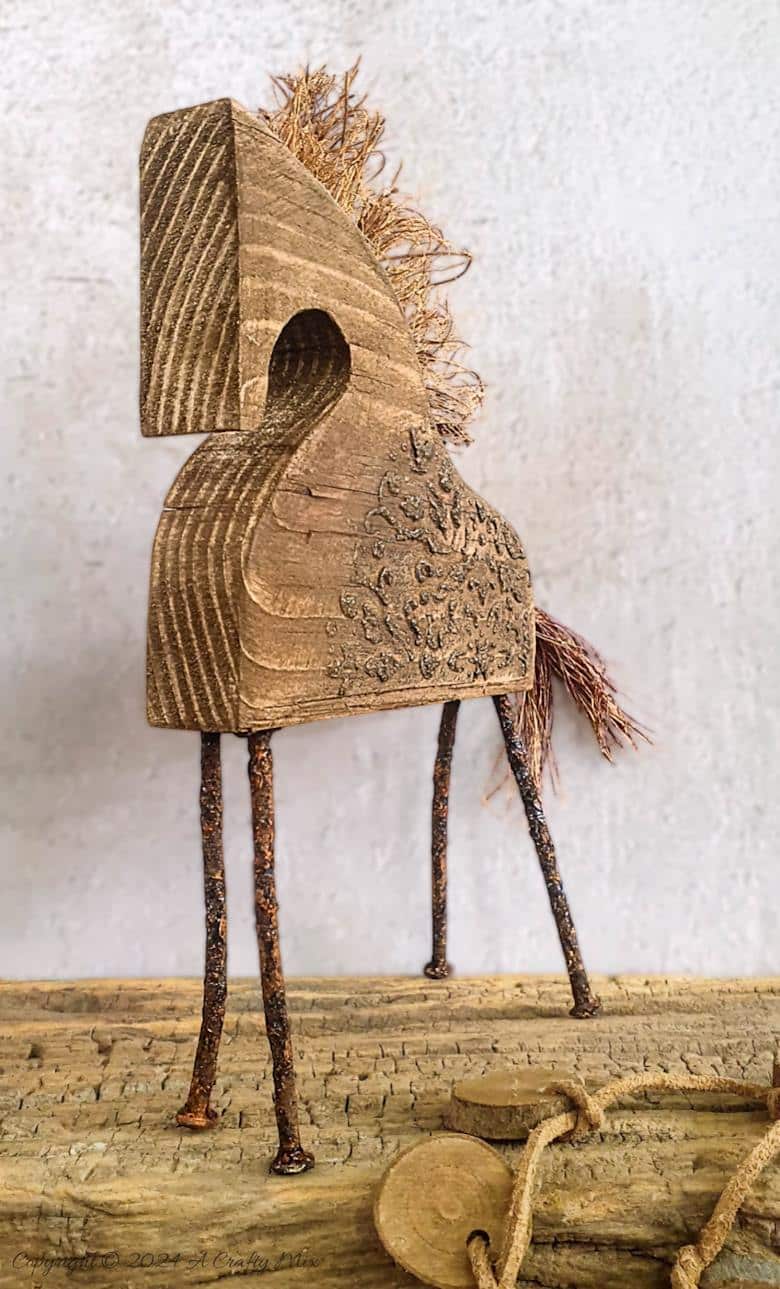
Aren’t they adorable? I’ve given them long, wonky, coltish legs and added some primitive details just for fun.
They remind me a little of the toy horses found in the collapsing ruins of ancient Karanis.

Except my horses are only a few weeks old and they sure weren’t unearthed under a hot dusty sun. Handcrafted in a day – yes, dug up – nope.
And that glorious, aged texture is thanks to rust dust. Yes, it’s a thing. But I’ll get to that in a minute.
In this easy tutorial that celebrates off-cuts and rusty stuff, I’ll show you how to make your own nuzzling horses. But before we get there, follow us on Facebook, Twitter, Pinterest, or Instagram. And don’t forget to subscribe so you’ll never miss a post!
What you need
- Free nuzzling horse template
- Scrap wood that’s at least 3/4”(2 cm) thick
- 8 Long rusty nails
- Coconut coir/fibre
- Sandpaper
- Texture paste
- Small stencil

You’ll also need a jigsaw or scroll saw, a drill, a large garden pebble, and some rust dust.
What is rust dust?
I’m so glad you asked. I collect all the nails we pull from our pallets and repurpose them to make our Rusty Nail Muti, eco prints, dragonflies, fairy furniture, and these reindeer gifts.
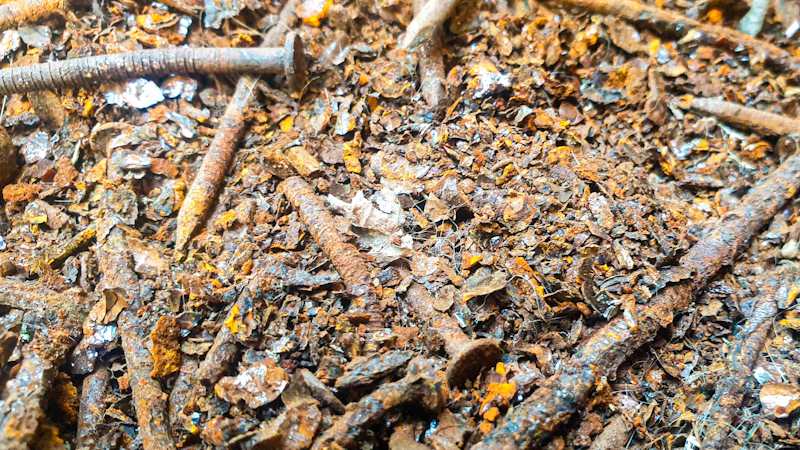
While sorting through our nail collection, I noticed a whole bunch of rust had crumbled into fine dust.
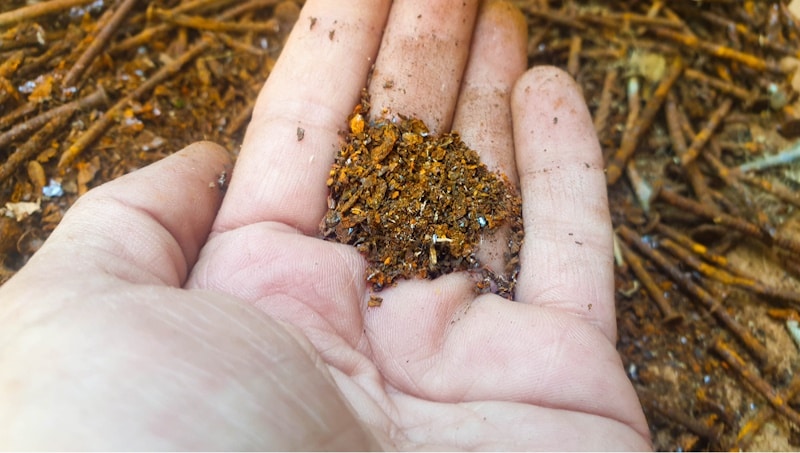
I wasn’t sure what to do with the stuff, so I played around. And wouldn’t you know it—that rust dust comes in so handy as an instant ageing stain or to add texture, both of which are covered in this tutorial.

If you don’t have any rust dust, you can use garden soil to achieve something similar. or try our cheap paint tricks to create a rust effect.
Making scrap wood nuzzling horses
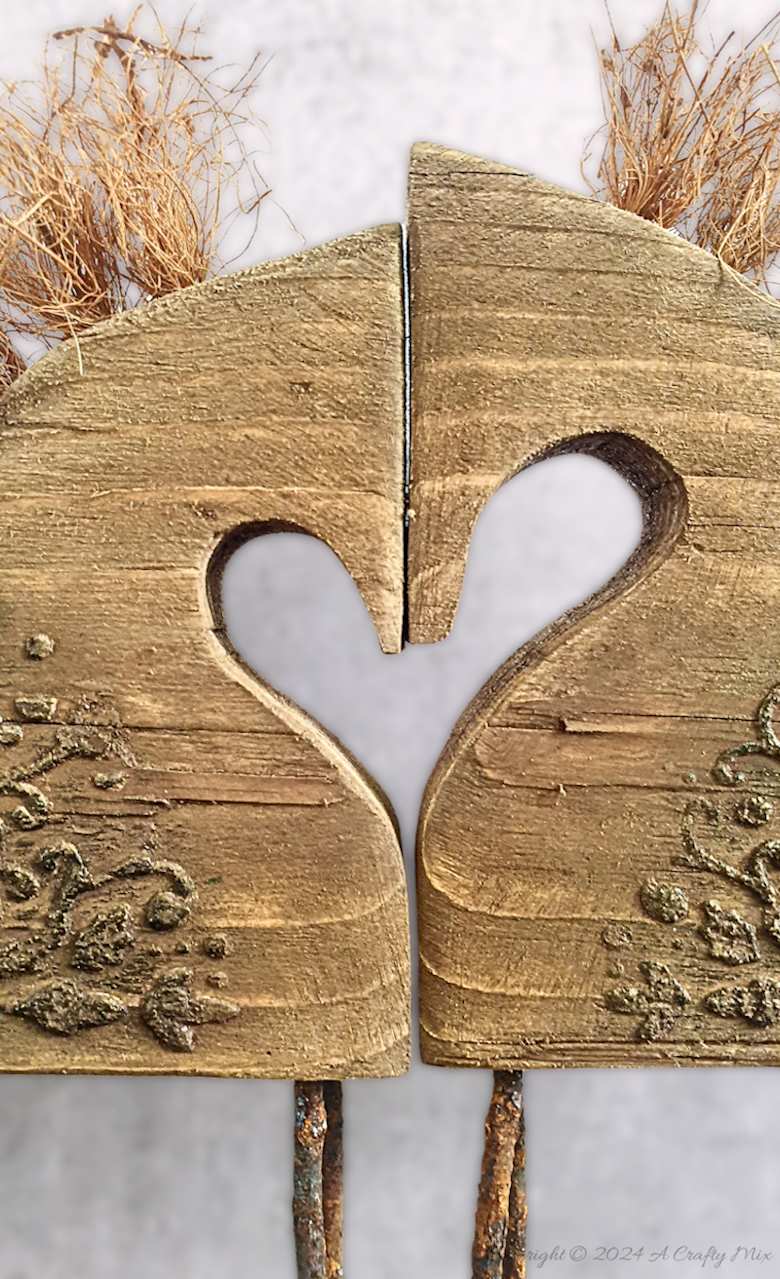
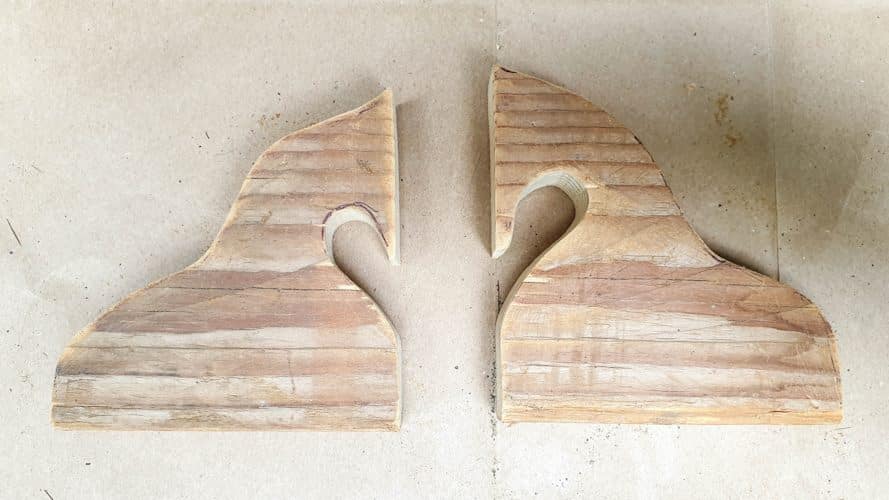
First things first. Transfer the free Nuzzling Horses template to the piece of scrap wood. It’s basically a flat-bottomed wooden blob, with a heart cut out in the middle.
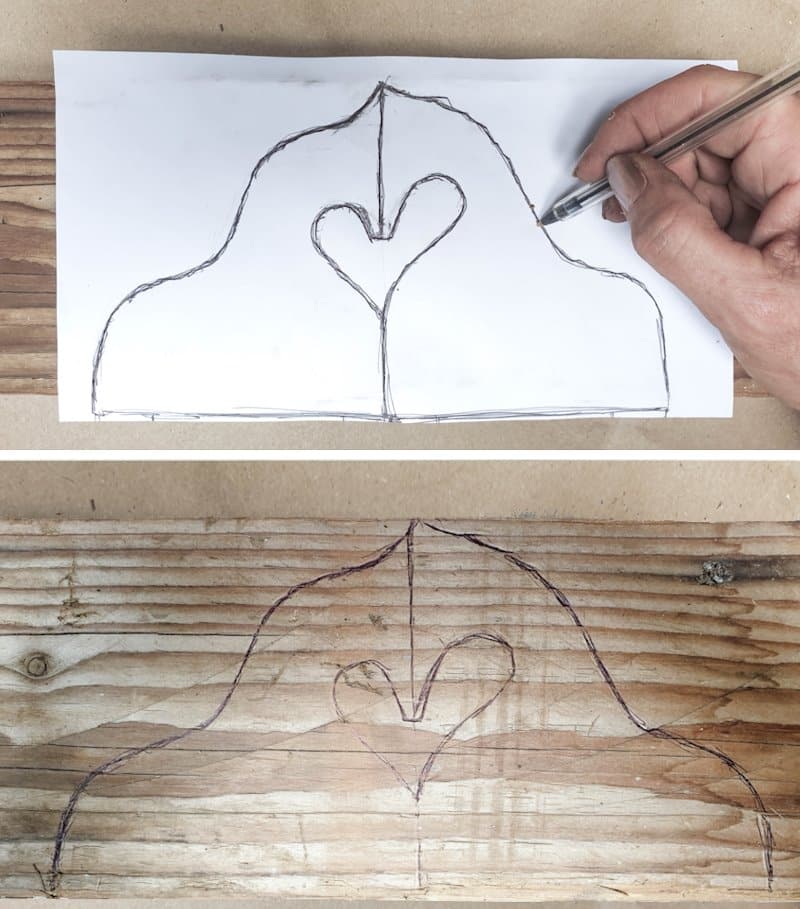
Cut the template out using a jigsaw or scroll saw. I found it easier to cut around the outside edges and then split the horses in two to cut out the heart. That sounds sooooo wrong, but you get what I mean.
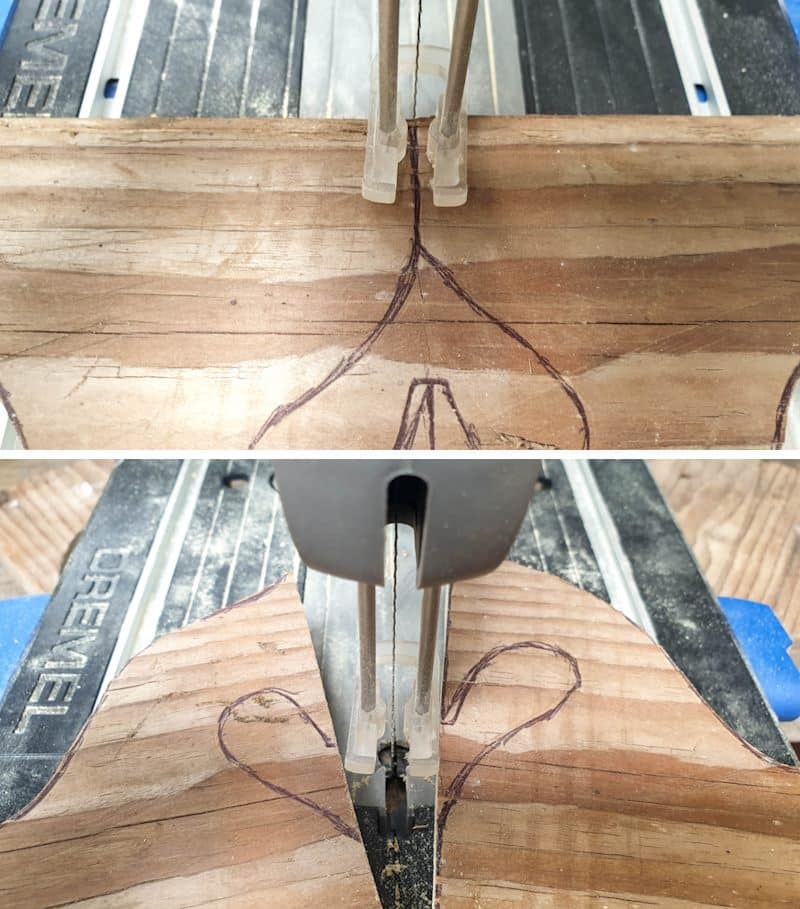
You should end up with something like this.

Sand the shapes with 80-grit sandpaper.
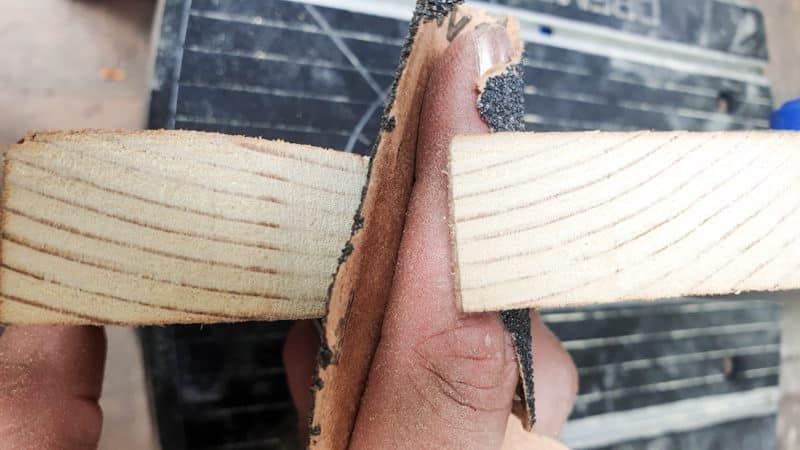
You want to roughen them up, so they look like they’ve been lying underground for a few years.
Adding a raised stencil detail
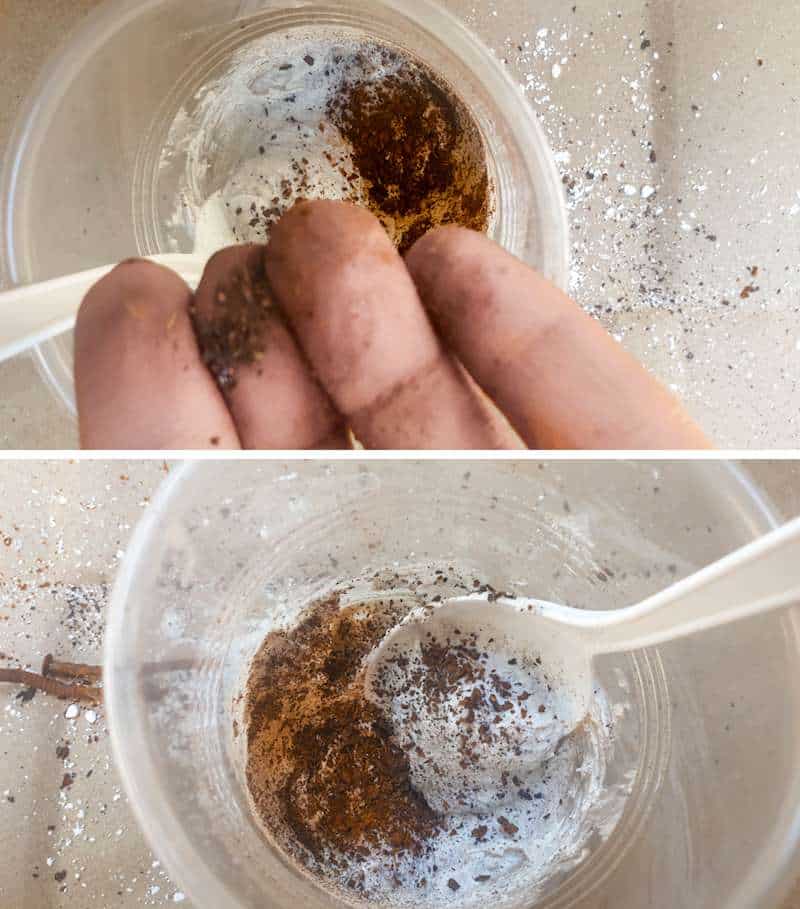
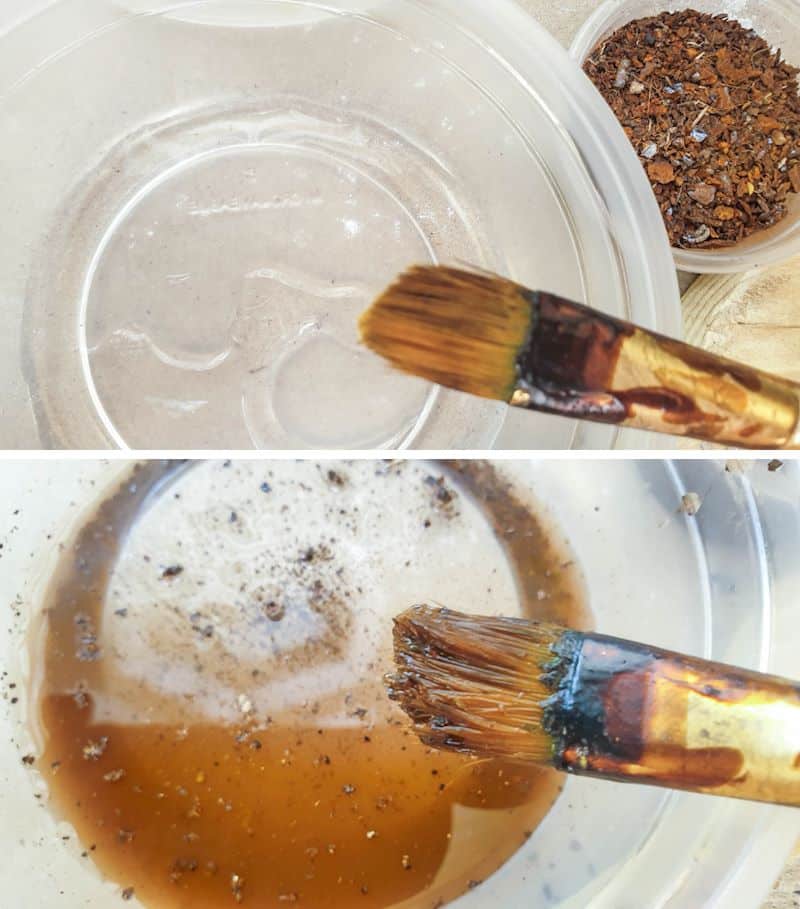
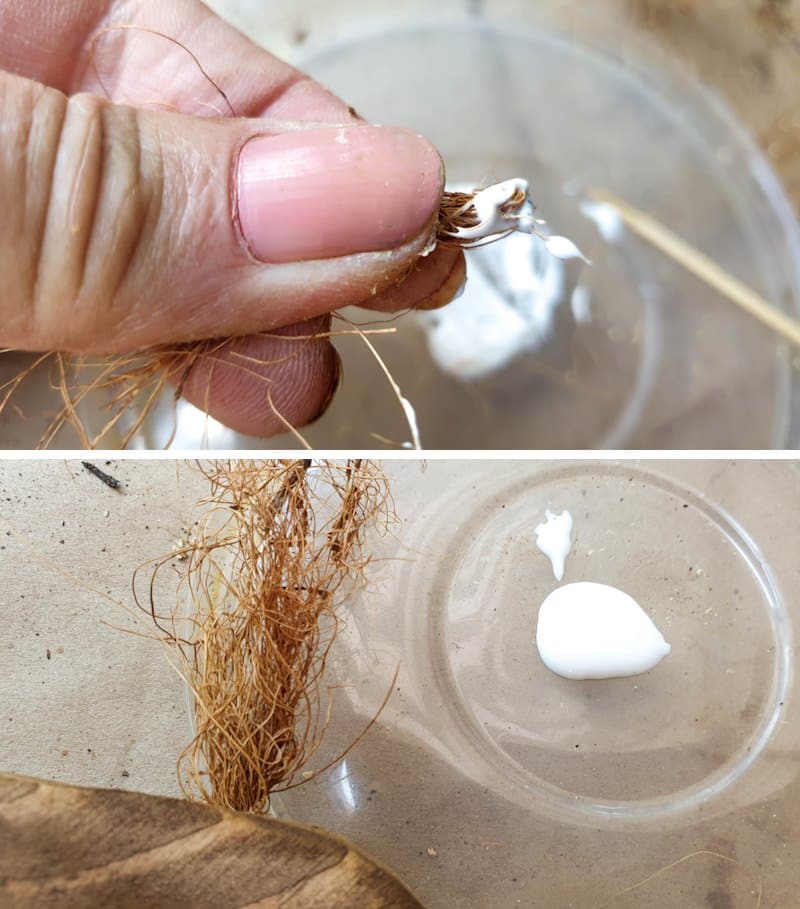
This part is optional. My over active imagination pictured a young boy in a well-to-do upper class family playing with the nuzzling horses 2000 years ago. Which meant they had to be a little fancy. Since I was experimenting with that rust dust, I adapted our homemade texture paste recipe by replacing the cornstarch with a 1:1 ratio of rust dust and cornstarch. If you’re using store-bought paste, mix the rust dust into the paste and add a little water if the paste looks too thick and chunky.
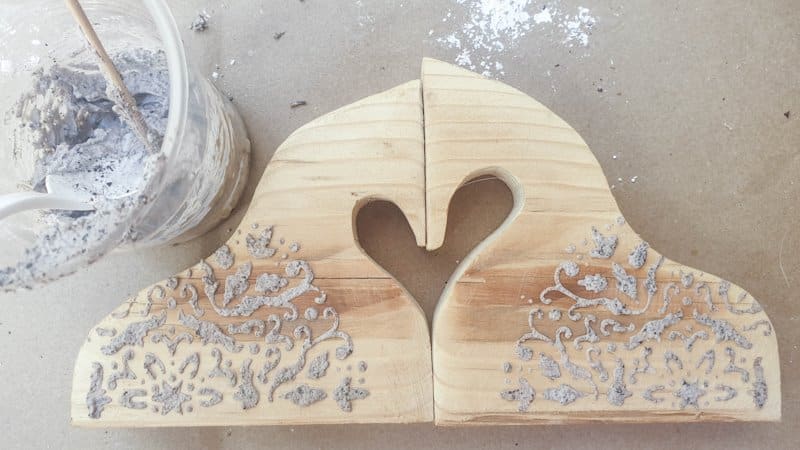
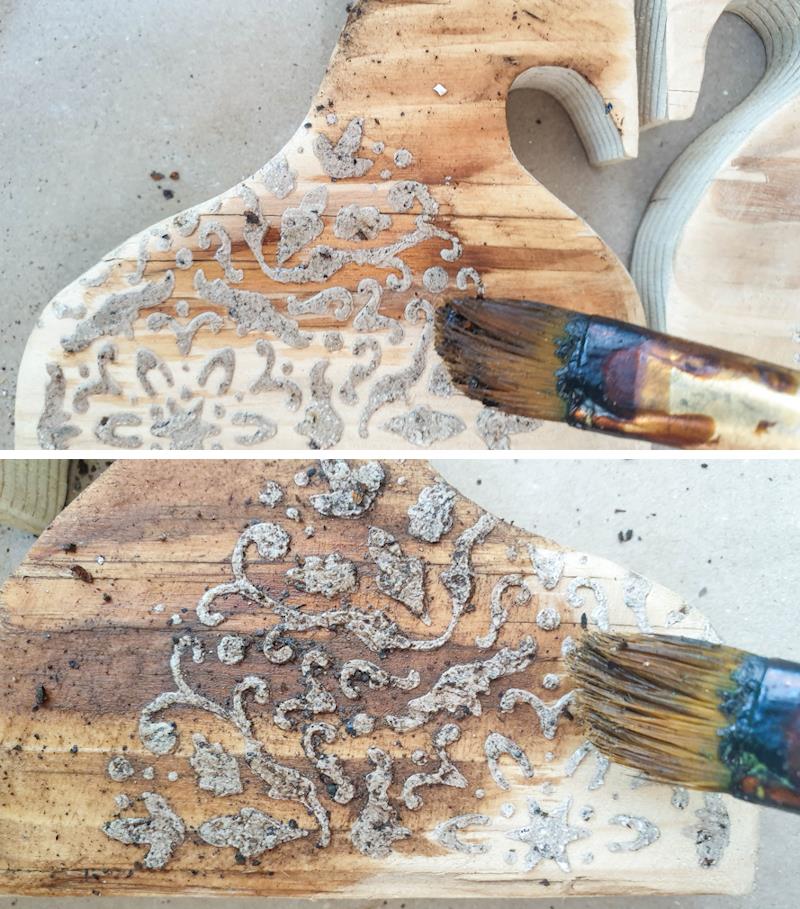
Place the stencil over the horse shapes and apply the texture paste with a craft stick or palette knife.

Remove the stencil and leave the rust infused paste to dry completely.
Ageing the scrap wood horses
To create a time-worn appearance gently smack the nuzzling horses with a pebble. It’s a quick and easy way to round off any sharp edges and creates dings and divets in the wood. Don’t worry if you chip away some of the raised stencil detail. It adds to the look.
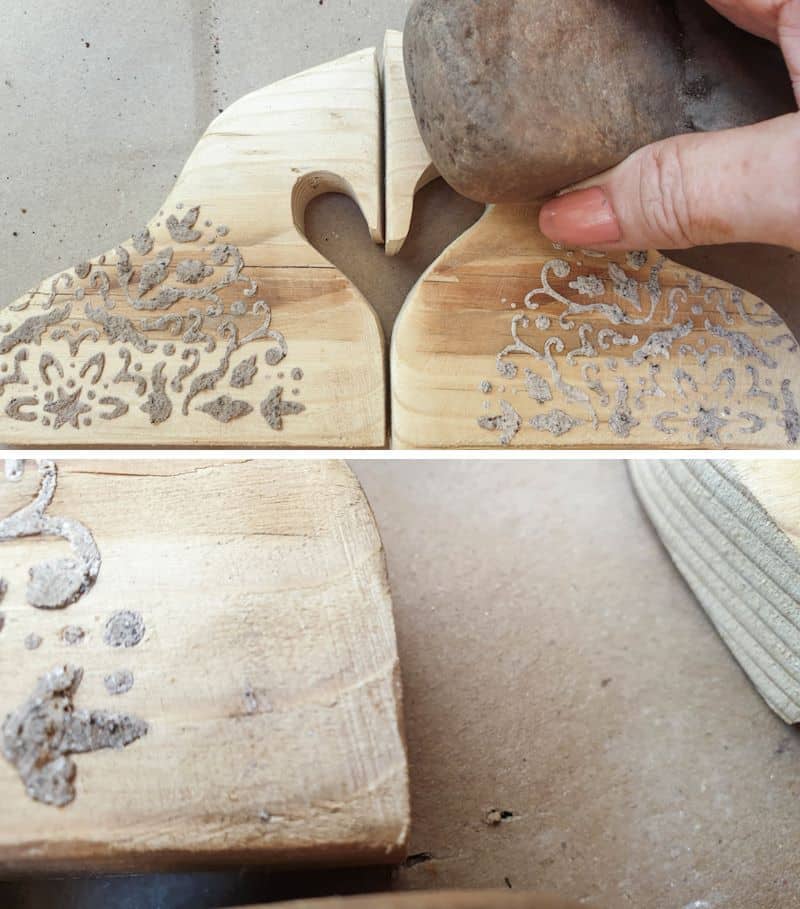
Once you’re happy, mix a teaspoon of the rust dust with white vinegar and paint it on.
It instantly ages the wood.
I left my nuzzling horses to dry with the rust dust flakes on.

Adding legs
The long coltish legs are probably one of my favorite features. If you want your horses to be the same height, it’s important to find nails that are roughly the same length.
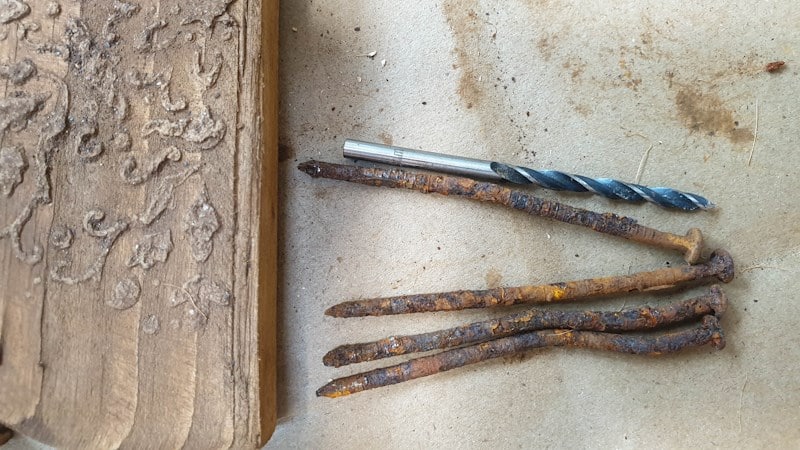
To avoid drilling holes that are too deep or shallow, wrap tape around the drill bit and only drill to the point where the tape touches the edge. Use a drill bit that’s the same diameter as the nails.

Make two holes at the bottom, front of each body and two at the bottom back. Insert the nails. If they’re a little wobbly pop some glue inside the hole before slotting the nails inside.
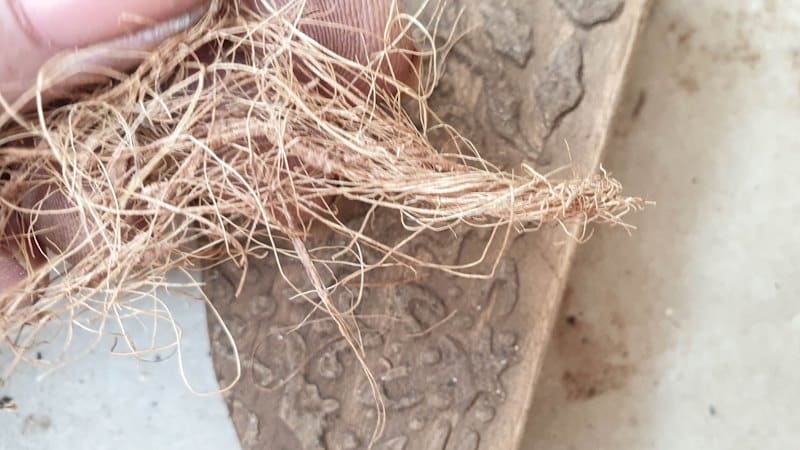
Giving the nuzzling horses a mane and tail
For the tail and mane, I used coconut fiber. That stuff comes in so handy for all kinds of crafty things, like porch creatures, teeny, tiny bird nests, and head-scratcher plant holders. Drill a few equally spaced holes down the back of the scrap wood horses.

Gather a few strands of coconut fiber, fold them in half and twist the folded end.
Put a dollop of glue on the fold and slip it inside the hole.
Fluff the coconut fiber out. The tail is done in much the same way.

And that’s it. Easy, sustainable, eco-friendly, repurposed home décor with heart.

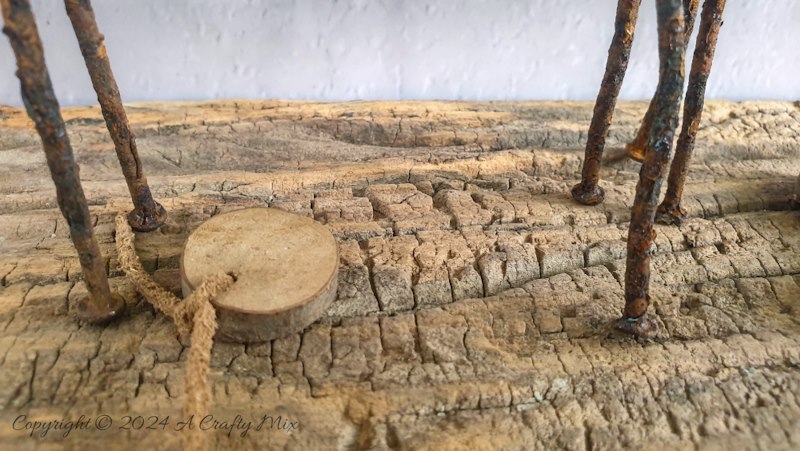
Not bad for a day’s worth of playing around with rust dust. I even had time to thread a whole bunch of small wood slices together. I had to test my rusty stain first before I tried it out on the scrap wood nuzzling horses😉

How do you repurpose your rusty nails? I still have a big bucket of the things.
If you like the idea of making a pair of scrap wood nuzzling horses with rusty accents, don’t forget to pin it for later.
Sharing caring.

Oh, and if you’re looking for some of the things we used, we’ve got you covered. Disclosure: Clicking on the links below, means we may receive a commission from Amazon. But don’t worry it won’t come out of your pocket, and it helps us make more amazing crafts to share with you 😉


And if you prefer to buy a rustic horse sculpture (or two), perhaps these beauties will appeal.

And as always, wishing you a wonderful, crafty week filled with laughter and love. Thank you for popping in for a visit.

Last update on 2026-06-03 / Source Amazon Affiliates