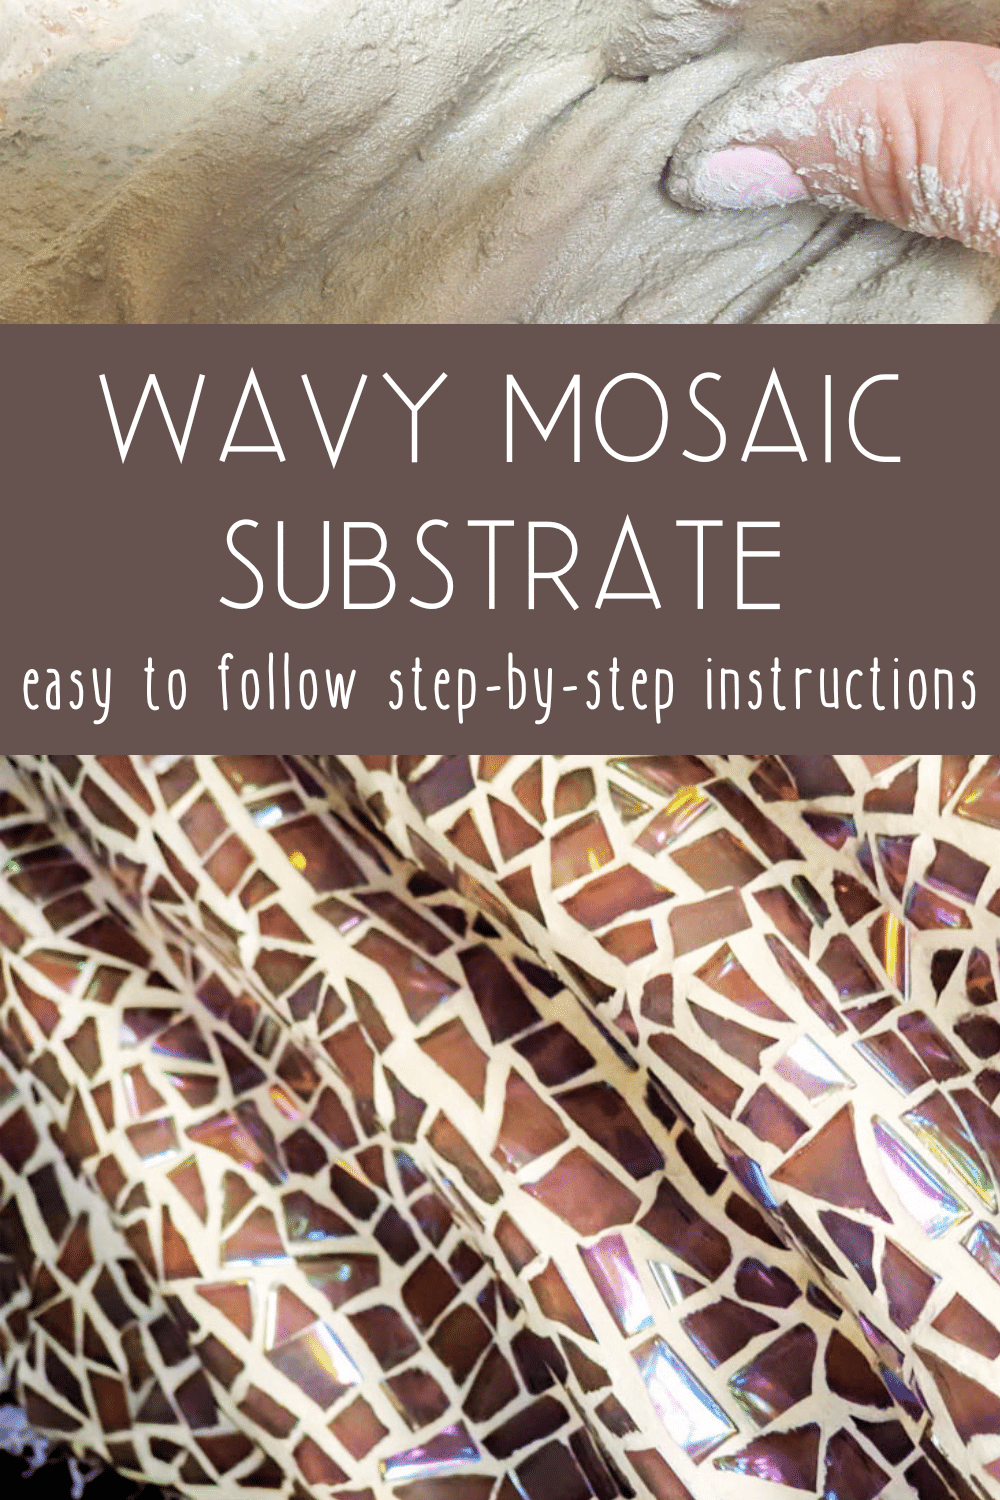
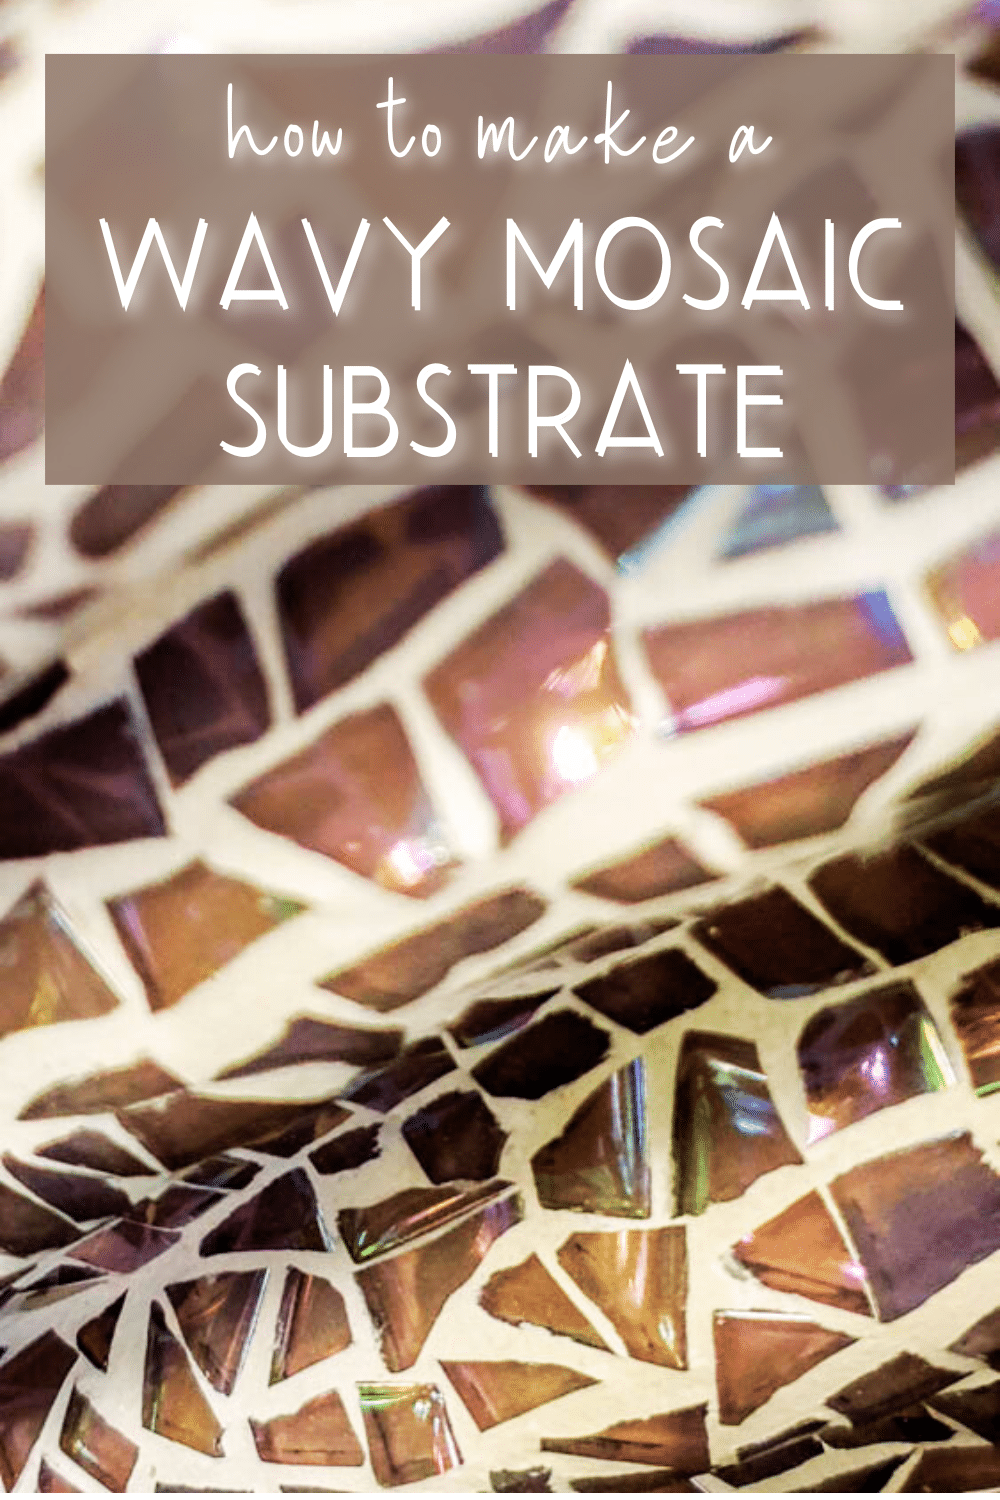
Creating your own mosaic substrate with folds and waves is both fun and rewarding. Not only does it add texture and depth to your artwork, but it also makes the final piece more dynamic and interesting.

This step-by-step tutorial is filled with tips and tricks and will show you how to make your own using inexpensive materials.

And it’s surprisingly easy to do.

RightyO, before I share how to make a mosaic substrate or surface with folds and waves, be sure to follow us on Facebook, Twitter, Pinterest, or Instagram. And don’t forget to subscribe so you’ll never miss a post!
What you need
Something to build the waves and folds on. I used one of our pallet scraps. An MDF board or flat artist canvas will work too. To make a substrate with folds and waves, you’ll also need the following:
- Thinset or tile adhesive
- Fabric
- Large bowl
- Plastic spoon or fork for mixing
- Aluminium foil
- Water
How to make a mosaic substrate with folds and waves
The key ingredients to make a wavy, folded substrate or backer for a mosaic is fabric and thinset.
What is thinset?
Thinset or tile adhesive is a cement-based product that’s used to “glue’ tiles to a variety of surfaces, such as concrete, cement board, and plywood. It gets its name from its consistency, which is thinner than traditional mortar. Unlike mastic, which is an organic, gooey glue, thinset is typically a mixture of cement, fine sand, and a polymer that provides the necessary bonding strength and flexibility.
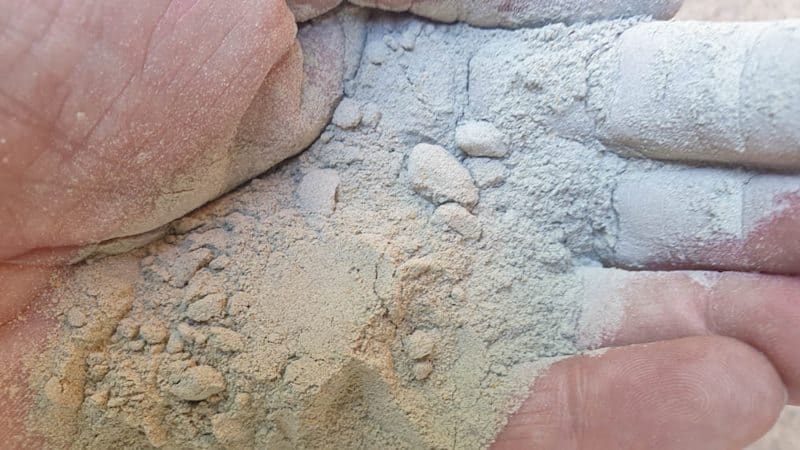
It comes in ready-mixed buckets or a dry mix and can be found at any hardware store that sells tiles. To make a wavy or folded substrate, you can use either the pre-mix or the dry mix. I used the dry mix since we had a bit left over from another tiling project. When using the dry mix, make sure you wear a dust mask and work in a well-ventilated room or outside.
What fabric can I use as a substrate?
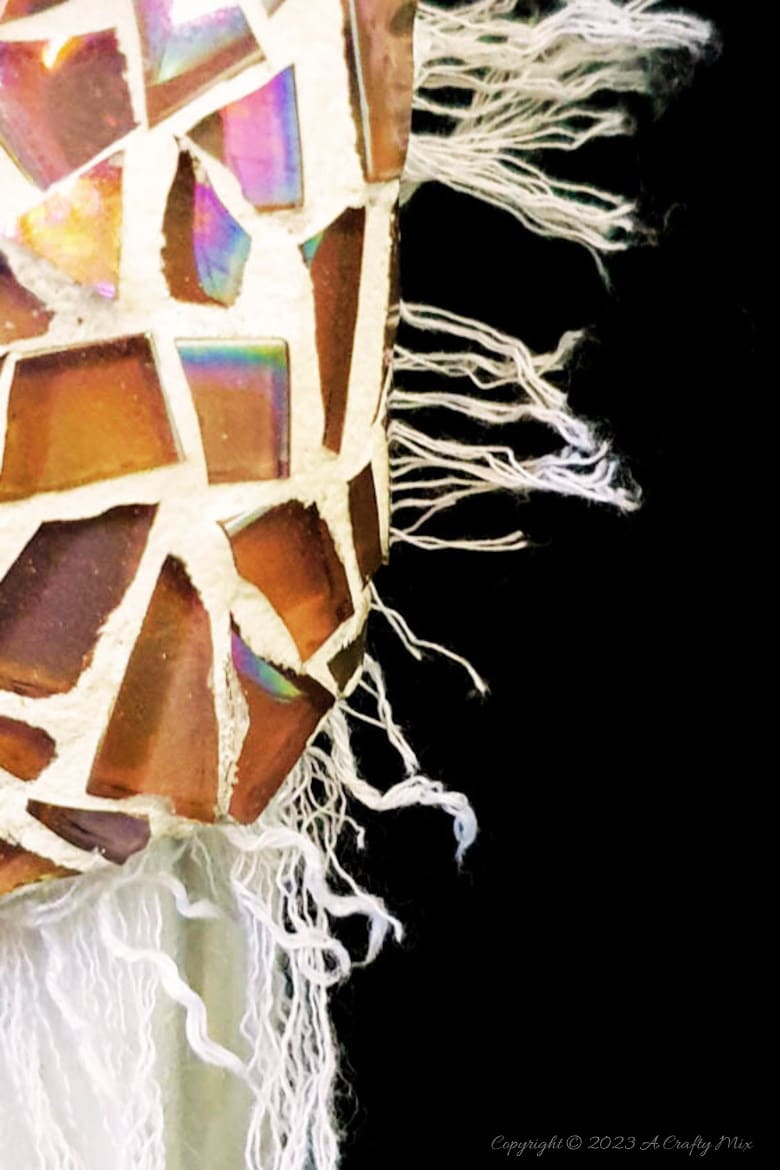
I used an old muslin scarf for this mosaic, but towels, t-shirts, bed sheets, and sweaters work too. One thing to remember, though, is that tightly woven fabrics don’t absorb the mixture and tend to buckle under the weight of the mosaics. If you don’t have any loosely woven fabric, you can add more layers of thinset once the first layer has cured fully to reinforce the waves and folds. Curing time is anywhere between 12 and 24 hours, depending on the brand.
Making a wavy or folded mosaic substrate
Just a heads up, this is a messy business, so prep your workspace before you start. I put some cardboard down and covered it with a large plastic bag.
Since I’m not a big fan of wearing gloves, I put loads of hand lotion on before making the substrate and wash my hands often in a bucket of water while I’m working. Thinset will suck every bit of moisture out of your hands if you give it half a chance.
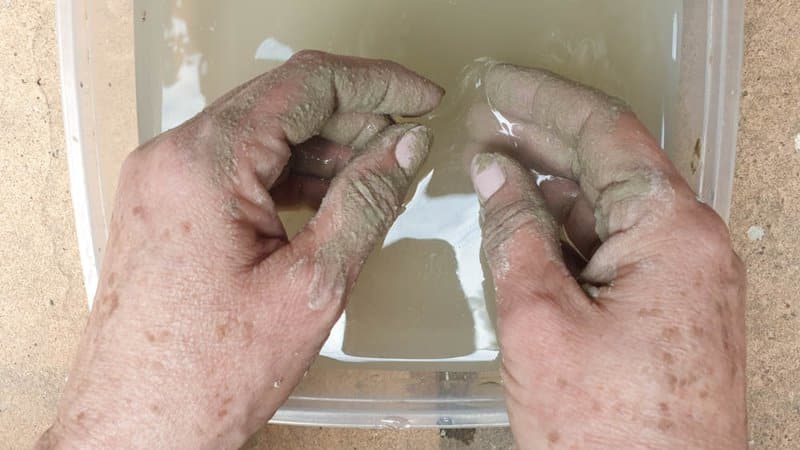
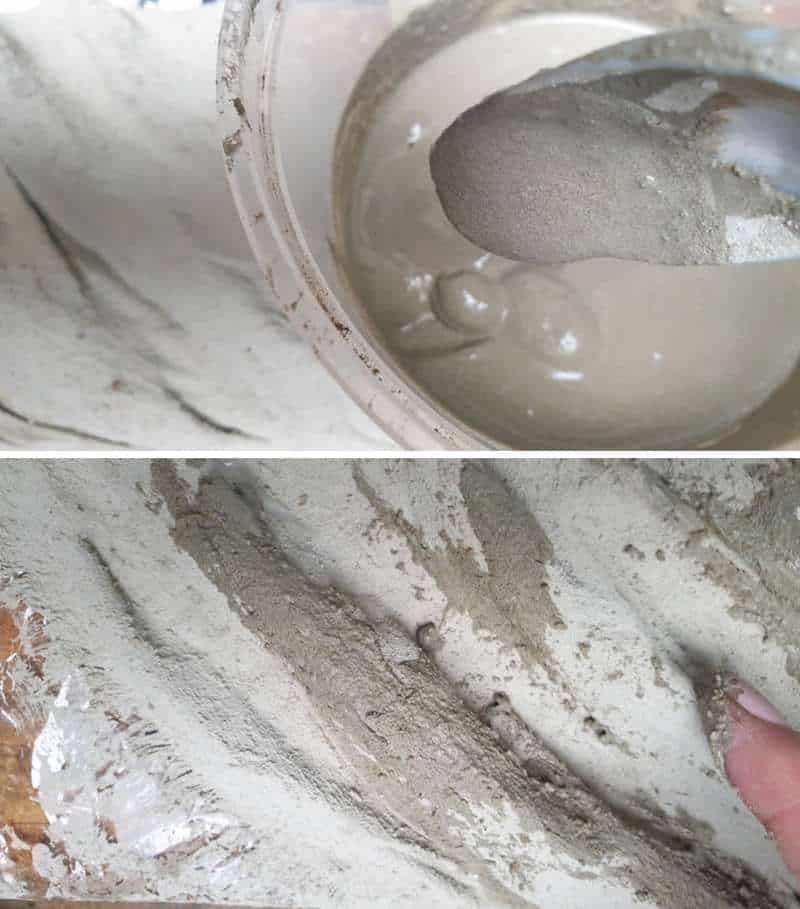
Grab a bowl, some water and Thinset. The bowl needs to be big enough to submerge your fabric. I used a large, empty tin can.
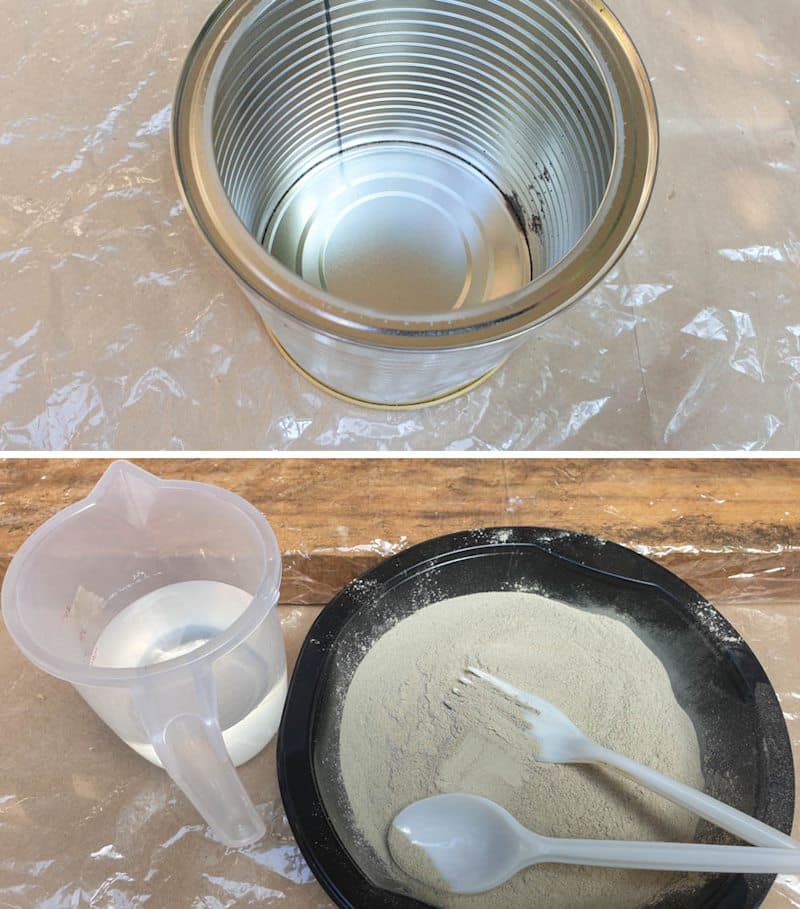
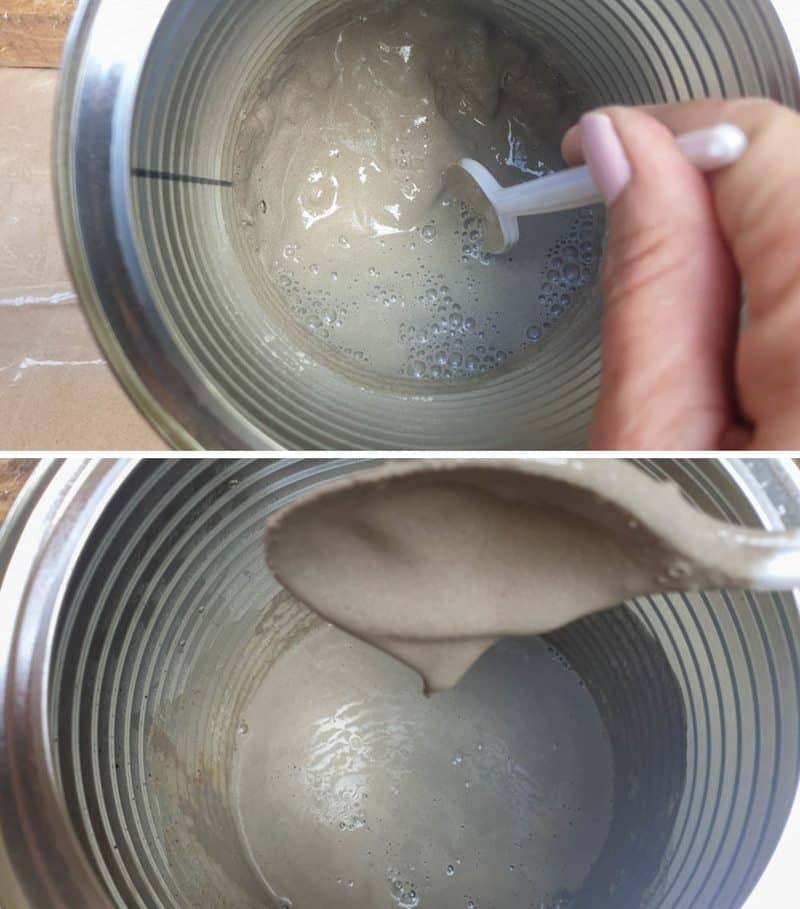
If you’re using a premixed tile adhesive, add a little water to thin it out. If you’re using the dry mix, pour the dry mix into the bowl and add some water.

Mix well until you have something that resembles warm cake frosting (oh wait, I know nothing about baking) chalk paint. The mixture needs to be thin enough to soak into the fabric.
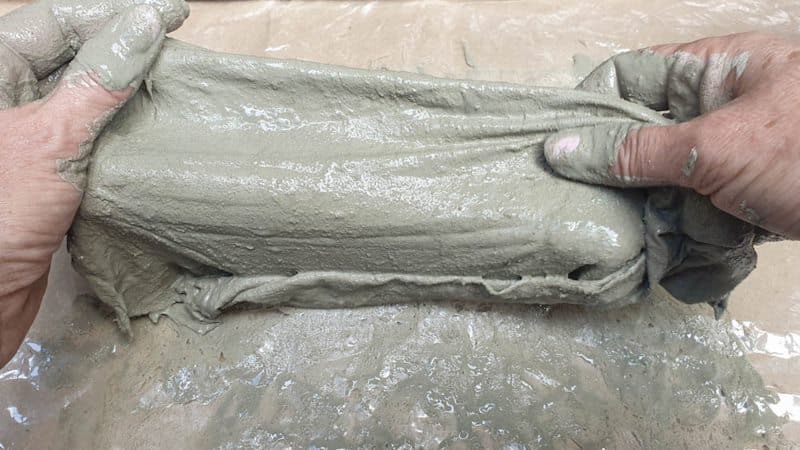
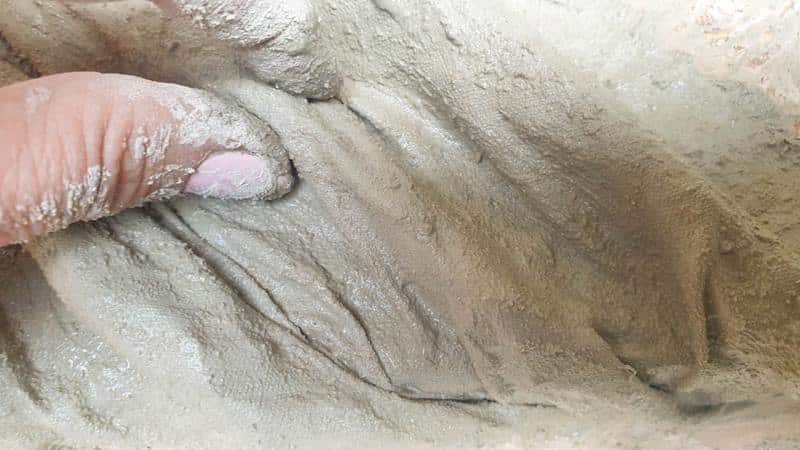
Completely submerge your fabric into the mixture, squishing it down firmly. Remove the fabric from the mixture, wring it out and submerge again. Repeat until the fabric is totally saturated.
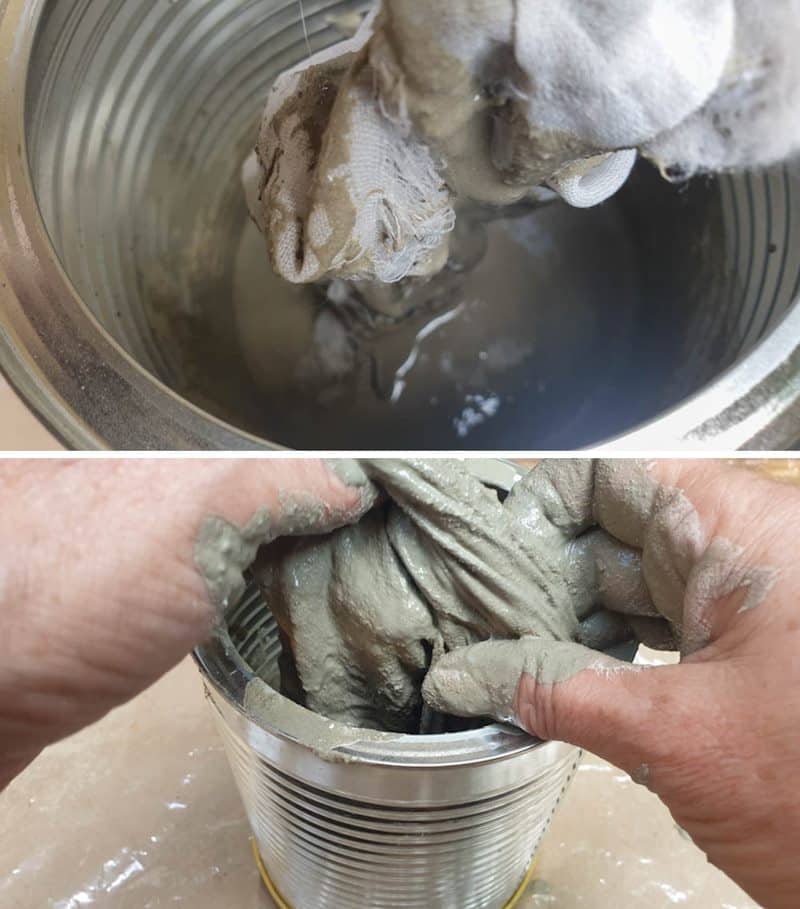
Lay the drenched, wrung-out fabric on the plastic bag and use your hand or a craft stick to add more thinset if you see any spots that look a bit iffy. Make sure to flip the fabric over and check the backside too.
Creating waves and folds
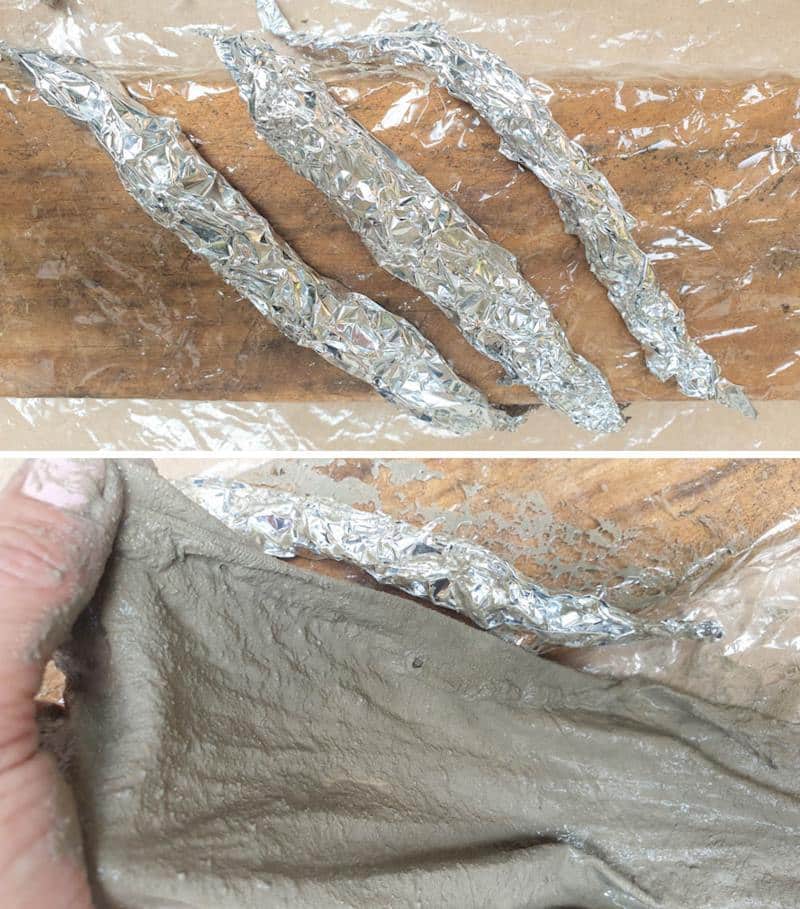
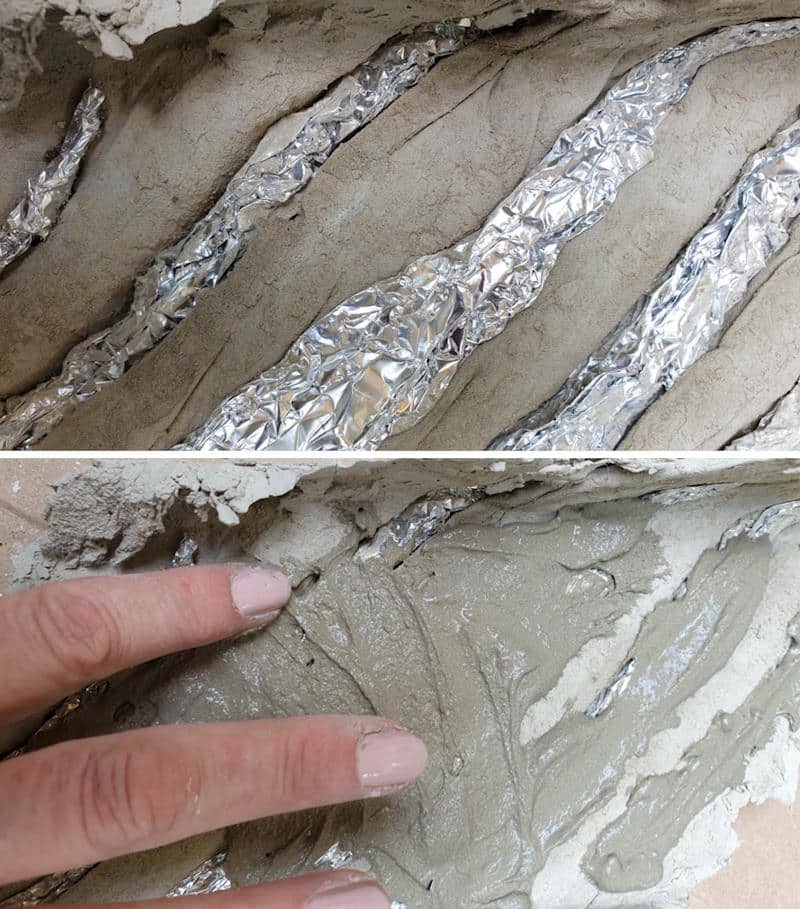
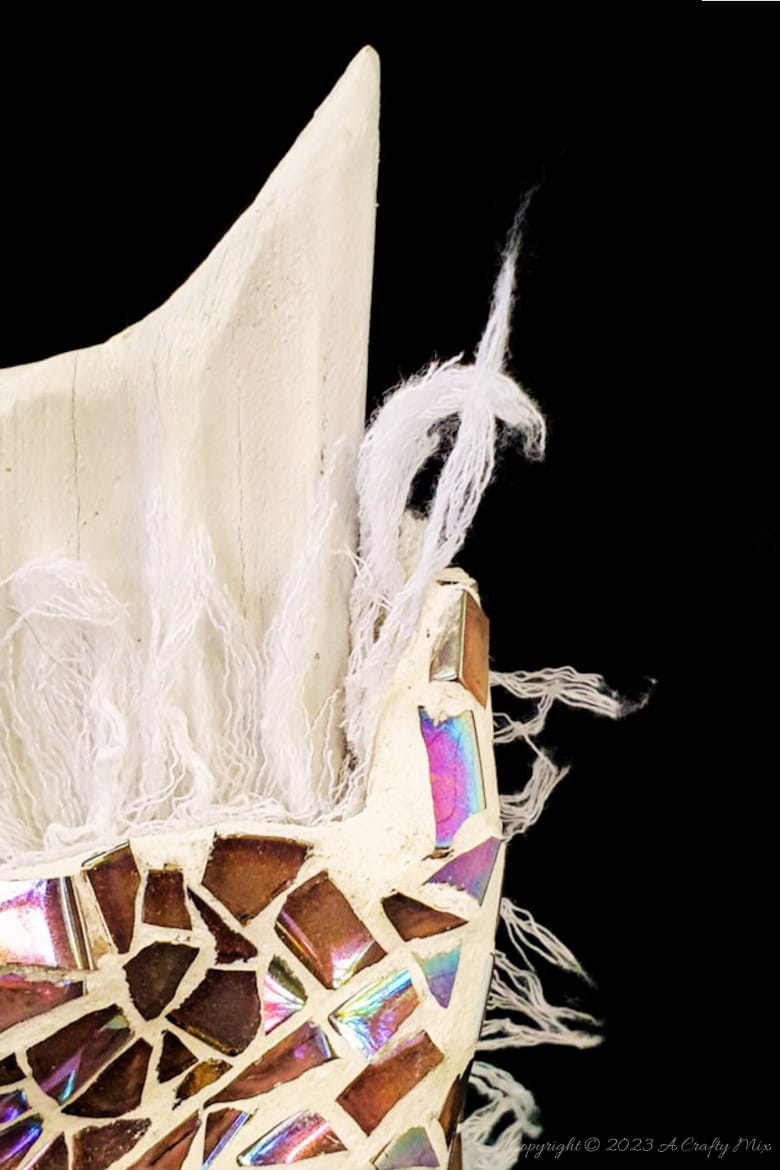
Once you’re happy, place the fabric on your board or scrap wood and use your hands to create folds. For large, high folds, I add a scrunched-up aluminium foil “worm” underneath so it keeps its shape while it dries.
Don’t make teeny, squished-up folds since they’ll be impossible to mosaic later.
Spread the creases out so there’s enough space for the tiles and your fingers to get into.
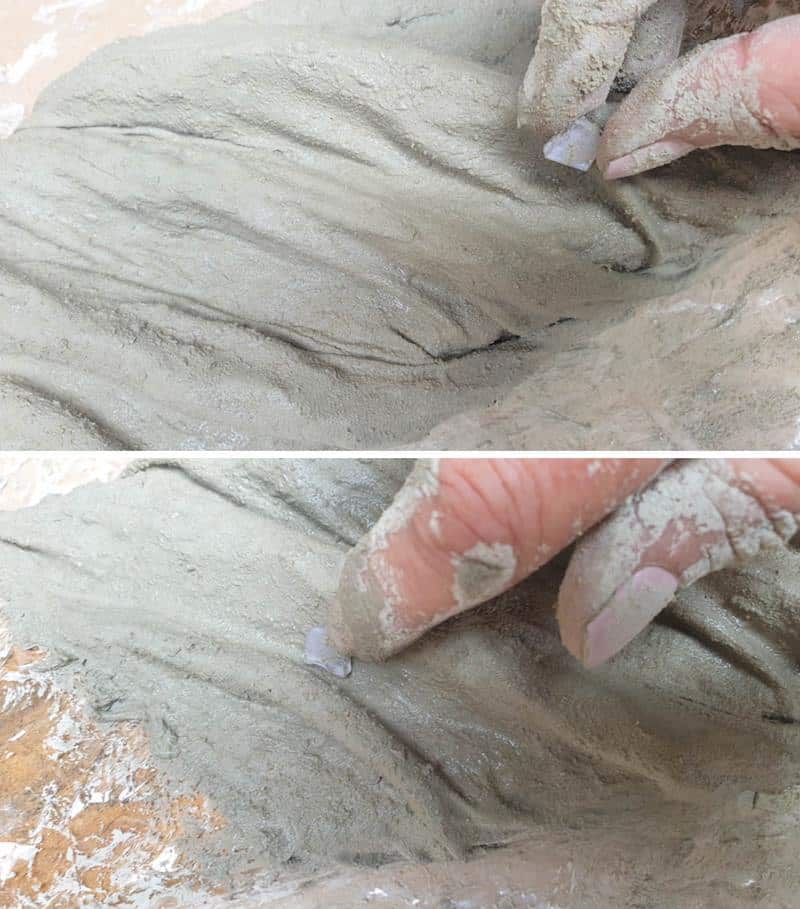
Leave the folds to dry completely before adding another layer of watery thinset.
The thinset dries rock hard and, with each new layer, becomes stronger. Here’s a short video of what the substrate looked like after applying the second layer.

With each new layer, fill up any areas that aren’t level or where the folds are too small for a tile to stick. I did four layers on my substrate.

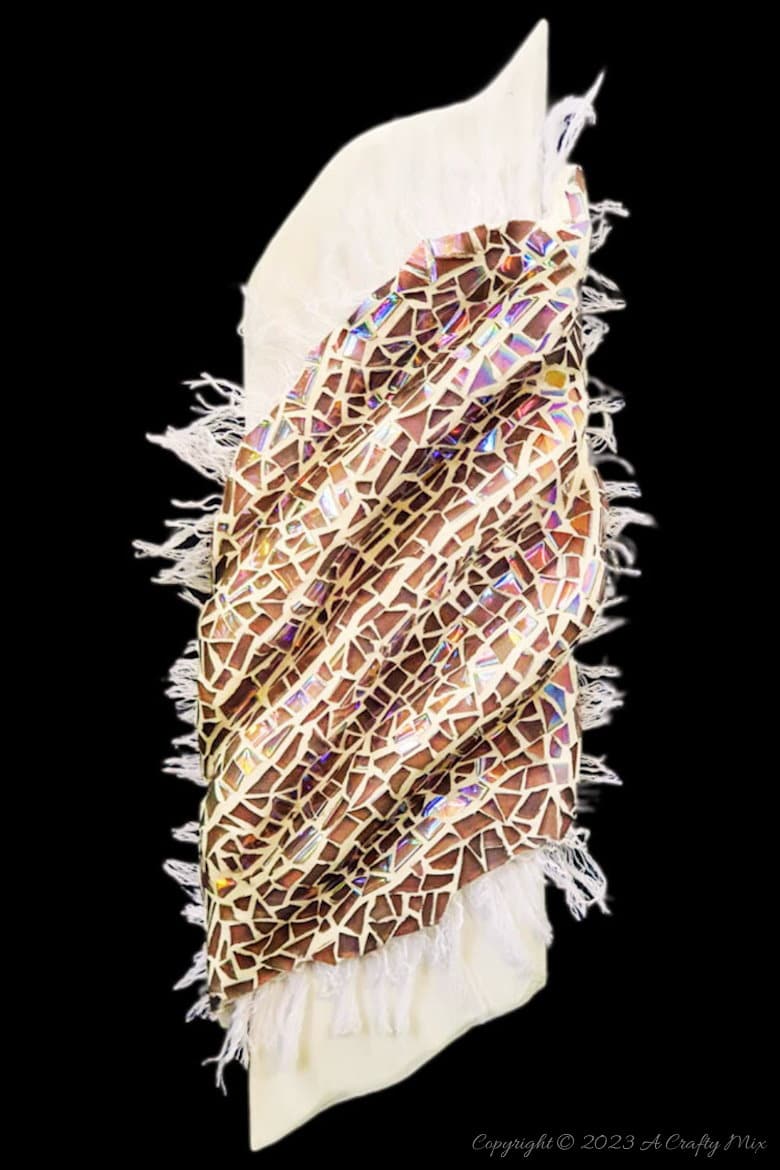
You should end up with something like this.

Add a layer of thinset to the back of the wavy substrate to reinforce it and keep the tinfoil strips in place.
When the layers are completely dry, you can add your mosaics.
Mosaicking a substrate with folds
Mosaicking a wavy or folded substrate is a little more challenging, especially if you add a pattern. I suggest doing a plain piece first to get the hang of it. You’ll also find more mosaic the tips and tricks I’ve learnt over the years in these tutorials:
- Beginner’s guide to mosaic
- Mosaic on a curved surface
- Multi-media mosaics
- Making your own clay tiles
The steps to making the finished piece are the same as for any other mosaic.
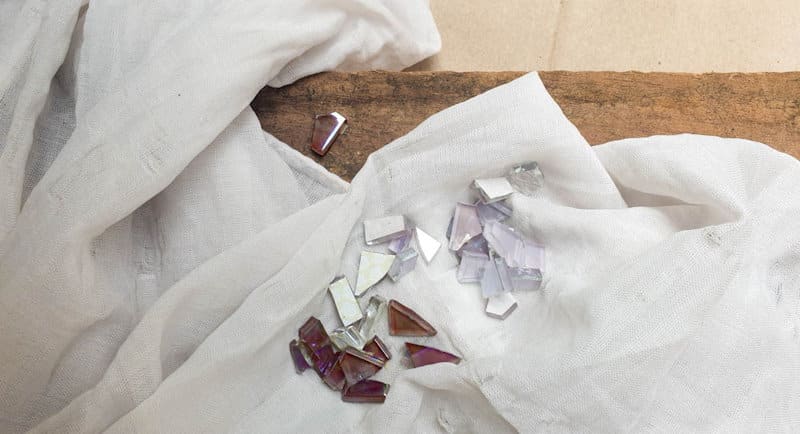
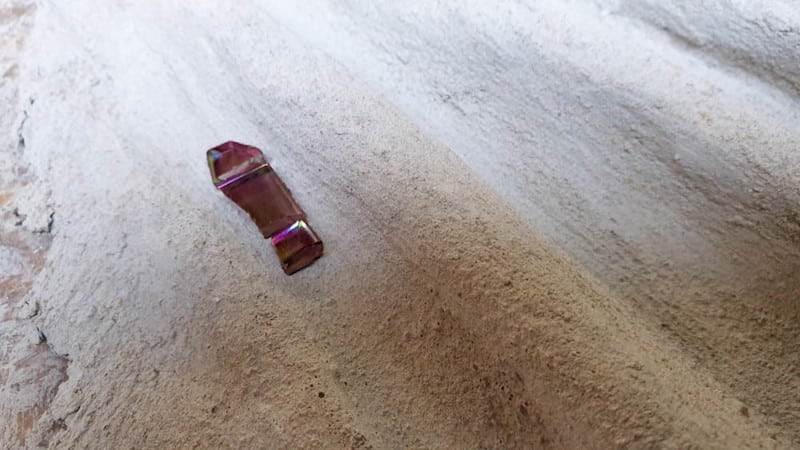
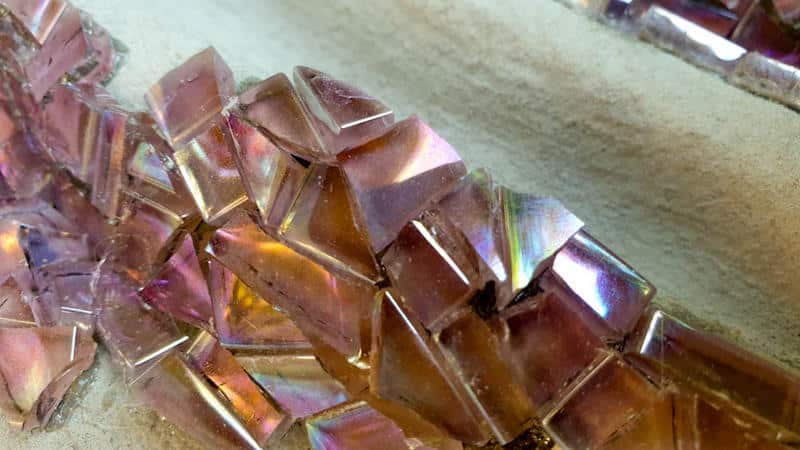
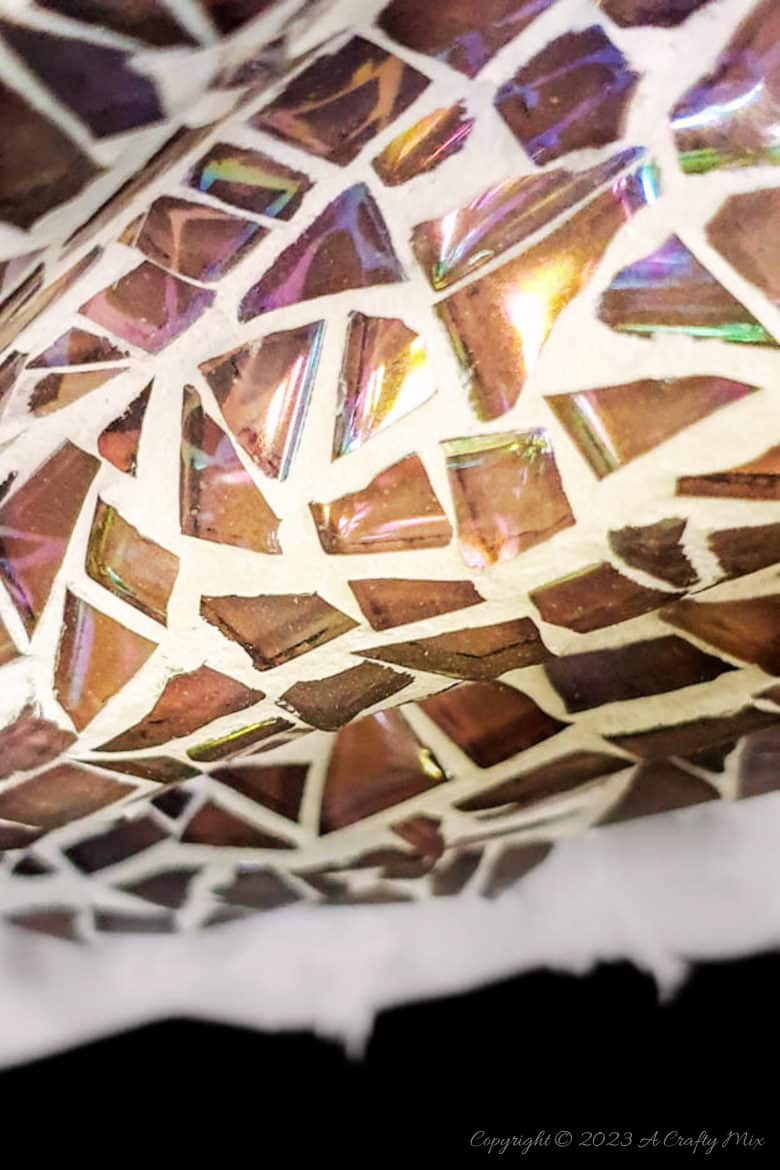
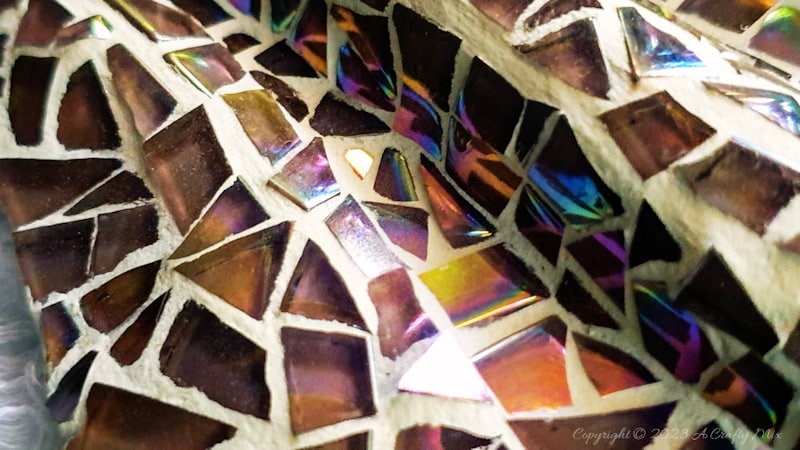
Step 1: Choose the type of tesserae (the fancy word for tiles, glass, ceramic, stones, or any other mosaic materials). Cut your tiles based on the size of your waves or folds. The tiles I used for this mosaic are 1 cm x 1 cm iridescent crystal squares (similar affiliate link below). They were all cut into 4 – 5 smaller pieces.

Step 2: Plan your design and do a rough sketch on a piece of paper. This helps visualize the final product and ensures the colors and shapes are balanced.
Step 3: Working in sections, apply some adhesive and arrange your tiles using your design as a guide. It’s kinda like building a jigsaw puzzle, but you can create the jigsaw pieces any way you want to.
Don’t try to cut the exact shape and leave a gap between the tiles for the grout.

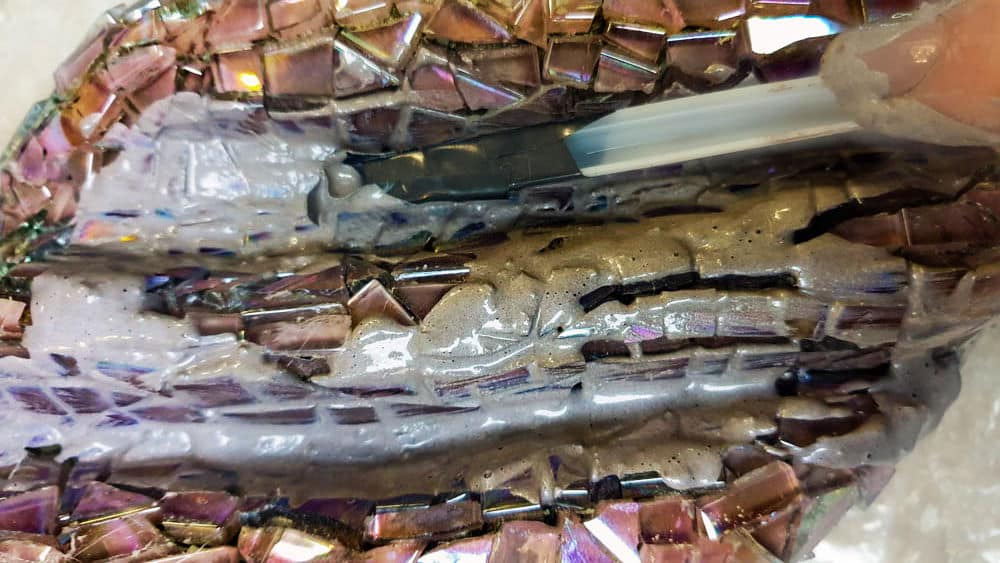
Step 4: Wait for the adhesive to dry completely before applying the grout with a small trowel or craft stick. You can make a mini trowel by wrapping the handle of a plastic fork or spoon in silicone tape. It makes it easier to get into all the creases and will save your hands from nicks and cuts.

Ensure the grout fills in all the gaps between the tiles. When grouting the folded substrate, I apply two layers of grout. The first one is watered down quite a bit, so the grout flows into the gaps between the tiles. The second layer is mixed according to the manufacturer’s instructions and applied over the first once dry.
Step 5: Use a damp sponge to gently wipe off any excess grout from the surface of the tiles and polish with a soft cloth to remove any haze or residue.
Using the folded mosaic substrate
Whenever I feel uninspired, I always end up making a mosaic.
Big or small, it doesn’t matter. It’s like meditating.

Choosing the colors and patterns, cutting and placing the tiles, and seeing the finished product is so satisfying.
I used the folded mosaic substrate in this tutorial to transform a piece of scrap wood into home decor that’s unique and eye-catching. You can also turn a well-loved sweater or top into a work of art (tutorial coming soon).
Finally, display your folded mosaic art in a prominent place where it can be appreciated by all.
You can hang it on a wall, frame it, or create a pedestal of some sort.
Have you played around with different mosaic substrates? Let me know in the comments.
If you’re keen to make your own mosaic substrate with folds and waves, don’t forget to pin it for later.
Sharing is caring.
Oh, and if you’re looking for some of the things we used, we’ve got you covered. Disclosure: Clicking on the links below means we may receive a commission from Amazon. But don’t worry, it won’t come out of your pocket, and it helps us make more amazing crafts to share with you 😉
Substrate materials


Mosiac Basic Supplies


And if you prefer to buy rather than DIY, then maybe these beauties will appeal.


And as always, wishing you a wonderful, crafty week filled with lots of love. Thank you for popping in for a visit.

Last update on 2026-06-03 / Source Amazon Affiliates