
I seem to be on a mission to create planters for our ever-growing succulent collection. Don’t you just love them? Last week we turned a tree stump into a succulent planter, and this week we made this crazy cool floating teapot planter complete with faux running water.

And in all honesty, the most difficult thing about making one is waiting for the glue to dry. Patience is not my strong point 😉 but in the end, it was so worth it.

I love how it turned out. It looks like some invisible hand is watering the plants. It’s magical.
If there is magic on this planet, it is contained in water. Loren Eiseley
Okay, before we get to the tutorial, be sure to follow us on Facebook, Twitter, Pinterest, and Instagram. And don’t forget to subscribe so you’ll never miss a post!
What you need to make the floating teapot planter
- Metal fork with a thin handle
- Plants
- Gorilla Glue
- Duct tape or sticky tape
- Bowl or planter
- A teapot 😉
We have a huge collection of enamelware, which you can buy in most stores here in South Africa. It’s lightweight, dirt cheap, and doesn’t break no matter what you throw at it 😉 Any small, light teapot will work for this unique planter. If you can’t find a teapot, you can adapt this floating tin can tutorial.

To mimic the water
- Wax paper
- A round pipe or dowel
- Clear craft glue
I normally use my glue gun and clear glue sticks, but for the life of me, I couldn’t find any clear glue sticks in our craft cupboard, so I used polystyrene glue instead. Any craft glue that dries clear should work.
How to make the floating teapot planter
Did I mention this is a really easy DIY project? First things first, we need to bend that fork into shape. Using the planting bowl and teapot spout as a guide, bend the fork. The fork handle will go into the spout, and the tines, or prongs, will be glued to the inside of the bowl. Depending on how hard the metal is, you should be able just to use the edge of a table to get the right shape.

Forks are such handy little things. We’ve used them to make a handle for our fishing tackle kitchen island and they make great air planters too. Use Gorilla glue to glue the fork tines inside the bowl. Gorilla glue works best if one surface is slightly damp, so dip the tines in water first before gluing. A little bit of duct tape will keep it in place while the glue dries.

I prefer using Gorilla glue for projects like this. It’s waterproof and super strong once it cures. Plus it’s eco-friendly so it won’t leak all kinds of toxic yuckiness into the soil and damage the plants.

When the glue dries, about 2 hours, you can slip the fork handle inside the teapot spout and glue it in place.

You may need to put a rock or large pebble inside the bowl to balance the whole thing out while it’s drying and don’t forget to make a few drainage holes, especially if you’re going to plant succulents under the floating teapot.

Once the glue dries, the floating teapot planter is ready for planting. If you used a rock or a pebble to help balance the planter, it will need to stay inside the bowl, so it doesn’t tip over. We added succulents to ours, but herbs would look lovely, too, especially if the planter is going in the kitchen. You could also plant your favorite annuals or perennials, as long as they don’t grow too tall and hide that magical floating effect 😉
To plant a garden is to believe in tomorrow

And for the final touch, all that’s left to do is hide the fork handle with some craft glue “water”.
How to mimic water with craft glue
Besides resin, one of the easiest ways to make faux running water is to use clear craft glue. The only clear glue I had on hand was polystyrene glue. It takes a little longer to cure though, so if you don’t want to wait, use a glue gun and clear glue sticks instead. Simply squirt a whole bunch of glue on a piece of wax paper to form a long, wide strip.

When the glue begins to set, wrap the wax paper around a pipe or dowel if you want the water to form a tube shape.

Once dry, simply remove the pipe and peel the wax paper off.

Polystyrene glue dries with these little bubbles inside so it almost looks like sparkling water. Trim the “water” to size and wrap it around the fork before gluing it in place.

That bubbly “water” is just perfect for disguising the fork.

Doesn’t it look so cool floating in the air like that?

Here’s another view from the side.

But I’d love to know what you think of the floating teapot planter.

Is it something you would make for your garden? What plants would you add?
If you like the idea of making a floating teapot planter, don’t forget to pin it for later.

BTW, if you’re looking for some of the things we used, we’ve got you covered. Disclosure: Clicking on the links below means we may receive a commission from Amazon. But don’t worry, it won’t come out of your pocket, and it helps us make more amazing crafts to share with you 😉
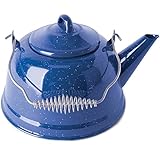


Would you rather buy than DIY? Then maybe these beauties will appeal.

And as always, here’s wishing you a beautiful, crafty week filled with lots of love. Thank you for popping in for a visit.

Last update on 2026-10-02 / Source Amazon Affiliates
78 comments
Hello You are the sweetest lady to share this cute idea with the world. I love it, and since we are moving I’m not able to print this out. Oh just hope I can remember all when I’m settled. I want to say Thank You so much for sharing. You are blessed big time! Thank You again.
You are soooooo very welcome, Nellie. After all these years I’m always a little surprised (and over joyed) when someone reaches out and loves the crazy crafts we come up with. Good luck with your move and I wish you many happy, memory making years in your new home.
I thank God for putting brilliant people on this earth to help others how to open their minds and create things to make things more beautiful. Thank you
You just made my day with your beautiful comment, Lynn. Thank you so very much ❣
Wow!!! This is the neatest idea EVER!! Yard sales here are scarce, but I’ll be looking for a tea kettle or pot to use. Might even work with a sauce pan. I will be moving next year so will have to wait to use your fun idea. I do Thank You for sharing your craftyness with everybody. This made my day and I’m amazed at how this was done.
?
You’re so welcome Sage. I can’t tell you how much I love hearing from our readers. I think a saucepan will work beautifully, especially if you plant some of the smaller succulents inside. Good luck with your move and I hope you make many happy memories in your new home.
YOUR CRAFT WATER IDEA IS TERRIFIC……………OPENS UP A WHOLE NEW REALM OF PLANNING AND IDEAS FOR ‘YARD ART’. THX.
You’re so welcome. Have fun making yard art 😉
I love this, Michelle! The use of clear glue for water is brilliant!
Thanks so much, Gail.
Aw Michelle, I just love this planter. Looking at that enamel crockery reminds me of when I was a kid in boarding school in South Africa. We always had those enamel cups, they were huge and would burn your fingers. I love the idea of the running water trick. Thanks for sharing.
You’re so welcome Anita. We love our enamelware, but the cups are a bit of problem when it comes to hot stuff 😀
I’m the person who has all the brilliant ideas but has to pay someone to do them because I’m so ham fisted!
But I’ve had a go, but mine is in red, and so far it’s looking really good! I honestly can’t believe it. I’m just waiting for the water to harden and then it just needs potting up with Aeoniums.
Thanks for the brilliant idea and the idiot proof photos!
That makes me sooooooo very happy Wendy and tree houseleeks will complement the floating teapot so beautifully too. Thank you so much for sharing what you’ve done ❣
Such a great planter idea, Michelle! I wondered how the heck that teapot was floating in the air – brilliant. Your faux water trick solved a dilemma I’ve been having about a project swirling around in my head, so thank you for that.
OoooEeeeee I so happy to hear that Marie. Can’t wait to see what you’re up to.
Just love this idea and maybe on a smaller scale could be made for indoor as well. I have a large teapot on a shephards hook outside with streamers of fairy lights coming out of the spout to a pot of flowers. Everyone here enjoys it. Can set the lights to a motion that looks like water falling. Thanks
The watery fairy lights sound amazing Wilma and it must look so lovely at night too.
I love this idea so much. Can’t wait to try it. Thank you for the detailed tutorial
You’re welcome, Nicki. Hope you have loads of fun making yours
I absolutely love this, I’m going to try and make this tonight.Thank you so much for sharing this beautiful craft idea and for giving great instructions on how to put it all together..
You’re welcome, Vickie. Enjoy making your floating teapot garden
This is sooo cute!! Great idea! I have to try this!! Thanks for sharing!❤️
You are most welcome, Penny. SO happy you enjoyed the idea and tutorial ?
Quede totalmente loca con este tutorial, de todas maneras lo haré, esta bellisimo me fascinan las manualidades gracias gracias
You’re welcome, Nancy
How do you get the teapot to ‘float’? Does the fork support the weight? Thanks, Sandra
Hi there Sandra, yes the fork supports the weight of the teapot. The most important thing is to use glue that stays stuck and that’s water-resistant so the fork prongs don’t get “unstuck” from the side of the container and the handle stays glued inside the spout.
Thanks Michelle, love love love teapots and this looks nice and easy. When I’ve finished with my markets I will have to give this one a go.
So happy to hear that Eva and all the best at the markets. I hope you sell lots of goodies