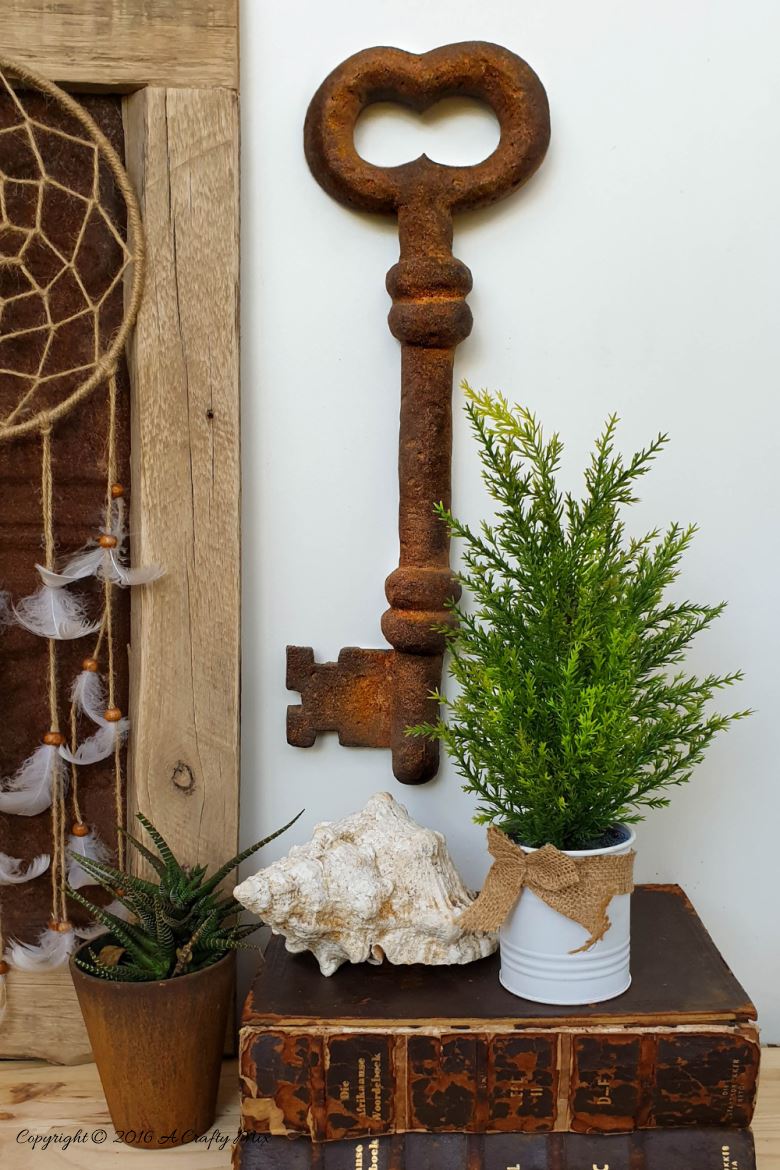
Have you seen those beautiful giant keys? Please tell me you have. They’ve been popping up on my Pinterest feed this last week, and I really, really wanted to try and make one. A lot!! And I think I managed to pull it off with this faux metal gigantic rustic key.
When I started planning the key, I had absolutely no idea if it would work.
But as they say in the classics you never know until you try 😉
And you’ll be glad to know you don’t need any fancy paints to pull that gorgeous rust effect off either. Just a few spices and water.
Okay, before we get to the tutorial, be sure to follow us on Facebook, Twitter, Pinterest, and Instagram. And don’t forget to subscribe to our monthly newsletter so you’ll never miss a post!
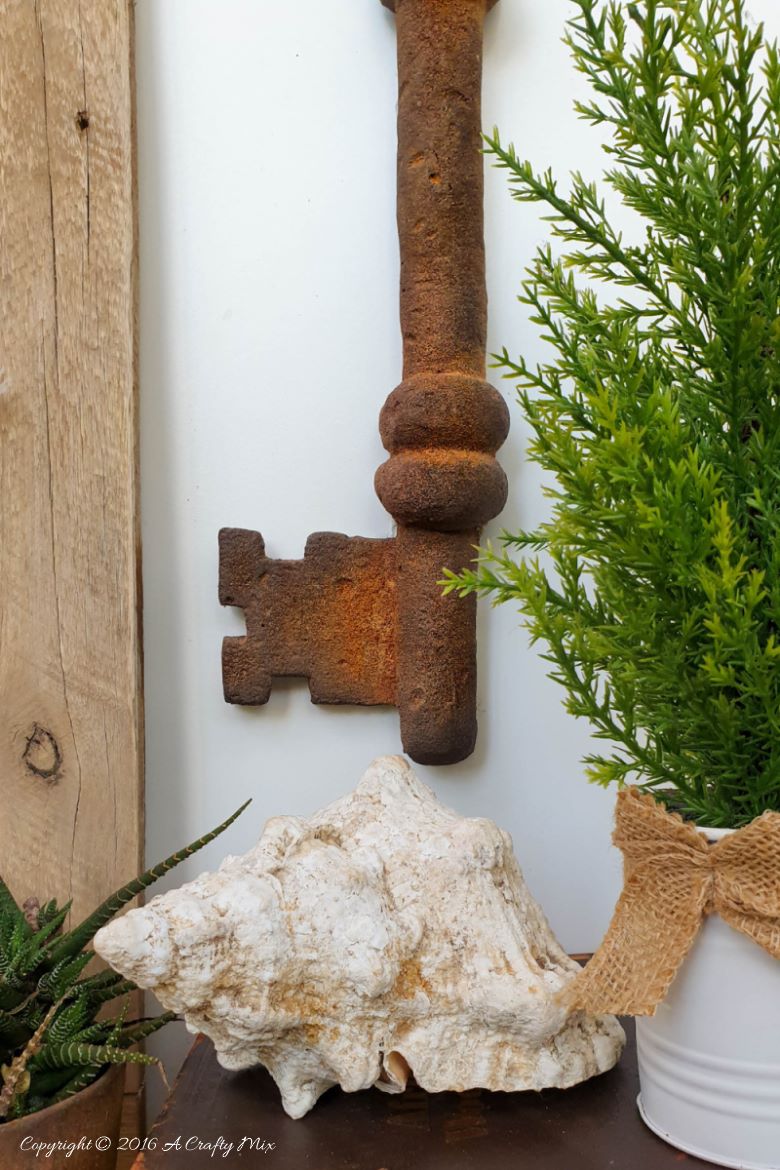
How to Make a Giant Rusty Key
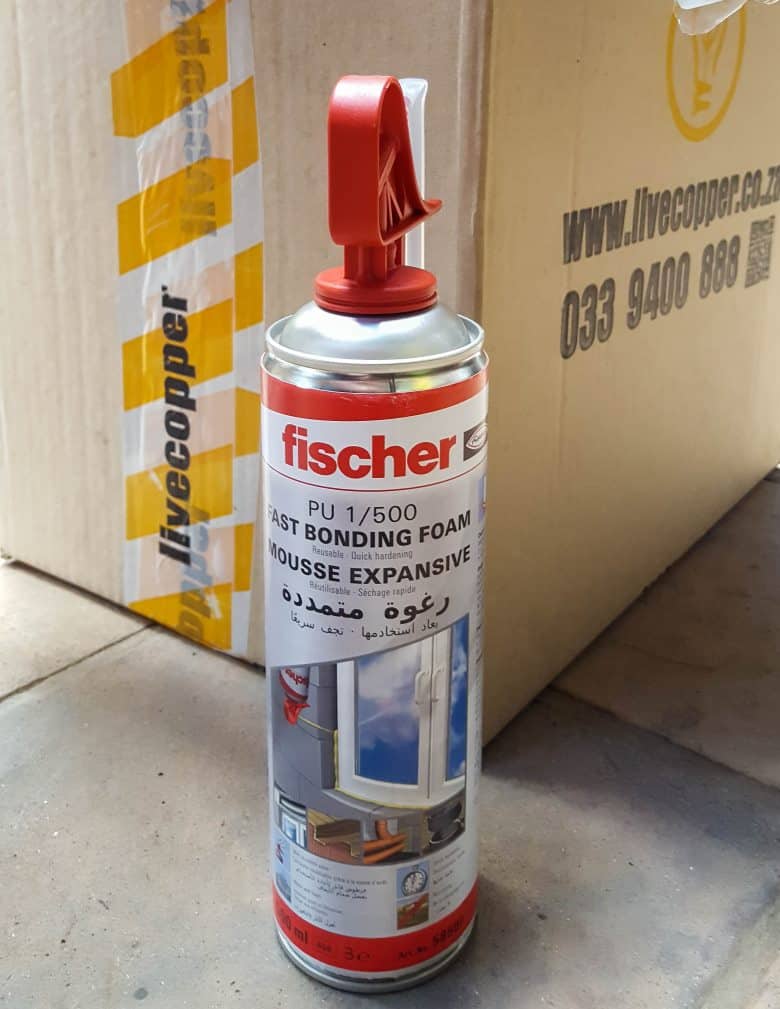
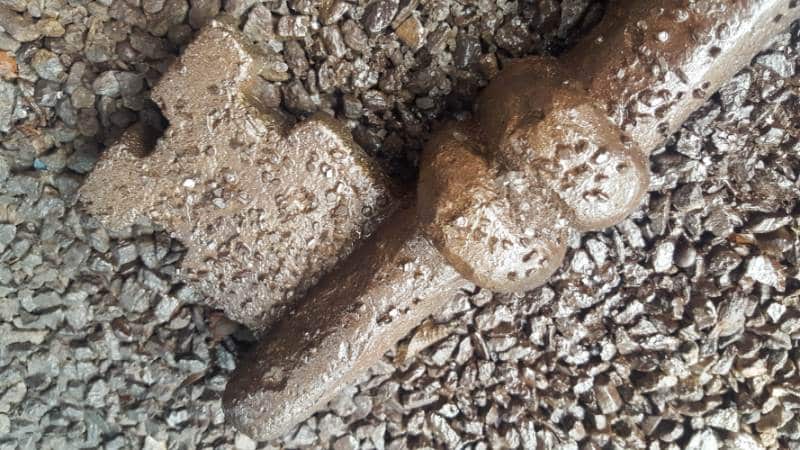
Our faux metal key is about 50 cm long, or 20″ for my American friends and it was one of those projects that really frustrated me at times, but I am so happy with how it turned out. If you’d like to make one all you need is some cardboard, paint, coarse sea salt, nutmeg, and expanding foam. That stuff you use to fill gaps with. Any brand will do.
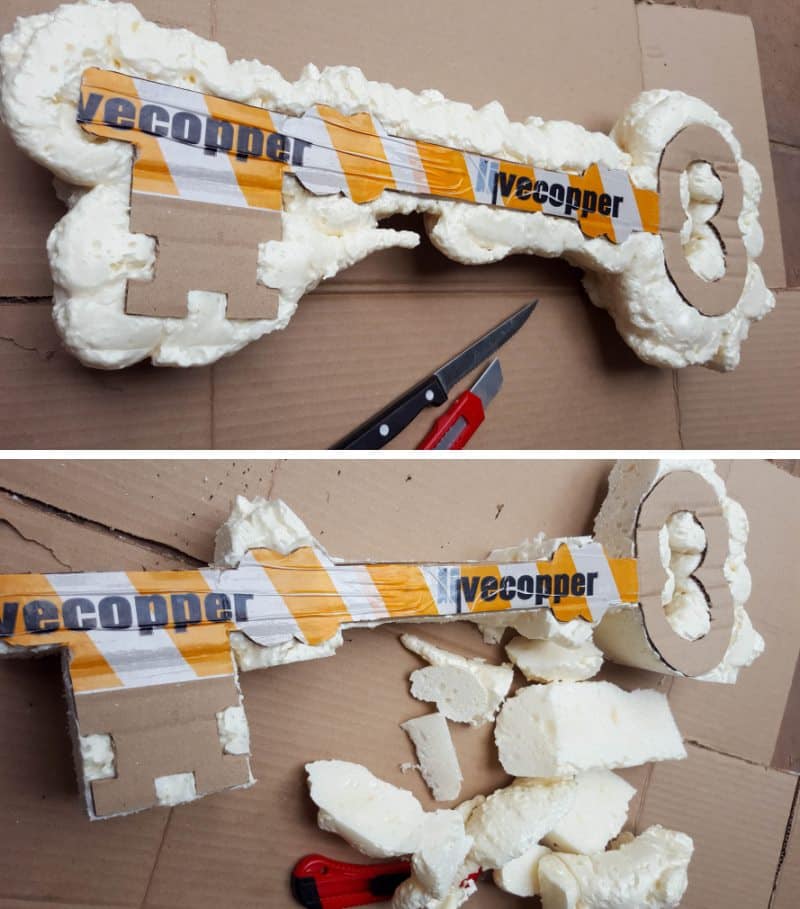
I found this basic key on the Graphic Fairy and used it to create a cardboard template for our key.
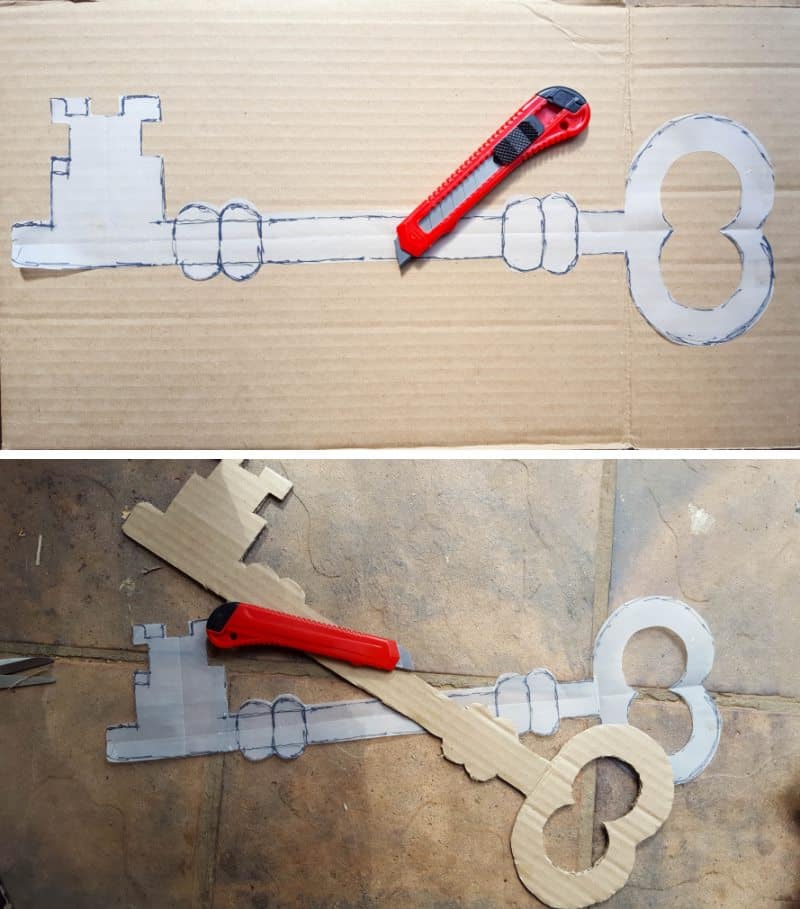
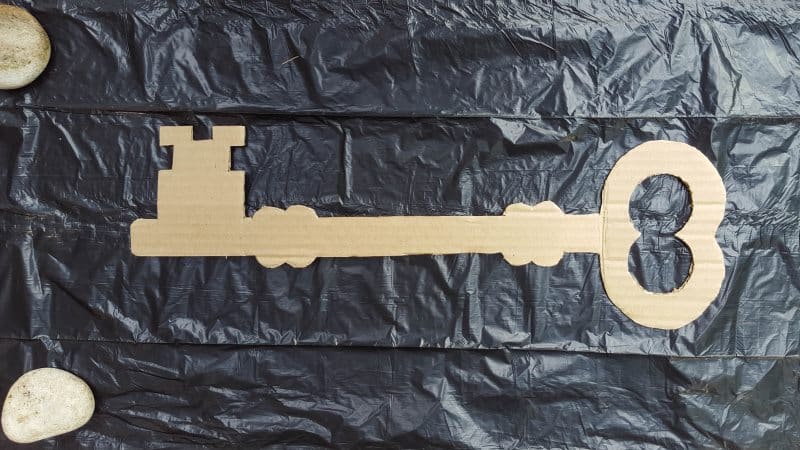
I considered going for something a little more intricate, but I think this technique is more suited to something simpler. Use a sharp craft knife to cut the key out of cardboard and place it on a sheet of plastic.
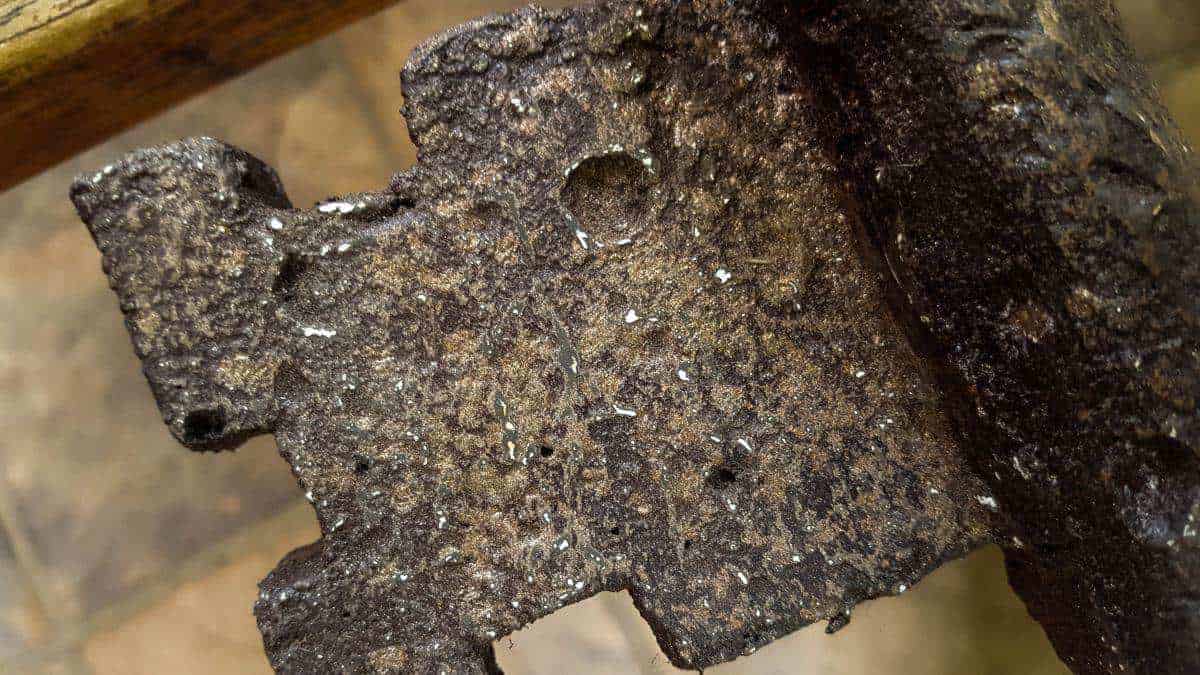
Grab some of that expanding foam and spray it all over the cardboard key, and wait for it to dry completely.
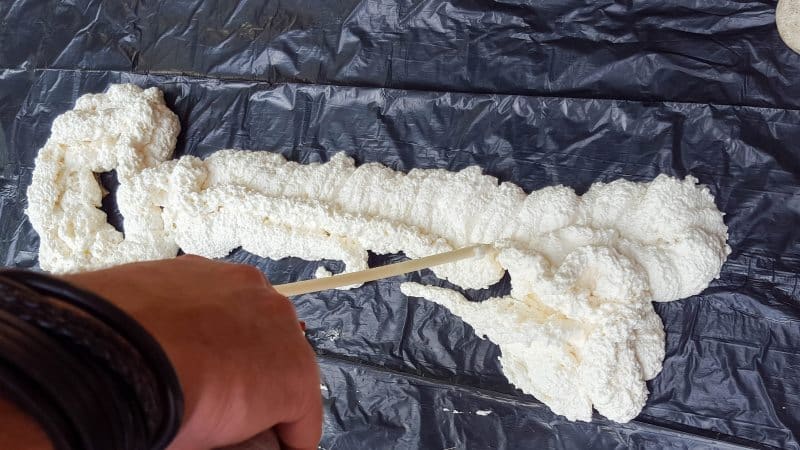
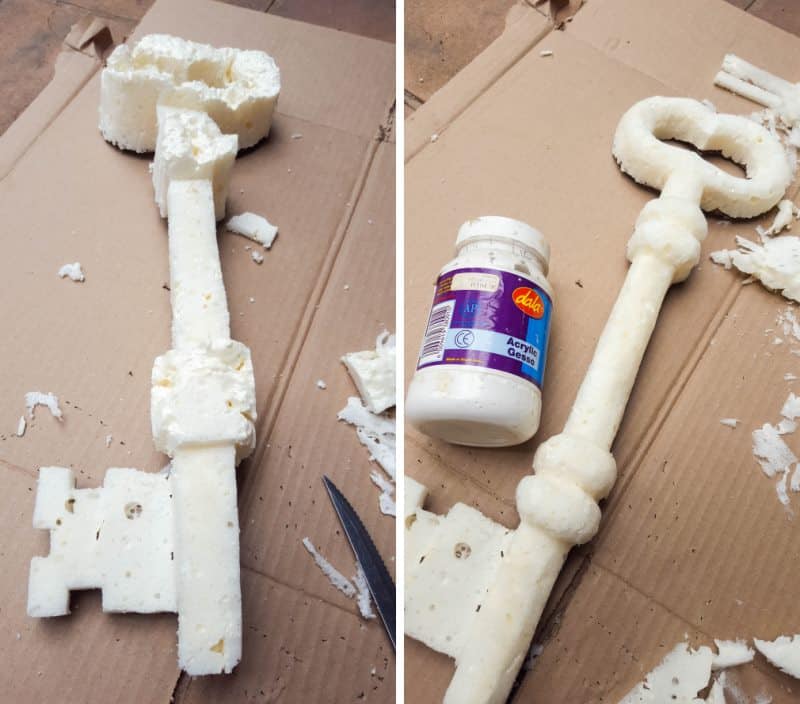
Ours took about a day. When it’s dry, use a craft knife to carve out the key shape. Start off by just cutting away large chunks of the foam and then whittle away the rest, little bits at a time. I promise it’s easier than it sounds and I found it very therapeutic. And if there’s any expanding foam left you can always make this adorable fairy toadstool
Don’t worry too much if there are gaps or air bubbles in the foam, it will add to the faux metal effect later.
Adding the Rust Factor
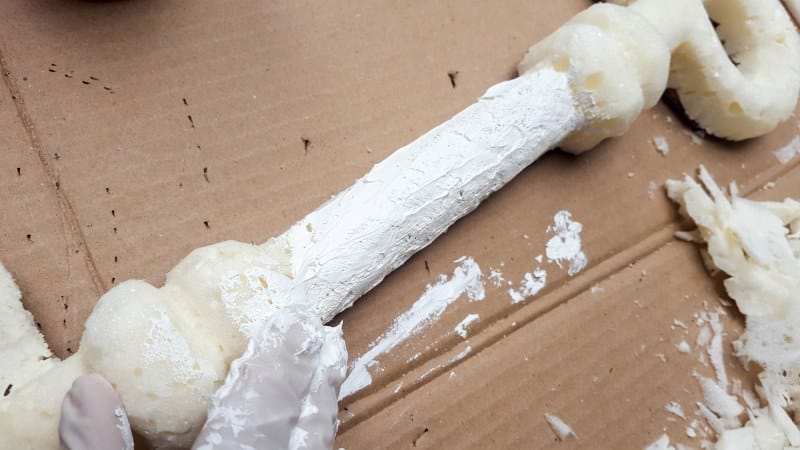
We used some Gesso to smooth out any rough edges, but if your carving skills are better than mine, it’s probably not necessary. Gesso is the stuff artists normally use to seal their canvas before painting and you’ll find it at most craft stores or you can make your own.
Paint the key in a copper brown color. You can use acrylic paints or spray paint, whatever you have in your craft cupboard. Once the paint is dry, spritz the key with water and then randomly sprinkle some coarse sea salt all over the key.
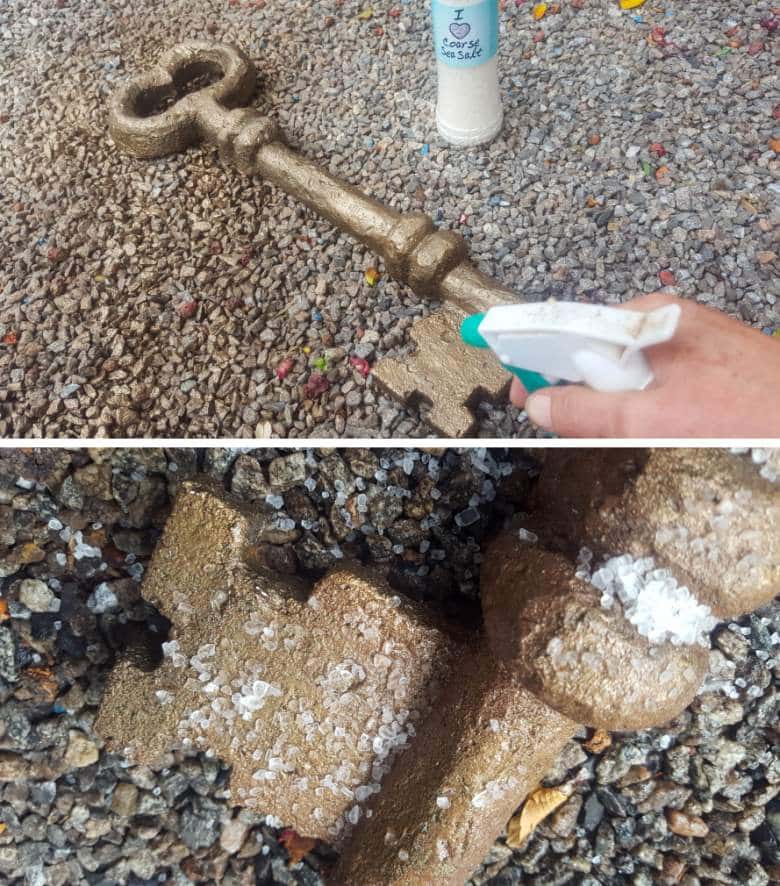
The sea salt melts and creates a barrier for the next layer of paint. Wait a few minutes for most of the water to evaporate, and then spray the key a deeper, darker brown.
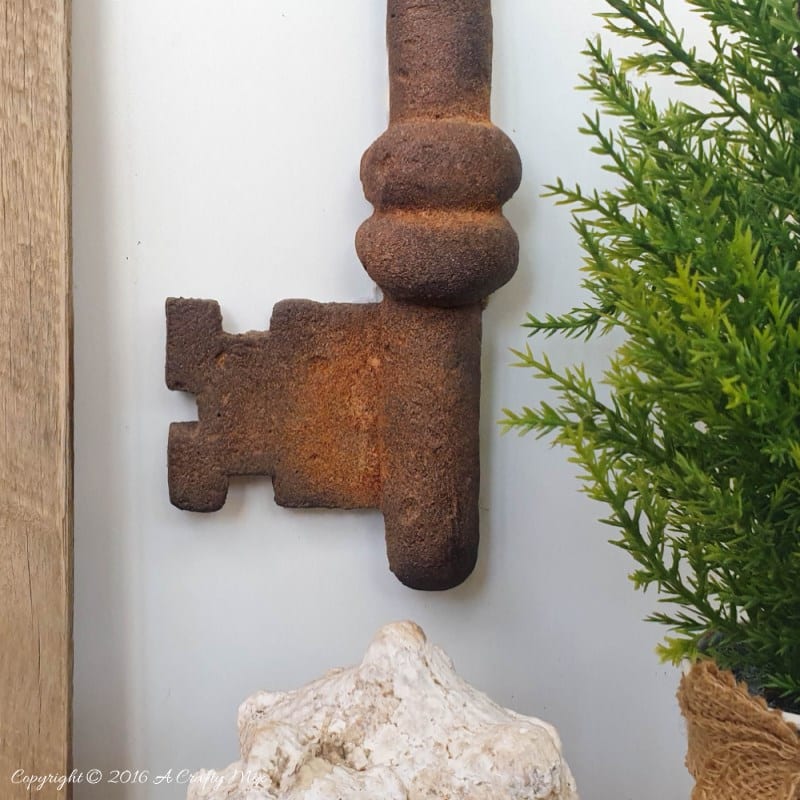
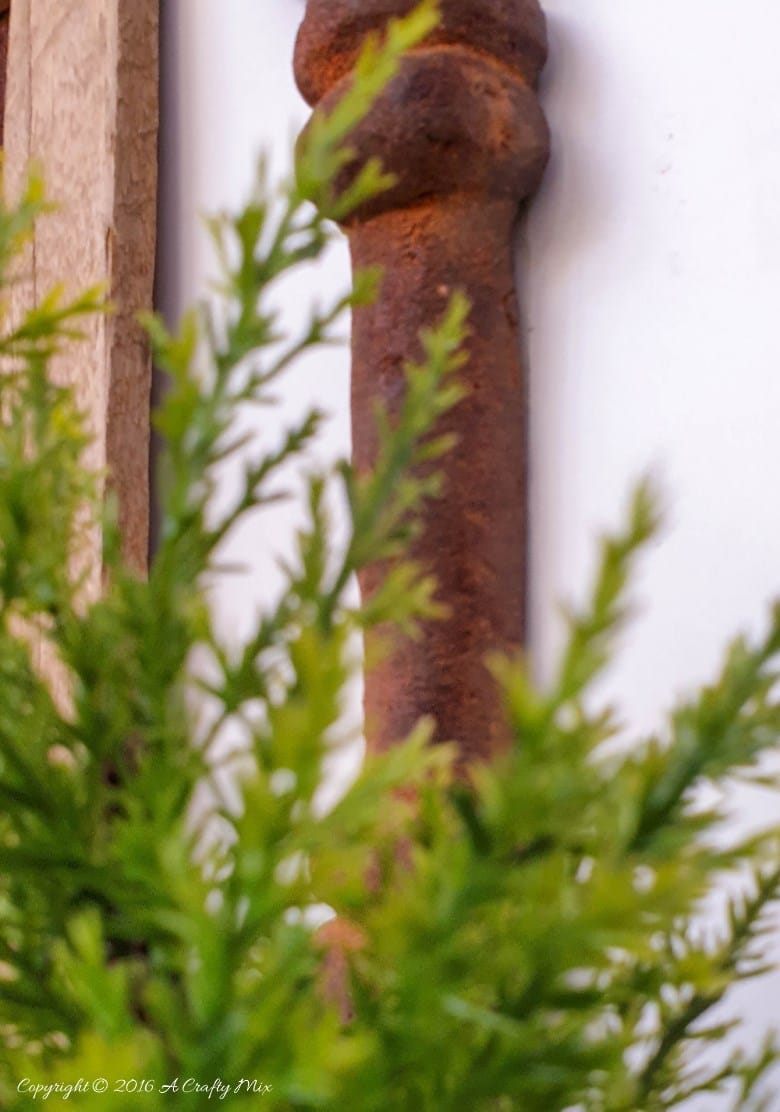
When the paint is dry, just brush the salt off, and you’re left with this gorgeous pitted effect.
Now for the nutmeg. Bet you were wondering what on earth that had to do with the whole equation 😉
Smile; it's the key that fits the lock of everybody's heart
Add little dabs of glue or mod podge and sprinkle the nutmeg all over the key to create some yummy, delicious, rusty awesomeness.
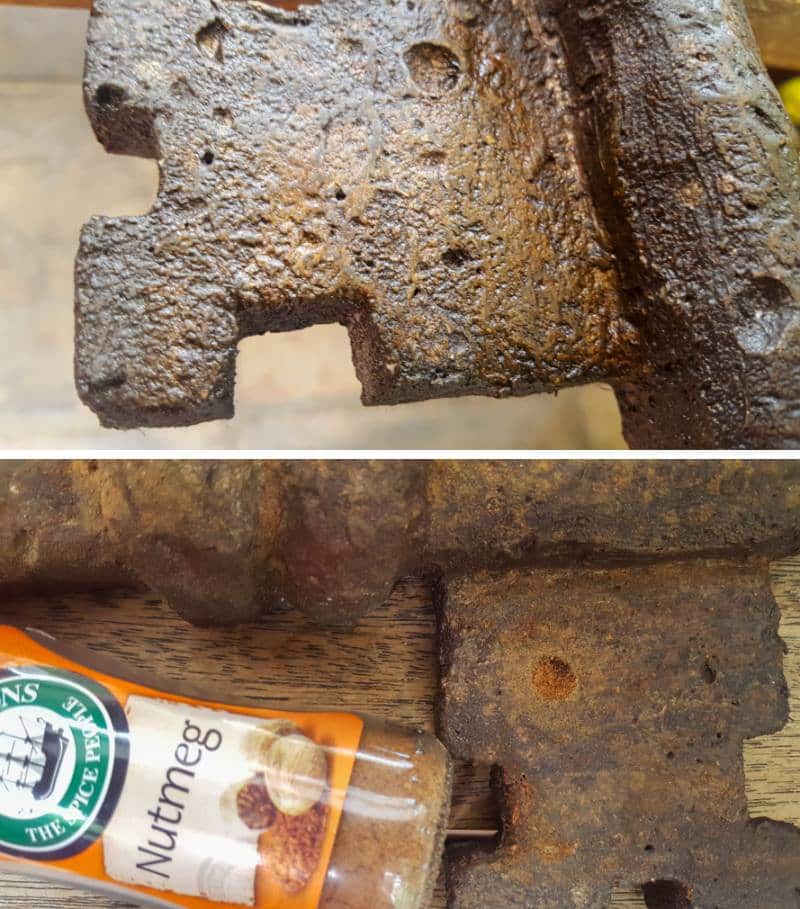
Be generous with the nutmeg, especially in the air bubbles.

That’s where rust would naturally form if the giant faux metal key had been lying in the rain and snow.

Seal the gigantic rusty key with a clear ,matt varnish.
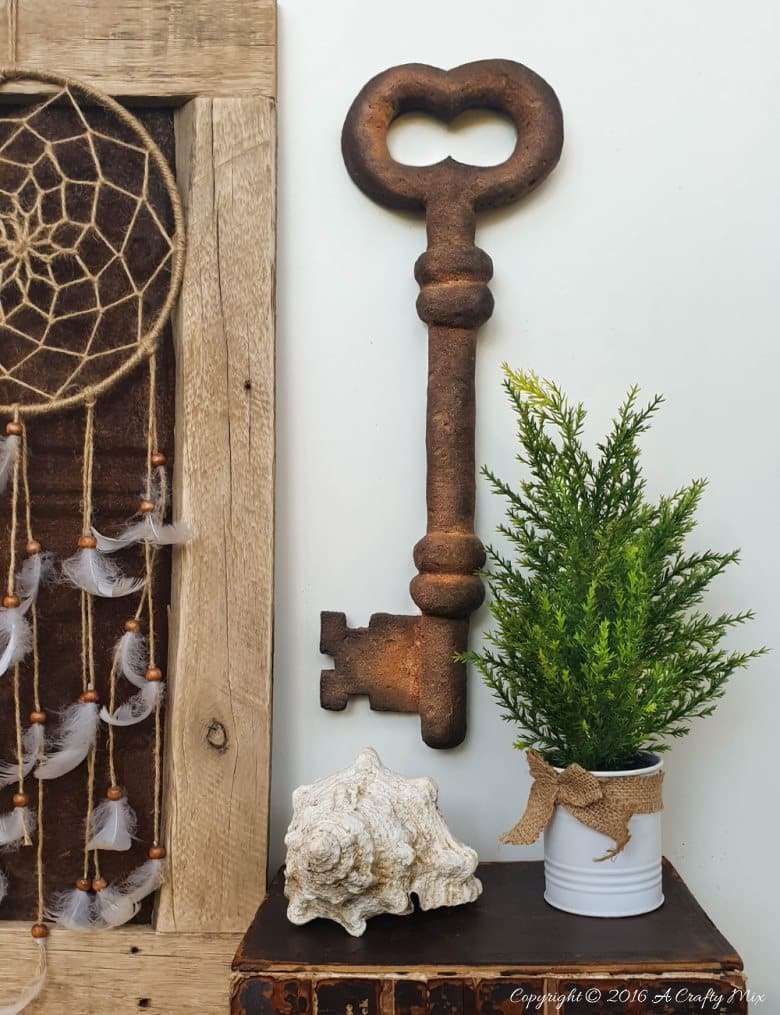
What do you think of the giant rustic faux metal key? Would you add something like this to your decor?
If you like the idea of making a faux metal gigantic rustic key, don’t forget to pin it for later.

I’d really love to hear from you; comments always make my day. Oh before I forget, if you’d like to make something similar or prefer to buy rather than DIY, we’ve got you covered. Disclosure: Clicking on the links below means we may receive a commission from Amazon. But don’t worry, it won’t come out of your pocket, and it helps us come up with more crafty ideas to share with you


And as always, wishing you a beautiful, crafty week filled with lots of love. Thank you for popping in for a visit.

Last update on 2026-06-03 / Source Amazon Affiliates