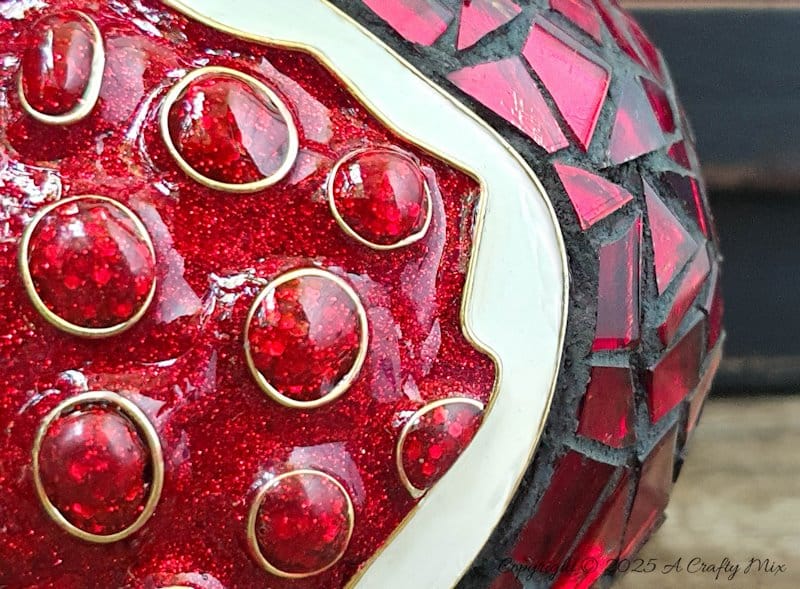
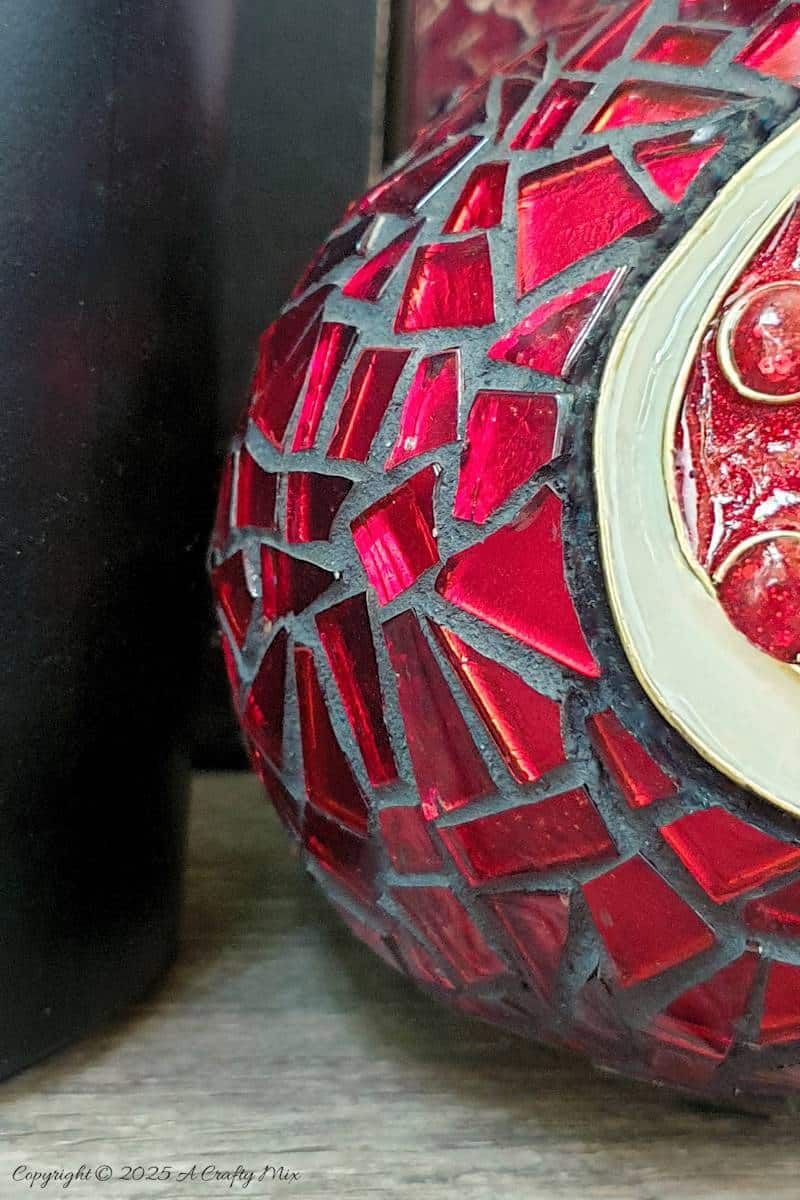
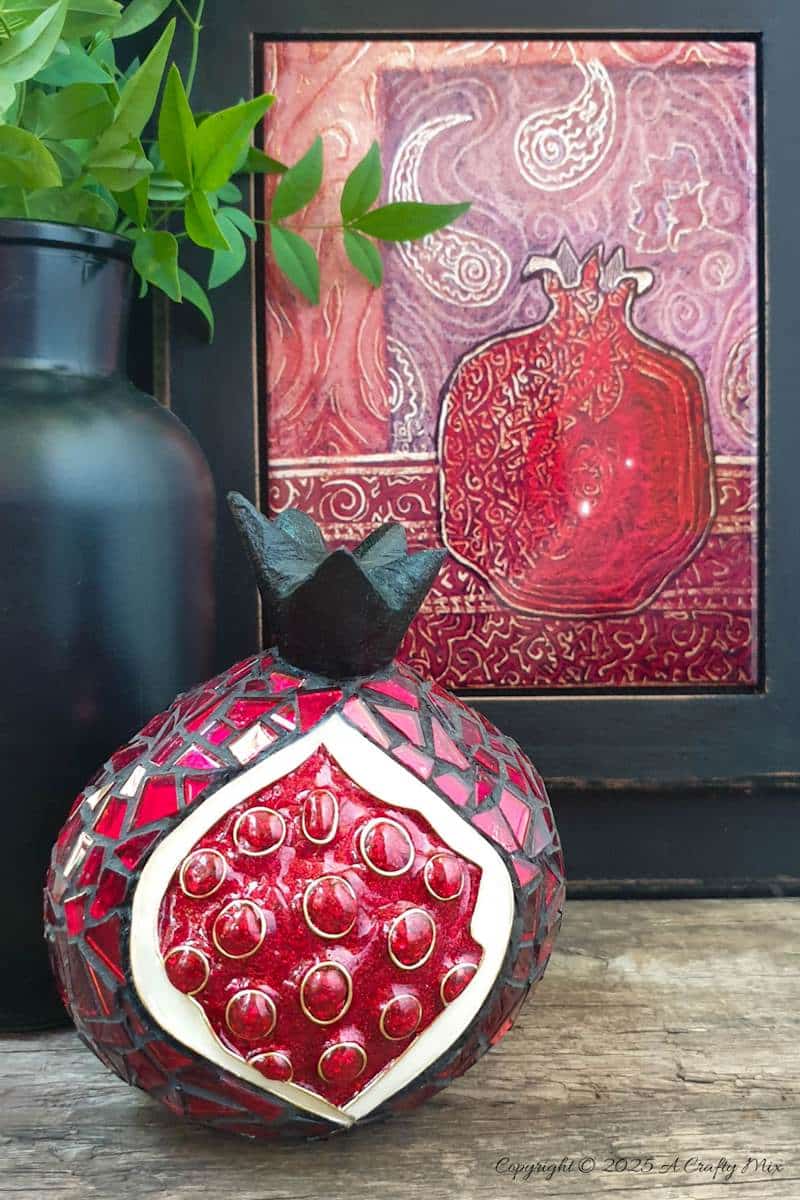
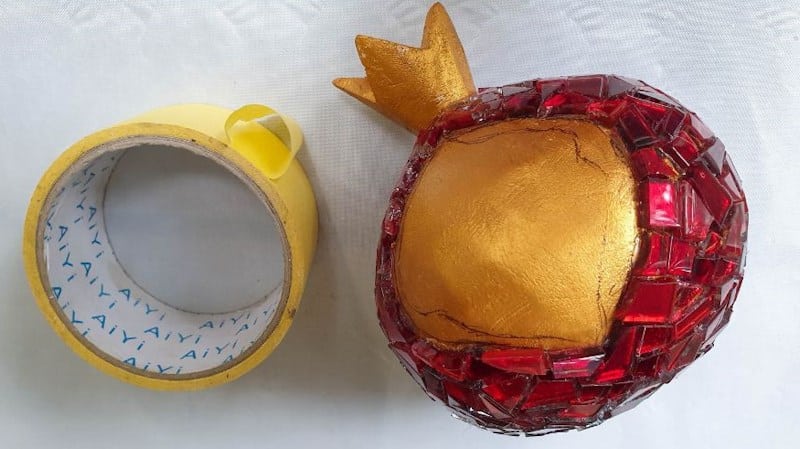
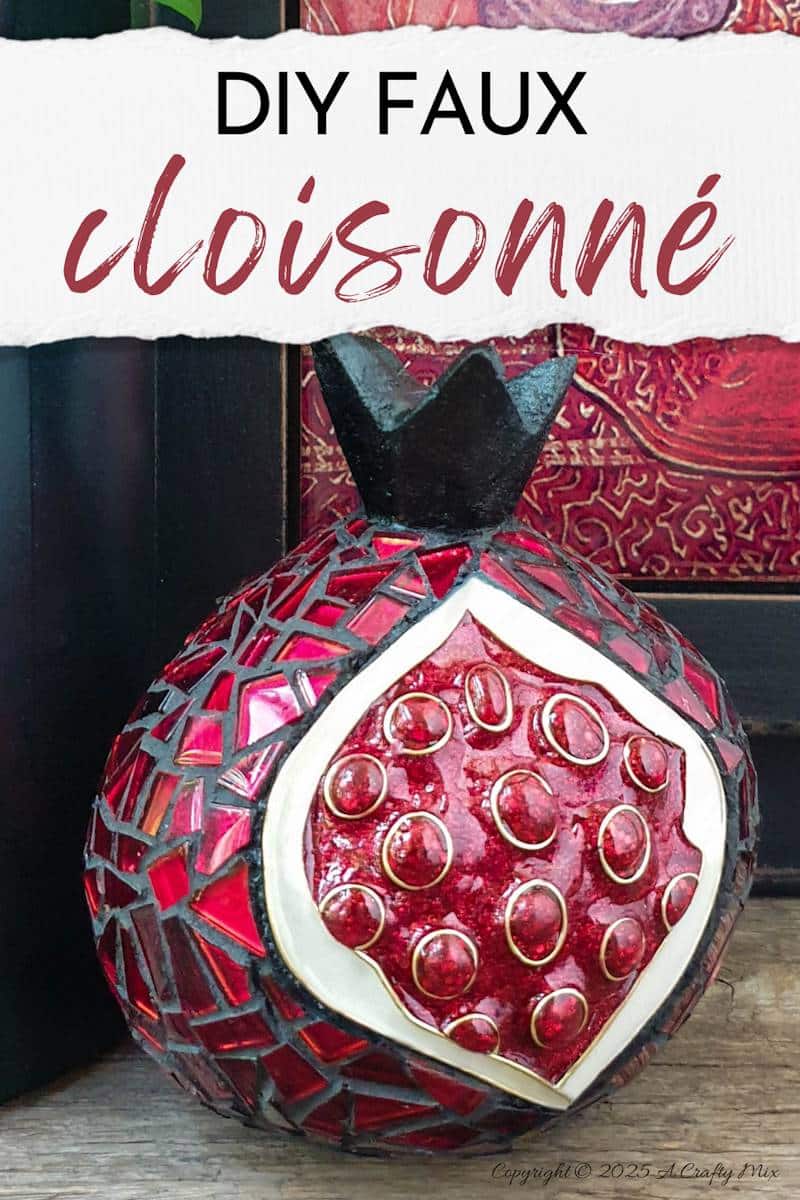
I’m a huge fan of wire art and mixed media mosaics. But for some reason I’ve never combined the two art forms into one. Until a few weeks back when I made the dazzling pomegranate. The leathery, outer skin is mosaic, while the glistening, jewel-like seeds and flesh inside are faux cloisonné.
 Traditional cloisonné involves soldering thin metal strips onto a metal surface to create compartments or cells (called “cloisons” in French, hence the name). The cells are filled with powdered glass or enamel and fired in a kiln.
I don’t have a kiln and couldn’t find powdered enamel either, so I came up with this faux cloisonné technique. It pairs beautifully with the mosaics.
The inspiration for this experiment was a gorgeous, printed tile I found at my favorite craft shop.
So, if you’re keen to make something similar, this tutorial will show you how you can mimic cloisonné using something you can buy at a beauty salon. But, before we get there, do me a favor and follow us on Facebook, Twitter, Pinterest, or Instagram. And don’t forget to subscribe so you’ll never miss a post!
What you need
For the mosaic
- Suitable object. I used a wooden pomegranate
- Mosaic tiles
- Grout
Please refer to this guide for a detailed tutorial that will show you how to mosaic on a curved surface.
For the cloisonné
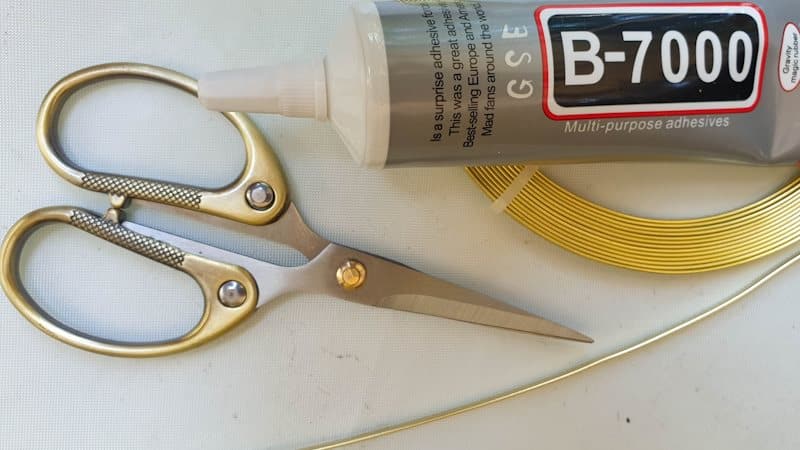
- 3mm Flat gold wire
- B7000 glue
- Scissors
- UV light
- Gel nail polish
- Gel nail polish topcoat
How to do faux cloisonné
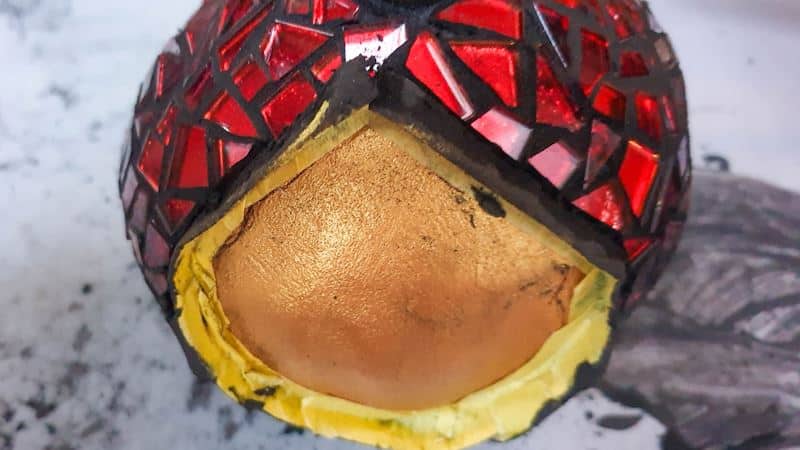
This tutorial is all about faking the look of cloisonné without a kiln, so I won’t go into too much detail about the mosaic. You can find a whole bunch of mosaic tutorials here. To illustrate, I’ll be using a wooden pomegranate that I painted gold for some strange reason.
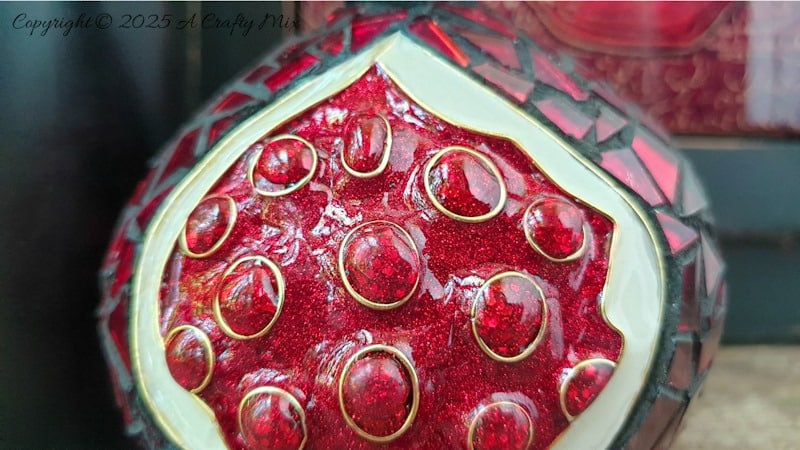
The same process or technique will work on any surface the glue sticks to. You are welcome to use this rough sketch of the pomegranate if you’ll be doing something similar on a flat surface. Two parts of the pomegranate have been cloisonné-d (is that even a word?): the seeds and the white fleshy bit.
Prepping the surface for faux cloisonné
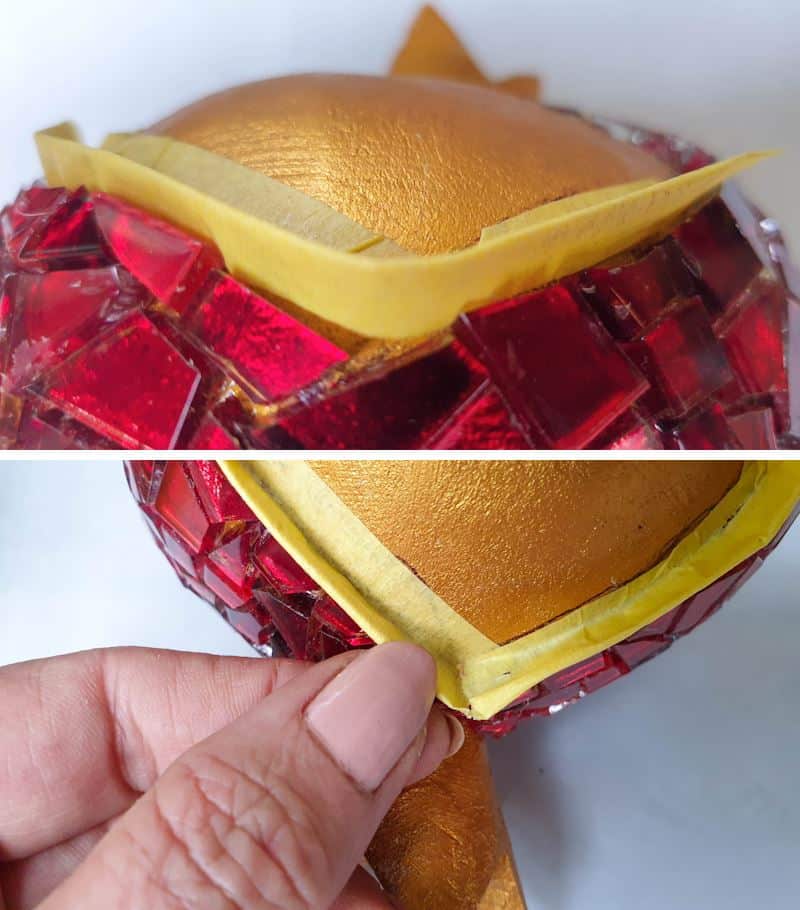
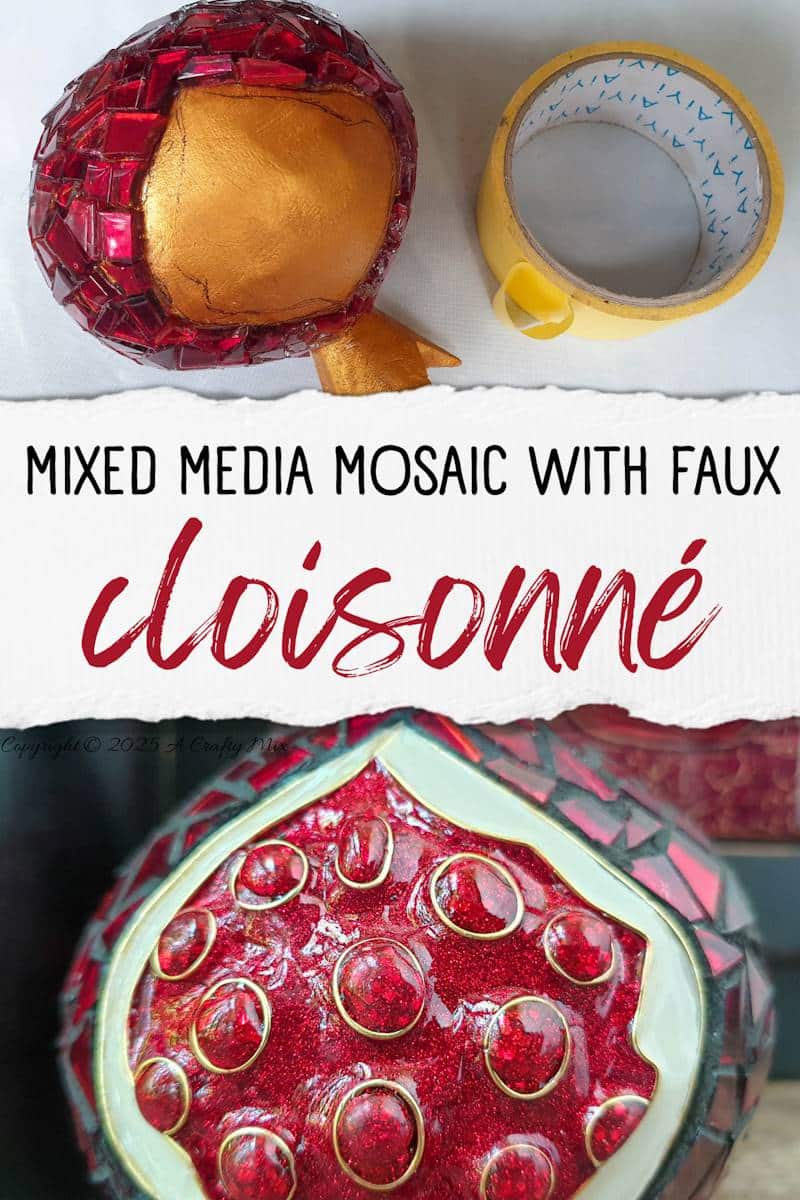
If you’re combining faux cloisonné and mosaics, be sure to grout the mosaic first. The edge where the grout joins the cloisonné should be as flat and smooth as possible. I used masking tape to create a retaining wall of sorts.
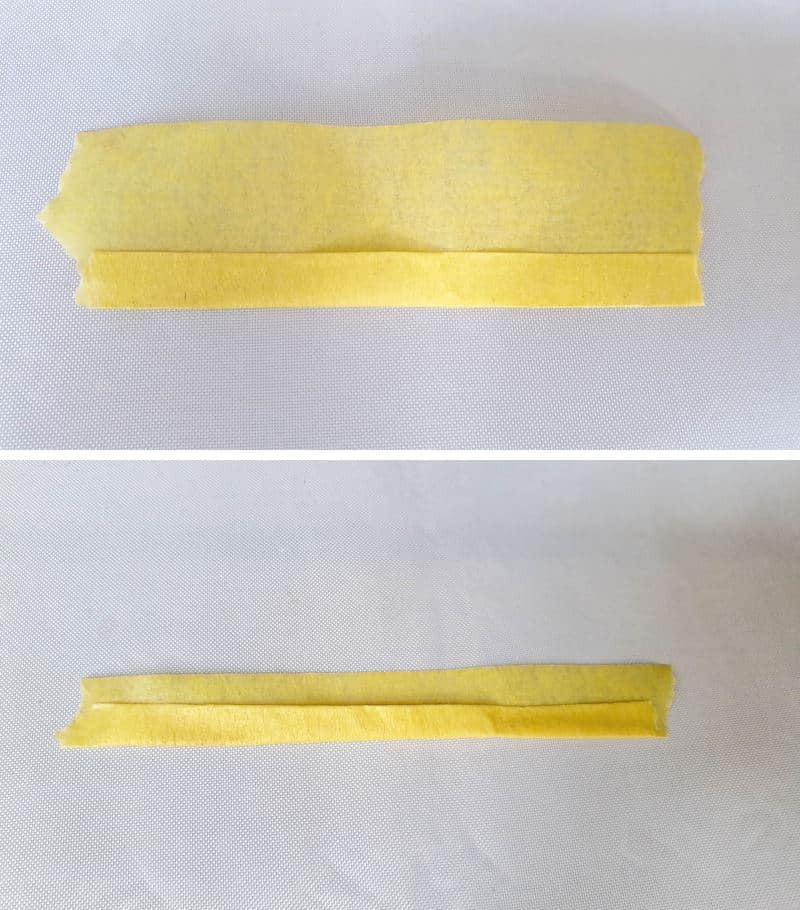
Add the tape all around the tiled edges as shown below.
Mix up a batch of grout and apply it as you normally would over the mosaic tiles.
Wait for the grout to dry completely before removing the tape.
Seal the mosaic edges with 2–3 coats of craft paint or mod podge. I don’t know if this step is necessary, but better safe than sorry. You don’t want any grout dust to cloud that gorgeous faux cloisonné effect.
Take your time with this part. It will save you from having to redo the next step. Ask me how I know. You see those jagged tiles in the piccy below?
 They weren’t the only culprits, mind you. But we’ll get to that in a minute when we do the faux cloisonné.
Adding faux cloisonné flesh
I’ve never tried the real thing. I’ve always wanted to, but kilns are expensive, and powdered glass is hard to come by. Instead, I used something I do have: gel nail polish and a cheap UV light.

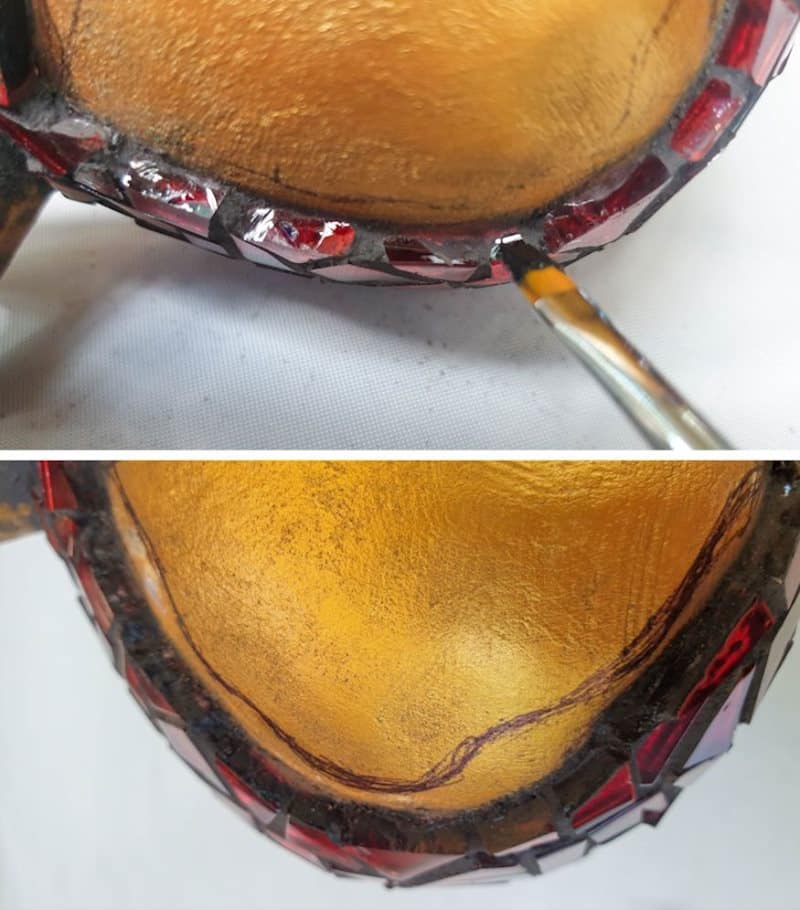
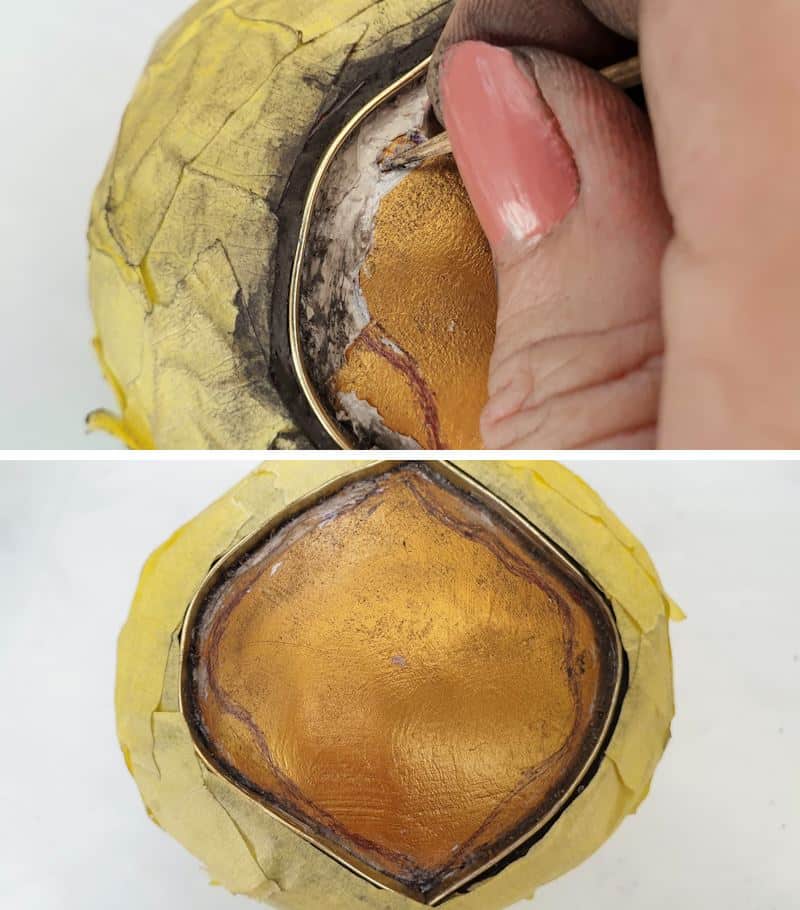
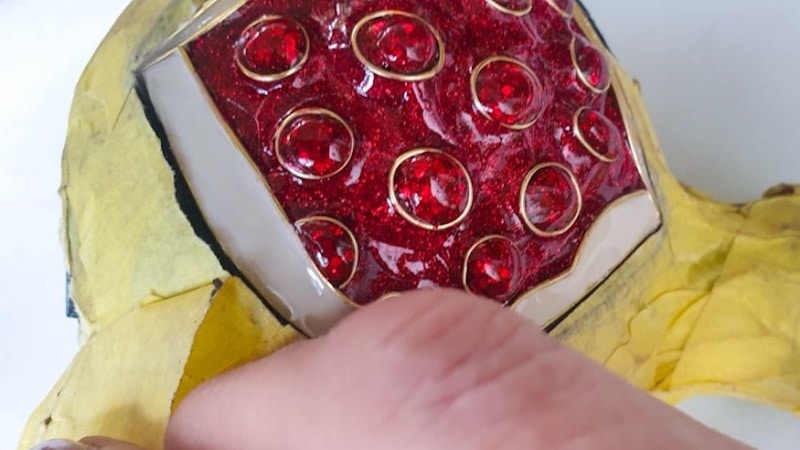
Both the fleshy, white inner skin and pomegranate seeds are faux cloisonné. The technique involves gluing down flat gold wire that acts as a retaining wall for the powdered glass, or in my case, nail polish. The wire comes in a roll, and it’s easy to cut with sharp scissors. Try and make vertical, perpendicular cuts.
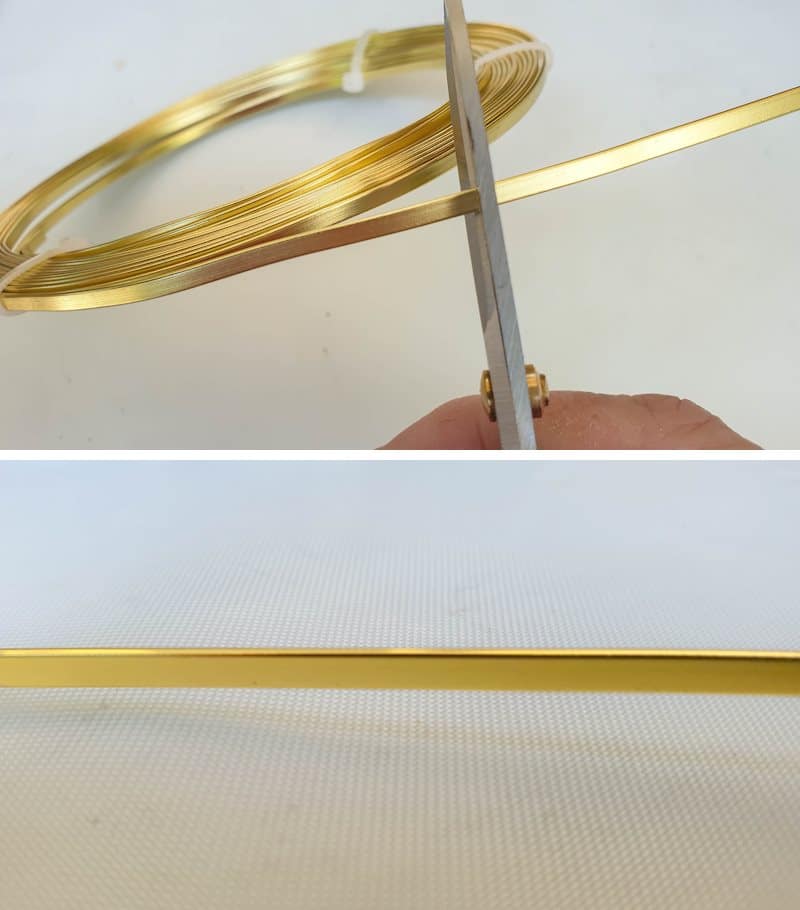
Using the mosaic edge as a guide, cut a length of wire. Grip the wire between two fingers and pull gently to straighten it out. Hold the wire down with tweezers or your fingers, and with the other hand, move the wire along the mosaic grout edge, bending and shaping as you go.
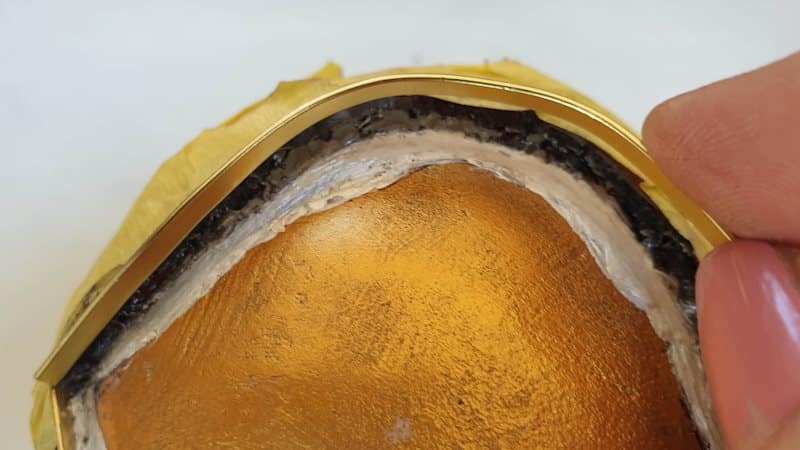
To protect the mosaic from what comes next, I covered it with masking tape. I’m a messy crafter and didn’t want to spend hours cleaning up oopsies later. Put the wire to one side and apply a line of B7000 glue along the grouted edge.

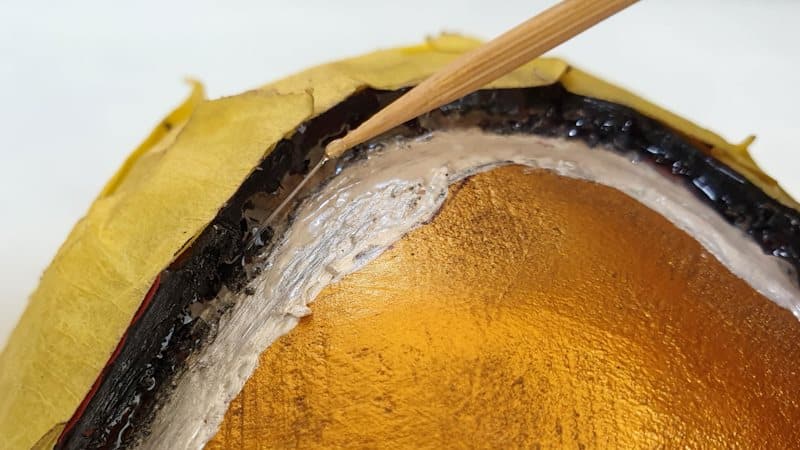
B7000 is slow-drying, so give it 5 or so minutes to become tacky. You’ll know it’s ready when you touch the glue with a toothpick, and it doesn’t pull up any stringy bits. In the piccy below, the glue is still too wet.
You can press the wire edge into the glue as soon as there are no more stringy bits. Press the wire down firmly into the glue. It’s important to make sure it’s glued down properly; otherwise, you run the risk of the gel nail polish leaking underneath.
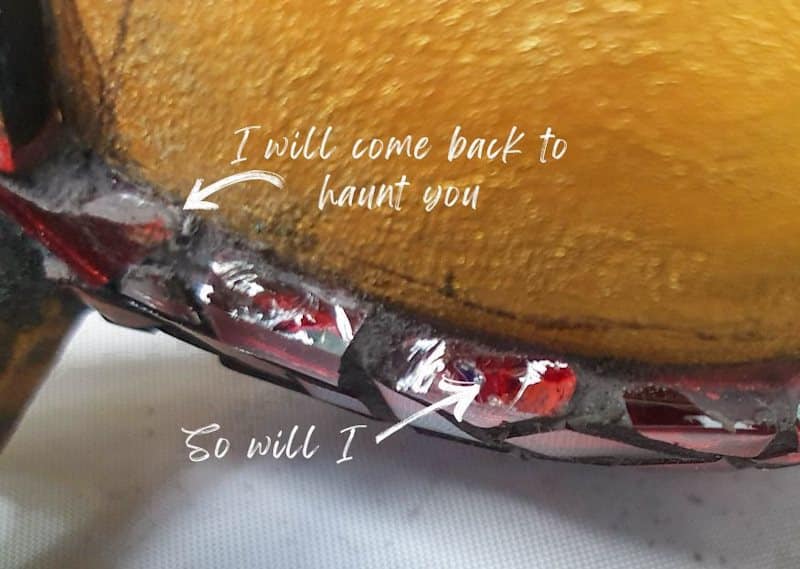
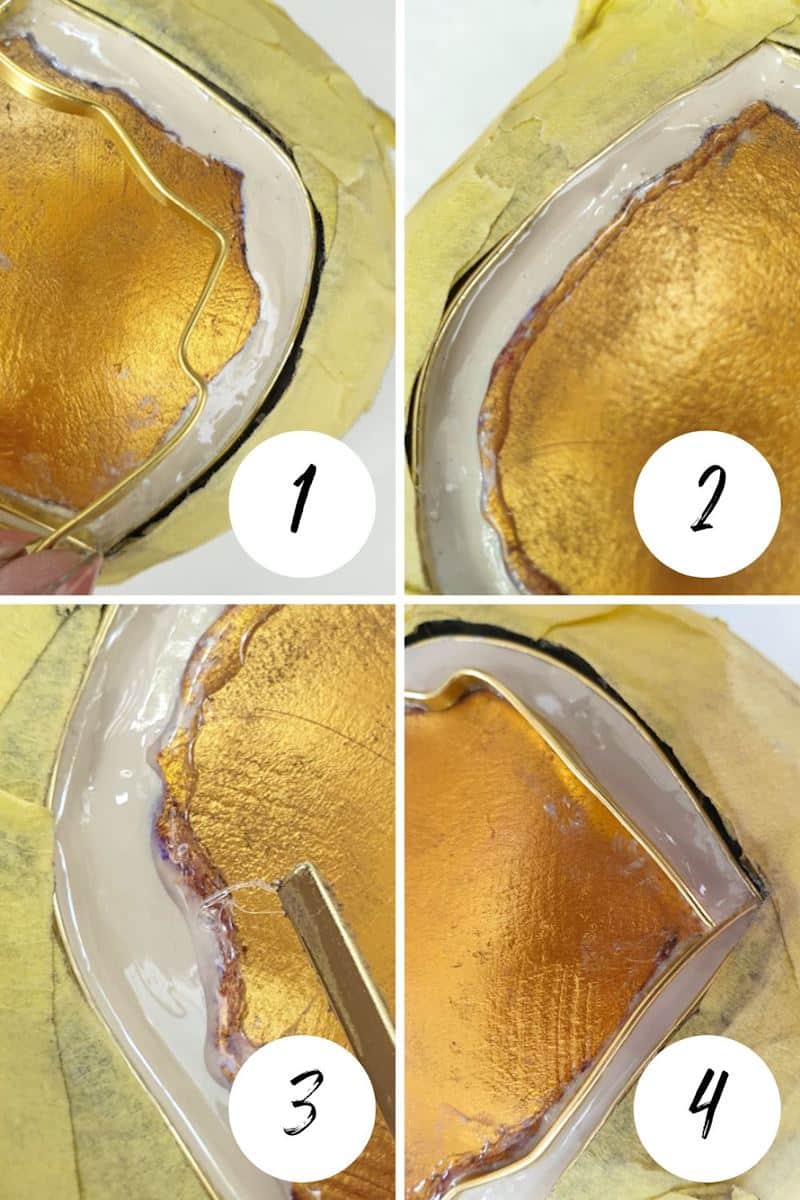
Fixing any gaps
Remember those jagged tiles I told you about? I’m not sure if you can see in the piccy, but they’re the reason there’s a gap between the wire and the grout.
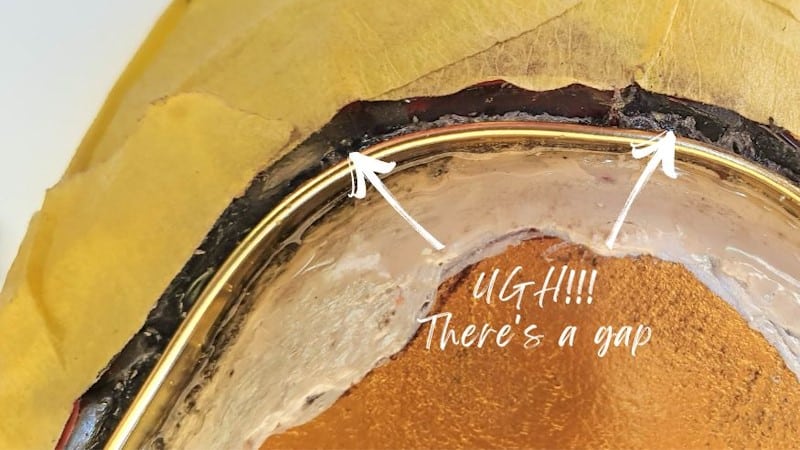
And that meant I had to add more grout with a toothpick.
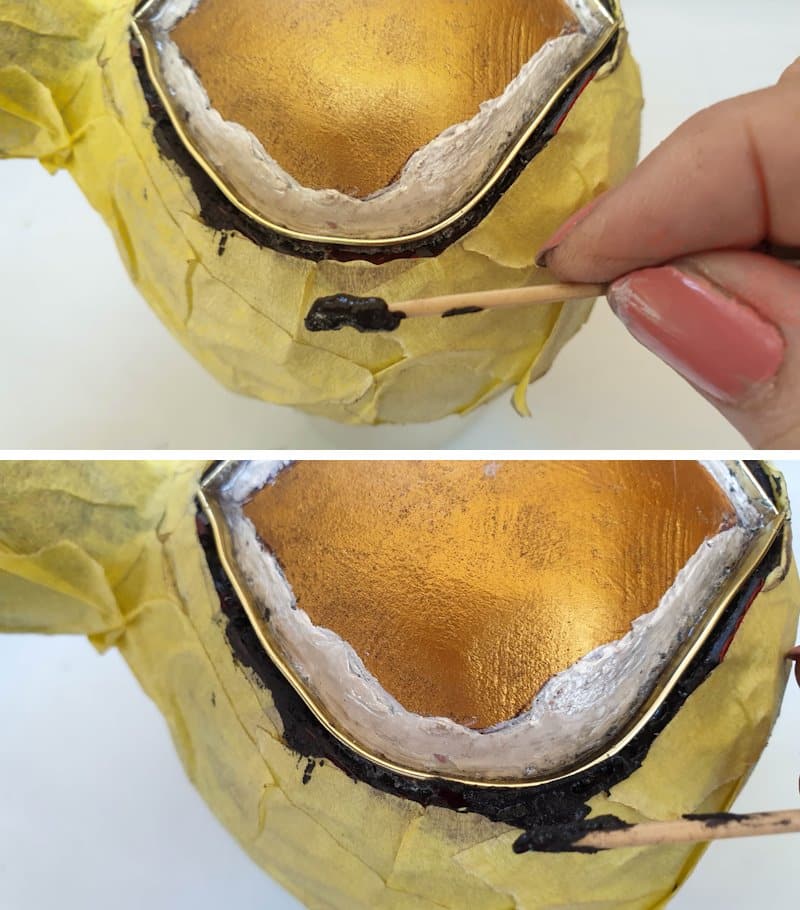
And clean up the mess and repaint. So frustrating.
Anyhoos, once that was done, I applied 2 thin coats of nail polish in the fleshy area, curing each coat under a UV light.

To enclose, or cloisonné, the fleshy area, I repeated the steps above.
- Bend the wire.
- Add the glue.
- Wait for the stringy bits to disappear.
- Glue the wire down firmly to form a retaining wall.
You can add more glue on the bottom edge to ensure there are no gaps where the next color could seep through.
Making the glistening jewel-like seeds
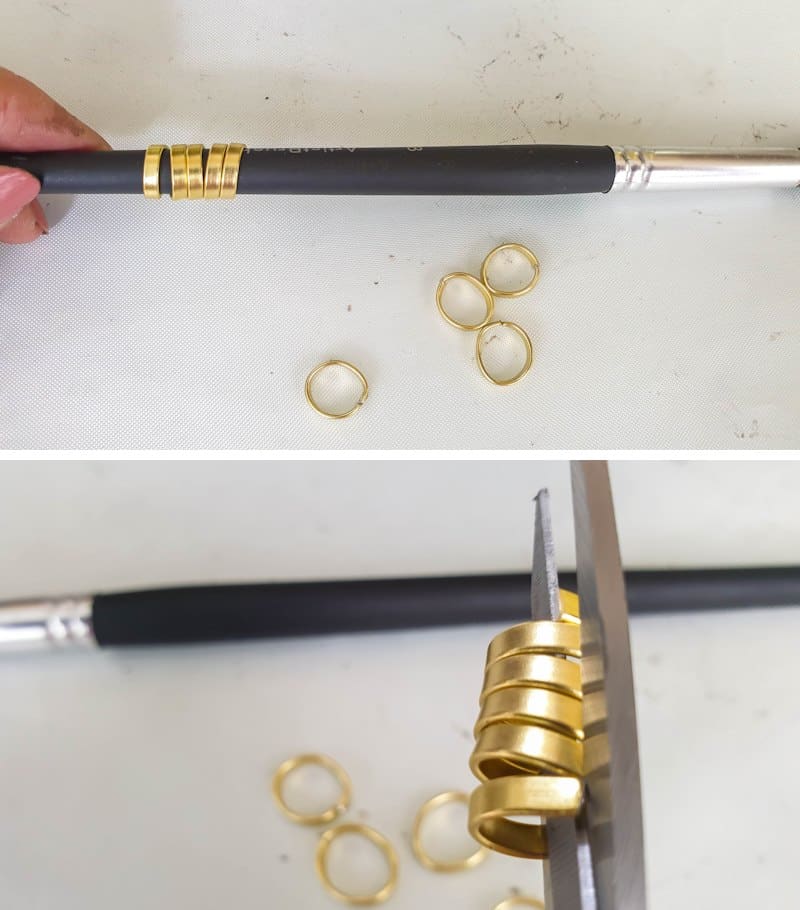
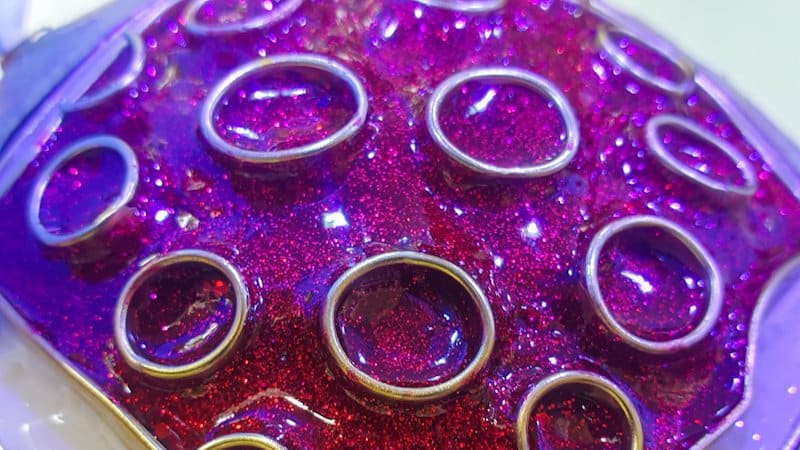
For the pomegranate seeds, I used the same technique as above. Besides the nail polish color, the only difference is that instead of wiry, gold, wavy lines, the seeds are wire circles. To make the seeds, wrap the wire around a skewer or paintbrush a few times to form a coil. Remove the coil and cut across to make a whole bunch of circles.
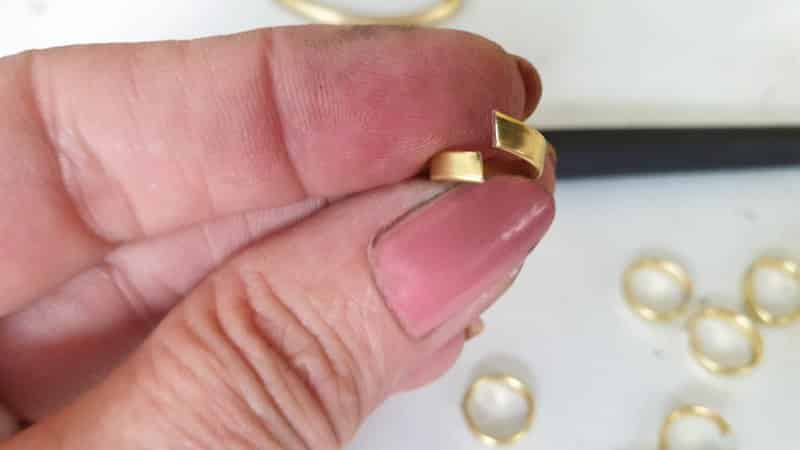
Squeeze the ends together and use tweezers to gently adjust the circles into seed shapes.
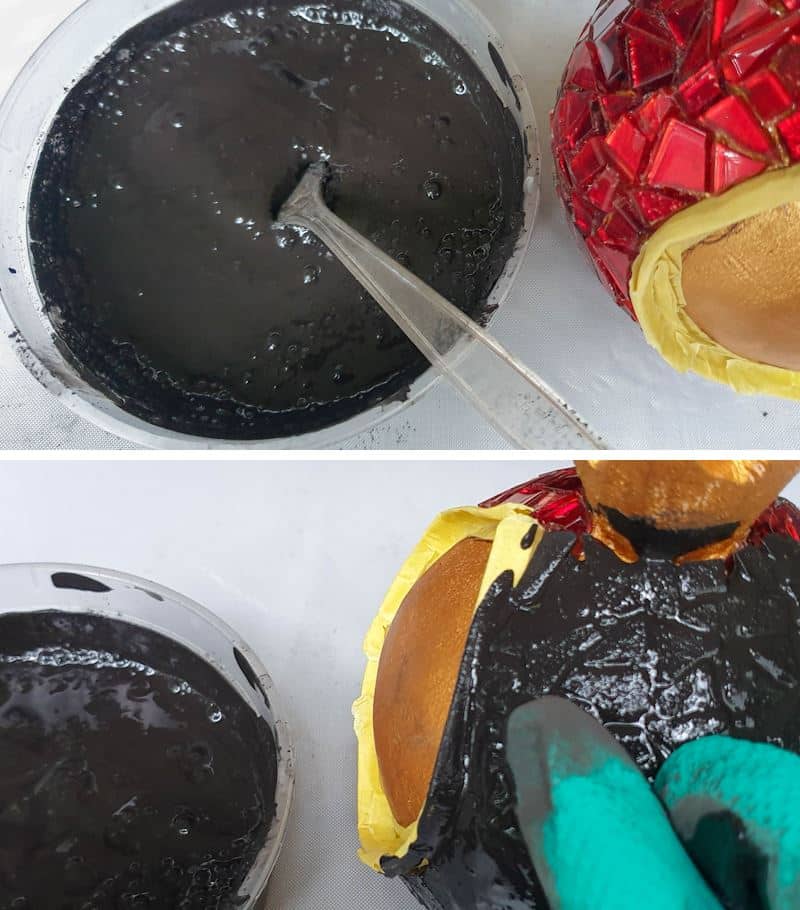
Before gluing down the gold seed circles, I painted the “inside” of the pomegranate black.
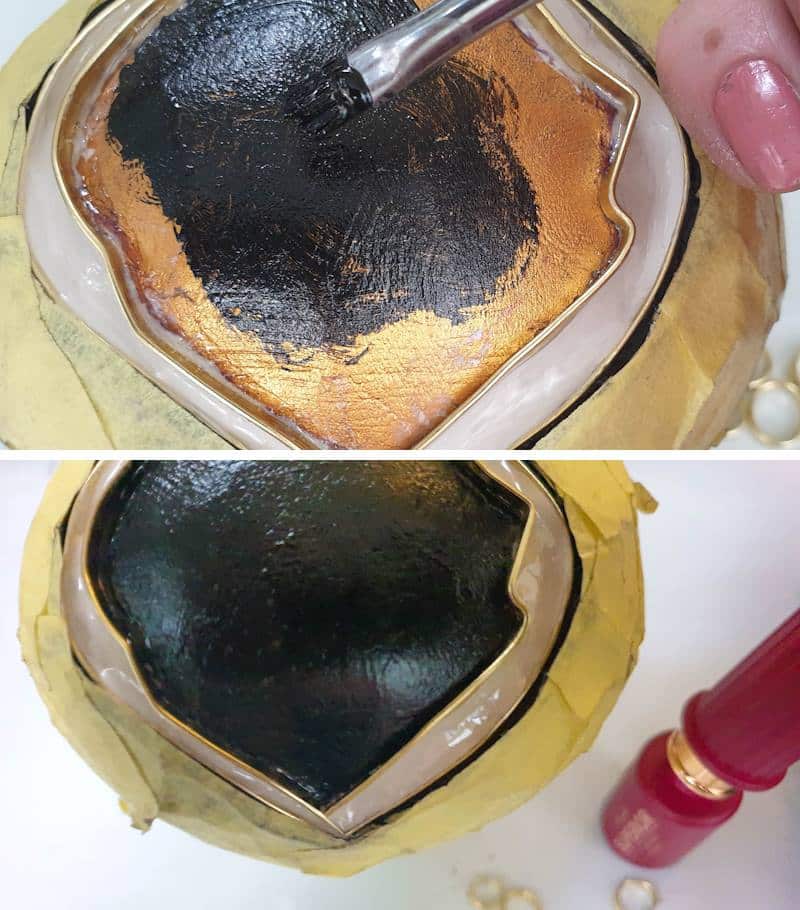
In hindsight, this bit wasn’t necessary. I put so many thin layers of reddish nail polish on that the black didn’t show through at all.
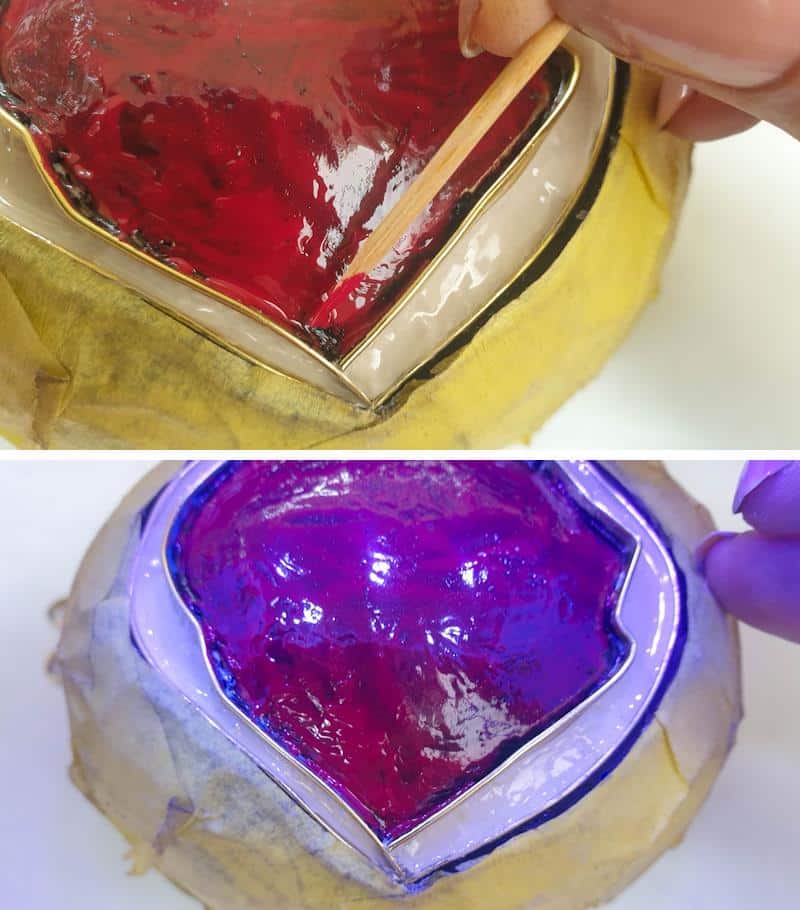
The first red looked dull after curing. Pomegranate seeds should glisten, IMHO, so I switched over to a red mica and glitter-infused polish, and that did the trick.

To add the seeds, draw circular shapes with B7000 glue. The glue can be slightly wider than the lines to ensure the gold wire seeds can be fixed firmly. Hold the wiry gold seed outlines with tweezers and place them on the glue. Press down firmly.

Use the nail polish brush to drop the gel polish inside the wire seed outlines. Less is more. You can also use a toothpick to move the polish into hard-to-reach places.

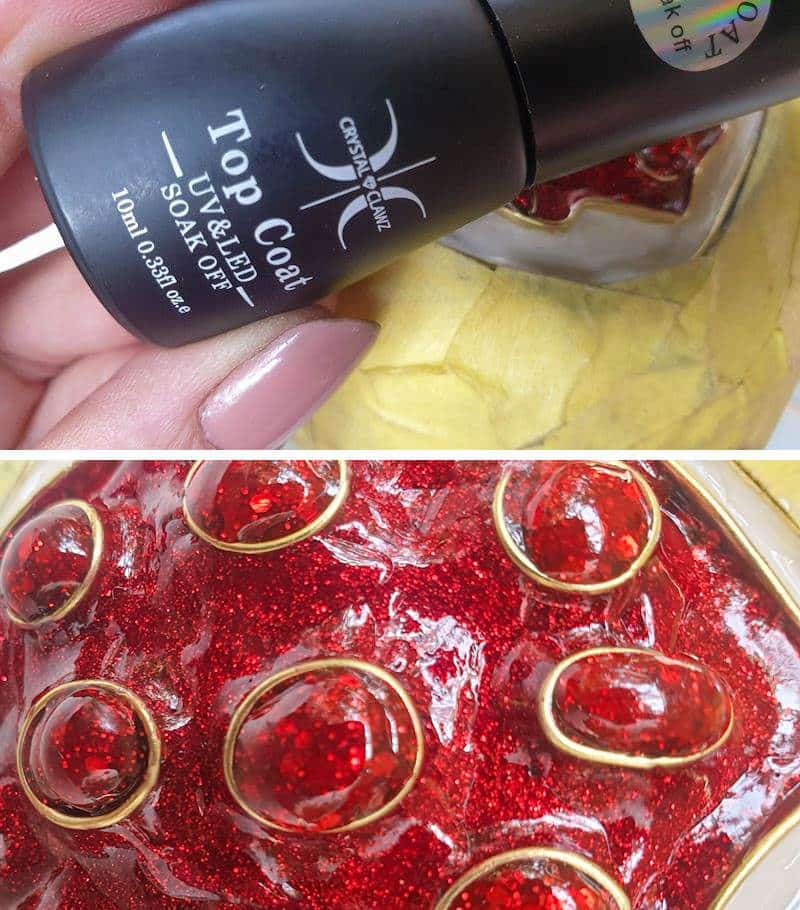
Build up the layers with more nail polish, curing between each application.
Once you’re happy, seal the faux cloisonné seeds and flesh with a layer of clear topcoat. Cure the topcoat under a UV light.
Don’t they look so wet and juicy? Almost like the real thing. To finish off, remove the masking tape. …
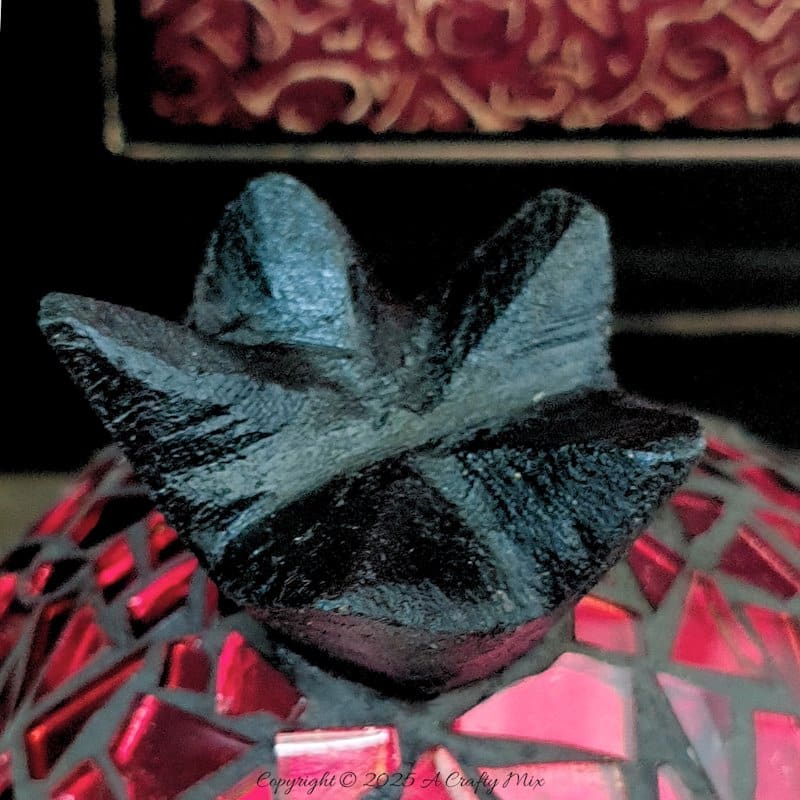
…and paint the top of the pomegranate black to match the grout.
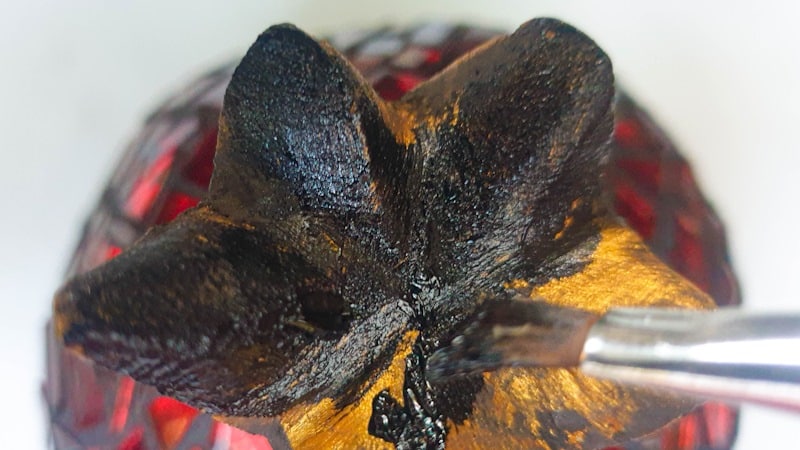
I think there’s enough going on already, what with the mosaics and the faux cloisonné.
Doing something fancy with the top would have been too much.

I’m super happy with how this experiment turned out. I’ll definitely do it again. Would you give it a try?
If you like the idea of combining mosaics and faux cloisonné, don’t forget to pin the tutorial for later
Sharing is caring
Oh, and if you’re looking for some of the things we used, we’ve got you covered. Disclosure: Clicking on the links below, means we may receive a commission from Amazon. But don’t worry it won’t come out of your pocket, and it helps us make more amazing crafts to share with you 😉
Faux Cloisonné effect


Mosaic supplies

And if you prefer to buy rather than DIY, then these may appeal.


And as always, wishing you a wonderful, crafty week filled with lots of love. Thank you for popping in for a visit.

Last update on 2026-06-03 / Source Amazon Affiliates