
OMW this year is just flying by. Anyone else feel the same? Last year my beautiful hubby bought me a Brother Scan & Cut, just because 😉 and I still haven’t used it. My bad. So when the ladies from the International Bloggers Club set the “New to Use” challenge for this month it seemed the perfect opportunity to play with my new toy. And if I can combine the challenge and create this secret storage solution at the same time then it’s a win, win, right!!?

Can you guess what that bucket is hiding under that faux topiary? Okay, wait before I expose the secret, I need tell you a little more about the IBC. On the last Monday of every month, a small group of international bloggers from around the world get together to challenge each other or share a themed project. You can see some of our previous challenges here. All righty then, ready?
I have far too much storage space, said no-one ever

Isn’t that awesome? The bucket stores all the paints that don’t fit inside my craft cupboard. Now they have a new home in Paris, at No 33, Rue Lafayette 😉 And the label, that I downloaded from The Graphics Fairy, was cut with my new toy 😀 I must admit, I really struggled a bit a lot in the beginning. UGH!! Making stencils and those kinda things isn’t as easy as it looks. Once I figured out what fonts would work and how to set the blade depth on the Scan & Cut it was pretty easy. I did cut through two mats though until I got the blade settings right. Shhh, don’t tell hubby.

Okay, before I show you how I created secret storage in a bucket, be sure to follow us on Facebook, Twitter, Pinterest, or Instagram. And don’t forget to subscribe so you’ll never miss a post!
Creating a Secret Storage Solution Using a Bucket
Let’s start with the easy bits first, shall we? I made a tiered stand to fit inside the bucket so I can store the paints and take them out without too much fuss. If you’re not in the mood to make the tiered stand, no worries you can still make something similar to store blankets or even cleaning products. The possibilities are endless. All you need is a large bucket and a faux topiary that fits over the top. Paint the bucket and add a label, if that’s how you roll, and then attach the topiary to the handle. In fact, you don’t even need to attach it if you don’t feel like it. I just wanted to be fancy 😉

Making The Secret Storage Tier For The Bucket
To make the tiered storage you’ll need two wooden circles that fit snuggly inside the bucket. I bought ours at a craft store. I don’t trust my jigsaw skills just yet 😀 You’ll also need a thread bar, 8 nuts, 2 washers, 16 long screws, wire, a polystyrene ball, glue, and some twine to make it all look pretty (optional).

Divide the wooden circles into 1/8ths and screw screws around the edge of the circles. Twist some wire around the screws to form a cage.

LOL, it kinda looks like a boxing ring or something like that. Next measure the height of the bucket and cut the thread bar accordingly.

Squish the polystyrene ball on top of the thread bar before using the twine to cover the ball and the thread bar. Just add dabs of polystyrene friendly glue every now and again to stick the twine down.

Don’t wrap the twine all the way down the bar. Only to the point where you want the first tier or “boxing ring” to go. Add a nut, the “boxing ring”, a washer and another nut. Wrap some more twine around the thread bar and then attach the next “boxing ring” in the same way. Tighten all the nuts so the storage tier is stable.

Finally glue 4 nuts to the bottom of the tiered, boxing ring thingy to stop it from wobbling when you take it out.

I’d love to know what you think of the out of the box bucket secret storage idea. Is it something you would use at home? What would you store inside?
If you enjoyed this secret storage solution, please don’t forget to share it with your friends and/or save it to Pinterest.

And If you’re looking for another crafty idea for faux topiaries then our African snowman might be just the thing.
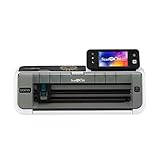
If you’d like to make one and don’t want to go to all that trouble of finding the materials to create some secret storage, I’ve got you covered 😉 Disclosure: If you click on the links below, we may receive a commission from Amazon. But don’t worry it won’t come out of your pocket, and it helps me buy new cutting mats when I make a boo-boo again 😉


I can’t wait to see what my friends have tried that they’ve never done before. Wanna join me? Their links are at the bottom 😉

Last update on 2026-10-03 / Source Amazon Affiliates
64 comments
Michelle, what a great idea! I’m curious what the topiary is attached to. It looks like it’s attached to a half-dome(ish) thing that you secures to the handle of the bucket….maybe? I like the simplicity and finesse of the topiary being attached to the lid …so I’m trying to figure that bit out a little better.
Such a clever idea.
I’d be grateful if you could shed some more light on that part for me, please.
Hello Mary, So happy you like the idea. The topiary is sewn onto the handle of the bucket. Sorry I probably didn’t explain that bit properly. We have quite a few of these little topiary storage buckets around the house and some of them I’ve just put the topiary on top of the bucket, so I can simply lift it off. This one though has been attached to the handle and it works really well, kinda like a built-in hinge.
That is brilliant Michelle! I never would of guessed a paint storage. The little peek in the top photo I thought it was for spices. That is way cool, and the tired cage with the ball handle very clever. Now it’s all stored nicely in the pretty faux topiary bucket. Love it!
I’ve never heard of the Brother Scan & Cut, but have been wanting something to make my own stencils, and graphics. But afraid to bring it up I already have so much craft stuff. The hubby is always saying we going to have to buy another house just for my crafts. LOL
I really enjoyed using the Scan & Cut, once I figured out how ? and it would be just perfect for making stencils and signs for your shop Linda. Plus it doesn’t take up a lot of space either. Hopefully you can convince the hubby. I’d love to see what you make with it
I love this Michelle! It’s so cute on its own, but then, its storage too!
🙂 gwingal
Thanks so much Nikki
Hi Michelle, that is so creative, I could use a whole load of them to hide the bits and pieces (& my chocolate stash!) in this house! I have no idea how we learned to do things before blogs and YouTube, there’s a tutorial for everything out there.
xx
LOL, love your idea of hiding the chocolate stash Debbie. That’s so perfect
I have the same impression about time Michelle! I think it runs like water… Your bucket is one of the pretiest secret storage I have ever seen. Of course we can hide anything in it! You made your miracle once more my friend 🙂
? Thank you Christina, you always say the nicest things and it means a lot to me
Great storage idea. I think I would use it to store dog toys outside. Or my little gardening tool. Very well done as always. Pinned
It would be perfect for storing dog toys and gardening tools Leanna. I would probably line the inside of the topiary with plastic so the rain or snow doesn’t get inside the bucket though, unless you keep it under some kind of cover
Just awesome!!!!
Thank you Gabi
You never cease to amaze me! Love it, Michelle! Great way to make the counter space look less cluttered. Now I need to find a bucket big enough to hide my crockpot, ha! XO
That’s gonna be one BIG bucket Jas, but I’ll keep an eye out for you 😉
It won’t help Amazon but Wal-Mart sells metal or metal look plastic bin in various shapes this time of year that might actually fit a crock pot!!! You might have to adjust what you use for the topiary part! But using your noodle is much of the fun!!
Ooooo that sounds like a plan Sally and you’ll probably be able to find a really big faux topiary somewhere but I’d love to know what your noodle comes up with
Michelle, just wow!! Your projects are always so amazing and this one is no exception. I love the platform you made for the paints and how they’re cleverly hidden. The bucket is beautiful! Thanks for mentioning my blog. Have fun with your Brother Scan and Cut!!
You’re stenciling tips were such a life saver Keri, thank you. I thought I was going to lose my mind every time the letters fell out.
Wow. What a very thoughtful and elegant idea. It’s definitely something I could use at home!
Thanks so much Marie. Glad you like it
What a creative and cool work Michelle, for me it is a very difficult task because I am not good at these type of DIY project. I really need some lessons from you.
Ahhh Sadhna, if I could cook like you do my friend I’d be in the kitchen instead of the workshop doing crafty things. Thank you so much