
Well hello there. What have you been up to? I’ve been spending way too much time drooling over the latest Grandin Road catalogue. OMW, they have the most beautiful and unusual décor pieces. But they’re in the States, and we’re in South Africa, and our Rand/$ exchange rate sucks right now. So there’s just no way I can afford any of their amazing creations. But I sure can use them as inspiration, right?!!! We’re DIYers after all. Like this “Spirit of the Forest” wreath we made last week using an inexpensive paper mache mask.

I tried real hard to imitate the Grandin Road version, but somewhere along the line I went a little over the top with all that greenery. Now, my wreath resembles the green man from Celtic lore instead.

That’s okay, though. I’m super happy with how he turned out and I really wanted to share how we made him, just in case you’d like to make one too. But before we get there, be sure to follow us on Facebook, Twitter, Pinterest, or Instagram. And don’t forget to subscribe so you’ll never miss a post!
What you need for the Spirit of the Forest Wreath
For The Face
- Plain white paper mache mask
- A piece of bark for reference purposes
- Texture paste. You can find the paste in most craft stores or you can make your own using this recipe.

You’ll also need
- Different earthy-colored paints (black, brown, gold, umber, etc.)
- Palette knife or a plastic knife
- Moss and floral foam
- Paintbrush
- Sponge
For the Wreath
- Something to mount the Spirit of the Forest wreath onto
- Hot glue gun and lots of glue sticks
- Faux greenery
- Twigs

First things first. I needed to turn that cheap white mask into something a little woody and “barkish” so the Spirit of the Forest would look more realistic.
How to Create Faux Bark
Creating faux bark is really easy to do. Just apply big dollops of texture paste all over the paper mache mask with a palette knife. A plastic knife works too. The nature of the texture paste makes it form these peaks every time you lift the knife up. It resembles the knotty, gnarly look you would normally see on an old tree.

Easy right? And keeping a piece of bark handy helps a lot too. Leave the mask to dry completely. It will take a few hours, depending on how thick you applied the texture paste. My inspiration bark piece had lots of dark undertones with hints of light and dark brown. So I started off by painting the whole mask black and then lightly sprayed a light and dark brown over the top.

That Rust-Oleum Espresso color is probably one of my favs. We’ve used it in so many of our projects, and we always have a tin in our stockpile. I didn’t wait for the paint to dry between coats. I sprayed, smudged, dabbed, and sprayed again until I was happy with the base colors. To add more depth, I applied some earthy-colored acrylic paints with a sponge, once again using the piece of bark as inspiration. The trick here is not to overthink things. Don’t be scared to mix the colors and build up the layers until you’re happy.
Nature always wears the colors of spirit. Ralph Waldo Emerson

Can you see that tiny piece of bark on the bridge of the nose? It’s a pretty close match, right?! The only problem was that the paint appeared too glossy compared to the bark. That’s easy to sort out, though. Just sprinkle some talcum powder all over the face and brush it off. It dulls the paint 😉

Next up, adding a little mossy to give it a forest feel.
Giving the Spirit of the Forest That Mossy Look
No self-respecting Spirit of the Forest or green man would be seen without a little bit of moss, in my humble opinion. The only moss we had was a little too coarse, so I used a cheese grater to make it finer before gluing it onto the mask. If I had a sponge that was big enough, I would have made my own moss.

If you want to be true to nature, apply more moss on one side of the face. Actually, moss doesn’t only grow on one side of a tree. It just MOSTLY grows on one side. In the northern hemisphere, it’s usually on the north-facing side, while down here in the southern hemisphere, you’ll find it growing on the south side of trees. But hey, it’s your Spirit of the Forest, so apply that moss wherever you think it looks good.
Don’t let moss grow on the path of friendship. American proverb
Okay, confession time. I messed up a little. I should have thought about adding the eyes right at the beginning because that would have made the next step so much easier. Oh well, you live and learn, and hopefully, I can save you from making the same mistake
Giving the Spirit of the Forest Some Soul
My vision for the Spirit of the Forest didn’t involve some sightless gargoyle-type creature with blank staring eyes. Nope, he needed soul, and the only way to do that was to add some eyes. So I used floral foam to “sculpt the eyes”. Just squish the foam into the sockets and use your finger to mold it into a rounded shape.

A little bit of brown paint and some more texture paste so they could tone in with the rest of his face, and they were ready to be painted.

I know not everyone is comfortable painting eyes, but this tutorial will show you how to do it in a few easy steps. If you’re still not keen to try painting them on, this tutorial will show you how to make realistic eyeballs with the help of a printer and yarn.

Once the eyes are dry, they can be glued in place. You can add some more moss to hide any gaps or imperfections.
Putting it all Together
So now that I was happy with his face, it was time to start putting the whole Spirit of the Forest wreath together. I’ve never made a wreath before. It’s not something we do here in South Africa. You normally only see them at funerals or maybe at Christmastime. But hey, there’s a first time for everything. For the base or backing, I used a piece of wood that’s been lying around forever. I’m guessing you could use a wreath form or polystyrene ring or something like that too. If you’re visiting from the States, then you’ll probably know how to do this way better than me. I glued a whole bunch of faux greenery and twigs from the garden onto the wood using our glue gun, making sure to leave a spot open to glue his face down.

I used a crap load of sooooo much hot glue to stick everything down. That greenery and the face ain’t going nowhere. We hung the Spirit of the Forest on our front door, and I love it.

Our door is a deep, dark brown, almost black, and the greenery really pops. BTW, you’ll find some great tips on how to spray paint a front door here.

I’m not sure if it’s just my overactive imagination, but for some strange reason, it feels like his eyes follow you.

Nah, I’m imagining things.

I would love to know what you think. Is it something you would make for your home? If you’re not comfortable playing around and turning a cheap mask into a face for your Spirit of the Forest or green man, then you can always get one of those resin bark faces online instead. I’ve added some links at the bottom of the post to make it easier for you to find them.

And if you like the idea, please don’t forget to pin it for later

Oh, before I forget, here are those links I promised you. Disclosure: Clicking on the links below means we may receive a commission from Amazon. But don’t worry, it won’t come out of your pocket, and it helps us come up with more unique DIY and craft ideas for you 😉


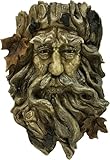



Until next time, I hope you have a beautiful, craft-filled week. Sending love as always, and thank you for popping in for a visit.

Last update on 2026-10-01 / Source Amazon Affiliates
89 comments
That green man mask is awesome. You should make those and sell them. They’re much better than anything I’ve seen online. I have a green man mask made out of ceramic that a friend of mine made and it’s awesome. He’s too heavy to put in a wreath though lol I’d love to make one, but I’m not sure I could do the face justice, especially the eyes. You did an awesome job.
Day made, Susan. Thank you so much for your beautiful comment and I would love to see the green man mask your friend made for you. He’s one of my favourite. I’m actually working on a 3D portrait of him right now. I’ll publish a tutorial on that one as soon as it’s done.
OMG!!! I absolutely love this wreath and can’t wait to make mine. I already have ideas on what I want to add to it. Thank you for sharing.
Oooo now I’m curious. Please tag me in when you’re done. I would love to see how yours turns out.
I’m so glad you posted this tutorial. It’s absolutely amazing! I collect all kinds of bits and twigs on my farm, and I can’t wait to create with them.
I bet your version will be stunning, Wendy, especially since you have all that lavender to play with.
Oh, my heart!!! I really, absolutely love what you did. I just told my girls we needed to make a green man wreath for the front door a couple weeks ago and stumbled across this post. You are very talented! I can’t wait to make one. So happy, and excited.
I am so happy you found the tutorial, Angela. Hope you have lots of fun making the Greenman together.
I am a big fan of the green man and have a collection of masks! I love love love this tutorial! You are so creative and talented. I made a face out of paper clay, and was going to do something like this but am going to use my mask to do exactly this! Thank you for the inspiration and the directions. Sending you love from Ohio USA! You are wonderful! ♥️♥️♥️
Oh wow, Tina. Day made!!! Thank you for your lovely comment, and if you remember, please share your Greenman when you’re done.
This is awesome!
Thanks so much, Carole
I love the Green Man wreath! I would love to make one. I was thinking about how his eyes must look like they follow you before I even read that part. Lol. I wonder if the wood filler paste would work as texture. Many blessings from the States!❤
😀 Thank you Henrietta. Wood filler will work, and that stuff you put on walls to cover holes. I think it’s called Spackle in the States.
Is there anything I could do to make this more weatherproof? I would like to hang it in my moon garden.
Yes, you can 😀 I would use a plastic mask as a base and mix exterior wood glue into the texture paste. You can seal your creations with a clear matt outdoor varnish afterwards to make double sure.
I like your version of the forest wreath much better than the Grandin Road wreath. You have inspired me to attempt something similar. Thank you.
You’re welcome, Regina. I’m really happy you found the Spirit of the Forest wreath inspiring enough to make something similar. If you can please share an image on Facebook or Instagram and tag us in. I would love to see how yours turns out.
Wow! Awe inspiring! Can’t stop staring at it and have been telling all my friends, too! Just ordered some supplies and then I am going to make one! Think I will add deer antlers and some feathers too! Then I am going to hang it in the dining room so I can admire it! Thank you Michelle for your energy and vision!
Hearts from Iowa! Amy
Awwwww, Amy, you’ve just made my day. Thank you so much. I hope you have loads of fun making yours. The addition of antlers is going to make him look spectacular. I would love to see how he turns out. Love and hugs right back at you from down here in the South
Aww he is so cool Michelle! You did a magnificent job on his face and eyes. Love all the greenery. He’s awesome!
Thanks so much, Linda. I enjoyed every little thing about making this one.
I am definitely going to make this wreath. I have been a wreath person for 40 years. Wish me luck. I am so in love with this theme.
Young lady what a wonderful job you did. Art at its best❤️
Thank you so very much Cinda ❣ I really appreciate that. Wreaths are just not a South African thing, but this one may have just convinced me to make a few more. It’s such fun seeing a story on our front door.
This looks incredible. I was also looking at the wreath in the catalog and almost bought it (I had a bit of extra cash) But I did not…just couldn’t justify it. Now this I can do. And putting something together myself feels better. Thanks for the post 🙂
You’re so welcome Joelle 😉 I really love Grandin Road’s wreath, but shopping to South Africa is so expensive from the States, and paying in dollars puts it waaaaaay out of our budget
OMW!!!!!!! That’s stunning,? I’m not sure I would be able to make one but I know I want one
Thanks so much, Teresa. I hope you do get to try to make one for yourself. It’s so rewarding and the texture paste is real easy to use too.
I actually like your Spirit of the Forest much better than the Grandin Road version!
Thanks so much, Kimberlee. I really enjoyed putting him together
I am not, nor have I ever been, a wreath person – but I WILL make this one! I absolutely love it!
Yay, I’m doing the happy dance over here, Jeannie.
NOOOOOOO! The only photo that loaded was the first one, and I MUST MAKE THIS! What happened? I even changed over from my Chrome to Edge, just in case!
UGH Rebecca, I’m so very sorry. It’s been happening on and off for a few days and I have no idea why. I’ve asked someone who knows all about the technical stuff to have a look for me.
refresh the page!!! That’s all it took for me 🙂
Looks fantastic. I’m definitely going to make this.
? Have fun
Mesmerizing! So completely captures the feel of the forest. Pinned this handsome man for sure! Thinking of places to creatively place several smaller faces around in the yard, on the house, etc. Truly in love with this idea!
That makes my heart so happy Theresa. Thank you so much. We made some wood nymphs too that will work as smaller faces. You can see how we did those here – https://acraftymix.com/wood-nymph-garden-ornament/
That is so creepy looking !!!!
I hope it’s creepy in a good way ?
WOW….what a piece of art! I am so impressed and thank you for the tutorial. I love it! Saw your post at the bloggers pit stop! Oh I pinned this:)
Thanks so much Kathleen ?