
Have you ever been to Egypt? It’s such a magical country. The sites, the sounds and the incredible history that dates back thousands of years just boggles the mind. The pyramids were wow. The sphinx, meh, not so much. It was so much smaller than I thought. The Sphinx Alley in Luxor, however, was a different story. There are more than 800 sphinxes standing on either side of the path and archaeologists believe that there are more buried under the sand. And I remember visiting Edfu on the western banks of the Nile and being awestruck by the splendor and ancient power of the place. Every square inch is covered with hieroglyphs or a cartouche that tells a story of kings and gods and the bitter battles they fought to win this beautiful land.

It’s an amazing place, and I so desperately wanted to capture a piece of that magic and make it part of our home décor. I figured the easiest way to do that was to cast some hieroglyphs in concrete, so it resembled an Egyptian cartouche.
Egypt is not a country you live in. It’s a country that lives in you
RightyO, before we get to the tutorial, be sure to follow us on Facebook, Twitter, Pinterest, or Instagram. And don’t forget to subscribe so you’ll never miss a post!

What you need to make an Egyptian cartouche
- Craft Foam and Cardboard
- Scissors, Craft Knife or Cutting Machine
- Egyptian Hieroglyphs Template
- Two Ingredient Mold Recipe
- Concrete or Plaster of Paris
- Paint or Stain (optional)
- Glue

How to make an Egyptian cartouche
Draw the hieroglyphics on the craft foam using the Egyptian Hieroglyphs as a template. The hieroglyphs need to be quite big since some of them are quite finicky. Especially the lion and the Eye of Horus. Carefully cut the hieroglyphs from the craft foam using a craft knife or sharp pair of scissors. Don’t worry too much if the edges are uneven; it adds to the final look. If you have a cutting machine, it will make it much easier, but it’s not necessary. BTW you can make something similar using a polystyrene takeaway dish.

Glue the hieroglyphs down on a piece of cardboard. You can get the kids involved, and they can spell their names or just put them down randomly, as I did. Random is good, right?!! Unless, of course, I just wrote a really bad cuss word.

Confession time. I lost the plot a little at this point. Strictly speaking, a cartouche should be inside an oval frame, but I completely forgot and created little lines between the hieroglyphs. Oh well, it’s that random thing again. Mix up a batch of the two-ingredient mold and place it over your cartouche. Be sure to squish the mold down into all the little nooks and crannies.

Once the mold has set, probably about ½ hour, carefully pull it off. The two-ingredient mold is very pliable, so it will peel off without a problem.
Casting the cartouche in stone, ermm I mean concrete
Apply a thin layer of Vaseline (petroleum jelly) using a nail brush. Since the hieroglyphs in the cartouche mold are quite detailed, I wanted to make very sure that I’d be able to release it once the concrete had set.

Mix up a batch of concrete or plaster of Paris and pour it onto the mold. You’ll need quite a thick layer of concrete. The first one I made was too thin and broke when I removed it from the mold. Use some tin foil to create a “form” around the cartouche so the concrete doesn’t spread everywhere.

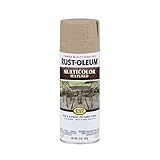
Once the concrete sets remove it from the mold and stain or paint it to suit your decor. I wanted ours to look like it had been carved from sandstone, and the hubby suggested I try Rustoleam’s Multi-Color Textured Spray. I think the color is called Desert Bisque. Quite appropriate for this little cartouche. If you can’t find the right paint, you can use textured paste (homemade recipe here).

The lid of an old ammo case makes the perfect frame for the cartouche. I just loved the way the two complimented each other. Another option would be to mount the cartouche on pallets to create art.

See what I mean about the uneven edges not having to be perfect. It makes the cartouche look like it’s withstood countless sand storms.

Let me know what you think, and if you like the idea, don’t forget to share.

Would you like to make something similar? We’ve got you covered Disclosure: Clicking on the links below, means we may receive a commission from Amazon. But don’t worry it won’t come out of your pocket, and it helps us come up with more unique DIY and craft ideas for you 😉

Or perhaps you’d like to add some Egyptian styled decor without DIYing.


Until next time, I hope you have a wonderful craft filled week. Much love as always

Last update on 2026-09-30 / Source Amazon Affiliates
54 comments
Absolutely beautiful…so well done and brilliantly displayed! When my grandkids were being homeschooled, and we were studying ancient Egypt, we made senet boards and molded our own tiles using polymer clay, and bent paper clips to the various shapes and used them to stamp into the clay. They turned out so well, we made extras and gave as Christmas gifts that year. And, the now-grown grandkids say that was one of the most fun projects they did all through their homeschooling!
I love the idea of making something larger like you did…polymer clay would be too expensive to make something that big. You are so very clever and talented. Thank you for sharing with us!
Awwwwww thank you, Sarah. I must say the cartouche was one of my favorite quick and easy crafts ever and over time she’s aged beautifully. I put her upright in a large pot plant on our stoep and it really looks like I stole a piece of beautiful Egypt. I love your idea of the paper clips bent into shapes for stamping. I have to remember to give that a try.
This project is brilliant Michelle, well done.
Thanks so much, Anita. I’ve always been fascinated with Egypt and seeing the tombs and hieroglyphs in real-life boggles the mind
hi
Hello 😉
Wow Michelle!! This is soooooo cool! Love the detail on it.
I was quite surprised with this one too Keri ?
I live in a country that has great Ancient History but I love so much ancient Egypt. If someone asked me to go to the past this is the place I am going to choose. But you my friend, you are the perfect example that all of us carry something from the past. Are you sure that in your previous life you lived there??? I want to make one of this the soonest possible! Thank you so much for the idea!
You know we went to Greece and Egypt on the same trip and they are both so incredibly beautiful and historically rich. I could spend hours wondering round all the temples and imagining the lives ordinary people lived way back when. Just imagine being a builder or an architect in those days. Oh the possibilities ….
That is amazing Michelle! It does look ancient, and I love all the details. Goes perfectly with your ammo lid. One of these days I want to get into playing with cement, and try making my own molds. Would like to go to Egypt too. But guess I’ll have to stick with playing with cement. Lol
Oh Linda, Egypt is such an incredible place, I do hope you get to go one day. And yes my friend, you need to start playing with cement. I was a little scared too at first. I thought I’d get the mixture all wrong but it’s really not difficult. Kinda like mixing plaster of Paris. It just works ?
This is too cool Michelle.
Years ago, I bought a cartouche while in Egypt and it is oval with my name (or at least they said it was my name, but one never knows for sure does one?) LOL!!! It is on a gold chain. I need to take it out and look at it again…sometimes I forget I even have things. I love the way your vignette looks. Great job!
Thanks so much Kari, I’m sure your cartouche does have your name on it or something very close ? Either way it’s a lovely memento from such an amazing place