My kids are all grown up and living in a land far away (how did it happen so quickly?). When the missing becomes too much, I grab a few tissues and huddle down with my memory box. It’s filled with cards, notes, scribbles, and doodles my babies made when they were little. And with my daughter’s birthday coming up, one of her doodles had me asking, Can I turn my child’s drawing into a plushie? And the answer is yes!!!
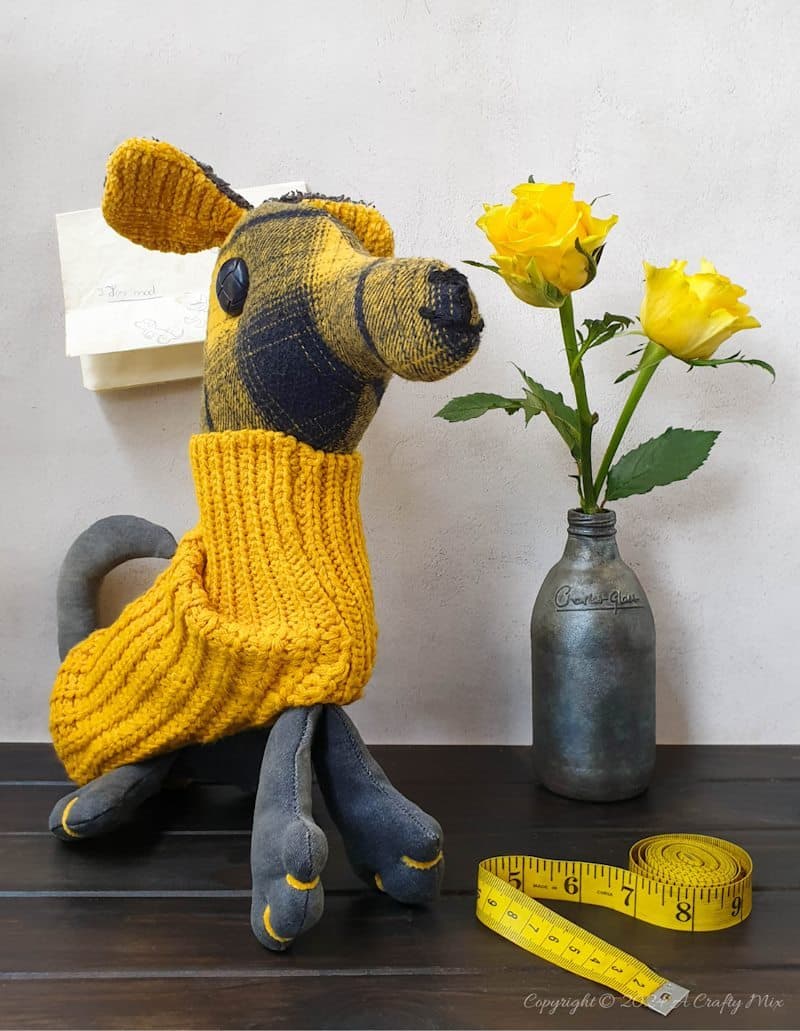
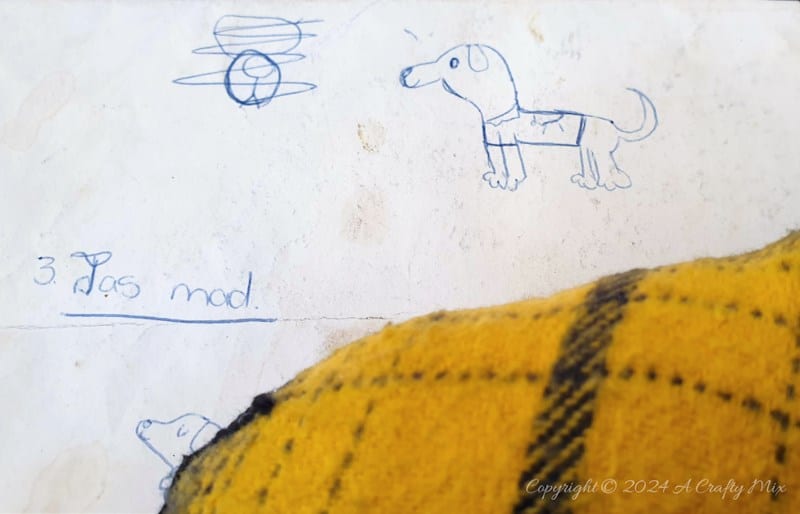
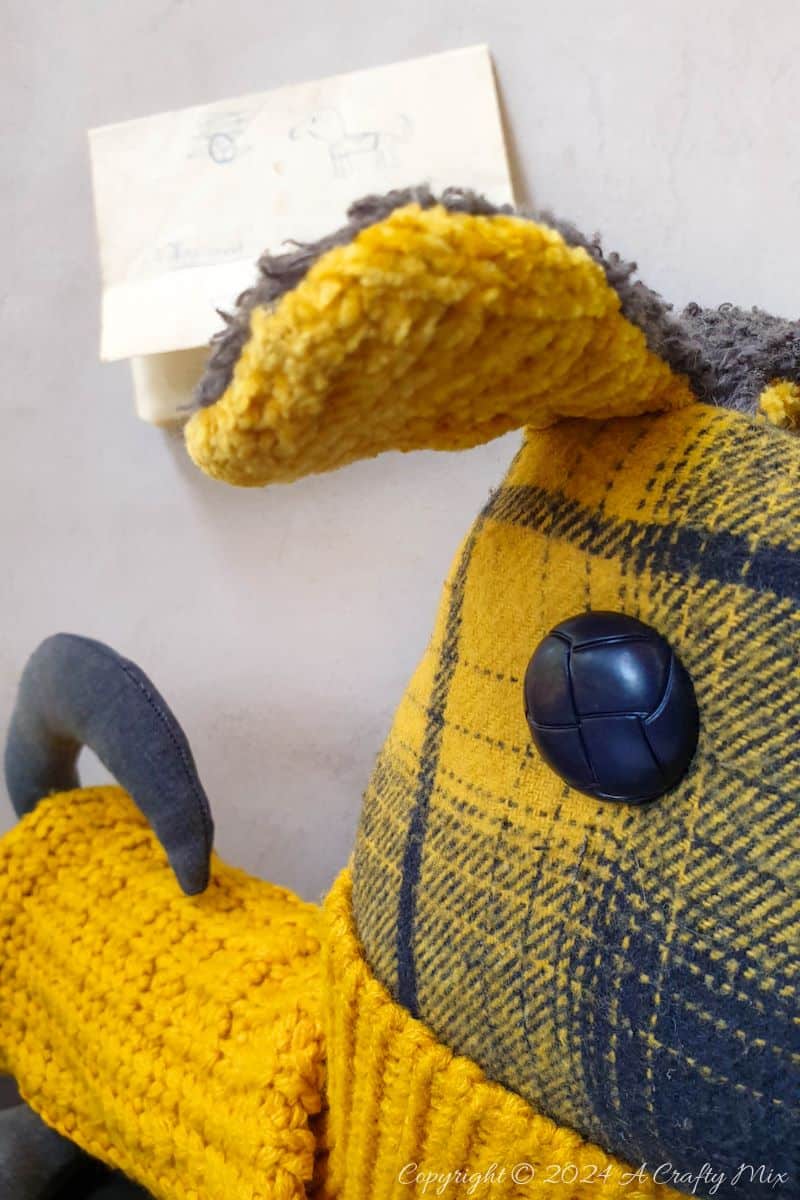
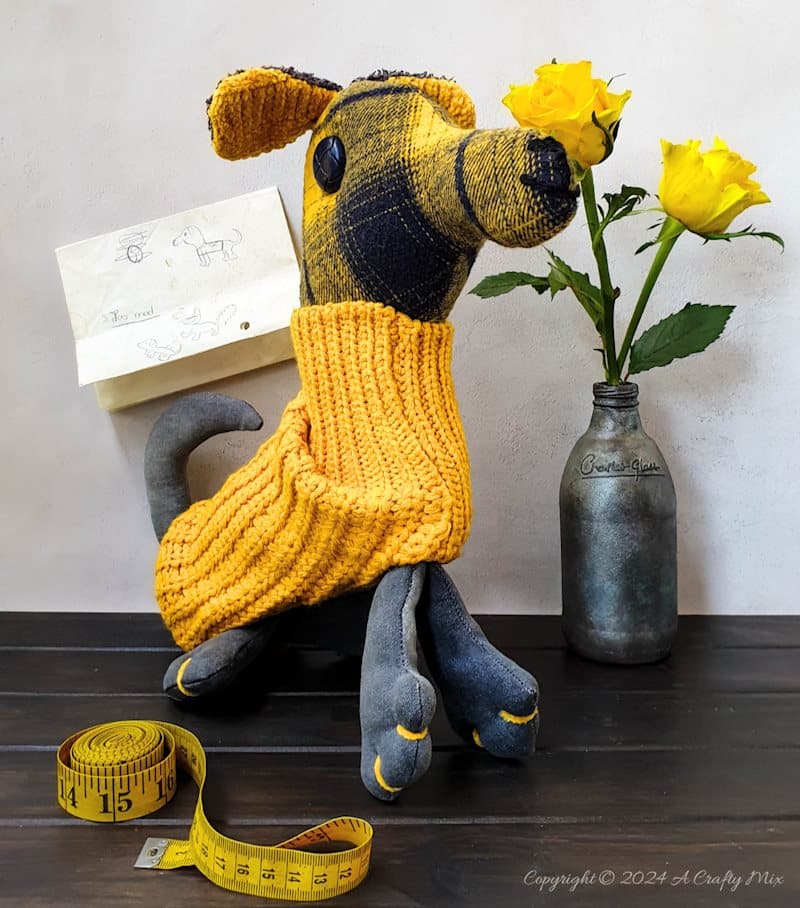
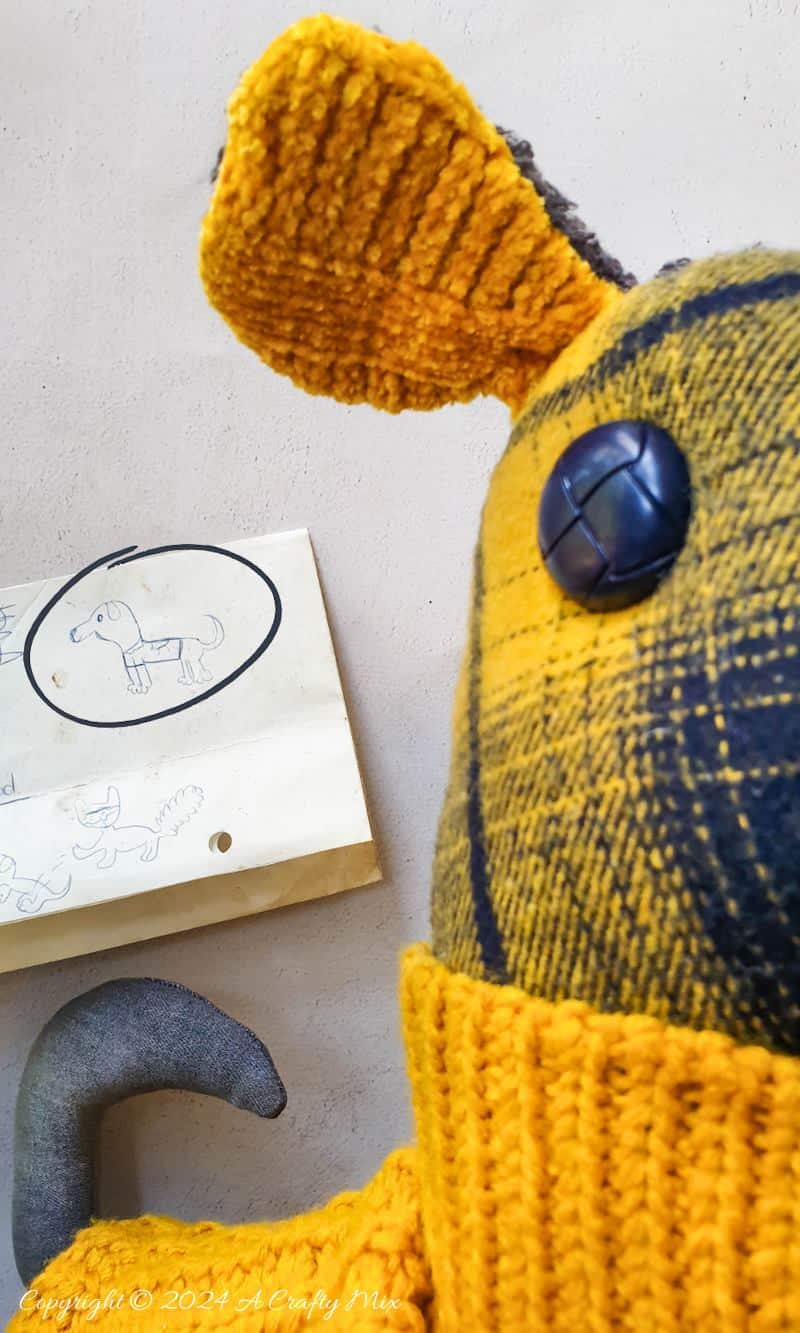
It’s a wonderful, heartwarming way to celebrate a child’s creativity and imagination. Here’s the original drawing Talea made when she was about 6 or 7 years old of her fur baby Lulu Bell.
A handmade soft toy (or pillow) based on your little Picasso’s drawings makes a truly special gift, IMHO. So just in case you’re keen to do something similar, I thought I’d share how I turned Talea’s work of art into a pattern to make this cuddly critter.

Just a heads up, I’m no seamstress, so I won’t go into too much sewing detail. There are brilliant videos on Youtube for that. This tutorial is all about taking a simple drawing and turning it into a pattern. But, before we get there, follow us on Facebook, Twitter, Pinterest, or Instagram. And don’t forget to subscribe so you’ll never miss a post!
What you need
- Enlarged image of a child’s drawing
- Scrap fabric and matching thread
- Sewing machine
- Sewing Needle
- Polyfil/Stuffing
- Sewing pins
- Fabric Scissors
- Buttons, felt, or plastic googly eyes
- Wool if your drawing has hair (optional)
How to turn a child’s drawing into a plushie
Choose the right drawing
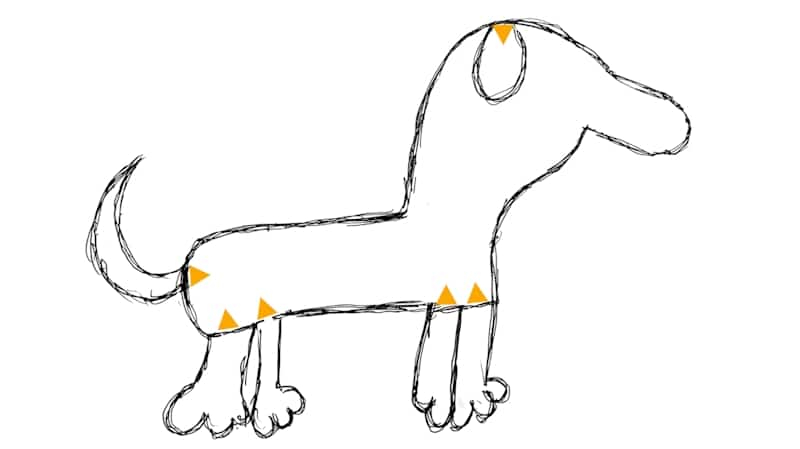
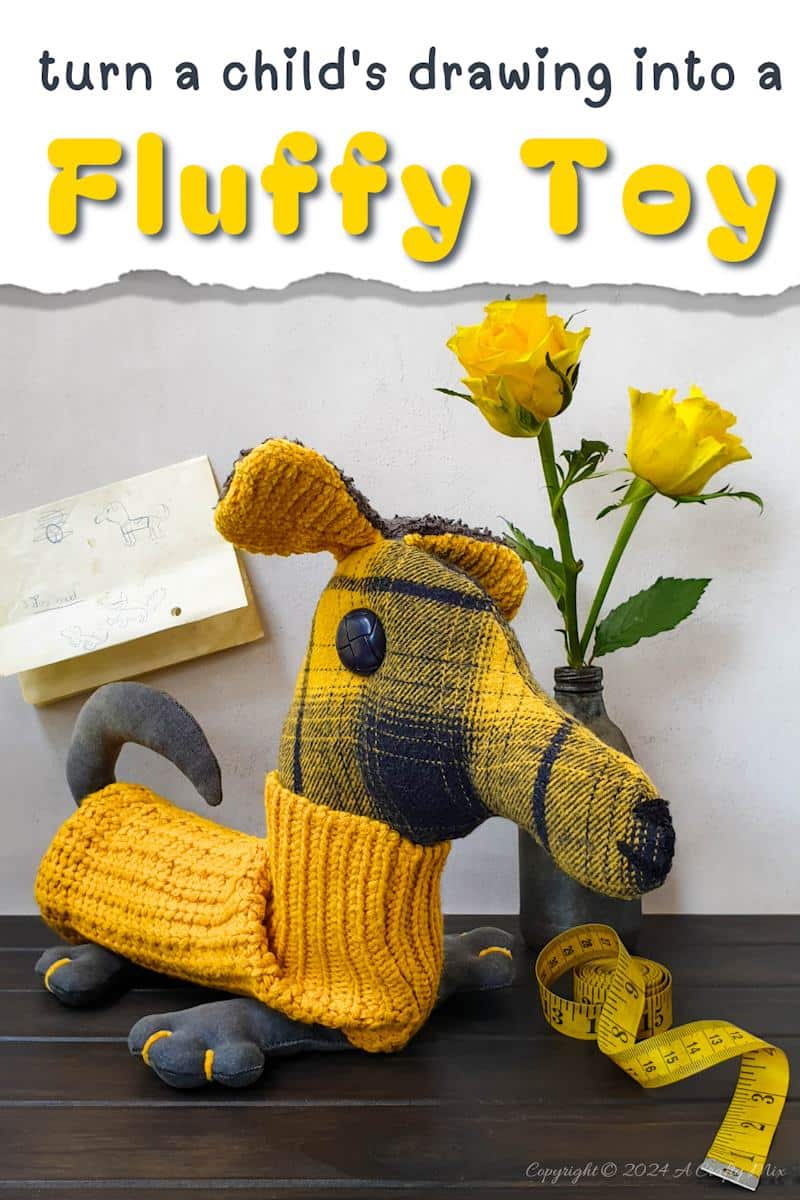
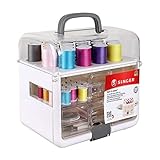
The drawing you use as a basis for your pattern is probably the most important part. Look for a child’s drawing that you can break up into simple shapes, like this one of Lulu Bell.
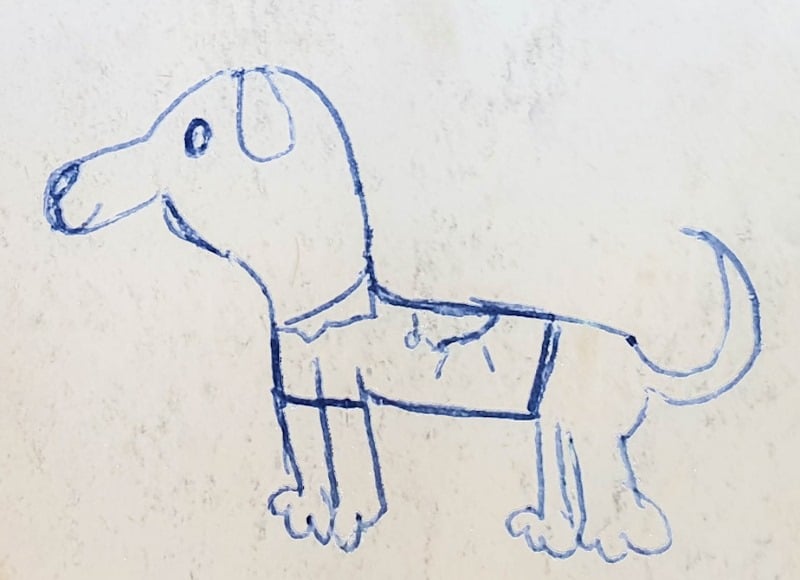
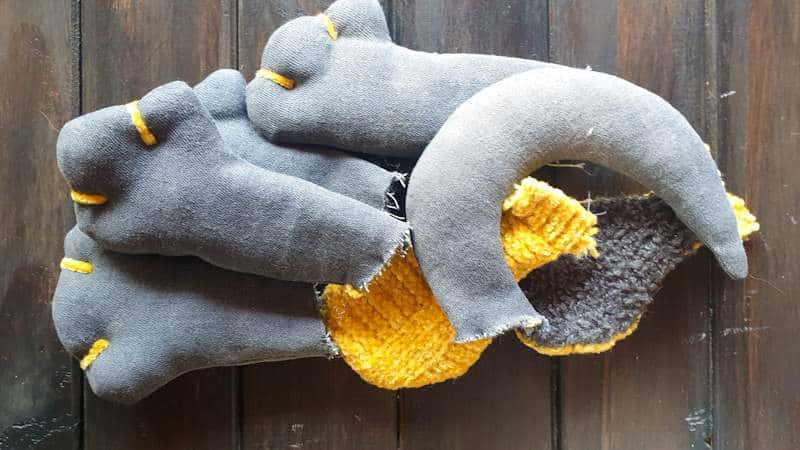
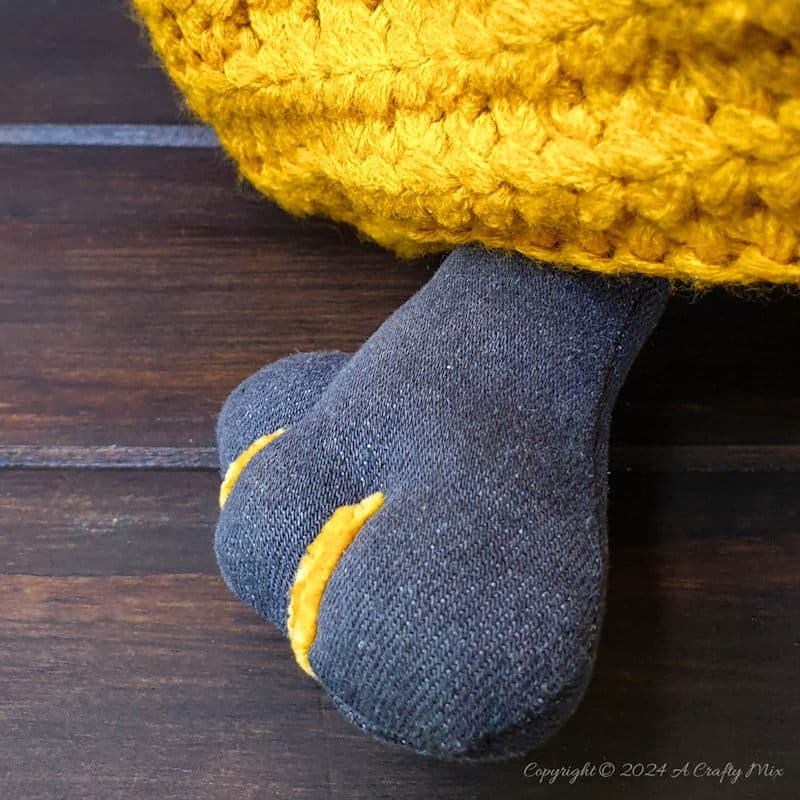
Her nose, head, and body are shaped like elongated, slightly rounded, rectangular, blobs. The legs are four long, dangling cylinders with bobbly toes. Those toes are my favourite. So cute.
The tail is curved and tapers toward the tip, and she’s got two small oval-ish ears.
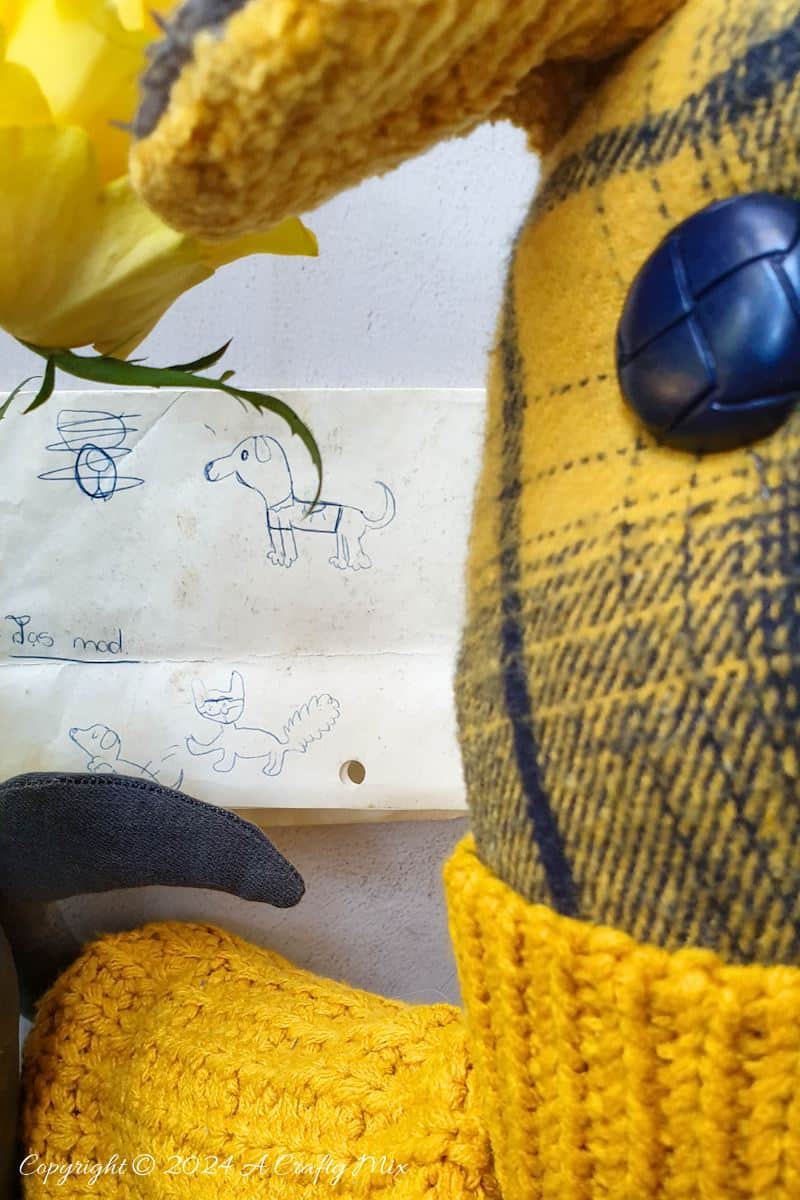
It also looks like Lulu is wearing a jacket, which is just another rectangle.
Try to avoid shapes or features that are too thin or narrow. They’re really difficult to turn right side out and stuff later on. If your drawing does have a few “skinny” details, cut those pieces out of felt so you don’t have to sew them together.
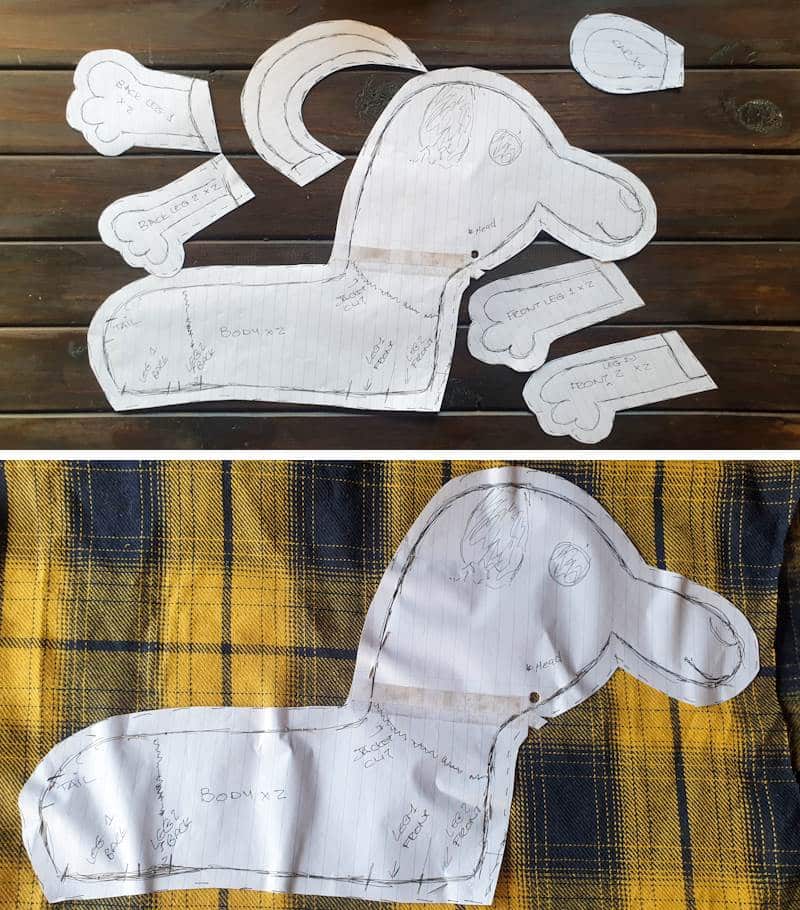
Turning a drawing into a pattern
There are two ways to convert the drawing into a pattern without destroying the original. You can either:
- make a photostat and enlarge it at a printing shop.
- redraw a larger version.
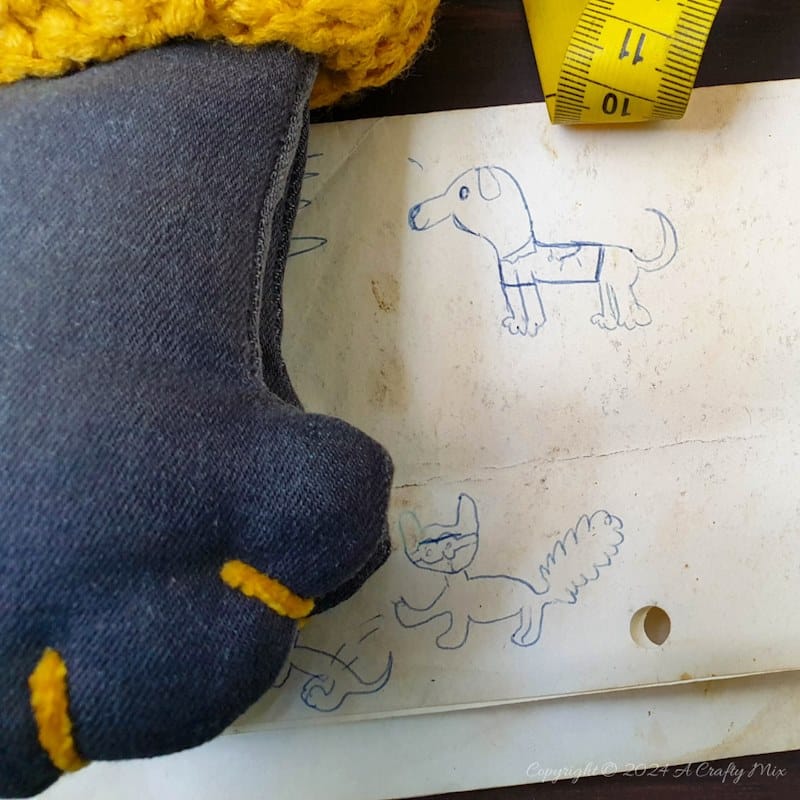
I went for option 2. If you go for option 1, make a few copies of the enlarged image. That way you can cut out overlapping pattern pieces, like the ear on this drawing.
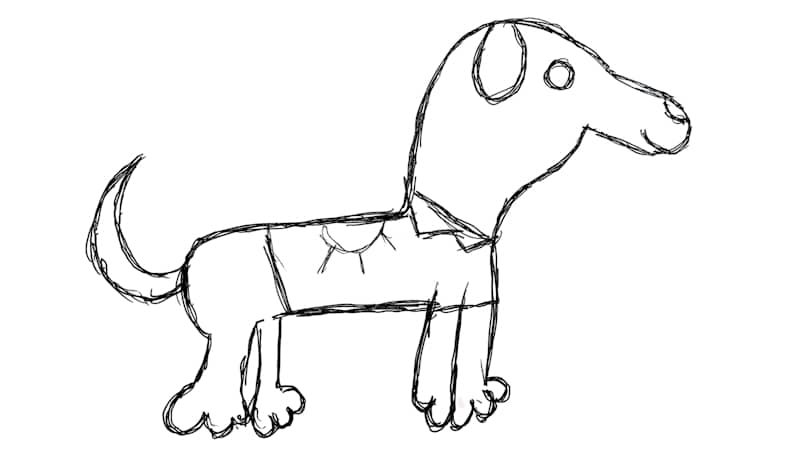
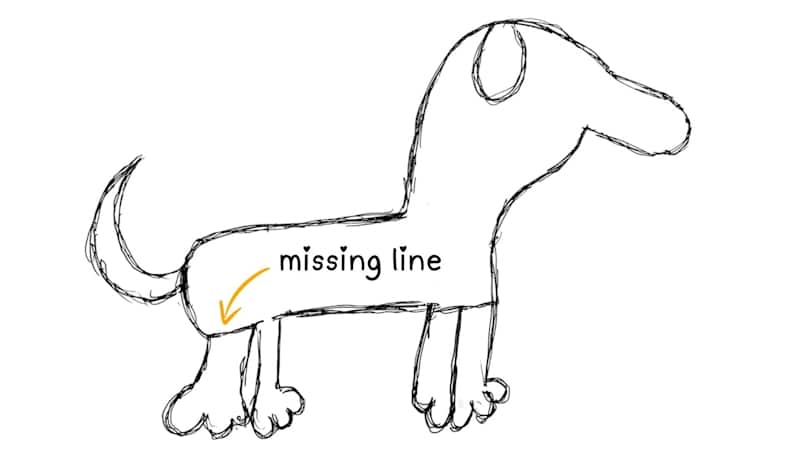
To make the pattern, I would suggest simplifying the drawing first. Remove any bits that you won’t be sewing and add any missing lines. I removed the jacket, eyes, and nose and added a line to separate one of the back legs from the body. Try to stay as true to the original drawing as possible.
Make marks where the different pattern pieces should line up. You don’t want to sew the ears on the wrong spot 😀
Separate the individual pieces and check that they’re not too small to sew. If they’re too small, you can either make a bigger copy of the drawing or cut the small offending piece out of felt. And if it’s not a key feature of the drawing, you can discard it.

Add a 3/4-inch (1 ½ cm) seam allowance around all the pieces.
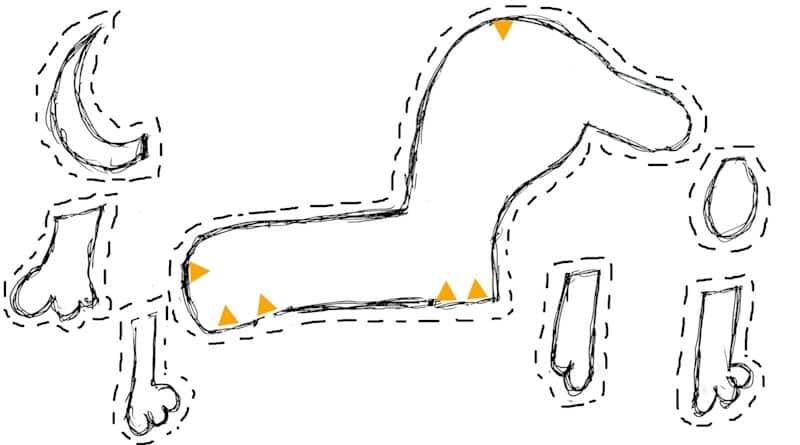
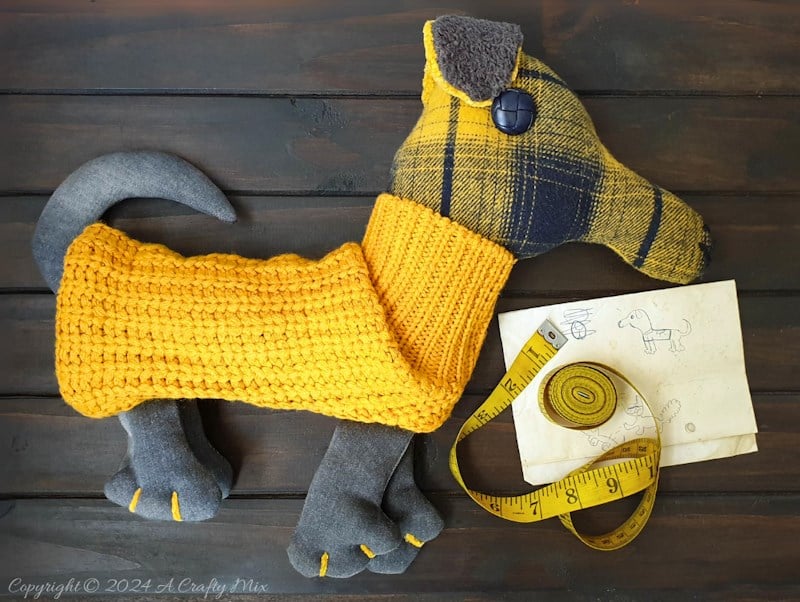
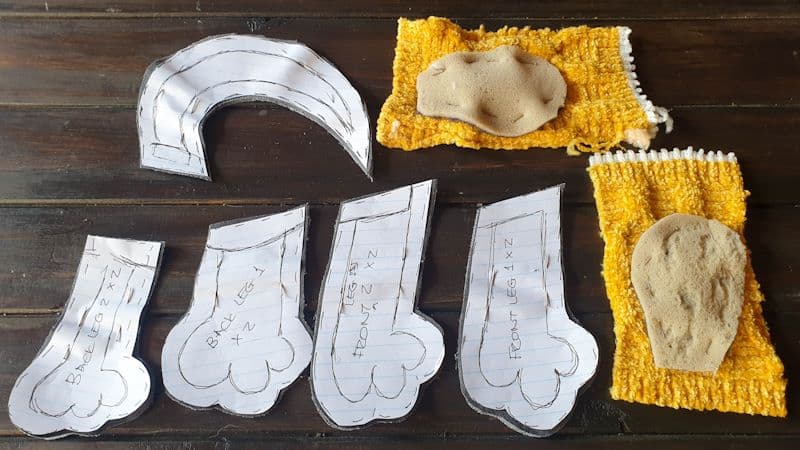
Mark on the pattern how many pieces of fabric you need to cut. To make the little ears for example, I needed 4 pieces; 2 for each ear so I could use a grey furry fabric for the top and a cuddly knitted underside.
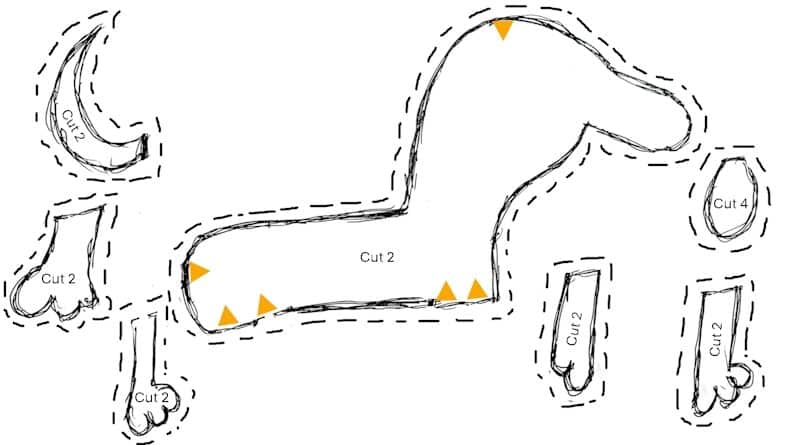
If you’re going to be stuffing the pieces, note them on the pattern. The yellow line below is my “no-sew zone” that I’ll keep open to stuff.
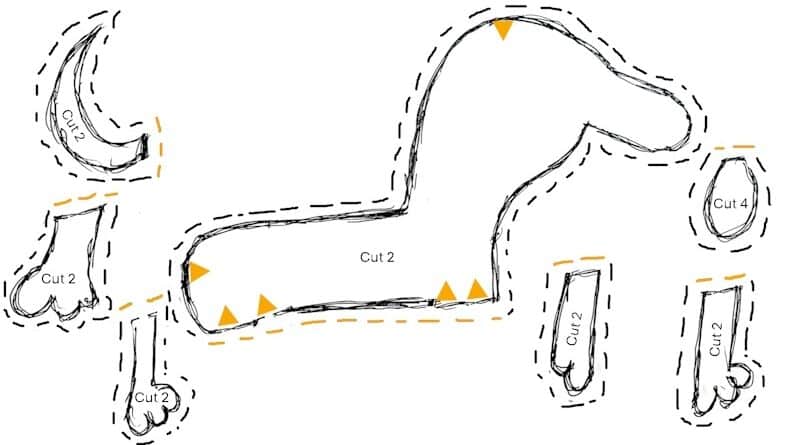
Make any final adjustments and cut out the pattern pieces.
Cutting the Fabric
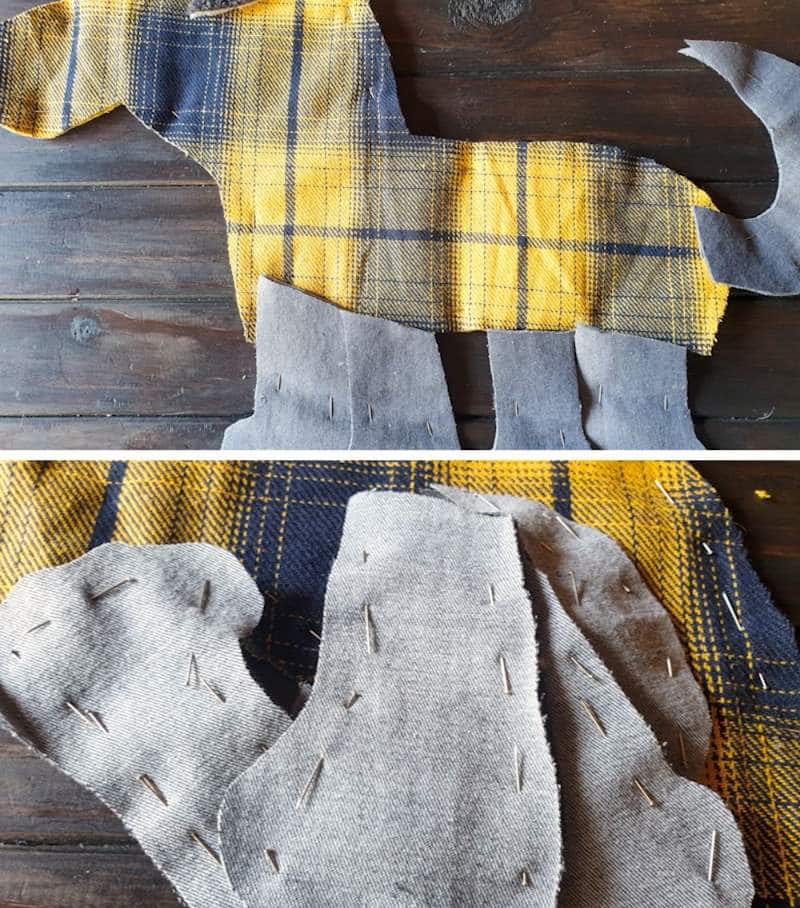
Pin the pattern pieces to the fabric.
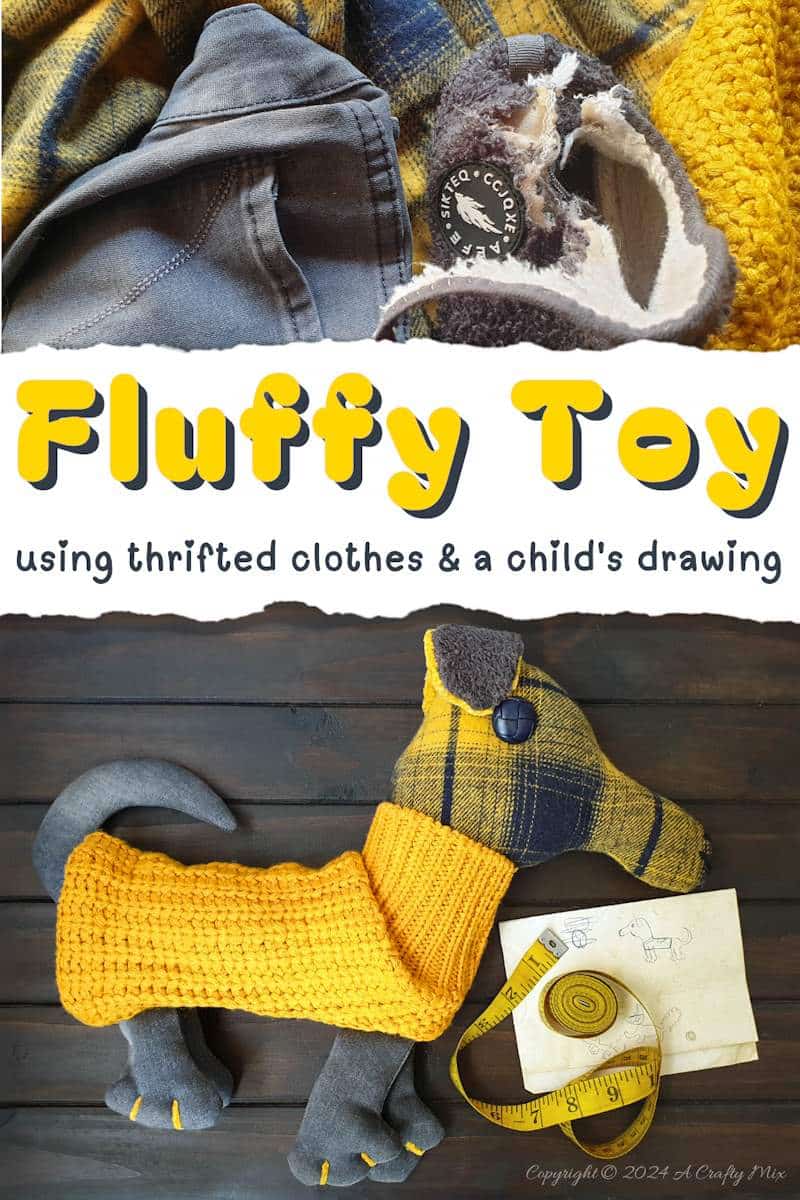
Soft fabrics like fleece, cotton, or felt are ideal for making a plushie. I would avoid stretch fabrics, as they’re more challenging to work with, especially for a beginner. For this cuddly toy, I used a thrifted flannel shirt, cuddly jersey, and jeans my son had outgrown.
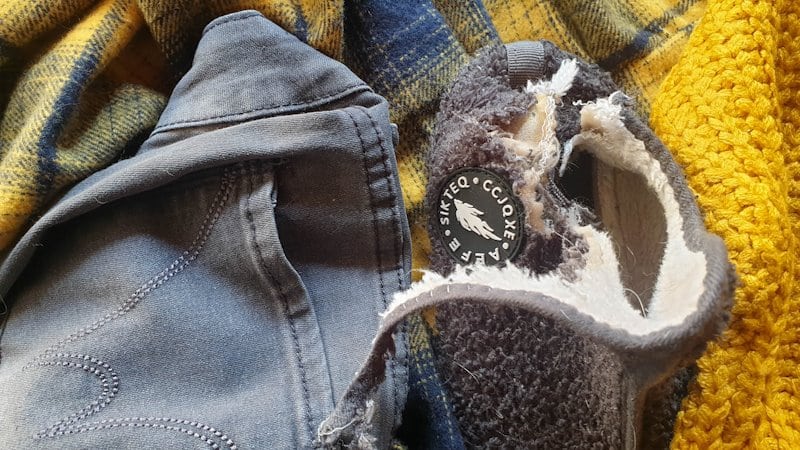
Oh, and my favorite slippers that our new fur baby had for breakfast. I did wash them first before cutting them up.
That reminds me, always prewash and iron your fabric before cutting and sewing. Using the pinned pattern as a guide, cut the fabric pieces out along the dashed seam allowance.
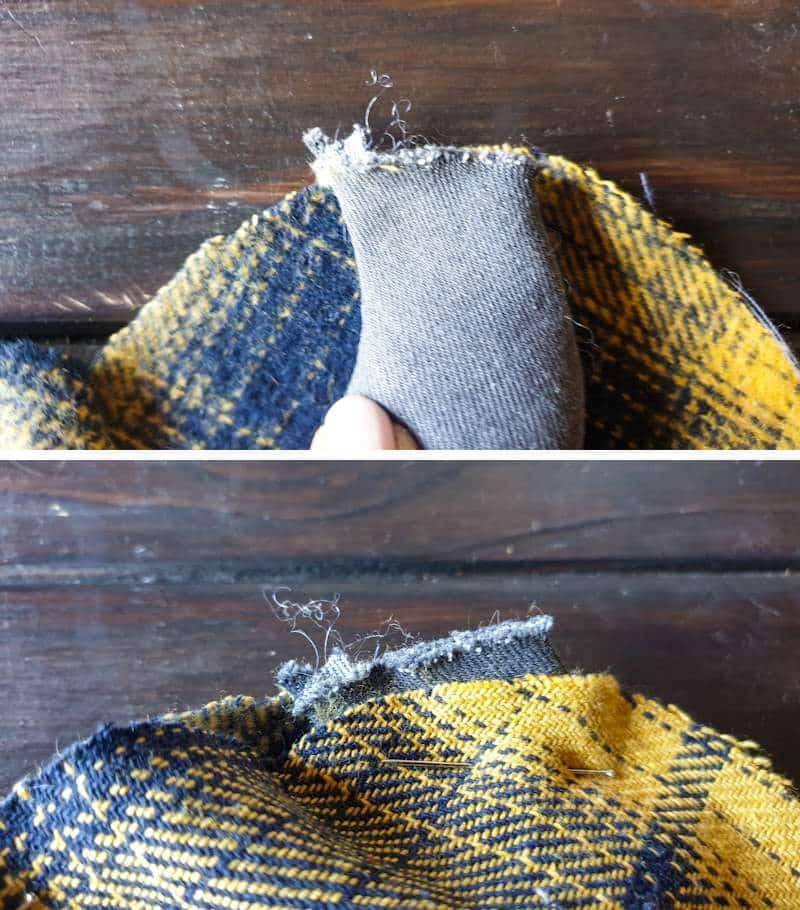
Remove the pattern and pin the fabric pieces together, placing the right sides of the fabric facing inward. Make sure the edges of the fabric line up neatly before sewing them together.
Basic sewing instructions
Sew the pieces together using a straight stitch. You can hand sew or use a sewing machine.
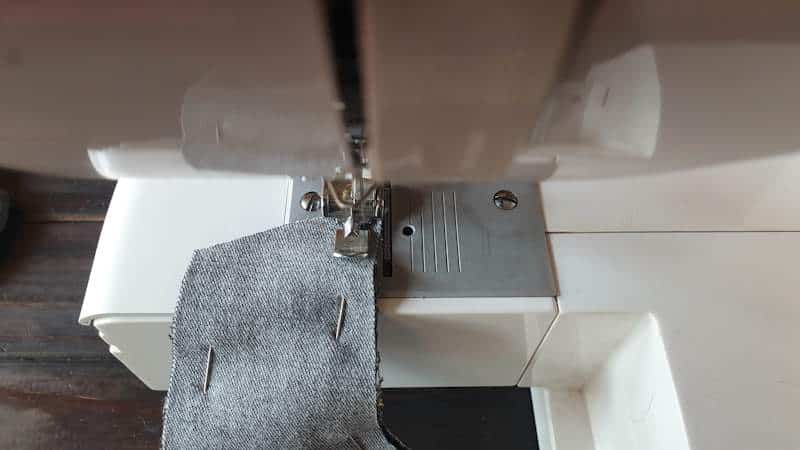
If your fabric tends to fray, use a zig zag stitch on your sewing machine to finish the raw edges or cut the fabric with pinking shears. The zig zag blade prevents fraying on most fabrics.
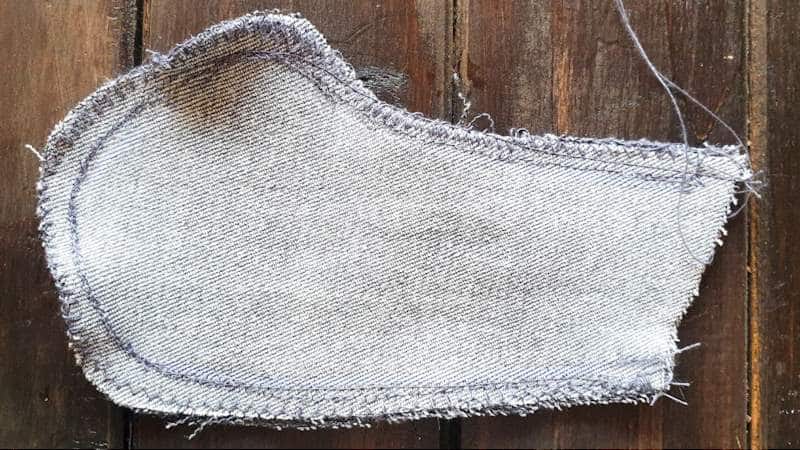
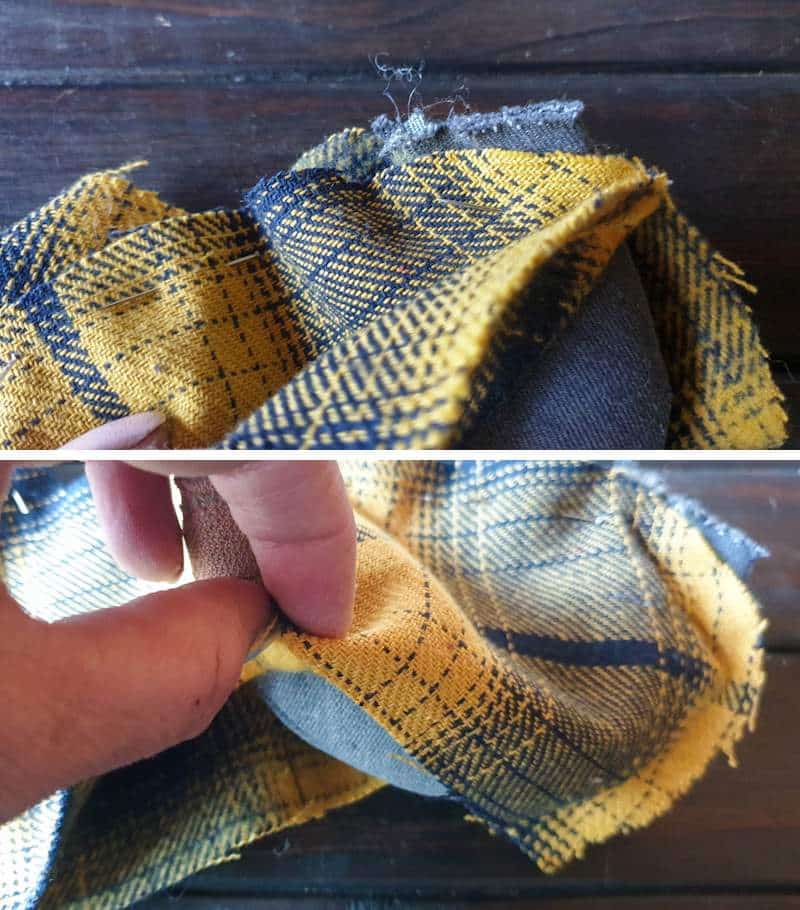
Remember to sew the plushie right-side-in, and leave an opening for the stuffing. Turn the plushie right-side-out and fill it with stuffing until it reaches your desired firmness.
If your child’s drawing has lots of attachments (legs, arms, tails, ears, beautiful, childlike imagined details), sew and stuff those first.
Pin the attachments to the main body and tuck them up on the inside. The image below will hopefully show you what I mean.
That’s the tail tucked inside and pinned to the plushie’s butt. (I never thought I’d say those two words in the same sentence.)
Once all the bits have been sewn in on, flip the main body right-side out and stuff.
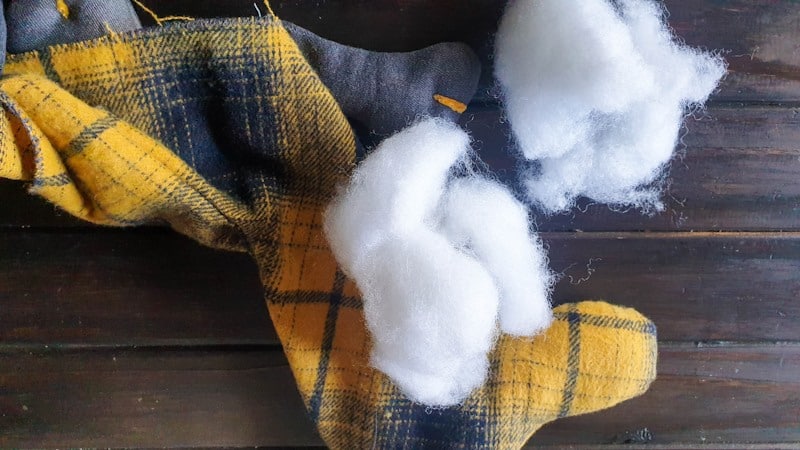
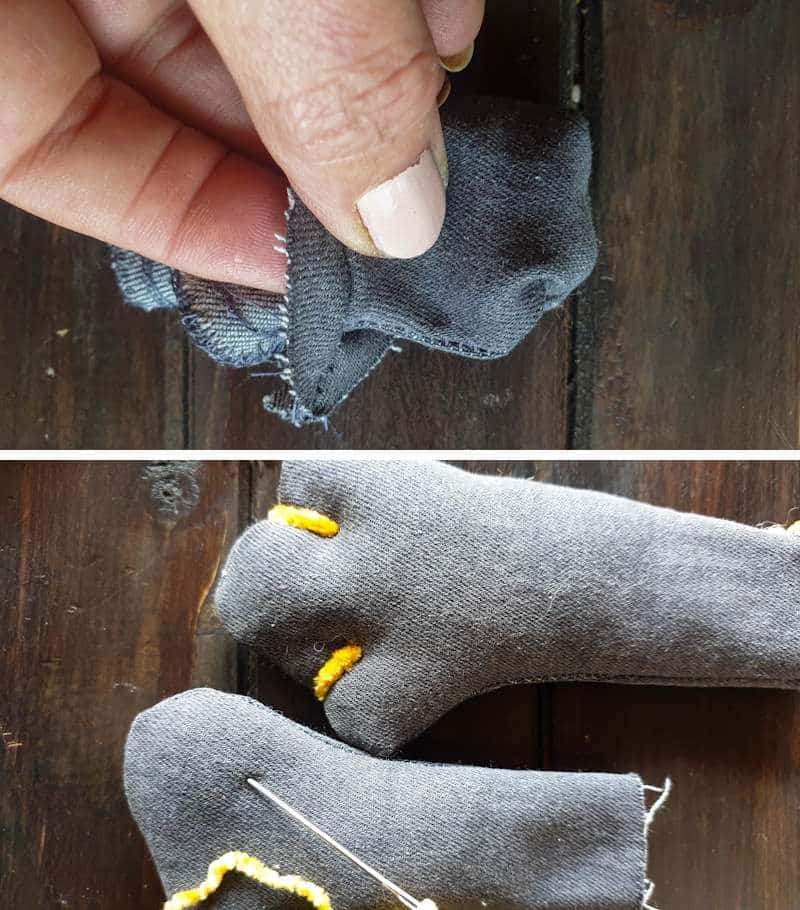
Sew the opening closed using a back-stitch or a blind-stitch to keep it neat. To finish your plushie, sew or glue buttons for the eyes and nose. You can also use fabric pens or paint to draw them on. If your Picasso is still a little person, stay away from anything that could pose a choking hazard.
Experiment with wool, embroidery thread, and felt cutouts to add small, important details. As an example, I used bright yellow wool to create the toe detail from my child’s drawing.
And for the jersey, I simply cut the arm off the thrifted jersey, made a few holes for the legs to fit through, and slipped it over the plushie’s body.
And that’s all there is to turning your little one’s drawing into a soft, cuddly toy or pillow.
At the end of the day, it’s all about creating a one-of-a-kind, handmade keepsake that celebrates your little artist’s creativity. I hope I covered everything. If anything is unclear, give me a shout in the comments, and I’ll do my best to explain a little better.
If you like the idea of turning your child’s drawing into a plushie, don’t forget to pin it for later
Sharing caring
Oh, and if you’re looking for some of the things we used, we’ve got you covered. Disclosure: Clicking on the links below, means we may receive a commission from Amazon. But don’t worry it won’t come out of your pocket, and it helps us make more amazing crafts to share with you 😉


And if you prefer to buy a plushie, perhaps these beauties will appeal.

And as always, wishing you a wonderful, crafty week filled with lots of love and laughter. Thank you for popping in for a visit.

Last update on 2026-06-03 / Source Amazon Affiliates