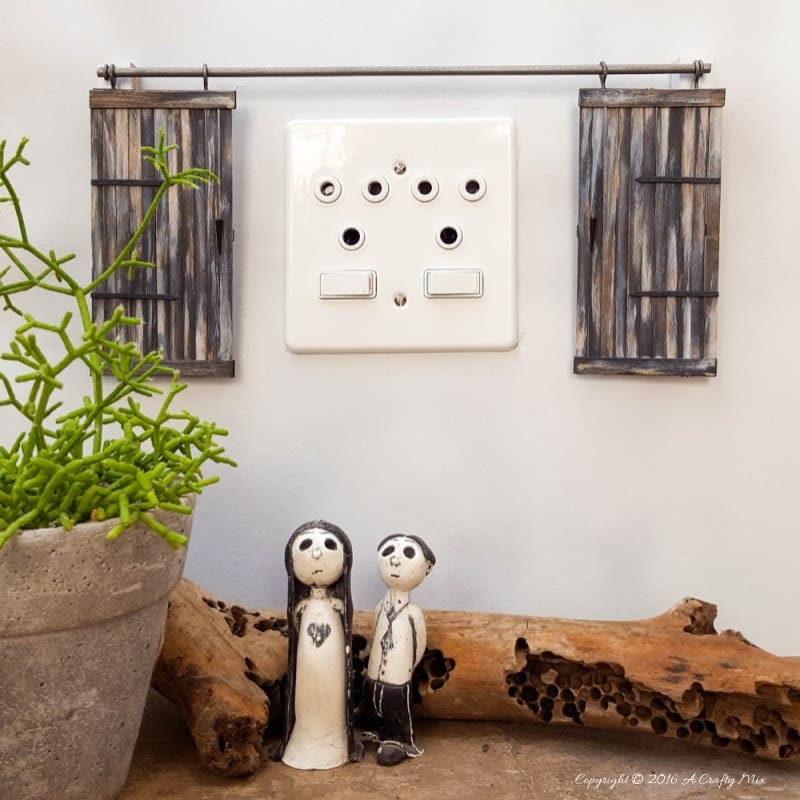
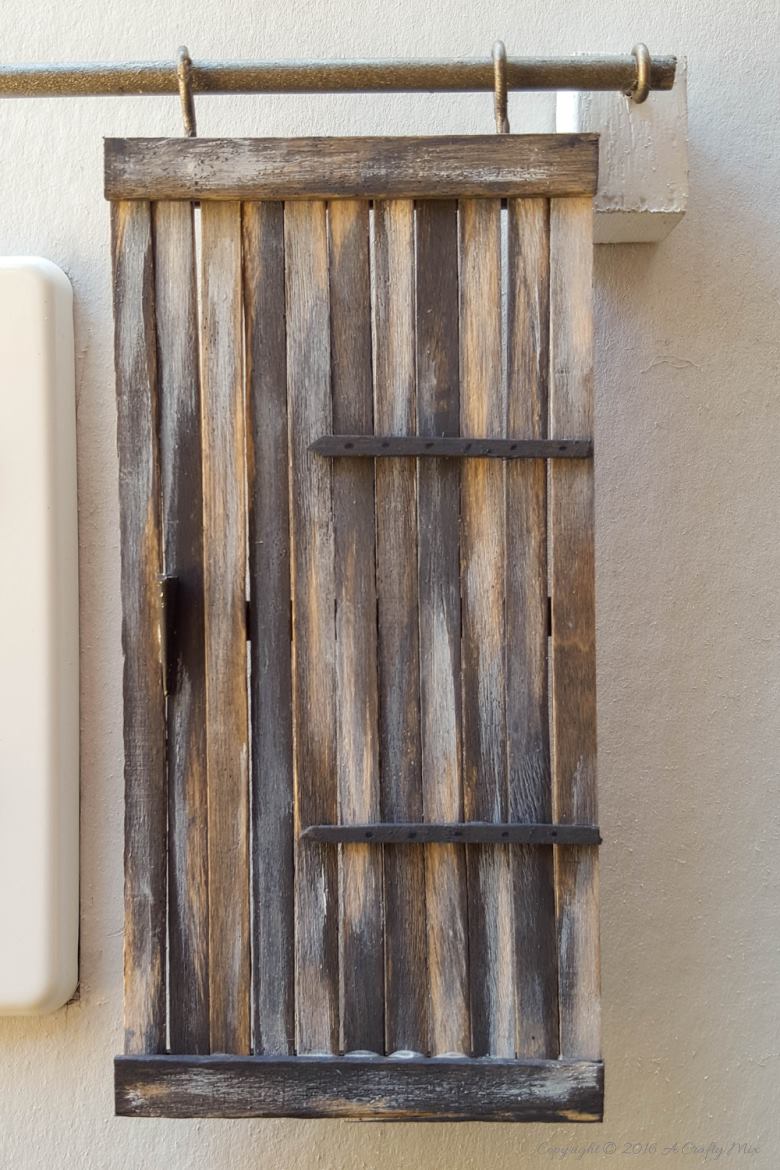
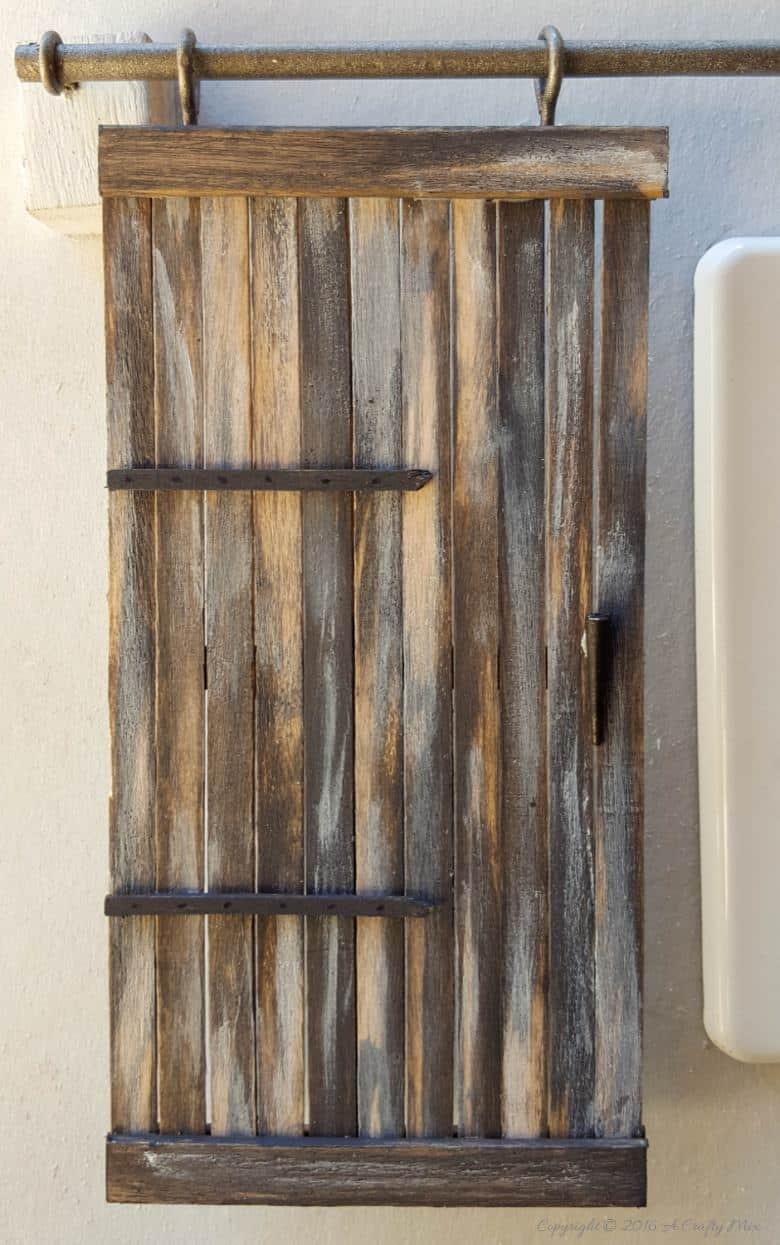
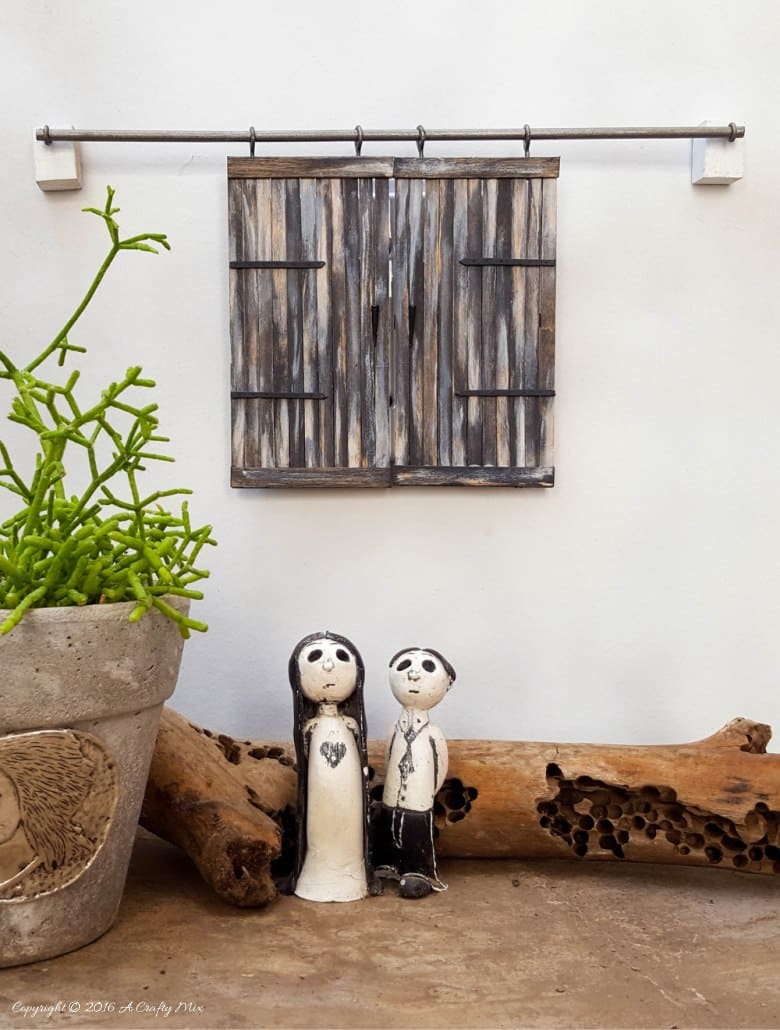
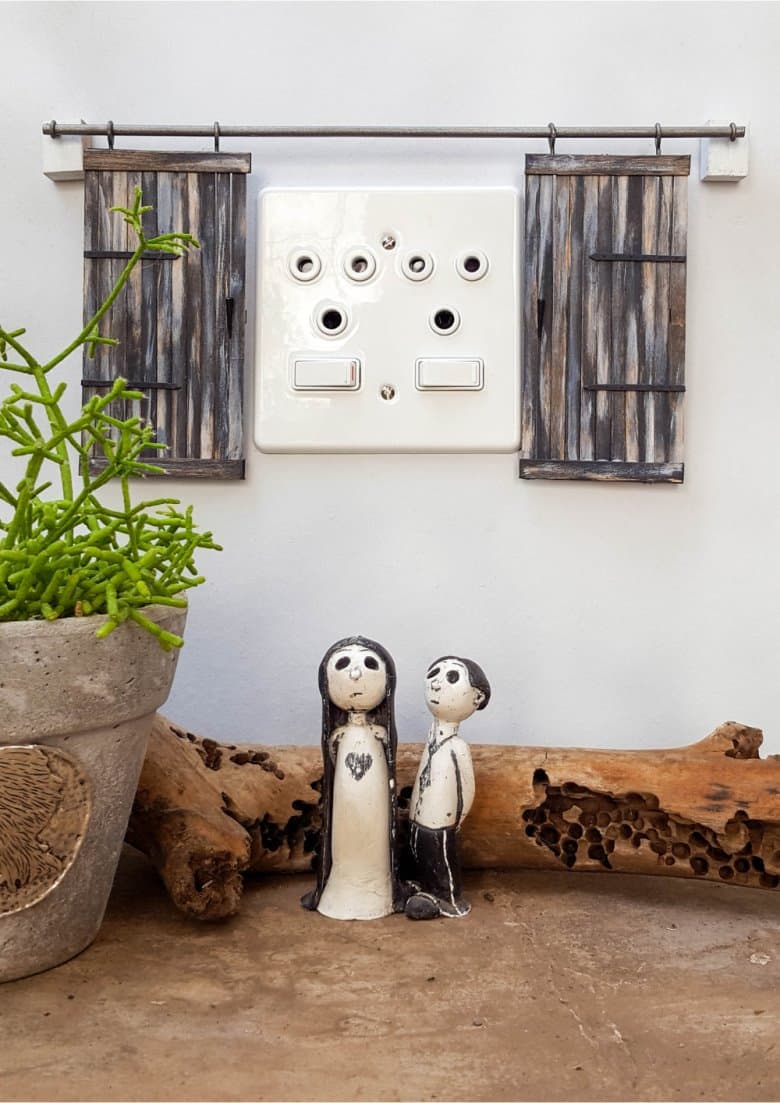
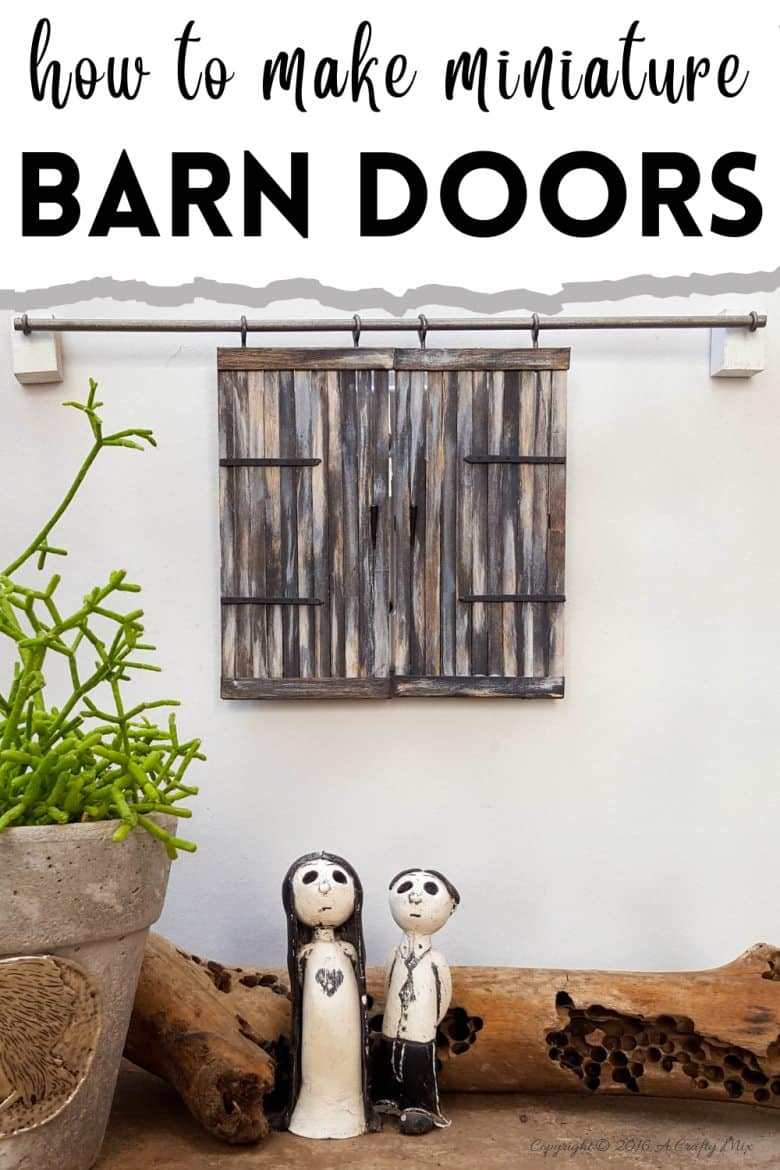
Happy New Year, everyone. Wow, is it just me, or did 2016 fly past really quickly? It’s like BAM, door number 2016 just slammed closed, and I wasn’t even ready for it. Talking about doors. Can you guess what these super cute miniature barn doors are covering?

Wait for it…………………………………………………………………………………..
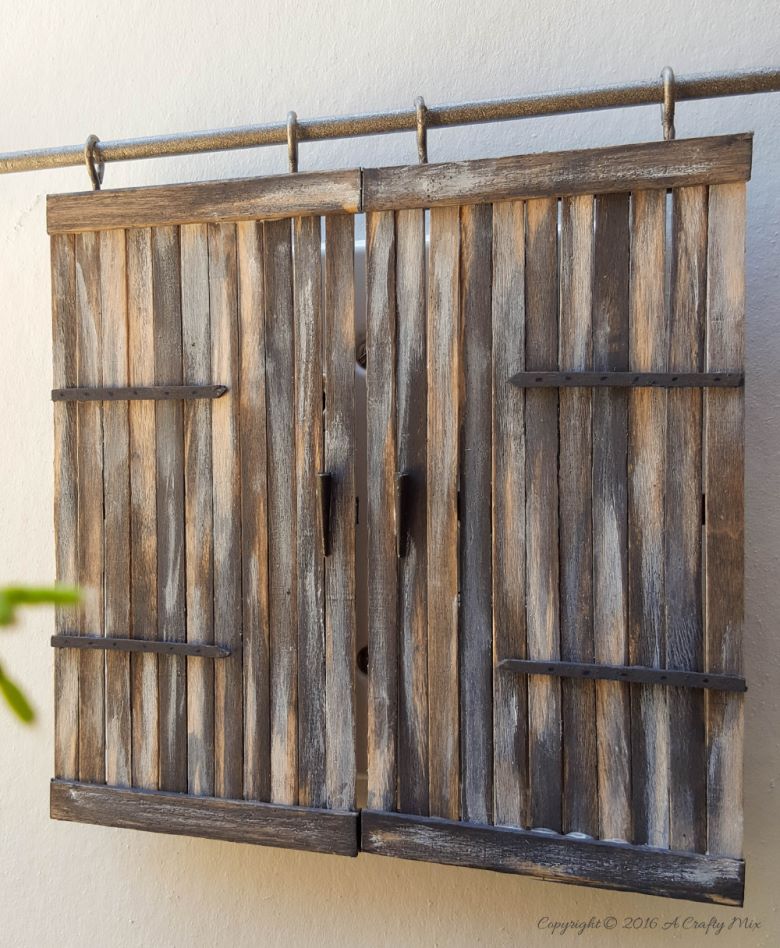
It’s a wall plug or socket.
Yup and they were so easy to make too.
How To Make Miniature Barn Doors
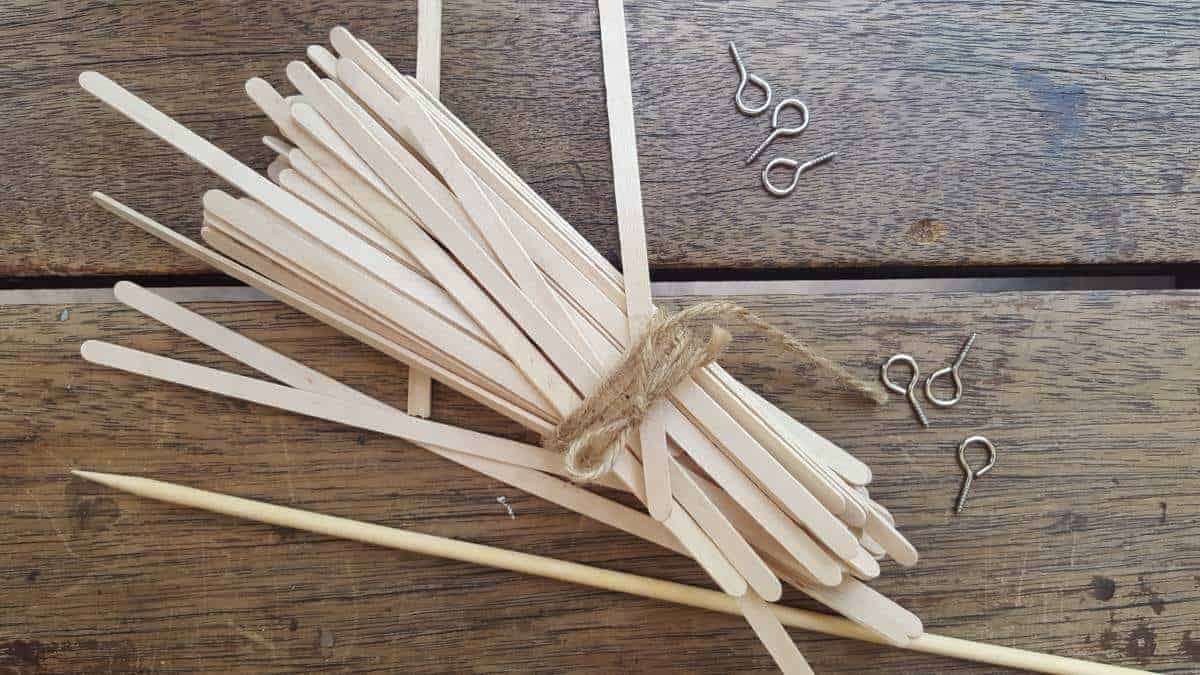
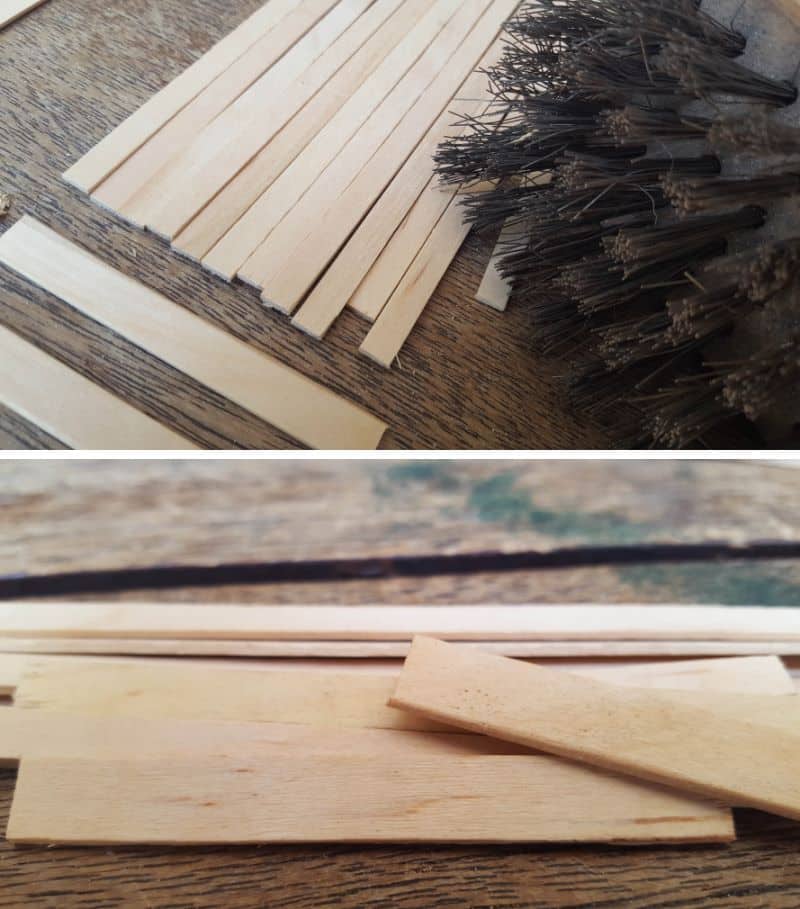
For a double plug, we used a whole bunch of ice cream sticks or stirrers, a looooooooong skewer, six screw eye hooks, paint, scissors and wood glue.
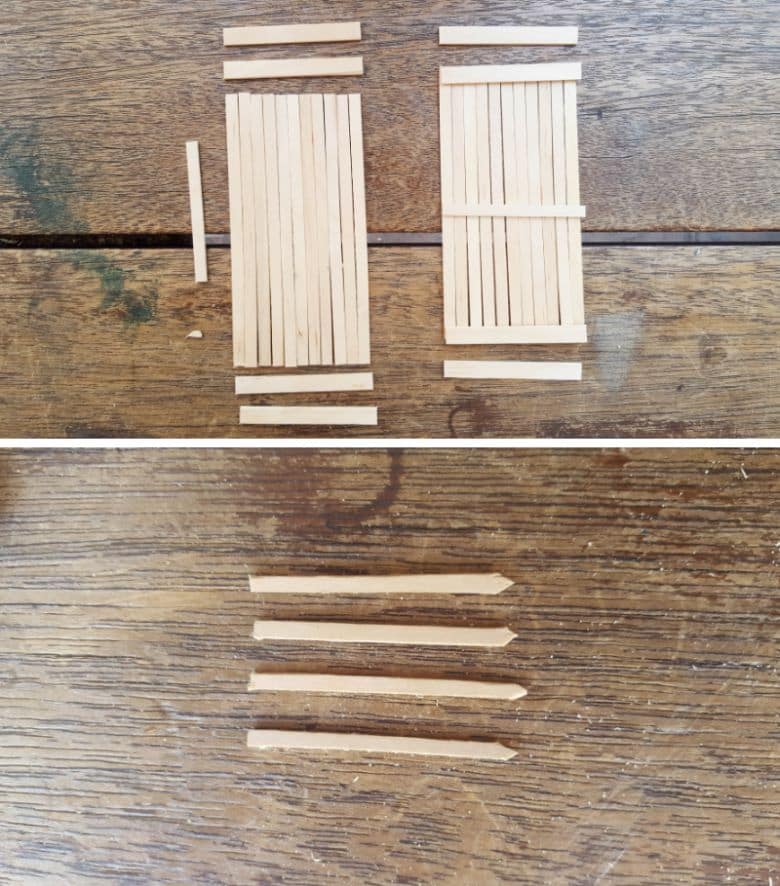
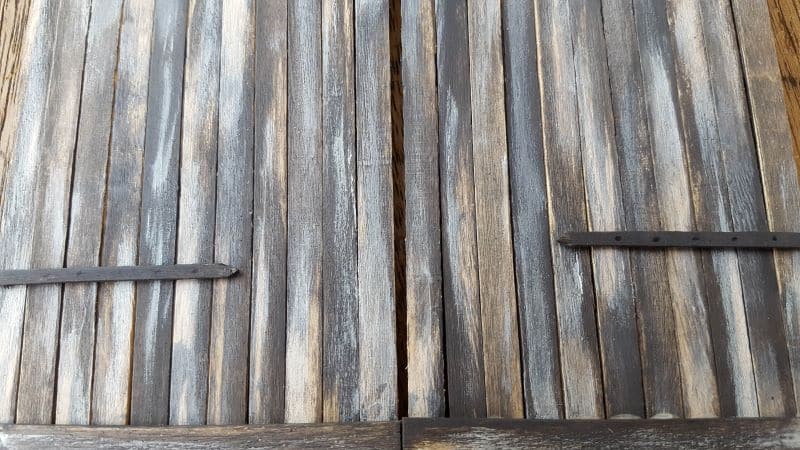
Measure the height of the wall plug, add 2 cm (7/8″) and cut the ice cream sticks using scissors. In South Africa, our wall plugs are 13 cm high, so we cut the ice cream sticks to be 15 cm long. Place the cut ice cream sticks next to each other until you have enough to cover the width of the wall plug. We used 22 in total, 11 for each door. Once you know how wide the doors are going to be, cut five ice cream sticks to fit across the width. Use the leftover bits to cut four hinges, and you should end up with something like this.
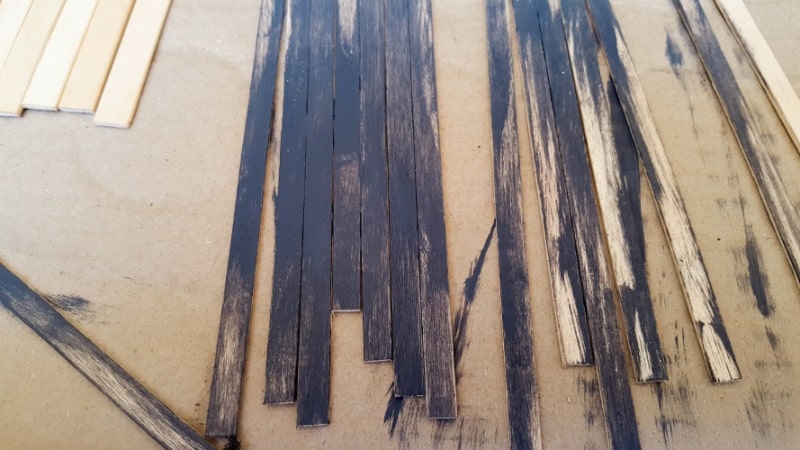
As an optional extra, you can use a wire brush to distress the sticks 😉
Painting the Miniature Barn Doors
Paint the sticks and hinges to suit your decor. I prefer painting the sticks one at a time, just coz I’m a little bit weird, and I think it adds some character 😉 If you’re not keen on painting each stick individually, you can glue the door together and paint it later.
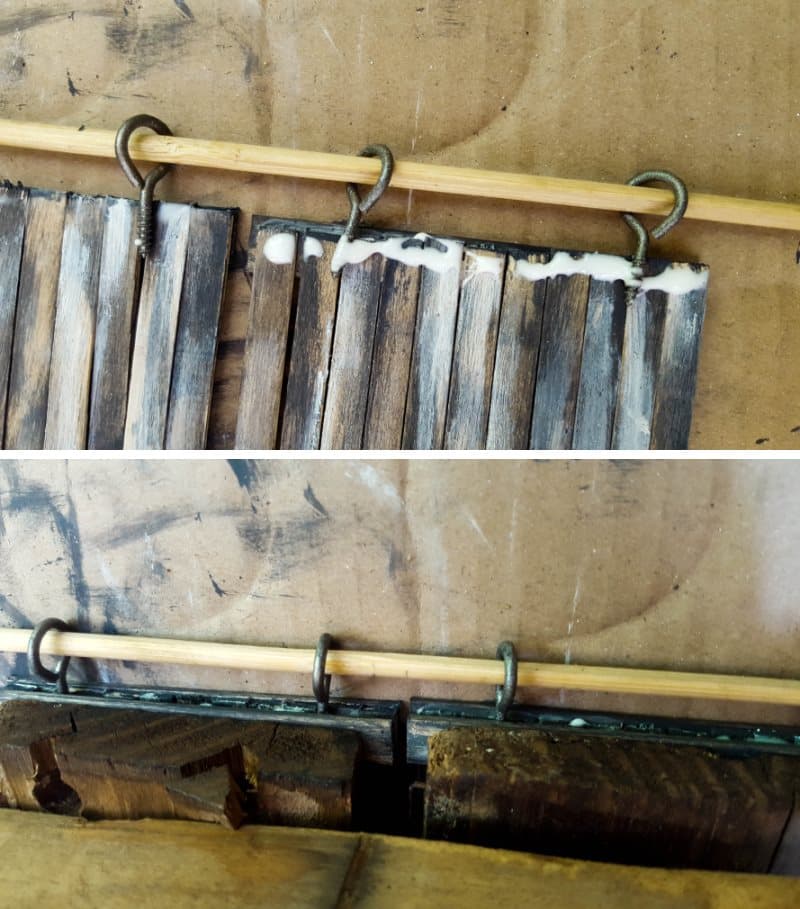
To glue the barn doors, place the long sticks together lengthwise and glue a short stick on the top, middle and bottom of each door. This will be the front side. When the glue is dry, flip the barn doors over and glue another short stick at the bottom of the door.
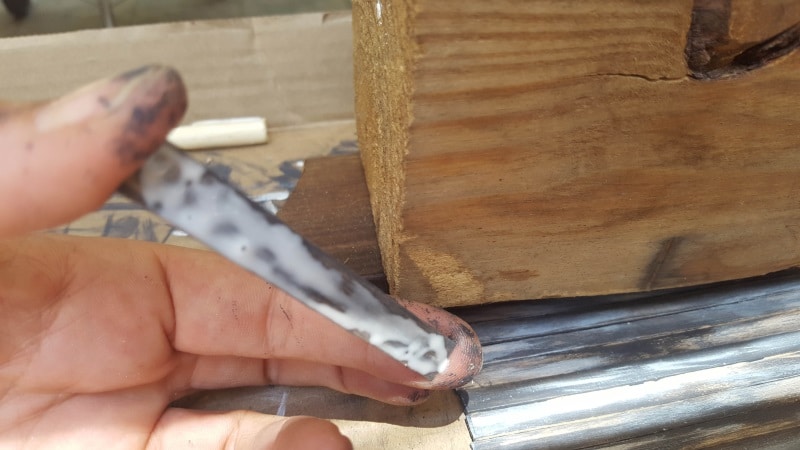
Now for the only tricky part, positioning the screw-in eye hooks at the top of the door. It’s easier if you slide the eye hooks on the skewer before glueing them into the doors.
It helps to keep the eye hooks stable, and they don’t wobble around so much. Carefully line the doors up and ensure the hooks are all lined up nicely.
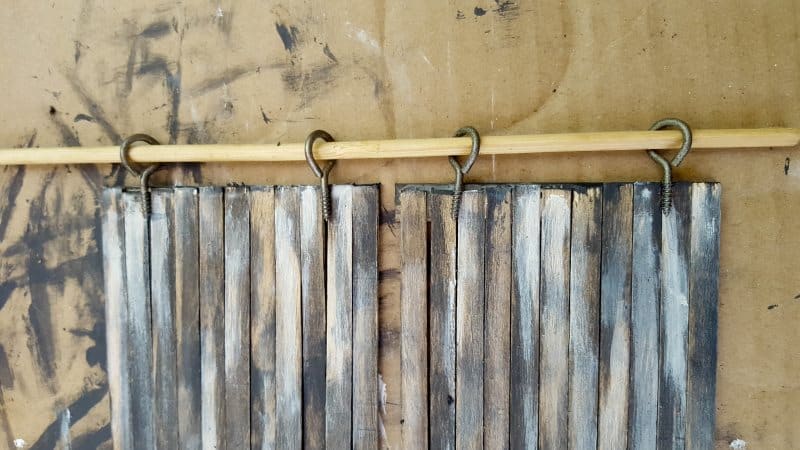
Use another short stick and glue it down to hold the eye hooks in place. Find something heavy and carefully place it onto the barn doors while the glue dries.
Hanging the Miniature Barn Doors
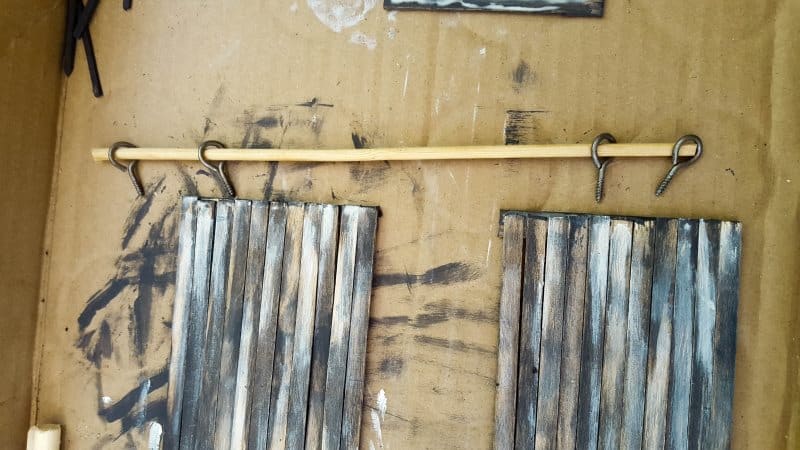
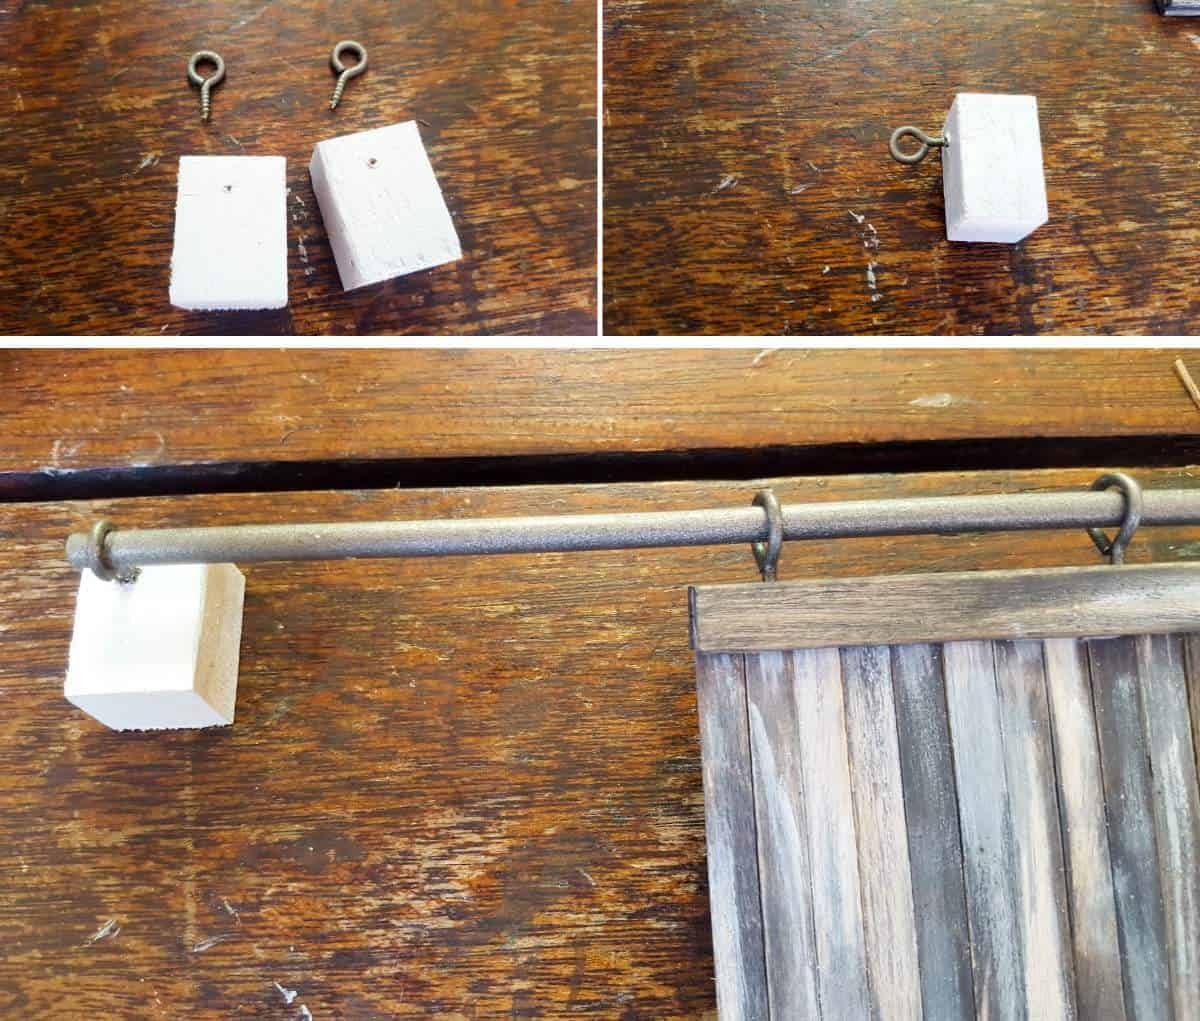
To hang the barn doors, we took two blocks of wood and screwed an eye hook into each one. The blocks of wood are about 1.5 cm thick or 1/2″, so when the doors slide, they don’t get stuck on the switches. It also makes it easier to add socket safety covers if you have those old wall sockets that don’t have safety “shutters” inside. Just insert the skewer through all the eye hooks, and the doors are almost ready to be hung.
All that’s left to do is glue on the hinges, and some door handles.
The handles aren’t really necessary, but it does add to the look. We used two teardrop beads to make the handles.
Handy Hint: Beads and whatnots are perfect for adding those small, special touches to miniature projects. For some more ideas, have a look at our thatch roof fairy abode and this miniature gypsy caravan.
The barn doors can be stuck onto the wall using double-sided tape, which makes them renter-friendly. You could probably also screw the blocks of wood into the wall if you know where the wiring goes.
What do you think? And what would you cover with your miniature barn doors?
Today is the perfect day for opening a new door.
If you like the idea of making miniature barn doors, don’t forget to pin them for later.
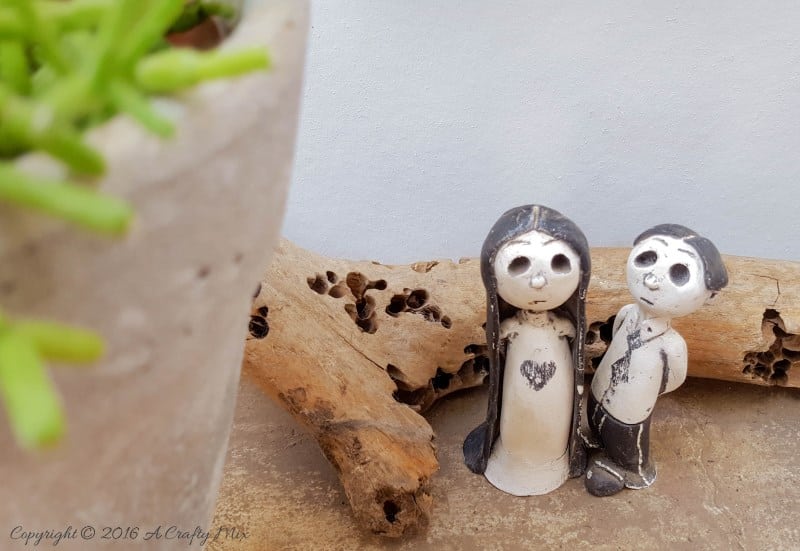
BTW, Those little people under the barn doors were a present from my kids. Don’t you just love the expressions on their faces? It seems like they’re as dumbfounded as I was when 2016 was over.
P.S. If you’d like to make something similar or prefer to buy rather than DIY, we’ve got you covered Disclosure: Clicking on the links below, means we may receive a commission from Amazon. But don’t worry it won’t come out of your pocket, and it helps us come up with more crafty ideas to share with you


Any hows here’s wishing you a beautiful 2017 full of crafty moments and many, many beautiful new memories. Sending love and blessings as always.

Last update on 2026-06-03 / Source Amazon Affiliates