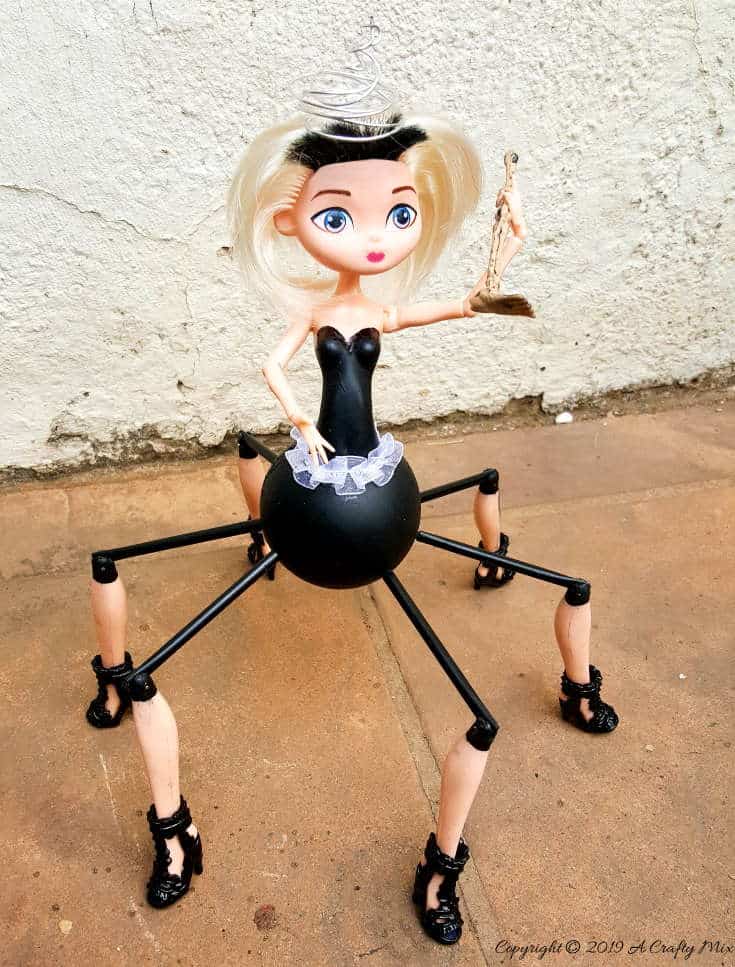
My daughter loves her dolls. She would spend hours entertaining herself and I remember, before she was born, telling her Dad that I hoped she’s wouldn’t be a Barbie kinda girl. I couldn’t picture myself being a Mom to a little person who did the “pink thing” and played with dolls. Well, guess what happened. When she was about two, all she wanted for Christmas was Barbie and Ken!!! 😐 So that’s what she got. And I watched her play with them. Barbie and Ken walked hand in hand to the edge of the pool to get married. Or so I thought anyway. But then my little girl did the most amazing thing. She took both their heads off and swopped them around and Ken, who was now Barbie, and Barbie who was now Ken, skipped away from the brink of Barbie Mania. That’s my girl. So, to honor all those little people out there who don’t do the normal thing, I decided to give one, or three 😉 of her Barbie-like dolls a makeover and turn them into Spider-Girl.

Okay, I know she won’t be everyone’s cup of tea but I think she’s the coolest doll EVER. You see, not only am I a tomboy I’m also an arachnophile, and if they had dolls like this when I was growing up, I probably would have played with them.
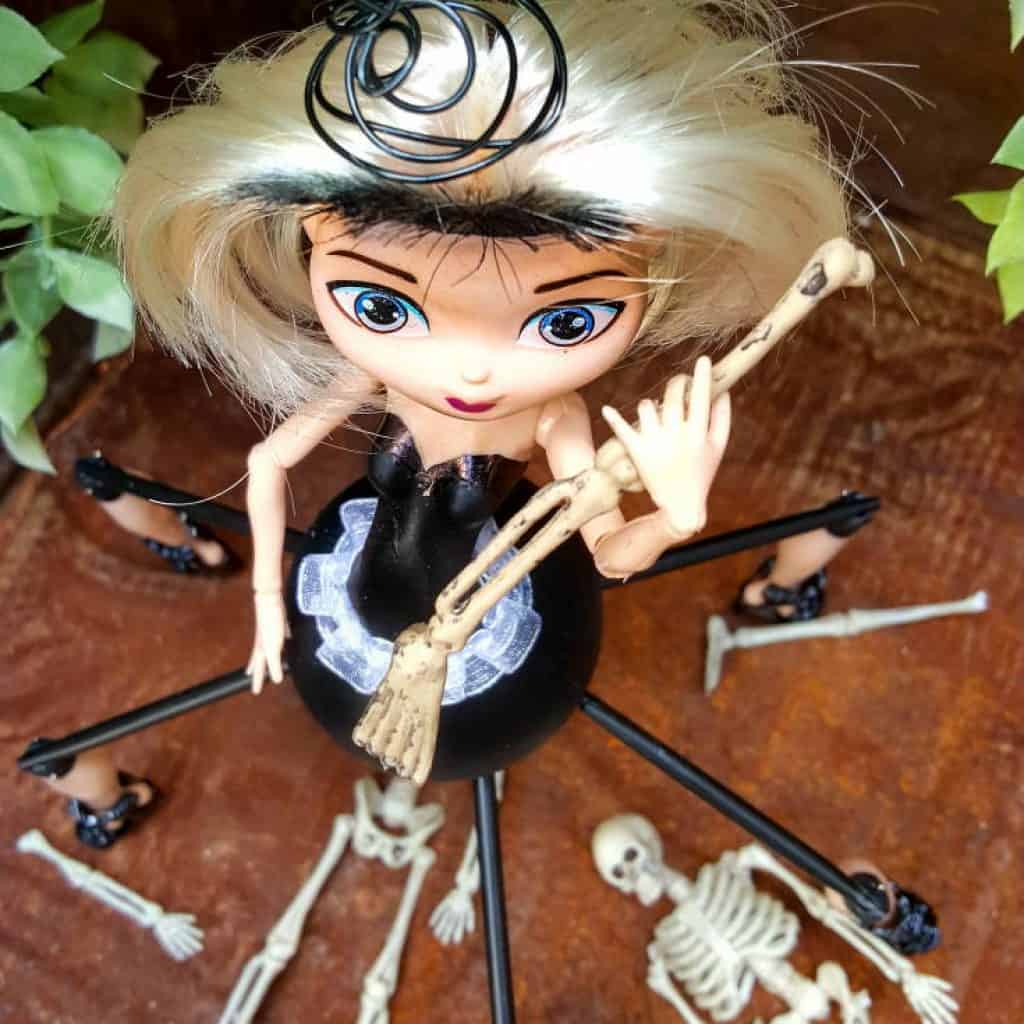
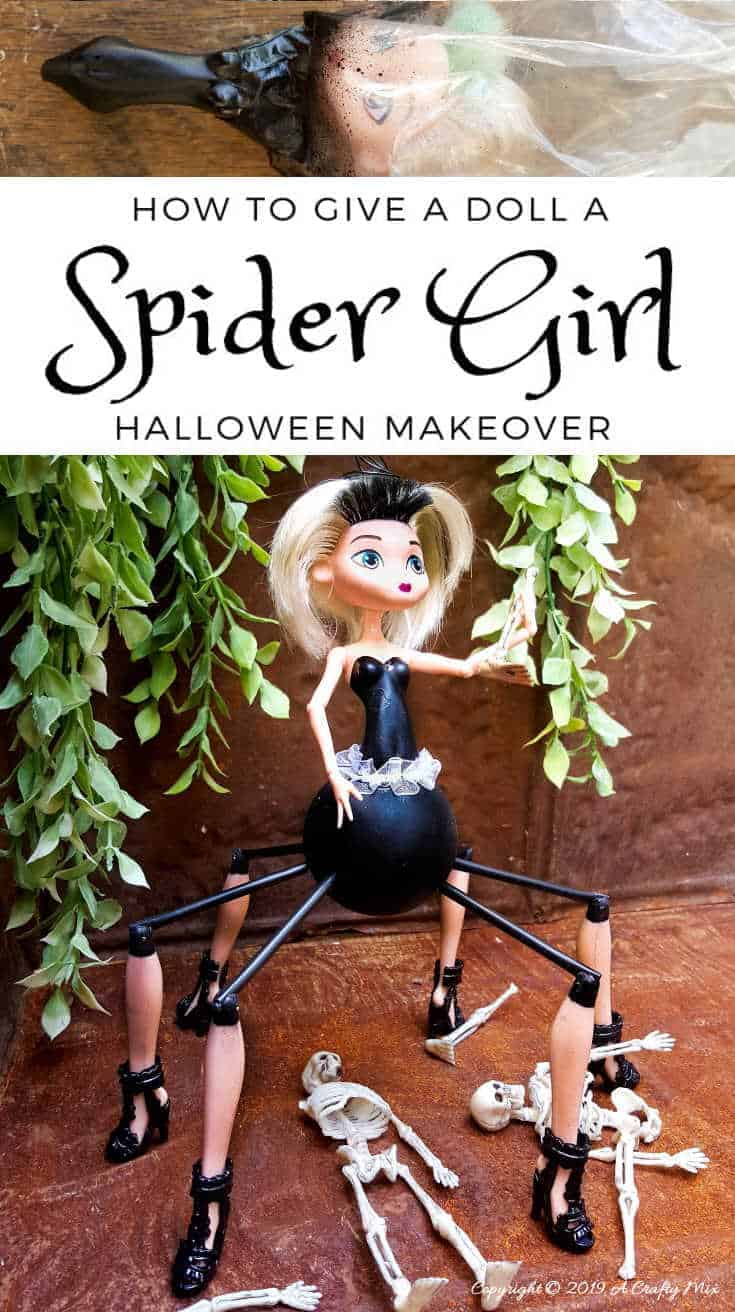
And my daughter, who’s a little scared of spiders, thinks Spider-Girl is pretty cool too 😉
Right, before we get to the tutorial, be sure to follow us on Facebook, Twitter, Pinterest, or Instagram. And don’t forget to subscribe so you’ll never miss a post!
What you need to give Barbie a Spider-Girl makeover
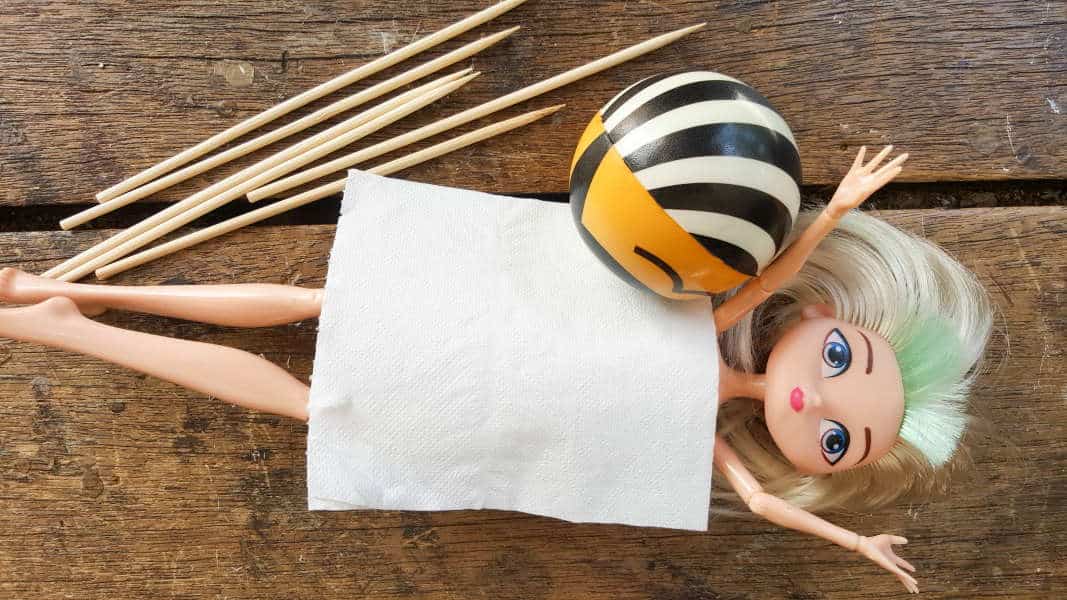
- 3 Cheap plastic dolls
- A rubber ball 3” (7 cm)
- Black spray paint
- Black Straws
- Wooden skewers
- Super Glue and Pins
- Masking tape or painter’s tape
- Hacksaw
Optional
- Scrap piece of tulle or ribbon
- Barbie shoes or boots
- Jewelry wire
How to give Doll a Spider-Girl Makeover
Warning. The following images may affect sensitive Barbie lovers. I apologize in advance but I’m getting my Dexter on 😀
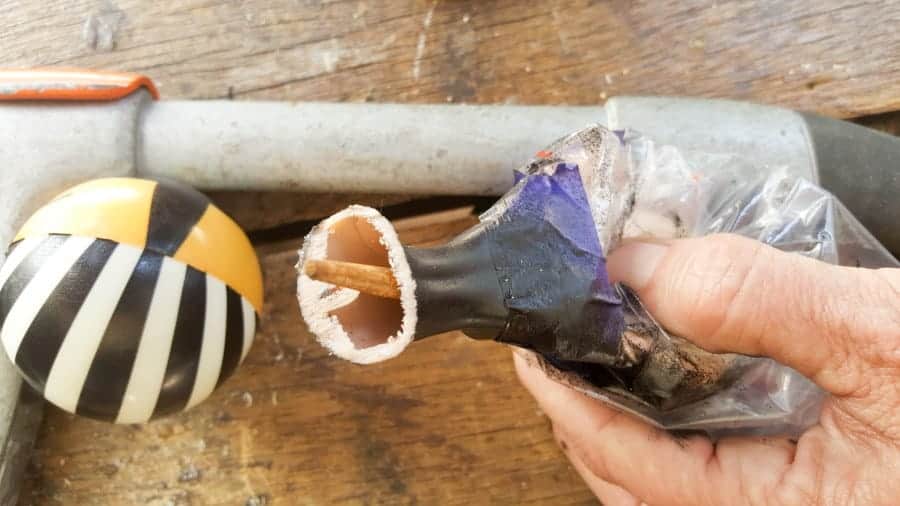
Remove the bottom of the plastic dolls’ legs and save them for later. You’ll need 6 legs. Place a plastic bag over one of the plastic doll’s heads to protect her from what comes next 😉 Use some painter’s tape to mask off her chest area and paint it black.
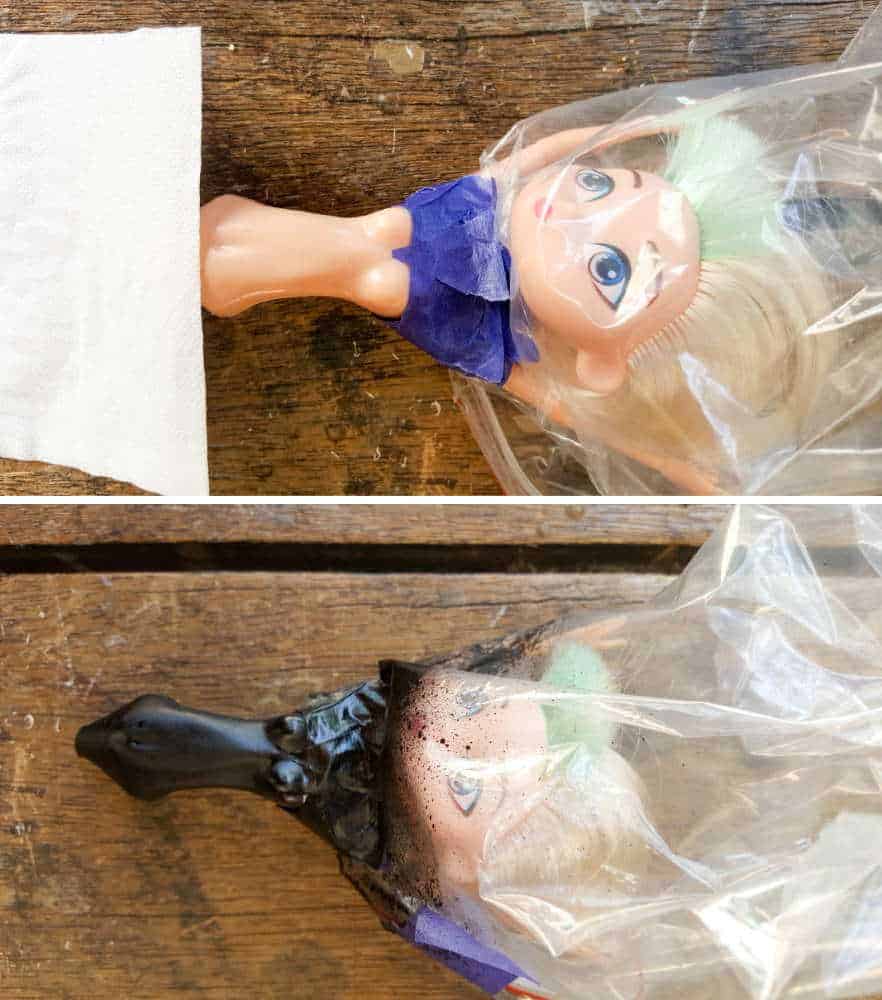
Cut the bottom part of her torso off with a hacksaw.
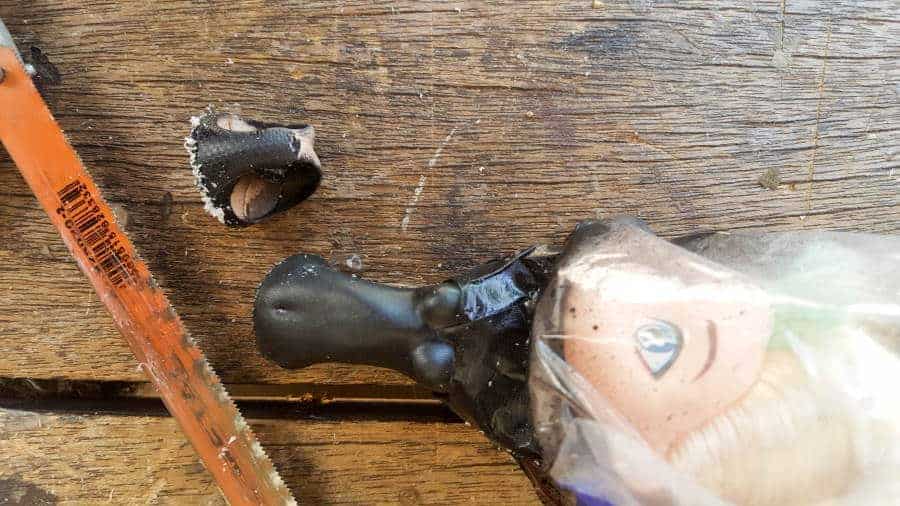
Impale her on a skewer. Glue a skewer inside her body cavity. OMW it’s starting to sound like a horror movie 😀
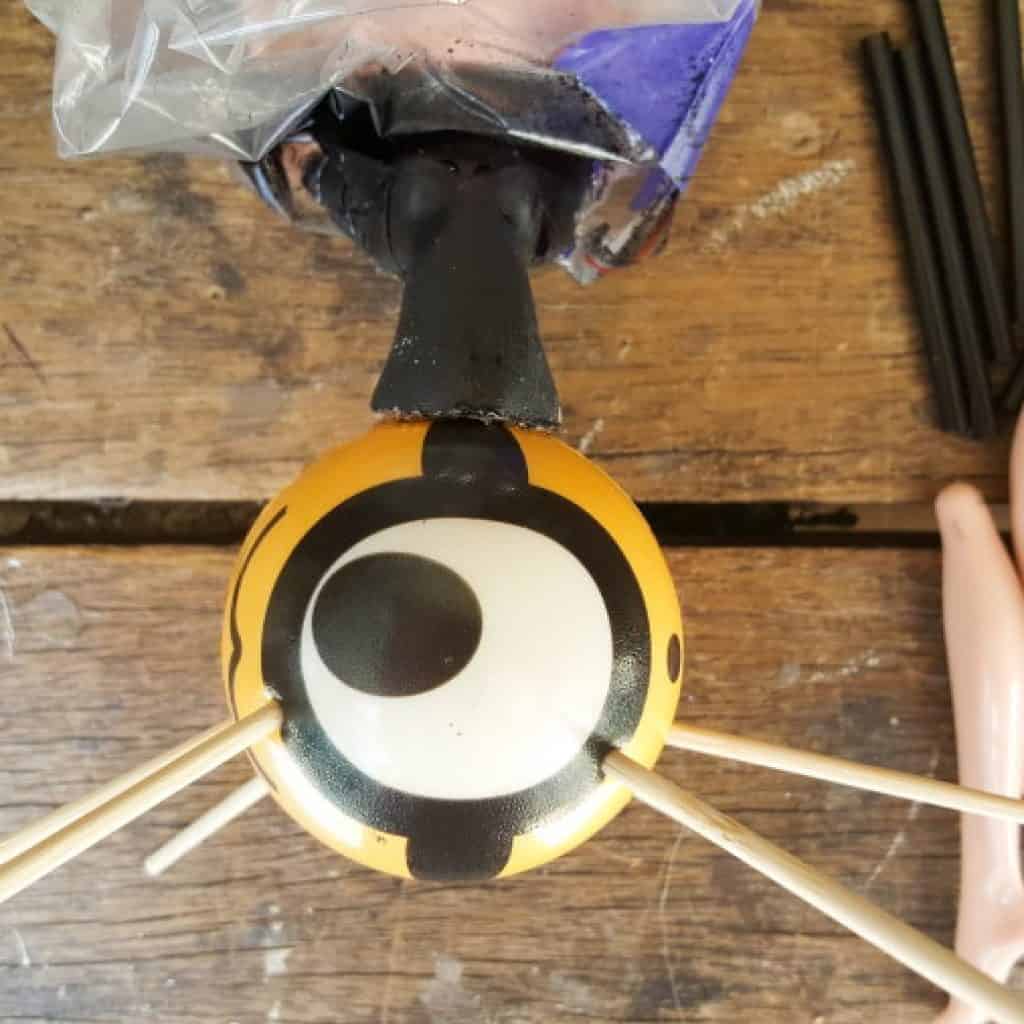
Then glue and stick her torso onto the rubber ball with some super glue. Insert six skewer sticks evenly around the bottom of the rubber ball to create the upper portion of her spider legs.
Mask off the bottom part of Barbie’s legs 😉 as shown below.

And give everything a coat of black spray paint.
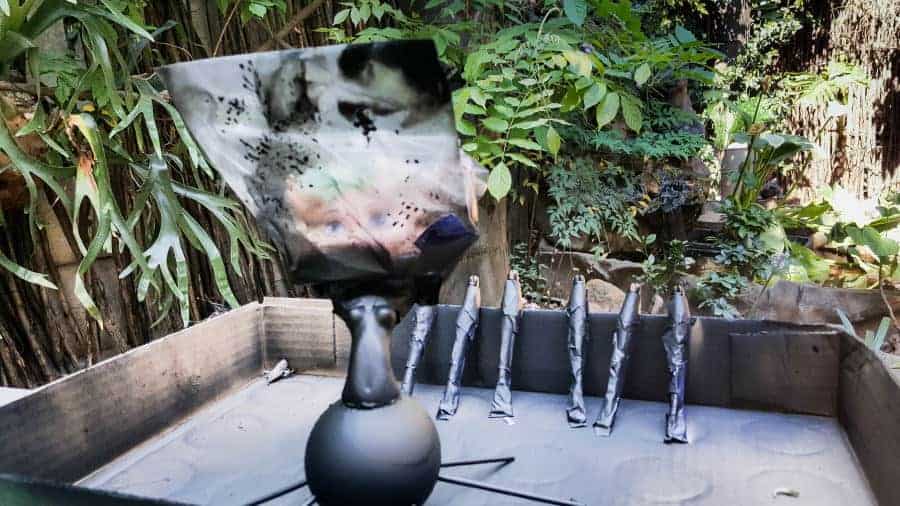
Once the paint dries you can start making the “mechanism” that will join the bottom of doll’s legs to the rest of the soon to be Spider-Girl.
Making The Leg Mechanism
Did you know that spiders have 48 knees? Imagine how tough your job must be if you’re part of the spider mafia 😀 Our Spider-Girl only has 8 (6 knees and two elbows). To join the bottom of her legs insert a straw into the knee joint and stick a pin through the joint and the straw to secure. Cut the pin and add a drop of super glue to hold it in place.

Add some super glue to the skewer and slide the straw over the skewer. To make it easier to balance Spider-Girl’s body while adding the legs, I used an empty tin can that I cut to the same height as her legs.

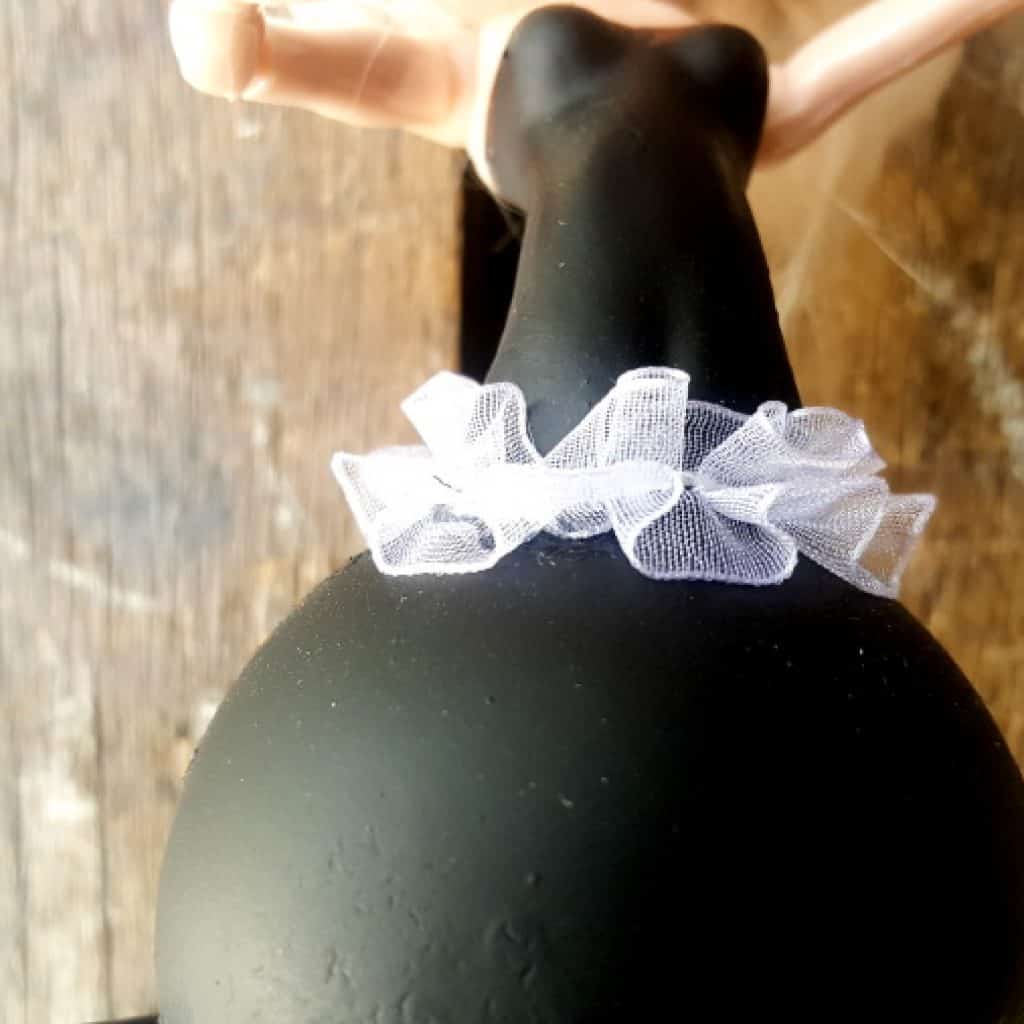
I added a small strip of tulle around the part where her cephalothorax joins her abdomen to hide the join.
And used a sharpie to color her bangs black. She also got some kick-ass boots 😀 When I sent my daughter this piccy on WhatsApp, her response was “Oh my gosh I really like her. Is she one of mine?”
Well, she was darling, but she’s mine now 😉

And those legs with their pin-knee-joint hinges still work too.

So what do you think? Would you give a plastic doll a Spider-Girl makeover?

Or is she too freaky? BTW if you have any spare legs lying around somewhere, you can use them to make these wickedly, wonderful witch’s legs in a cauldron. They’re sure to put a smile on your face. And if your Barbie has a pretty face you can always use her to make one of these gorgeous wood nymphs.
If you like the idea of giving a doll a Spider-Girl makeover for Halloween, don’t forget to pin her for later.
Oh and if you’re looking for some of the things we used, we’ve got you covered Disclosure: Clicking on the links below, means we may receive a commission from Amazon. But don’t worry it won’t come out of your pocket, and it helps us come up with more amazing craft ideas to share with you 😉


Or if you prefer to buy rather than DIY


And as always, here’s wishing you a spooktacular crafty week. Thank you for popping around for a visit.

Last update on 2026-06-03 / Source Amazon Affiliates