Have you ever tried making an umbrella? The mechanism that opens and closes the canopy is ingenious. It’s so simple and yet so functional. I was really keen to try and make a fairy umbrella to go with our little picnic table.

Hummph, easier said than done. I dismantled lots of tiny cocktail umbrellas, drew tons of pictures, bent a whole bunch of wires and finally came up with this.
The plan
I know, it looks a bit odd, but stay with me because that piece of cardboard becomes this.

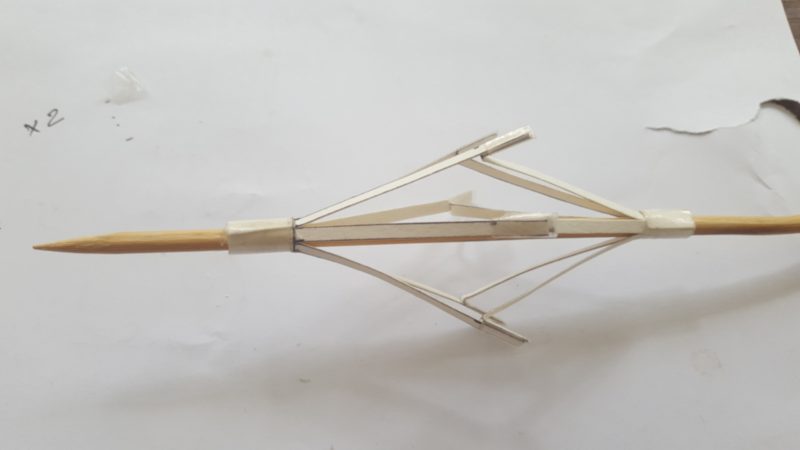
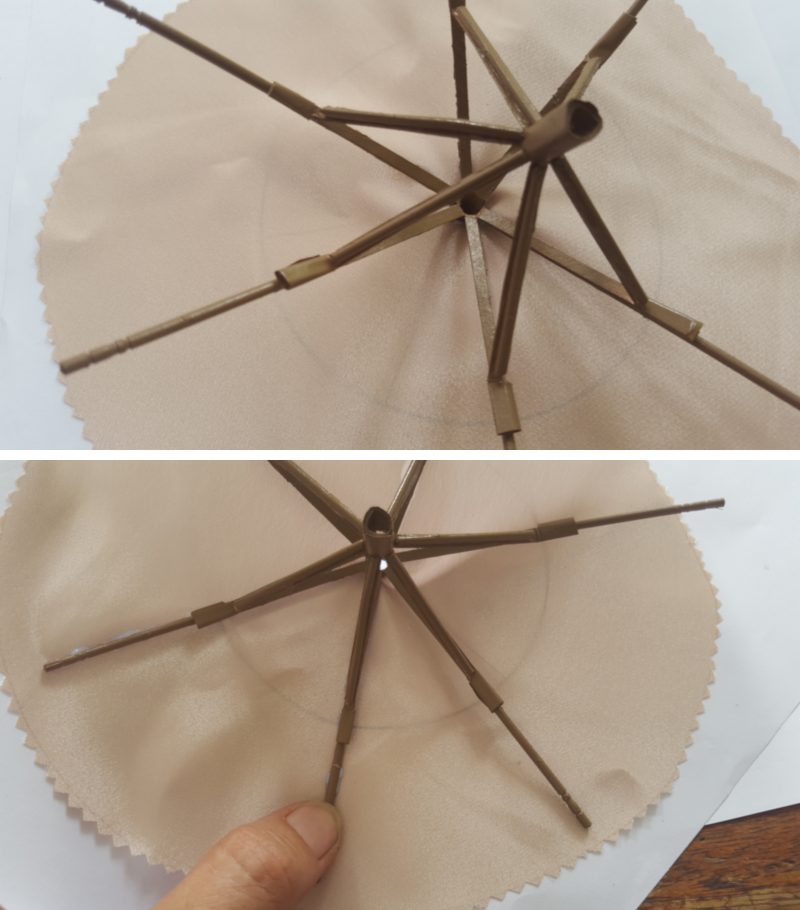
View of the mechanism from the bottom
So to save you the trouble of trying to figure this one out and wasting loads of cocktail umbrellas, I thought I’d share the tutorial with you.
What You Need to Make a Fairy Umbrella
To make the umbrella you need:
- 12 toothpicks,
- a wooden skewer,
- sellotape (sticky tape),
- card stock and
- pretty fabric
Making a Fairy Umbrella Mechanism That Works
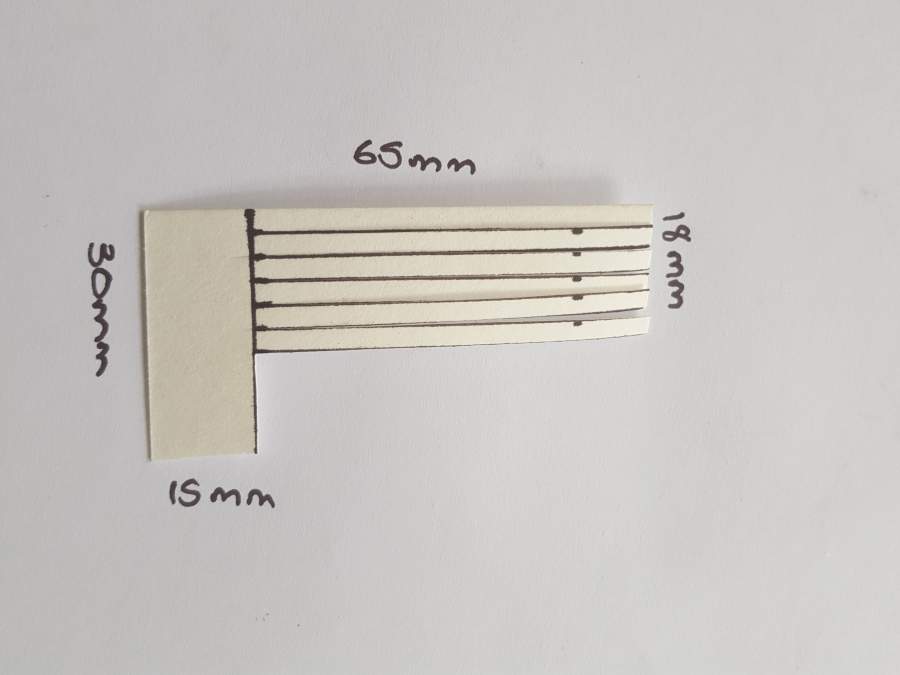
To make the mechanism or frame, measure and cut the card stock as shown below, you’ll need two of these.
Note: The measurements are based on a skewer with a diameter of 18 mm, so if yours is thinner or thicker you need to adjust the top (18 mm) and bottom (30 mm) measurements as follows:
- Add 12 mm to the diameter to get a new bottom measurement
- Divide the diameter of your skewer by 6 to find out how to create spokes that are equally thick (those are the little lines that run vertically down the card stock in the first picture)
- To convert mm to inches you can use this handy converter.
Take one of the cut outs and fold the top most edge over by 10 mm (second picture below). These card stock cut outs will form the basic frame for the umbrella.

Making the mechanism
Assembling the Fairy Umbrella
To assemble, wrap the card stock cut out, with the bent edges, tightly around the skewer and use sellotape around the bottom to secure (pics 1 and 2 below). Trim off any excess sellotape. Wrap the second card stock cut out around the skewer in the same way, but make sure the spokes are pointing towards the already wrapped card stock (pics 3 and 4 below). It’s easier than it sounds, I promise.
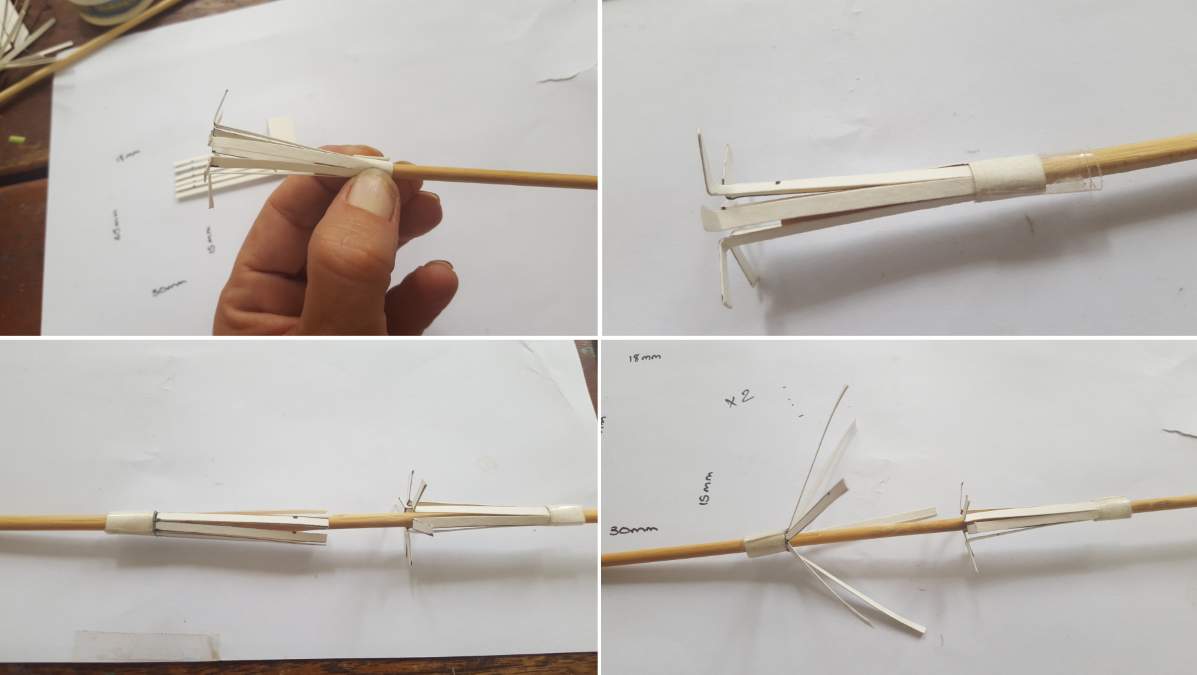
Assembling the umbrella mechanism
Open up the top and bottom frames by bending the spokes outward from the skewer. Attached the bottom spokes to the top spokes, one at a time using sellotaped. Test to see if your frame works by holding the top bit firmly and sliding the bottom bit up and down.

Making the umbrella mechanism – part 1
WIP – Umbrella mechanism
I wanted our fairy umbrella to last and I wasn’t sure if card stock would withstand the test of time so I glued toothpicks cut to size over each spoke on the bottom mechanism and used longer toothpicks to cover the spokes of the top mechanism.

Toothpicks on the mechanism
It starting to look like an umbrella. Slide the frame off of the skewer and spray them both with Rust-Oleum® Metallic Spray Paint (we used Aged Copper). Allow to dry completely. Then give the frame and the skewer a coat of Rust-Oleum® NeverWet® Liquid Repelling Treatment. This stuff is awesome, it creates a moisture repelling barrier on any surfaces and is suitable for indoor and outdoor use.
Making the Canopy For The Fairy Umbrella
To make the canopy, take your piece of material and cut a circle wide enough to completely cover the top bit of the umbrella frame. Fold the circle in half, and then in half again and make a small slit at the top.
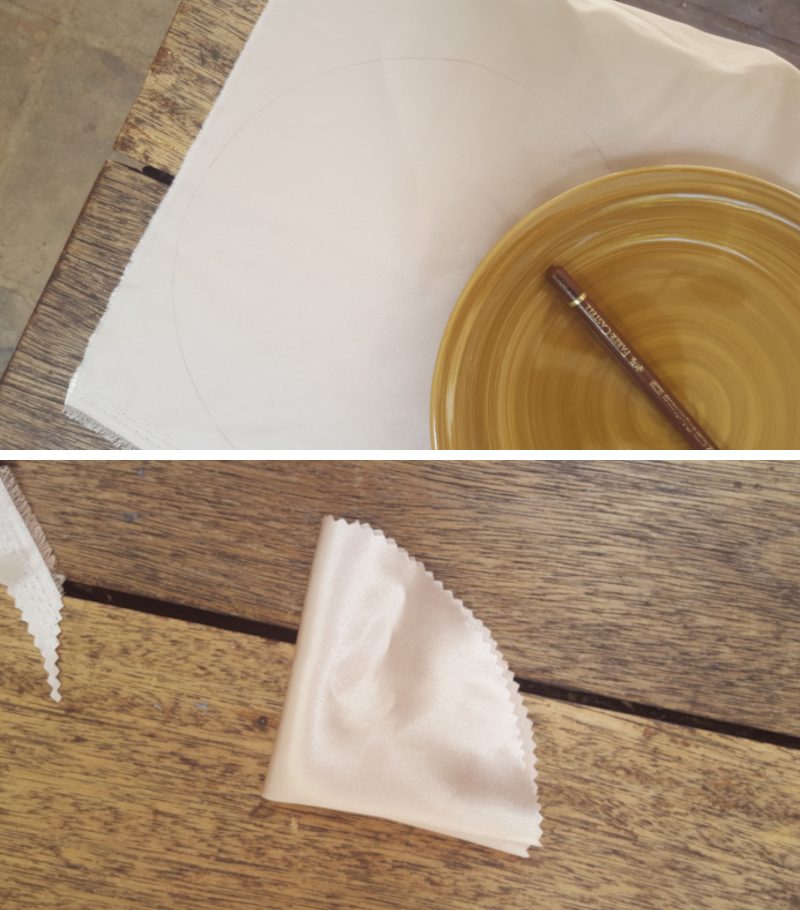
Cutting the circle
Unfold the circle and push the top bit of the frame into the slit. Gently push the frame so that it’s completely open and then glue each of the top spokes of the frame to the canopy.
I used fabric glue, which was probably not a good idea because it didn’t dry clear as promised (or maybe I didn’t read the instructions properly). Eeeew, no self-respecting fairy would ever sit under an umbrella that looks like that. So onto plan B. I cut a second canopy out of a piece of lace and attached it over the original canopy using my glue gun. Much better.
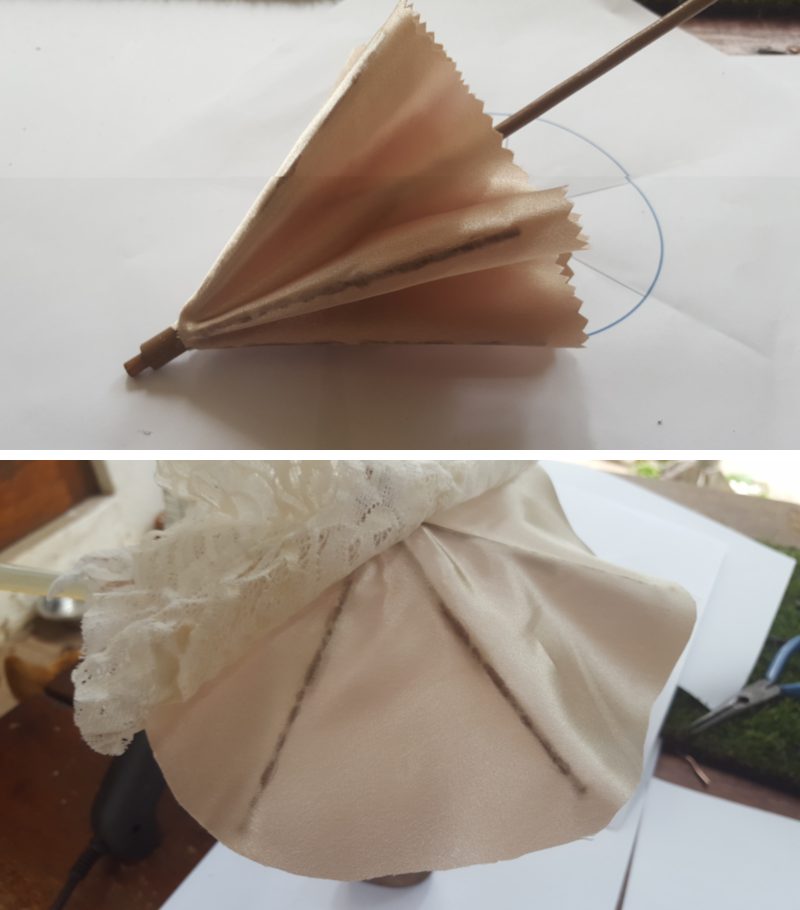
Disguise the glue stain with lace
Spray with Rust-Oleum® NeverWet®. Did I mention that this stuff is awesome? It dries crystal clear and it doesn’t change the feel of the material at all. To finish off, glue the top of the mechanism to the skewer and wrap some wire around it to hide the card stock.
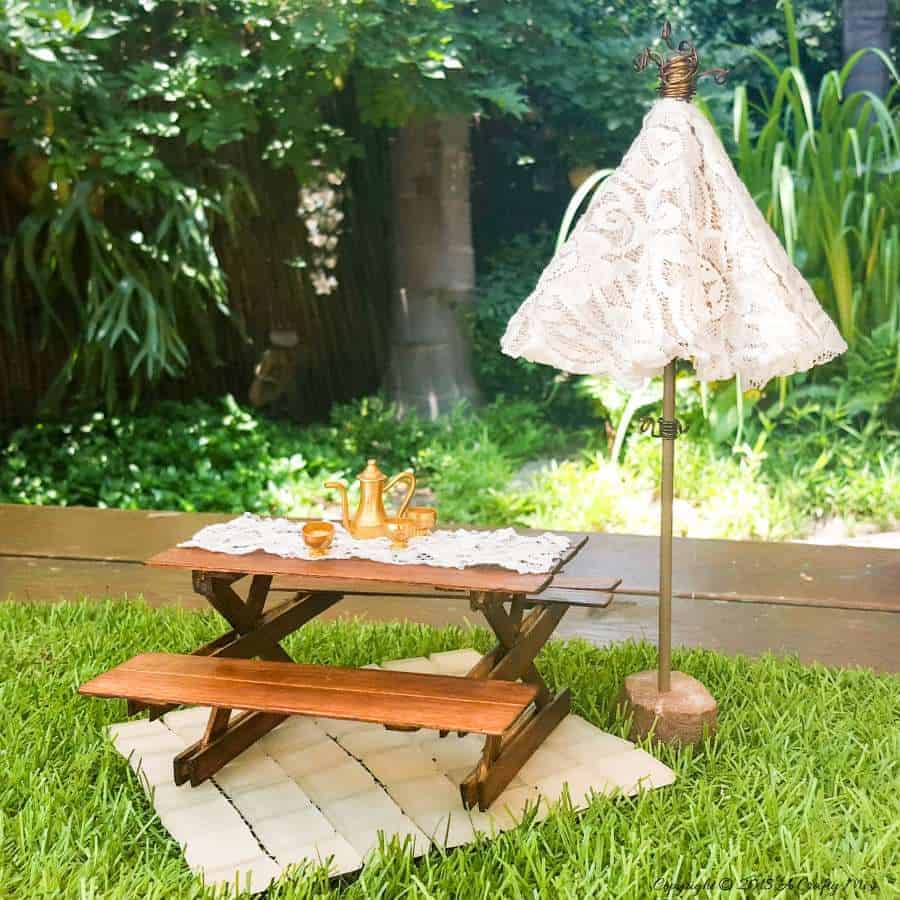
Hubby made me a little umbrella stand by drilling a hole into a flat rock and the fairy umbrella fits perfectly with the little picnic table we made a few weeks ago.
If you like the idea and want to make your own fairy umbrella don’t forget to pin it for later.
Pinny Please

I would love to know what you think of the fairy umbrella. Is it something you would make for your garden? For your convenience I’ve added some links so you don’t have to struggle to find some of the goodies we used. Disclosure: If you click on the links below, we may receive a commission from Amazon. But don’t worry, it won’t come out of your pocket, and it helps us create more fairy magic 😉
And as always wishing you a beautiful week filled with love and fairy dust

Last update on 2026-06-03 / Source Amazon Affiliates