
Hey there, how are you doing? It’s been a strange week here. The temperatures have yo-yo’ed between sweltering and freezing, which is very unusual for this time of the year. We don’t know if we should get our winter coats out of storage or put a bikini on 😀 Even our garden is saying “what the fudge!!?” So we spent the weekend doing some preventative maintenance just in case. Tender new shoots got little blankets of their own and spent about an hour knitting up a little planter for our Tillandsias. They all made a whole bunch of pups, which need a new home.

Tillandsias or “Air Plants” are fascinating little things. They do all their feeding through their leaves rather than their roots and they can grow on almost anything. From rocks, seashells, forks, clay tubes, leather and scraps of wood. As long as the wood hasn’t been pressure treated.

You can even combine different things to show off your air plants like I did with this one.

Okay, before I show you how to knit your own Tillandsia planters, be sure to follow us on Facebook, Twitter, Pinterest, or Instagram. And don’t forget to subscribe so you’ll never miss a post!
What you need to make a knitted planter
- A scrap piece of wood
- Jute twine
- Knitting needles
- Embroidery needle

This knitted planter is suitable for small Tillandsias or succulents. I put tillies in mine.

How to make a knitted planter
I wasn’t 100% sure what this piece of scrap wood had been stained with so we sanded it down and used a heat gun to bring out that beautiful grain, before sealing the wood with a non-toxic outdoor sealer.

There are many different ways to attach Tillandsias to wood. Soft wire, elastic stretch cord, or glue. We normally use E6000 because it’s waterproof and non-toxic to plants, but I wanted to try something a little different this time. So instead of gluing the Tillies on, I used natural jute twine to loosely knit three rectangles, which were gathered at the bottom to form small pockets.
Knitting keeps me from unraveling
The pockets need to be “loose” to allow for proper airflow. Tillies don’t like feeling smothered.

I used a paper template to figure out where to drill some holes so I could sew the pockets onto the piece of wood.

Adding the Air Plants
Once all the pockets had been sewn on they were filled with a tiny bit of coconut fiber and the Tillandsia pups. The coconut fiber helps “anchor” the Tillies until they get a little bigger. It should encourage them to grow some roots too.

Tillies thrive in bright indirect light and don’t mind a few hours of direct sun in the morning or afternoon.

We’ve hung ours outside on a western wall that gets early morning sun and dappled shade for the rest of the day.

I don’t know about you, but I’m loving the look.

We’ll watch our pups for the next few weeks and if the weather carries on being temperamental we’ll bring them inside for a bit. Just until they’re settled. Or I might even bake up a few clay cubes and keep them there while Mother Nature figures out what season we’re in.

But I would love to know what do you think? Would you knit up a plater for your air plants?
If you like the idea of making a knitted planter, don’t forget to pin it for later.

Oh and if you’re looking for some of the things we used, we’ve got you covered. Disclosure: Clicking on the links below, means we may receive a commission from Amazon. But don’t worry it won’t come out of your pocket, and it helps us make more amazing crafts to share with you 😉
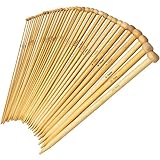
And if you prefer to buy rather than DIY, then maybe these beauties will appeal.
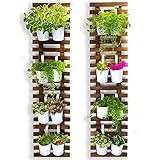

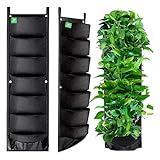
And as always, wishing you a wonderful, crafty week filled with lots of love. Thank you for popping in for a visit.

Last update on 2026-10-02 / Source Amazon Affiliates
74 comments
It is so beautiful, love the way you knitted the cool pocket for the plant. I really love knitting. Great job, admire the pictures.
Reply
Thanks so much Adil
Post by post I discover your creativity! It is amazing the way you combine matterials, the way you “build” something! I am allways surprised how you think of your constructions… I just love your knitting planters
Thanks so very, very much my friend <3
What an interesting plant and, of course, only you can build a perfect housing for it. Amazing, Michelle!
? Thank you Jas ?
The weather has been fickle where I live as well. This week, temperatures are well above normal. It doesn’t feel like fall at all. I love your planter, and I’m super impressed with your knitting skills. Those little planter pockets are adorable! It looks great! I hope your pups do well in their new home. 🙂
Thanks so much Amy, it looks like the pups are real happy with there new home ?
I just realized we have Tillandsias at home! We call them Air Plants and we have them hooked on a wire but your planter is lovely, love how you burned the wood to show the grain. Yours are fortunate plants!
Thanks so much Pili. Have yours flowered yet?
I haven’t knitted in years but I think I can do this. What an adorable idea. I love the texture. This will probably work for orchid also.
What a great idea, I’m sure it would they grow in similar conditions. Thanks for the idea Debra
Those are so cute! I didn’t realize they were air plants until you said so, then I recognized them. Love that they gather nutrients through their leaves, & love that they take root anywhere. They look so nice and settled on your board. I agree that the weather is a little crazy here too.
? I hope they do settle in nicely, they’ve only been in there for a bout two weeks, but they seem really happy
Wow!! I think this is the best DIY I have ever seen. Perfect for wall decorating in our garage. You are so creative and talented to make this one of a kind tillandsias planters. So impressive.
Thanks so much Elizabeth ?
Wow!! You have a creative and brilliant idea. This tillandsias planter looks so gorgeous and unique. Perfect for your garden. I think I need to try some DIY like this. I am looking forward to that.
Oh I hope you do Angela. DIY’ing is so much fun
What a fabulous idea, Michelle! I love the rustic, natural look. It’s so beautiful!
xo Julia
Thanks so much Julia ?
Michelle, fantastic idea to knit holders for the tillies! I love how this all turned out, it’s beautiful and rustic and just so awesome!! I hope the weather gets evened out soon. 🙂
Me too Keri, me too 😀
Wow! This diy tillandsia planter looks so creative and awesome. I really want this for my garden. It’s a perfect hanging plant.
Thanks so much Candy
Ahh so cute! I wouldn’t have thought of this. What a cool fusion of macromet (can’t spell which is funny cause I’m a writer… shh don’t tell anyone haha) and I am not even sure what – wood?! lol
LOL Amy, I struggle with that word too ?
They are so cute, what a great idea! Do they last in the rain?
They do ? In the wild they grow on trees so they love being outside. They just need a little spritz of water once or twice a week if it’s dry and hot
Wow knitting something like that is so cool. I would never think to knit a plant holder. What a great idea! I love how you really walk us through the process.
Thanks so much Nina, I really appreciate that
These are such a cute idea for an indoor planter. This would make a great gift idea too!
They do make lovely gifts ?