Vertical gardens fascinate me. It doesn’t matter where you live or how much space you have a vertical garden is a living canvas that showcase the best that nature has to offer. With so many inspiring ideas on the web we had to try make our own using a plastic frame we found at a local thrift store.

What you need
What We Used to Make a Vertical Garden
- A large plastic frame
- Plastic coated wire mesh
- Pallet off-cuts and eco-friendly waterproof wood sealer
- Aluminum tape (optional) I was being extra cautious and wanted to make really sure the wood didn’t rot
- Woven fabric weed mat (plastic weed mats won’t allow plants to get the water and nutrients they need to grow)
- Plastic drop cloth
- Staple gun
- L-shaped brackets
- Plants (we used succulents because they don’t need a lot of water and are really easy to maintain)
- Potting soil mixed with perlite
Making the Vertical Garden
We measured the inside of the frame (where the picture would go) and cut the wire mesh and weed mat to fit. Then we attached the wire mesh and weed mat to the back of the frame using a staple gun. Make sure that the “furry” side of the weed mat faces upwards (or inwards) – the furry side helps retains water while the wire mesh and weed mat will hold the soil in place and provide support for the plants.
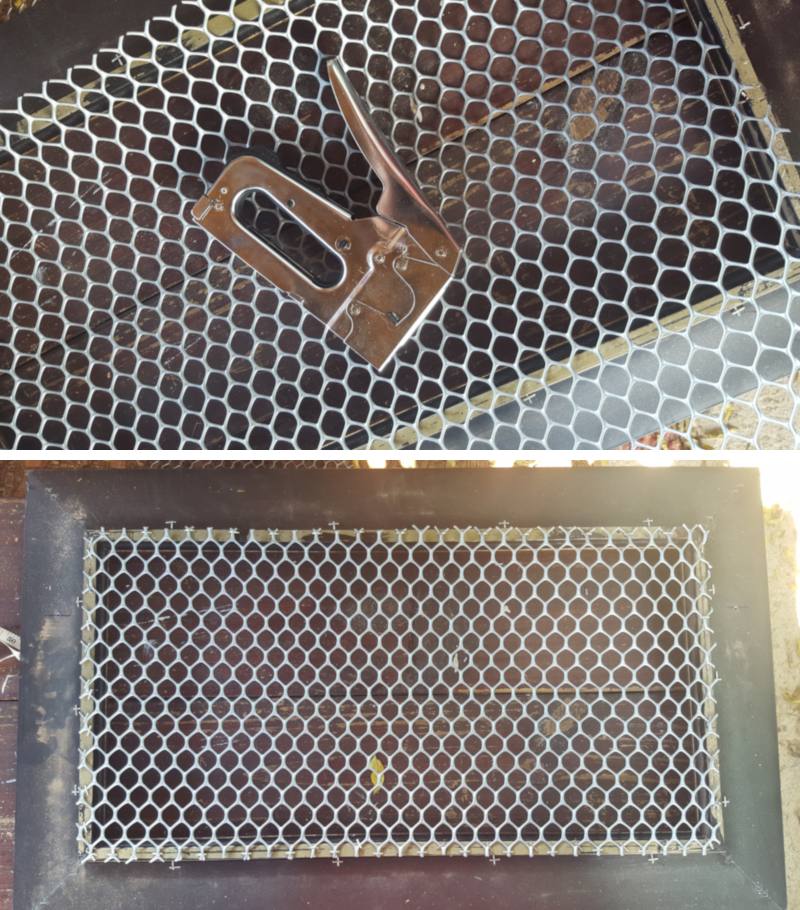
Attached the wire mesh using a staple gun
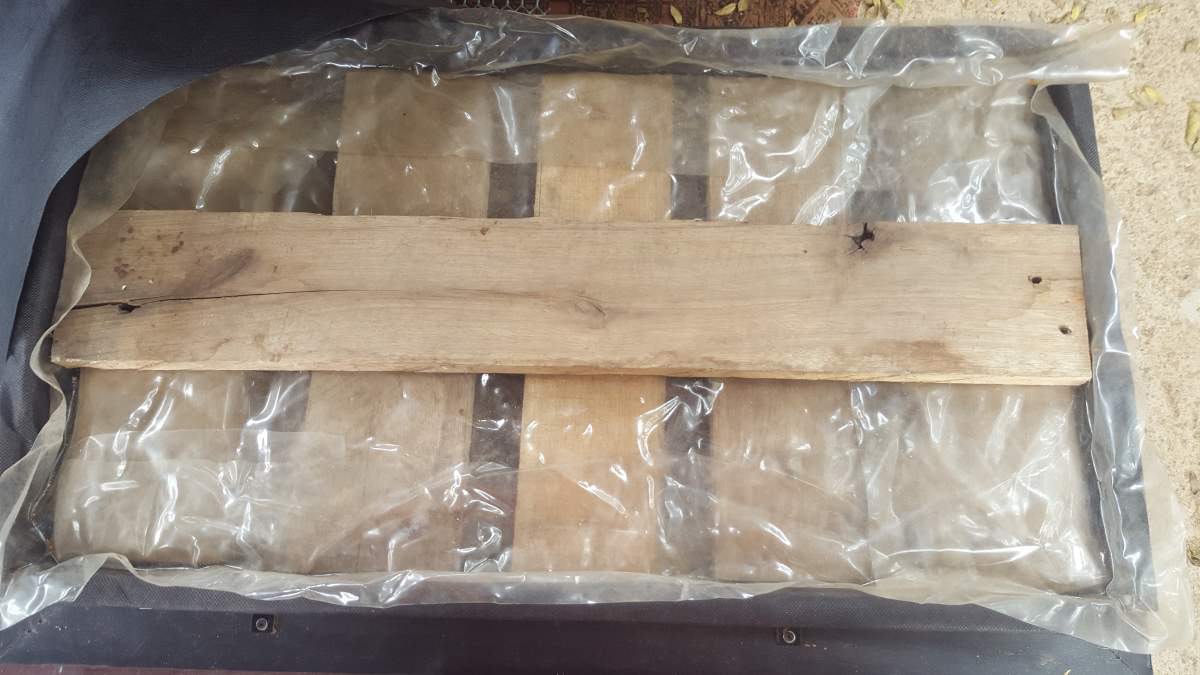
Using the inside frame measurements we cut some light weight pallets to form the sides of a box which we sealed with an eco-friendly wood sealer. For extra protection we added aluminium tape to protect the wood and prevent it from water rot. I love that stuff and we’ve used it to make so many things for the garden. It’s waterproof, super sticky and a roll goes a long way.
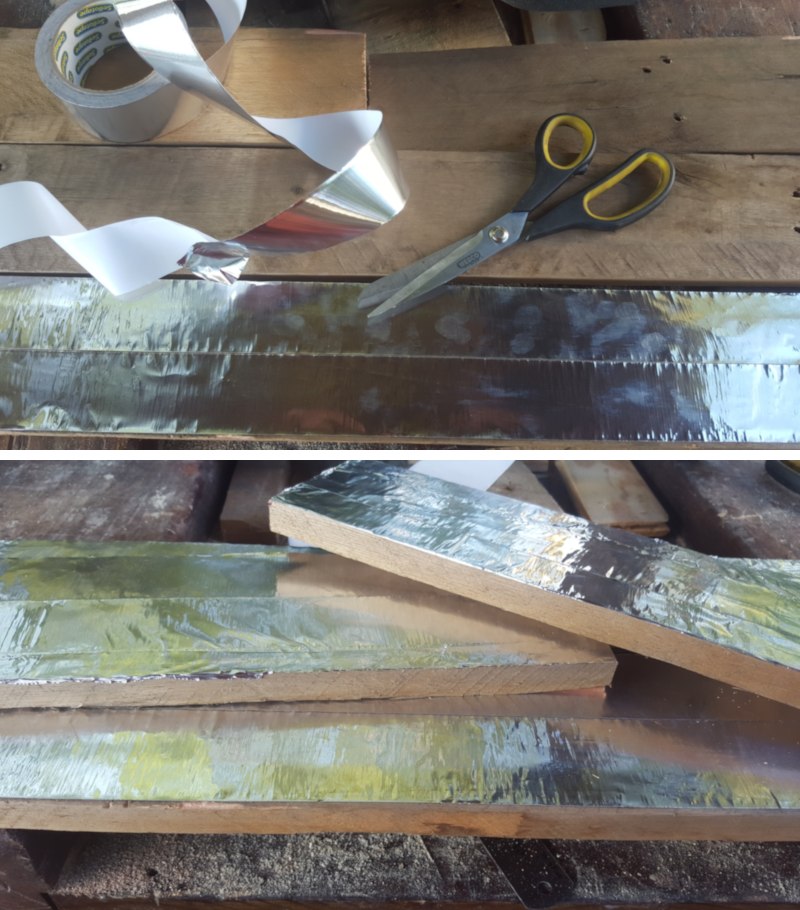
Cover the pallets with aluminium tape
We used L-shaped brackets to put the box frame together and attached the box to the plastic frame. We also drilled some holes at the bottom for drainage.
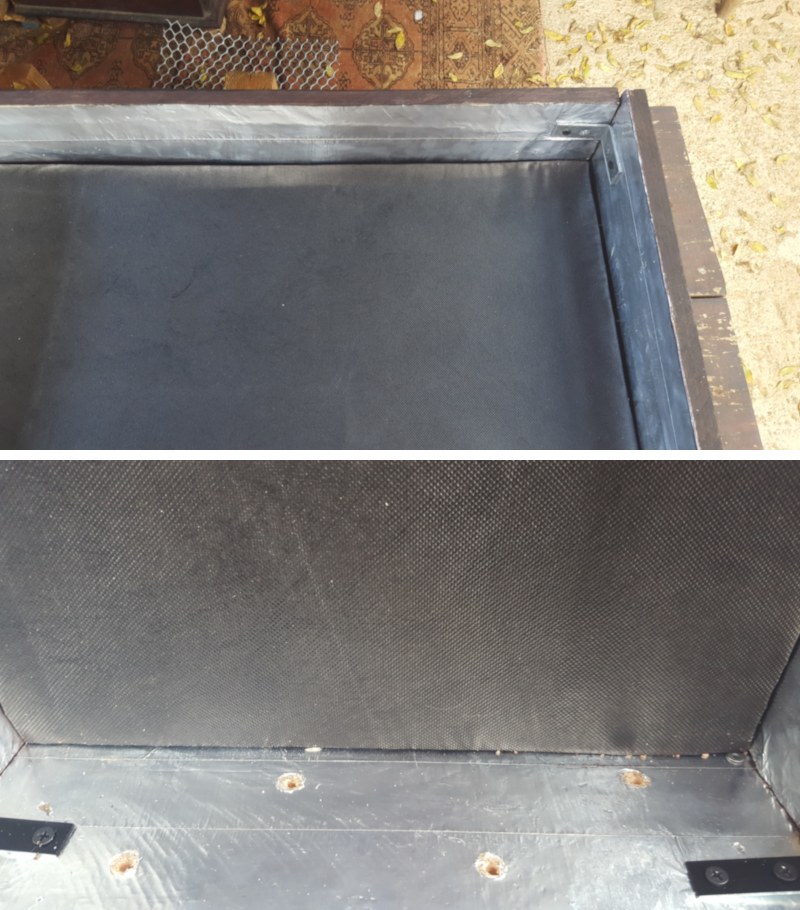
Building the box frame
Once the sides of the box were done we covered the whole inside with weed mat using a staple gun and added some mulch, compost, perlite and potting soil. Potting soil helps retain the water and keep it moist for longer than normal soil would.
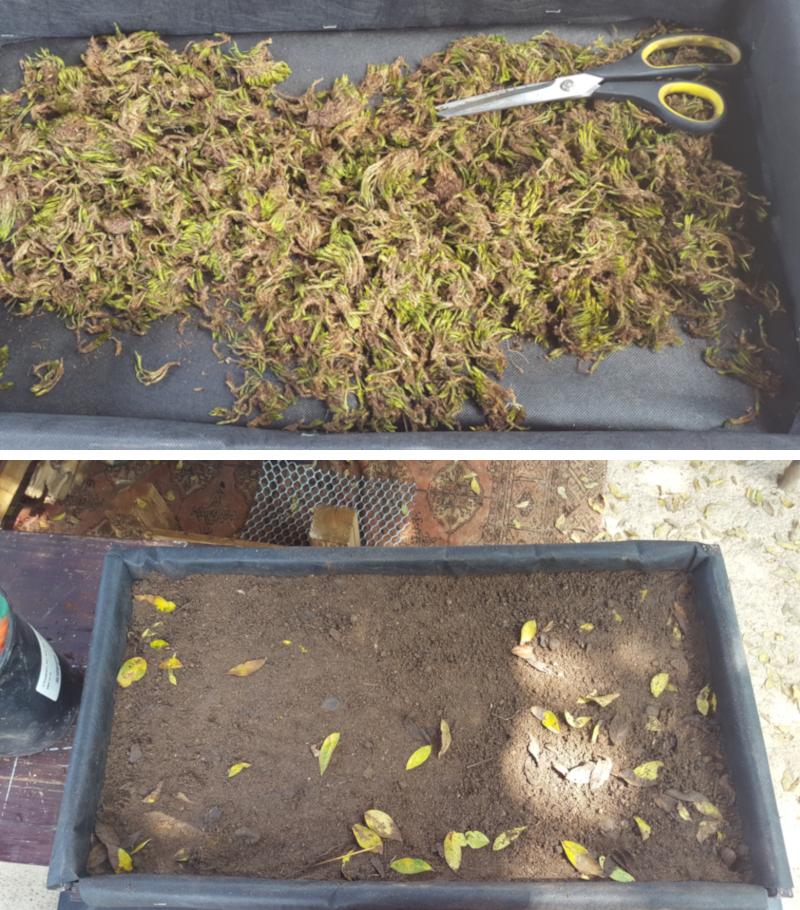
Fill with moss and sand
I was a bit worried about how we could stop moisture seeping through the back of the box frame and into our wall, so we used a thick plastic drop sheet, which we put on top of the soil before we closed off the box frame with some more pallets which we cut to size.
A plastic drop sheet to prevent water from seeping through the back of the box frame
We flipped the frame over to check that everything stayed together. It was a bit disconcerting working backwards if you know what I mean, it’s kinda like filling a pot from the top down. Anyhows, the box frame held up and the soil didn’t fall out. Lulu seems happy enough with the whole contraption 😀

The frame is ready for planting
Planting the Vertical Garden
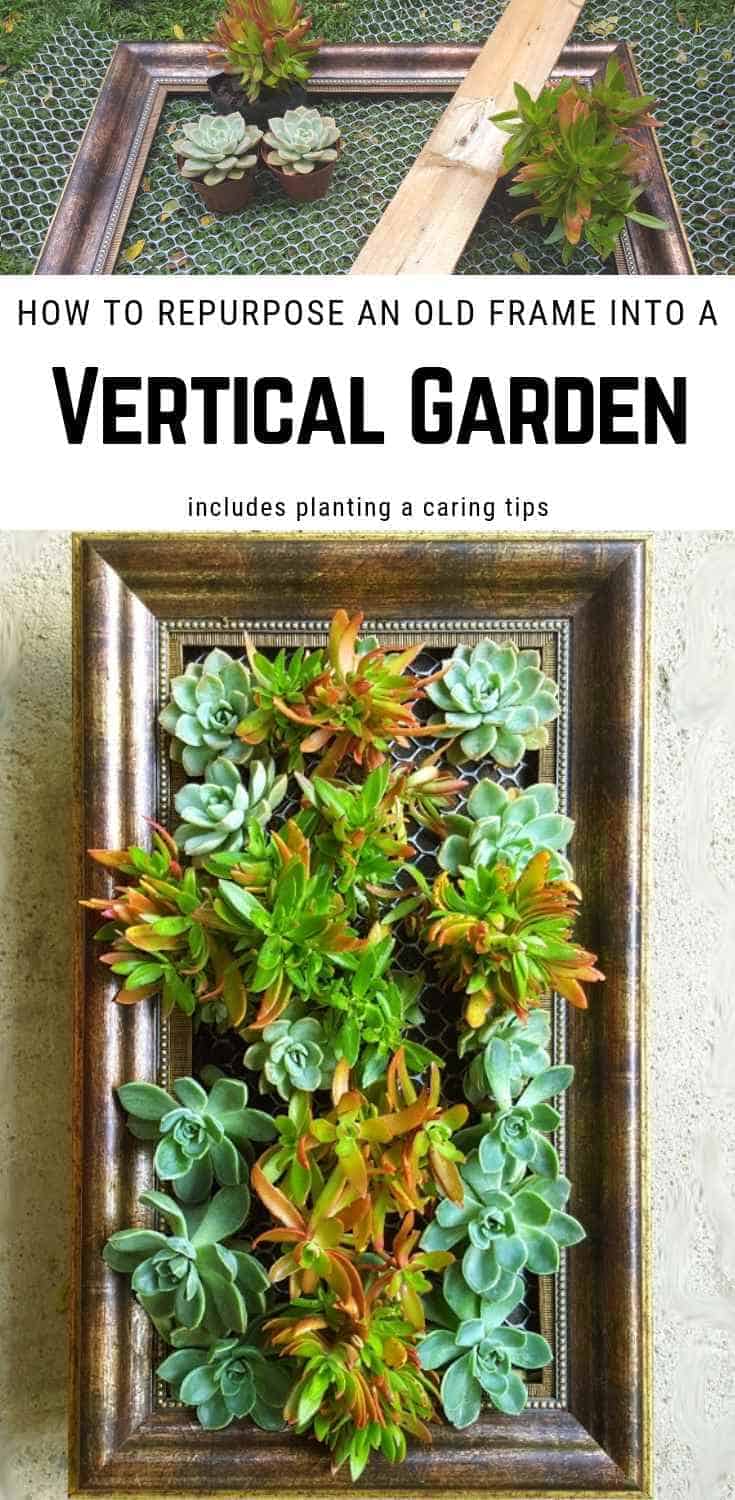
Now for the fun bit. To add the plants we just cut a small hole in the wire mesh and weed cloth and carefully tucked the plants into the pockets flipping the wire mesh back down to secure the plants.
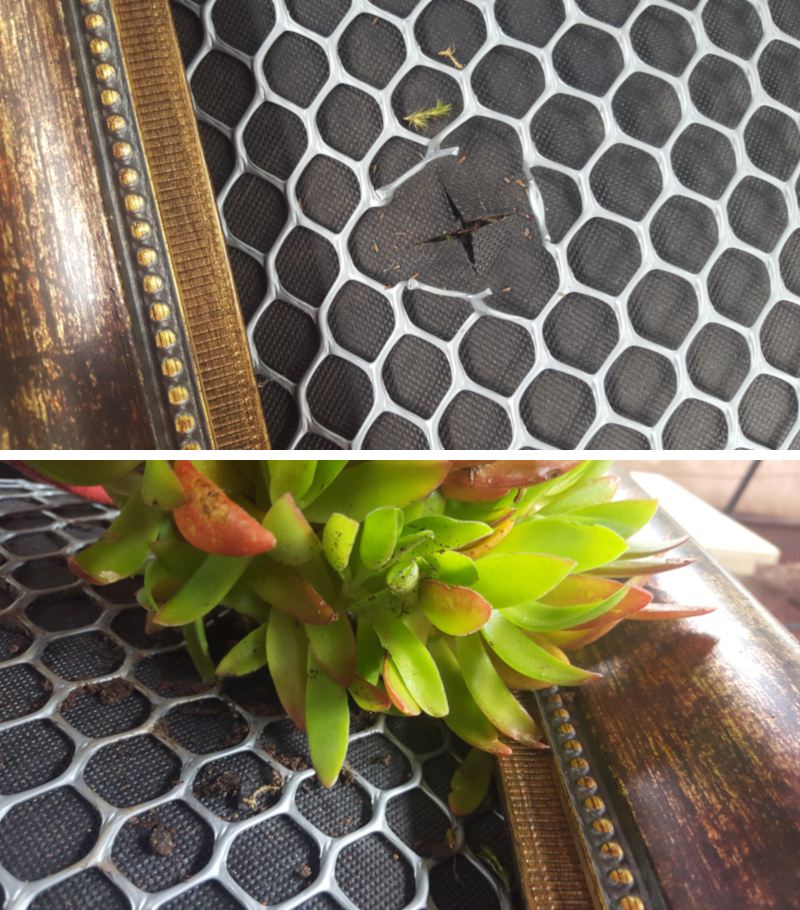
Planting the succulents
It’s always best to choose plants that don’t need a lot of water, since a vertical garden can dry out really quickly. Succulents are a great choice. They’re easy to grow and propagate and they come in the most beautiful colours!!!
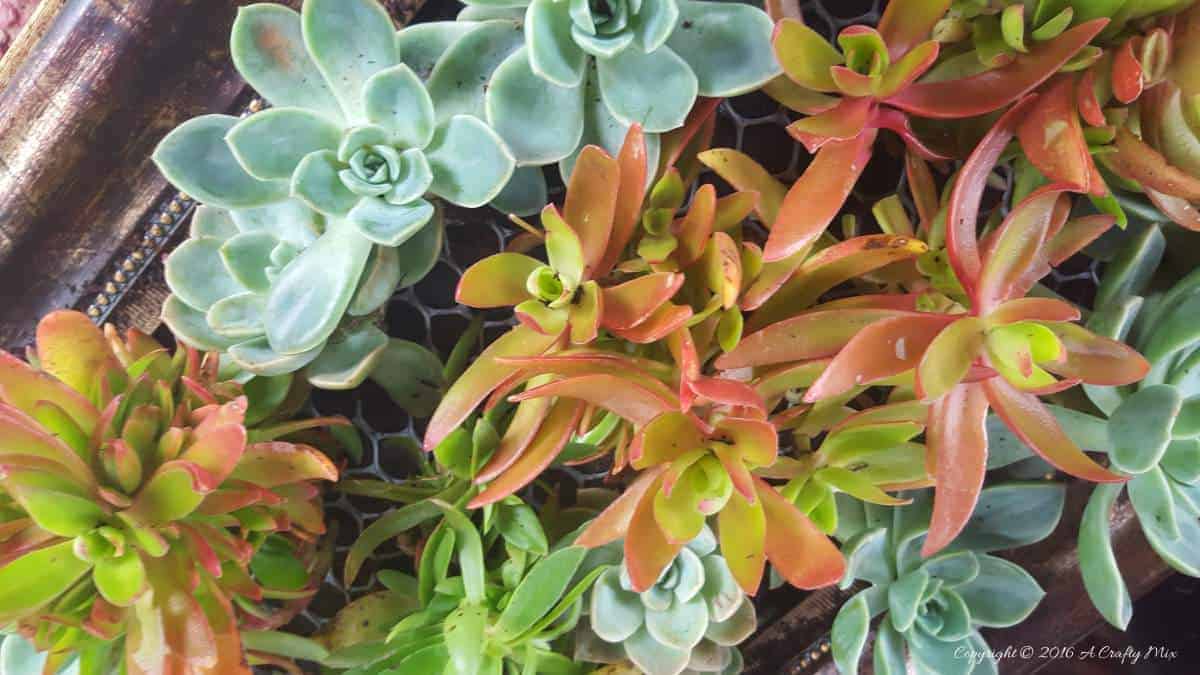
Mother Nature at her best
Hanging and Caring For a Vertical Garden
Give the roots some time to establish themselves before hanging the vertical garden. Both the soil and the plants need a few days to settle in their new environment. Initially vertical gardens need more maintenance than normal container gardens. The plants are really close together and have less soil to “spread their wings”. So you will need to water them more often in the beginning.
Vertical gardens can also be very heavy. That’s one of the reasons we added perlite to the soil mix and a plastic frame. Our walls are all brick so fortunately we didn’t have to worry about finding studs to hang this baby up. Just make sure the drainage holes are at the bottom. Ask me how I know.
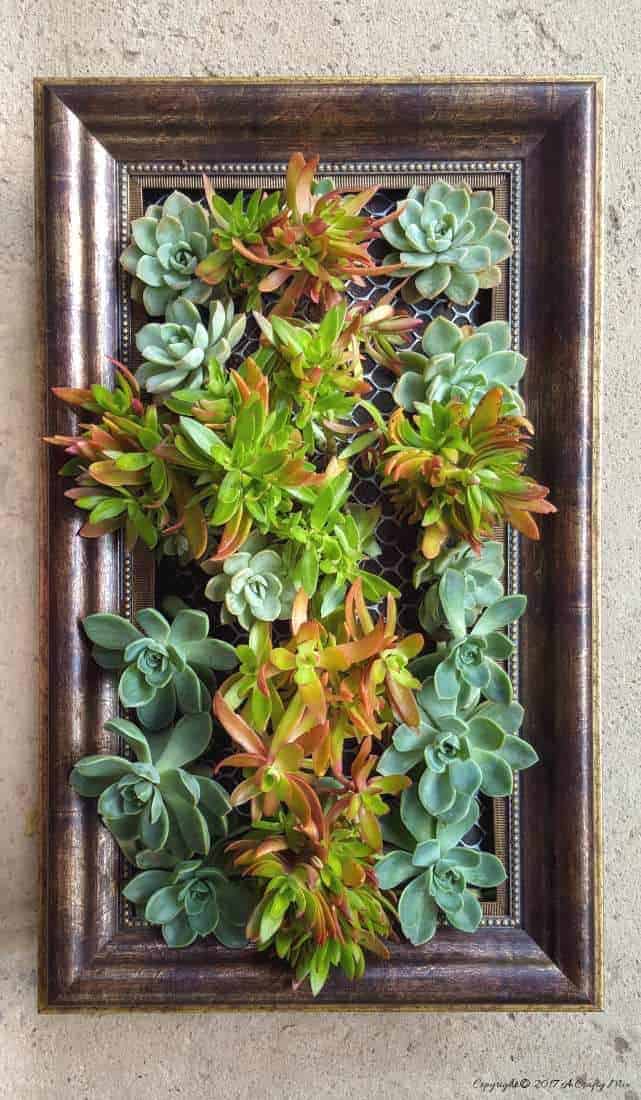
I abSooooLutely love how our repurposed framed vertical garden turned out. They truly are amazing, we’ve even made one using empty DVD cases
If you like the idea of repurposing an old frame to make a vertical garden, don’t forget to pin it for later.
Have you tried making one?
Oh and if you prefer to buy rather than DIY, we’ve got you covered Disclosure: Clicking on the links below, means we may receive a commission from Amazon. But don’t worry it won’t come out of your pocket, and it helps us come up with more amazing craft ideas to share with you 😉


Last update on 2026-06-03 / Source Amazon Affiliates