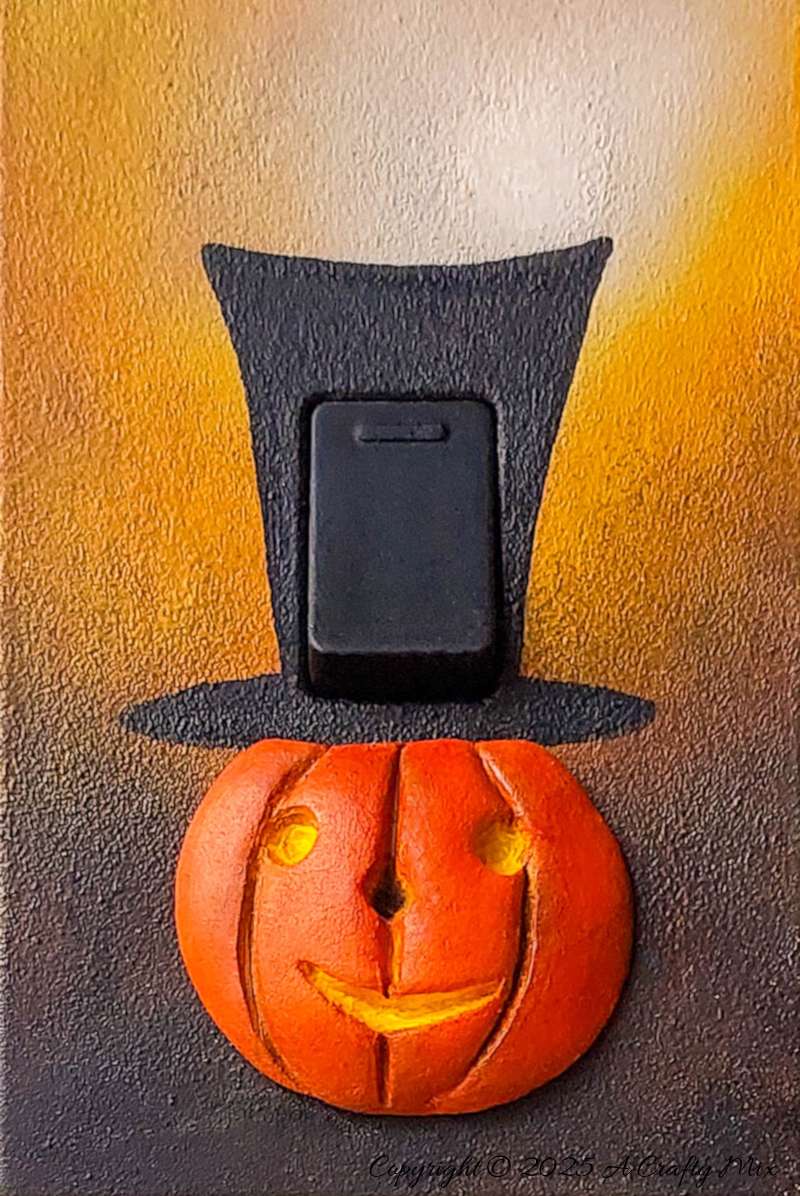
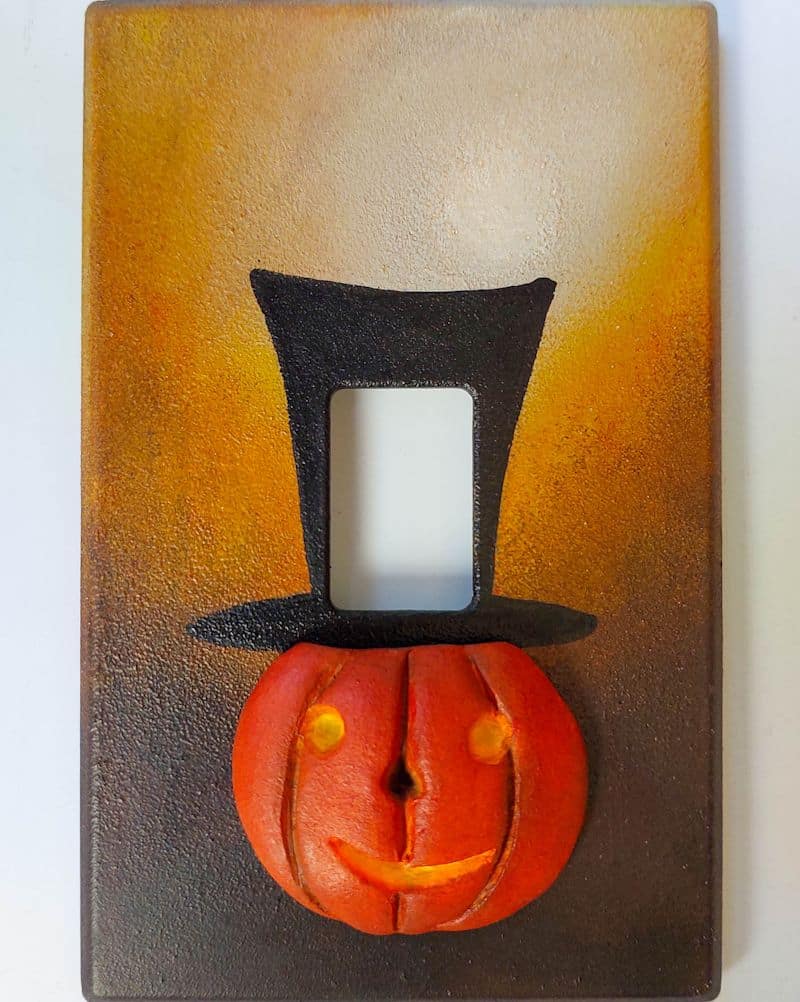
Ready to add some whimsical charm to your haunted holiday décor? This DIY Halloween light switch cover transforms an everyday feature into a playful and functional work of art.
Whether you call it a spooky season accent or a fright night upgrade, the cheeky pumpkin with his tall top hat is quick and easy to make.
But, before we get to the tutorial, do me a favor and follow us on Facebook, Twitter, Pinterest, or Instagram. And don’t forget to subscribe so you’ll never miss a post!
What you need
- Craft paint
- Sponge
- Black and White primer
- Ziploc bag
- Permanent marker
- Clay sculpting tools (optional)
- Clay (air-dry or baked)
- Wall Light Switch

Optional extra to make an ornate frame
- Foam clay
- Border sugar mold
- Craft paint
How to make a Halloween light switch cover
We’re going to paint both the switch cover and the toggle switch itself. I have zero confidence in my ability to spray paint a little toggle switch while it’s mounted to the wall. The paint will go everywhere, gaurenteed. So I got the hubby to remove the whole thing for me. This video will show you how it’s done.
Always turn off the power at your circuit breaker before removing or installing a switch plate.
The covers on our light switches are clip-ons, so I didn’t have to worry about unscrewing the cover from the backing plate that holds the switch.

You need to separate the two parts, since we’ll be painting the switch and cover different colors. Clean both the cover and switch with rubbing alcohol to remove any greasy fingerprints and dirt.
Painting the switch black
Mask off the area around the switch. My hubby said this part isn’t necessary, but I didn’t want any paint to clog up the switch. Better safe than sorry. If you only removed the switch cover, I would suggest masking off the wall too, especially if you’re a messy painter like me.
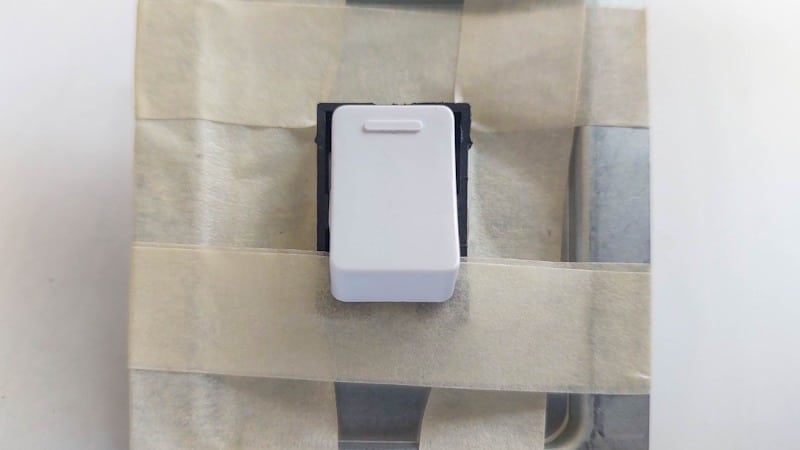
Grab a can of matt black primer and paint the switch. Don’t forget to flip the switch before giving it a second coat of paint.

While you wait for the paint to dry, we can make that cheeky pumpkin.
Making a clay pumpkin
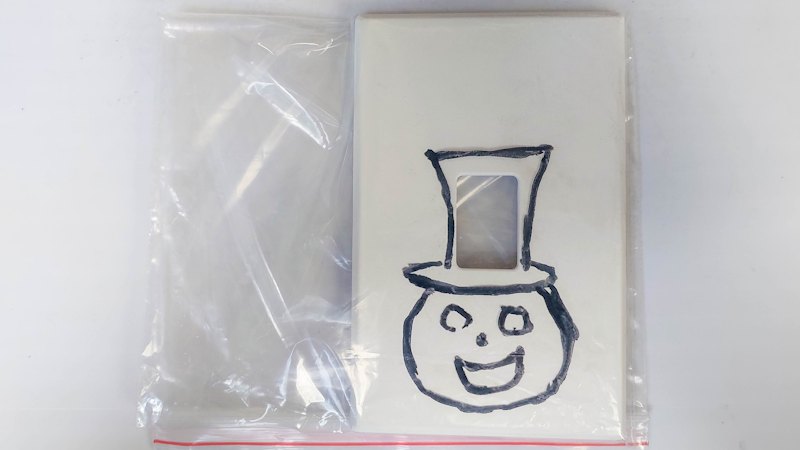
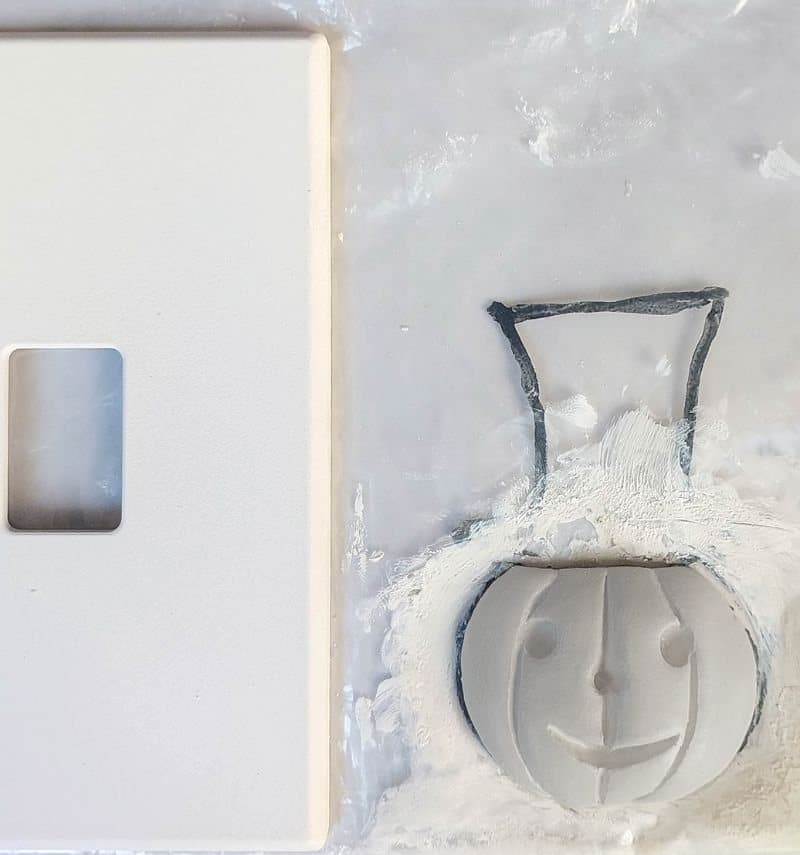
The focal point of this Halloween light switch is a clay jack-o’-lantern pumpkin wearing a top hat. Slip the light switch cover inside a zip lock bag and use a permanent marker to sketch both the pumpkin and top hat. That way you can get the proportions right before making the clay pumpkin.
Condition the clay between your fingers.
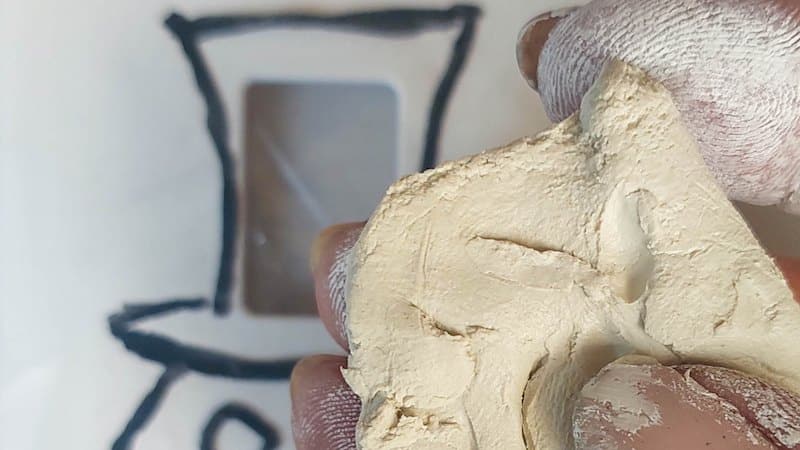
To make the pumpkin, follow the steps below:
- Using the sketch as a guide, roll the clay into a ball and gently press it onto the image. Flatten and smooth the clay with your fingers to create a rounded pumpkin shape.
- Use the back of a paintbrush or a clay tool to shape the top curve that will sit under the hat brim.
- Gently carve vertical lines from the top to the bottom of the pumpkin to create ridges.
- Smooth out the edges and surface with a ball-tipped sculpting tool or your fingertips, refining the pumpkin shape and deepening the grooves.
- Carve out two round eyes and a cheerful mouth using a small ball tool or pointed clay tool. Make the features deep enough so they’ll show up after painting.

Leave the clay pumpkin to cure completely. I popped mine in the air fryer to speed things up. If you’re going to bake the pumpkin, remove it from the Ziploc bag first, otherwise you’ll end up with a mess of melted plastic. And no-one’s got time for that.
Painting the clay pumpkin
To paint the clay pumpkin for the Halloween-themed light switch cover, follow the steps below.
- Lightly sand away any fingerprints or imperfections on the cured, unpainted pumpkin.
- Wipe away the sanding dust and paint the whole pumpkin a bright, happy yellow.
- Wait for the paint to dry before adding a layer of orange craft paint. Let some of the yellow peek through around the eyes and mouth to create depth.
- Add a small dab of brown to your orange paint and accentuate the grooves and creases.

Let each layer dry before adding the next to avoid smudging.
Painting the Halloween light switch cover
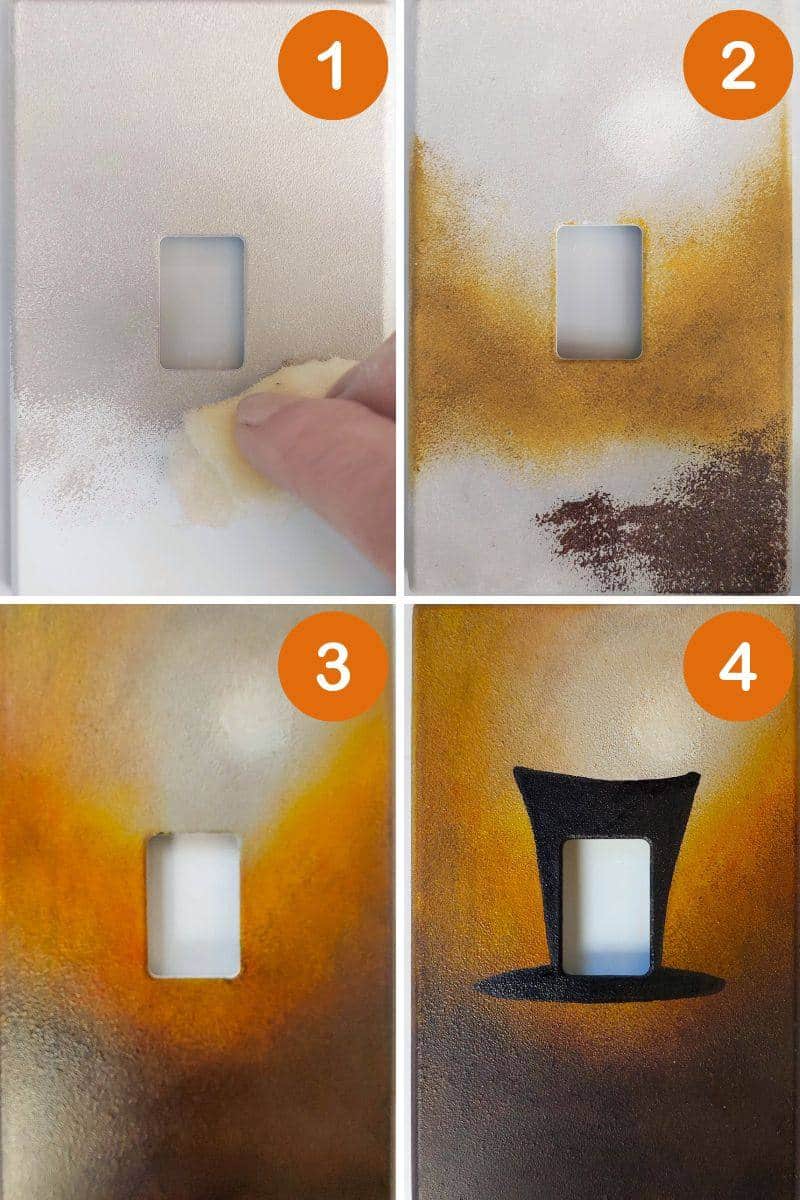
To paint the background for your Halloween light switch cover, split it into three zones: a light area (top), a medium area (center), and a dark area (bottom). Lightly sand the cover and use a matt white primer or gesso to turn it into a canvas.

- Once dry, use a sponge or soft brush to dab the lightest shade—a creamy white or pale yellow—onto the top third of the plate.
- In the middle third, blend warm medium tones like mustard yellow or golden ochre. Apply the colors in a rounded, radiating motion so they blend into the lighter section above.
- Finish by adding a rich, dark shade—brown or burnt orange—to the lower third of the plate. Blend upwards with your sponge to softly transition between shades.
- When you’re happy with the background, paint the top hat over the center.
Wait for the paint to dry completely before glueing the little pumpkin on.
Making an ornate frame
This part is optional, but it does help create the illusion that the Halloween switch cover is a work of art. I used an ornate border sugar mold and foam clay to make mine. Just condition the clay and squish it into the border. If you don’t have foam clay, you can use hot glue instead.

You need four borders. Leave the clay to cure completely and then paint them black. Use the switch cover as a guide to cut the borders at an angle to make the frame. Foam clay is super easy to cut with scissors, which is why I love using the stuff for something like this.
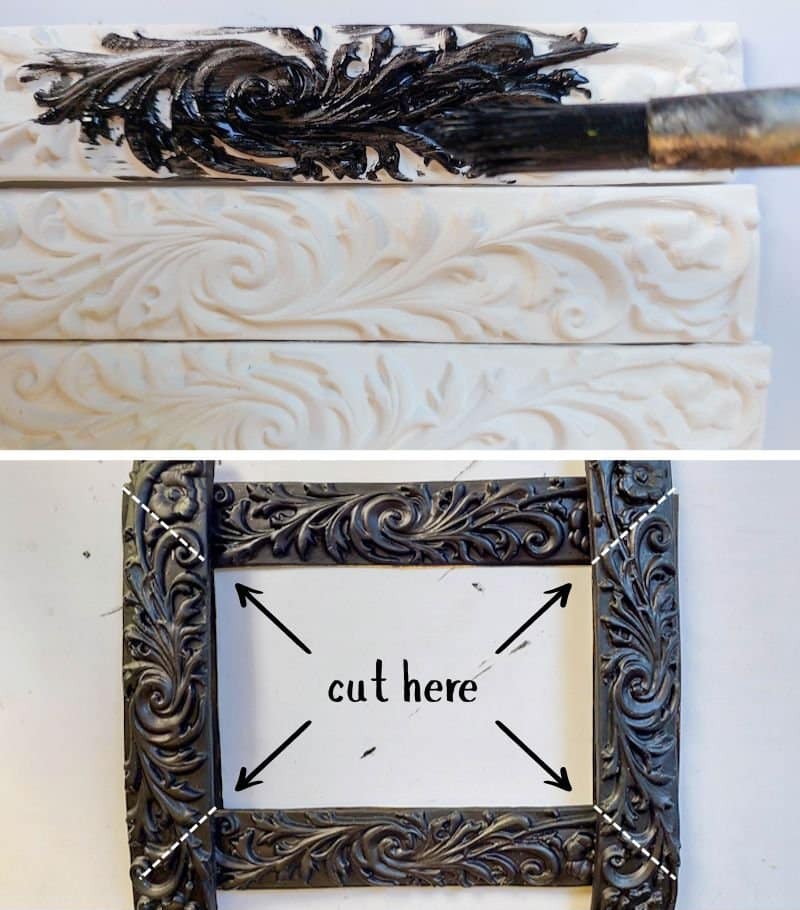
Glue the pieces together and use a copper rub and buff to highlight the ornate patterns.

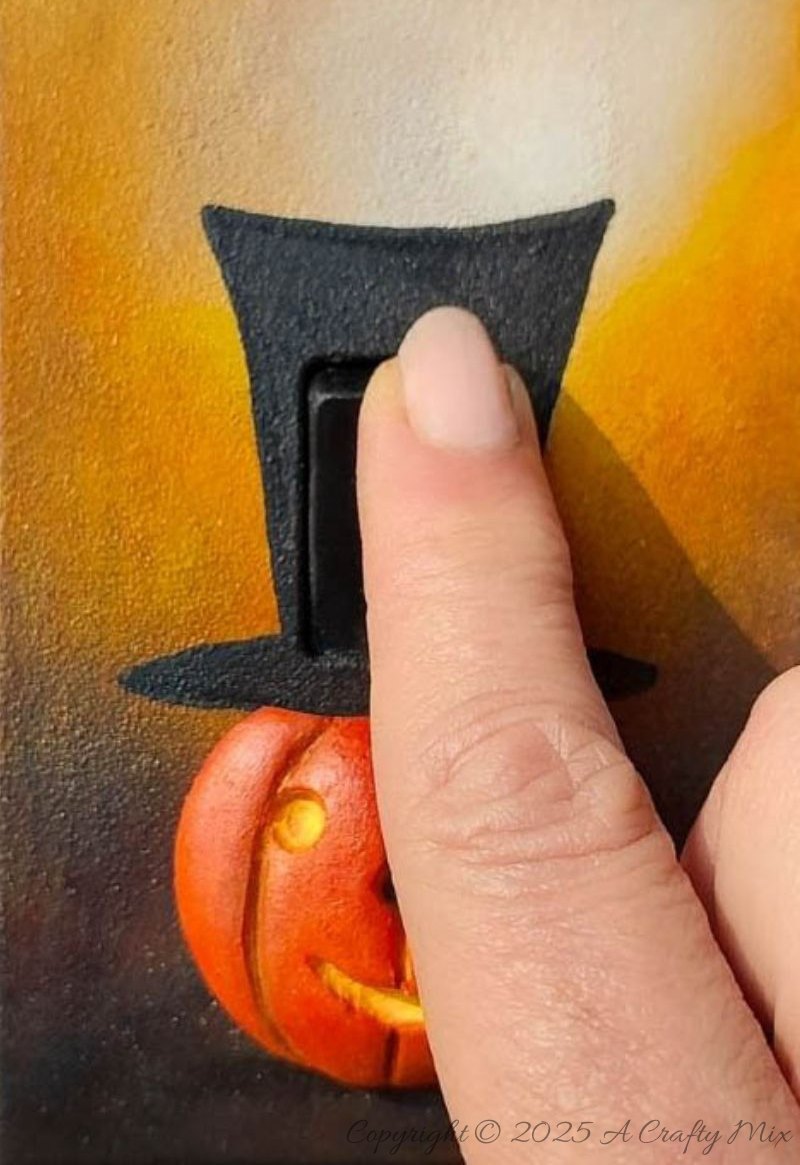
Now all that’s left to do is install your new Halloween light switch cover. Remember to turn off the power at your circuit breaker.

If you see anything odd behind your plate, like loose wires, it’s best to get a professional to take a look. But for a simple cover switch, you’ll be rocking your new spooky (or whimsical) look in minutes.
Since my light cover will only be up for the haunting season, I used double-sided tape to attach the frame to the wall.

You can glue the frame to the switch cover too.

And that’s all there is to turning a plain switch plate into a ghoulish conversation starter.
If you like the idea of turning a plain switch plate into something a little more spooky, don’t forget to pin the tutorial for later.

Sharing is caring.

Oh, and if you’re looking for some of the things we used, we’ve got you covered. Disclosure: Clicking on the links below means we may receive a commission from Amazon. But don’t worry, it won’t come out of your pocket, and it helps us make more amazing crafts to share with you.


To make a custom frame for the switch plate


Or if you prefer to buy rather than DIY, then here you go.

And as always, wishing you a wonderful, crafty week filled with lots of love and laughter. Thank you for popping in for a visit.

Last update on 2026-06-03 / Source Amazon Affiliates